|
|
 Rank: Master      Groups: Registered
Joined: 25/03/2011 Posts: 1,027 Points: 3,075 Location: Lincolnshire
|
Thanks for the welcome Hans and the advice, nice to meet you! 
|
|
|
 Rank: Master      Groups: Registered
Joined: 25/03/2011 Posts: 1,027 Points: 3,075 Location: Lincolnshire
|
I'm trying to remember how to post photo's, I'll get it in a moment 
|
|
|
 Rank: Master      Groups: Registered
Joined: 25/03/2011 Posts: 1,027 Points: 3,075 Location: Lincolnshire
|
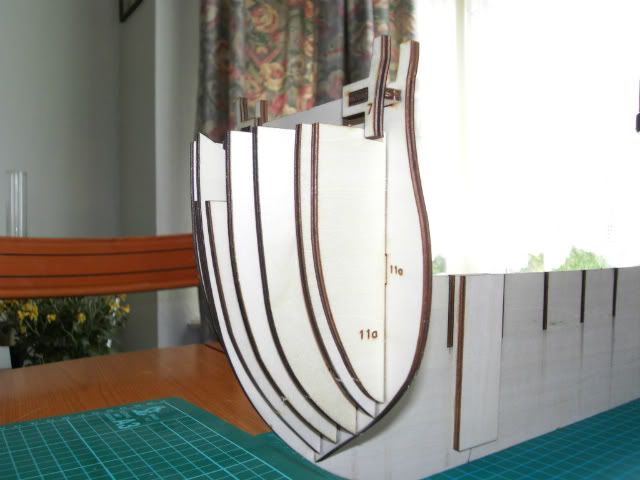
 That's better now where was I, oh yes! Well the first thing you will notice is I've got the picture size right this time. Here is a side on view of the bow section. It also shows the reinforcing strips for the hull section which has already been added. To extend the hull length.
|
|
|
 Rank: Master      Groups: Registered
Joined: 25/03/2011 Posts: 1,027 Points: 3,075 Location: Lincolnshire
|
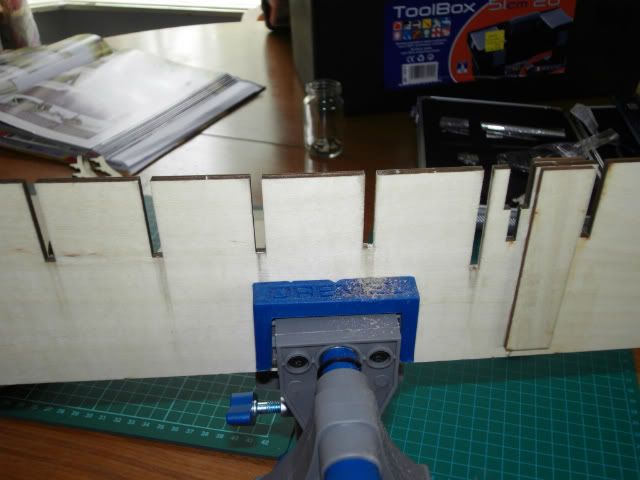
 This is how I support my model at the moment. I use a Dremel vice. It's a really good piece of kit and I can highly recommend it. The vice is Ok for these early stages, but I will have to use a keel clamp for the work coming up. I got sent a work stand for my Endeavour model. I will have to see if I can adapt that, or build one. Anyway I attached the other hull extender section to take the model to almost its full length. The second section was not as tight fitting as the first so I thought I would clamp it using my trusty vice. I came unstuck though, because I couldn't get the reinforce strips to settle properly because of this. If in doubt read the instructions, which were to lay it flat and use some form of a weight. Which I did so all was good in the end.
|
|
|
 Rank: Master      Groups: Registered
Joined: 25/03/2011 Posts: 1,027 Points: 3,075 Location: Lincolnshire
|
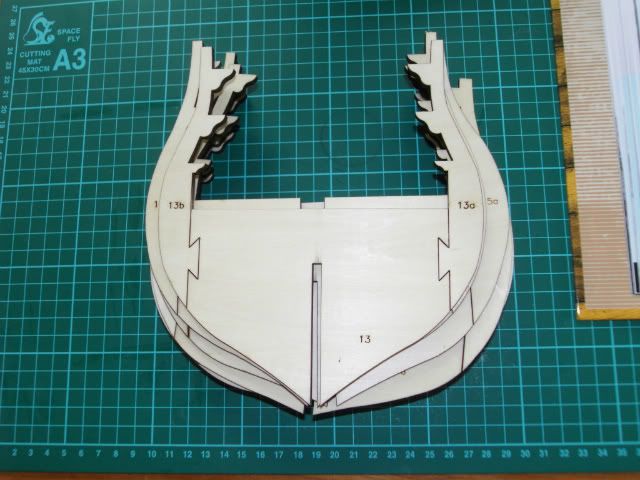
 Here is a big pile of the hull sections stacked on top of each other. I adopted a almost factory style approach to building these., building four at a time. This allowed me to progress quite quickly with the hull part of the build, and was quite straight forward.
|
|
|
 Rank: Master      Groups: Registered
Joined: 25/03/2011 Posts: 1,027 Points: 3,075 Location: Lincolnshire
|
|
|
|
 Rank: Master    Groups: Registered
Joined: 20/03/2010 Posts: 1,199 Points: 3,473 Location: Glenrothes
|
 hiya silent have u squared the rib u have fitted to the keel just concerned as u have taken the keel out of your vice
|
|
|
 Rank: Master      Groups: Registered
Joined: 25/03/2011 Posts: 1,027 Points: 3,075 Location: Lincolnshire
|
Hi budgie,
Yes I checked it when I took it from the vice. I quickly realised using the vice was not a smart thing to do. Looking at the build diary's of others, one thing I am going to do is check and re-check that it's square before I fix the hull formers with the watered down PVA glue permanently.
I think if you get this bit wrong, the hull will be squint and will cause heartache further down the line. Laying the keel is the most important part in real ship building as it shapes the accuracy of the rest of the build.
|
|
|
 Rank: Master      Groups: Registered
Joined: 25/03/2011 Posts: 1,027 Points: 3,075 Location: Lincolnshire
|
budgie wrote: hiya silent have u squared the rib u have fitted to the keel just concerned as u have taken the keel out of your vice Meant to tell you in my last post I haven't stuck anything yet, as per instructions. 
|
|
|
 Rank: Pro   Groups: Registered
Joined: 25/03/2010 Posts: 472 Points: 1,357 Location: Hyde
|
Hi mate. Welcome here. I'm glad you've started your build diary. I can see that you started well, take it easy and enjoy every hour of modeling. Keep them pictures coming 
|
|
|
 Rank: Master      Groups: Registered
Joined: 25/03/2011 Posts: 1,027 Points: 3,075 Location: Lincolnshire
|
tom.ganc wrote:Hi mate. Welcome here. I'm glad you've started your build diary. I can see that you started well, take it easy and enjoy every hour of modeling. Keep them pictures coming  Hi Tom, Thanks for your kind words, these models do give you endless pleasure don't they? 
|
|
|
 Rank: Master      Groups: Registered
Joined: 25/03/2011 Posts: 1,027 Points: 3,075 Location: Lincolnshire
|
Hi Shipmates, Can someone take a look at the third picture in post 26. It looks squint or is that just the way I have taken the picture? Do you think I need to re-check this. (a good excuse to buy a laser level I think  ) What do you guys think?
|
|
|
 Rank: Super-Elite        Groups: Registered
Joined: 04/04/2010 Posts: 3,955 Points: 11,809 Location: uk
|
hi Silent_Running I've noticed that the keel has a slight bend,can you make a jig? now is the time or probs will occur,just a few brackets and a lump of wood (straight lump and flat)old shelf ect.save you heartache later on. Current builds: SotS, USS Consitution, San Felipe, D51 loco, HMS Surprise, RB7, Arab Dhow, Jotika HMS Victory Completed builds: HMS Pickel, Thermopylae, Mississipi river boat, Mary Rose, Cutty Sark, San Francisco II, HMS Victory x5, Titanic Lifeboat, Panart HMS Victory Launch, Hachette Titanic, Virginia Schooner, Endeavour Longboat. http://www.model-space.com/gb/
|
|
|
 Rank: Master      Groups: Registered
Joined: 25/03/2011 Posts: 1,027 Points: 3,075 Location: Lincolnshire
|
Hi Karl, Yes I'm going to do that for certain, Thanks your advice, I really appreciate it. By the way I'm building the Eaglemoss Endevour like you. Will start to post a build log for that soon. As soon as I have a firm foundation for Victory established. Can you suggest a jig that would be suitable? One things for certain i'm not making another move until I'm sure it's straight. 
|
|
|
 Rank: Super-Elite      Groups: Registered
Joined: 24/04/2010 Posts: 5,787 Points: 17,662 Location: Stafford, United Kingdom
|
Hi Glen, Karls advice is sound, please put it in a Dry Dock (Jig)before you do any more work without it she could twist even though you put all the ribs in straight.  MWG BUILD DIARIES: HMS VICTORY, SOVEREIGN OF THE SEAS, SAN FRANCISCO II, HMS HOOD, HMS ENDEAVOUR LONGBOAT, HMS VICTORY X-SECTION, 007 DB5, NISSAN GTR, CUTTY SARK, RB7, AKAGI, BARK HMS ENDEAVOUR, HUMMER H1, MITSUBISHI ZERO.
|
|
|
 Rank: Vice-Master     Groups: Registered
Joined: 26/09/2010 Posts: 851 Points: 2,565 Location: Walsall
|
i there
Nice to see a new build but PLEASE listen to the advice. get the false keel part straight and you shpuld have no problems unlike what happend to mine.
All the best with the build
Foz
|
|
|
 Rank: Master      Groups: Registered
Joined: 25/03/2011 Posts: 1,027 Points: 3,075 Location: Lincolnshire
|
Hi guys, Thanks for the advice, message received and understood. 
|
|
|
 Rank: Super-Elite        Groups: Registered
Joined: 04/04/2010 Posts: 3,955 Points: 11,809 Location: uk
|
hi silent,I suggest a trip to b&q or homebase etc.shelf approx. 3'.0 x 6-8" width,try and steer clear of pine,tends to warp,a dozen 4" angle brackets.I did'nt glue my ribs till I got the lower deck,that help's to sq. up the ribs,and then I glued the ribs with the deck in place,drill pilot holes in deck and then temp. pin deck,not knocking in the pins all the way,(removed after glue has dried.)I used a dress making pin as a drill,cut the head off the pin and that is the end you use as a cutting edge.surprisingly it cuts well.good luck and enjoy. p.s. two types of jigs,mwg's build for the basic one and son of bulwarks for the fancy one,but extra material are needed for that one. Current builds: SotS, USS Consitution, San Felipe, D51 loco, HMS Surprise, RB7, Arab Dhow, Jotika HMS Victory Completed builds: HMS Pickel, Thermopylae, Mississipi river boat, Mary Rose, Cutty Sark, San Francisco II, HMS Victory x5, Titanic Lifeboat, Panart HMS Victory Launch, Hachette Titanic, Virginia Schooner, Endeavour Longboat. http://www.model-space.com/gb/
|
|
|
 Rank: Master      Groups: Registered
Joined: 25/03/2011 Posts: 1,027 Points: 3,075 Location: Lincolnshire
|
Quote:try and steer clear of pine,tends to warp Thanks for the advice Karl about the pine I nearly bought a sheet of it the other day. What about MDF is that OK? 
|
|
|
 Rank: Pro Groups: Joined: 24/08/2009 Posts: 48,827 Points: -13,348
|
As long as its at least 12mm thick or a melamine shelf of the same thickness
|
|
|
|
Guest
|