|
|
 Rank: Elite      Groups: Registered
Joined: 13/02/2011 Posts: 2,243 Points: 6,849 Location: Sussex
|
Thank you for looking and all your comments Alan,Martyn,and Dave very much appreciated, working on the cylinder head this weekend, of to Biggin Hill on the 20th to view a Merlin V12 Engine. Regards Trev. Work in progress: Tombstone (Scratch) - San Francisco 2. -The Mayflower ( scratch by plan).
OcCre- Santa-Maria (Kit).
|
|
|
|
|
 Looks great Trev  Current builds:-C57,Zero, Lamborghini Countach, Caldercraft HMS Agamemnon,Robi,R2-D2, MFH Cobra .
|
|
|
Rank: Elite Groups: Registered
Joined: 13/02/2011 Posts: 2,243 Points: 6,849 Location: Sussex
|
Hi Andy, Thanks for looking, Regards Trev. Work in progress: Tombstone (Scratch) - San Francisco 2. -The Mayflower ( scratch by plan).
OcCre- Santa-Maria (Kit).
|
|
|
Rank: Elite Groups: Registered
Joined: 13/02/2011 Posts: 2,243 Points: 6,849 Location: Sussex
|
UPDATE:SPITFIRE. 221115. PROBLEMS WITH UNDERCARRIAGE. On testing the undercarriage for up and down movement the suspension struts (which holds the undercarriage) broke away from the suspension joints now this is a major problem for my build. In my mind where the joints fit into the struts it appears that the projection from the joint is far to short and should be made longer. So what do we do? The only way in my mine will be to extend the projection from the joint. How do we do that? First cut a piece of 3/16 tube Albion Alloys Code AT5 this will be a tight fit so you may have to reduce the projection on the joints. This can be glued as the official build, but my preference was to drill and glue and pin the tube and fill it with filler to the top.(green stuff)this will make the tube harder and easer to drill. Now add the suspension joint drill and pin/screw. When set over night my next job was to test fit the cylindrical tube into the main strut and see how it fits and adjust if need. All ok so the next problem will be to fit the tube to the main suspension strut, first I assembled and placed the undercarriage and adjusted the joint on the end to the correct angle as the official build with that done I then drilled to small holes into the main strut and pined/screwed. In short this has made the Undercarriage Suspension a lot stronger and in appearance look's the same. So what caused this to happen: The wrong type of glue.? To much up and down testing.? Projection to short from the Suspension to fit into the Strut.? Did I receive a faulty part with out noticing it.? A few pictures. 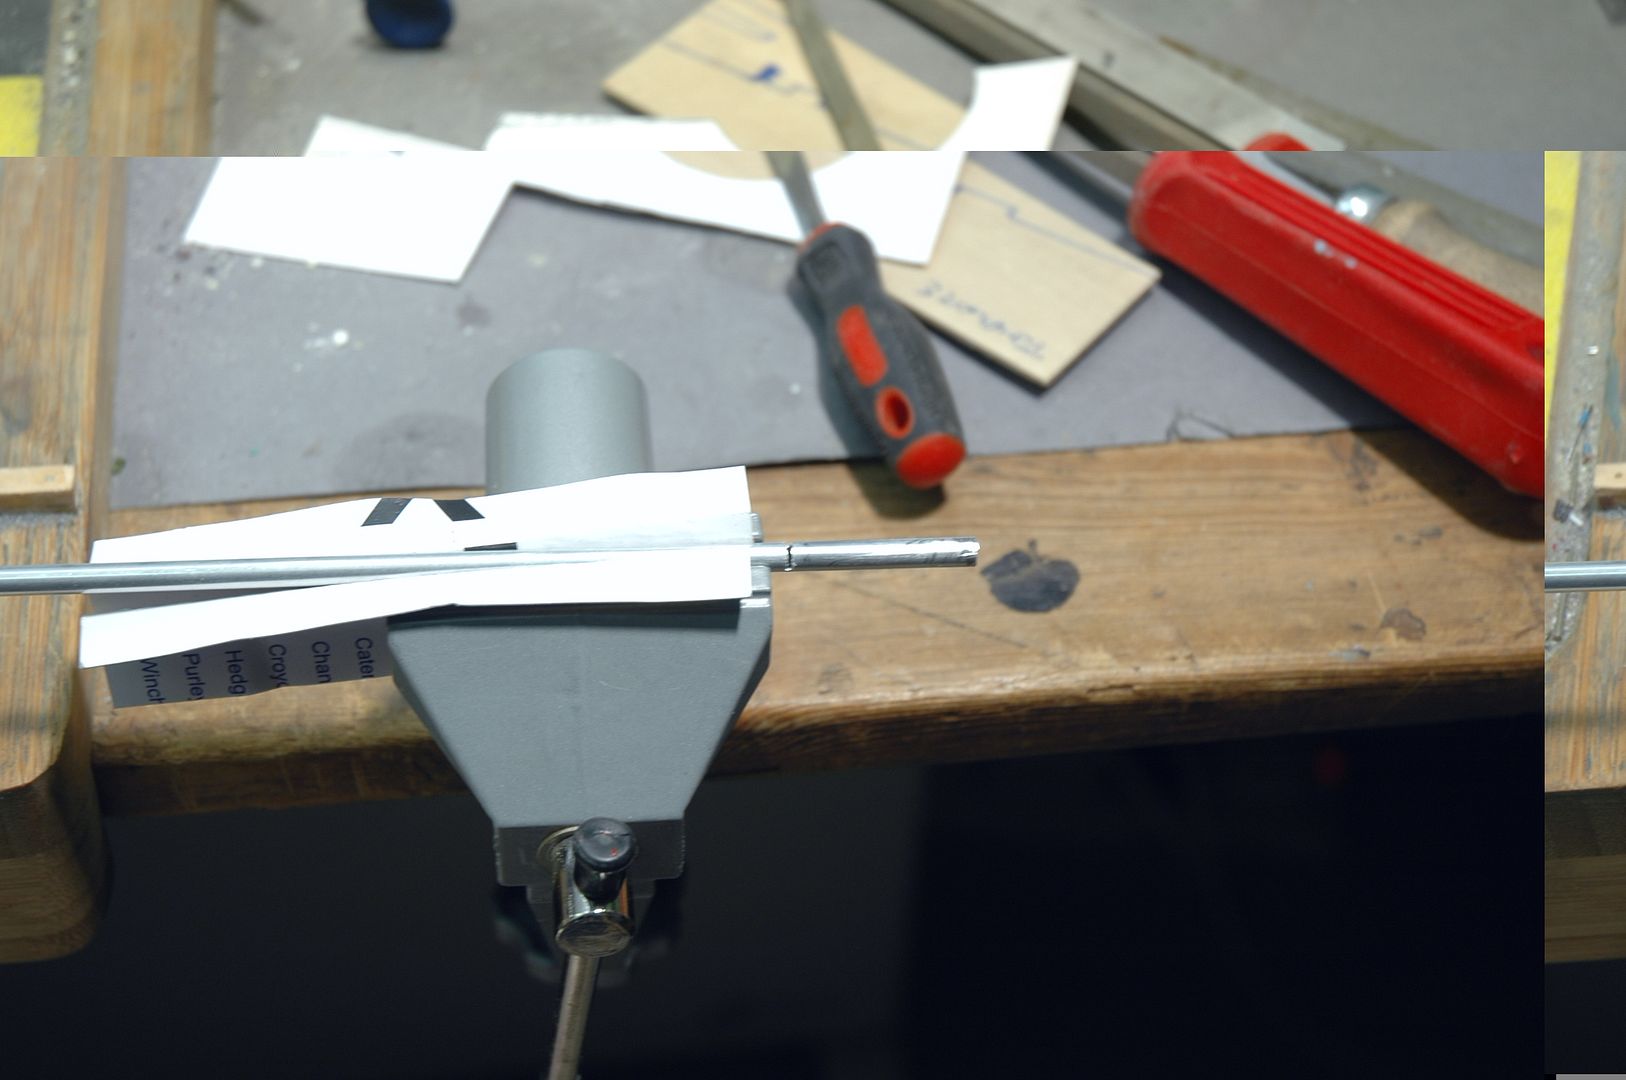 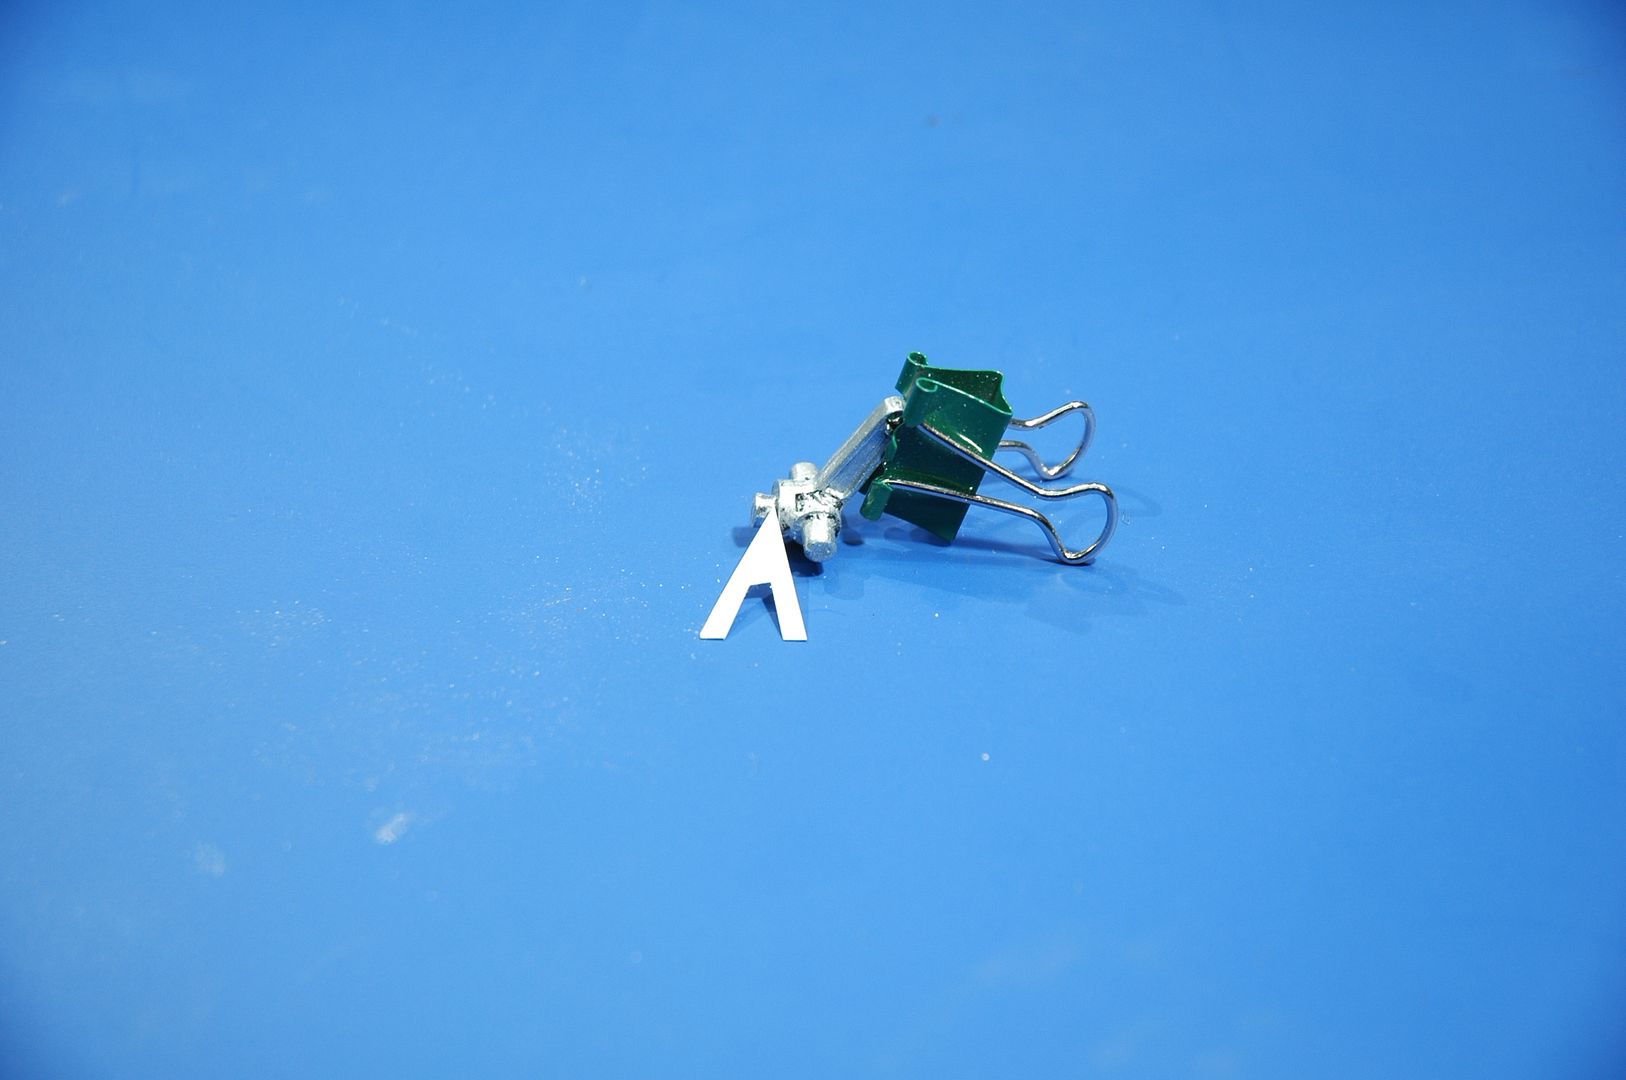 Suspension Joint showing projection. 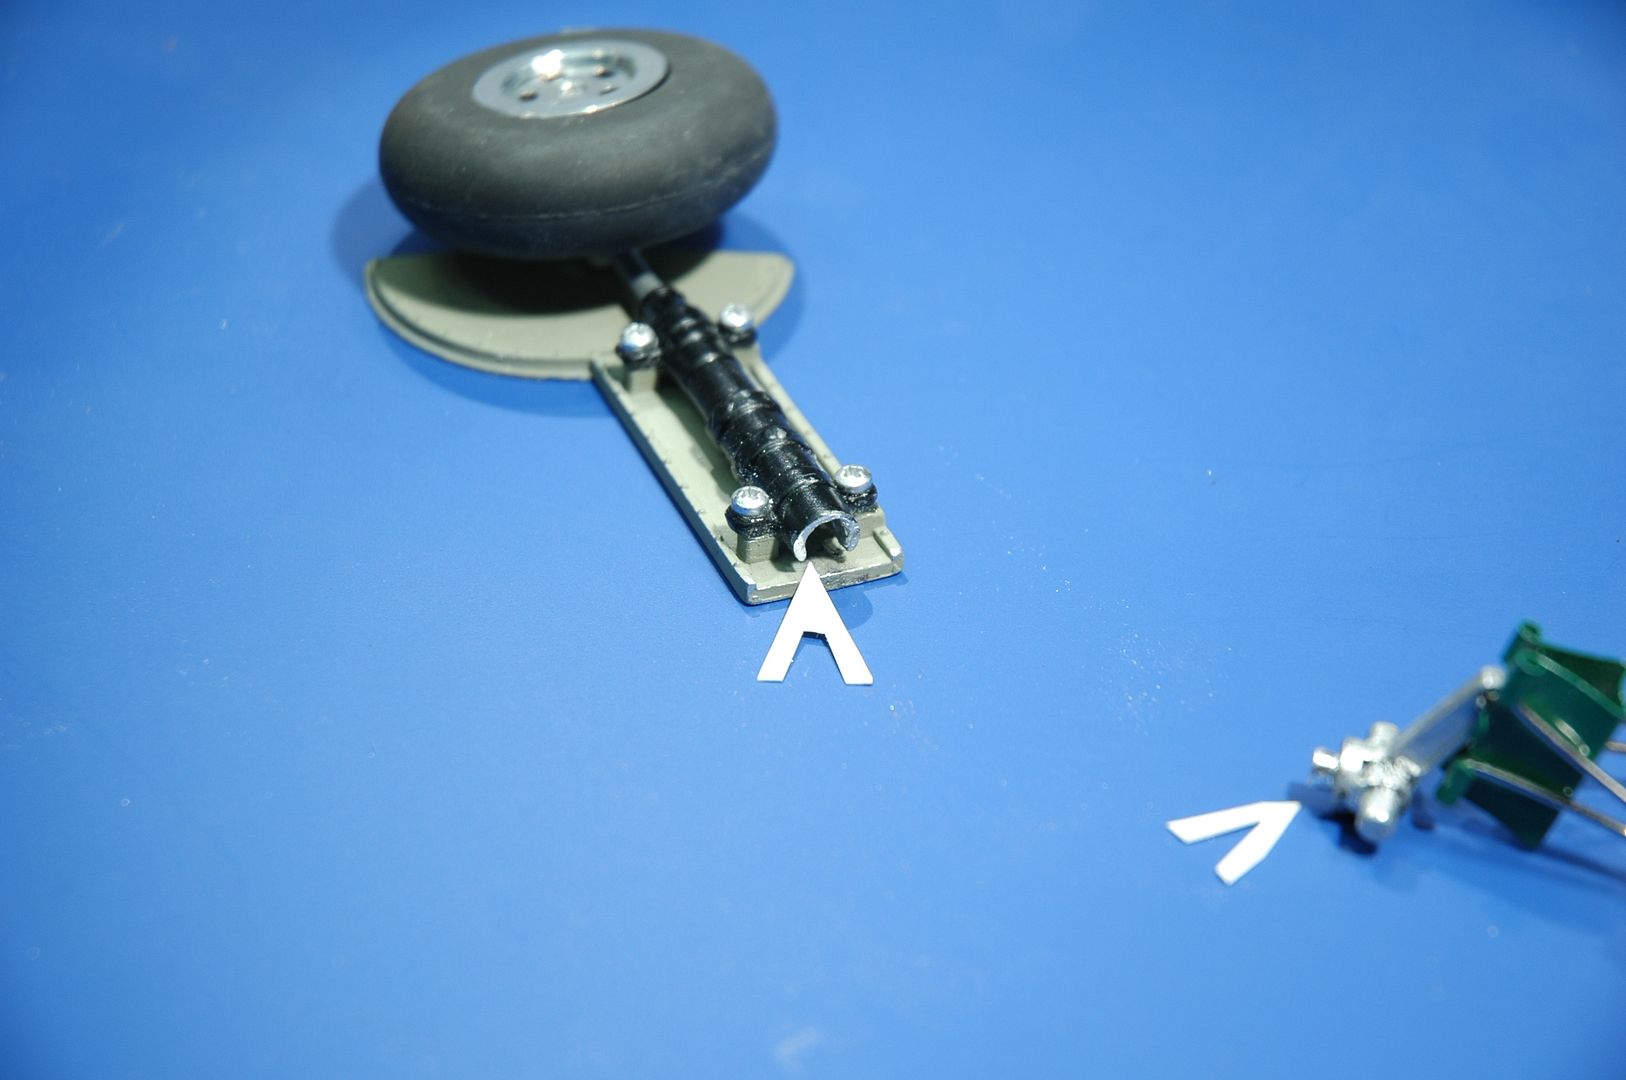 This is were it fits (I have removed metal ready for the tube that's why it looks to big) 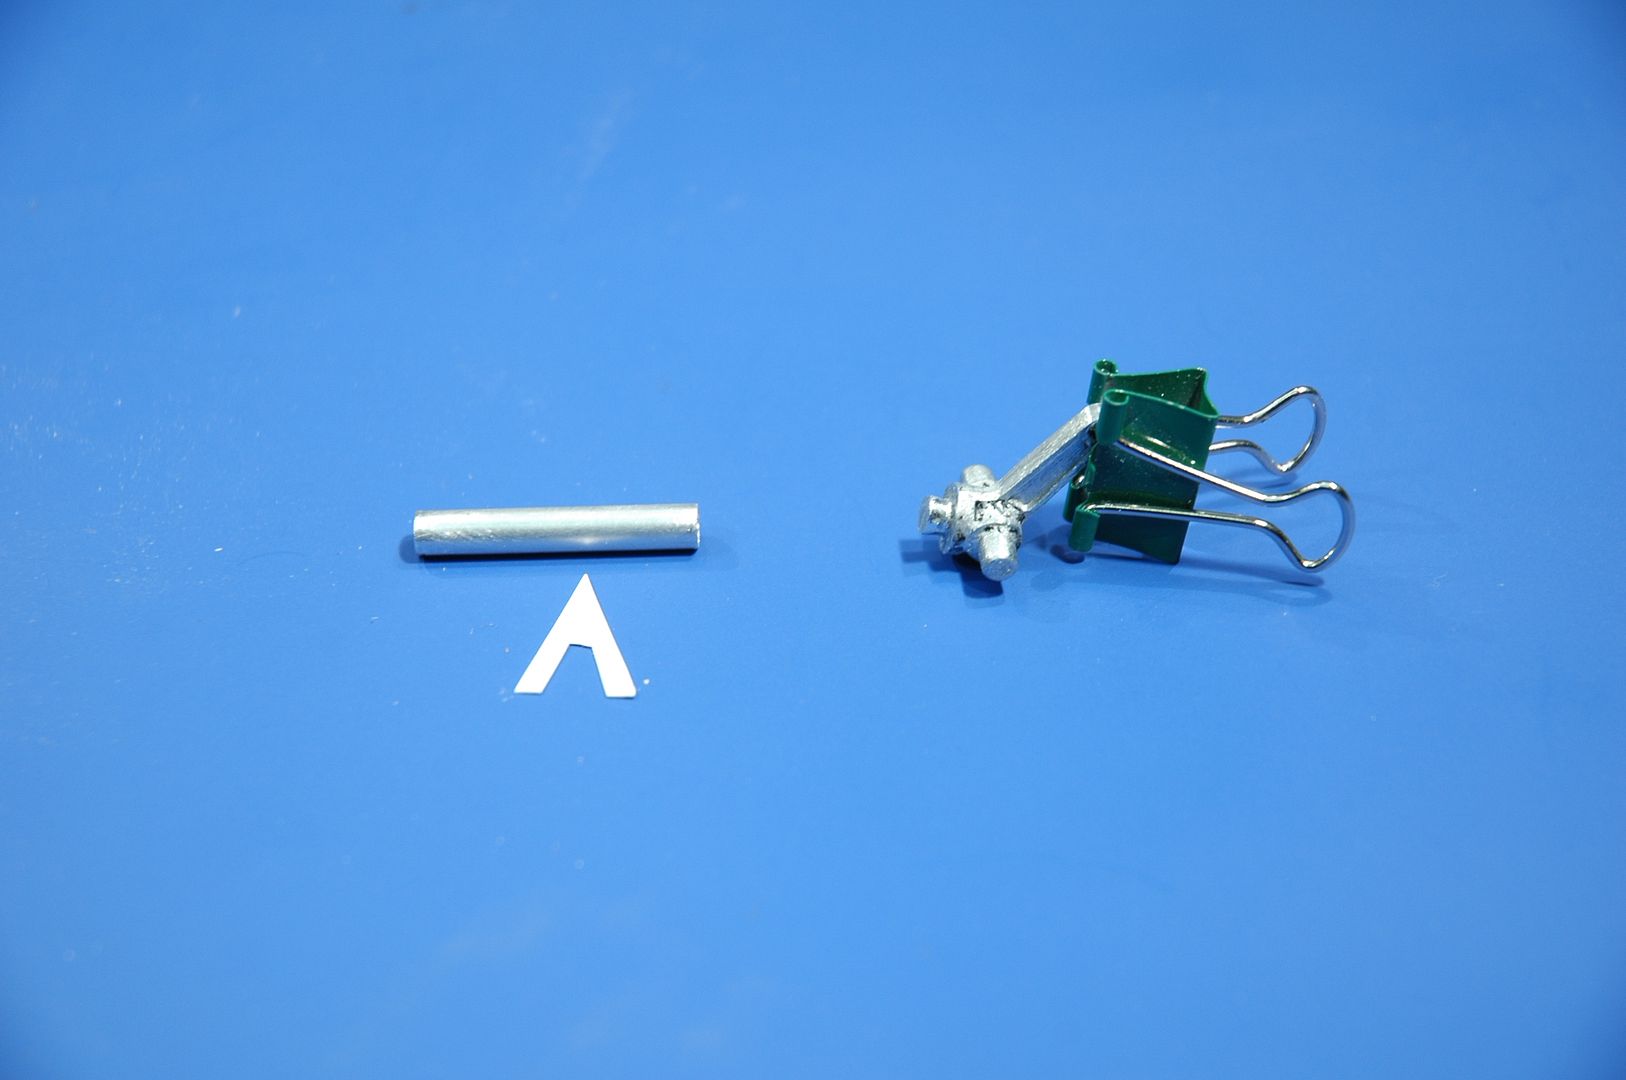 Tube ready to be drilled. 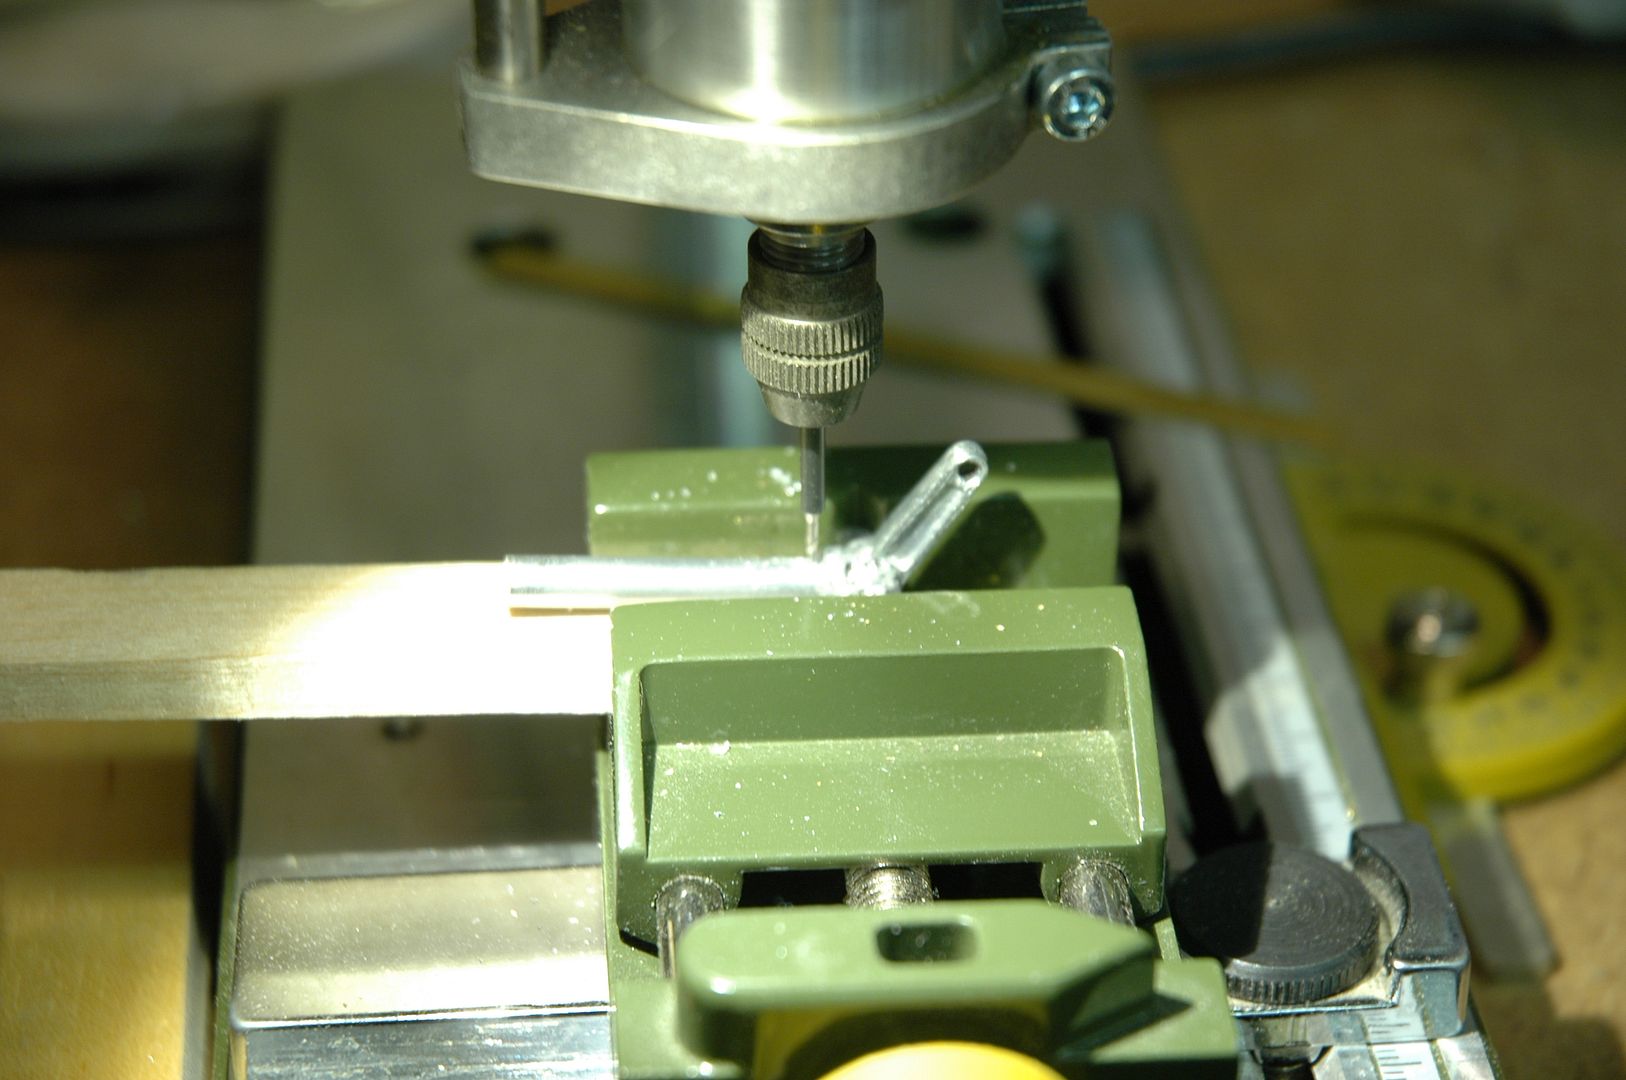 Drilling tube. 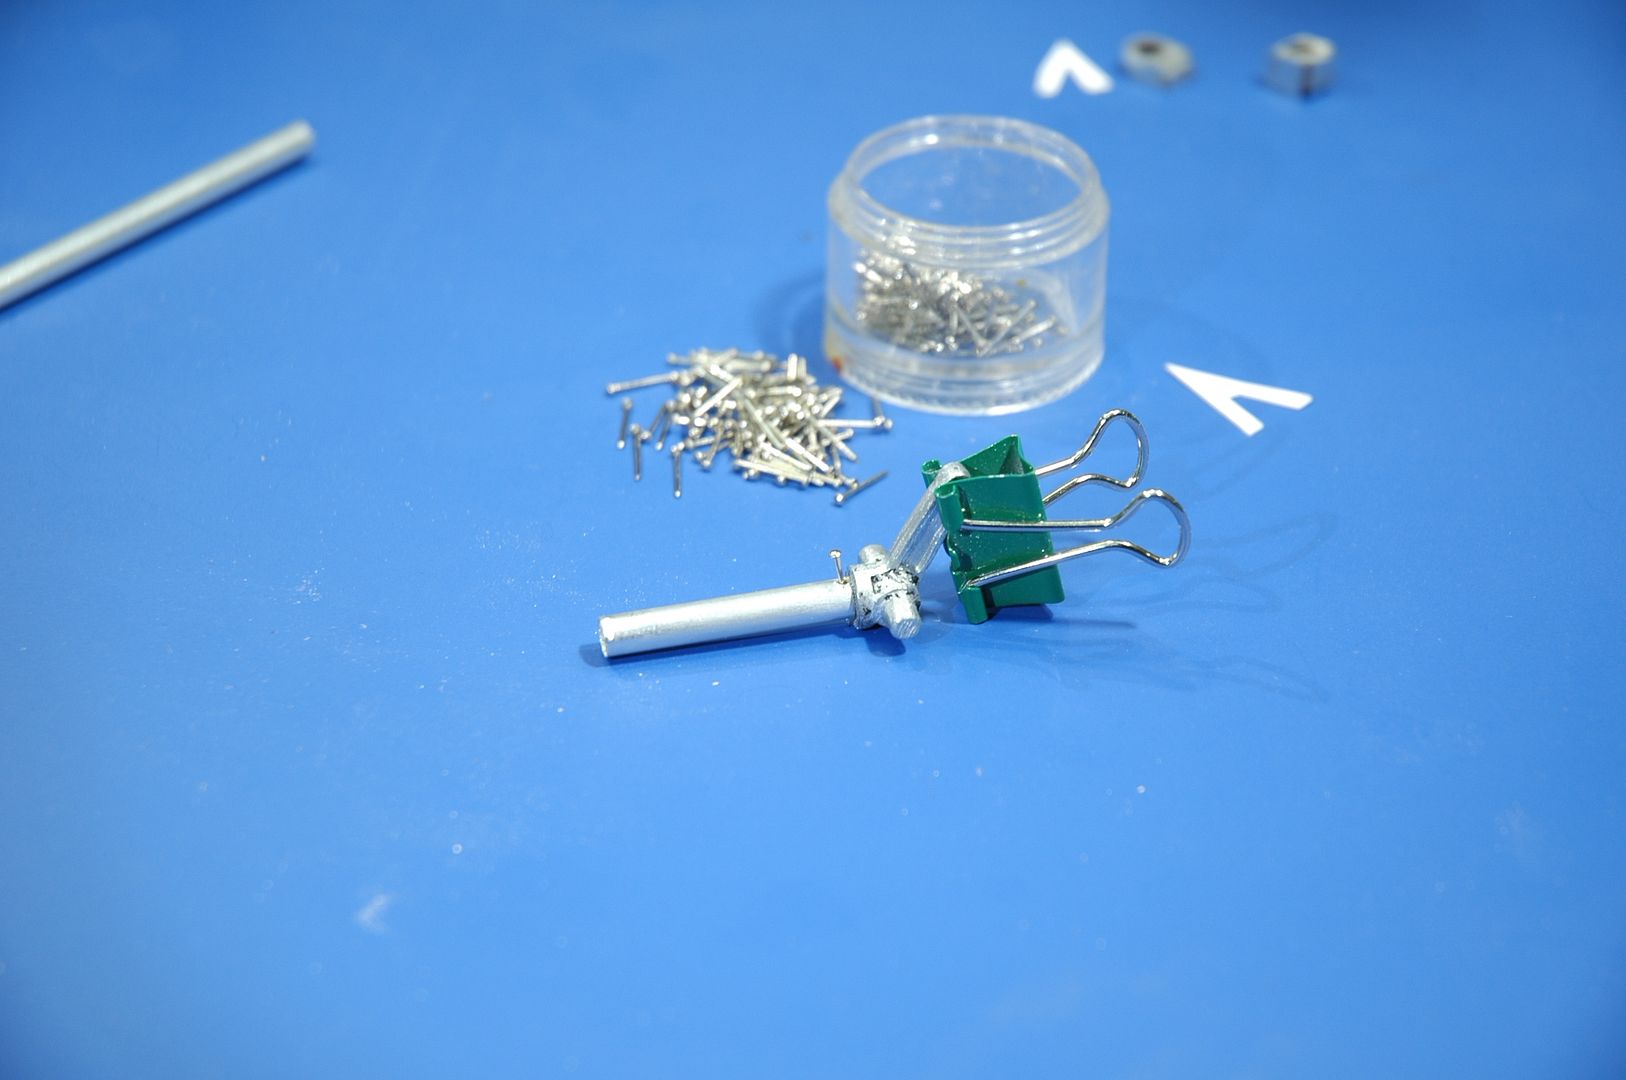 Drilled tube showing pin or screw. 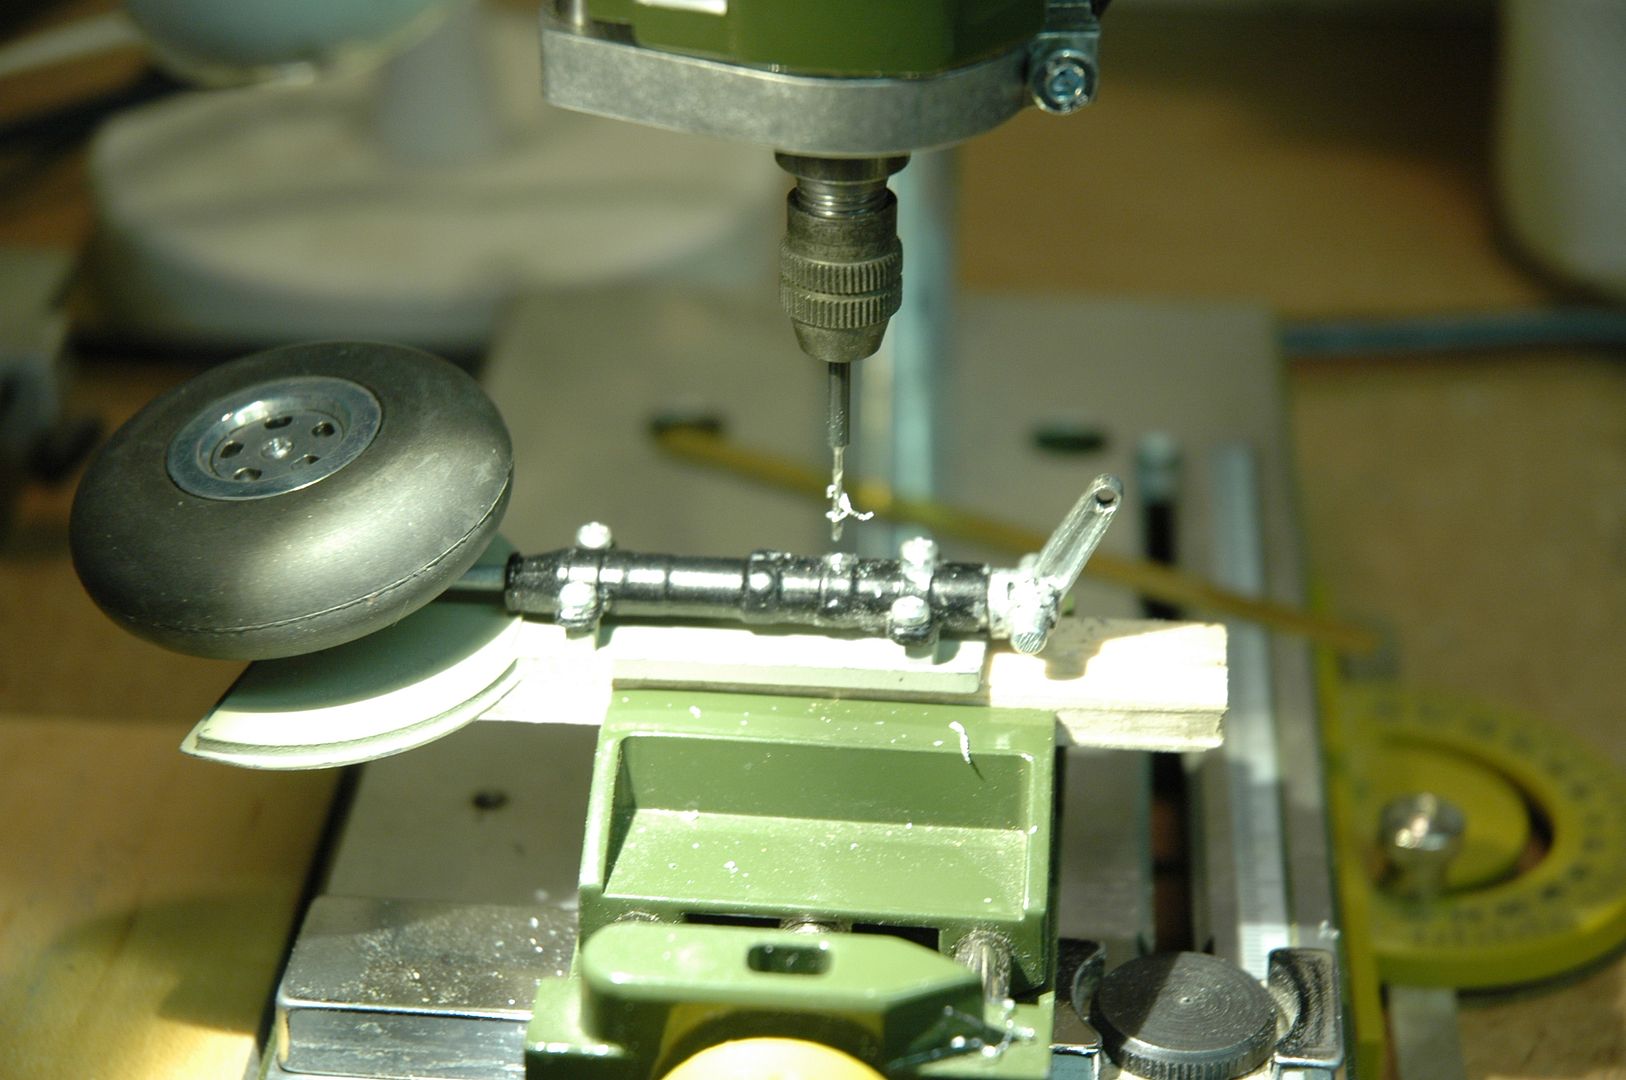 Drill Suspension and set angle of joint. 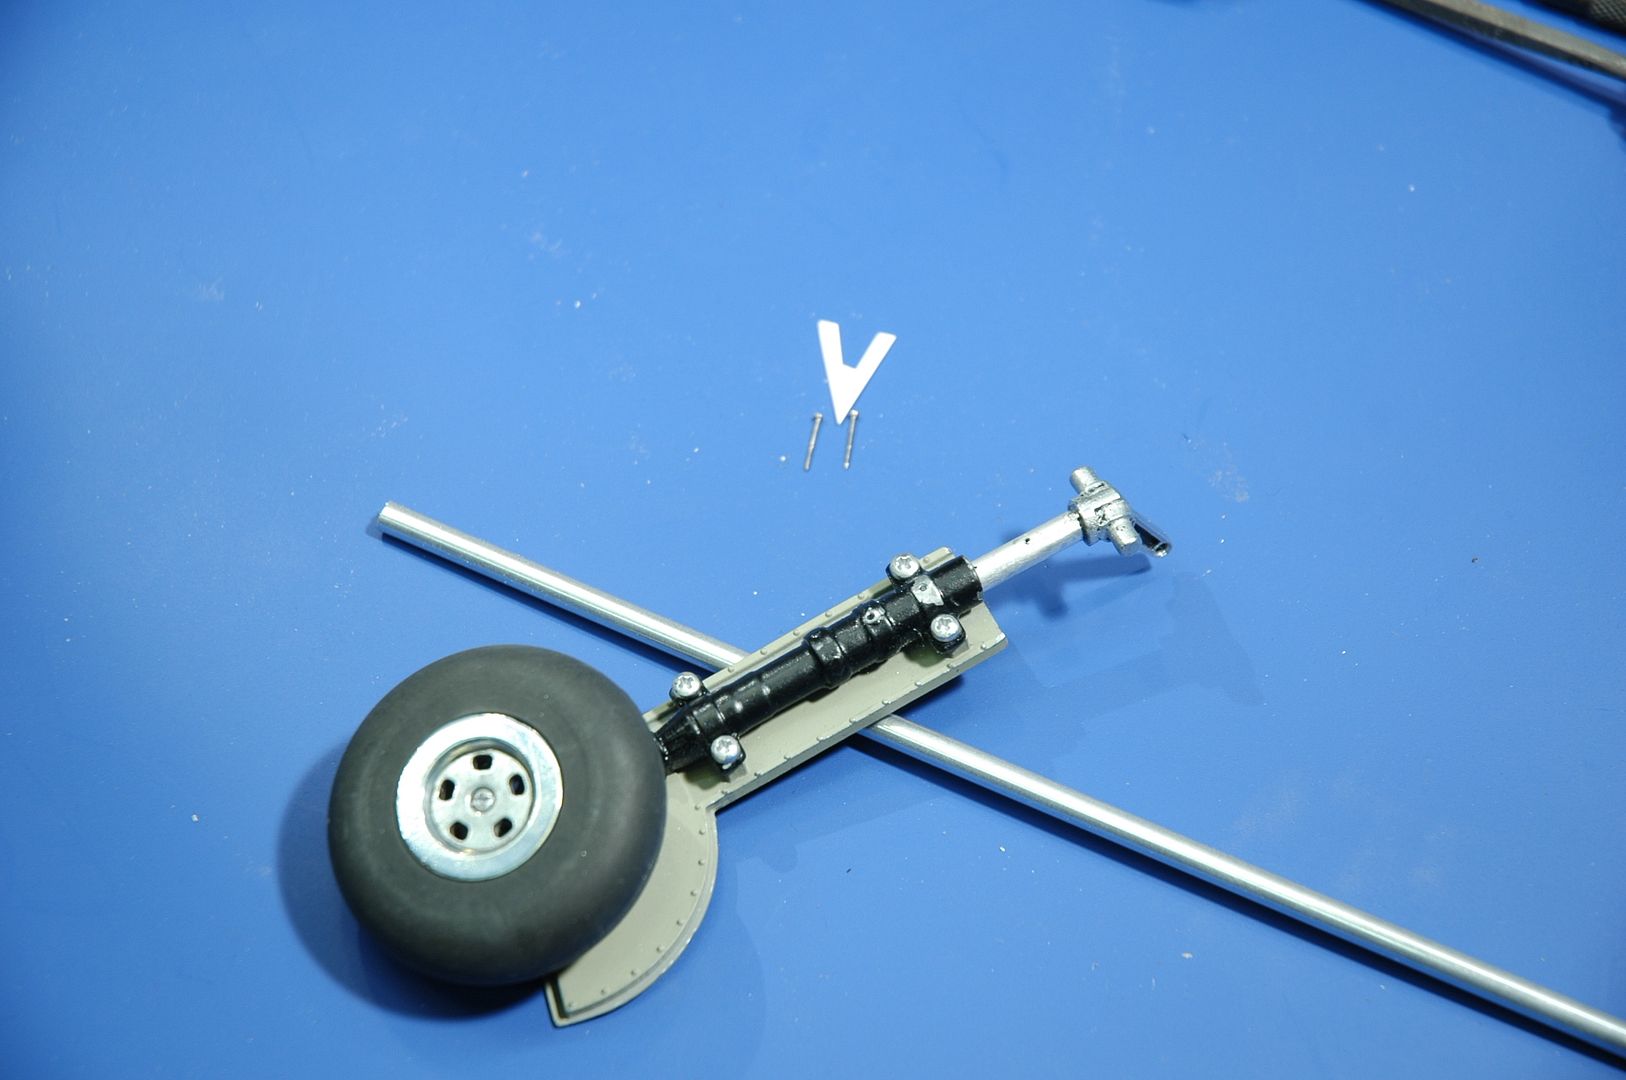 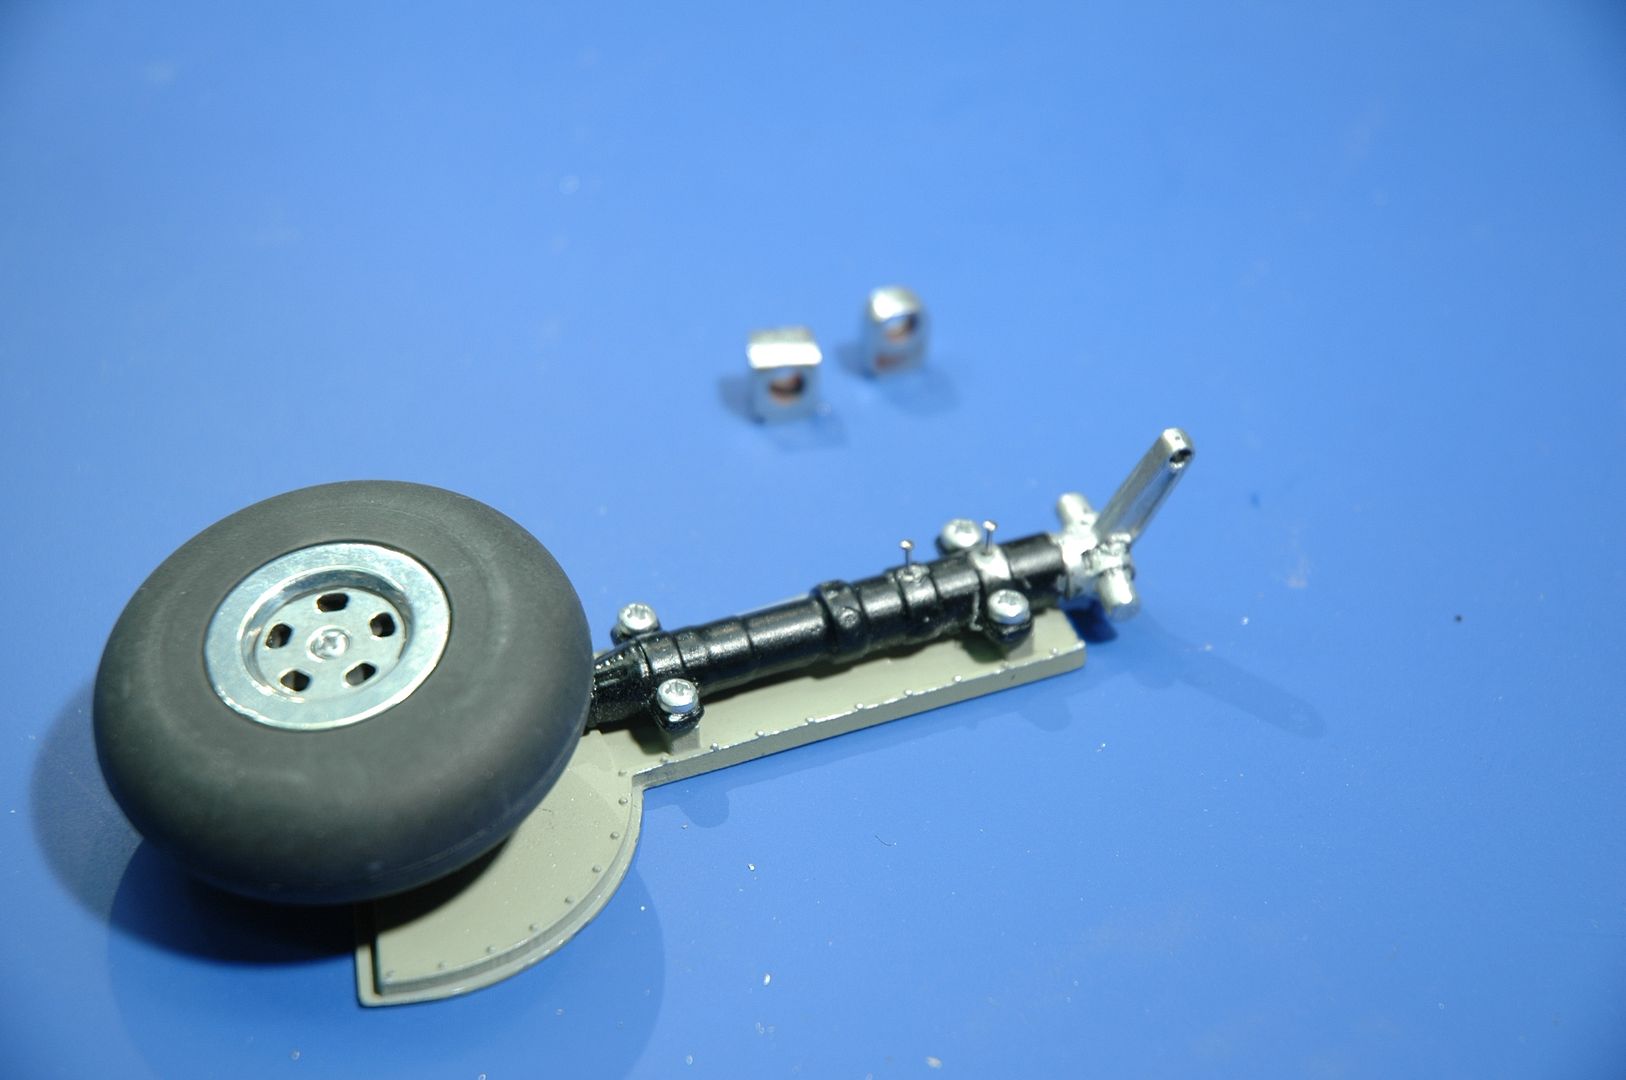 Ready to pin or screw. 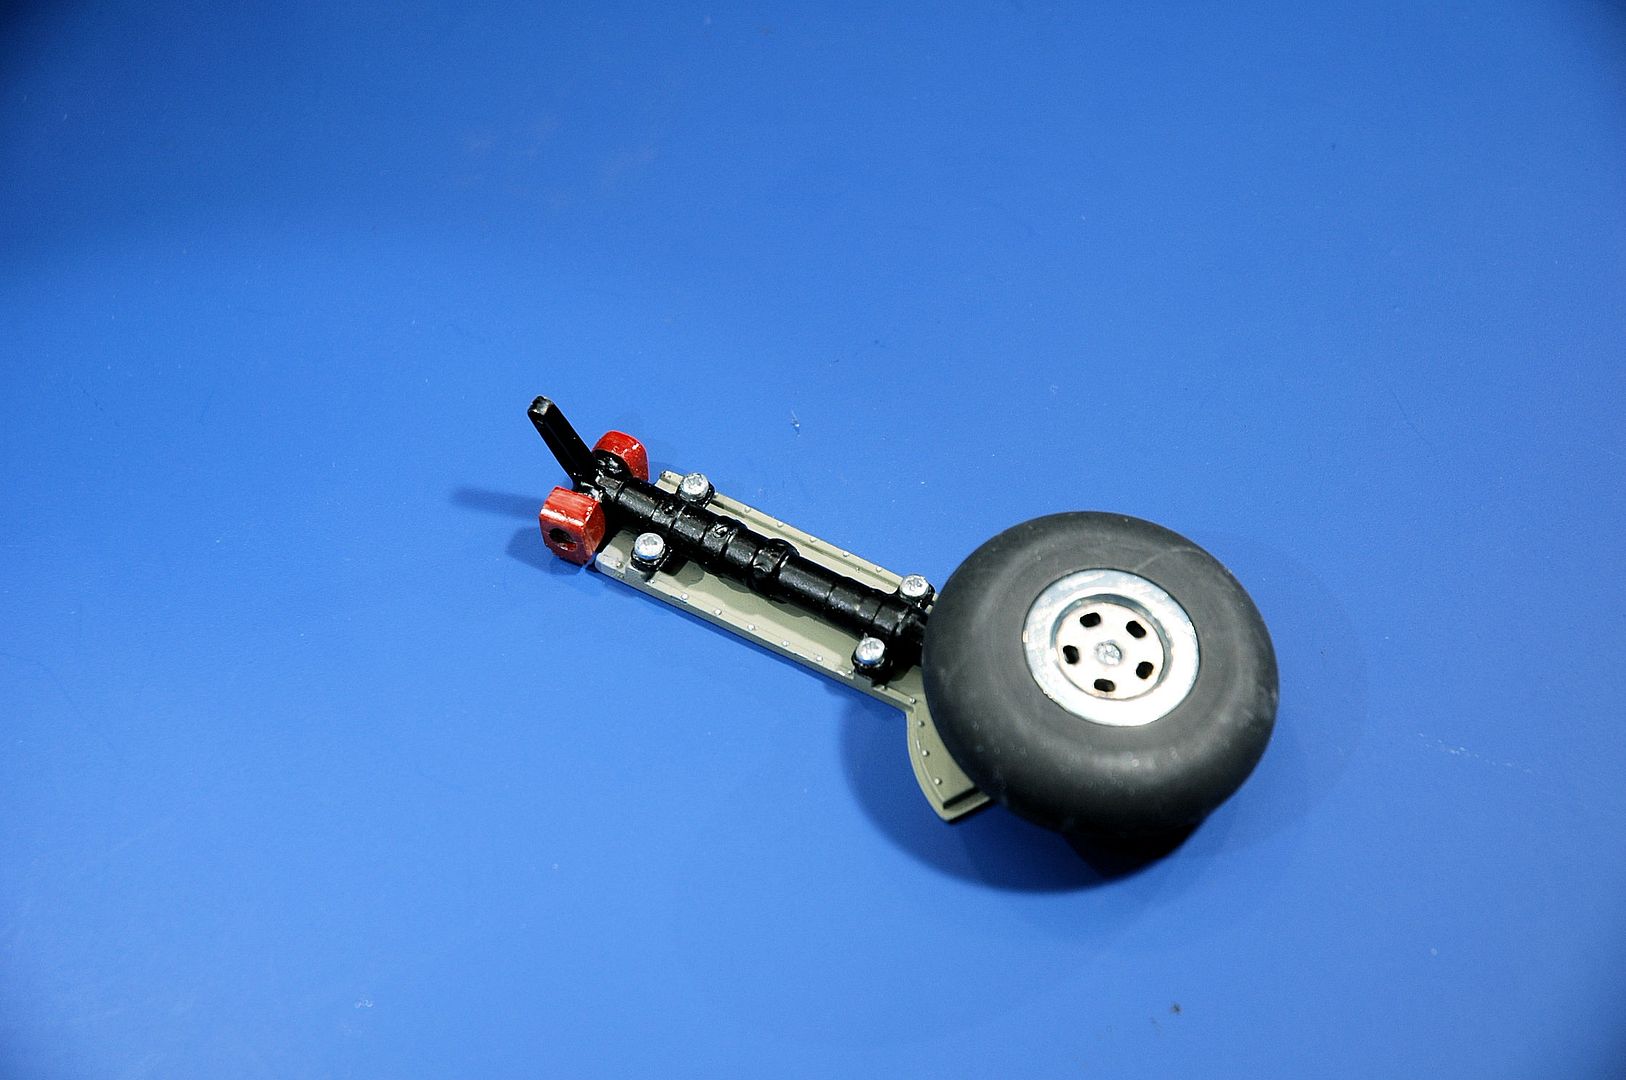 This is the final picture showing the finished repair work. Thank you for your time. Regards Trev. Work in progress: Tombstone (Scratch) - San Francisco 2. -The Mayflower ( scratch by plan).
OcCre- Santa-Maria (Kit).
|
|
|
 Rank: Super-Elite   Groups: Registered
Joined: 31/05/2010 Posts: 5,679 Points: 17,011 Location: Wiltshire
|
Trev You pulled that strut repair off very well. Its a good update should anyone encounter a similar issue. Kind regards Tony Happy Modelling
BUILDING: Hachette Spitfire Mk 1A, Constructo Mayflower
SUBSCRIPTION COMPLETE (Awaiting building): USS Constitution, Sovereign of the Seas, 1:200 Bismarck (Hachette)
COMPLETED: Porsche 911, E-Type Jaguar, Lam Countach
|
|
|
Rank: Super-Elite  Groups: Registered
Joined: 27/01/2014 Posts: 5,060 Points: 14,980
|
Awesome repair job Trev, that should add a considerable amount of strength now 
|
|
|
|
|
Well done on the fix Trev brilliant job Rgd Martyn Building ?
Completed. Soliei Royal . Sovereign of the Seas . Virginia . Scotland . San Felipe . Corel vasa , Santisima Trinadad X section , Vasa
Next Build ?
When sailors have good wine, They think themselves in heaven for the time. John Baltharpe
|
|
|
Rank: Super-Elite  Groups: Registered, Forum Support Team, Administrators, Global Forum Support Team, Moderator, Official Builds Joined: 09/11/2012 Posts: 8,520 Points: 24,651 Location: East midlands
|
WTG Trev, Looking good, keep up the good work.  Regards delboy271155 (Derek) COME BACK GUY FAWKES "YOUR COUNTRY NEEDS YOU"
|
|
|
Rank: Elite Groups: Registered
Joined: 13/02/2011 Posts: 2,243 Points: 6,849 Location: Sussex
|
Hi, Thank you Tony,Dave,Martyn,and Delboy, for your comments and taking the time to look in as I know your modelling time is so important. Regards Trev. Work in progress: Tombstone (Scratch) - San Francisco 2. -The Mayflower ( scratch by plan).
OcCre- Santa-Maria (Kit).
|
|
|
Rank: Elite Groups: Registered
Joined: 13/02/2011 Posts: 2,243 Points: 6,849 Location: Sussex
|
UPDATE:SPITFIRE. 300116. Sanding down the main fuselage. Fitting Nose plate. Engine under plate. (I will cover this part next time.) Fitting engine cover top plate. Tailfin. After finishing of the main fuselage with 3x5 mm strips between the frames, the next job was to sand down the entire length of the fuselage which will be covered with metal plates as I did with the wings, my experience at this point will be to make sure that there are no sharp corners or bumps that will show when finished. This part is so important to get correct, you need to put it in your mind what it will look like when finished, so follow the natural curve with no sharp angles. The first picture shows the fuselage, the second shows two pieces of 3x3mm wooden strips starboard side sanded down to a taper this will support the tailfin. 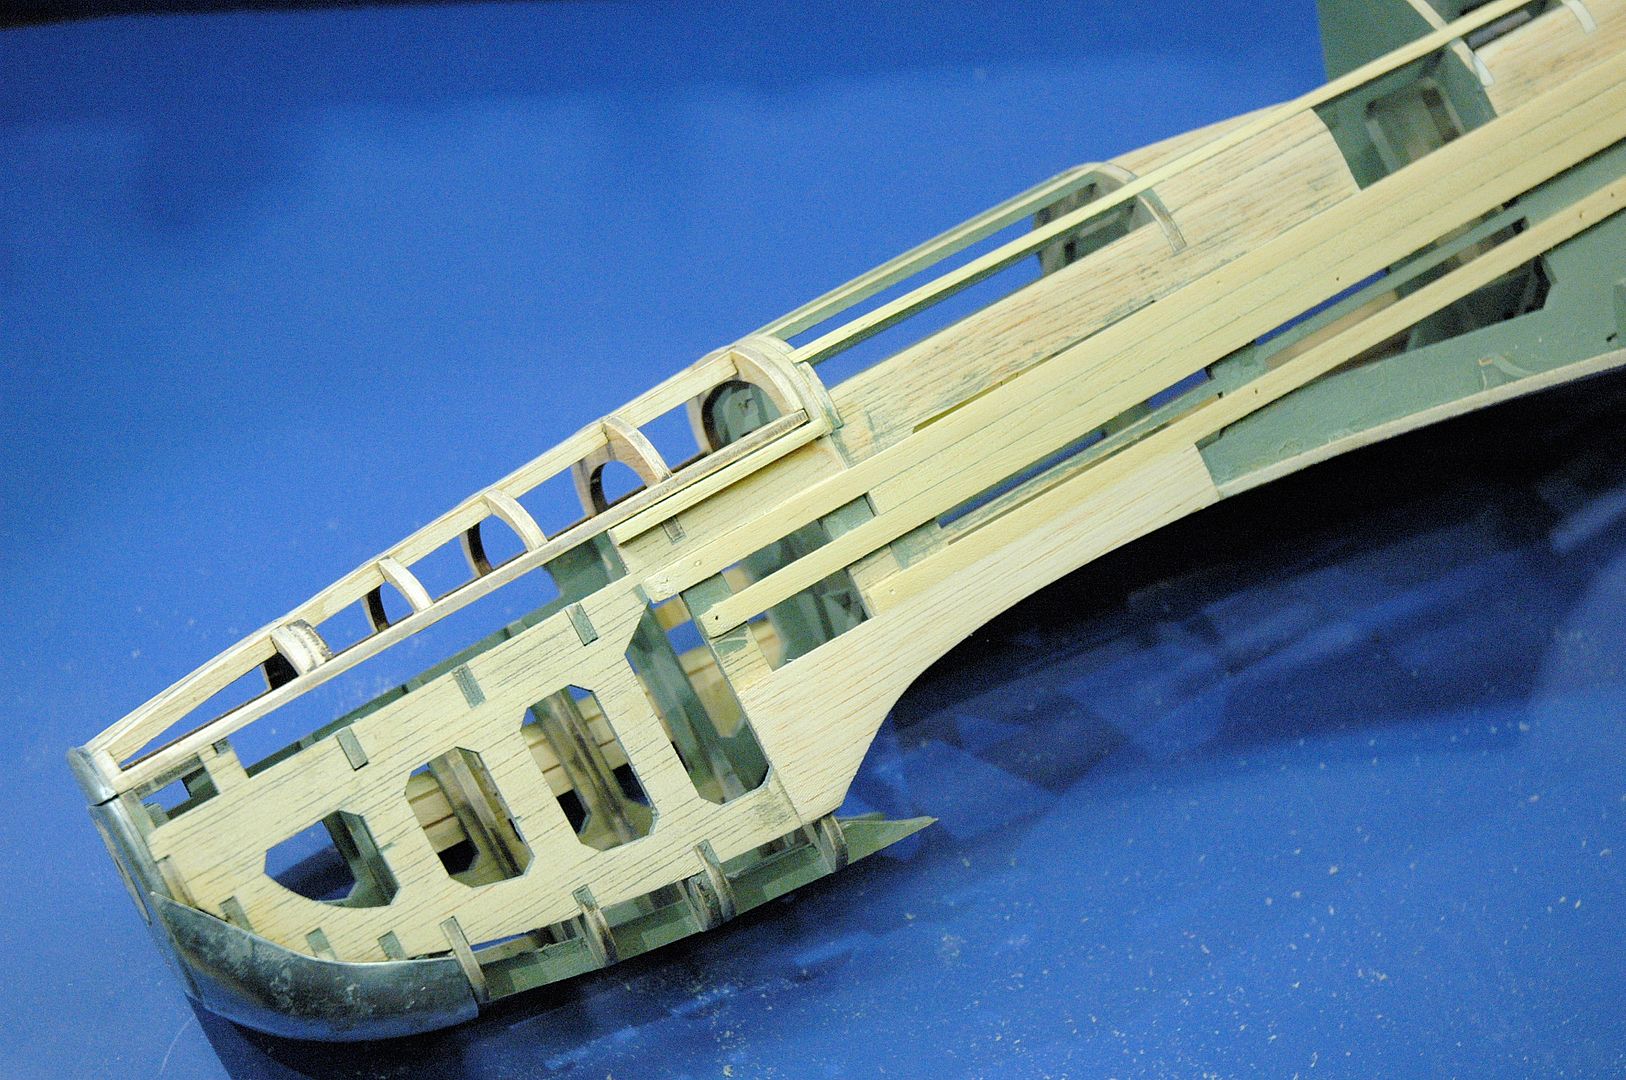 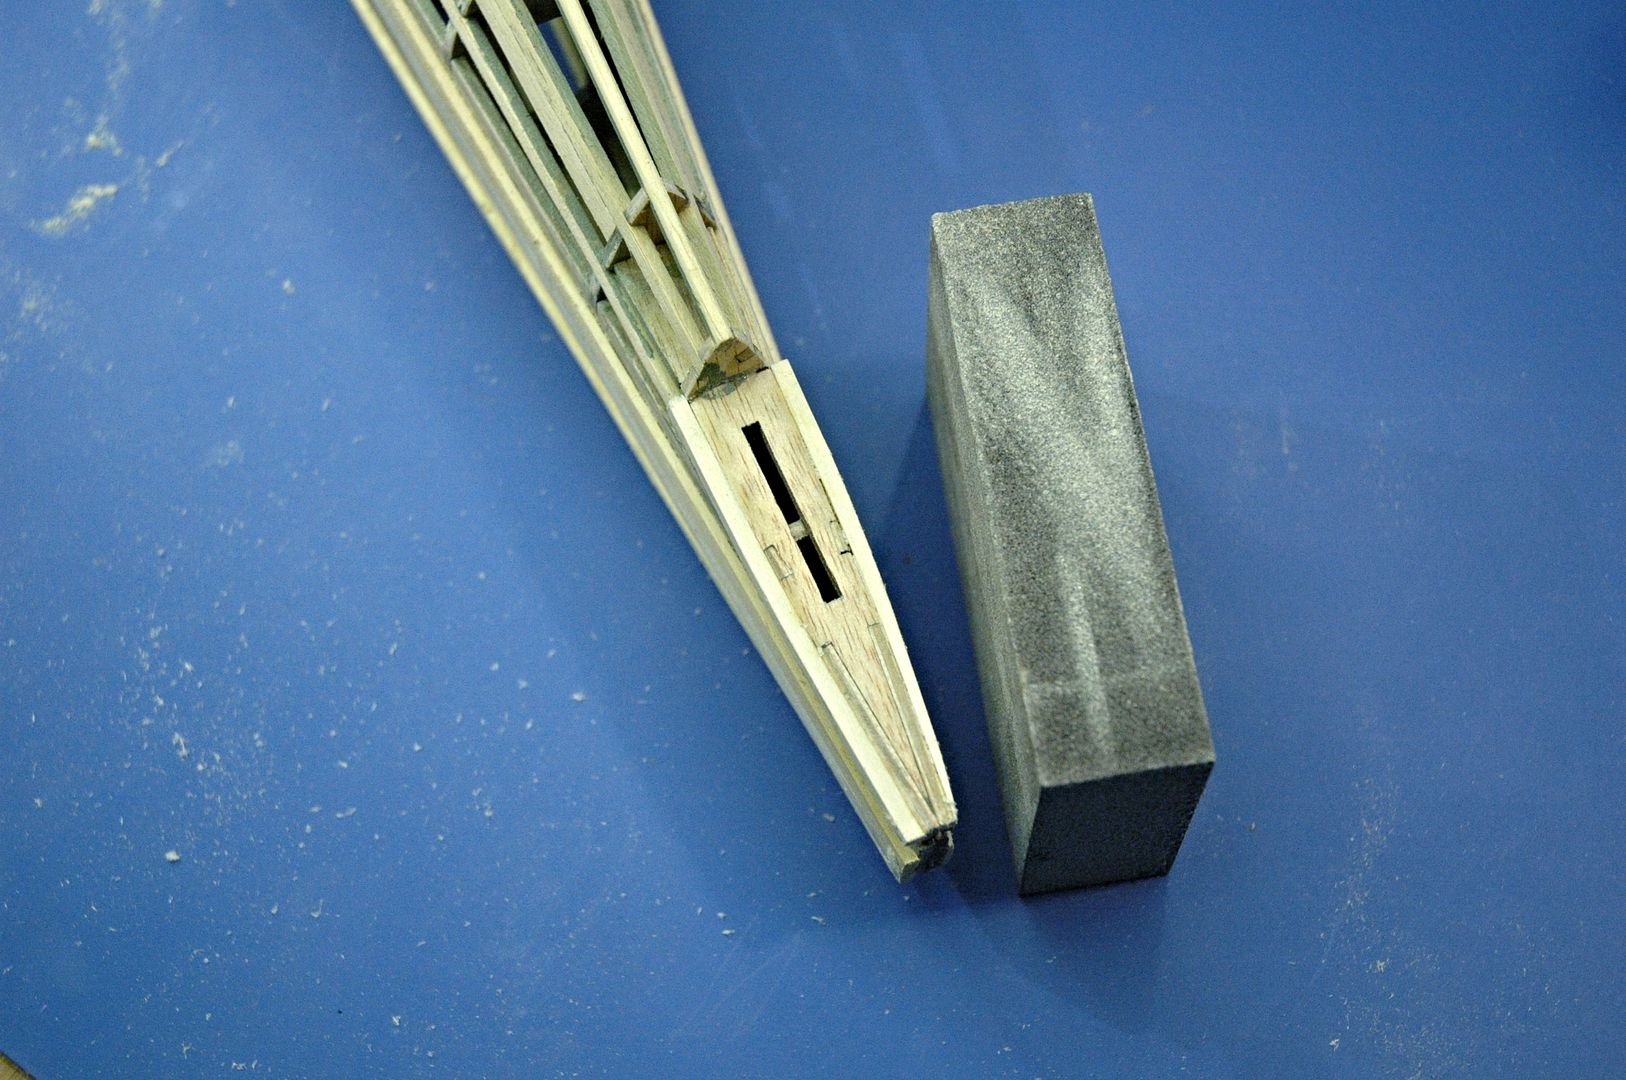 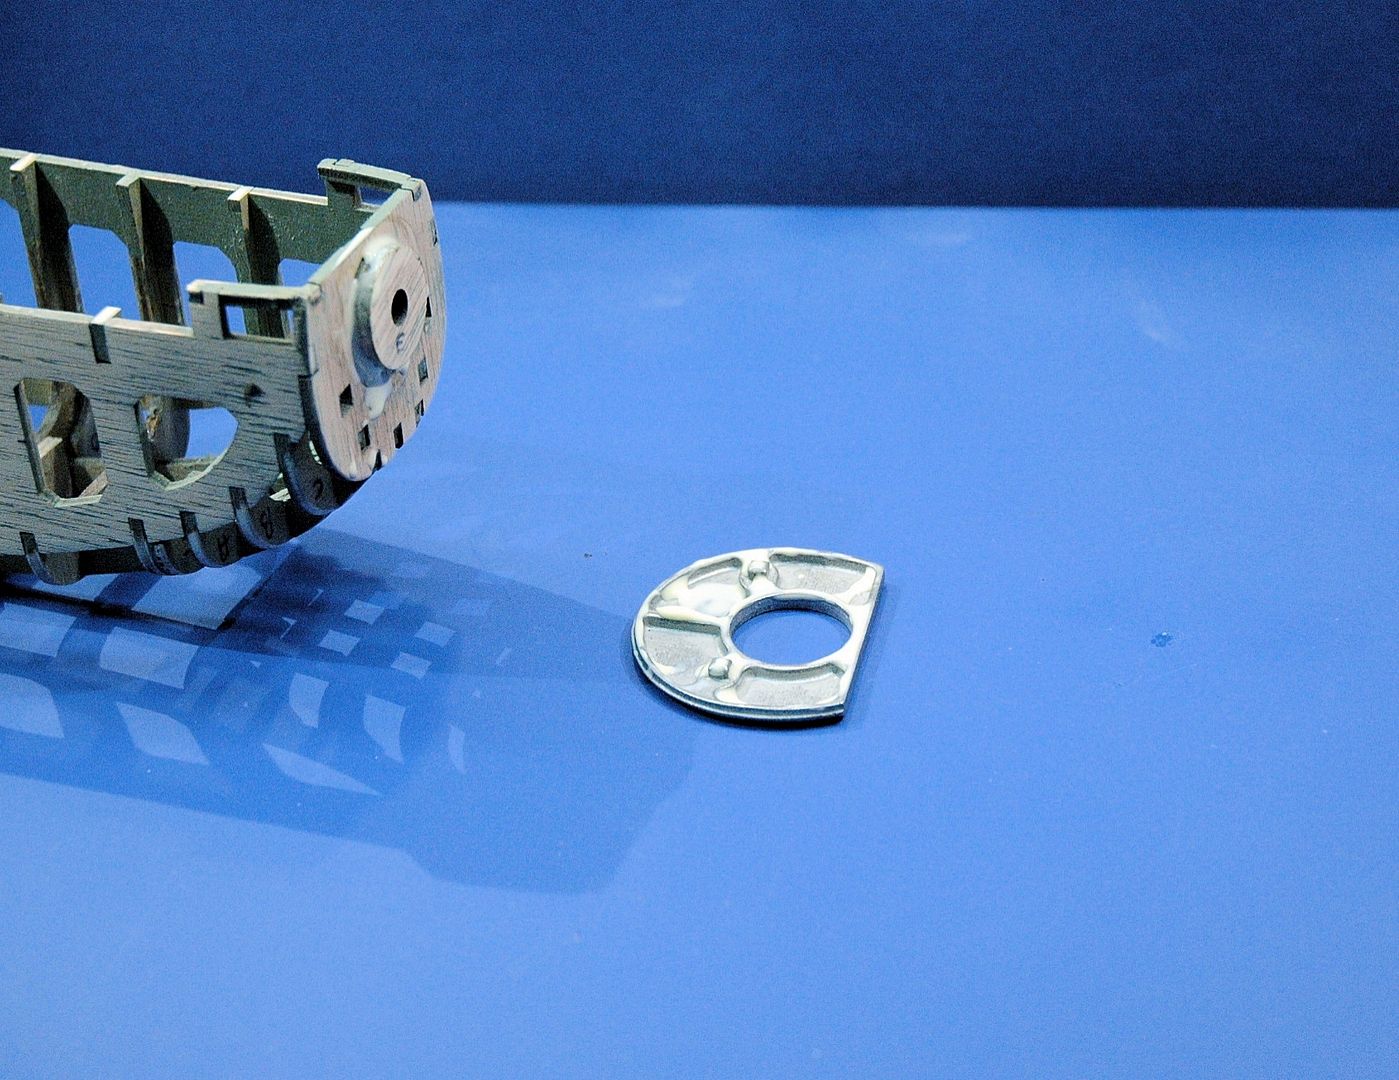 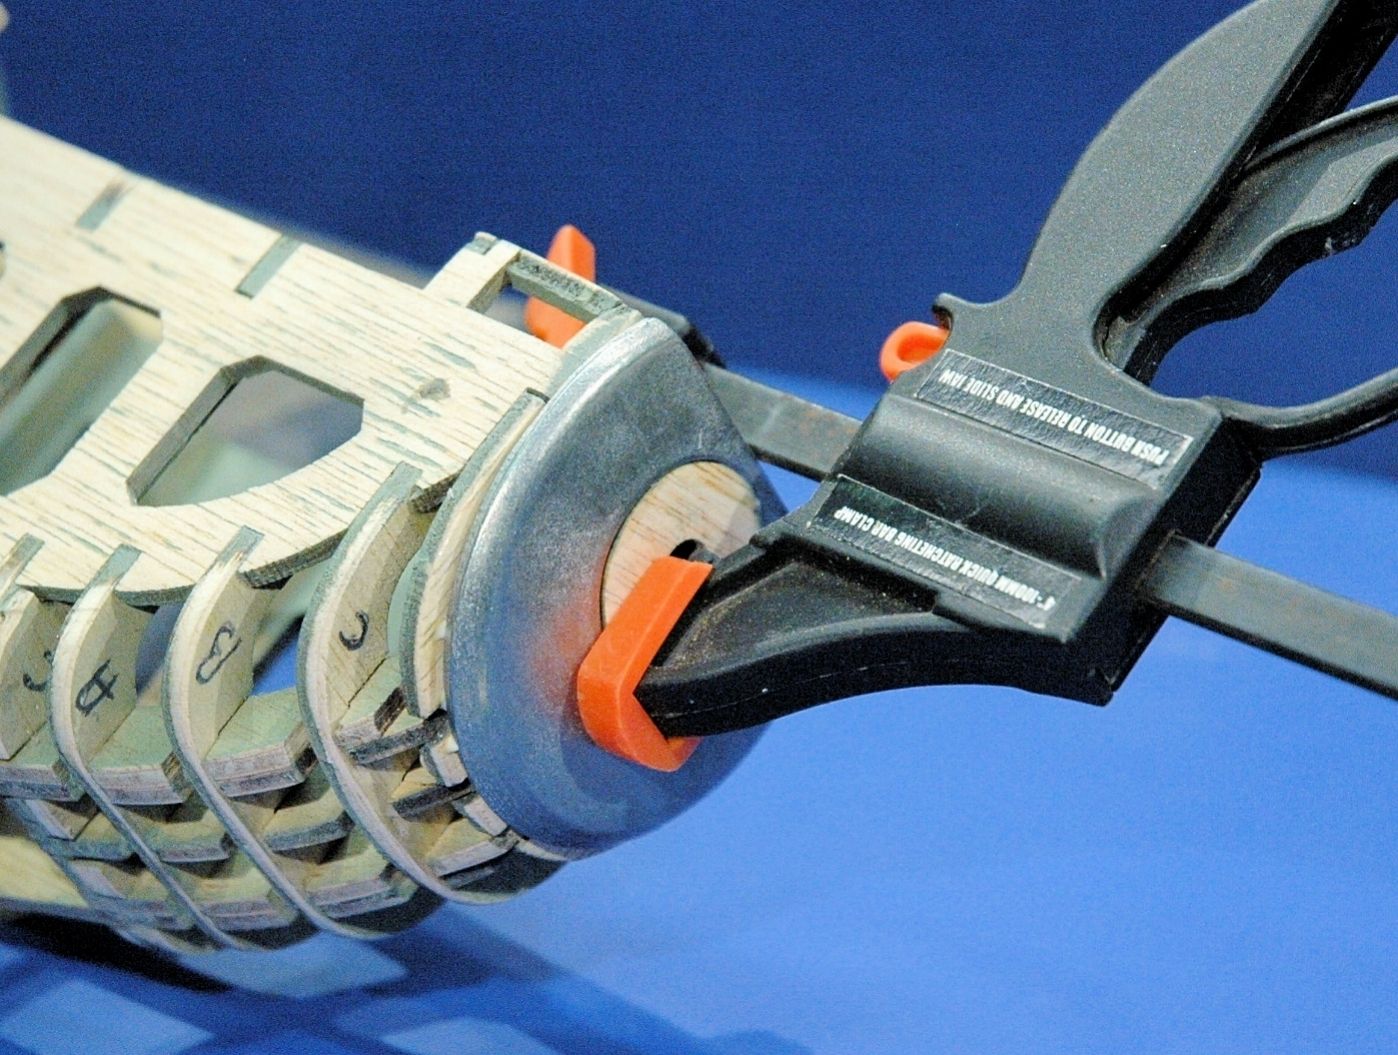 Front nose plate not to much to say on this part, just glue and clamp. Engine cover top plate first I made sure that it still fitted as I first made it, no adjustments needed to the air frame so on we go I did notice that it is very important to make sure that you have removed all the wood around the in side radius (as in the picture with pink spots)otherwise you will have bumps. 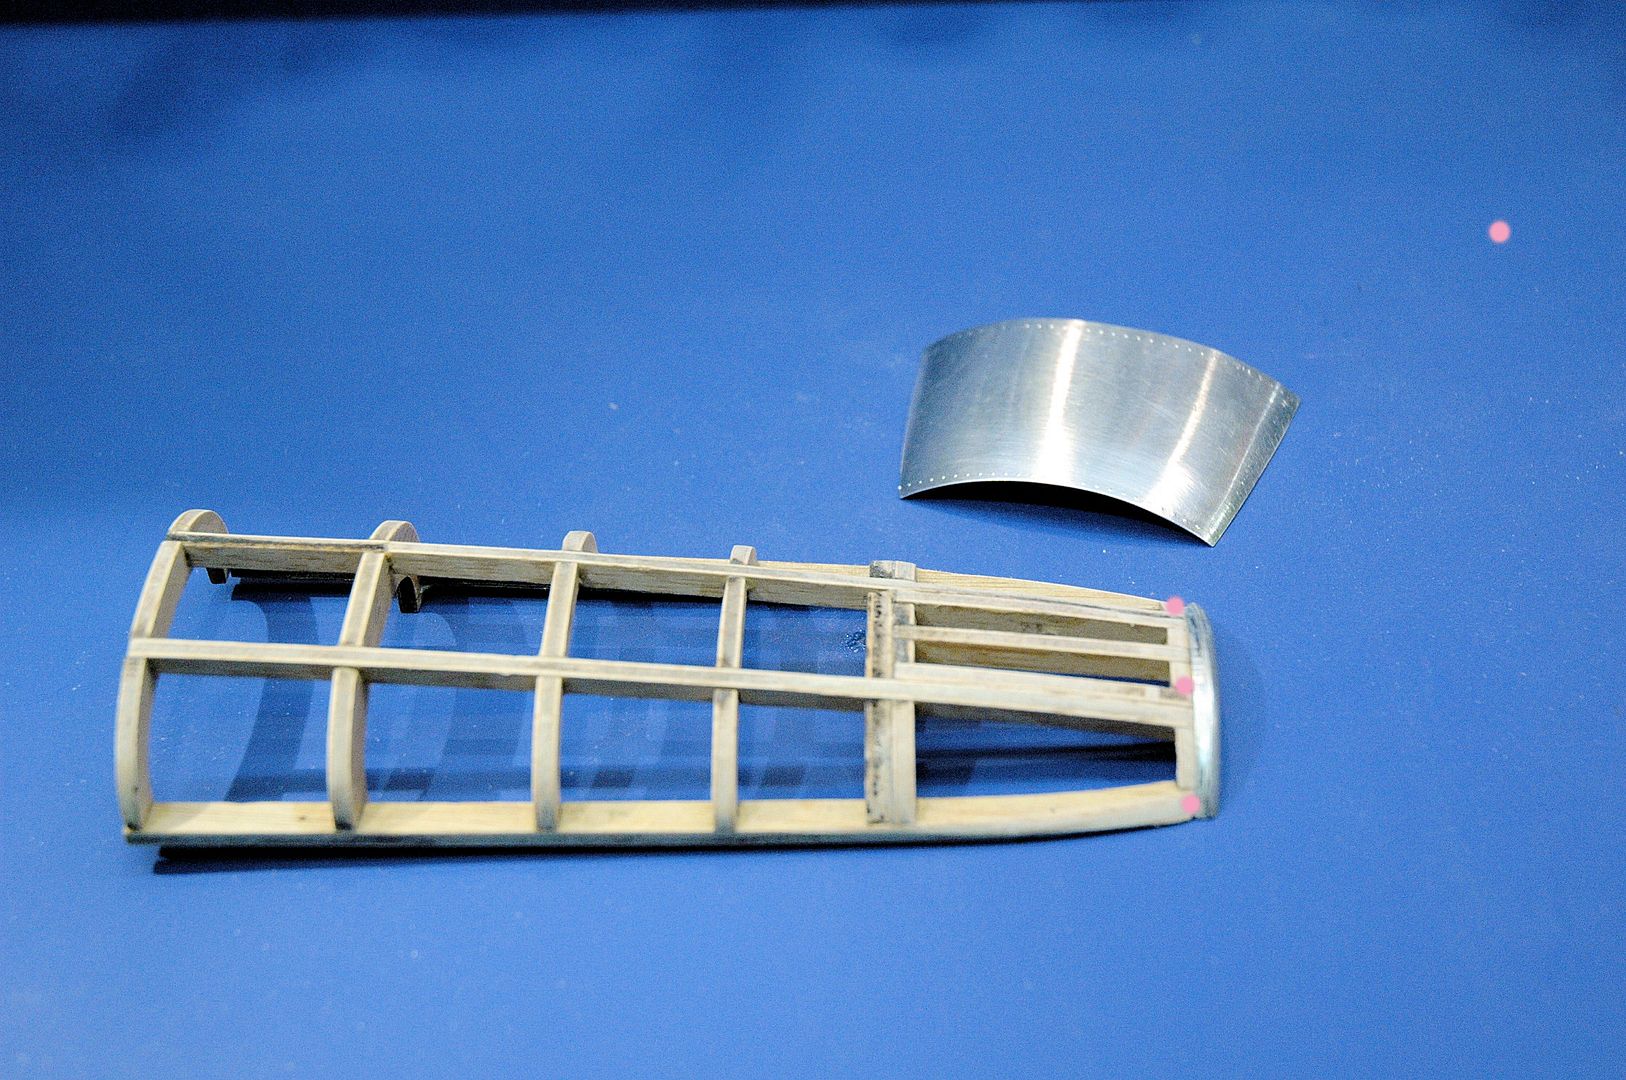 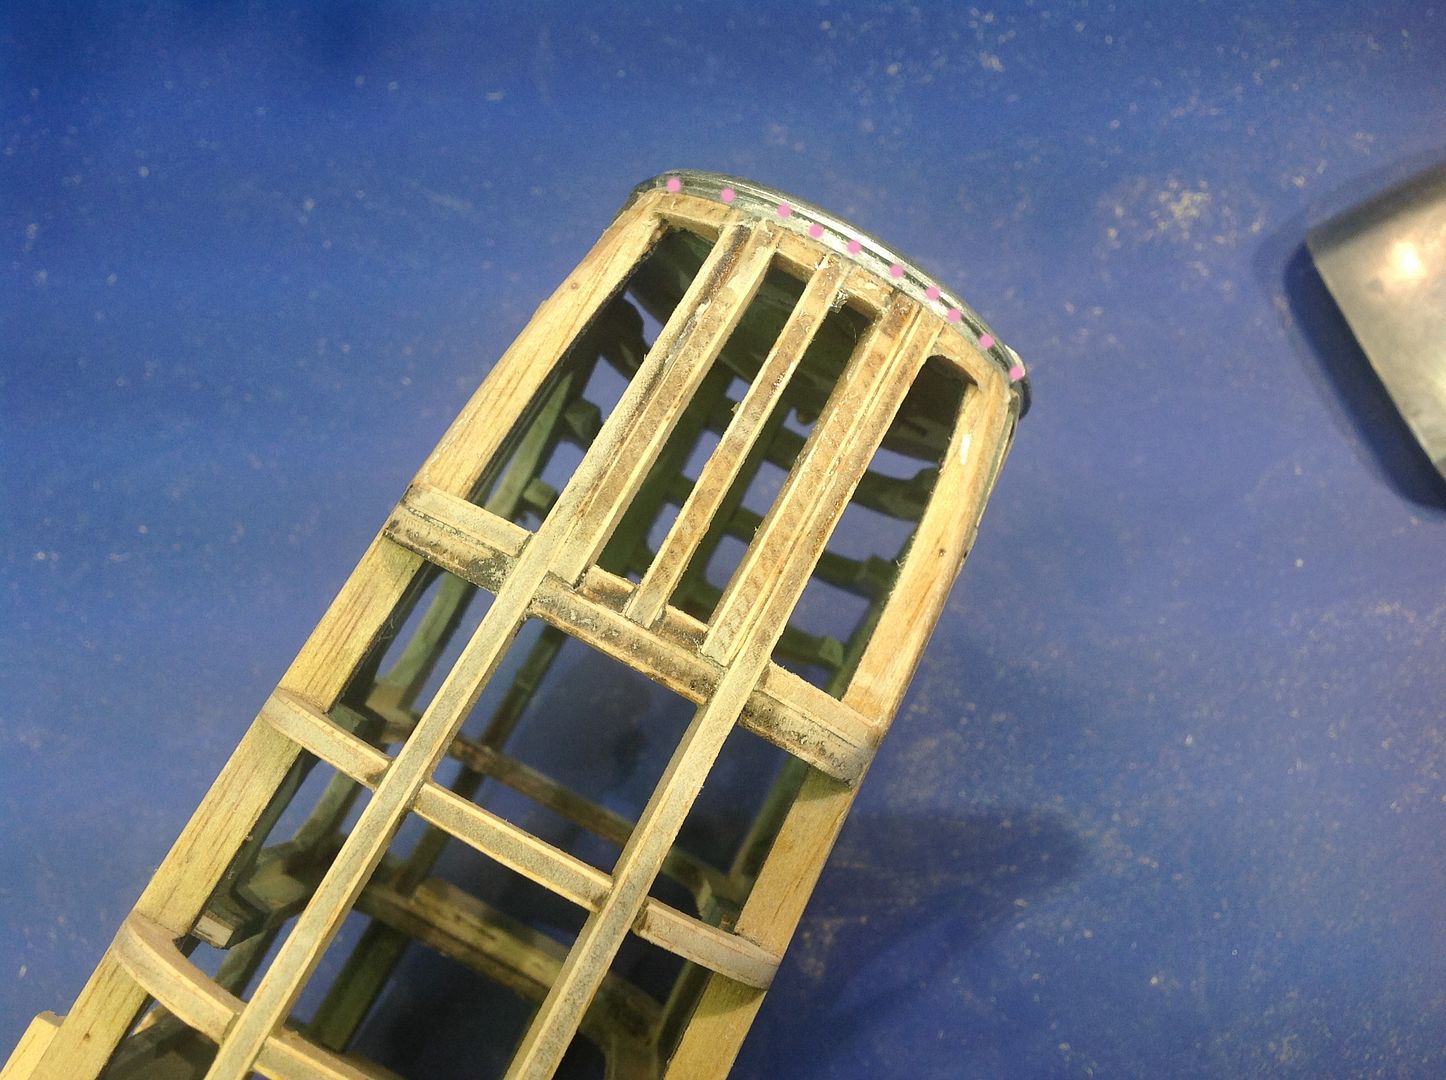 In this picture I have added more reinforcements, the reason because of the tight curve of the metal plate so this will help it stick. 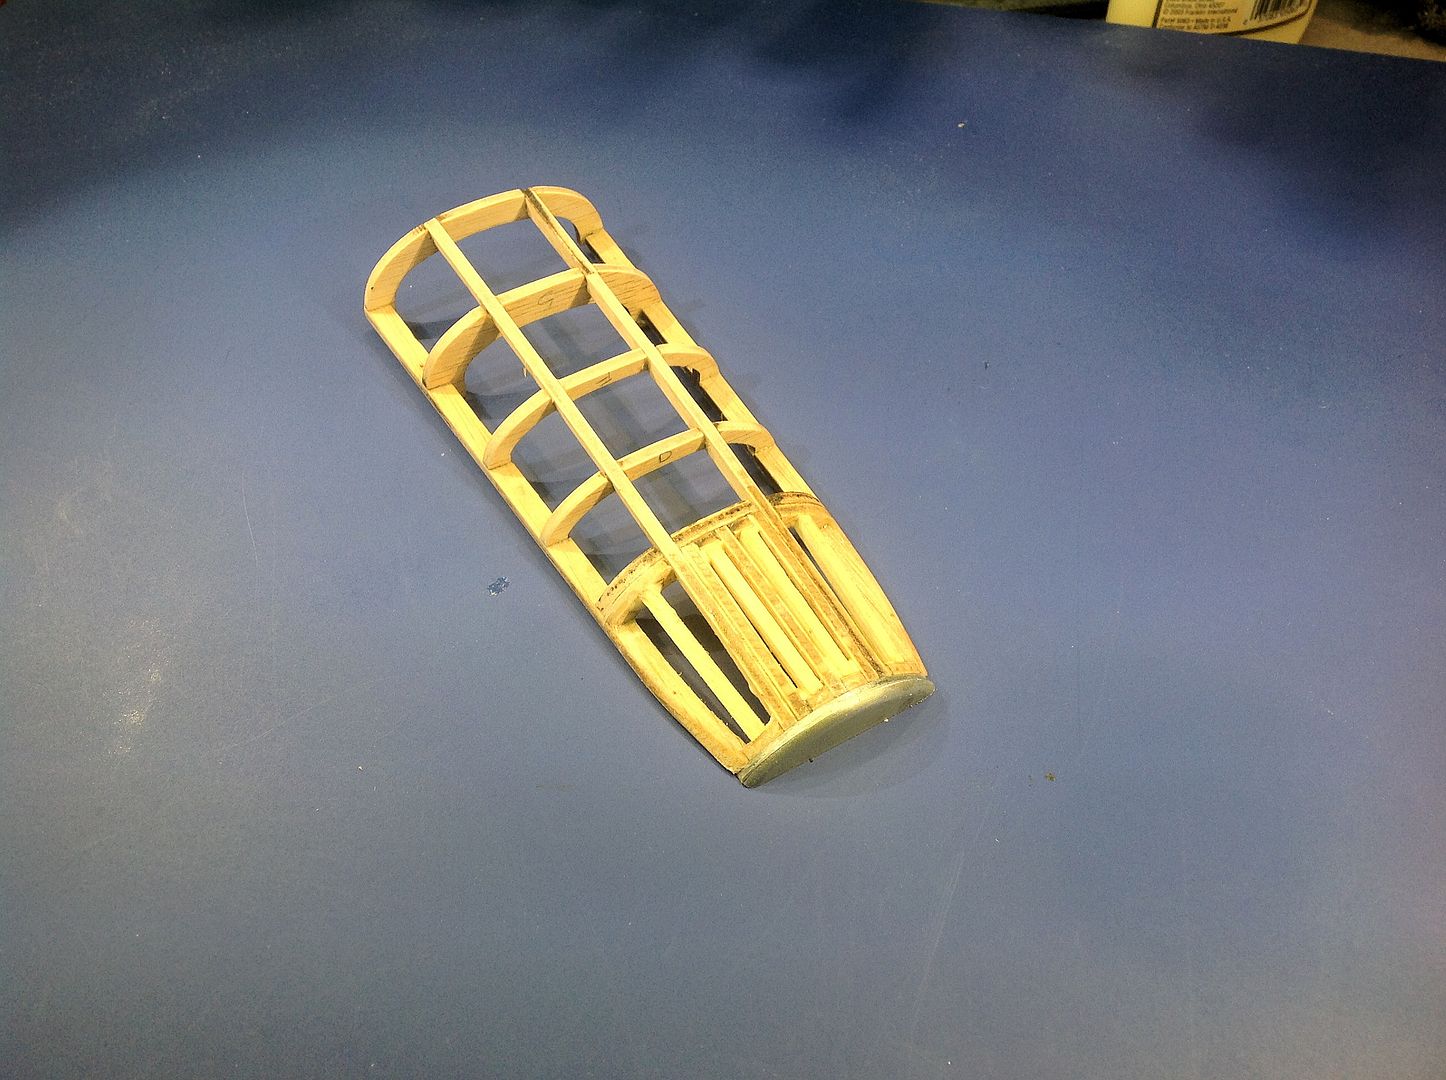 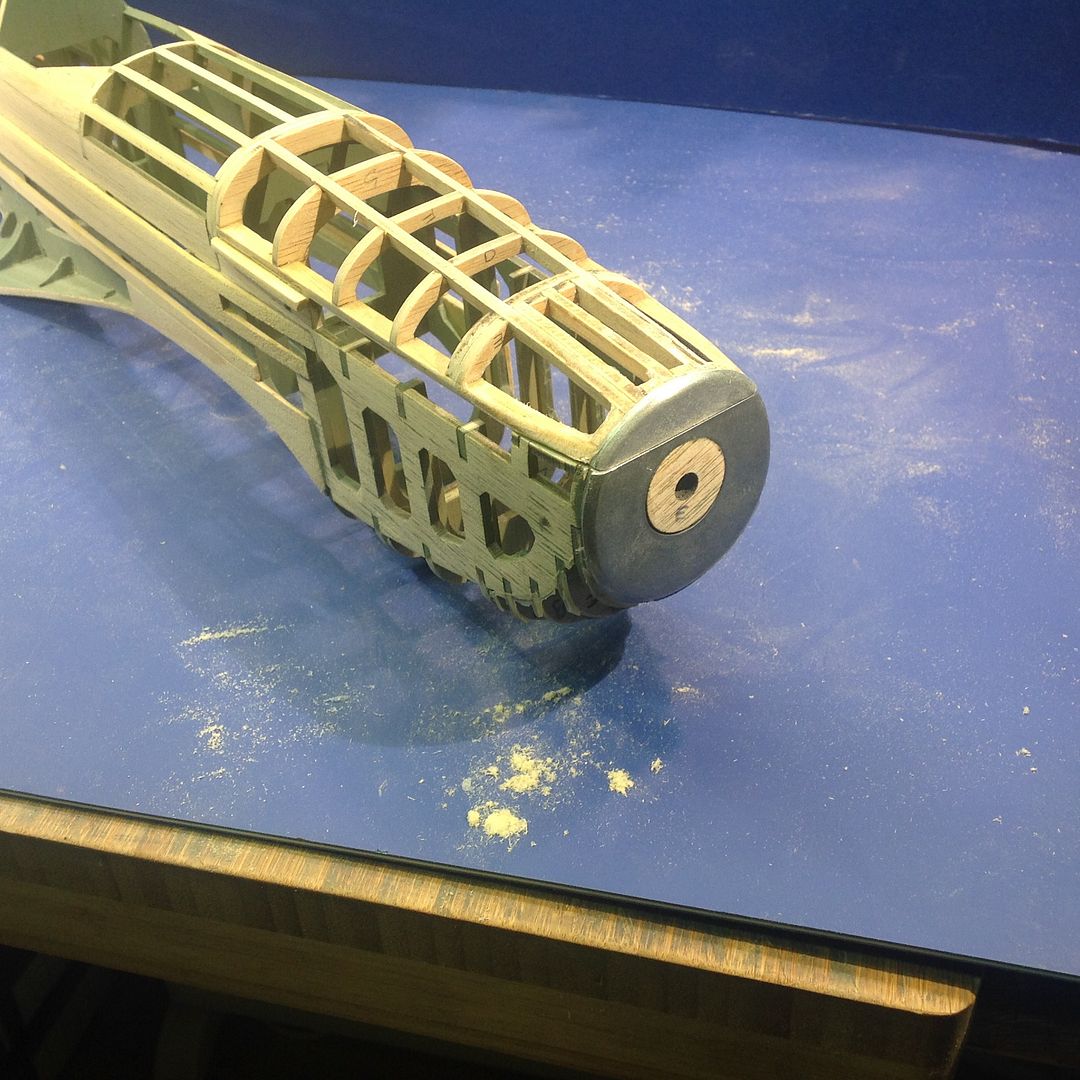 Tailfin. The next stage was to fit the metal leading edge to the wooden tailfin, the metal edge has internal reinforcements which slot into the tailfin, I doted ink on the metal part and pressed on to the wooded fin and that showed me the spot to file out (well it gives you a bit of a guide) 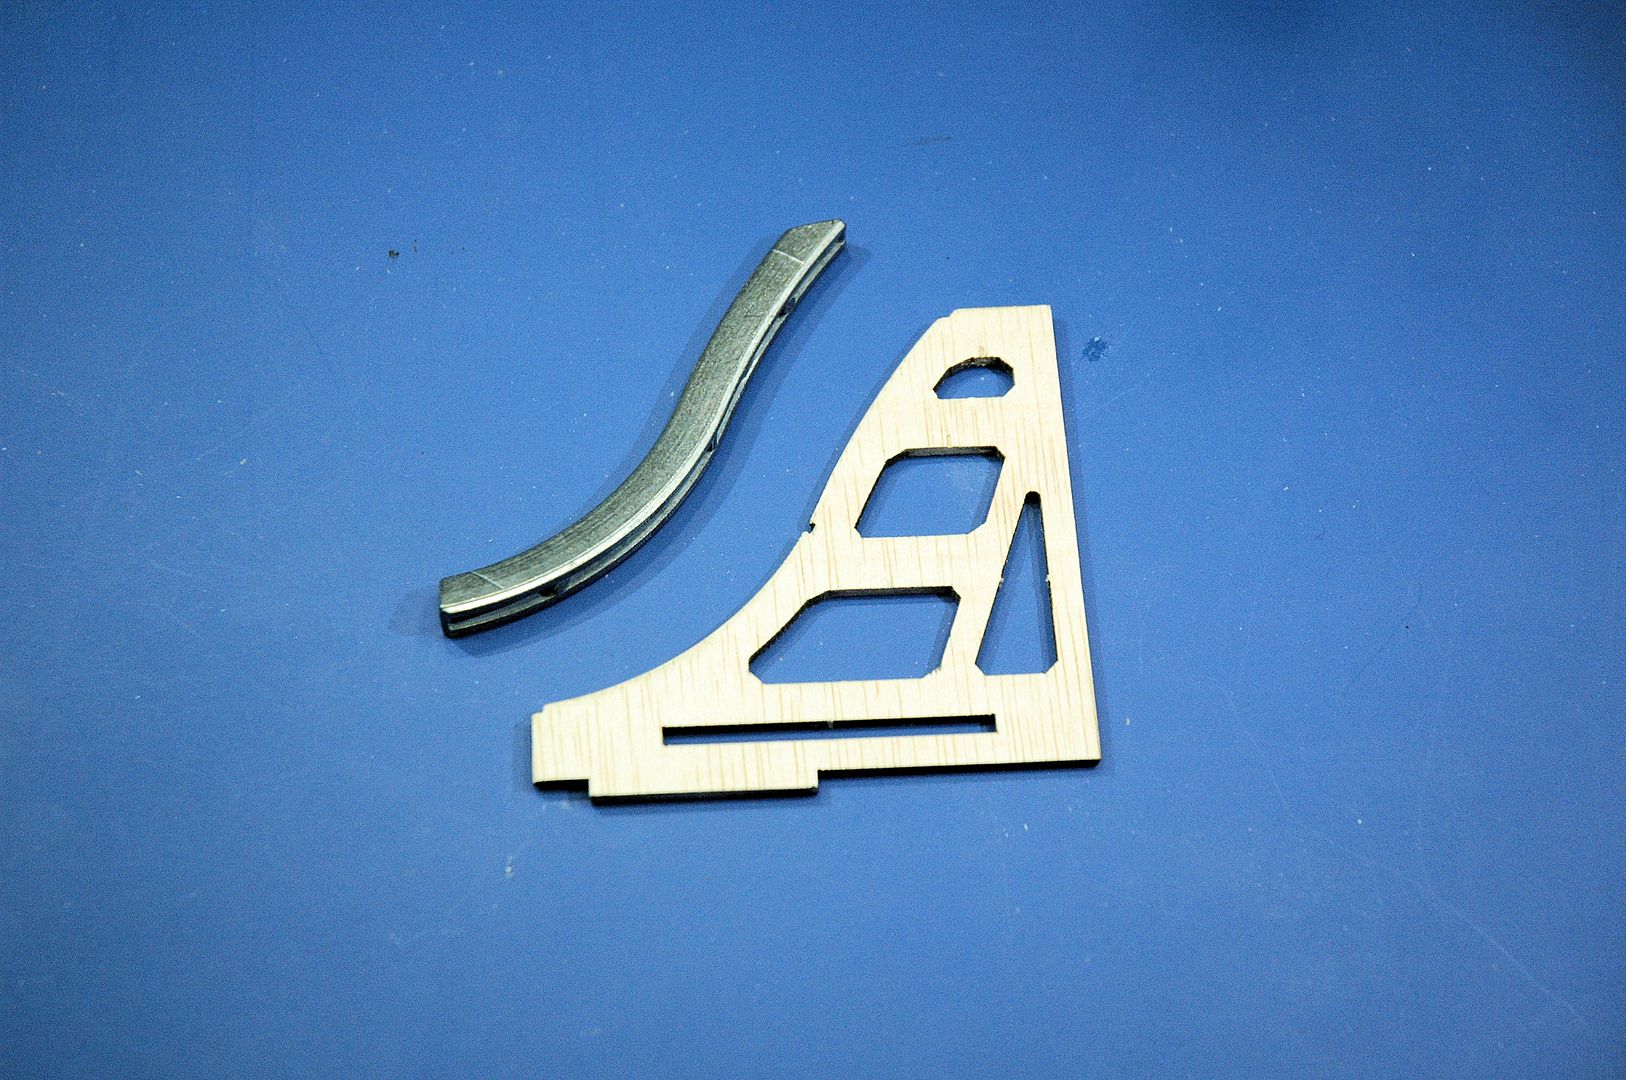 Stabilisers and Metal Edges. No problem with Port/Starboard marked out and cut the same as the tailfin. 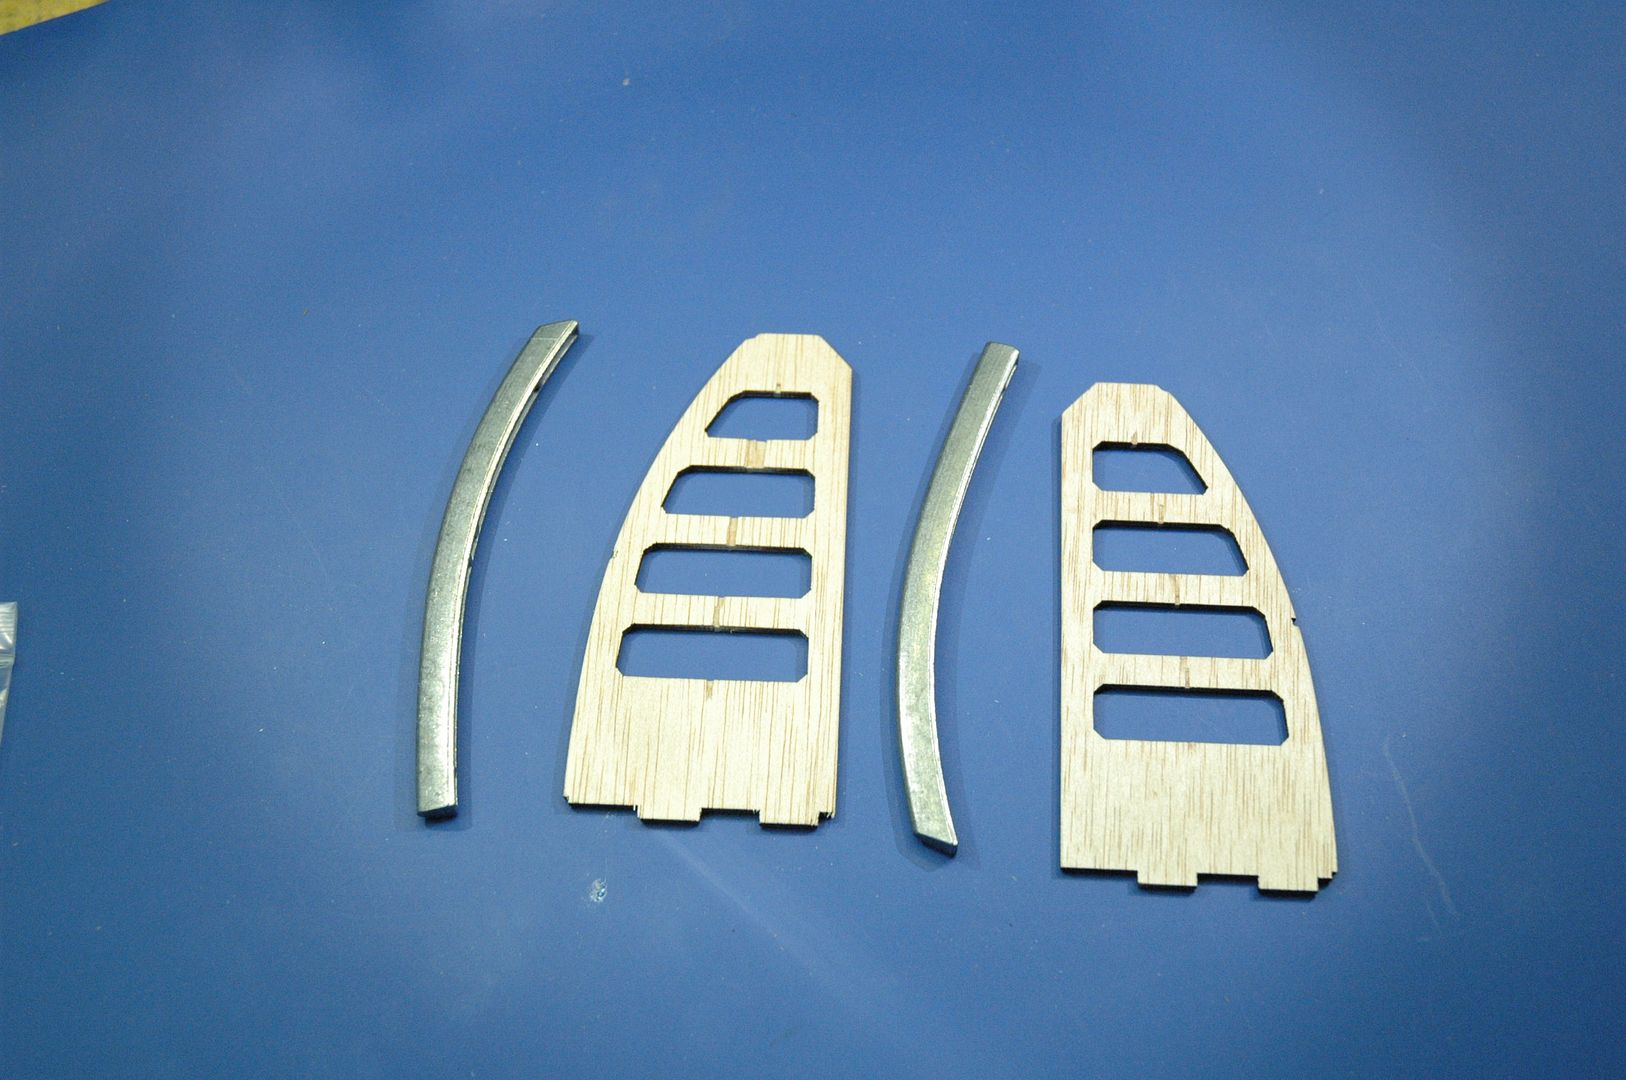 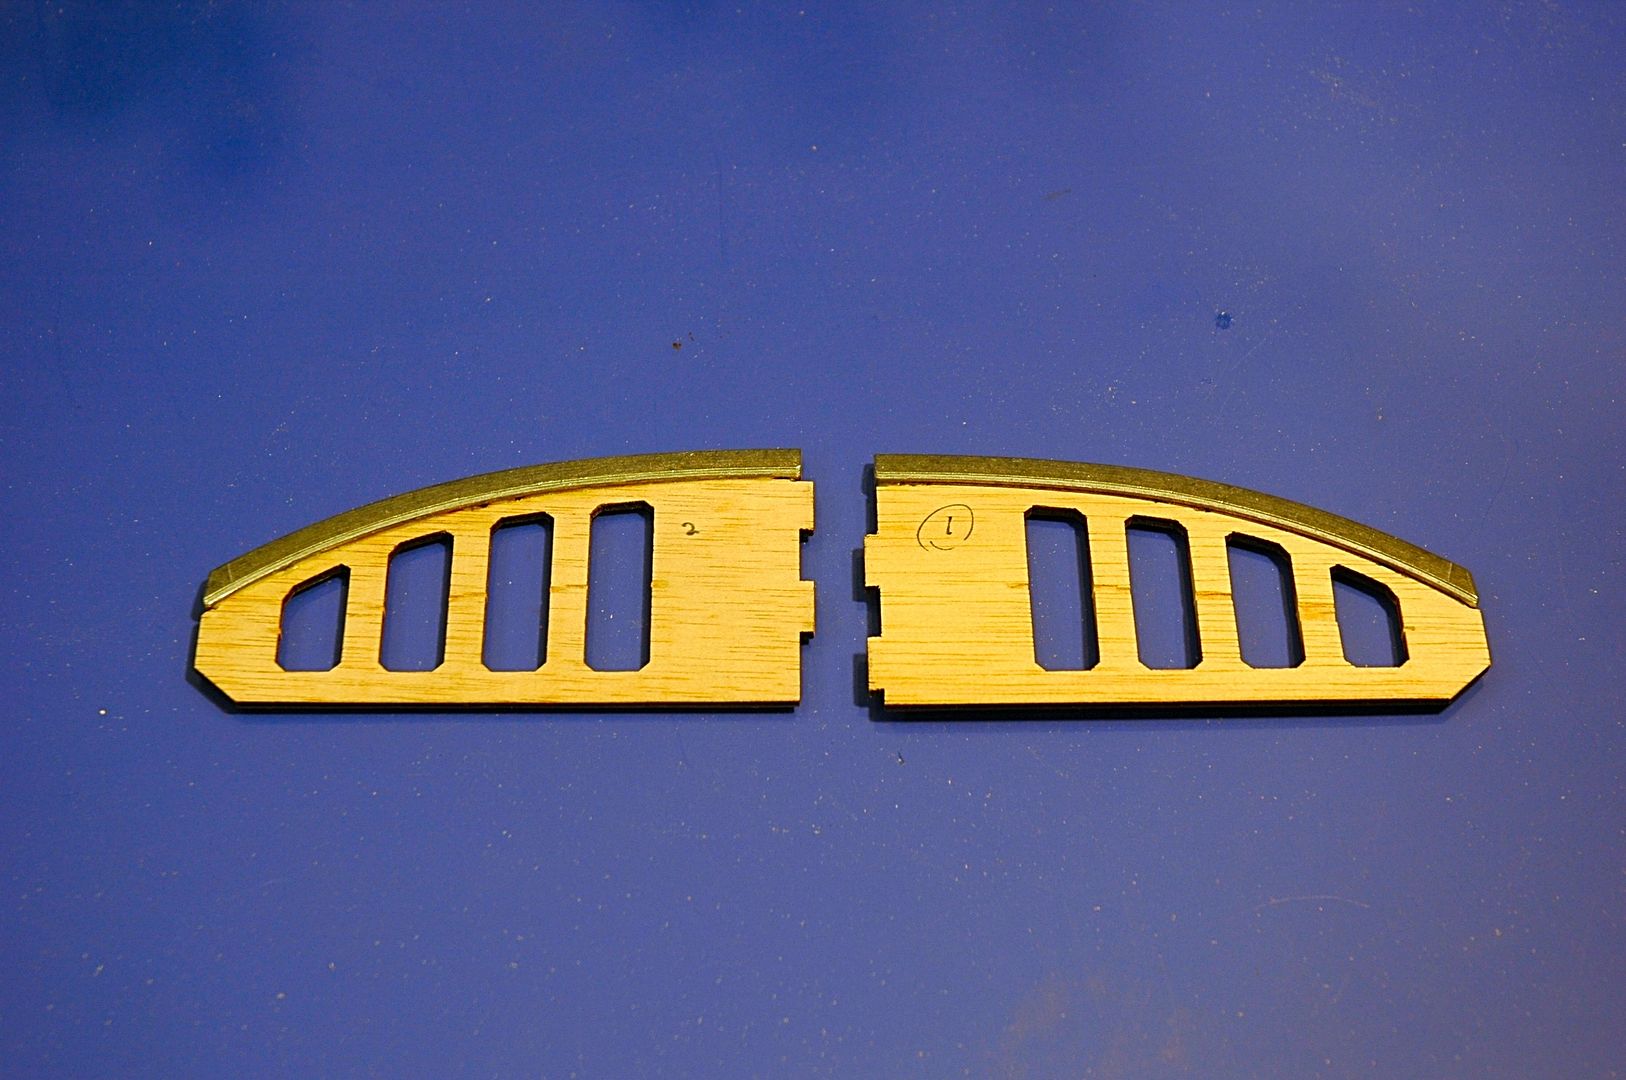 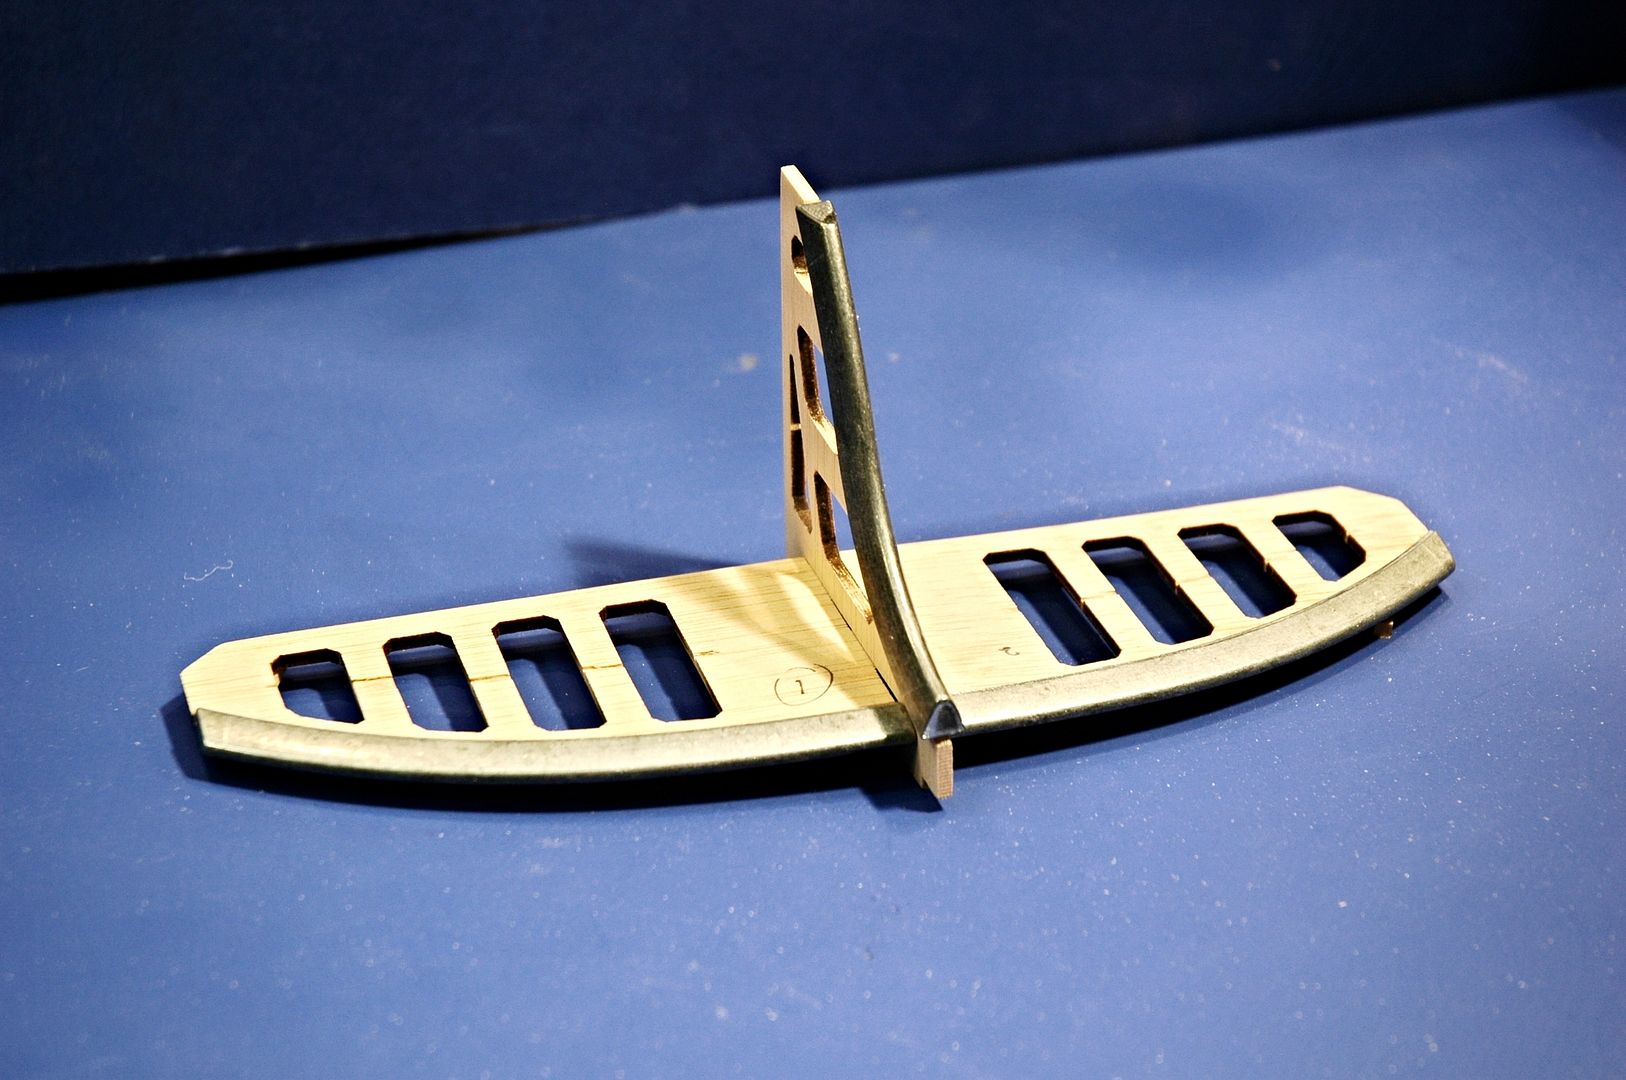 Thank you for your time. Kind Regards Trev. Work in progress: Tombstone (Scratch) - San Francisco 2. -The Mayflower ( scratch by plan).
OcCre- Santa-Maria (Kit).
|
|
|
Rank: Super-Elite Groups: Registered
Joined: 31/05/2010 Posts: 5,679 Points: 17,011 Location: Wiltshire
|
some very and tidy work there Trev. Not a trace of stray glue anywhere which is a real credit to you. Been enjoying seeing this one come together it looks a fantastic model and great value from the mount of build time it provides. Happy Modelling
BUILDING: Hachette Spitfire Mk 1A, Constructo Mayflower
SUBSCRIPTION COMPLETE (Awaiting building): USS Constitution, Sovereign of the Seas, 1:200 Bismarck (Hachette)
COMPLETED: Porsche 911, E-Type Jaguar, Lam Countach
|
|
|
|
|
Starting to come together now Trev and great work Current builds:-C57,Zero, Lamborghini Countach, Caldercraft HMS Agamemnon,Robi,R2-D2, MFH Cobra .
|
|
|
Rank: Super-Elite  Groups: Registered
Joined: 30/01/2013 Posts: 4,604 Points: 13,607 Location: Monmouthshire UK
|
Nice update Trev, lovely neat build Steve
|
|
|
Rank: Elite Groups: Registered
Joined: 13/02/2011 Posts: 2,243 Points: 6,849 Location: Sussex
|
Tony, Thanks for having a look on my progress this has been a great build looking forward to the next stage. Regards Trev. Work in progress: Tombstone (Scratch) - San Francisco 2. -The Mayflower ( scratch by plan).
OcCre- Santa-Maria (Kit).
|
|
|
Rank: Elite Groups: Registered
Joined: 13/02/2011 Posts: 2,243 Points: 6,849 Location: Sussex
|
Andy, it's getting harder now I am at the fuselage stage, all good fun and thanks for your time. Trev. Work in progress: Tombstone (Scratch) - San Francisco 2. -The Mayflower ( scratch by plan).
OcCre- Santa-Maria (Kit).
|
|
|
Rank: Elite Groups: Registered
Joined: 13/02/2011 Posts: 2,243 Points: 6,849 Location: Sussex
|
Steve, Good day today on the spit with the tailfin and rudder, hope to finish of the tailfin Sunday. This involves building up the fins with 3x5mm wood to make it flush with the metal on the leading edge and then fix metal skins over it. Regards Trev Work in progress: Tombstone (Scratch) - San Francisco 2. -The Mayflower ( scratch by plan).
OcCre- Santa-Maria (Kit).
|
|
|
|
|
Great build, great diary Trev.... Looking superb, all your efforts are paying dividends so keep it up.... Regards Alan
|
|
|
Rank: Elite Groups: Registered
Joined: 13/02/2011 Posts: 2,243 Points: 6,849 Location: Sussex
|
Hi Alan, Thanks for looking in always value your comments. Thank you Trev. Work in progress: Tombstone (Scratch) - San Francisco 2. -The Mayflower ( scratch by plan).
OcCre- Santa-Maria (Kit).
|
|
|
 Rank: Pro Groups: Joined: 24/08/2009 Posts: 48,827 Points: -13,348
|
Hello Trev,
I love this Spitfire build of yours Trev, it doesn't look like an easy kit to put together with any accuracy, but you are making it look easy my friend, which is testament to your skills I am sure?! I've said it before, that I know you used to be keen on building radio controlled model aircraft and this model is similar in the way that it has to be built, but your past experience in building those flying models has clearly paid dividends here and is very plain to see in the way that this model is coming together?!
Top work Trev, I love it, not just because I am an aircraft fan myself but also because of the way you are building it? I'm really looking forward to seeing the tail unit fully skinned mate - well done!! 
All the best,
Kev 
|
|
|
Rank: Elite Groups: Registered
Joined: 13/02/2011 Posts: 2,243 Points: 6,849 Location: Sussex
|
Hi Kev. How pleased I am to read that you are following my Spit build with interest, I have a great enthusiasm for plane builds as with the interest I have for your builds, in particular with your foil project that's takes great skills and worth every comment you receive, and that's how I feel when I received your last post to me. Thank you Kev Regards Trev. Work in progress: Tombstone (Scratch) - San Francisco 2. -The Mayflower ( scratch by plan).
OcCre- Santa-Maria (Kit).
|
|
|
|
Guest (18)
|
 US
US

