|
|
 Rank: Semi-Pro Level 1   Groups: Registered
Joined: 24/05/2015 Posts: 74 Points: 212 Location: Camberley .Surrey. UK
|
Absolutely gorgeous work Mo
Rgds NigeBuilding: Sovereign Of The Seas Reading About Everyone Elses Builds[/b]
Enjoy Making
Nige
|
|
|
 Rank: Vice-Master   Groups: Registered
Joined: 09/02/2012 Posts: 569 Points: 1,675 Location: Scotland
|
|
|
|
Rank: Vice-Master Groups: Registered
Joined: 09/02/2012 Posts: 569 Points: 1,675 Location: Scotland
|
I can honestly say, that is the most intense, fiddly bit of work I have done on this project. But one side done now.
 [/URL] [/URL]
Not going to do the other side for a few days, going to look for a few easy tasks.
Mo
Mo
|
|
|
 Rank: Super-Elite     Groups: Registered
Joined: 27/01/2014 Posts: 5,060 Points: 14,980
|
Looking good Mo, the chains are a great improvement. How difficult would it be to paint them black in situ
|
|
|
|
|
Hi Mo, doing a great job....  .. Adding the detail, fixtures and fixings is a very fiddly job in places but its this that brings out the best in these builds and requires a great deal of patience.... .. Keep doing as your doing and she'll be a fab build.... Regards Alan
|
|
|
|
|
Nice upgrade Mo. I agree the kit chains leave slot to be desired. But you have come up with a nice alternative that looks great.  Chris On the bench 1/350 Revell Tirpitz Platinum Edition (Pontos PE and Wooden deck) plus extra Eduard PE set and extra MK1 door sets.
|
|
|
Rank: Vice-Master Groups: Registered
Joined: 09/02/2012 Posts: 569 Points: 1,675 Location: Scotland
|
davetwin wrote:Looking good Mo, the chains are a great improvement. How difficult would it be to paint them black in situ
Not even going to attempt painting in place, I did see black chain in the store where I bought the chain, but did not buy it. Would next time Thanks anyhow.
Mo
Mo
|
|
|
Rank: Vice-Master Groups: Registered
Joined: 09/02/2012 Posts: 569 Points: 1,675 Location: Scotland
|
Thanks all for your comments again..
Mo
Mo
|
|
|
Rank: Vice-Master Groups: Registered
Joined: 09/02/2012 Posts: 569 Points: 1,675 Location: Scotland
|
|
|
|
Rank: Super-Elite   Groups: Registered, Forum Support Team, Administrators, Global Forum Support Team, Moderator, Official Builds Joined: 09/11/2012 Posts: 8,520 Points: 24,651 Location: East midlands
|
Looking good Mo, Nice update as usual. WTG Congrats on your "Orange" medal for 500 posts. Well done. Regards delboy271155 (Derek) COME BACK GUY FAWKES "YOUR COUNTRY NEEDS YOU"
|
|
|
 Rank: Pro Groups: Registered
Joined: 08/05/2015 Posts: 239 Points: 693 Location: Wisconsin
|
Amazing work. The detail you have put into this. Also, I really like your pics.
I have this ship in my stash and hope to get to it some year and this log will be a valuable resource.
Thanks for posting
|
|
|
Rank: Vice-Master Groups: Registered
Joined: 09/02/2012 Posts: 569 Points: 1,675 Location: Scotland
|
delboy271155 wrote:Looking good Mo, Nice update as usual. WTG Congrats on your "Orange" medal for 500 posts. Well done. Regards delboy271155 (Derek)
Thanks for the congratulations, Didn't even notice I got one, But I see it now.
Mo 🍾
Mo
|
|
|
Rank: Vice-Master Groups: Registered
Joined: 09/02/2012 Posts: 569 Points: 1,675 Location: Scotland
|
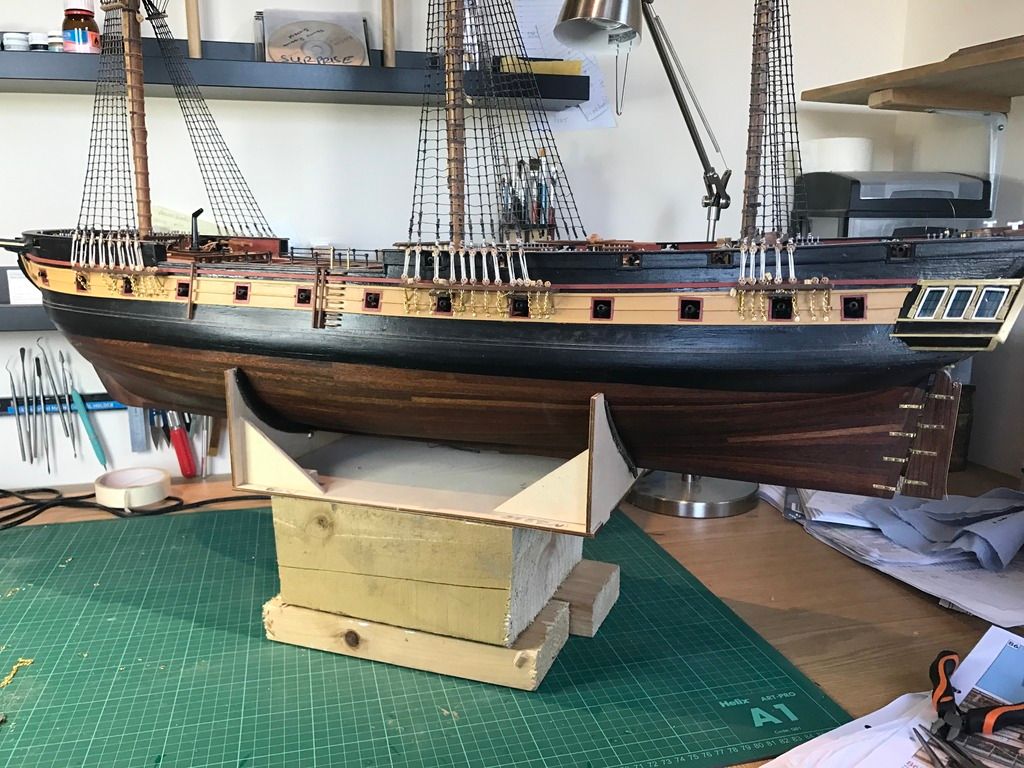
There is one job I am avoiding, more on that later. lol ( I know it needs done, but I just can't get in the mood for it at all )
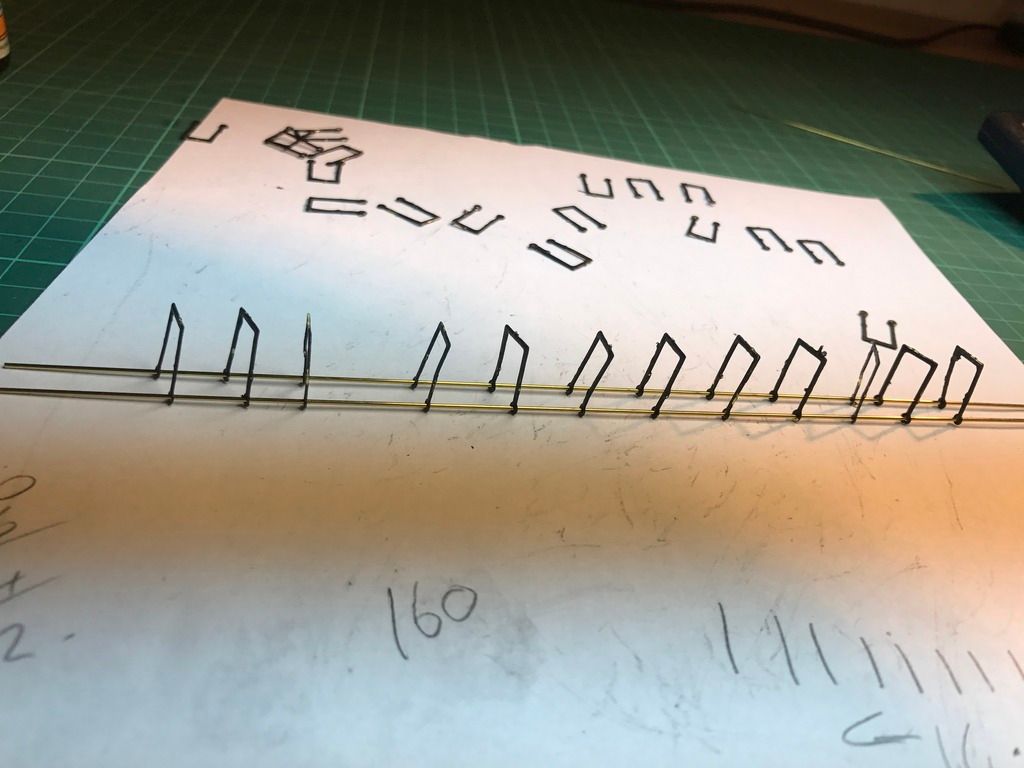
So I have decided to do the Cargo stantions and netting to the Ship sides.
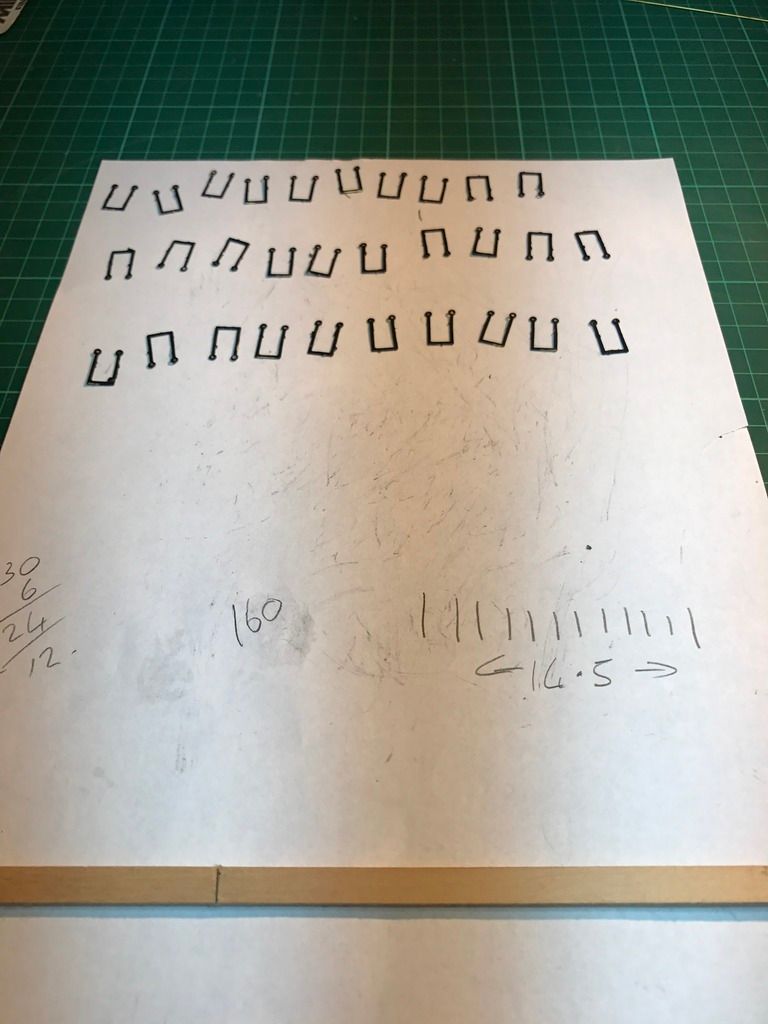
I cut out and painted the brasswork, I was half way through the painting, when I remembered that I had previously used Brass blackening solution, That would have given me a lot better finish, but it was to late.
 [/URL] [/URL]
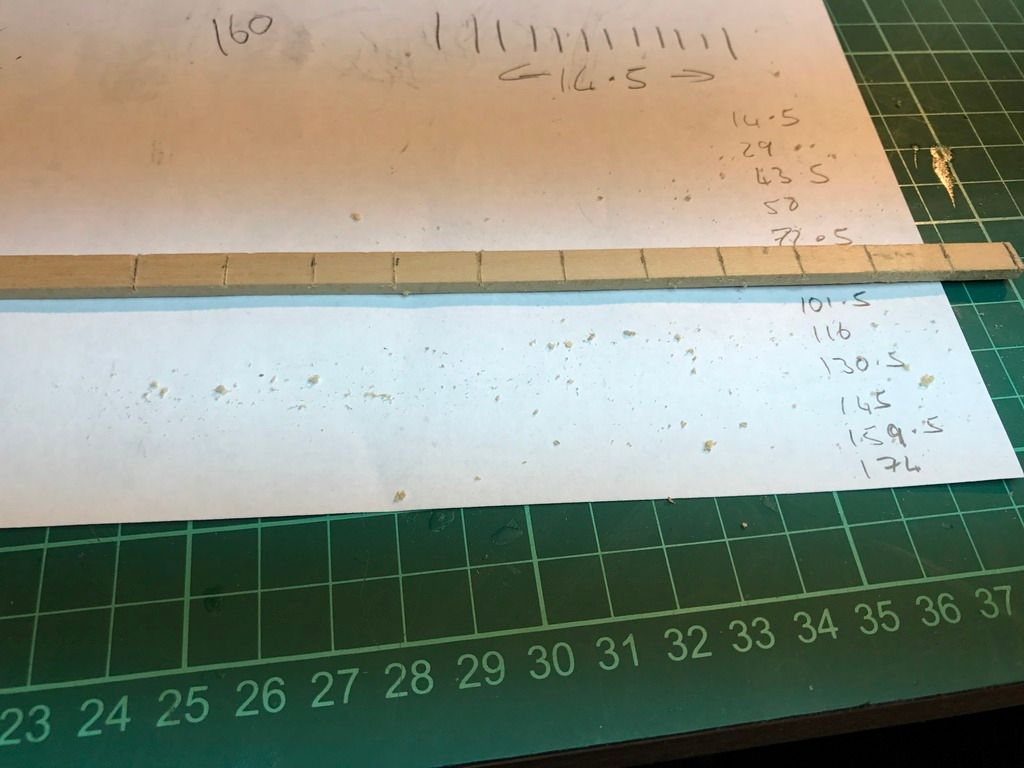
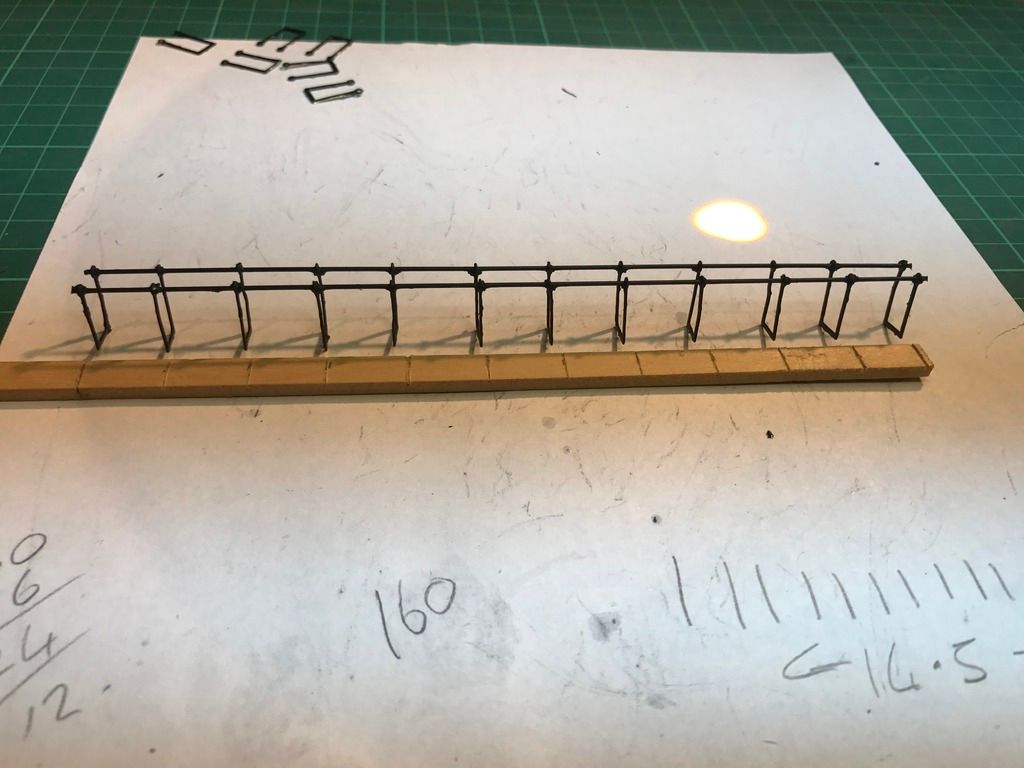
I cut a piece of wood to the length of the rails I required, marked of the positions of the stantions, This enabled me to get everything equal.
 [/URL] [/URL]
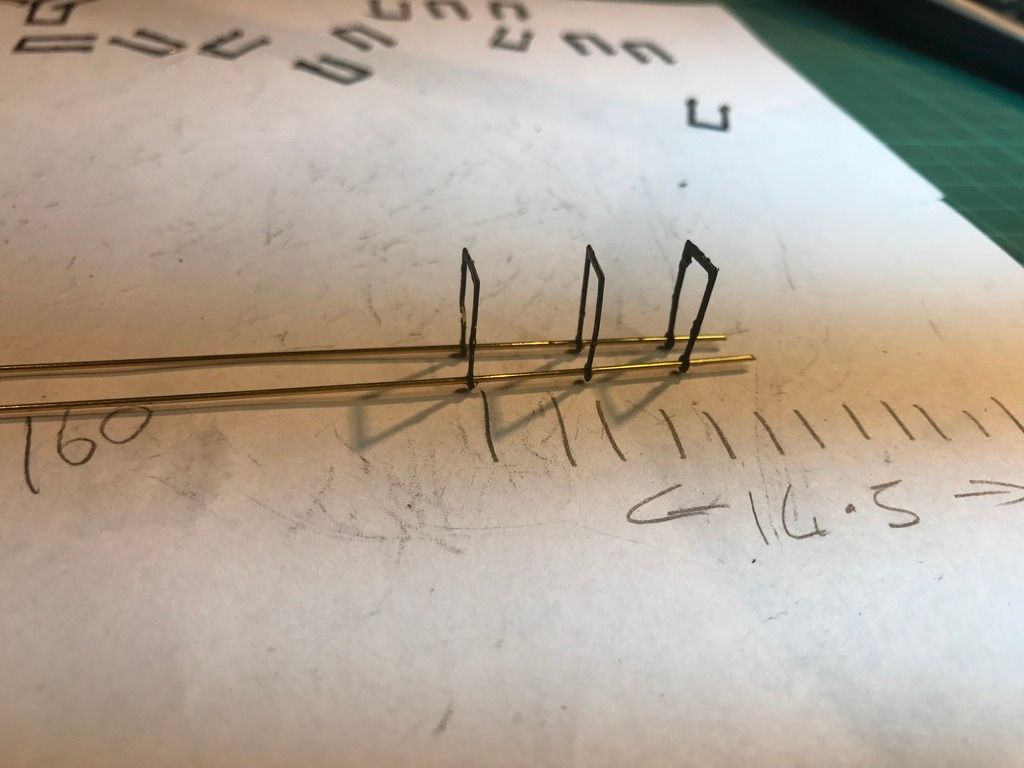
I then threaded through the brass rod, superglued the stantions in the correct positions, and sprayed them black.
 [/URL] [/URL]
 [/URL] [/URL]
 [/URL] [/URL]
Because the brass is only glued at the top, and is very thin, I can still line up, and make sure the stantions are plumb when I glue the bottoms to the Ship. That's the plan anyway.
Mo
Mo
|
|
|
Rank: Vice-Master Groups: Registered
Joined: 09/02/2012 Posts: 569 Points: 1,675 Location: Scotland
|
|
|
|
Rank: Pro  Groups: Registered
Joined: 18/04/2016 Posts: 134 Points: 402 Location: Durban, South Africa
|
Nicely done Mo....even if I could catch up I wouldn't be able to keep up with you...I'm still back at the cannon stage....  Barry There's no time like the present.....
|
|
|
Rank: Vice-Master Groups: Registered
Joined: 09/02/2012 Posts: 569 Points: 1,675 Location: Scotland
|
BarryM wrote:Nicely done Mo....even if I could catch up I wouldn't be able to keep up with you...I'm still back at the cannon stage.... Barry
Thanks for your comments Barry,
I was off my build for nearly 4 years, while I built my house, I have a bit of time on my hands now, and pushing on when I can,
Enjoy your build,
Mo
Mo
|
|
|
Rank: Vice-Master Groups: Registered
Joined: 09/02/2012 Posts: 569 Points: 1,675 Location: Scotland
|
Thats one side finished, I have added the handrail to the stair also.
Now the other side.
Mo
 [/URL] [/URL]
Mo
|
|
|
Rank: Vice-Master Groups: Registered
Joined: 09/02/2012 Posts: 569 Points: 1,675 Location: Scotland
|
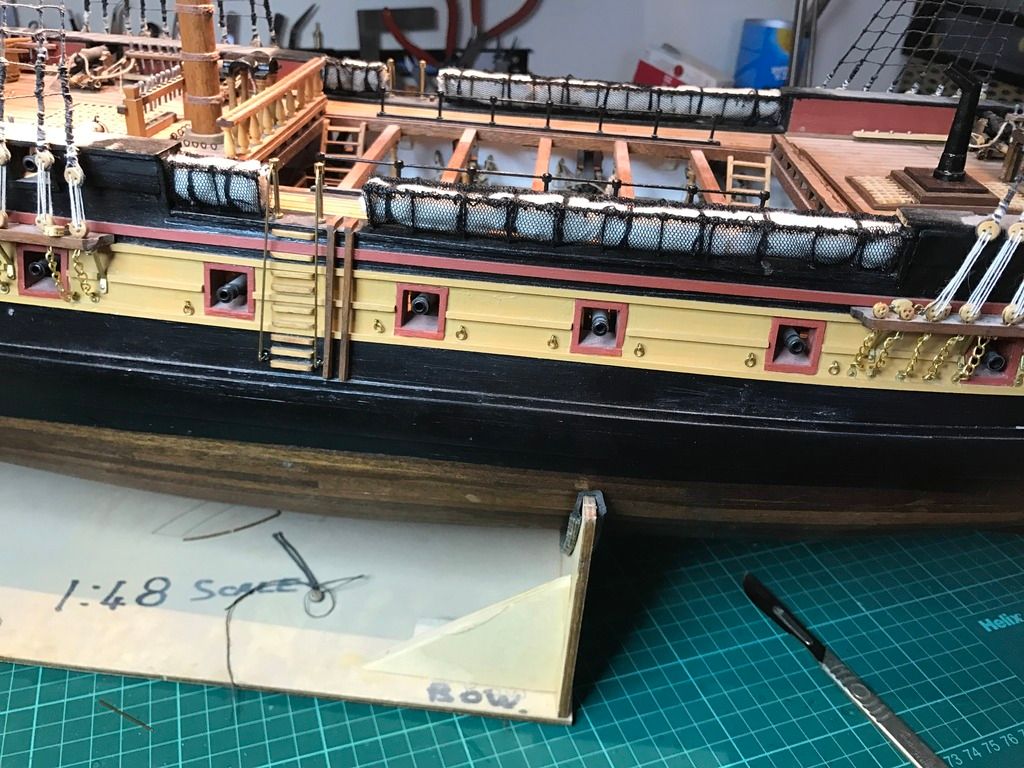
On the second side now.
I don't know what happened, but my ladder access to the ship is off set, the drawing shows it tight to the end. of the ship sides.
Thats why my cargo storage areas are in two bits, Never Mind.
Picture also shows my cargo, Tubigrip, elastic bandage, cut up and tied with black tread, The build drawings show the brass satantion being glues to the ship first, and the netting sewn in place, I found it a lot easier to make it up, and do all the sewing before fitting it to the ship.
 [/URL] [/URL]
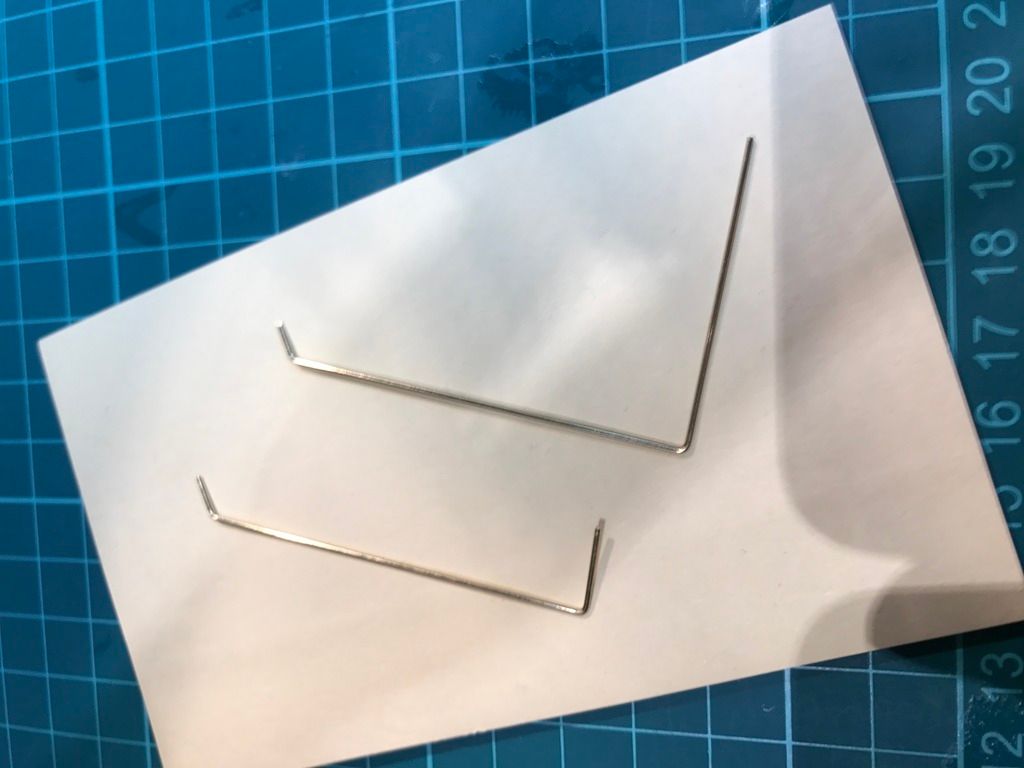
The brass handrail, bent ready for fitting
 [/URL] [/URL]
 [/URL] [/URL]
Mo
Mo
|
|
|
|
|
Doing a great job Mo, she's looking great....  Regards Alan
|
|
|
Rank: Vice-Master Groups: Registered
Joined: 09/02/2012 Posts: 569 Points: 1,675 Location: Scotland
|
I am waiting for some materials to be delivered, I am just looking round to see what else needs doing.
The rear mast needs completing, at the top, fortunately it is not fixed and I can lift it out to work on.
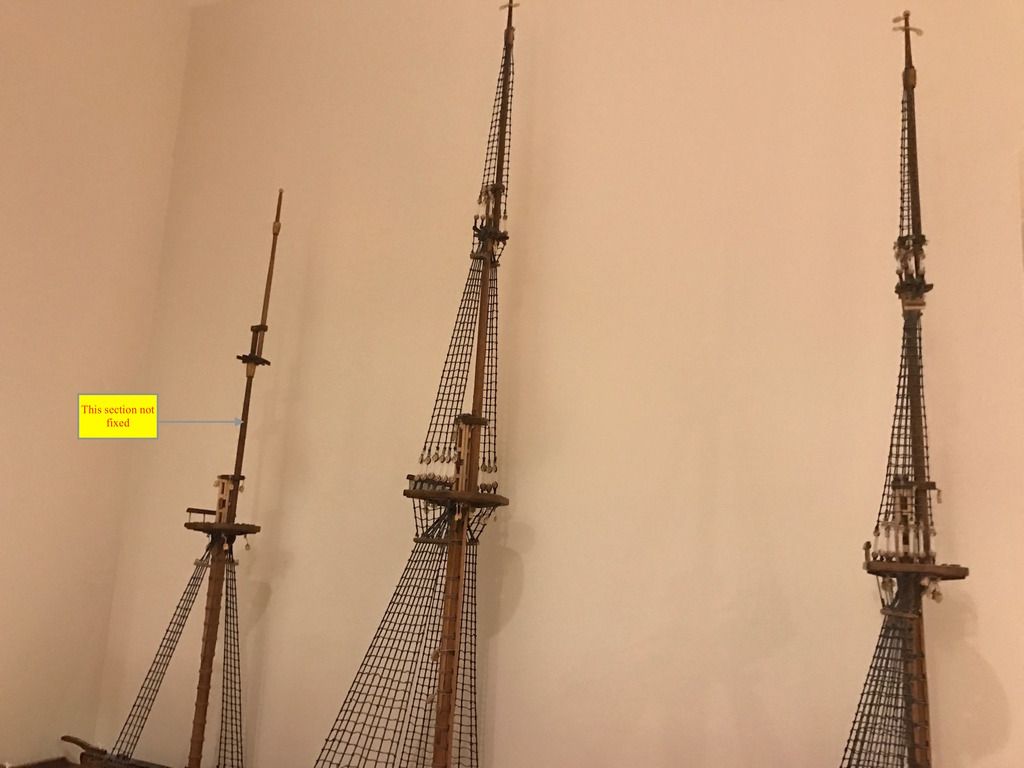 [/URL] [/URL]
Mo
Mo
|
|
|
|
Guest
|
 US
US

