|
|
|
|
Admiral Anti Spiral wrote:looking great alan, not far until those gun ports come along, personally i cant wait to start, though i did a test with a cheap rotary tool i managed to buy, using the cutting disk is handy because it gives a straight cut but its not as easy as i thought, but much easier than doing it by hand i suppose, im sure it will come along nicely! Hi Admiral, thanks for those kind words.... Rest assured, I will be doing some practice sessions on some spare planking to work out my technique..... Think I am more concerned on how to get them marked out accurately and in the right place, the cutting will take care of itself.....  Regards Alan
|
|
|
 Rank: Master       Groups: Registered
Joined: 05/09/2012 Posts: 1,400 Points: 4,690 Location: Beaminster, Dorset
|
Gandale wrote:court orchard wrote:Looking Fantastic Alan. Don't worry about the Gun Ports in no time you'll be advising others how to do them.  Thanks for the words of encouragement Andy, very much appreciated..... I'll just be relieved when I get the first one cut out without any mishaps, then I'll know if I can tell my knees to stop knocking.... Regards Alan You better stop shaking Al or those Gun Ports will be all over the place
|
|
|
|
|
|
|
|
|
|
 Hi Alan I can understand your reticence about cutting out the gun ports, the best advice I can give is to follow Mr T's build diary and measure 3 times and double check, think about it measure again then cut when your sure, honestly after you have done one side you will think to yourself 'what was I so worried about'. To be honest with your progress so far it's not the problem you think it is. regards Andy Current builds:-C57,Zero, Lamborghini Countach, Caldercraft HMS Agamemnon,Robi,R2-D2, MFH Cobra .
|
|
|
|
|
arpurchase wrote: Hi Alan I can understand your reticence about cutting out the gun ports, the best advice I can give is to follow Mr T's build diary and measure 3 times and double check, think about it measure again then cut when your sure, honestly after you have done one side you will think to yourself 'what was I so worried about'. To be honest with your progress so far it's not the problem you think it is. regards Andy Andy, as an agony aunt you are brilliant...... thanks bud.....  Regards Alan
|
|
|
|
|
I have made a practice hull out of spare planking Martyn Ingram attached the following image(s): Building ?
Completed. Soliei Royal . Sovereign of the Seas . Virginia . Scotland . San Felipe . Corel vasa , Santisima Trinadad X section , Vasa
Next Build ?
When sailors have good wine, They think themselves in heaven for the time. John Baltharpe
|
|
|
|
|
Thanks Martyn, appreciate your pic and you taking the time to look in..... Will be setting up practice sessions with some bamboo offcuts however it is not the cutting out of the ports that I'm apprehensive about, it is the marking out part, how to ensure they are in the right position and accurately drawn out..... it is that part I am thinking about most of all but am sure it will work out in the end...... Thanks again Martyn.... Regards Alan
|
|
|
Rank: Master Groups: Registered
Joined: 05/09/2012 Posts: 1,400 Points: 4,690 Location: Beaminster, Dorset
|
Alan, there was some debate on the Italian Forum about an incorrectly placed Port so keep an eye on Mr T's build.
|
|
|
 Rank: Super-Elite   Groups: Registered
Joined: 16/08/2010 Posts: 2,771 Points: 8,344 Location: Brighton
|
Hi Alan. Fantastic job you have done on planking your hull. Look forward to seeing your progress. Ian Current builds.Hachettes build the bismark,HMS Victory, HMS Hood.
Finished Builds Corel HMS Victory cross section.
|
|
|
Rank: Super-Elite  Groups: Registered, Forum Support Team, Administrators, Global Forum Support Team, Moderator, Official Builds Joined: 09/11/2012 Posts: 8,520 Points: 24,651 Location: East midlands
|
Hi Alan, Just returned from hols and I`m a bit adrift of what`s going on, but I have been wondering how we were going to cut the gun ports also. I am concerned as to the location, more than the how do we cut them out.It has confused me as to how we will know exactly where the ribs are when they are covered with planks. Now I am sure the Pro`s can help us out here(please !!  )but as a fore thought and before I start upper planking I have thought of marking the areas of the dummy gun port areas as follows: 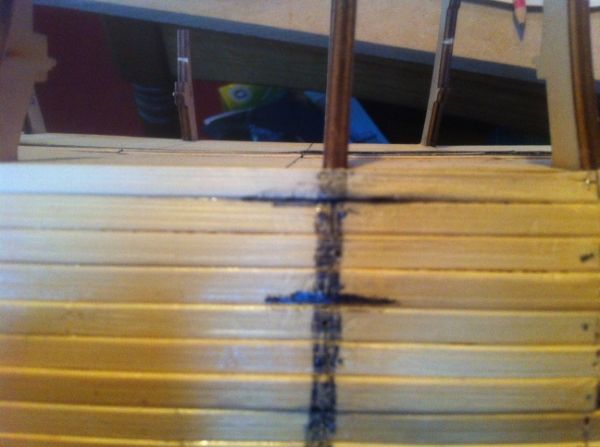 At this moment I have not finished bottom planking, so used masking tape down line of rib and shaded, also marked top and bottom lines of dummy cannon planks that are on the inside of the ribs. Hopefully somebody could explain if I/We need to do this as a precaution before we do the upper planking. As usual comments/criticism welcome Regards delboy271155 (Derek) COME BACK GUY FAWKES "YOUR COUNTRY NEEDS YOU"
|
|
|
|
|
court orchard wrote:Alan, there was some debate on the Italian Forum about an incorrectly placed Port so keep an eye on Mr T's build. Thanks for the heads up Andy, did see something about corrections on the Italian forum so yes, will be watching Mr T's build closely to see how he accurately marks them out.... Certainly no intention of running ahead of the mags or Mr T's build..... Thanks again.... Regards Alan
|
|
|
|
|
ian smith wrote:Hi Alan. Fantastic job you have done on planking your hull. Look forward to seeing your progress. Ian Thanks for looking in Ian and for your nice comments..... Progress tonight was to lay 2 more rows either side, will add the 3rd row tomorrow and post some pics to show progress..... Regards Alan
|
|
|
|
|
delboy271155 wrote:Hi Alan, Just returned from hols and I`m a bit adrift of what`s going on, but I have been wondering how we were going to cut the gun ports also. I am concerned as to the location, more than the how do we cut them out.It has confused me as to how we will know exactly where the ribs are when they are covered with planks. Now I am sure the Pro`s can help us out here(please !! )but as a fore thought and before I start upper planking I have thought of marking the areas of the dummy gun port areas as follows: At this moment I have not finished bottom planking, so used masking tape down line of rib and shaded, also marked top and bottom lines of dummy cannon planks that are on the inside of the ribs. Hopefully somebody could explain if I/We need to do this as a precaution before we do the upper planking. As usual comments/criticism welcome Regards delboy271155 (Derek) Hi Derek, thanks for your little insight.... I did think of marking out the positions of the ribs on the planks as we went along but also realised we will be sanding the hull smooth before we start marking and cutting, with that thought I think any marks made are likely to disappear during the sanding process.... My thoughts on this is to use the pinholes and planking joins on the ribs to draw the centre line of the rib and measure out from there.... Probably overthinking it and feel sure the magazine and Mr T will keep us on the straight and narrow...... Thanks again. Regards Alan
|
|
|
Rank: Super-Elite Groups: Registered, Forum Support Team, Administrators, Global Forum Support Team, Moderator, Official Builds Joined: 09/11/2012 Posts: 8,520 Points: 24,651 Location: East midlands
|
Gandale wrote:delboy271155 wrote:Hi Alan, Just returned from hols and I`m a bit adrift of what`s going on, but I have been wondering how we were going to cut the gun ports also. I am concerned as to the location, more than the how do we cut them out.It has confused me as to how we will know exactly where the ribs are when they are covered with planks. Now I am sure the Pro`s can help us out here(please !! )but as a fore thought and before I start upper planking I have thought of marking the areas of the dummy gun port areas as follows: At this moment I have not finished bottom planking, so used masking tape down line of rib and shaded, also marked top and bottom lines of dummy cannon planks that are on the inside of the ribs. Hopefully somebody could explain if I/We need to do this as a precaution before we do the upper planking. As usual comments/criticism welcome Regards delboy271155 (Derek) Hi Derek, thanks for your little insight.... I did think of marking out the positions of the ribs on the planks as we went along but also realised we will be sanding the hull smooth before we start marking and cutting, with that thought I think any marks made are likely to disappear during the sanding process.... My thoughts on this is to use the pinholes and planking joins on the ribs to draw the centre line of the rib and measure out from there.... Probably overthinking it and feel sure the magazine and Mr T will keep us on the straight and narrow...... Thanks again. Regards Alan Hi Alan, Yep, do see your point, but think we could be losing the pin holes when sanding. I was wondering if we may cut cannon holes before sanding?  . Like we both said, "the needed info will be forth coming". Keep up the good work. Regards delboy271155 (Derek) COME BACK GUY FAWKES "YOUR COUNTRY NEEDS YOU"
|
|
|
|
|
Hi Alan You could get a pencil and twist it in the pin holes so after any amount of sanding they will still show but TBH its not the problem you think it will be. hope this helps regards Andy Current builds:-C57,Zero, Lamborghini Countach, Caldercraft HMS Agamemnon,Robi,R2-D2, MFH Cobra .
|
|
|
|
|
arpurchase wrote: Hi Alan You could get a pencil and twist it in the pin holes so after any amount of sanding they will still show but TBH its not the problem you think it will be. hope this helps regards Andy Thanks for that Andy and yes it does help, now I can sleep..... ... Still looking forward to the challenge of it though.... and your eagle eye will certainly come in useful..... Best regards Alan
|
|
|
 Rank: Pro Groups: Joined: 24/08/2009 Posts: 48,827 Points: -13,348
|
You will find if the set out dimensions are the same as the italian forum they work from the centrelines of the bulkheads.I have cut all mine out to these(i dont advocate anyone else following this).As for there being errors i didnt come across any but then i fitted longditudanal stringers to the frame at deck levels for strength and reference.The one piece of advise i can give is to take a length of timber and shape its section to that of the required gunport e.g. 10mm x 10mm.Cut inside your lines and the file hole so the gauge just fits in.Using this method they all come out the same size.I will be starting a build log or more a progress report within the next few weeks.I should finish the second planking tomorrow so i have been racing ahead but i havent been using the kit planking.
Regards Nigel
|
|
|
|
|
NMBROOK wrote:You will find if the set out dimensions are the same as the italian forum they work from the centrelines of the bulkheads.I have cut all mine out to these(i dont advocate anyone else following this).As for there being errors i didnt come across any but then i fitted longditudanal stringers to the frame at deck levels for strength and reference.The one piece of advise i can give is to take a length of timber and shape its section to that of the required gunport e.g. 10mm x 10mm.Cut inside your lines and the file hole so the gauge just fits in.Using this method they all come out the same size.I will be starting a build log or more a progress report within the next few weeks.I should finish the second planking tomorrow so i have been racing ahead but i havent been using the kit planking.
Regards Nigel Thanks for looking in Nigel, appreciate your input and comments.... .. I had thought of making a sizing jig to 13mm square, believe that is the size of the gun ports to be cut.... I hadn't thought of running a stringer along the lines of the deck though and it is one idea I think I will be adopting so thanks for that one.... .. Look forward to seeing your progress when you have finished the second layer of planking..... Good luck on your build..... Regards Alan
|
|
|
|
|
Update on where I am now.... Have now completed the planking up to issue 32 and found it pretty straight forward... .. Also took the advice of the magazine and Mr T about not pinning the last strake onto frames 7, 13, 15 and 16.... simply glued and clamped until set....  . It does mean of course I can get back to the SF II at least until issue 33 comes out on Wed..... Hope you enjoy the pics..... Regards Alan Gandale attached the following image(s):
|
|
|
Rank: Pro Groups: Joined: 24/08/2009 Posts: 48,827 Points: -13,348
|
The ports are 13mm wide by 12mm high.The italian instructions suggest drilling small holes against the top of the deck from the inside and the same against the bulkheads from the inside.I did this with a 0.5mm drill in a pin vise(you cant get dremel etc inside hull).I drilled a hole every 10-15 mm.Then its a case of joining the holes dot to dot style on the outside with a pencil,i clamped a piece of 4mm square lime for the deck levels as this gives a nice flowing curve.Because of the tumblehome (onion shape)of the hull the second decks ports are in a face with about a 20 deg slope,i kept the size gauge horizontal so the port is actually higher if you measure on the sloping face of the hull.Having cut all mine out now i have decided to reduce the port size on the top deck to 11mm wide by 10mm high,as it just looks top heavy and the gunports should decrease in size a you go up decks.as mine are cut i'm just going to line the top ports with 1mm strip,this part is black so will be covered.I hope you can understand my waffle and thankyou for your encouragement,
Regards Nigel
|
|
|
|
Guest (23)
|
 US
US

