|
|
 Rank: Pro Groups: Joined: 24/08/2009 Posts: 48,827 Points: -13,348
|
Hi again guys and thanks for the attension. This might be a bit of a tutorial to some and not to others, anyway here goes. On the RC there is a moulded rail that runs from bow to stern travelling through the gun ports and so on . The kit has supplied some length of brass. N ow I dont know about you lot but this is the devil to work with especially when it is all bent and twisted. It,s practically useless to me like that and I dont like it anyway. Another way is to do it in plastic rod available in various diameters. I have posted a few pics to show this and when it is painted you cant tell the difference and I reckon it looks better, more refined detail. I will be doing the beakheads and that this way, it is a lot easier.  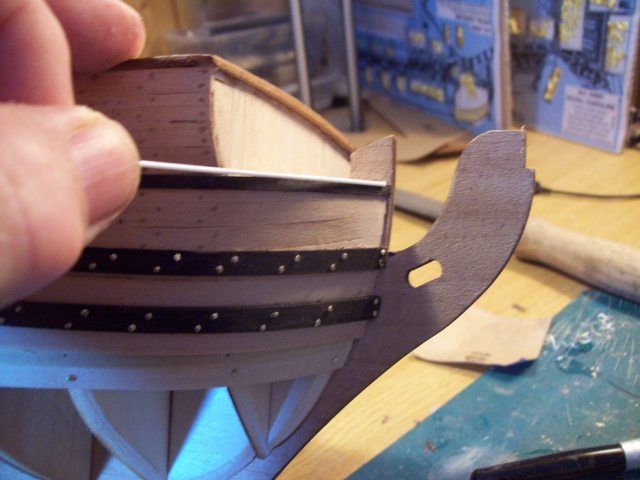
|
|
|
Rank: Pro Groups: Joined: 24/08/2009 Posts: 48,827 Points: -13,348
|
Starting to glue on with just a touch of thick super glue, it does,nt go off so quick. 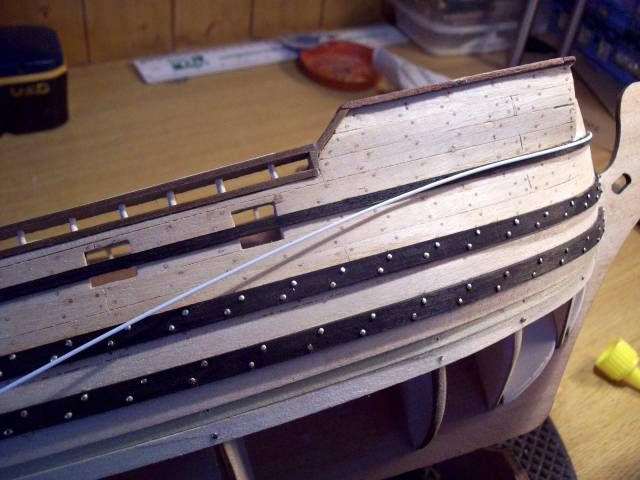
|
|
|
Rank: Pro Groups: Joined: 24/08/2009 Posts: 48,827 Points: -13,348
|
|
|
|
Rank: Pro Groups: Joined: 24/08/2009 Posts: 48,827 Points: -13,348
|
Hello Harty,
I have been watching this build and you are doing a fantastic job with it and building quickly too without sacrificing your usual high standards!!
I know what you mean about the brass wire mate, once it has a bend in it, it is the devil to rectify completely. I reckon the plastic will do the job just as well, it is a lot easier to use and as you say, when painted who will know anyway?? Good stuff mate!!Well done again and keep the pics coming, I'm following with interest.
All the best,
Bernie.
|
|
|
Rank: Pro Groups: Joined: 24/08/2009 Posts: 48,827 Points: -13,348
|
Been building the windows this time and guess what, they dont fit. Be very carefull at this stage cos the brass work has to fit. I got my windows in and the brass would not go in, Demolish and start again to custom fit to the brass. I changed the appearance of them slightly and I think they look better. I had difficulty at this stage and hopefully it is now sorted. The pic is how they are now . 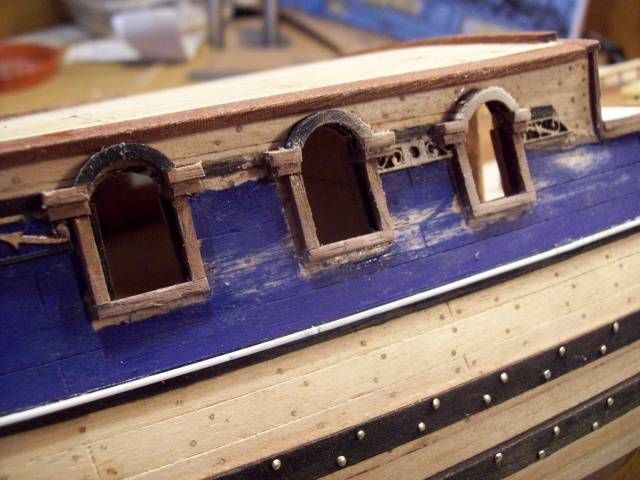
|
|
|
|
|
Hi Harty the brass can be annealed [heated then left to cool]this softens the brass until working it [by straightening]causes it to harden up again,this of course can take several attempts per wire.The wire should have really been supplied in a straight format so it can be used as per the instructions. Your choice of plastic strip is really the best of both worlds,as you know i use it alot also its easy to trim and fix and when painted it looks the same. Excelent work on the hull so far and the dry fitting of components saves loads of time as you have discovered to your cost regards Andy  Current builds:-C57,Zero, Lamborghini Countach, Caldercraft HMS Agamemnon,Robi,R2-D2, MFH Cobra .
|
|
|
Rank: Pro  Groups: Registered
Joined: 22/06/2010 Posts: 179 Points: 428 Location: Poole Dorset
|
She is coming along a treat there Harty. I have sidelined my RC build (current stage, frame and six planks built). I have got the parts for my Virginia and will carry on with that. Interesting about the brass parts not fitting, I must make a note of that any any other problem that you may see in the build. It looks and impressive build as it is, she will look great when complete. The Italian to English translation needs to be thought out a bit but that adds to the fun of it. cheers Peter ps superabundantly???? completed..... Endeavour Longboat, San Francisco 2, Virginia 1819
building Royal Caroline
|
|
|
Rank: Pro Groups: Joined: 24/08/2009 Posts: 48,827 Points: -13,348
|
Cheers guys, just a little more work on the windows and a quick paint job. Done a trial fit of the really in yer face brass work and........ it fits, there is a god to modeling . 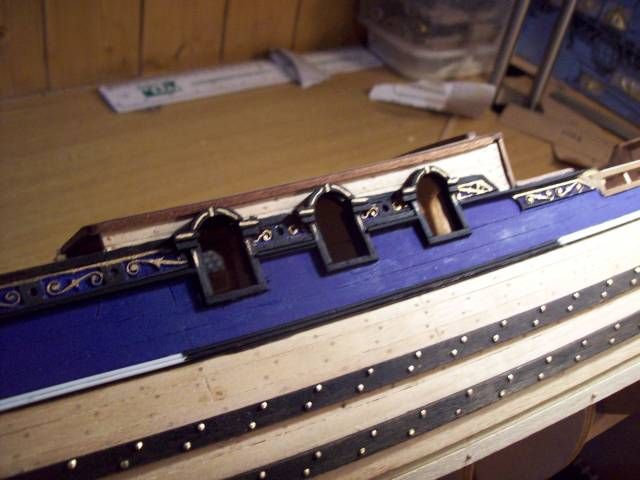
|
|
|
Rank: Pro Groups: Joined: 24/08/2009 Posts: 48,827 Points: -13,348
|
here it is dry fitted. 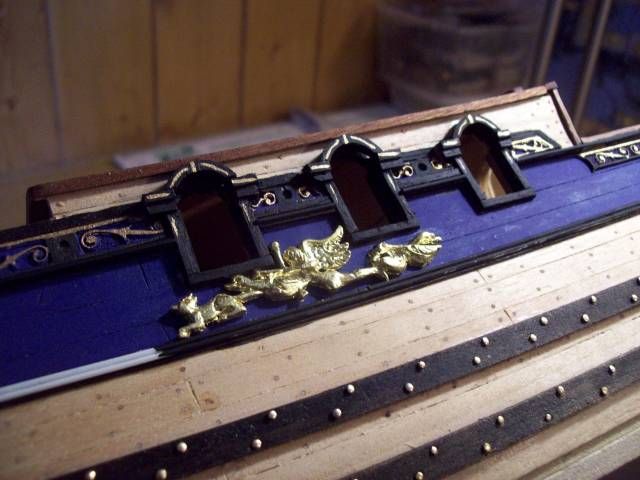
|
|
|
Rank: Pro Groups: Joined: 24/08/2009 Posts: 48,827 Points: -13,348
|
Just been experimenting with the brass to black stuff. dipped it for about 20 seconds, dried it and then buffed it up with the mini drill. A before and after. 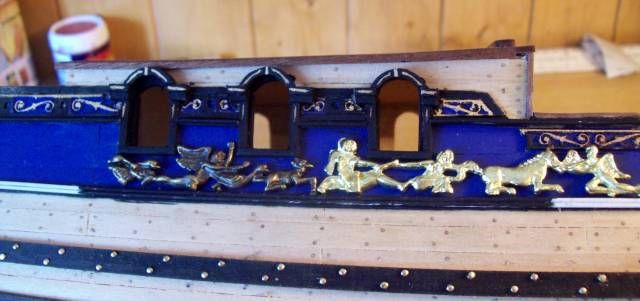
|
|
|
Rank: Pro Groups: Joined: 24/08/2009 Posts: 48,827 Points: -13,348
|
Message was deleted by User.
|
|
|
|
|
Hi Harty deff prefere the after on the brass but you have 'opened the can of worms so to speak' as weathered brass on a pristine painted ship will look out of place so a bit of weathering might be in order to match it all up,just my opinion and its your model but i guess you can see where im coming from.Excelent work keep it up regards Andy Current builds:-C57,Zero, Lamborghini Countach, Caldercraft HMS Agamemnon,Robi,R2-D2, MFH Cobra .
|
|
|
Rank: Pro Groups: Joined: 24/08/2009 Posts: 48,827 Points: -13,348
|
Today we have been mostly doing the brass and building the other wales and windows and a paint job, and a little bit more planking 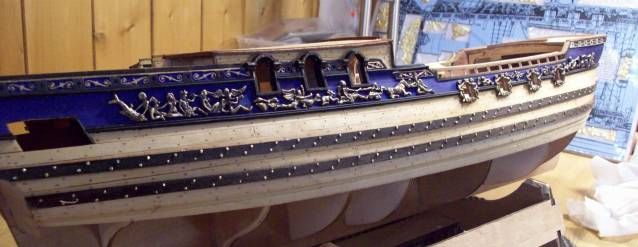
|
|
|
Rank: Pro Groups: Joined: 24/08/2009 Posts: 48,827 Points: -13,348
|
This is the other side, found it a bit easier after the trauma of the larboard side 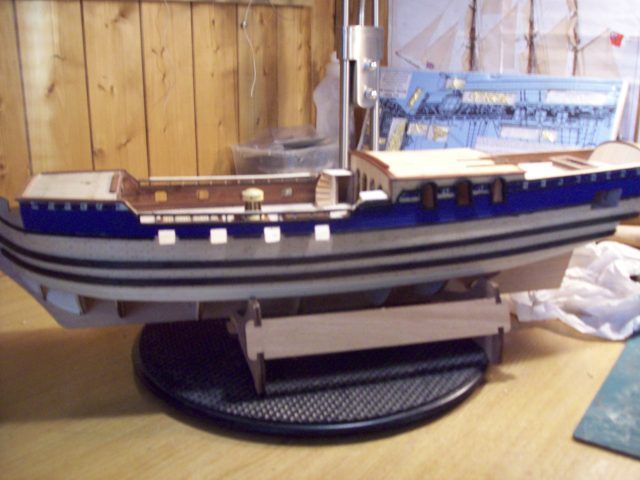
|
|
|
Rank: Pro Groups: Registered
Joined: 22/06/2010 Posts: 179 Points: 428 Location: Poole Dorset
|
Nice work Harty. Did that stand come with your kit? Mine hasn't got one. completed..... Endeavour Longboat, San Francisco 2, Virginia 1819
building Royal Caroline
|
|
|
Rank: Pro Groups: Joined: 24/08/2009 Posts: 48,827 Points: -13,348
|
The stand came with the kit, its ok to build on but as a display stand I think its terrible. I got some lovely little bases off a friend of mine so I will be displaying on one of them .
|
|
|
Rank: Pro Groups: Joined: 24/08/2009 Posts: 48,827 Points: -13,348
|
Today I have been mostly planking. All the first layer is now in and I must say that this is one of the easiest hulls I have ever done.The planks just aeemed to fall in place with the minimum of cutting and sanding . 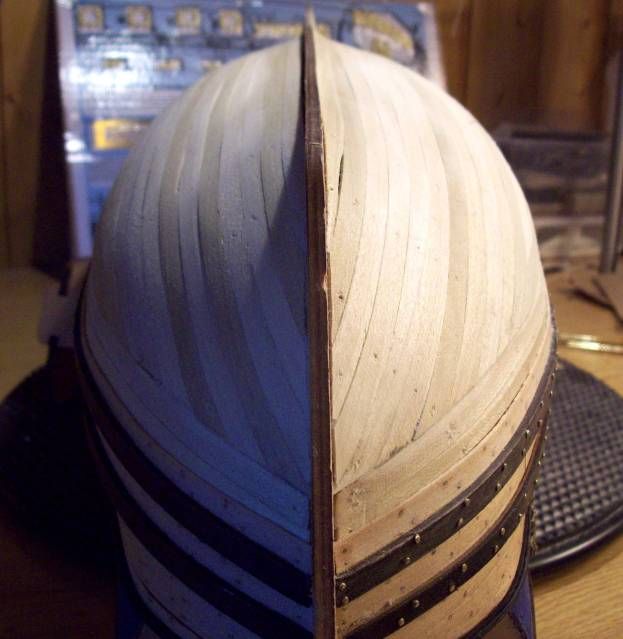
|
|
|
Rank: Pro Groups: Joined: 24/08/2009 Posts: 48,827 Points: -13,348
|
Here is the full length view 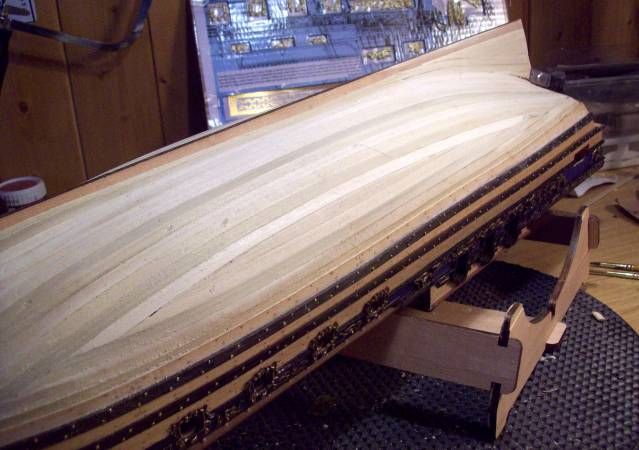
|
|
|
Rank: Pro Groups: Joined: 24/08/2009 Posts: 48,827 Points: -13,348
|
Spent most of the day second planking so I,ve got all that done now. Thought I would do the side windows and get them sorted. The plans say to fit the supplied window which is preformed and makes the job look easy...... if you have got it. None were supplied in my kit so it were a scratch build for them. Built them as a dry fit on the hull and once the shape was there removed them to do all the finishing touches. This is what I came up with. 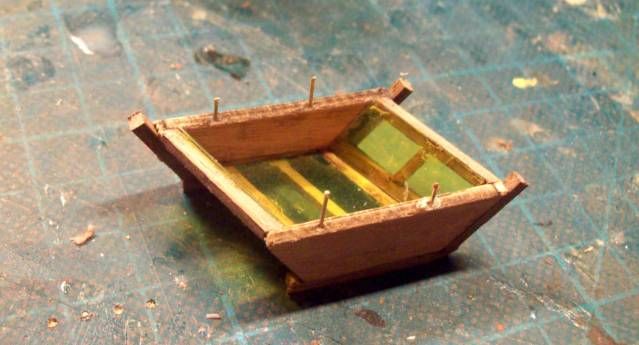
|
|
|
Rank: Pro Groups: Joined: 24/08/2009 Posts: 48,827 Points: -13,348
|
And the fitted and almost complete effort on the hull. 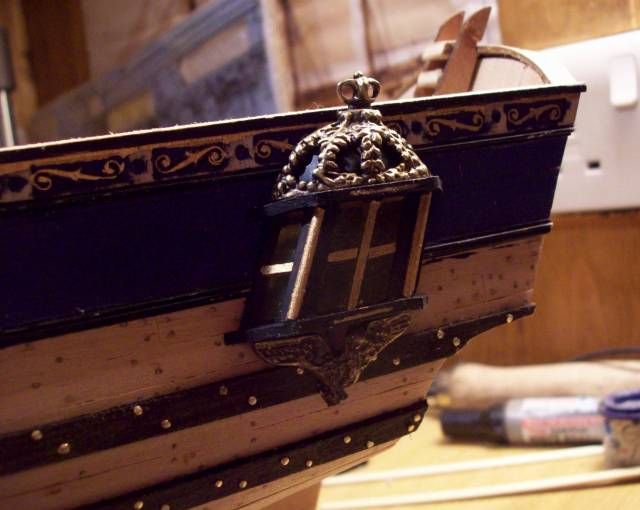
|
|
|
|
Guest
|
 US
US

