|
|
|
|
Fab work Adrie, enjoy your beer.... in fact I think you deserve two.....  .. Nicely done....  Regards Alan
|
|
|
 Rank: Pro    Groups: Registered
Joined: 23/03/2014 Posts: 185 Points: 545 Location: Essex
|
Thanks Alan, I had my beers and they were luv'ly!!!! But today there was just a little bit of progress made, the mizzes had an appointment in London and when we returned the long awaited DVD had arrived with Master and Commander so that had to be watched for 'historic' accuracy.  Having finished the conning tower I wondered what to do next. The instructions wanted me to continue with the stokehold deckhouse, but I considered the following.  There's an aweful amount of white showing there, and as there is nothing major to be build in that area anymore I decided to fill the voids there first. This includes the anchor capstan, the first and second gun turret, the double machine gun turrets and three of the four searchlights. Working from the bow aft the first white spot was for a deckcover.  It's a simple, double, then cut and edge paint-job. 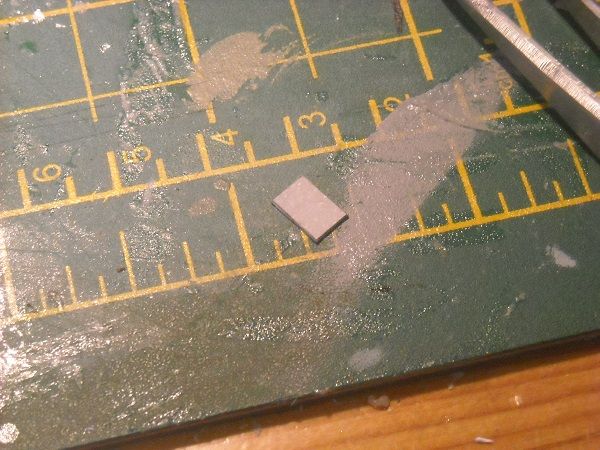 Next one up were the anchor chains pathways. 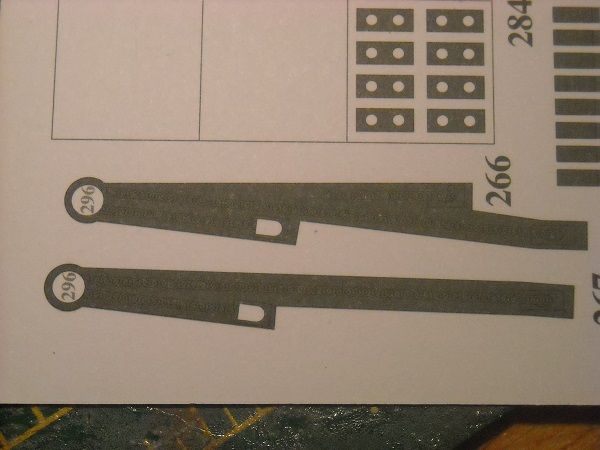 Siomple cut, edge-paint and fill the white space with the entrance to the spill pipe. 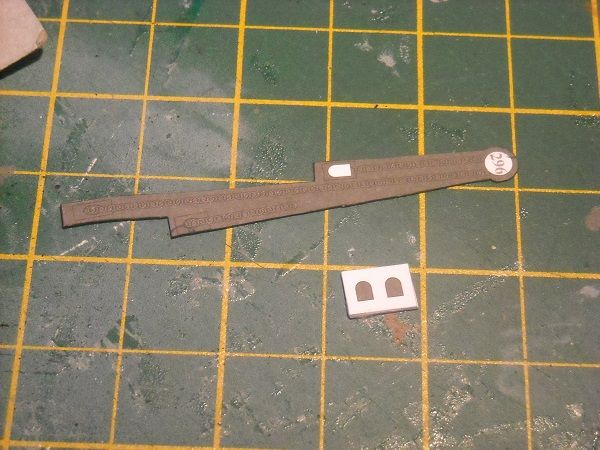 Once all completed, down they went. 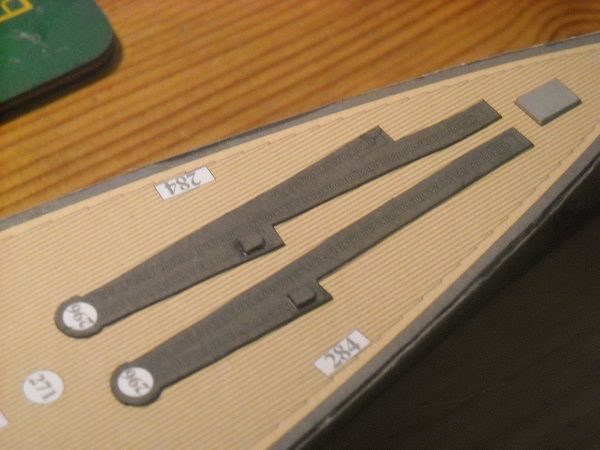 Already looking better there.  But of you look closer, they actually drew the chains on the pathway but black on dark grey doesn't really work. If I was going to embellish this model then a proper chain would be the first thing on my list. But I'm not going to embellish her, so this is as good as it gets. Did you notice the other white circle on the pathway? That's the position for the capstan, which will be made now. 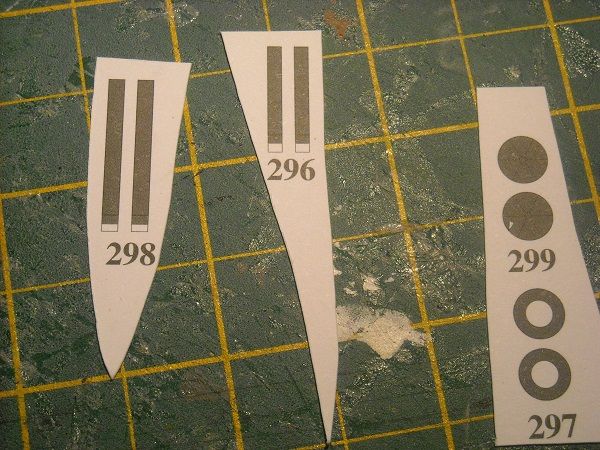 The capstan consists of two rings (one for the capstan base and one for the capstan head) and the covers for the capstan head. The rings were cut out but as I did so, I noticed a small black line on one of them. 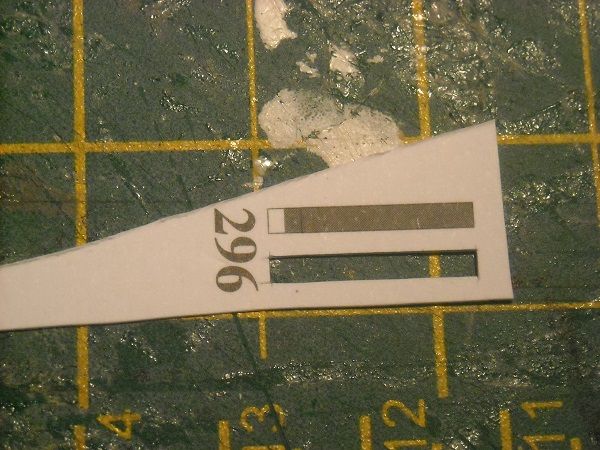 It doesn;t really stand out so I missed it the first time I cut it. But the line is the position where the ring ends and the connection tab for the ring starts, so I had to cut it off otherwise the ring would be too large. So the ring was pre-formed, with a brush this time and then with the tab connected to itself. The ring was then glued on the bottom capstan head circle. 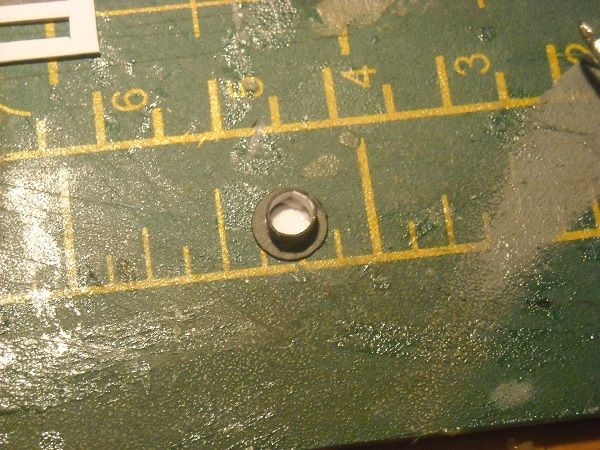 In the same way the head ring was formed and glued on the bottom part and the top part was glued on top of the ring and the whole assembly was glued in the indicated position. 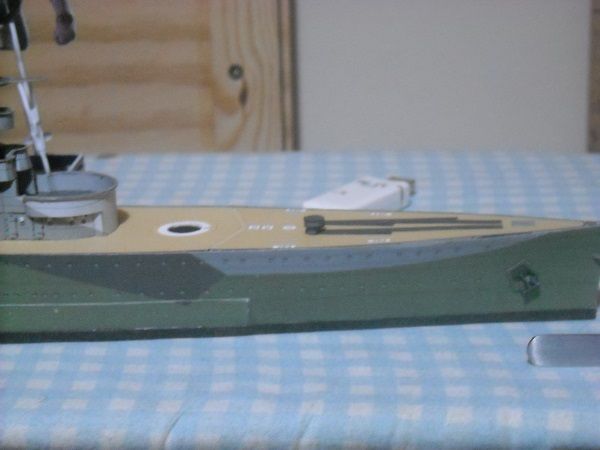 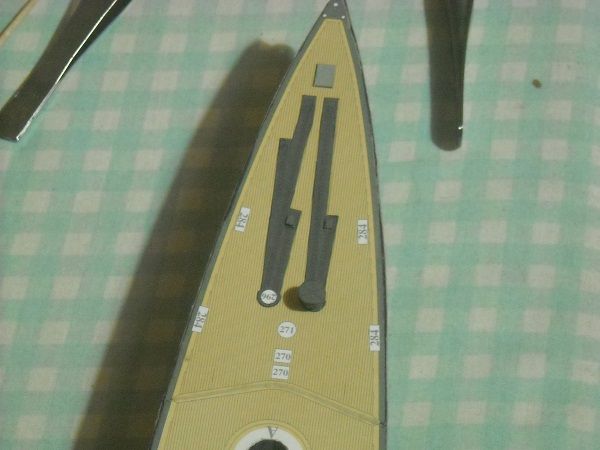 But that is as far as I got. I'll do the other capstan tomorrow and start on the mooring bitts 284. But more about that later!!!! Adrie. 'Where to glue or where not to glue, that is the question'
Building: Hr. Ms. de Ruyter (card), Retourschip Batavia (Revell), HMS Surprise (De Agostini)
Built (and sunk): Too many to list
|
|
|
Rank: Pro Groups: Registered
Joined: 23/03/2014 Posts: 185 Points: 545 Location: Essex
|
Hi all!! A little update was in order, I thought. So let's get cooking!! If you see the side view of the bow from yesterday, you might have noticed that the capstan wasn't as rightly centered and straight as it could be. I noticed it too and spent some headscratching to work out what had actually gone wrong. Going through the same steps with the second capstan I suddenly noticed the problem. The connecting tab was almost impossible to get straight behind the capstan ring. And the capstan wouldn't stand up straight up because of that little angle that stuck out at the bottom! So to counter that I decided to cut a little strip of the connecting strip to allow some 'give' on both sides when glueing the tab to the ring. 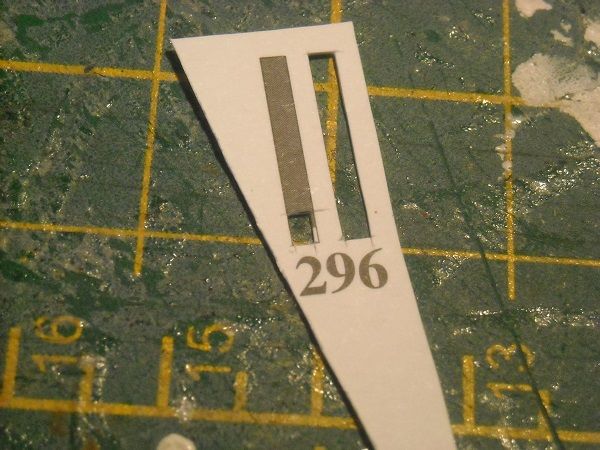 That seemed to have straightened everything up and I was pleased with the capstan. So next bitts then (and that is not a typo!  ). Them bits of the mooring bitts: 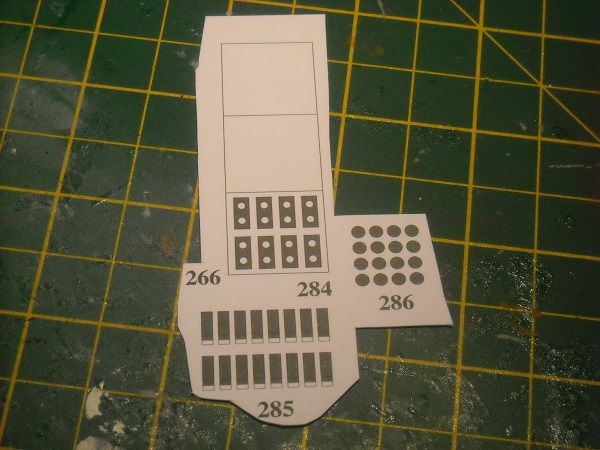 There's the plate that needs to tripled, the rings that will need rolling and the caps to go on the top of the rings. Simples, eh? Well, it would be if the rings weren't so small! The total structure on a penny ... 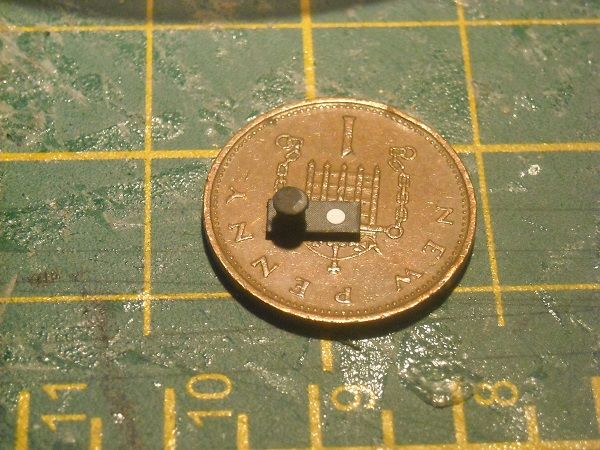 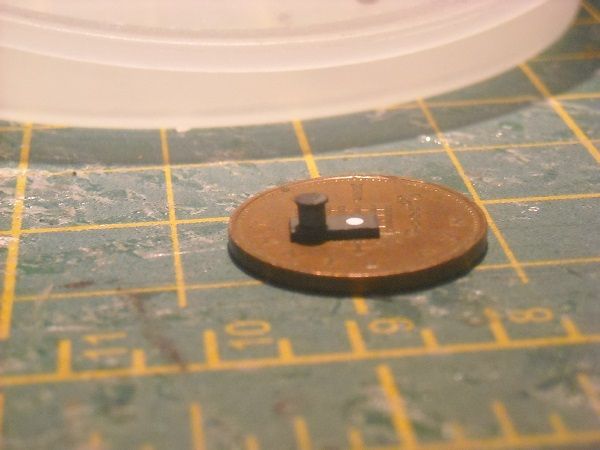 It took me half an hour for that one ring. And did you notice the dark stain on top of the cap? That's where the paint leaked onto the top through the tips of the tweezer that I used when edge-painting. I tried the next ring which took me 45 minutes! Those rings are too small for me to handle properly ! At half an hour or so per ring, a pair of very painful eyes and 8 rings to be shaped just for the bow section I better get my thinking cap on. In fact, I think I might have an idea. Remember the column underneath the searchlight platforms on the side? They were about the same size as these rings so why not roll a cylinder tightly as that is a lot easier to handle. Then when the roll is done, I intend to cut a length off the height of the bitt ring and hey presto!! I'll touch up the top of those bitt-caps when I have finished this group of 4 bitts. Well, that is the theory, anyway. But here is 'all' the work that I have finished today. Well, it's the thought that counts, right? 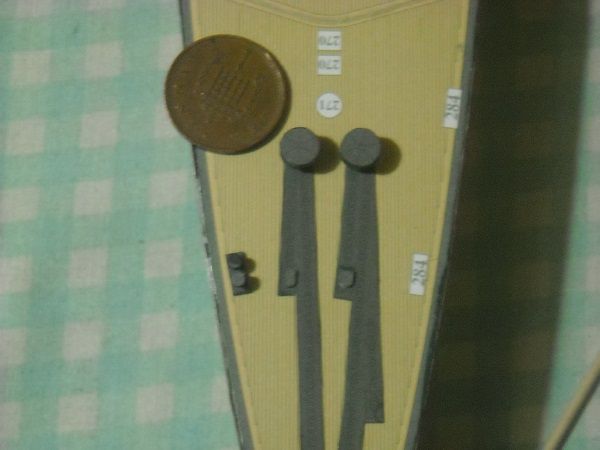 But I'll get those rings sorted, don't you worry! Until laterzzzzzzzzzzzzzzzz. Adrie. 'Where to glue or where not to glue, that is the question'
Building: Hr. Ms. de Ruyter (card), Retourschip Batavia (Revell), HMS Surprise (De Agostini)
Built (and sunk): Too many to list
|
|
|
|
|
Keep it going Adrie, she looking the biz..... Regards Alan
|
|
|
Rank: Pro Groups: Registered
Joined: 23/03/2014 Posts: 185 Points: 545 Location: Essex
|
Ohhh, I'll keep the good lady going, Alan, don't you worry. And thanks for the praise ... once again. But I am having a serious problem now. Remember what I said when I started this build? That I would drop this one as soon as the Surprise parts came in? Well, they have come in, two installments. But I don't wanna drop 'Ur! We were getting along so well!!!!! But I can't go back on my words to you all, can I? But it's 'Ur !! The only lady that my mizzes allows me to gawk at!!!!! Mind you, I did say once that I wouldn't start the Surprise build anyway until I had the deck and that is surely stiil a month or so away so I am in my right to just keep working on the lady. I mean the mizzes allows it!!! So, if this disappoints any of you, tough! I am following the directions of She-who-keeps-me-on-the-straight-and-narrow! So now we have made that clear, it's time to get cracking!!! I tried the roll today. First I used a strip of 8 mm which was the same size as the upper part of the searchlight column. But that rolled and glued stick was too big. So I reduced the size of the strip to 5 mm and gave it another go. Just about right! 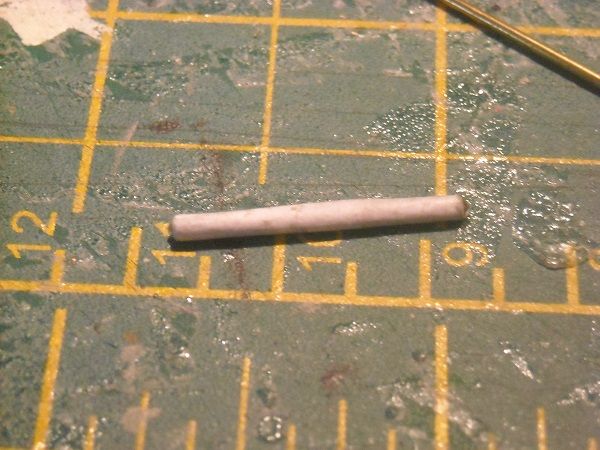 I also found a paint that was closer to the dark grey deck colour. This is a Humbrol satin enamel (123). 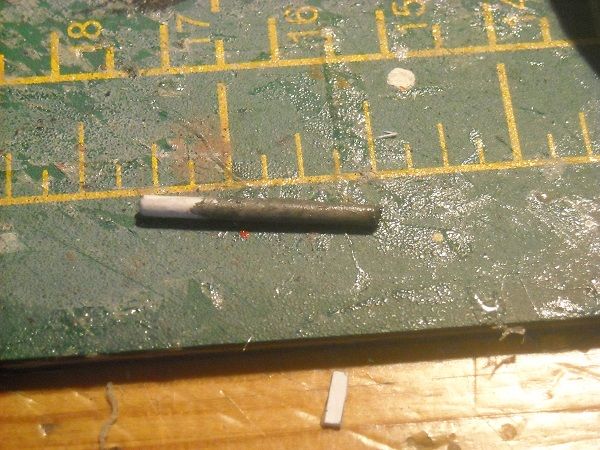 Because it is an enamel, the drying time is a lot longer and doubly so for a satin finish colour. But even with that additional waiting time, I rolled and painted the strip in about ten minutes. Added another 35 minutes for touch fast dry and I was able to start cutting. 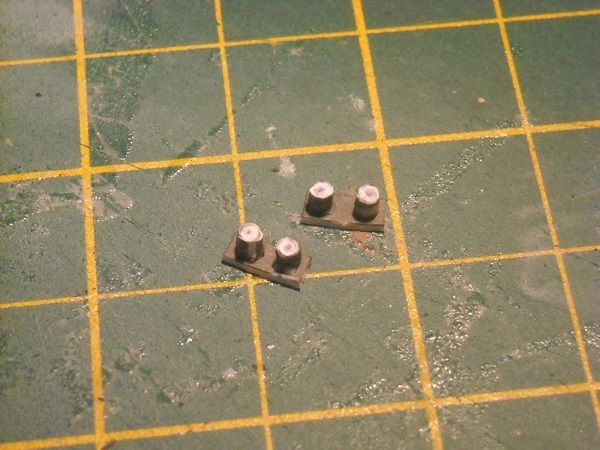 I glued them onto the plates then let them dry whilst stabbing out the tops and after touching up the plates and centres the caps were edge-painted and glued on top. All three remaining bitts were done in the time it took me to do a single ring yesterday and with a LOT less strain on the eyes. Are they perfect? Heck no! But are they good enough? Ohhhhhhhhhh yes !!!! So I even had enough time to do three more deck plates, one circle and two squares which were doubled and edge-painted and glued on the deck together with the three bitts. 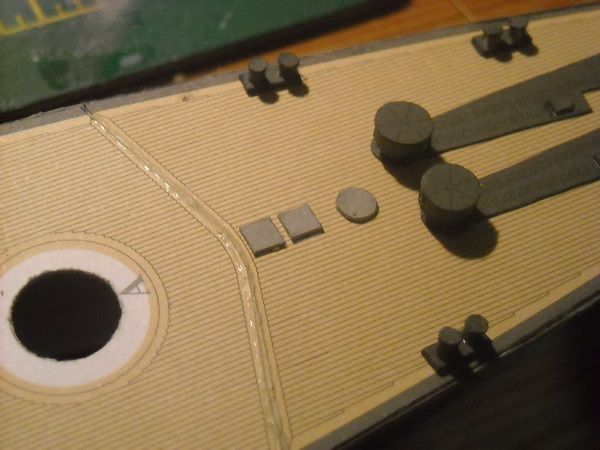 I'm quite chuffed again. But more than that, see what I have to start tomorrow??  Yup, the first gun turret! The lady will finally her first set of teeth! I'm so excited! And I just can't hide it! I'm about to lose control and I think she likes it! Till tomorrowzzzzzzzzzzzz! Adrie. 'Where to glue or where not to glue, that is the question'
Building: Hr. Ms. de Ruyter (card), Retourschip Batavia (Revell), HMS Surprise (De Agostini)
Built (and sunk): Too many to list
|
|
|
|
|
Hi Adrie, more lovely work I see.... .. With you building the Surprise then surely this will become your in between build... would hate to see it laid to rest until the Surprise is complete.... .. Will be following anyways.... Regards Alan
|
|
|
Rank: Pro Groups: Registered
Joined: 23/03/2014 Posts: 185 Points: 545 Location: Essex
|
Many thanks, Alan. I think that until the planking starts the Surprise will be the in-between build. Until then I expect the arrival of the issues for thst ship will be the speed-determining factor. But I expect that for both builds there will be times where you have to wait so I might as well continue with the other. But for both I am attempting to take my time. Talking about time, I think it might be time to show what I have 'wrestled' with today! As said yesterday, today I will be making a start on the first gun turret. The first step was the construction of the barbette.  A simple ring with a cap and quite big in size, for once! The ring was edge-painted and glued together then to make sure it stays nice and .... circle-like I used a cap of a paint bottle for storage whilst drying.  After a while I then glued the ring to the cap, making sure it followed the edge of it and when I was happy with the fit, I deposited drops of the PVA glue on the inside of the ring, to make sure it would not come loose. 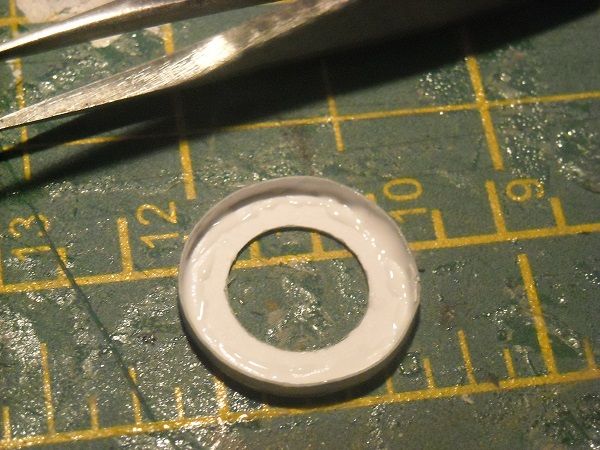 It was then put side to dry further whilst I continued with the next step, the actual turret. 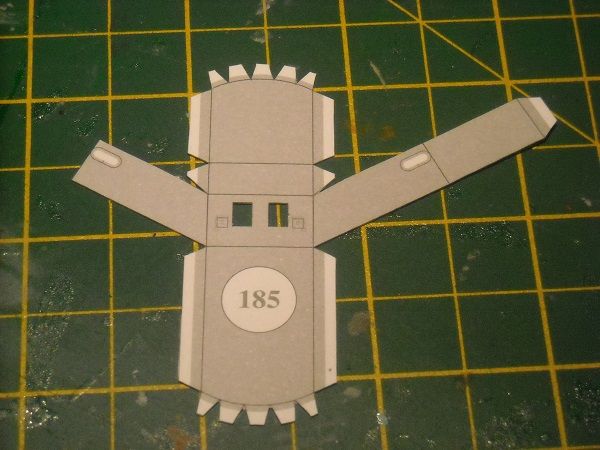 This was scored at the back then shaped, In the meantime the barbette was dry so I then glued it to the deck with a ring of glue on the bottom of the ring.  Then was left to dry as I went back to the turret. where I glued the bottom part and sides together. 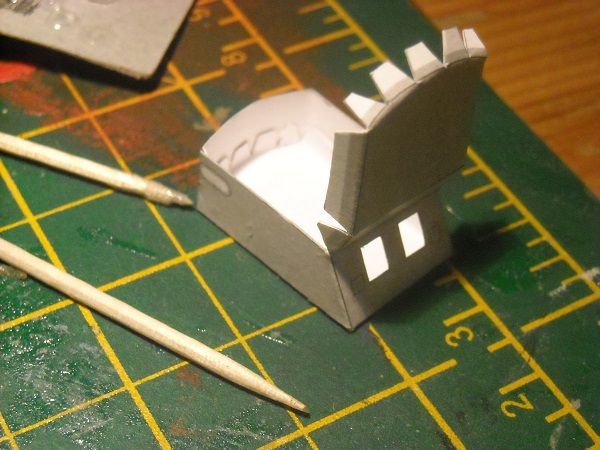 The turret was put aside and I continued with the next step. 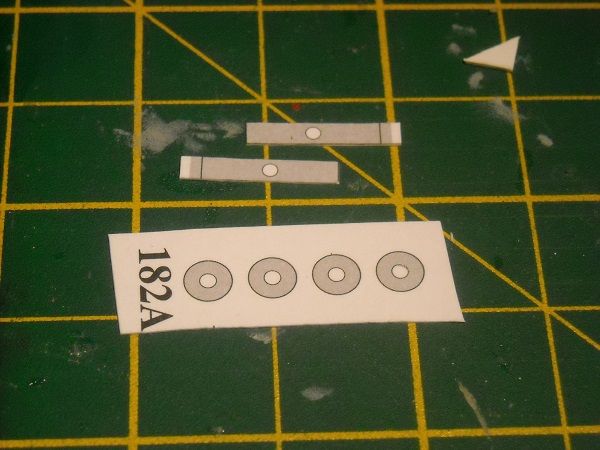 These will form the gun mantlets and gun axle. The mantlets are formed from a ring and two caps per mantlet. The caps had their centres stabbed out before being stabbed out themselves. 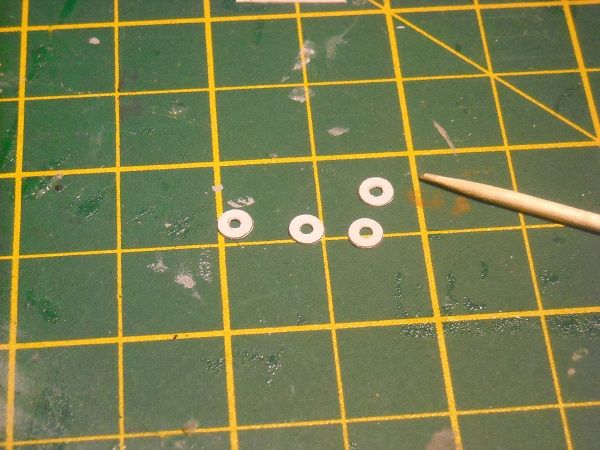 The rings were cut out, edge-painted and preformed with a toothpick then glued together and stored on a brush handle to keep them round. 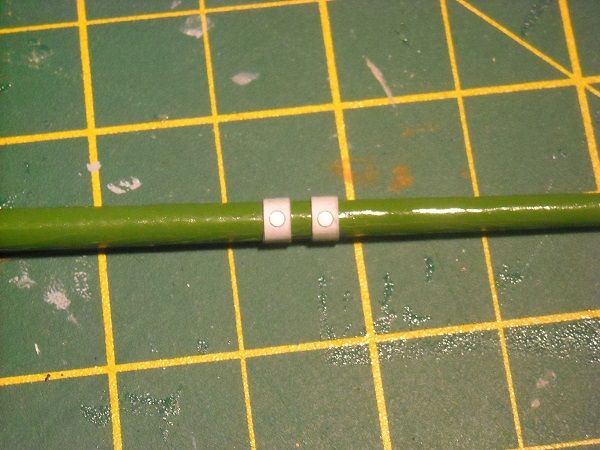 The white circles are the positions where the barrels are going to be glued. While the rings were drying, I started on the axle, which was cut out, 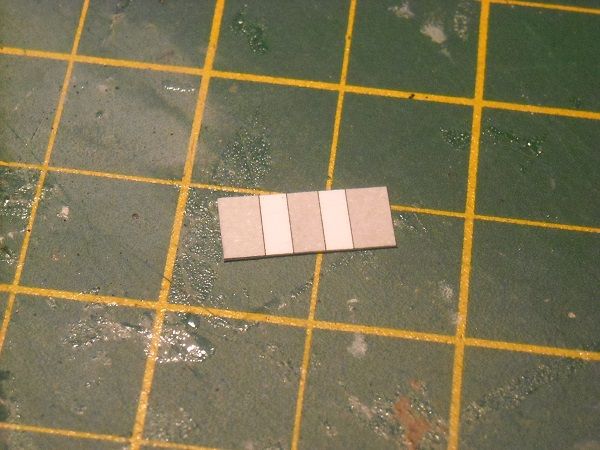 then pre-formed around a 1.3 mm brass rod, then a 0.5 mm iron rod. I then glued the tightly rolled axle and kept one side slightly bigger than the other, purely because I did not know how well the mantles would fit around the axle. 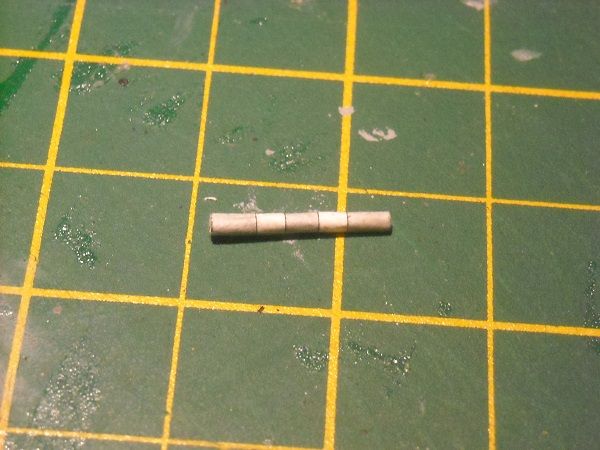 The caps were then glued onto the mantlet ring. 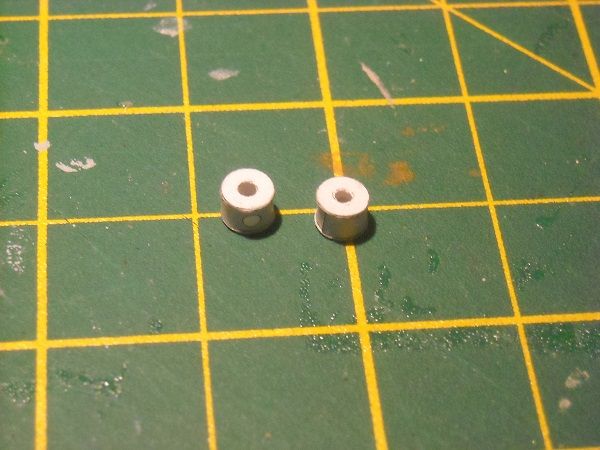 The caps were sticking out slightly but once in place that will barely be visible or so I assume. Once dry I inserted the axle (small size first) into the first mantlet and glued the mantlet to the axle when in position. The second mantlet was then positioned and when I was happy with it, glued in place too. I used the two openings in the turret to ensure that the mantlets would be far enough from one another to fit the turret windown. But when I tried that, I found that the mantlets were slightly too wide for the opening so I cut slithers off the inside of the openings until the mantlets fit snuggly. I then took the mantlets and stored them inside the turret, 'looking out'. 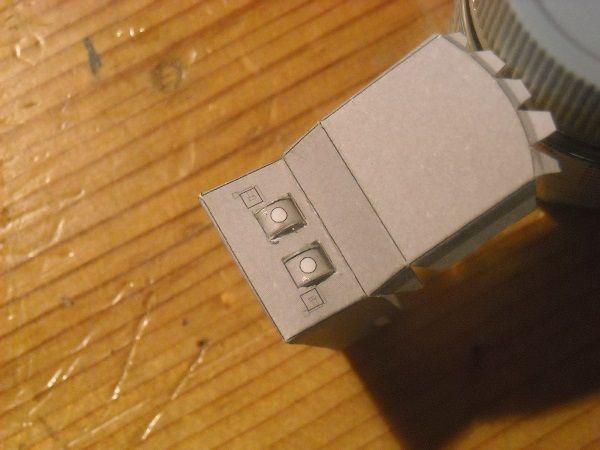 Not bad so far but I saw that I was too eager with my cutting out of the openings so when they have thoroughly dried I will have to repair some of it with drops of PVA glue and some paint. The turret was set aside to dry completely. Tomorrow I'll start on the barrels and add them to the mantlets and I can finally glue down the top of the turret, glue a location ring under the turret and install it. But nore about that tomorrow!!! Thanks for looking in!  Adrie. 'Where to glue or where not to glue, that is the question'
Building: Hr. Ms. de Ruyter (card), Retourschip Batavia (Revell), HMS Surprise (De Agostini)
Built (and sunk): Too many to list
|
|
|
Rank: Pro Groups: Registered
Joined: 23/03/2014 Posts: 185 Points: 545 Location: Essex
|
Hi all, not as much to show tonight as expected but that's no reason not to put in a bit of filler. [wink} Anyway, I continued from where I left yesterday with the barrels. 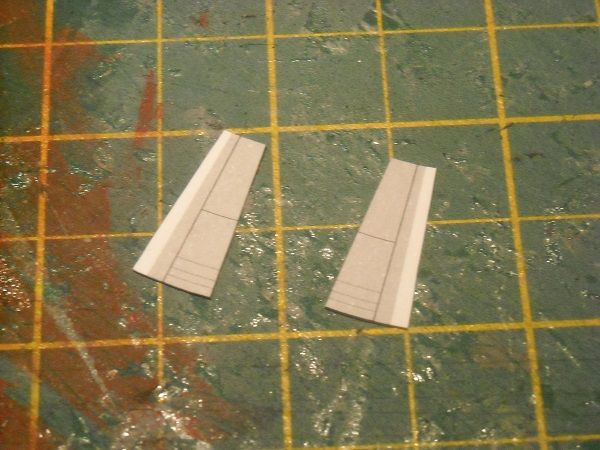 These need to be rolled but not as a cylinder but as a cone. Slightly more difficult but not too much. But I painted the inside of the first barrel on the inside, starting with light grey near the top, dark grey in the middle and black at the bottom, thinking that when looking inside it, it would look lifelike. 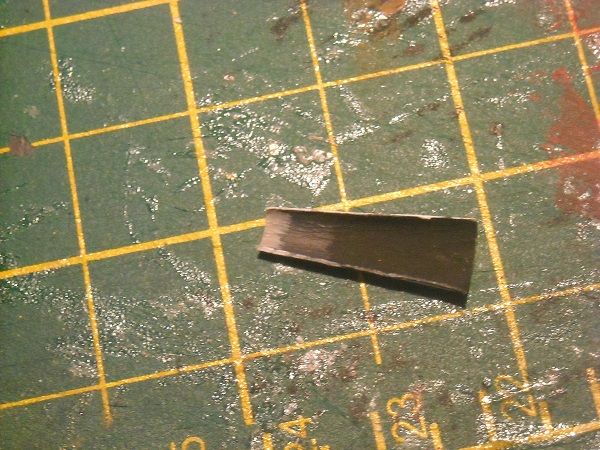 Well, that was the theory. Unfortunately the tab of the barrel was so big that even with tight rolling I could not close the barrel edge over the flap. So I had to cut off a portion of the tab. 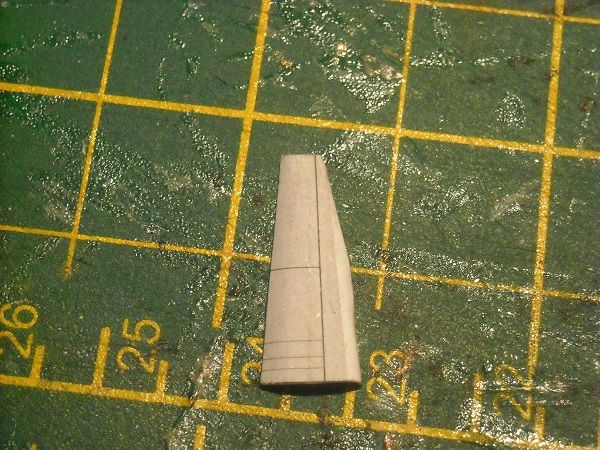 I tried rolling it again and still it wouldn't fit. So another cut was required and finally .. 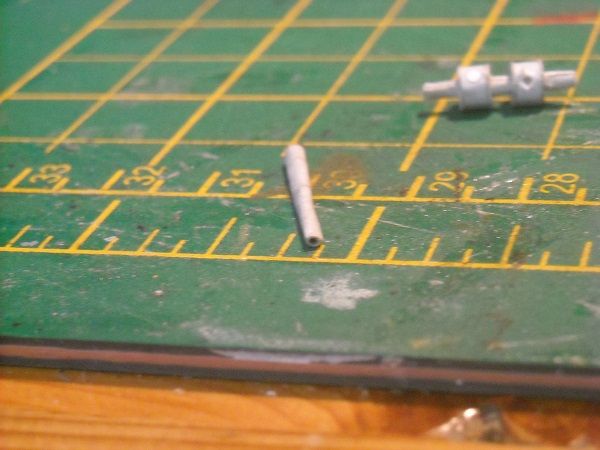 I left it to dry thoroughly after straightening the barrel by rolling it over the table. You can see the turret with the mantlets in the background. I decided to drill out the mantlet so I could push the barrel inside. This way the glue connection would be a lot stronger. Strong enough to allow the barrels to be moved up and down. I used these babies manually to get the right openings.  Even though I bought them to be used with a pin vice on the ship. The barrel was then glued into the mantlet and the combination was put back in the turret for drying.  I'm quite pleased with the darker look of the gun bore even if I doubt you'd be able to see enough for the dark grey and black to make an impact. Oh well, it was a good idea. Oh. Sometimes people ask me if I use a lot of glue on my models. And the answer is no, even though I go through bottles and tubes of glue per model. But most of the glue ends up here.   But the second barrel was made as before, only this time I didn't paint the inside dark grey and black. The barrel was glued into the mantlet and the whole combination was now placed inside the turret for the last time. I glued two triangles inside, to keep the mantles pushed against the turret openings so they won't fall out when moving the barrels. The lid was then glued down. 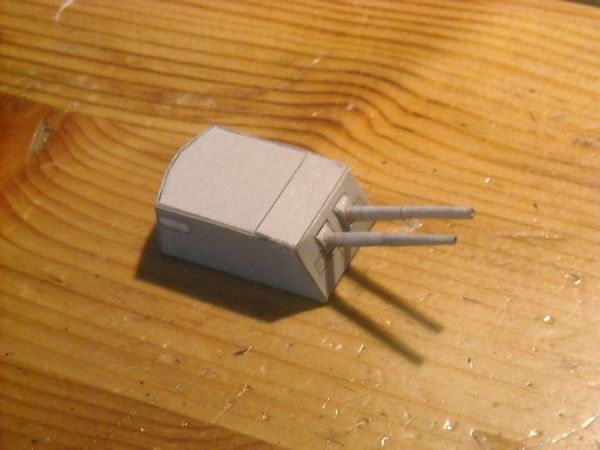 I then rolled the rotation ring that will fit inside the barbette but won't glue it until the turret is completed. There were two more parts to be added, namely the rangefinder 'horns'. They are made from two parts, a ring and a cap. 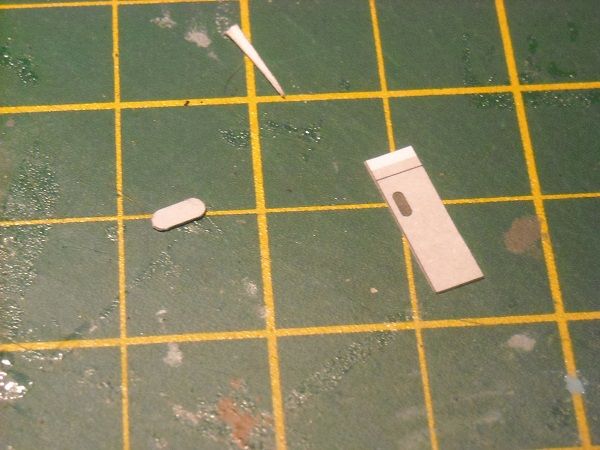 I rolled the ring and when it was dry I then flattened it with my fingers until it had the shape of the cap, which I then glued against the ring and the whole went against the side of the turret. 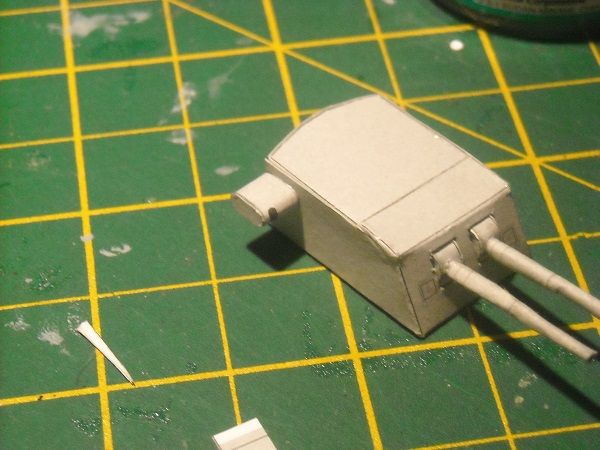 The port range finder will be done likewise but that will have to wait until tomorrow. See you all laterzzzzzzzzzzzzzzzzzz. Adrie. 'Where to glue or where not to glue, that is the question'
Building: Hr. Ms. de Ruyter (card), Retourschip Batavia (Revell), HMS Surprise (De Agostini)
Built (and sunk): Too many to list
|
|
|
 Rank: Master   Groups: Registered
Joined: 20/03/2010 Posts: 1,199 Points: 3,473 Location: Glenrothes
|
Lookin' good Adrie  Admiring your perciverence with the smaller parts Hats off to you Sir  'fraid i will be looking at alternatives (cheating)for my project ie styrene rod/strip/brass wire etc to make it a wee bit easier Keep up the good work will be popping in to pinch ideas
|
|
|
Rank: Pro Groups: Registered
Joined: 23/03/2014 Posts: 185 Points: 545 Location: Essex
|
Cheers, Budgie! Looks like we'll be both looking at the other trying to pick bits up! But thanks for your kind words and you'll be certainly more than welcome to pop back in! Adrie. 'Where to glue or where not to glue, that is the question'
Building: Hr. Ms. de Ruyter (card), Retourschip Batavia (Revell), HMS Surprise (De Agostini)
Built (and sunk): Too many to list
|
|
|
|
|
Looking great Adrie Current builds:-C57,Zero, Lamborghini Countach, Caldercraft HMS Agamemnon,Robi,R2-D2, MFH Cobra .
|
|
|
 Rank: Super-Elite    Groups: Registered
Joined: 30/01/2013 Posts: 4,604 Points: 13,607 Location: Monmouthshire UK
|
Coming together nicely Adrie Steve
|
|
|
Rank: Pro Groups: Registered
Joined: 23/03/2014 Posts: 185 Points: 545 Location: Essex
|
Many thanks, Andy!! I do like it when I get comments about my good looks!  And many thanks, Steve! I am quite happy with my decision to start filling in the white bits before continueing with the superstructure. I feel you get a better feeling for the model. (I don't really have to say that I did it because I get bored easily, do I?)  But seriously, guys, your comments are much appreciated, as always! It is the positive comments that keep me going, well, that and the pleasure I have building the little lady!! Talking of her, she finally has her first teeth! I finished the second rangefinder, glued it on then glued the locating ring underneath the turret. 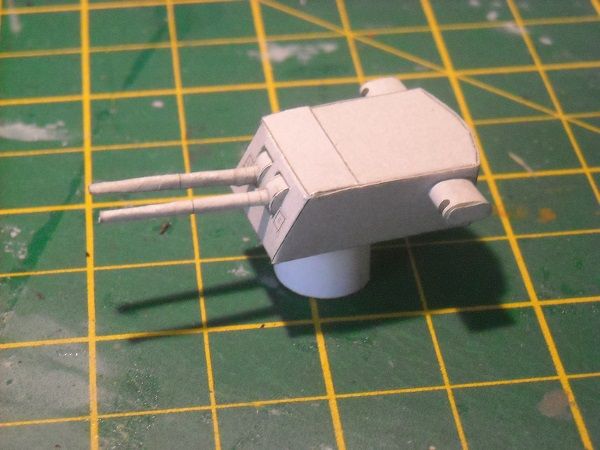 It took a bit of filing with a half round file to make sure the barbette and the hole underneath would let the ring turn inside them without having too large a gap that makes the turret wobble. But here she is, ready to defend her honour! 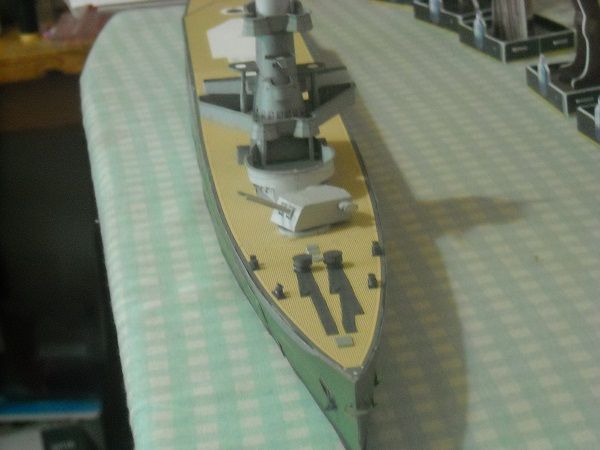 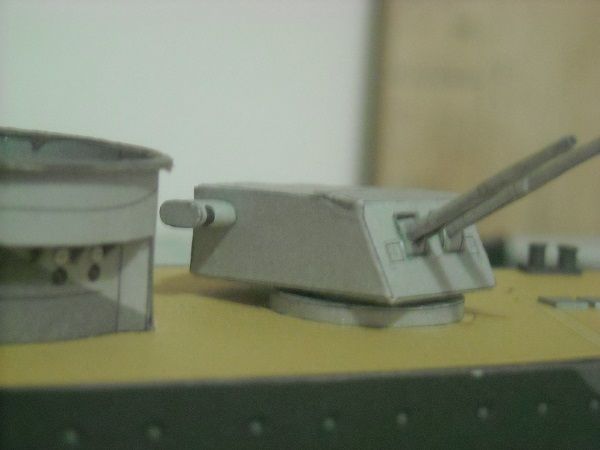 The barrels still elevate and the turret still rotates which was a very nice bonus. Next on the list was the breakwater. 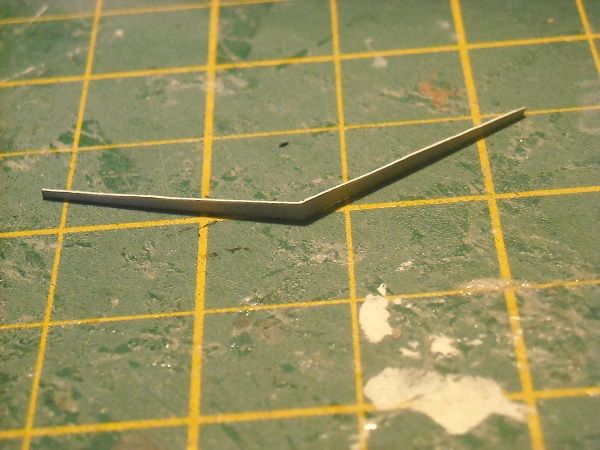 A simple cut out and bow in the middle and it was ready to be placed. But before I did so, I worked on two cable drums that were to be placed just before the breakwater. Each drum was created from a cylinder, two caps and two stands. 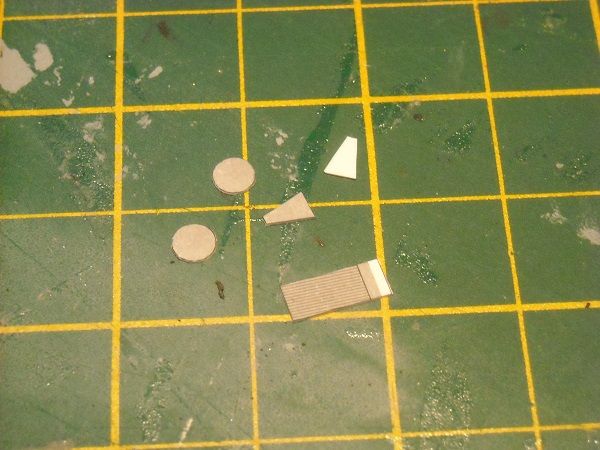 The cable roll was rolled over a toothpick 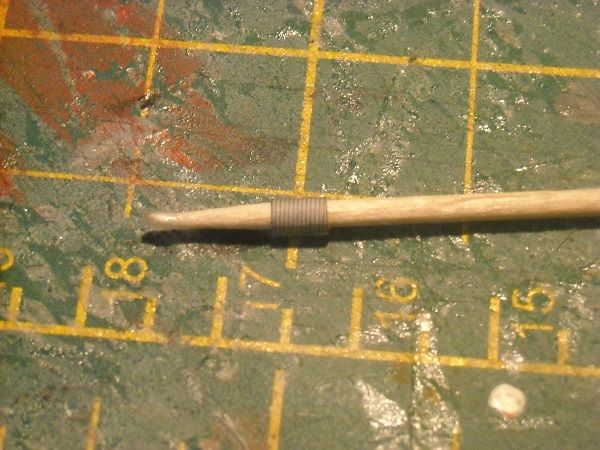 and then glued between two caps. 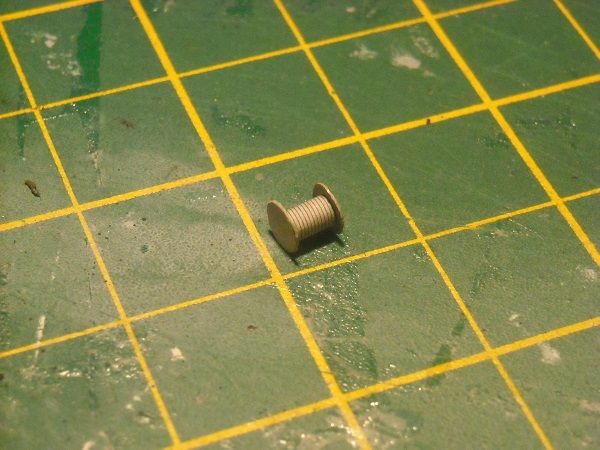 The rather naff looking stands were then added. 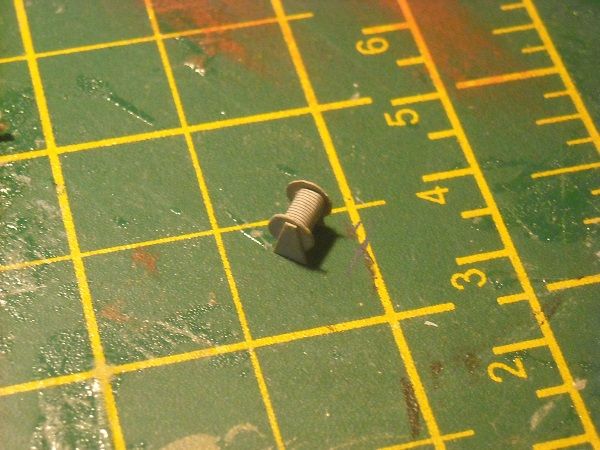 When I finished the second cable roll I glued them and the breakwater to the deck. 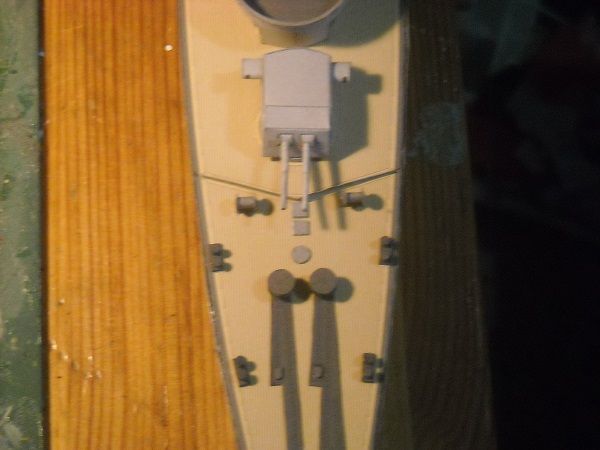 And that's it, so far. Next one to come is an extra single tooth that will occupy the B-position, then the searchlights and finally the anti-aircarft guns on the conning tower. But more about that later! Adrie. 'Where to glue or where not to glue, that is the question'
Building: Hr. Ms. de Ruyter (card), Retourschip Batavia (Revell), HMS Surprise (De Agostini)
Built (and sunk): Too many to list
|
|
|
Rank: Super-Elite   Groups: Registered, Forum Support Team, Administrators, Global Forum Support Team, Moderator, Official Builds Joined: 09/11/2012 Posts: 8,520 Points: 24,651 Location: East midlands
|
Hi Adrie, Love the detail and craftsmanship going into this build. That along with the way this diary is running, makes this a must to follow. WTG I`ve got the Hood in my stash (1:400), made from card, but it will have to wait for some while as too much underway. Keep it coming  Regards delboy271155 (Derek) COME BACK GUY FAWKES "YOUR COUNTRY NEEDS YOU"
|
|
|
|
|
More wonderful work Adrie, pleasure to see and a pleasure to read your diary.... keep it going, will be watching.... Regards Alan
|
|
|
Rank: Pro Groups: Registered
Joined: 23/03/2014 Posts: 185 Points: 545 Location: Essex
|
It's always nice to know that others appreciate your musings and toil and sweat! Many, many thanks, Derek and Alan. But I know my role in life now so without further ado... The single tooth (sorry, 5.9" gun) ... them bits ... 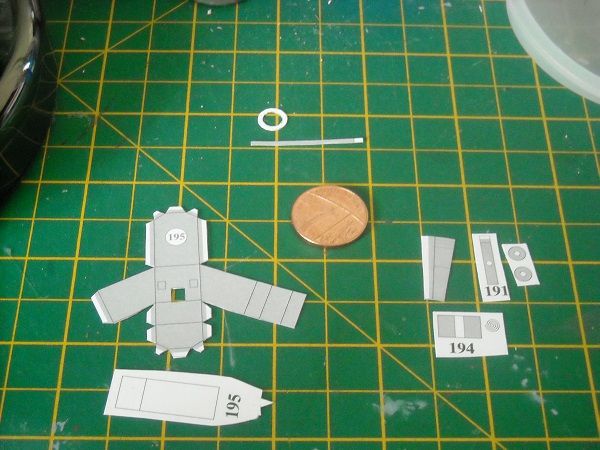 All just like before, right? Starting with the barbette, which this time will be completely covered by the turret so no colour required on top. Ahhhhhhh. Uhhhhhhhhh. {BLEEP!}  The barbette ring was rolled and glued and the barbette cover cut out and then to glue the ring on top of the cover, like before. BUT .... 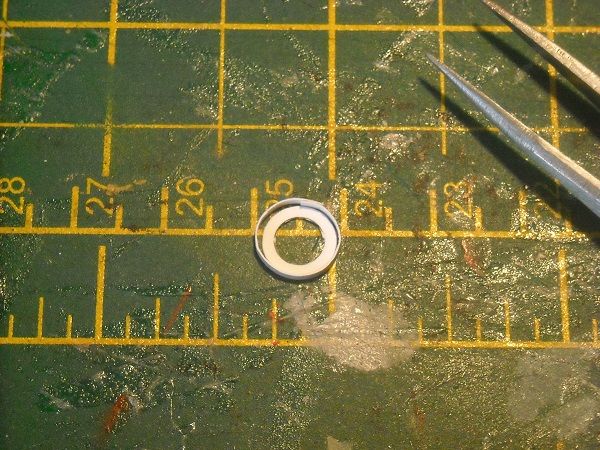 The ring is WAY too big, there is a gap between the two of at least half a millimeter. Hang on, half a millimeter? Hmmmmmm... Ok, sorted. Well, in theory anyway. The theory is to glue down the ring onto a peiece of scrap paper, then cut out a small strip of card with the right width and length and then roll and glue that around the cover after which the ring should fit snugly. Card has a thickness of a little less than a quarter of a millimeter and since it is a ring, the cover diameter will increase by 2 * 0.24 or just about 0.5 millimeter! The paper is just to make sure that the 'repair' ring will be placed at the right level so that the repair ring willbe flush with the cover. Well, that was the plan and this is how it went. 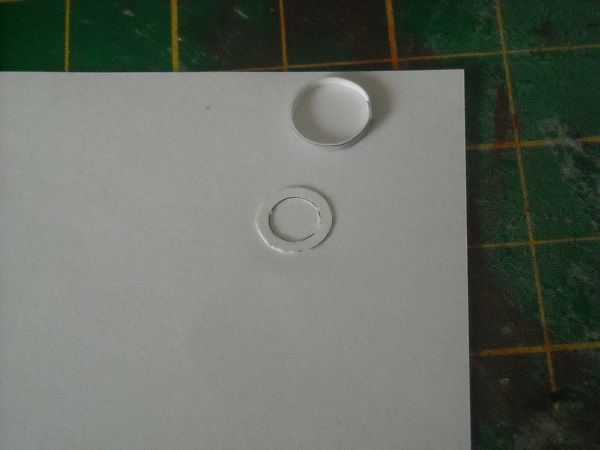 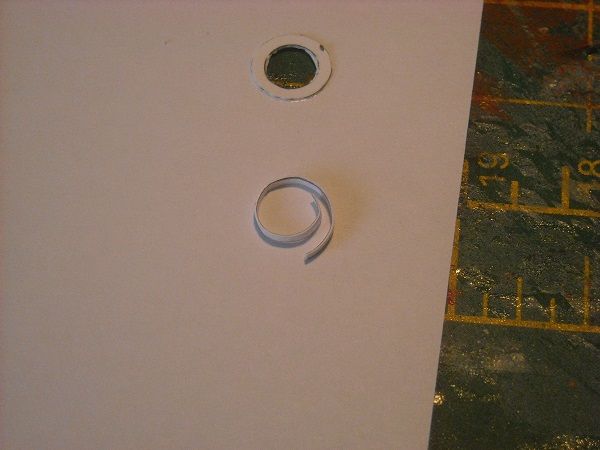 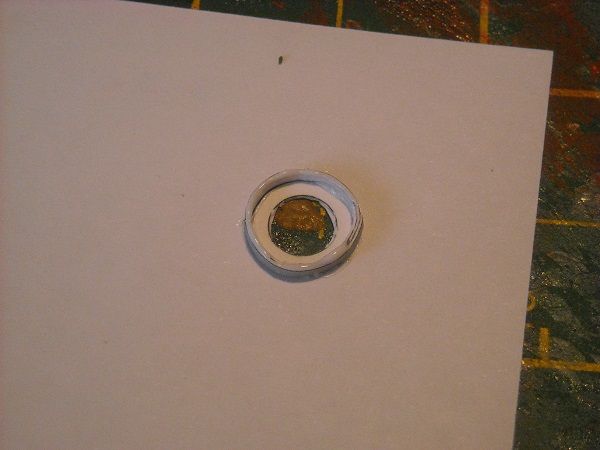 Looks horrendous from the underside but at least the repair ring and the glue was enough to fill the gap. "Mind the gap"??? Pah! Phew. But I decided to change the sequence. I'll create the connecting ring first to make sure it fits with the barbette, the hole in B-position and the underside of the turret. Just to make sure we won't get caught again, of course. One of the differences is that where the holes for the double turrets are all i the strengthened deck the hole in the B-position (and the cover of the barbette) is a single layer of card so would be a lot floppier and subsequently more difficult to file. So for starters ... [imghttp://i1156.photobucket.com/albums/p562/GluedFingers/de%20Ruyter/DSCN0553_zps92773909.jpg][/img] And as it turned out, the holes in both barebette cover and platform were slightly too small, but a little filing with a rat's tail (is it called that in English? Hmmm, it appears not. Oh well, a round file then). So a little filing with a round file (I still think rat's tail is way cooler ) and the ring went in smoothly.   I decided to use the extra work to my advantage, so I kept the ring in the barbette cover, put drops of glue on the bottom of the barbette ring then used the ring to center the barbette around the hole when glueing it in place.  When dry take away the ring .... 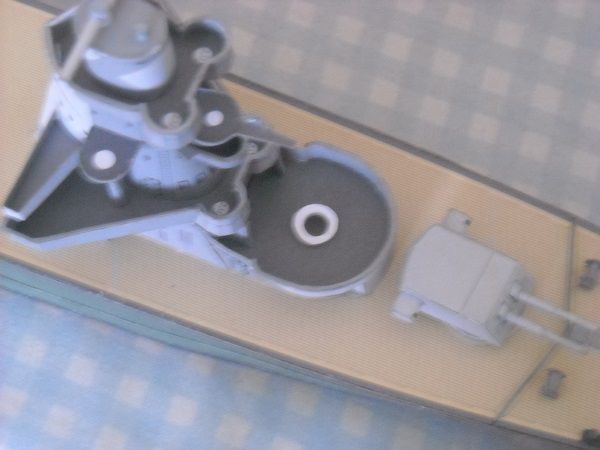 And hey presto! (Ok, the picture is lousy but you can take it from me that I have never seen a better aligned barbette! } Next was the glueing of the smaller turret ... 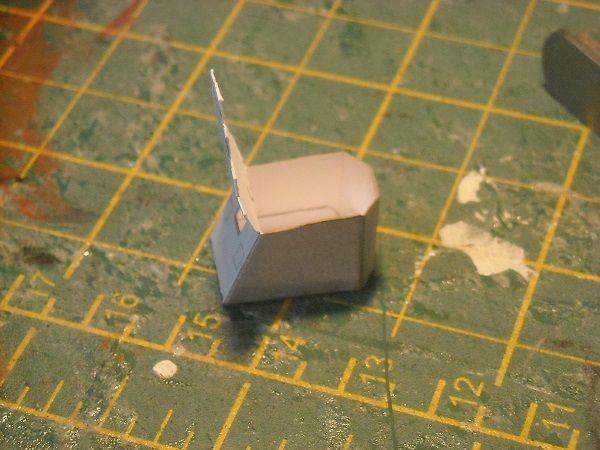 the gun axis ... 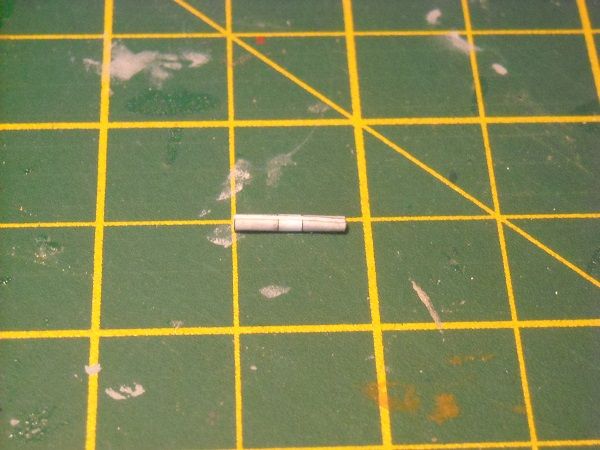 ... combine it with the gun mantlet ... 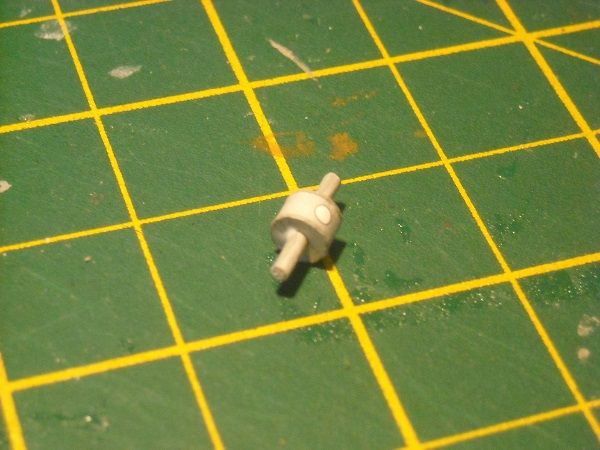 ... drill a hole in the mantlet, insert the rolled gun barrel and push it all through the window. 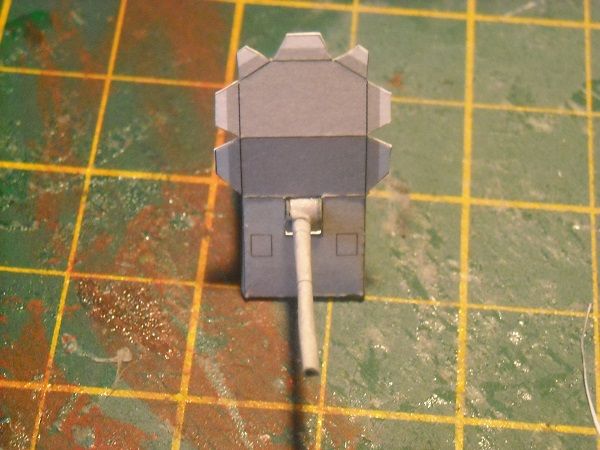 So the turret ceiling can come down and the ring glued underneath ... 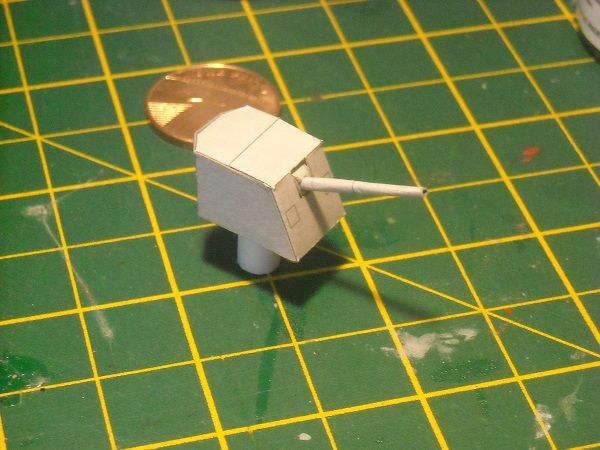 ... and down she went!  Not bad, eh? 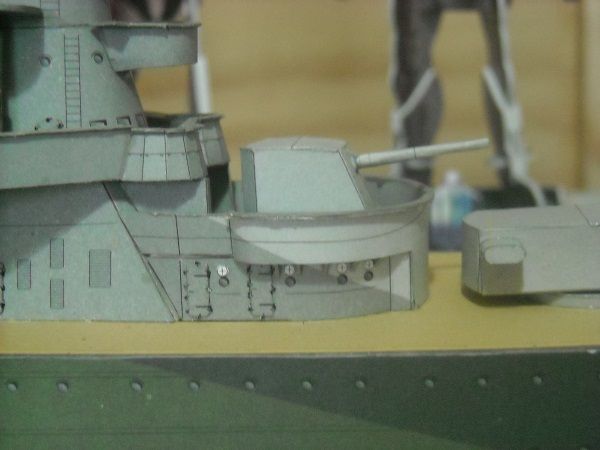 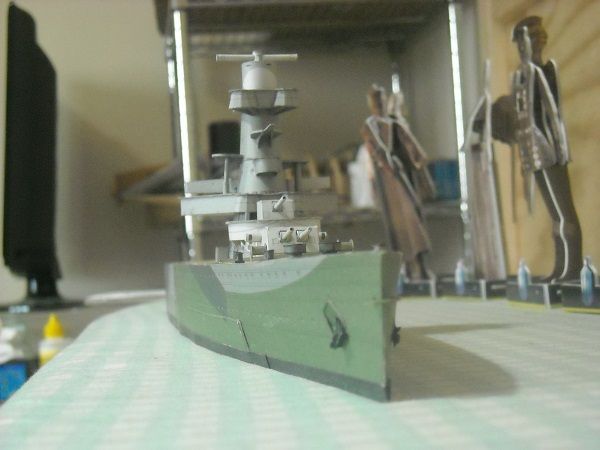 That will do for me. I'll continue with the searchlights tomorrow. I have used up my allotted building time and need to spend some time with the mizzes! So, till laterzzzzzzz. Adrie. 'Where to glue or where not to glue, that is the question'
Building: Hr. Ms. de Ruyter (card), Retourschip Batavia (Revell), HMS Surprise (De Agostini)
Built (and sunk): Too many to list
|
|
|
|
|
Hi Adrie Looking the part now Andy Current builds:-C57,Zero, Lamborghini Countach, Caldercraft HMS Agamemnon,Robi,R2-D2, MFH Cobra .
|
|
|
Rank: Pro Groups: Registered
Joined: 23/03/2014 Posts: 185 Points: 545 Location: Essex
|
She certainly is, Andy. Well from the front anyway. But again thanks for looking in! However, there are still some white spots showing, so let's get cracking again! First step: the searchlights. These are them bits ... 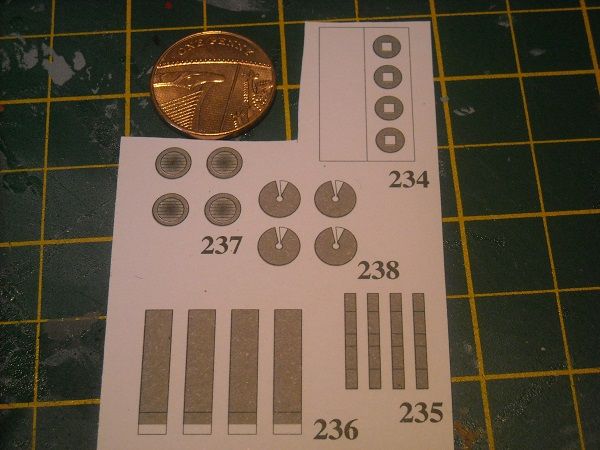 As you can see, there is enough 'stuff' to make four searchlights but so far we have only created three platforms for them. The remaining one will be placed aft of the funnel so we'll keep the remaining parts tucked away for later use. Them are the bits of one searchlight shaped and painted ... 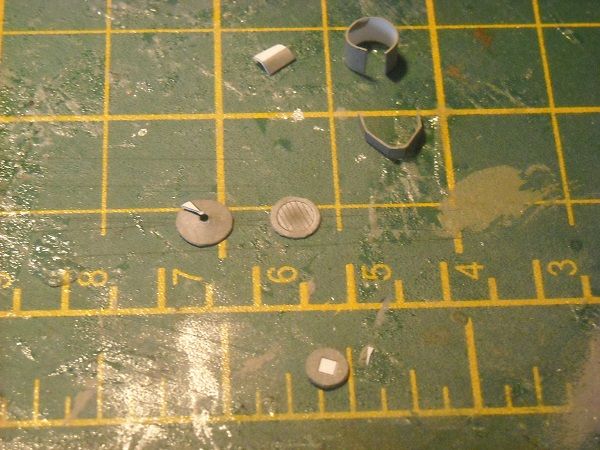 The main ring is glued together then topped with the front and back of the searchlight.  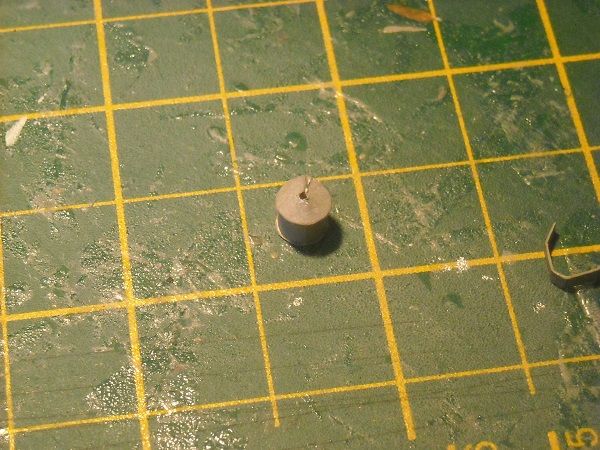 Then the bracket was glued in place ... 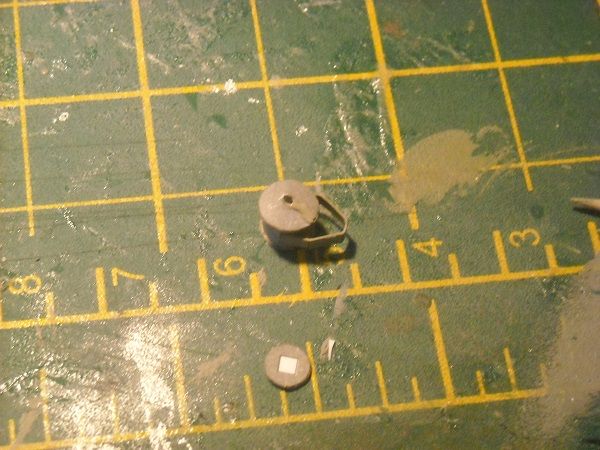 and the bracket was then glued to the stand and hey, presto, one searchlight! 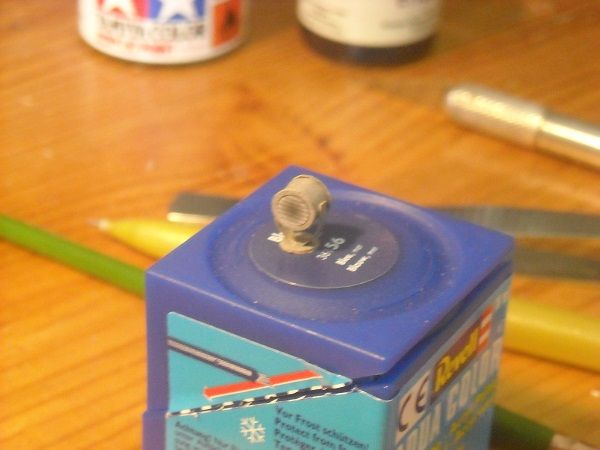 I continued this for the next two and put them aside while I was going to work on the double MG positions. For which we need the following parts: 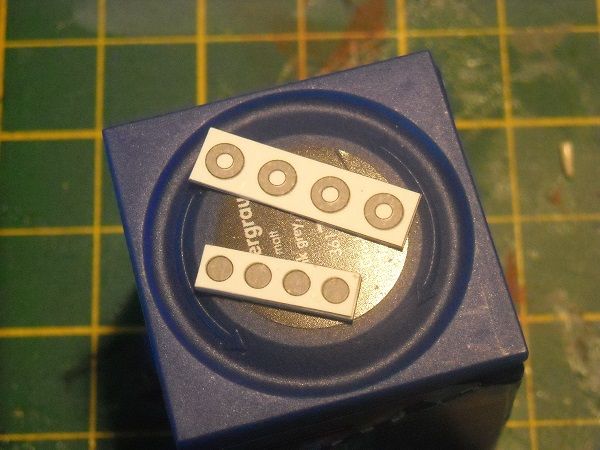 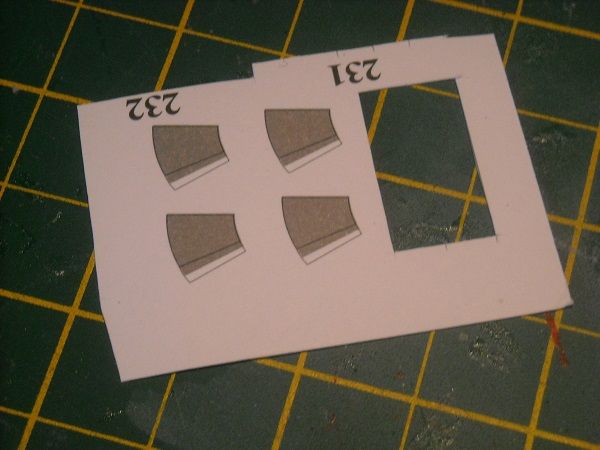 and also required are the MG barrels. These would be too small to make from paper so we are instructed to create the barrels out of rod with a diameter of 0.3 mm fior which I used brass rod. The shape for it was shown on a template as part of the instructions. 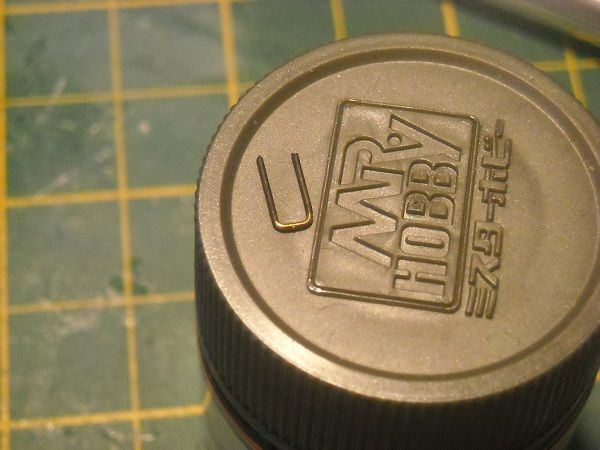 Easy to cut and bend in the right shape and with a bit of dark iron paint (Gunze Sangyo) looks almost like the real thing, right? Whatever the real thing is supposed to look like. There aren't many detailed photographs available of the De Ruyter and couldn't find one of the AA guns so I haven't got a clue of the proper view. Oh well, we can't have everything, I guess. The circles for the MG stand were doubled (for the base) and quadrupled (for the gun position). Unfortunately when you stab-cut you can just get through a double card but not a chance with four layers of card. So for the top we need to cut away the card that we don't need to keep in small sections.  But once it was cut out, the sides were painted and the guns were pushed around the top. 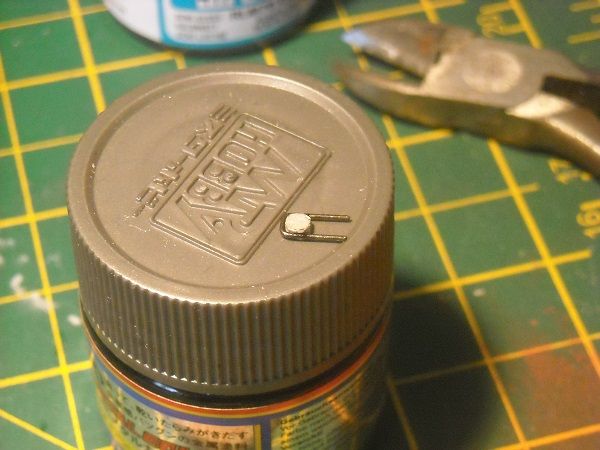 The cone shaped stand was then glued together and glued on top of the base after which the gun-top was glued in place. 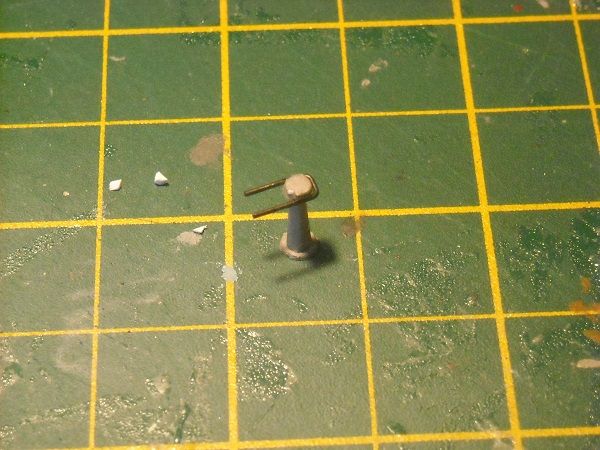 Hmmmm, not sure about that one. But like I said before, we can't have everything. But I decided that I had enough to put on the model, so 'ere we go!  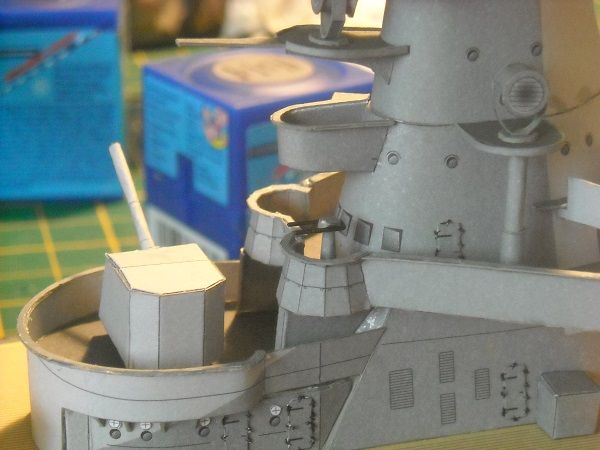 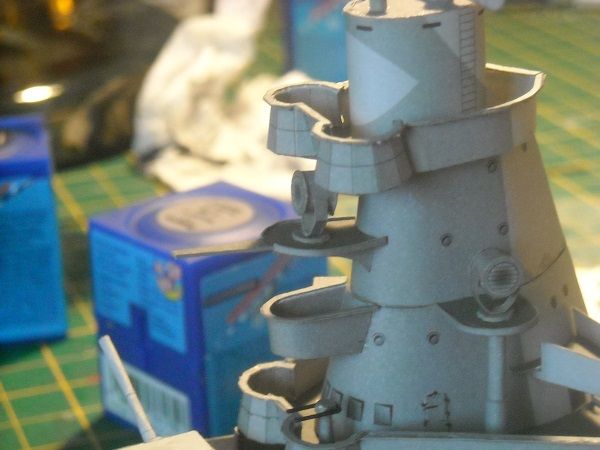 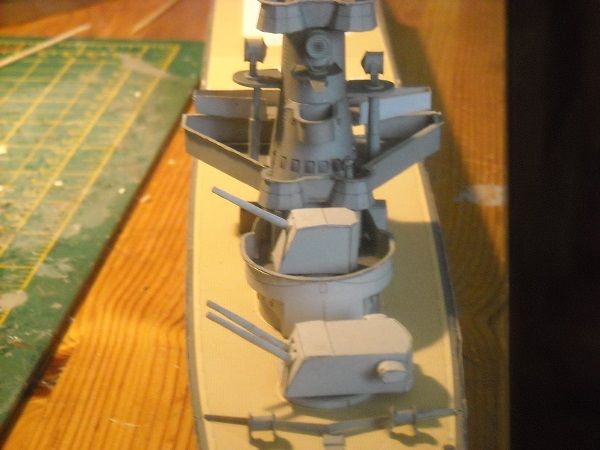 Now all I have to do is create three more gun .... uhhhh ... thingamajigs. Wish me luck. Adrie. 'Where to glue or where not to glue, that is the question'
Building: Hr. Ms. de Ruyter (card), Retourschip Batavia (Revell), HMS Surprise (De Agostini)
Built (and sunk): Too many to list
|
|
|
|
|
More lovely work Adrie, looking great.... Regards Alan
|
|
|
Rank: Pro Groups: Registered
Joined: 23/03/2014 Posts: 185 Points: 545 Location: Essex
|
Cheers for looking in, Alan, and for your kind words. She IS a bit of a looker, isn't she? If I wasn't married, and all that stuff. But I'm glad that I was able to finish another section of her .... uhhhhh .... micro-'bits'.  I finished off the machine gun positions to remove the last of the white bits in the front. 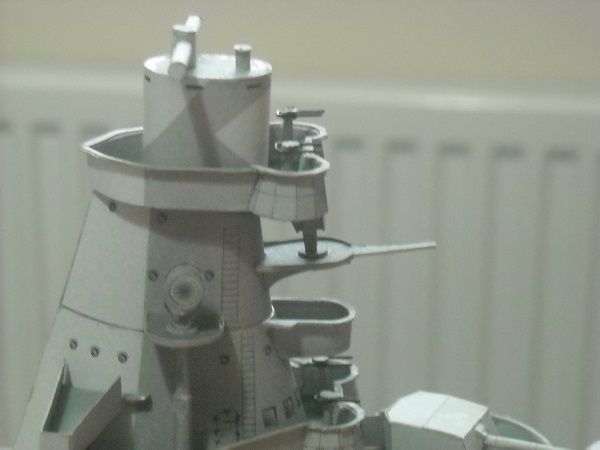 I'm still not sure about them, to be honest. But they do fill up the vacant spots. . But I think the decision to invest some time to do a few micro-bits out of sequence paid off. It enhanced the model but also allowed me to break up the tedium of doing nothing but micro-bits at the end of the build. So I'm 'fully recharged' to turn back to the superstructures now. And it's time to start on the stokehold deckhouse. Which is built up out of a handfull of parts but which cover quite a bit of area.  This assembly actually consists of two deckhouse, covered by one deck. Because of previous experiences with incorrect sizes, I decided to build the deckhouses and the deck separately and try the fit out before glueing the separate parts onto the deck. I started with the aft deckhouse. Them bits ... 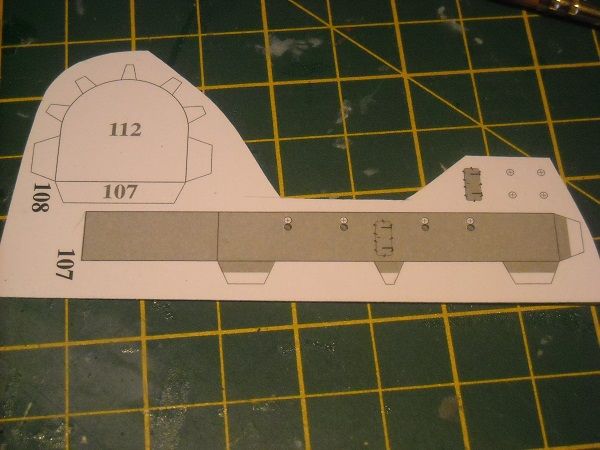 Just a wall which has to be rounded and a ceiling. PLUS 4 portholes and a door. Yay!!!!!  Uhhhh? Did I just say that? There's a door to be done and I said: "Yay"? Hmmm, I guess this changing the sequence around must have worked better than I originally thought if I'm actually looking forward to doing one of them!!! But ... never look a gifted horse in the mouth! So onwards!!!! The wall was quickly formed and the long tab of the ceiling glued on. The other tabs were then bent inwards so I could 'close the lid and put drops of glue on the remaining tabs and push them in place from the underside. 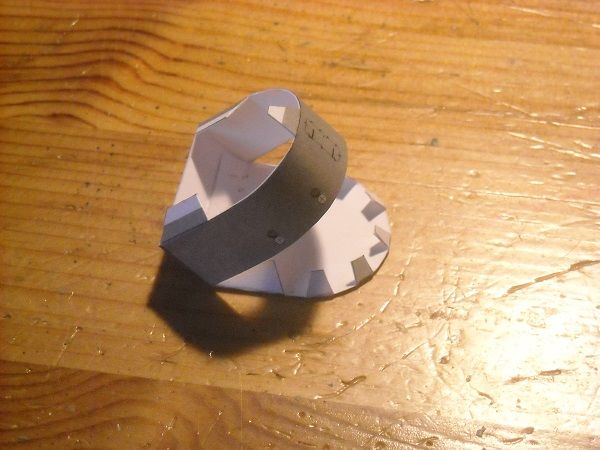 This way you don't run the risk of the glue starting to dry on the other tabs when you are working on the first ones. Then I stabbed the door and portholes and glued those in place. And there is that assembly placed (but not glued) on its position on the deck. 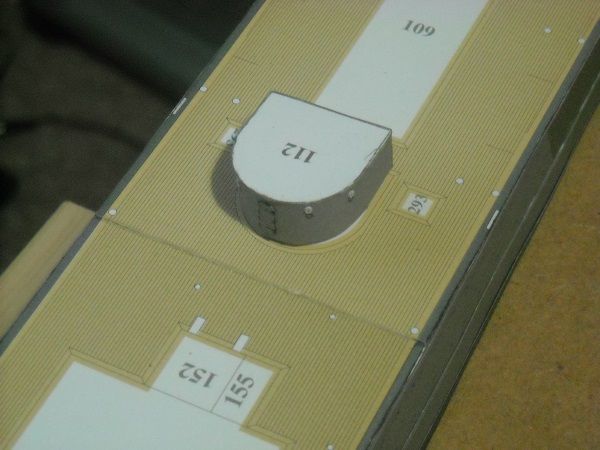 And the stokehold is next! But more about that tomorrow! Adrie. 'Where to glue or where not to glue, that is the question'
Building: Hr. Ms. de Ruyter (card), Retourschip Batavia (Revell), HMS Surprise (De Agostini)
Built (and sunk): Too many to list
|
|
|
|
Guest (5)
|
 US
US

