|
|
 Rank: Super-Elite        Groups: Registered, Forum Support Team, Administrators, Global Forum Support Team, Moderator, Official Builds Joined: 09/11/2012 Posts: 8,520 Points: 24,651 Location: East midlands
|
Hi Adrie,  This scale AND in card, absolutely BRILL  WTG Regards delboy271155 (Derek) COME BACK GUY FAWKES "YOUR COUNTRY NEEDS YOU"
|
|
|
 Rank: Vice-Master   Groups: Registered
Joined: 21/04/2012 Posts: 747 Points: 2,233 Location: Tokyo, Japan
|
Hi Adrie! What a excellent work you have done! I read your diary and have recognized that paper has much possibility as a material of models. Also in my DiAGOSTINI Akagi, the trusses under the flight deck are made of papers. Best Regards, Yutaro DeAGOSTINI 1/250 the YAMATO, 1/250 the AKAGI.
Hasegawa Co. 1/350 Battle ship NGATO, 1/350 Aircraft carrier Akagi, Battle ship MIKASA.
Water line series 1/700 Battle ship YAMATO, HIEI, YAMASHIRO, Aircraft carrier HIRYU,TAIHO, Heavy Cruiser Myoukou, Ashigara, Nachi, Haguro & others.
|
|
|
 Rank: Pro  Groups: Registered
Joined: 23/03/2014 Posts: 185 Points: 545 Location: Essex
|
Hi all! @Derek - thank you for your praise. In fairness, 1:250 is a nice big scale, allowing for a lot of details to be constructed. Mind you, the amount of detail is a lot less in 1:400 but it will remain fiddely. Oh, and I have to warn you, your praise is almost making me too big for my boots! And you definitely do not want THAT! I have very smelly feet!!!!!  @Yutaro-sama - That is indeed high praise for which I thank you sincerely.  Paper is indeed quite a good material for modelling because it is flexible and stiff at the same time and easy to cut. But the biggest advantage from my point of view is that it comes already painted!!! I have never been a master in painting and my weathering ...... hmmm, let's not talk about that. I must admit I have had a few looks at the Akagi. In fact it might be the next wooden model that I will tackle (that is, if it is still sold in two and a half year!! ) But the main point for me is that this model is perfect for me in that it gives me a LOT of pleasure building it. And that is for me the main reason for modelling. So let's have some more fun, shall we?  This is the stokehold deckhouse 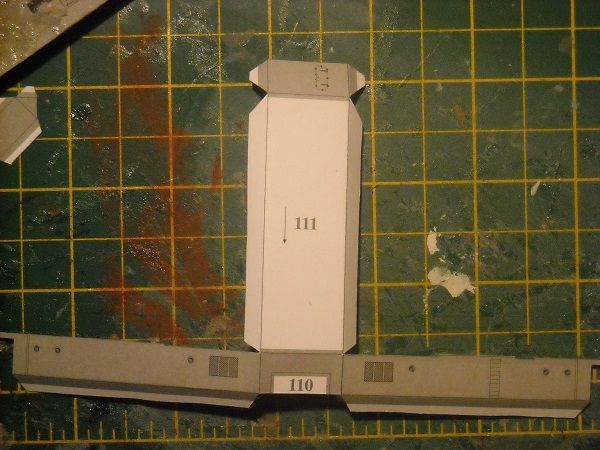 Simple. square, easy bending, what could go wrong, eh? (People who have followed me this far, will probably already know the answer, when I put a loaded question like that. ) As it turns out, the deck has cutouts where the platform will fit in. You can see the cutout for the tab on the right side in the above photo and the tab in the following photo. 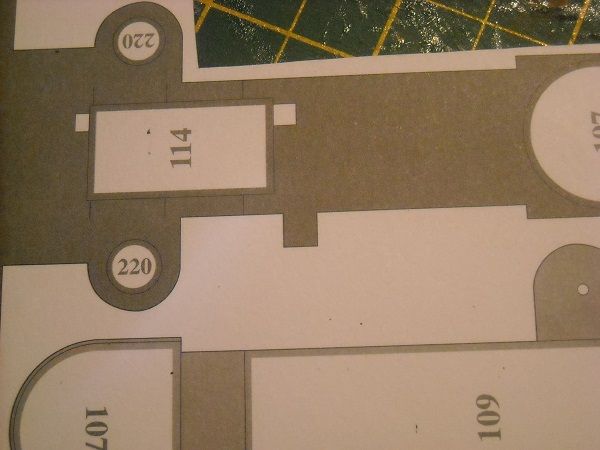 But when you put one on top of the other ... 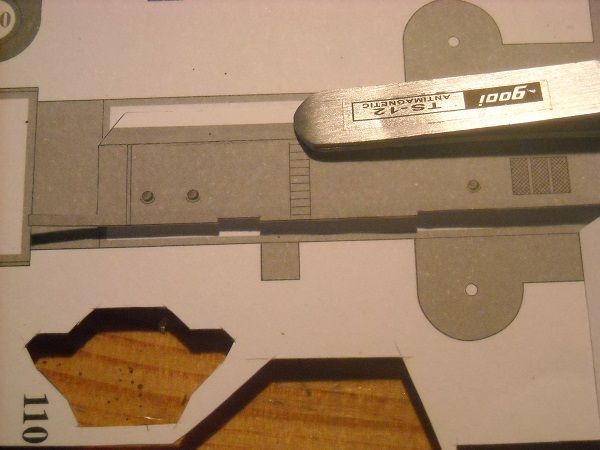 The cutout is in the wrong place or the tab is on the wrong place. I checked the assembly drawing and the tab is the top of the stairs to the main deck and the position is not that critical. And since it is easier to cut off a tab and glue it back in the right place than to cut out a new slot and fill the old slot with the material you cut out, the choice was quite simple. So I glued the two platform parts together first. 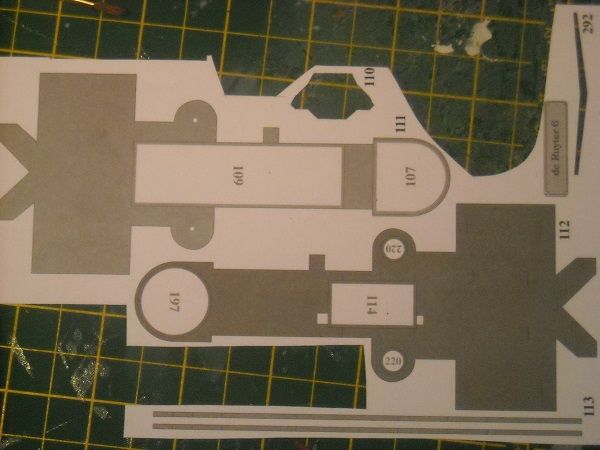 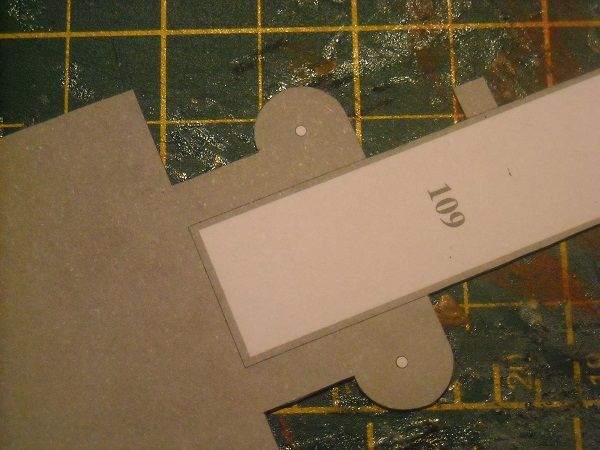 And then OFF WITH HIS TAB!!!! 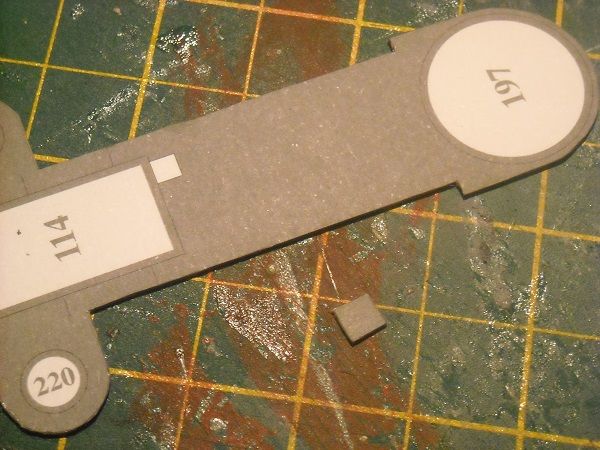 I will re-attach it before placing the deckhouse onto the deck. I then went back to the deckhouse, some unfinished business there. 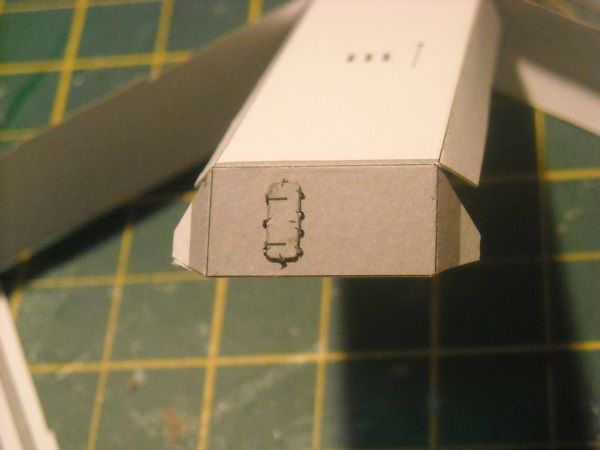 I DO  the look of them!!! But when I got this far, I suddenly started thinking. We have a rim ... 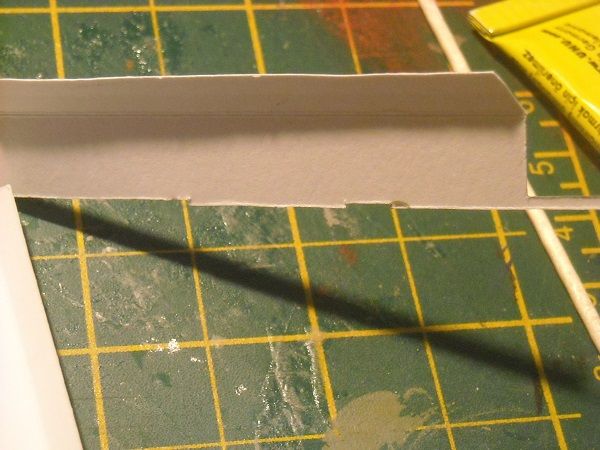 ... and we have an edge. 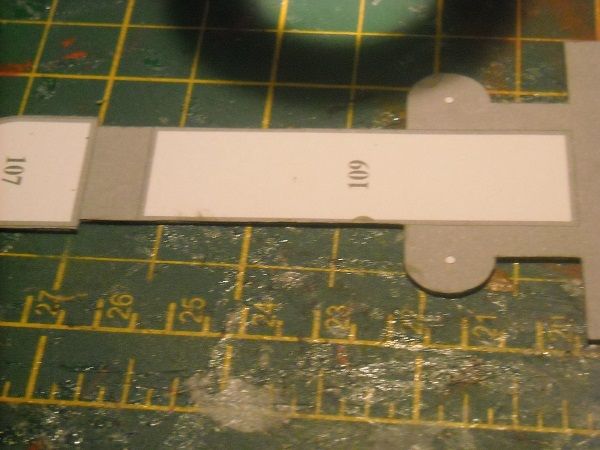 So why not use glue the deckhouse to the platform before glueing it to the deck? With the platform on the bottow I should be able to get a good fit around the edge. So i put a bit of glue on the edge ... 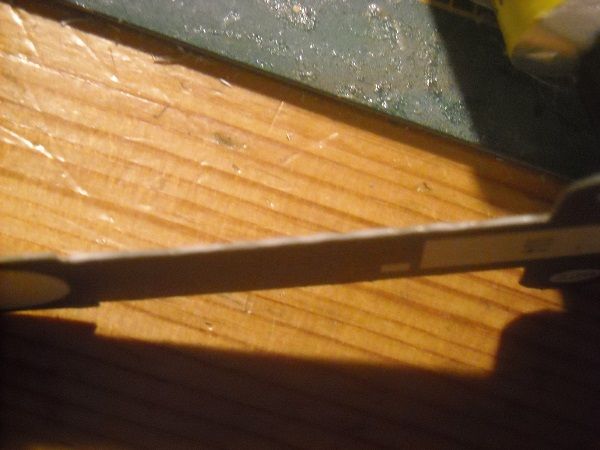 ... put the platform down and push the top edge of the deckhouse against it. Then a little extra glue in the inside corner for extra strength ... 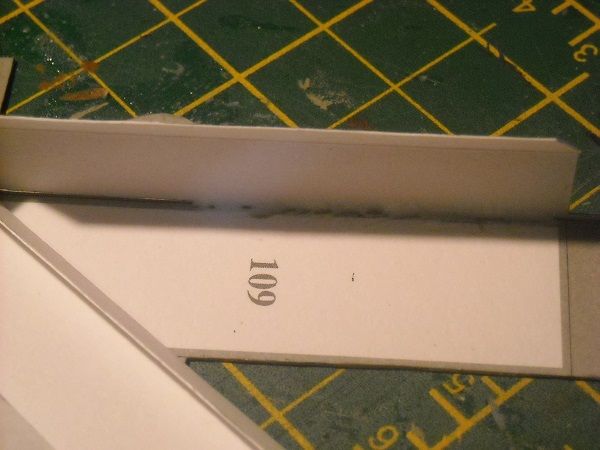 ''' a relatively large amount of glue on the top of the deckhouse and the connecting tabs then with a little glue on the opposite edge and hey presto:  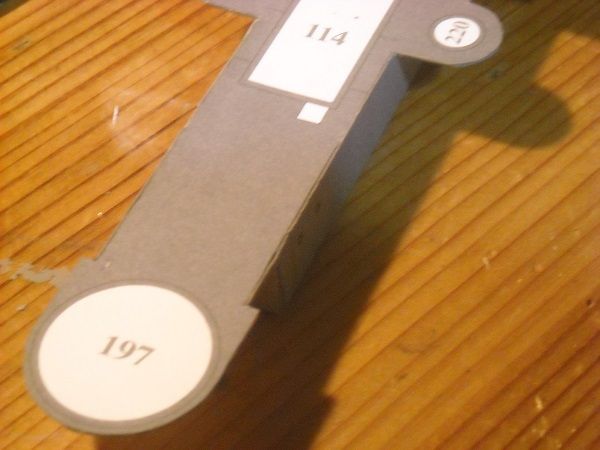 Not bad looking, if I say so myself. A little weight to keep everything flat while drying ...  and tomorrow we will finish off the deckhouses. Until laterzzzzzzz! Adrie. 'Where to glue or where not to glue, that is the question'
Building: Hr. Ms. de Ruyter (card), Retourschip Batavia (Revell), HMS Surprise (De Agostini)
Built (and sunk): Too many to list
|
|
|
Rank: Pro Groups: Registered
Joined: 23/03/2014 Posts: 185 Points: 545 Location: Essex
|
Good evening, all! It's been a hectic few days but with the weekend in sight I should have a bit more time to build and report. So without further ado ...... The last time I stopped with a picture of the stokehold deckhouse glued under its platform which also doubles as boatdeck under weight, because I used quite a bit of PVA glue to glue them together and the water in PVA and card really don't go well together. And when I removed the jar it showed because the loose flap of the platform had warped. 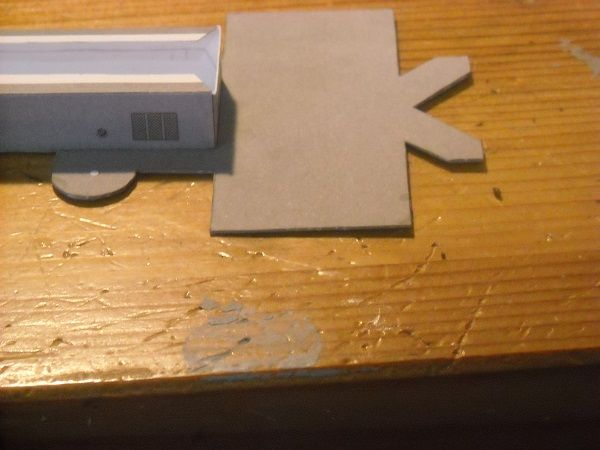 Nothing major, mind you, but enough to cause a problem when placing the assembly onto the deck. The flap should form a connection with the rear of the conning tower where a door was showing. If left unchecked, the warp would mean that any crew that walked through that door would crash on the platform below rather than step onto it! Ok, ok, I know there aren't going to be any crew that would even consider stepping through the door, notwithstanding the fact that the door isn't real, but it's the principle that counts! Luckily the fit with the conning tower was good so I would be able to glue the flap against the conning tower and all I needed was a temporary fixture that would keep the flap straight while the glue was setting. I cut off a strip of the 0.5 mm cardboard after marking the height of the deckhouse on it and with three triangles glued in position to keep it from falling over, I was ready. 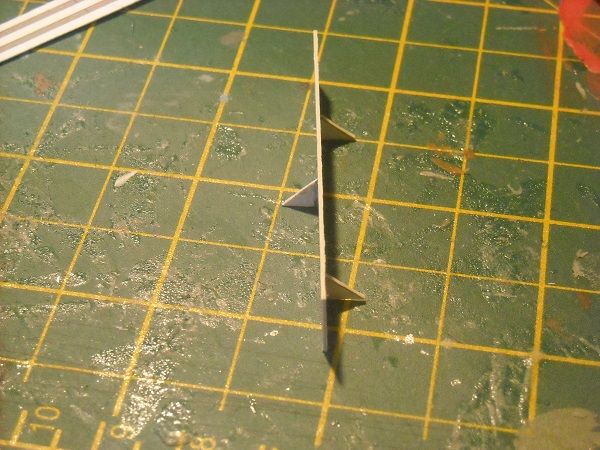 The rest in place ... 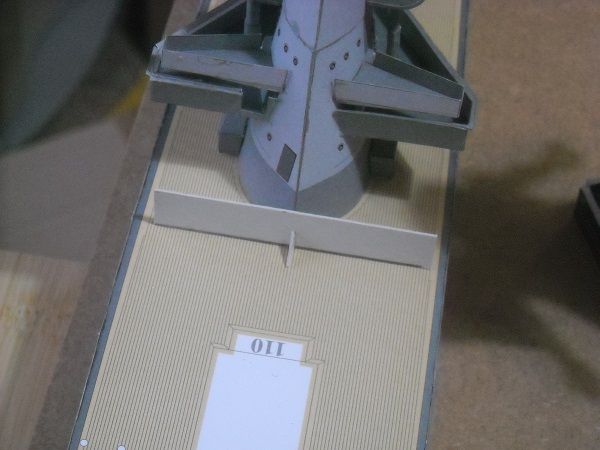 ... and we are ready to glue down the deckhouses. I did the aft deckhouse first to make sure the circular end would end up circular. To do this I applied glue to the tabs then placed that part on the deck and pushed the circular area with my finger until it fitted inside the halfcircle drawn on the deck.  Not bad, and the door and portholes are really effective! But we already knew that, didn't we? So upwards and onwards! The main construction was finally ready to be glued. I used the aft deckhouse as anchorpoint and dropped the assembly down with a little bead of glue on the connecting edge to the conning tower. A little push to make sure all was flat and I class it a successful operation! 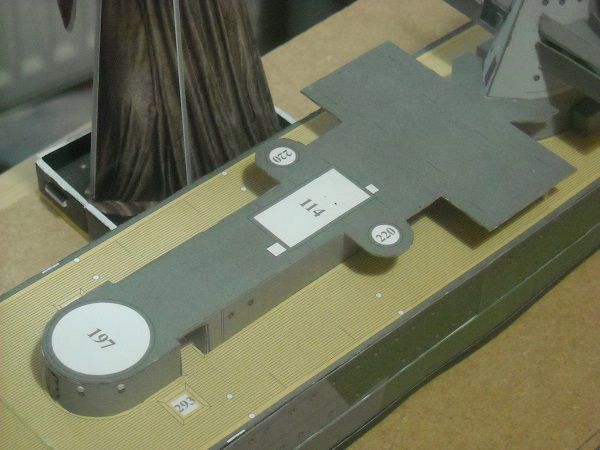 I left the rest in place while the glue was drying ... 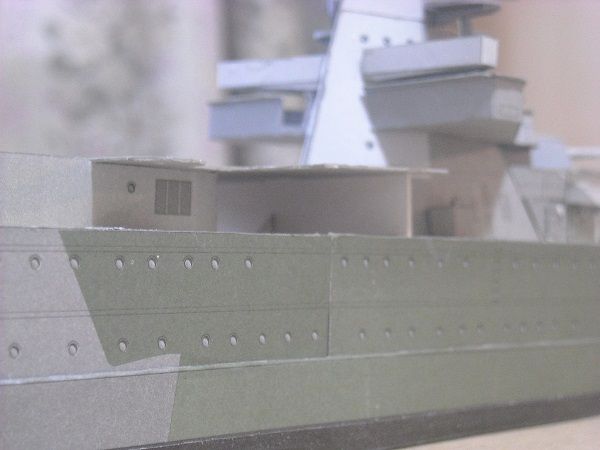 ... and started on the last parts, the deck rims. 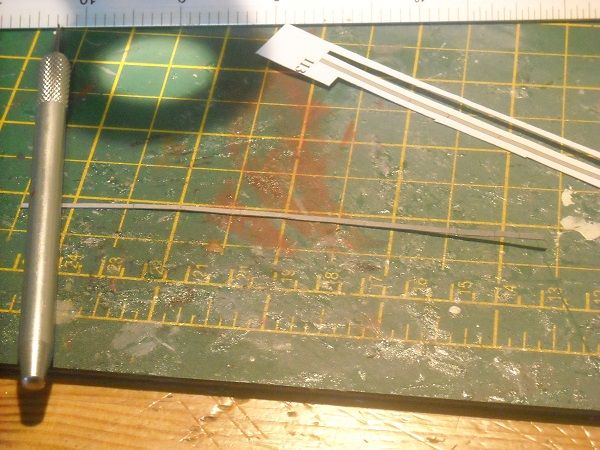 These are basically grey strips of card to be glued to the platform to act as a ...... trip hazard? It's nowhere high enought to stop a sailor from falling over the edge and in real size would probably just reach shin-height. Not very safe, I would think. Not to mention painfull!  But after forming and bending these were added to the platform edges. 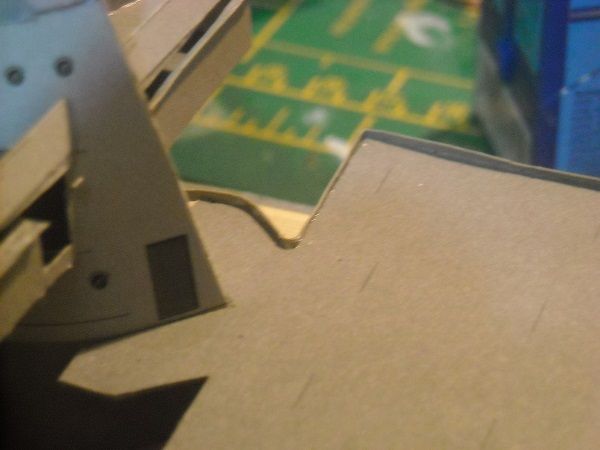 And of course the cut off tab had to be replaced. 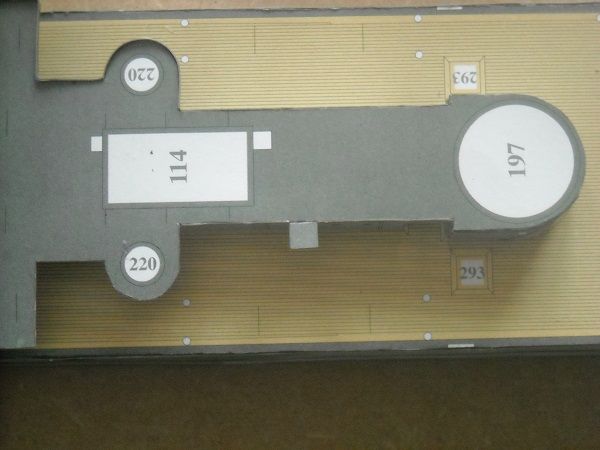 Once it is fully dry I'll add some glue drops and a bit of paint to get rid of the gap. But in the meantime we continue with the superstructure for the platform, which is the base for the funnel. These are them bits ... 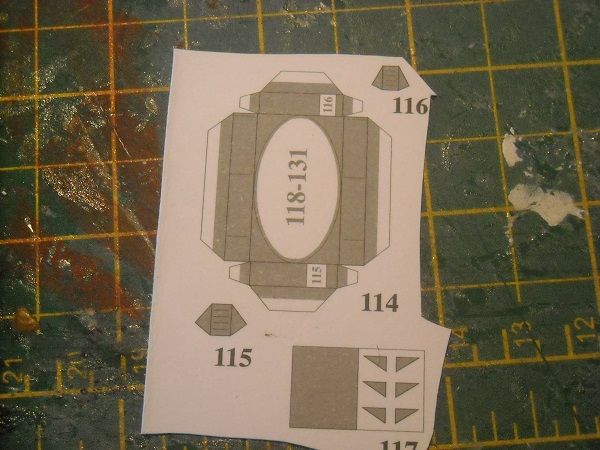 A rectangular base, two stairs and brackets, all relatively simple to do. This is the constructed base ...  And the base placed on the platform with the brackets attached. 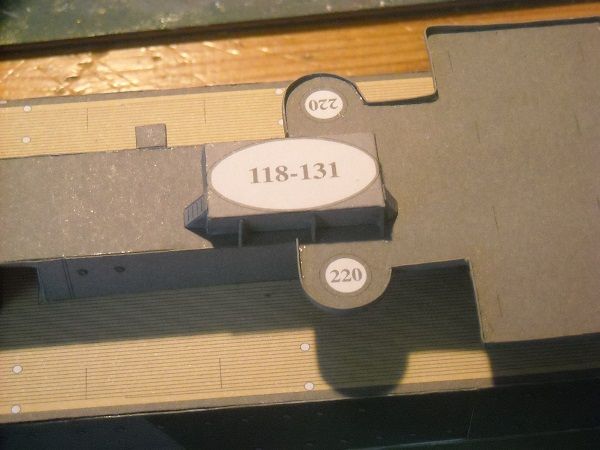 And we are ready for the next layer, the funnel. This will be build up in stages. The bottom stage consists of the following pieces: 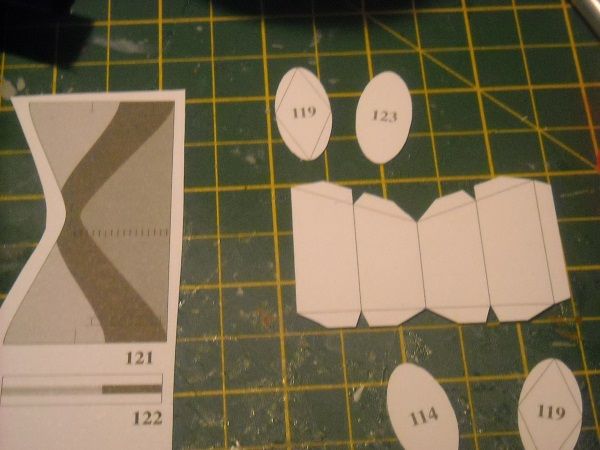 The framework works the same as for the conning tower, the formers are constructed first. 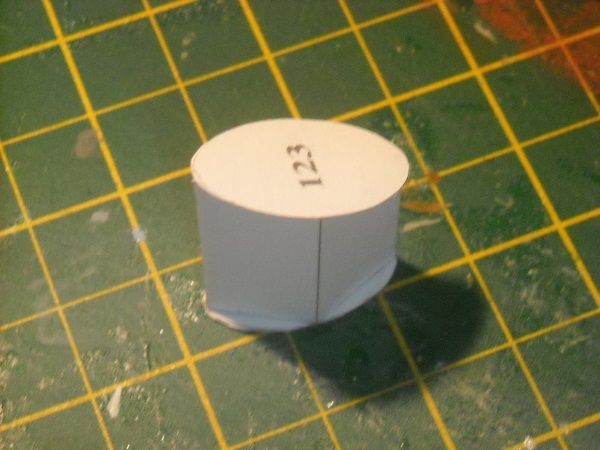 Once this is fully dry, I will add the skin around it as with the conning tower but this time I will glue the connecting strip against the former and use that to position the skin. But that will have to be tomorrow, I'm afraid. Thanks for watching in and until laterzzzzzzzzzzzzz! Adrie. 'Where to glue or where not to glue, that is the question'
Building: Hr. Ms. de Ruyter (card), Retourschip Batavia (Revell), HMS Surprise (De Agostini)
Built (and sunk): Too many to list
|
|
|
|
|
She's really coming along, impressive work Adrie.... well done.... Regards Alan
|
|
|
Rank: Pro Groups: Registered
Joined: 23/03/2014 Posts: 185 Points: 545 Location: Essex
|
She is indeed, Alan! And thank you for the praise!  But with every day more white areas are disappearing. Mind you, there will be plenty of 'micro'-bits still to come to slow it all down but so far she's been growing well. Let's hope we can keep that going!  While I was working of the Surprise I used the in between times when there was something that required drying to keep working on the de Ruyter but didn't have the time to show it here. So we have a bit to catch up upon. I glued the connecting strip to the funnel framework ... 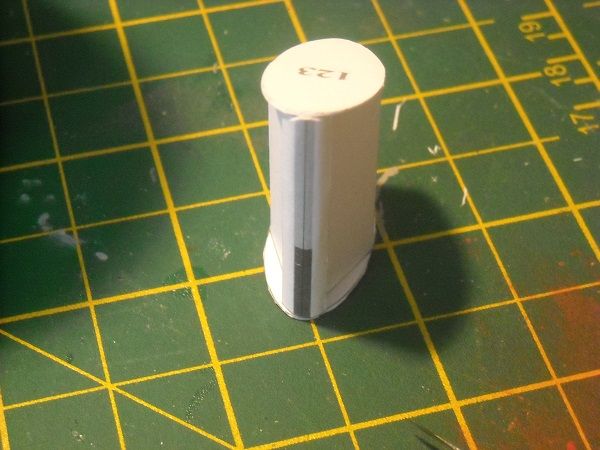 ,,, and let that dry thoroughly. In between I cut out the bits for the second funnel layer ... 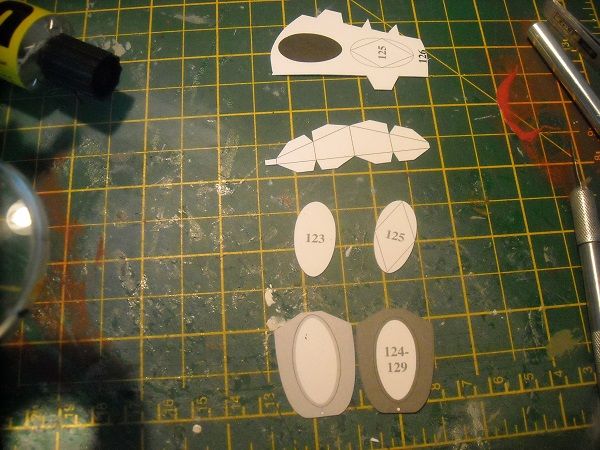 ...then continued with glueing the skin against the connecting strip. 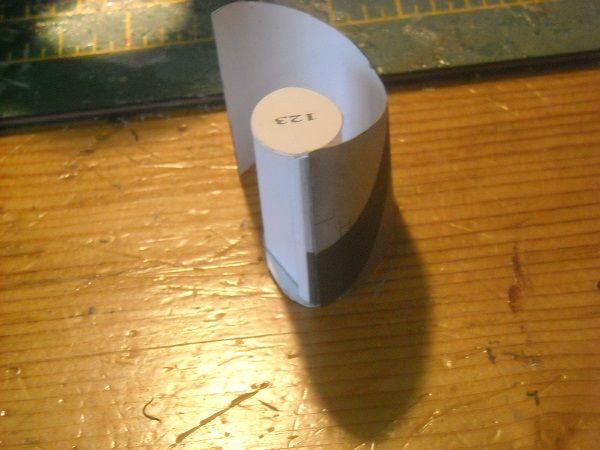 Then after that dried, I glued the end of the skin to the connecting strip as well, which showed a couple of problems. The skin was too big, both in width ... 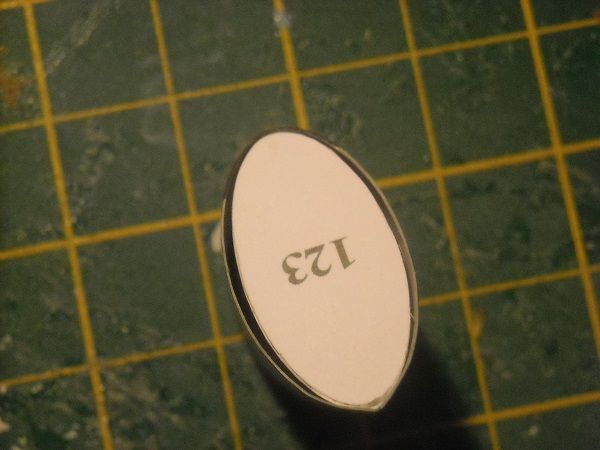 ... as well as in height. 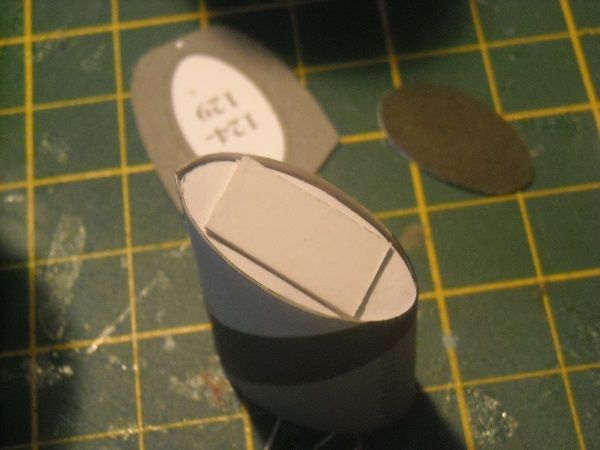 I needed to add a strip of 0.5 mm card to fill up the height difference. The width wasn't that big a problem because the skin fell almost completely within the ovals which were drawn on the base and the platform. So I glued the platform to the funnel as if nothing was wrong.  Nothing really that would suggest it didn't really fit. So onwards, then! The second funnel part was constructed in the same way as the first part. 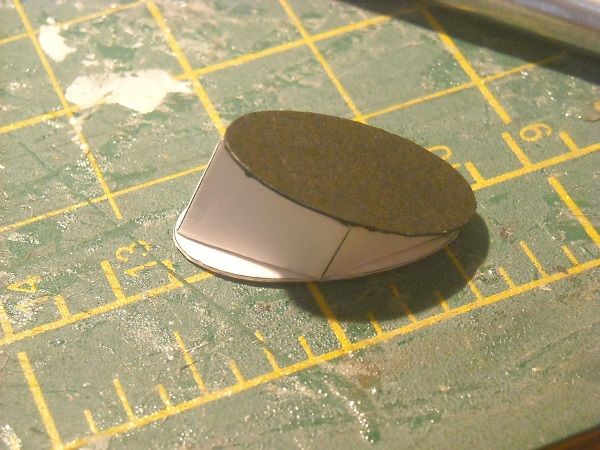 I glued the skin around it, which fitted well, then added the funnel cap. 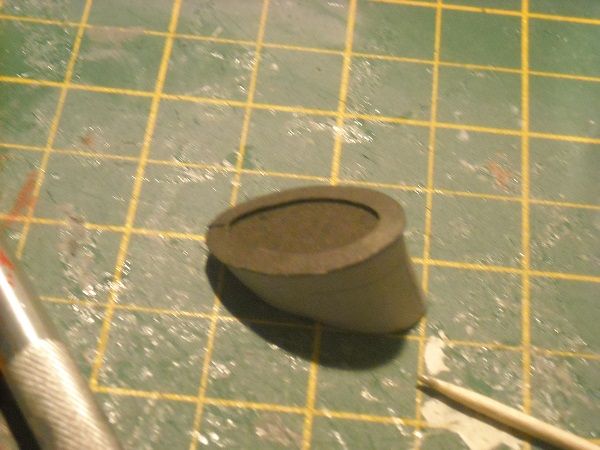 That was then glued onto the first funnel part/platform. 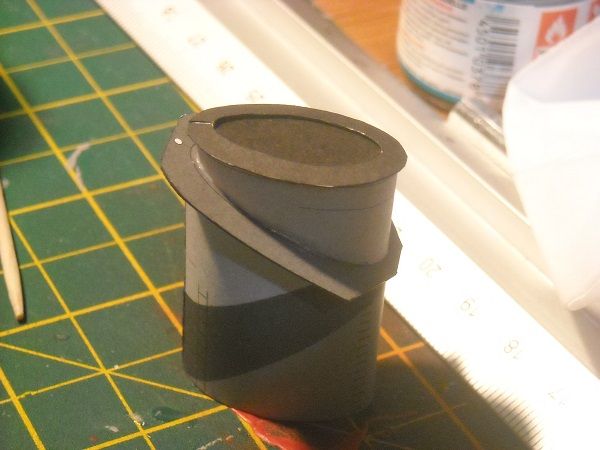 Then the rticky part came, a wall that went around part of the platform which acts as a smoke discharger, apparently. Whatever it didm it was a tricky fit with nothing but the edges of the platform to glue it against. In the end it went on ok ... 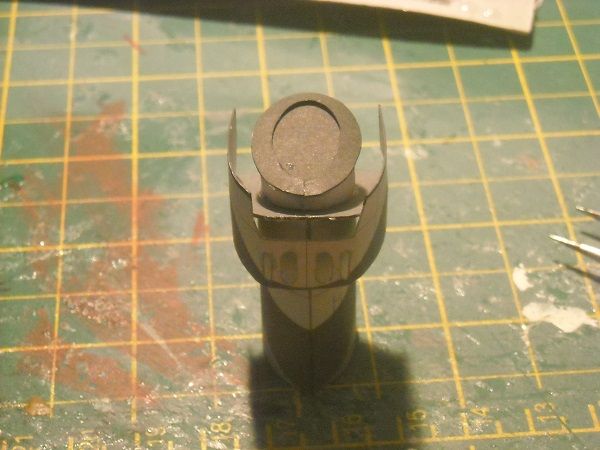 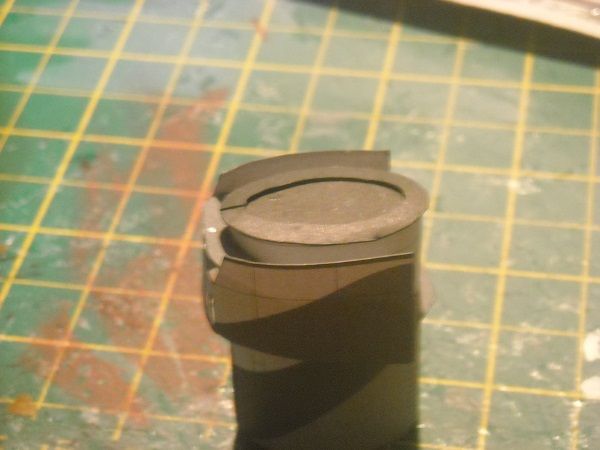 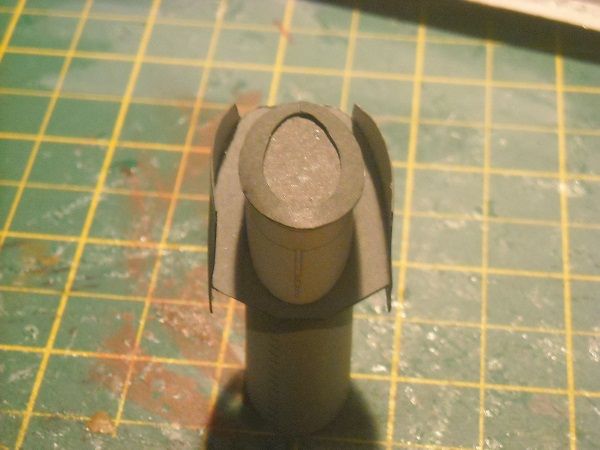 ... but it will require some touching up. But Im going to do that after it has all dried thoroughly again! So until tomorrow, then! Adrie. 'Where to glue or where not to glue, that is the question'
Building: Hr. Ms. de Ruyter (card), Retourschip Batavia (Revell), HMS Surprise (De Agostini)
Built (and sunk): Too many to list
|
|
|
Rank: Pro Groups: Registered
Joined: 23/03/2014 Posts: 185 Points: 545 Location: Essex
|
Hi all!!! Having little reference material available of the ship, I have to trust the instructions to be truthfull. I wondered about the shape of the funnel and the smoke extractor. But this is what the instructions show me ... 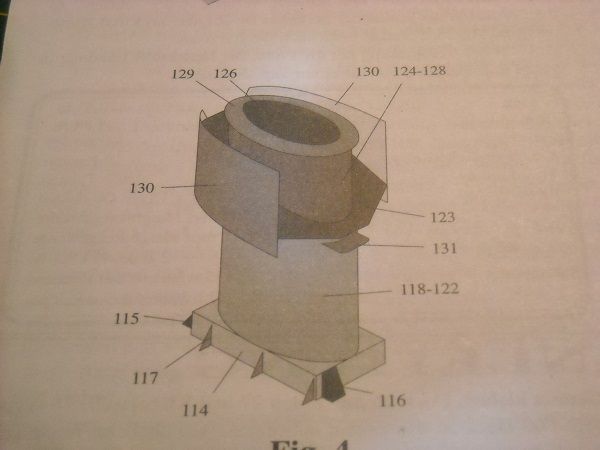 ... and my structure looks quite similar. And after a night's rest I found out that the back section (with the extractor holes) looked quite good and it needed just a bit of extra bending to flatten the holed section. Having done that I was supposed to glue the funnel to the base but I decided to keep it separate until I finished with the three platforms that needed to be added. The first platform was a simple double platform which was glued together and stuck to the front of the funnel. 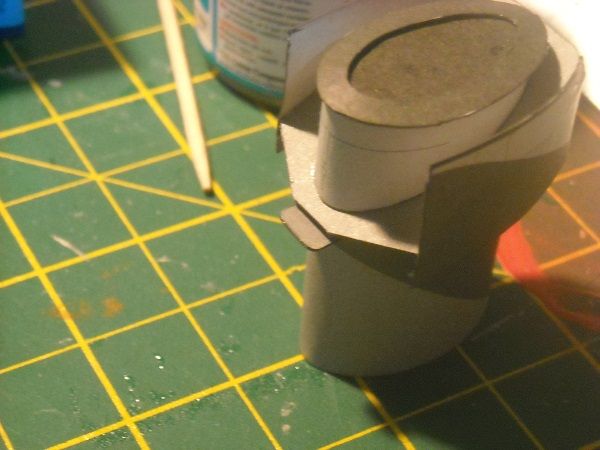 I then started on the searchlight platform. Them bits. 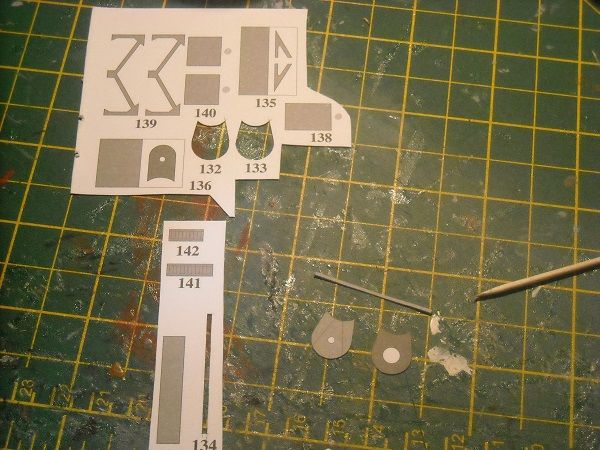 Like before two layers of platform with a ankle buster/strip to go around it. 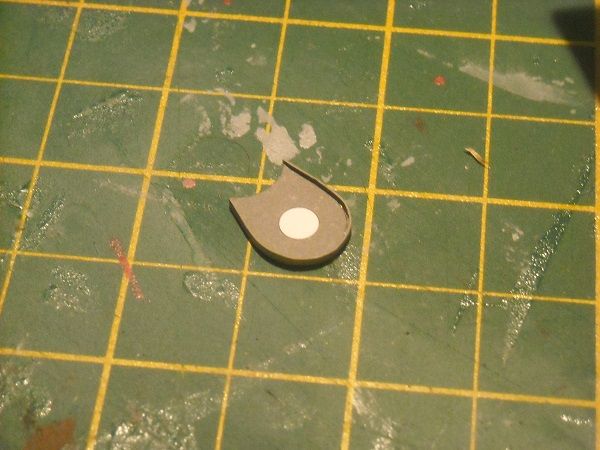 I'm getting good at this. What I'm not getting good at is remembering to take snaps of everything. In this case I forgot to take photo's of the supports for the searchlight platform. Sorry! The next platform was the one that goes underneath the searchlight platform connected to the another with a pillar. Those parts are shown below. 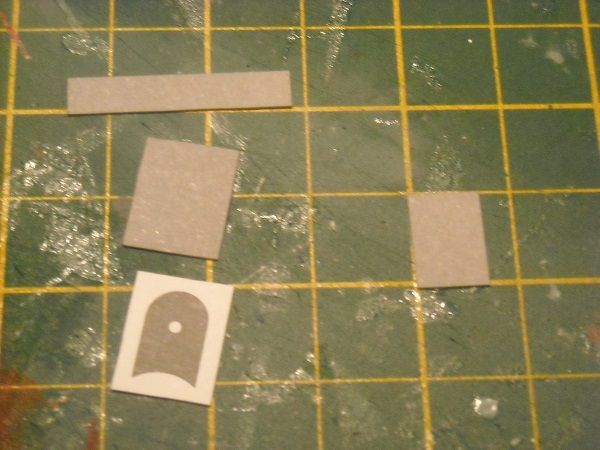 And combined they look like this. 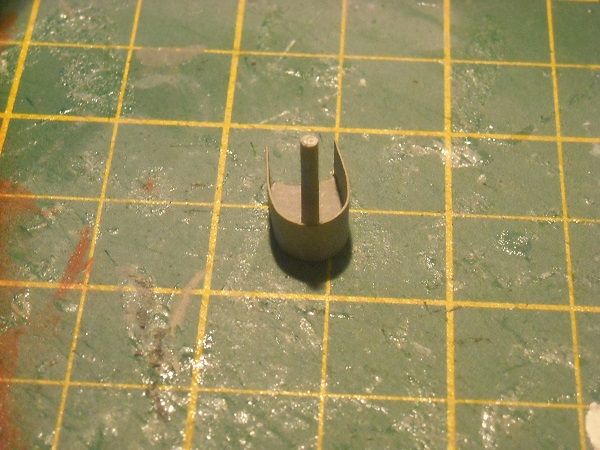 I then glued the two platforms on the back of the funnel, with the lower one first to make sure that the pillar came high enough. But once that was done, the second one was quickly glued in place. 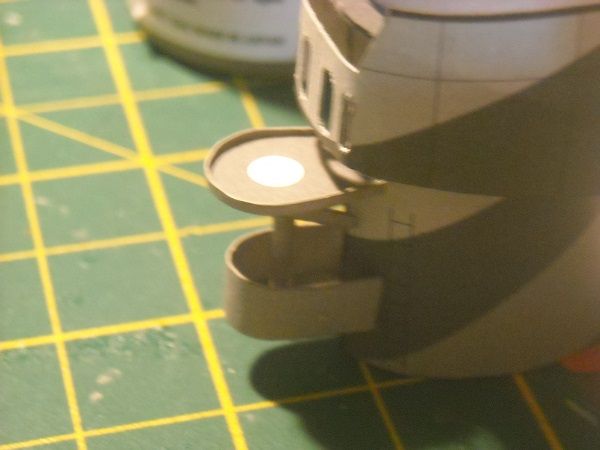 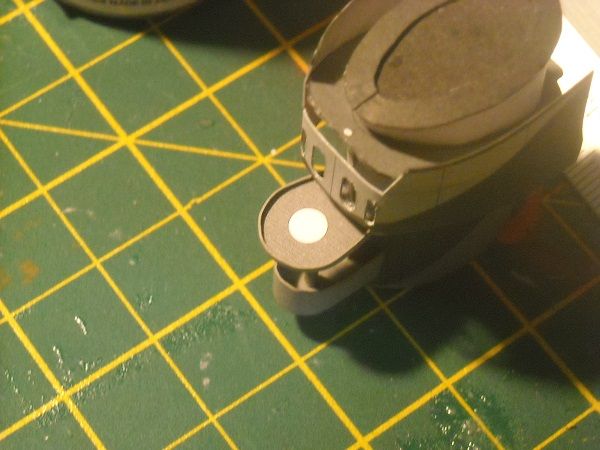 Another white spot appeared! No worries, it will be dealt with tomorrow! But as all parts were now glued to the funnel, it could finally be placed. 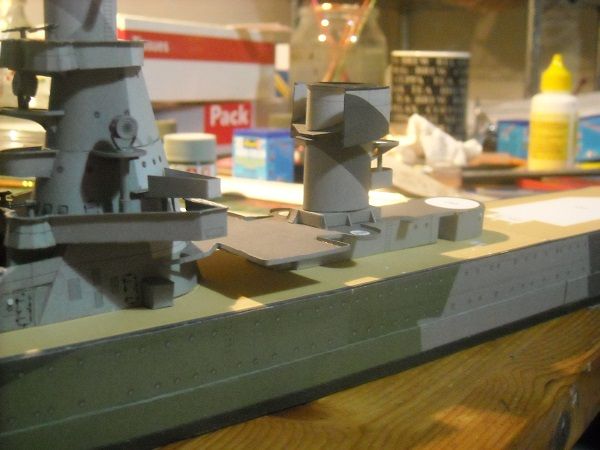 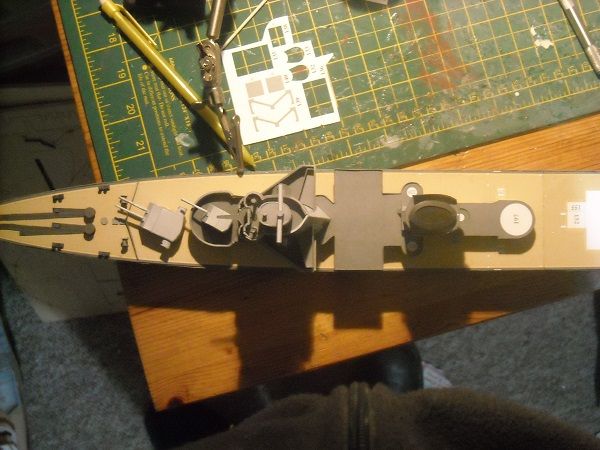 Tomorrow I will finish the supports for these deckhouses and start on the white spots on this structure. As this platform also acts as the boatdeck there will be some boats to constuct and with boats we are going to need cranes!! Things are gonna get interesting again!!! So until tomorrow then!!! Adrie. 'Where to glue or where not to glue, that is the question'
Building: Hr. Ms. de Ruyter (card), Retourschip Batavia (Revell), HMS Surprise (De Agostini)
Built (and sunk): Too many to list
|
|
|
Rank: Super-Elite  Groups: Registered
Joined: 30/01/2013 Posts: 4,604 Points: 13,607 Location: Monmouthshire UK
|
Still full of admiration for you cardies This is look fab Adrie, keep it coming. Steve
|
|
|
Rank: Pro Groups: Registered
Joined: 23/03/2014 Posts: 185 Points: 545 Location: Essex
|
Thanks for looking in and your kind words, Steve. As I said somewhere before, paper and card are wonderful materials for modelling, stiff and flexible at the same time. The true masters are the designers, I just cut it out and slap some glue on. But you wanted more? Your wish is my command! As I said yesterday, there were some supports to construct, two for the platform sides of the boatdeck and two pillars for the crane positions. These are them parts .. 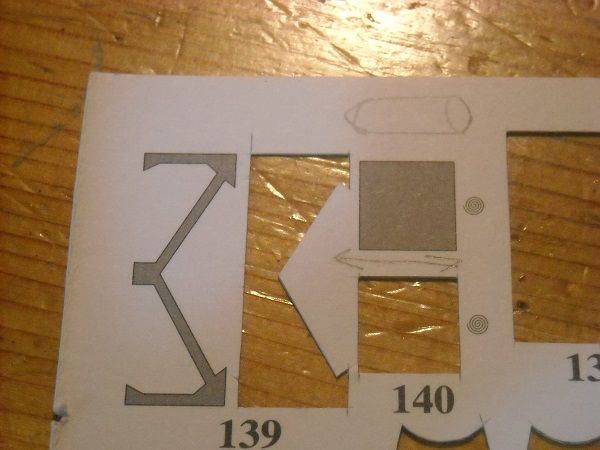 BUT as you can see when I cut out the boatdeck support, thin card and small structures can be a troublesome combination. 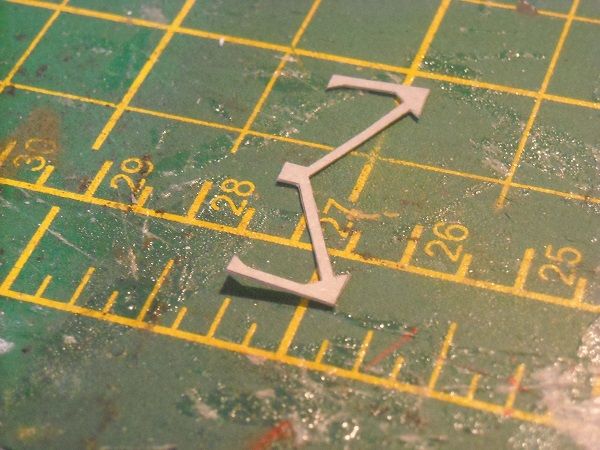 Because the card is quite floppy, it can warp when you cut it out. And it can be a headache trying to de-warp them, because of the floppy nature of the card. But there is another way, which requires CA glue. When you put a thin layer of CA glue on the back of the part and let it dry ... 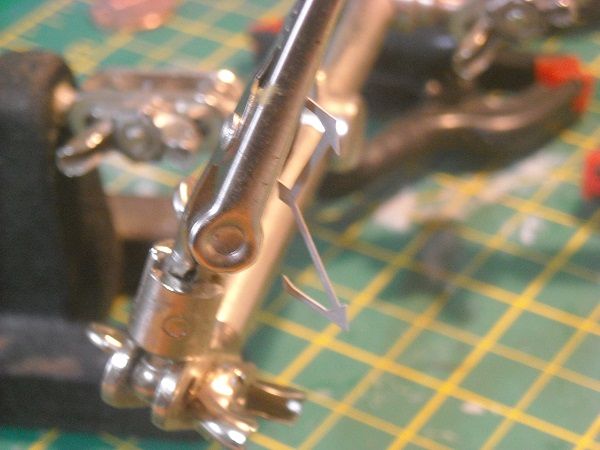 ... then it becomes nice and stiff. You have to be careful though that the glue doesn't touch anything else otherwise your nice and stiff card will get stuck! So a structure like the support I tend to do in two goes and let each treated end dry thoroughly before starting on the other side. You have to do it on the back because the glue will become shiny. 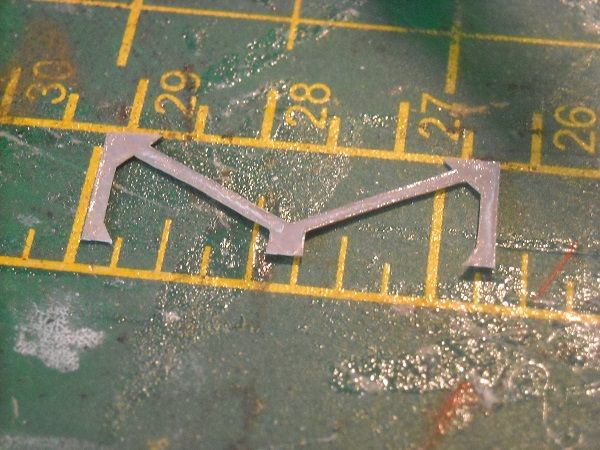 But when stiff, the card can be easily flattened. 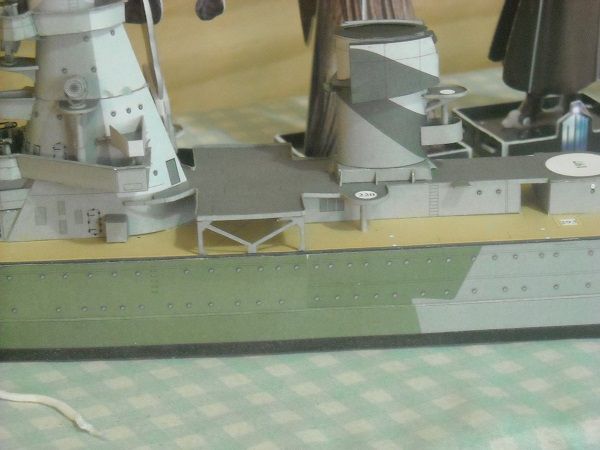 The port supports are in place. And a little bit later so were the starboard supports. 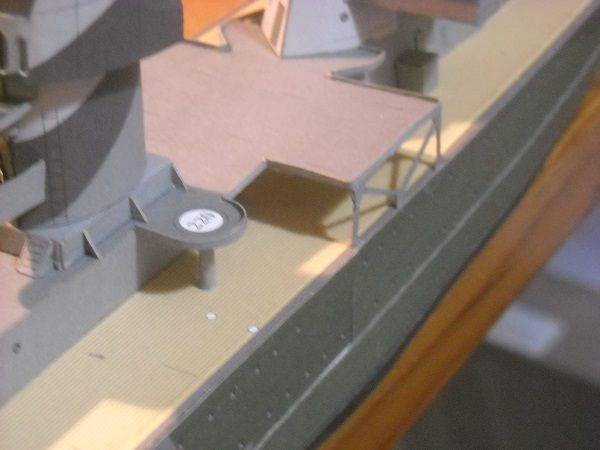 Finally the last of the search lights was assembled as before and stuck in place.  And now it is time to fill in some more of the details. As I said yesterday, there will be boats. Not just one as with the wooden boats but eight. Luckily they are a bit easier to construct, as long as you give it plenty of drying time and attention. We start (as always) with the parts. These parts are for the inner pair of boatdeck boats. 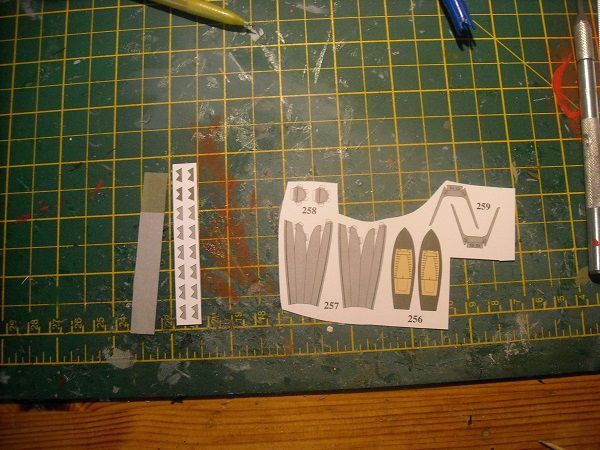 This is one set cut out ...  ... which were scored, bent and edge-painted. When dry, I first glued the front points of the hull together with tabs. 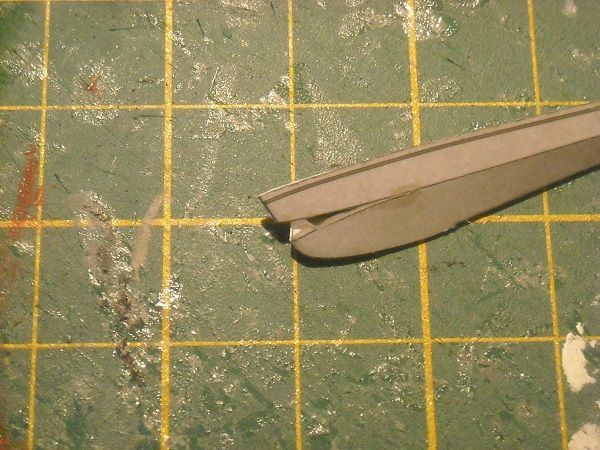 I let that dry, then turned the boat around and inserted the back.  Once that was fully dry, I started pushing the tip backwards so that the sides would bulge out until they were the same width as the deck. 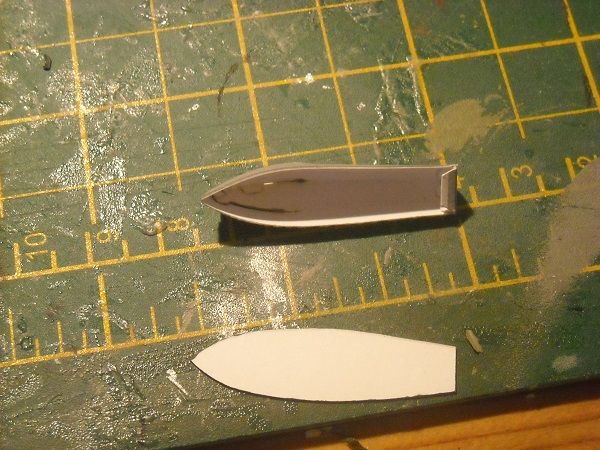 Then it was time to glue the front section together. I did this after pushing the top down into the lower hull until the sides met at the front. Then I placed some glue on the inside to cover the edges. 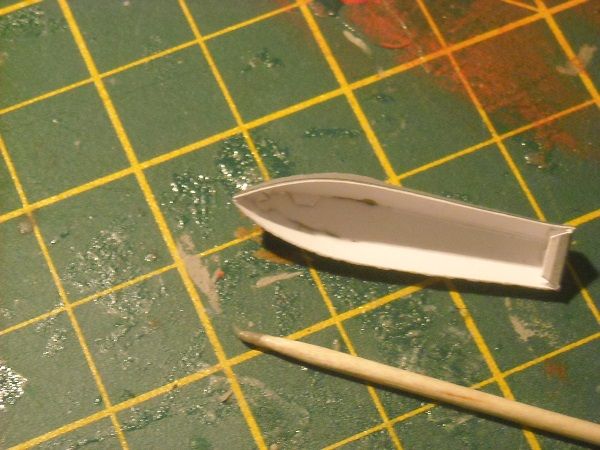 I opened the sides of the aft boat with my fingers until the whole of the hull fitted the topdeck. Then a line of glue on the underside of the deck and the hull was put in place. 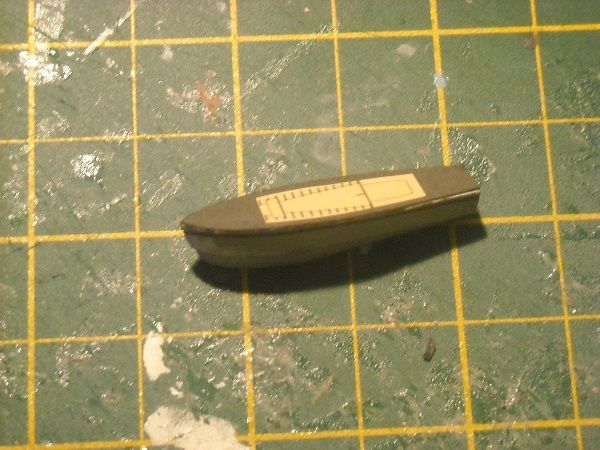 As it was drying I made sure it kept the right shape and when it set, I glued two of the boat stands onto the boatdeck. 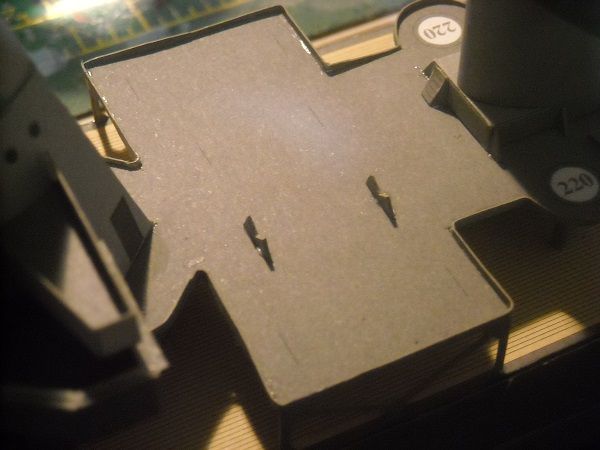 And once they were dry, the boat was glued in place. 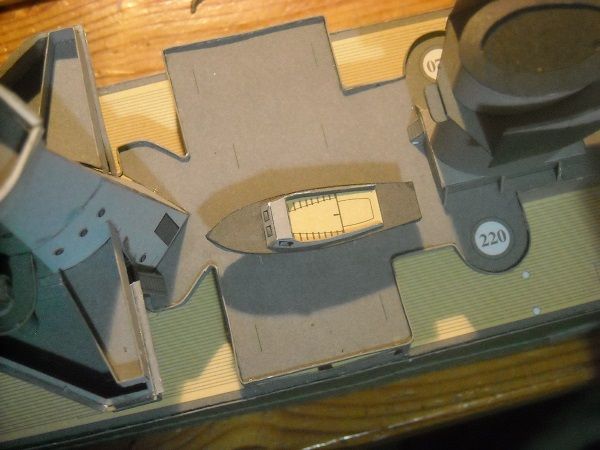 Simples, no? Now only three more boats to be done for the boatdeck, then the cranes and then two more boats to go onto the main deck. But more about that laterzzzzzzzzzzzzz! Happy building, all! Adrie. 'Where to glue or where not to glue, that is the question'
Building: Hr. Ms. de Ruyter (card), Retourschip Batavia (Revell), HMS Surprise (De Agostini)
Built (and sunk): Too many to list
|
|
|
Rank: Super-Elite Groups: Registered, Forum Support Team, Administrators, Global Forum Support Team, Moderator, Official Builds Joined: 09/11/2012 Posts: 8,520 Points: 24,651 Location: East midlands
|
Hi Adrie, Still stunning me with this one. WTG matey Keep up the good work. Regards delboy271155 (Derek) COME BACK GUY FAWKES "YOUR COUNTRY NEEDS YOU"
|
|
|
Rank: Pro Groups: Registered
Joined: 23/03/2014 Posts: 185 Points: 545 Location: Essex
|
Hi all! @Derek, what can I say. You keep me blushing! But I'm glad that you like/love it too, just like me! Anyway, let's see if we can stun a bit more. I finished the second motorboat yetsreday but forgot to take pictures with the card inside the camera! OOPS!  My apologies for that. But rest assured, it is still there and can be seen in the last photos. So, today I started on the other boats for the boatdeck, a launch and a cutter (if I got the names right). These are their bitzzzz. 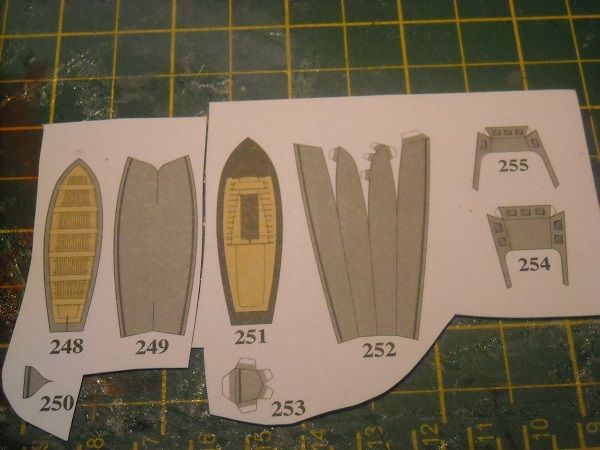 The launch is constructed like the motorboat with two deck enhancements instead of the one on the smaller motorboats. The cutter is a different story. Instead of being angled, the bottow was curved, which meant I had to preform the aft side of it. Then I used the transom to shape the side by glueing it to the transom. 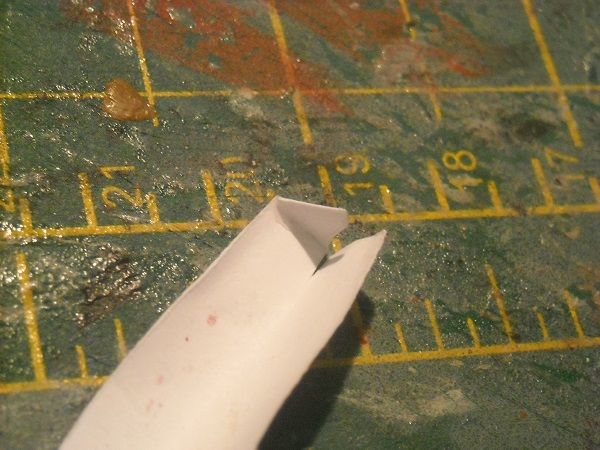 The bottom of the boat was scored in front and back to allow for the card to take the curved shape. 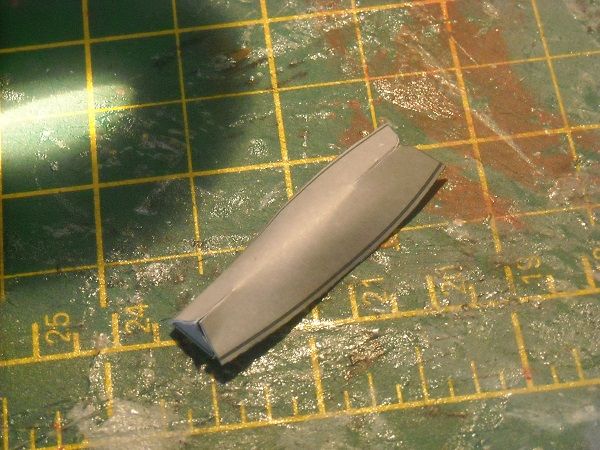 Then the other side was glued to the transom and the front was bent by finger then glued together as well. Note that there was no tab so it took me a while to keep the sides together with the fingers until the glue had set. 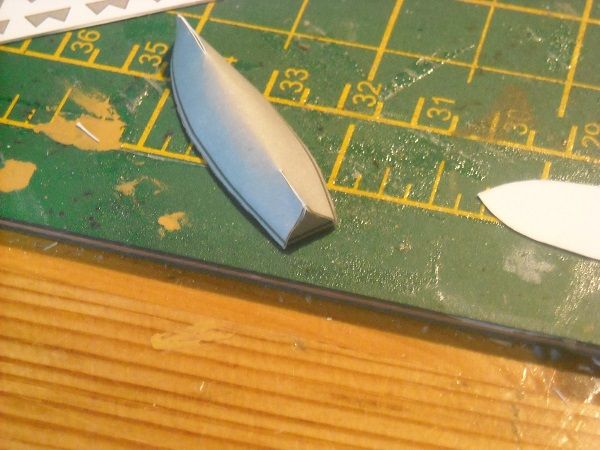 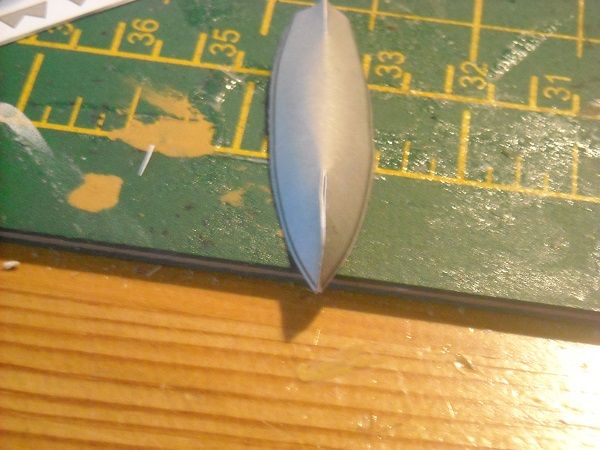 The curves were quite pleasing to see. Then the sides were bent outwards like before until it fitted snugly with the deck after which the two were glued together. 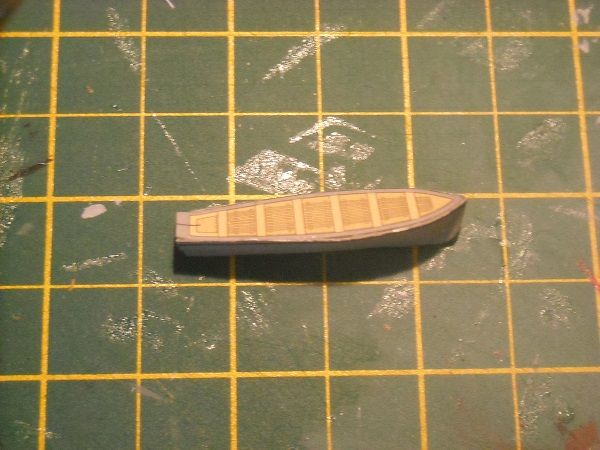 All that was required was a bit of edge touching up and that was put aside with the other motorboat to be installed later. That left the launch, of which them bits are shown here. 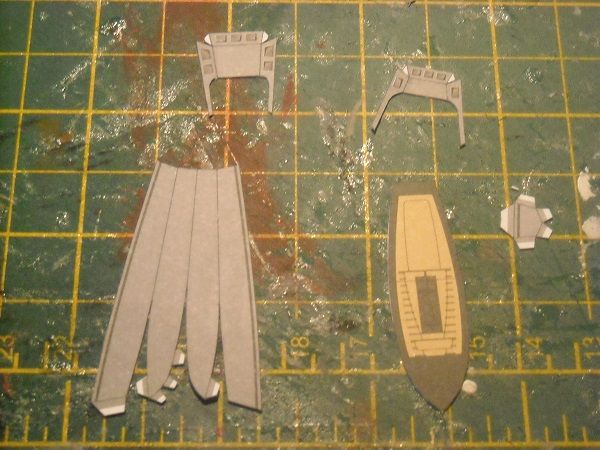 As said before, construction was the same as for the motorboat and the end result was good (even if the photo wasn't up to scratch).  But this one is better. 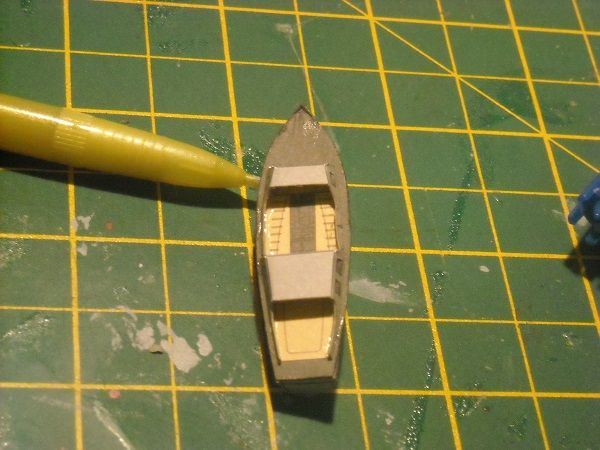 And then I cut out the stands and glued them on the boatdeck where indicated and once dry the boats were placed on them. 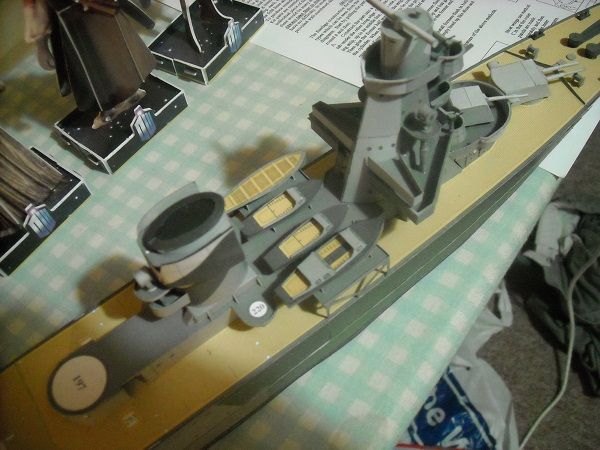 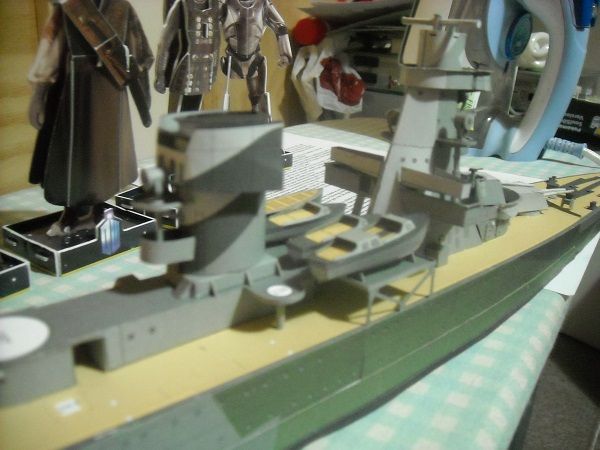 Quite chuffed again. Tomorrow I'll start on the cranes, for which the parts are shown below. 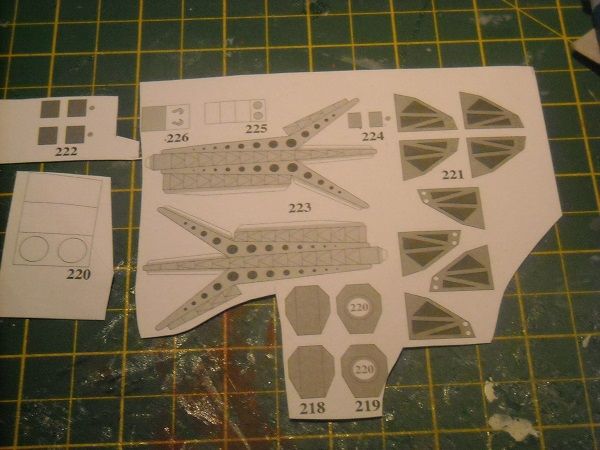 I am thinking about cutting out the black bits to open up the otherwise flat structure. But at the moment I'm just thinking about it and planning it. I'll probably do it, mind you .... The lady deserves it.... Toodlepips!!!! Adrie. 'Where to glue or where not to glue, that is the question'
Building: Hr. Ms. de Ruyter (card), Retourschip Batavia (Revell), HMS Surprise (De Agostini)
Built (and sunk): Too many to list
|
|
|
Rank: Vice-Master Groups: Registered
Joined: 20/10/2010 Posts: 511 Points: 1,459 Location: Loughborough
|
Loving this build, still can't belive its paper . And by the builds in the background its not your first. If you like paper model please check these out you can build, you would do a great job of them. http://uhu02.way-nifty.c...le_der_minerva/041.html
Keep the pictures coming. Peter Builds in progress: HMS Victory.HMS Surprise.
Completed builds: Revell London Bus 1/24.
Builds to do:Sovereign of the seas, Hms Albion.
|
|
|
Rank: Pro Groups: Registered
Joined: 23/03/2014 Posts: 185 Points: 545 Location: Essex
|
Hi Peter. Thanks for your nice comments! And thank you so much for the link!!!  I recognised the works, they are by someone who goes by the name of UHU02 and has an almost legendary status amongst cardboard builders in Germany and at Zealot. I remember seeing him design and build the Valley Forge there. And amazingly he still shares all his dedicated labour with others!!! I had a look at the models there. They are all amazingly detailed and most probably a royal pain in the behind to build. But they are sooooo gorgeous, aren't they? Have you looked at the Viper Mk2? Filled to the rim with internal detail! Definitely a royal pain in the behind to build! But that doesn't mean I am not going to try it. But not now. To do them justice you need to concentrate on them. So they are on my list to build, and with Google translate at the ready, the instructions are easily translated if not always easily understood. But the biggest problem is going to be to decide which one first.  Again, my thanks for the link! But now it is time to continue the story from before. Which leads us to cranes, And as said I was thinking of opening them up. Which I did, only to find out that this quadrupled the build time of one.  Or I think it's going to be quadrupled since I haven't finished one yet. But this is what happened .... I started with the base of the crane, which consists of relatively simple parts. 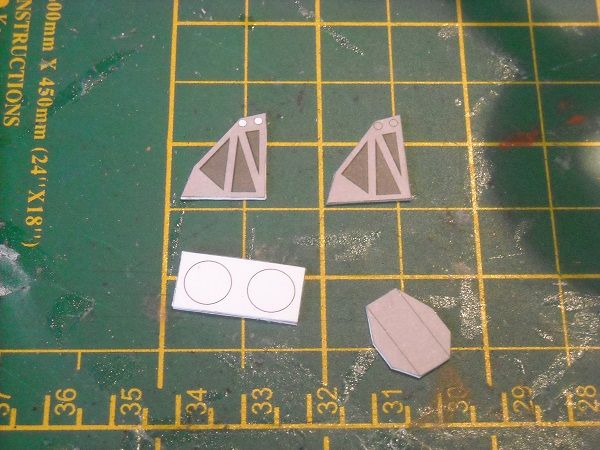 The base itself and the distance piece beneath it were ok ... 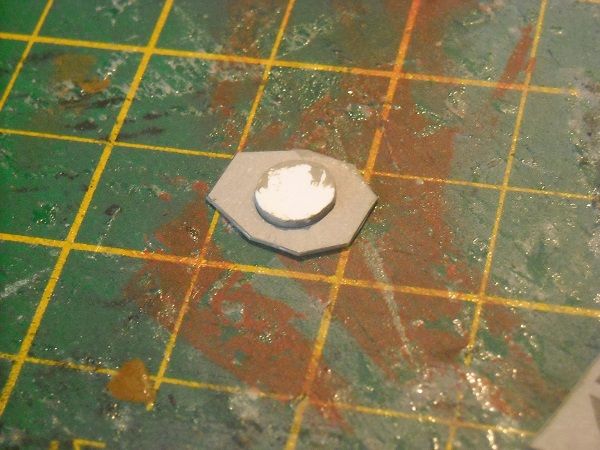 ... but the sides needed opening up. 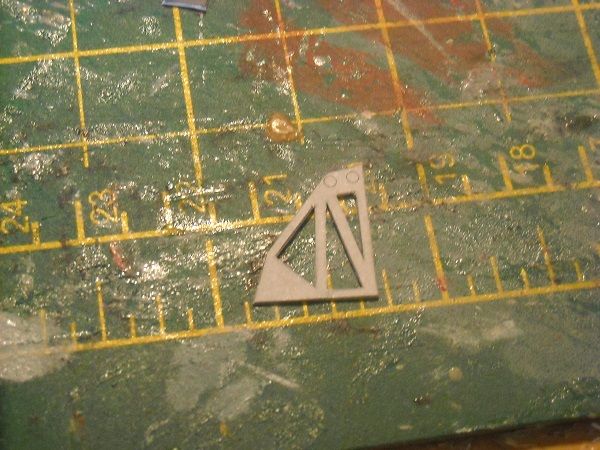 Already looking better, isn't it? Even more so when compared with the untreated one. 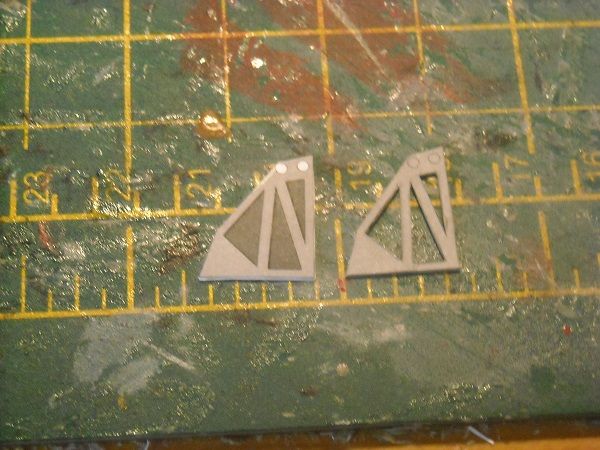 Two pieces that will form the cable rolls needed tight rolling. 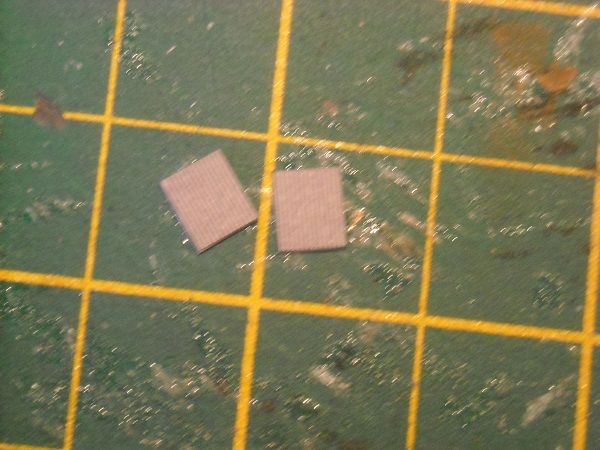 But I won't do that until I have the base structure ready. I glued one siide to the base ... 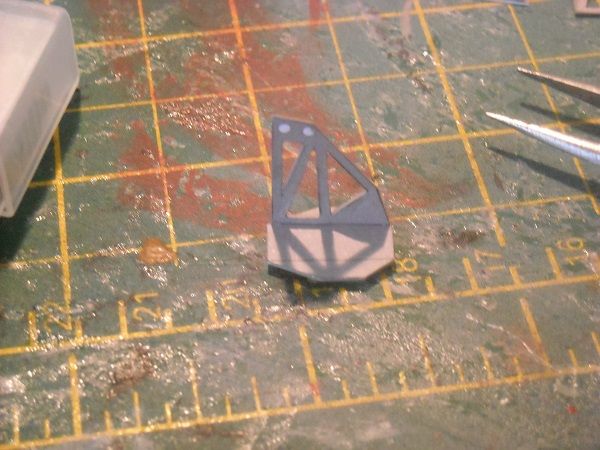 ... then worked on the crane itself. the idea was to make it first to make sure that it would fir snugly between the sides. And that's were things went .... interesting. 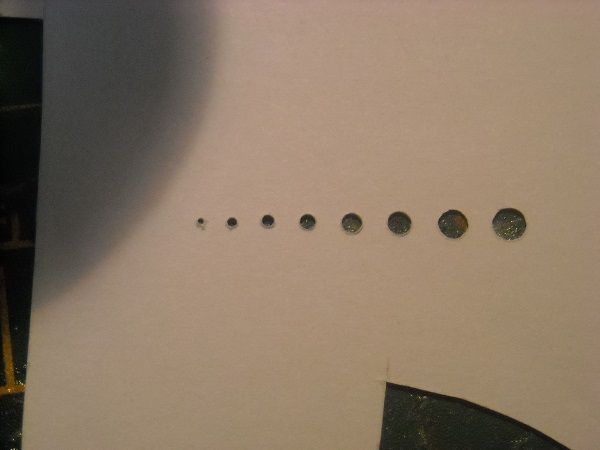 Any idea what these are? 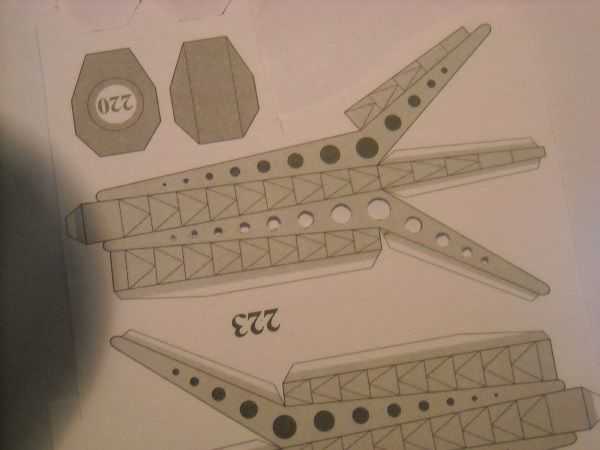 Just a little clue. All those holes have been stabbed out and the holes were then reamed with a toothpick. Quite time consuming, especially considering I had to do the other side as well. But since I had cut the holes, I needed to paint the inside of the crane as well, since you could now see inside. I did that after I scored the part where it would need bending and found out that paint too can stiffen a card, to the point that getting a straight bend was getting very difficult. But with my tweezers and some added time I managed to line them all up nicely. After which I found out that the tabs on the part were so large that they appeared behind the openings that I had cut out so I had to unrafel the part and cut off a strip of the tabs. But eventually ...  ... I finally could glue the crane together. 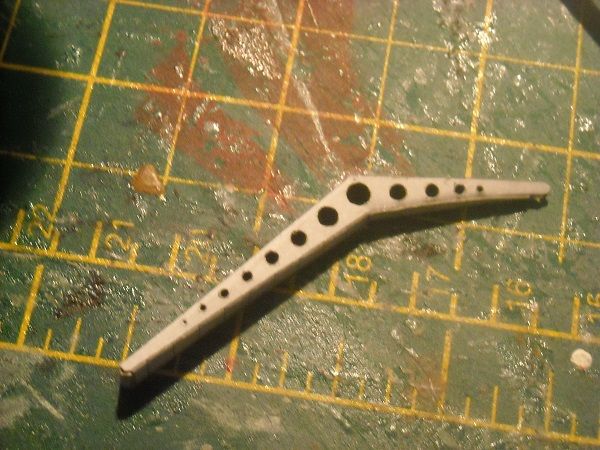 I then finished the base with the other side and the two rolls mentioned before. 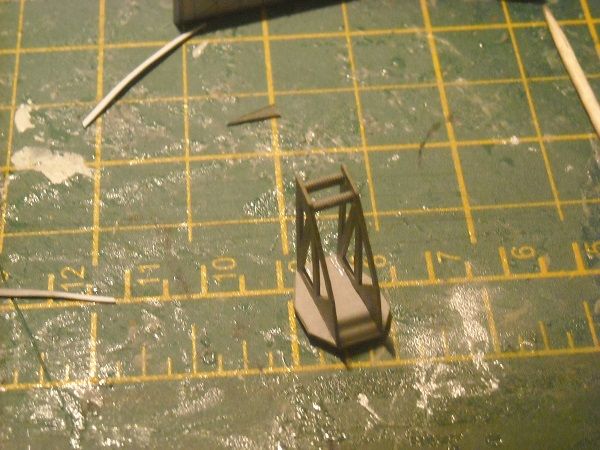 Looking a LOT better in the opened state, don't you agree? The crane fits as well, but they both need to dry thoroughly. The base was a bit wonky so I had to add a few more glue lines to the back of the sides and that needs to dry properly before continueing. So that will be picked up tomorrow. Thanks for looking in and until laterzzzzzzzzzzzzzz. Adrie. 'Where to glue or where not to glue, that is the question'
Building: Hr. Ms. de Ruyter (card), Retourschip Batavia (Revell), HMS Surprise (De Agostini)
Built (and sunk): Too many to list
|
|
|
Rank: Pro Groups: Registered
Joined: 23/03/2014 Posts: 185 Points: 545 Location: Essex
|
Good evening, all! Not that much to show, I'm afraid. I seem to have the additional time required for getting the crane spot on a bit wrong. And it could have been worse. 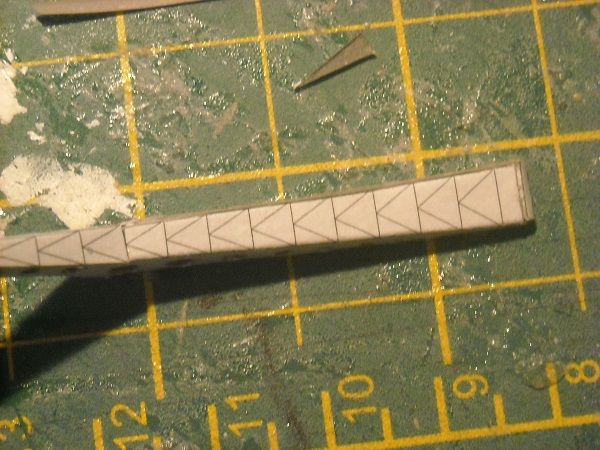 This is the top of the crane. And according to some pictures I found online, all that should remain of it are, in fact, the black lines. And all that is grey should be removed. Now that is a bit too much for me. If I had a PE fret with the crane I would have used that instead, but since I don't, I won't. But consider that the second on the list of wanted improvements for this model, after the chains for the anchors. I could start cutting some of the grey away in the hope that the crane wouldn't be turned into a very weak version of a swiss cheese (or any cheese with a lot of holes in it) but I couldn't do that to the already made crane parts and to have one crane with and one without would look even worse. So I'll stick with what I have done so far. I must admit that I had some reservations anyway regarding the crane. I once saw a model of the de Ruyter in 1:400 where the builder had made the crane cables from thread and glued that in place. Unfortunately the thread hadn't been straightened before glueing so that the crane hook made a hook of about 30 degrees off the vertical. Although you can only applaud someone trying his best to make the model a little bit better, the problem is that if you can't get it just right, the model will look worse with the embellishment rather than better. And that is my worry, that I, even though the intention is good, ams making the model worse, not better. So I am taking as much time as I need to try and get it right. And since I am using a thread as well as cable (as indicated in the instructions), I made sure it was a lot stiffer than normal so I could make sure the thread could be forced in the right shape and stay there. Of course, I used the PVA-water mixture for it and gave the thread two coatings. I would have used three coats but I am sure the glue would have shown up badly. The crane fitted well enough in the structure so that was quickly glued in place. Then I used the thread and glued the tip to the top cable roll and let it dry. The other end of the thread was then lead around the bottom of the two lower rolls and secured with a drip of glue. That was left to dry again and the remaining thread (carefully) cut off. The second cable was then installed, after glueing the hook to it. This was first glued with a drop to the wheel at the end of the crane, left to dry, then glued to the top of the top cable roll and left to dry, aftwer which the remainder of the thread was lead to the other roll and glued in place. 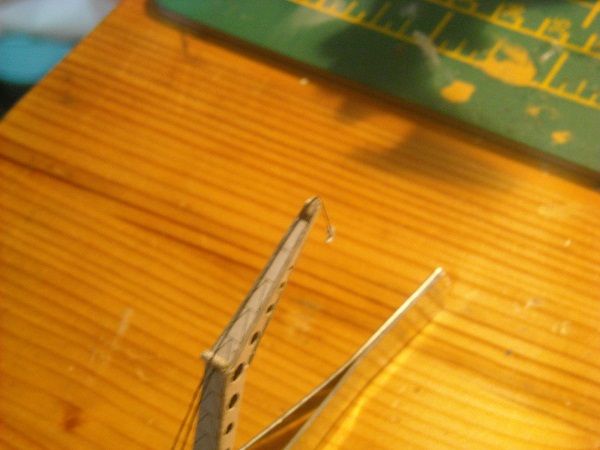 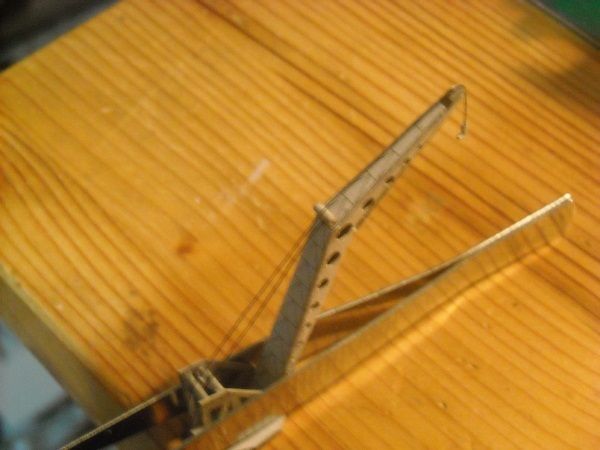 With all the reservations I had about it first, I think I have pulled it off quite nicely. And here it is, glued in place. 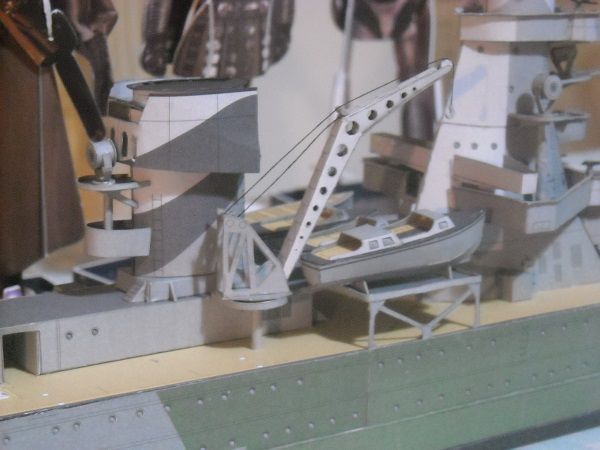 So after two days of stopping and starting, I have another one to do!  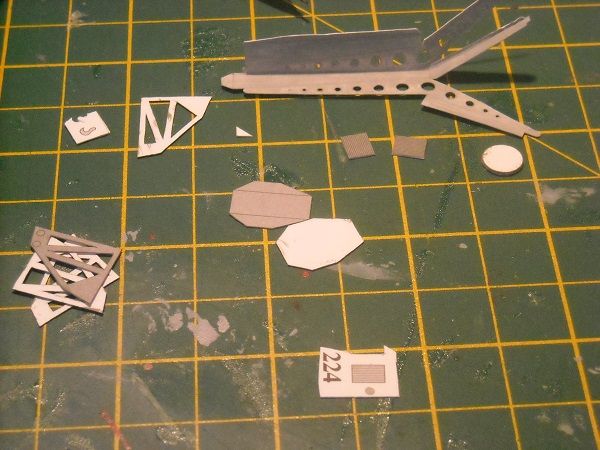 Here's to hoping we get the other one done as well as the first one and in LESS than two days. Until laterzzzzz! Happy building! Adrie. 'Where to glue or where not to glue, that is the question'
Building: Hr. Ms. de Ruyter (card), Retourschip Batavia (Revell), HMS Surprise (De Agostini)
Built (and sunk): Too many to list
|
|
|
|
|
Absolutely brilliant work there Adrie! You should be well chuffed with yourself for that! I see what you mean about the strength of the crane jibs, the only way I can see to improve those triangular areas and still keep the thing 'in one piece' would be to paint the flat areas black and then glue tiny strips of grey card over where the black lines were. That would keep the strength but also give a 3D effect as well. With the boats in place I can see what you mean about the 'Light Cruiser' By the way, I bought that Cyberman today - found him in our local Poundland!!  I'll have to look more closely in there from now on! Keep it coming!! Robin First wooden ship: The Grimsby 12 Gun 'Frigate' by Constructo Second: Bounty DelPrado Part Works Third: HMS Victory DelPrado Part Works 1/100 scale Diorama of the Battle of the Brandywine from the American Revolutionary War Diorama of the Battle of New Falkland (unfinished sci-fi), Great War Centenary Diorama of the Messines Ridge Assault Index for the Victory diary is on page 1
|
|
|
|
|
Beautiful work Adrie, keep it going.... Regards Alan
|
|
|
 Rank: Master Groups: Registered
Joined: 20/03/2010 Posts: 1,199 Points: 3,473 Location: Glenrothes
|
She is looking better n better the more this build is progressing  Would gluing something like a staple on top of the thin lines of the crane then cutting out inbetween be an idea or do you thing at this scale too fiddly
|
|
|
Rank: Pro Groups: Registered
Joined: 23/03/2014 Posts: 185 Points: 545 Location: Essex
|
Hi all! And thanks, fellas, for looking in and the kind words. I think she is looking better and better and I do think that finishing one section of the ship before going to the next section does help here. And thank you, Robin and Budgie! . Your input into the problem is VERY MUCH (!!!!!) appreciated! The ideas brought forward are quite similar and it made me suddenly wonder why the designer had the 'good' bits drawn in black and the 'bad' bits in grey. It would have made more sense if he had done the same as he did with the jib sides and the foot, namely print the 'metal' in grey and the 'holes' in black. But I don't think it would look that good if the sides were 'free of black bits' and the top and bottom would still sport them. Another worry is with this section.  The stripes at the point of the jib are quite short. That would make the staples or the strip squite small and I am unsure of being able to keep it strong enough to resist manhandling, apart from it becoming extremely fidgety. In a perfect world where I had another copy of this kit available, I would have tried to just cut away the top and botttom sections and replace it with strips. But even then I would have no clue as to how to create them as 'K'-shaped strips. You would prabably need something as 0.25 mm rod to cut to length and glue other cut rods as the 'arms'. Luckily I finished one crane and it looks decent enough to give me some praise, so it can't have been that bad. So I will do the same for the other crane and see if I can blow up this kit to double size (A4 to A3 printer/scanner would do, that is if I had one ) and then try it again with a bit more material to play with. But as I have been told, I am to be 'well chuffed' with it so far , so I would do well to tread the well-trodden path! But that doesn't mean that I don't appreciate and welcome the assistance offered!! Oh, and Robin? YAY on the cyberman!! When are you going to show them all? They are not that hard and if I can do them, then the Master of the Messines Ridge should have no trouble with them! Oh, and Budgie? What's the latest on the Hood? I am still very interested in seeing how foaming the formers is going to turn out!!! But I guess it is time to show what I have done so far. I made better time, this time! And since I had done it before I decided to fill some of the required waiting times with the next parts, some more boats. This time two more cutters. 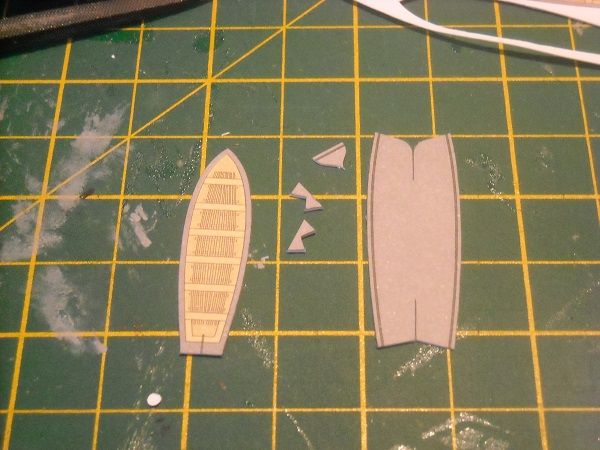 These are to be placed on either side of the superstructure with a pair of davits next to them. 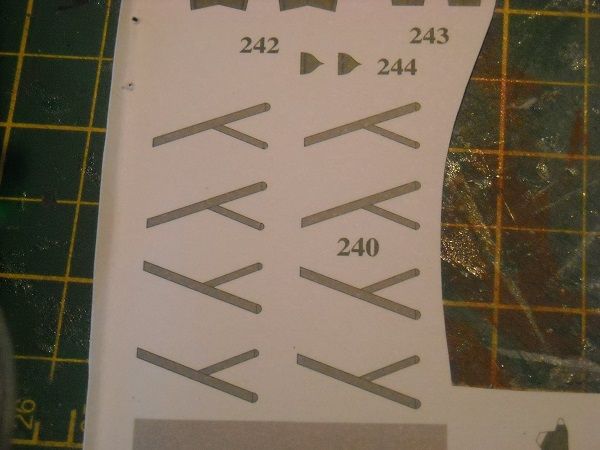 But I started with glueing the jib and the base together as before and when it was throughly dry, I started on the threads.   During the drying time I started on one of the cutters as before, with forming the bottom of the hull and glueing the transom first to one side of the stern then the other, keeping the assembly in my fingers until the glue set. Then the bow section was glued together and the whole set aside to dry. 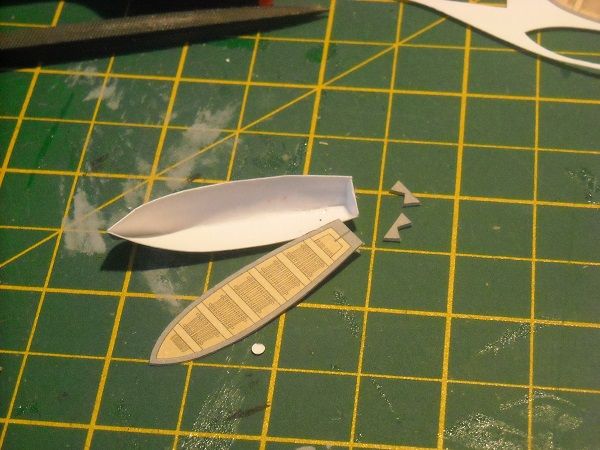 I then returned to the crane and glued the threads to the cable rolls as before. 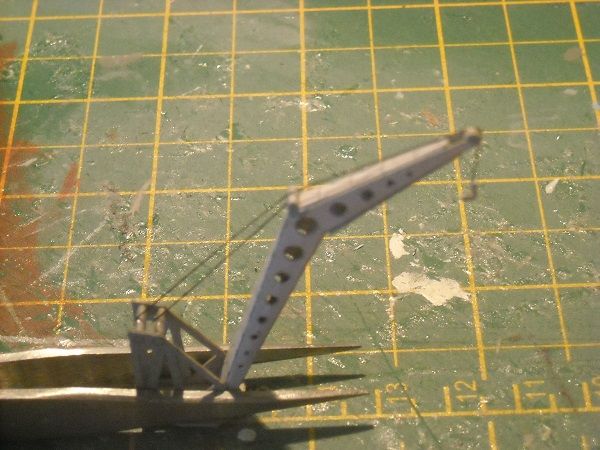 And when it was dry, I straightened the hook and the crane was ready to be glued in place.  I will finish the proper 'drop' of the hook when it is all nicely dried. It's quite close as it is but can be made a bit better. I must admit I think it looks good. Good enough to leave her be for the moment and have some rest. Thanks for looking in , happy building and until laterzzzzzzzzzzzz! Adrie. 'Where to glue or where not to glue, that is the question'
Building: Hr. Ms. de Ruyter (card), Retourschip Batavia (Revell), HMS Surprise (De Agostini)
Built (and sunk): Too many to list
|
|
|
Rank: Pro Groups: Registered
Joined: 23/03/2014 Posts: 185 Points: 545 Location: Essex
|
Evenin' all!! Time for an update, I guess. I continued with the cutters that I started in the previous post. The deck was glued inside the hull ... 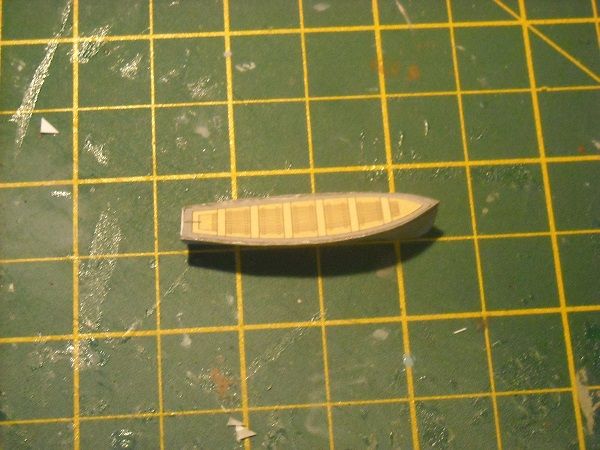 ,,, and when it was fully dry I touched up the sides with a toothpick/cocktail stick/little round wooden pointy thingy. 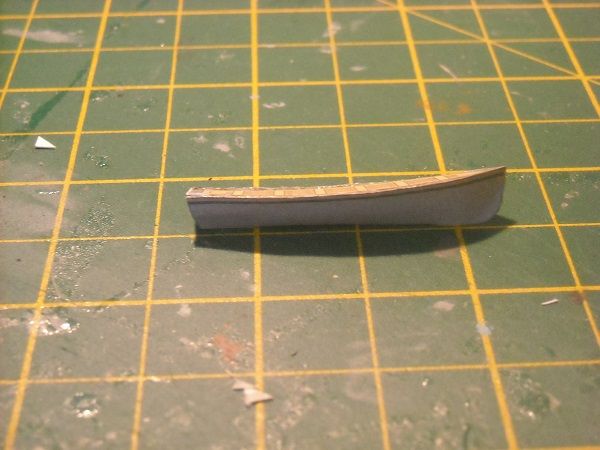 Oh, and please let me know if you have a preference for one of the terms used upwards. If so, I will do my best to keep that name in, even though if you choose for tha latter I will probably just shorten it to lirowopoth. Just so you know ... Anywayzzzzzz The mounts and the davits were glued to the deck ... 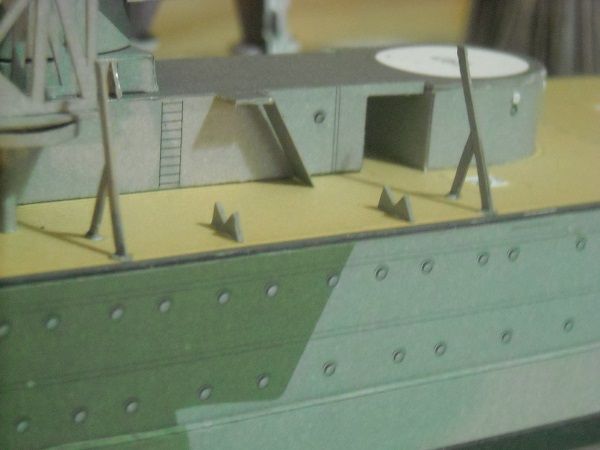 ... and the cutter was allowed to have a rest in her bed. 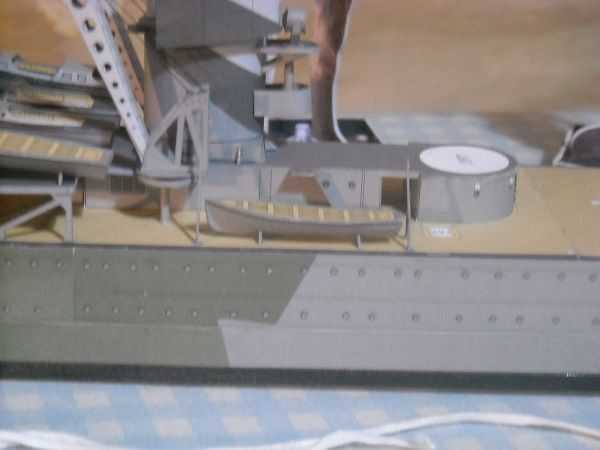 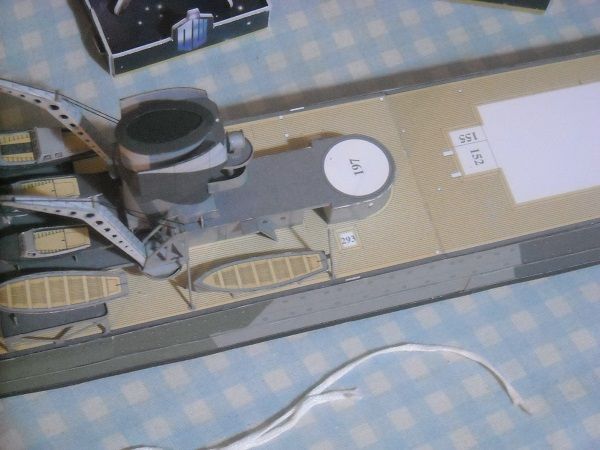 Cute, no? As I started on the second cutter, I checked the drawings to see what else needed to be stocked in that area. There were two structures that I assume were some kind of ventilation units for the stokehold below the decks. 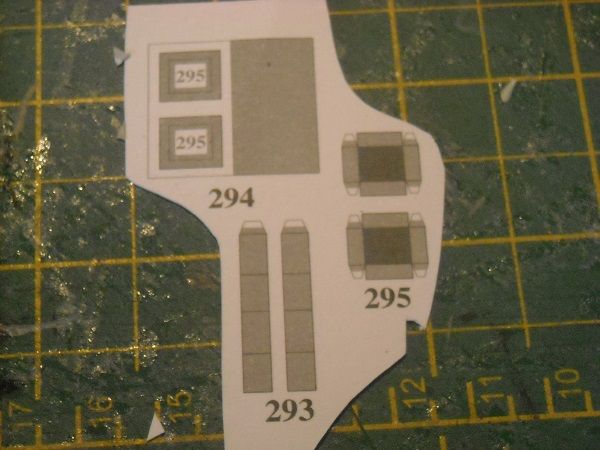 Then I suddenly noticed that on the drawing two supports were drawn for the navigation bridge platform. They were never mentioned in the instructions!! But luckily I was still able to get them in place with nothing sticking outside the hull so I could lay the ship on her side to get under the platform. According to the template the support columns were to be made from rod with a thickness of 1.3 mm. I cut these from the 1.2 mm rods as I didn;t have thicker ones. But an extra layer of paint should bring them up to 1.3 easily. They were quickly cut slightly larger then filed down (to remove the malformed cutting area) and painted. 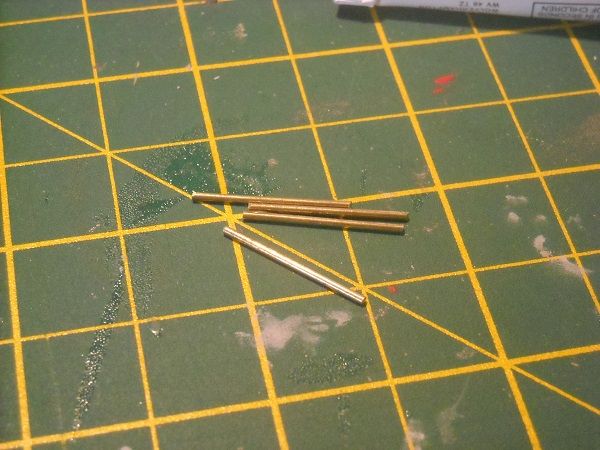 As I lay the ship on her side to glue the rods in place with a bit of superglue, transfered to the ends via lirowopoth , I noticed that the bottow of the platform sported two drawn circles to denote the supports' positions but none were drawn on the deck. But the supports went in easily with a little pressure on the platform sides to ensure good contact.  As the supports were drying, I worked on the airco's, which were scored, cut, bent and edge-painted before assembly.  The first unit in place ... 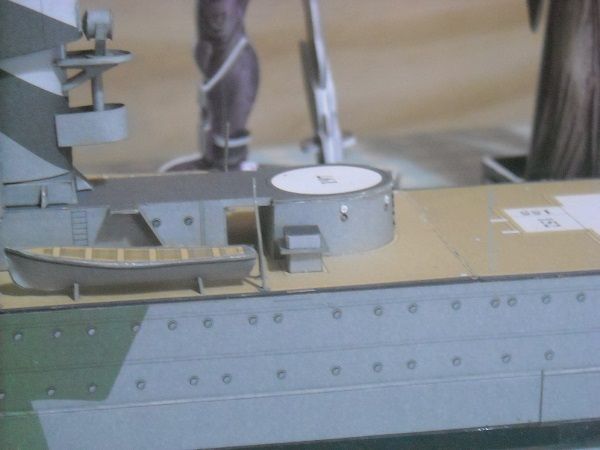 As I finished the other side, I suddenly felt the 'metal craze' come over me!! I needed more metal bits!!! Ahhh! Found a victim! One 1.2 mm rod piece and two 0.7 mm smaller rod pieces which makes ... ??? 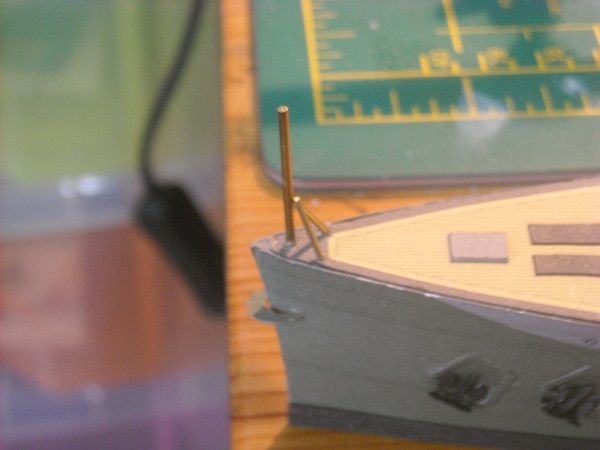 A flagpole! I drilled holes in the deck that were 0.05 mm smaller than the rods, making sure that I drilled the holes with the right orientation. Then a few more drips of superglue (with the you-know-what) and the main pole went in first, then the sides. An extra drip of superglue to ensure good contact between the three and we were cooking!!! Then a few drips of PVA to smoothen the connections and a bigger drop on top of the central rod to act as a truck. 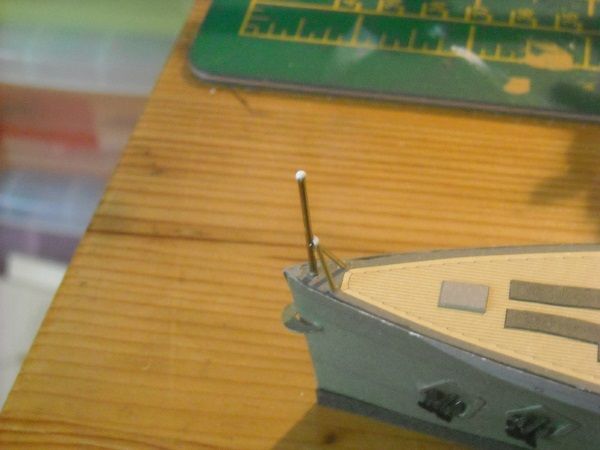 After letting the glue dry I finished it off by painting the flagpole. 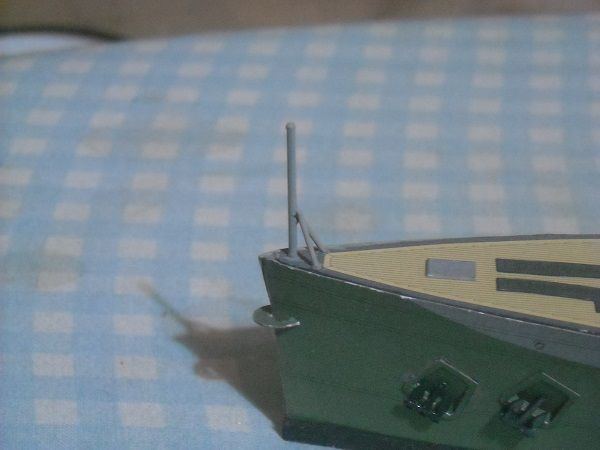 Not bad!! But with that all white spots have been filled in nicely, apart from the white spot where the catapult is going but I don't want to start that one yet because it will be near the next deckhouse. So now I have a choice. Will I continue in the 'metal craze' mode and start on the masts for the ship or do I gather my strength and finish the deckhouses first? There is only one left, after all, the deckhouse for the engine room. Hmmm, a toss-up really. But I promise that by tomorrow I will have made up my mind! See you then and happy building! Adrie 'Where to glue or where not to glue, that is the question'
Building: Hr. Ms. de Ruyter (card), Retourschip Batavia (Revell), HMS Surprise (De Agostini)
Built (and sunk): Too many to list
|
|
|
Rank: Super-Elite Groups: Registered, Forum Support Team, Administrators, Global Forum Support Team, Moderator, Official Builds Joined: 09/11/2012 Posts: 8,520 Points: 24,651 Location: East midlands
|
Hi Adrie, Brill, Work to the usual high standards. WTG Regards delboy271155 (Derek) COME BACK GUY FAWKES "YOUR COUNTRY NEEDS YOU"
|
|
|
|
Guest
|
 US
US

