Welcome Guest Search | Active Topics | Log In | Register

13 Pages «<678910>»
FraH2o Building Diary - An Italian job Options
Markwarren
#141 Posted : 23 September 2019 07:56:00

Rank: Super-Elite

Publisher Medal: Featured Build of the MonthActive Service Medal: 500 post active service MedalPurple Medal: Super active service medal for 1000 postsTurquoise Medal: Turquoise Medal for model making know-how contributionOutstanding Build: An award for an outstanding buildBuild-Diary Medal: Build-Diary Medal of HonourRed Medal: Red Medal
Groups: Registered, Administrators, Global Forum Support, Moderator, Forum Support Team, Official Builds

Joined: 04/01/2016
Posts: 6,541
Points: 19,940
Location: Northamptonshire, England
Looking very good, love your attention to detail.Love

Mark
frah2o
#142 Posted : 24 September 2019 07:04:05

Rank: Vice-Master
Publisher Medal: Featured Build of the MonthActive Service Medal: 500 post active service MedalBuild-Diary Medal: Build-Diary Medal of HonourRed Medal: Red MedalOutstanding Build: An award for an outstanding build
Groups: Registered

Joined: 05/04/2016
Posts: 708
Points: 2,127
Location: Ferrara
Markwarren wrote:
Looking very good, love your attention to detail.Love

Mark


Thanks Mark Blushing

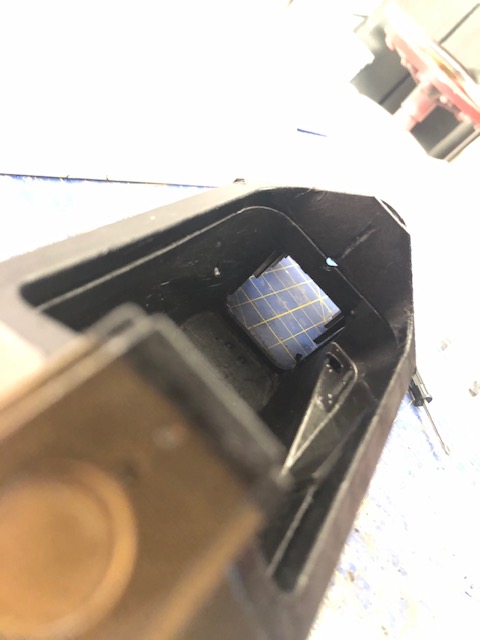
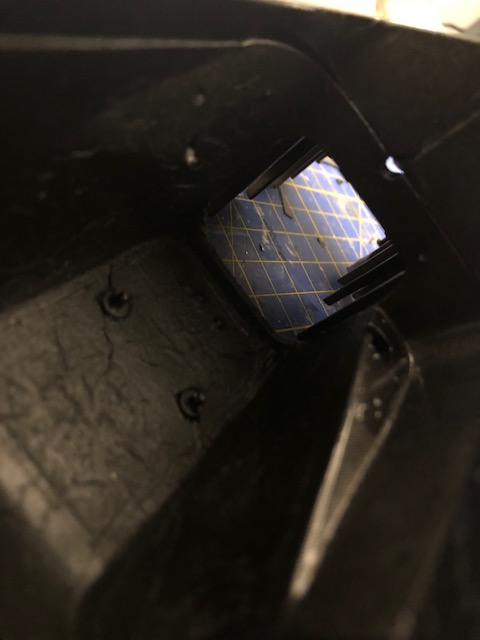
I quite terminated the work on this "carbon beast"

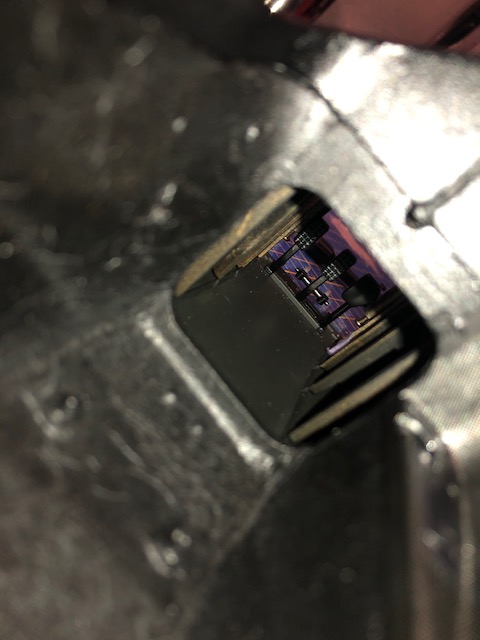
The hardest areas of this "wrapping" are the inside of headrest (specially the air vents) and the cowling dash that i would carbon in one piece.
The other bodyshel is very helpful to create templeate without working on new bodyshell.

I leave and rest carbon for two week and then I'll start to coat with clear matt.


Collection active: Lotus 97T, Audi Quattro A2, Vw Maggiolino '60

Work in progress: Porsche 911 RS Turbo

Completed model: Delta WRC Martini, Mclaren MP4/4, Golf GTI 1/8 Tuned
RM1
#143 Posted : 25 September 2019 06:51:51

Rank: Elite

Publisher Medal: Featured Build of the MonthActive Service Medal: 500 post active service MedalPurple Medal: Super active service medal for 1000 postsOutstanding Build: An award for an outstanding buildCompetition Winner of Model Builds: Competition Winner of Model BuildsBuild-Diary Medal: Build-Diary Medal of HonourRed Medal: Red Medal
Groups: Registered

Joined: 27/03/2012
Posts: 1,973
Points: 5,963
Location: johannesburg
Great work with the Carbon.
Malc.
frah2o
#144 Posted : 25 September 2019 08:14:48

Rank: Vice-Master
Publisher Medal: Featured Build of the MonthActive Service Medal: 500 post active service MedalBuild-Diary Medal: Build-Diary Medal of HonourRed Medal: Red MedalOutstanding Build: An award for an outstanding build
Groups: Registered

Joined: 05/04/2016
Posts: 708
Points: 2,127
Location: Ferrara
RM1 wrote:
Great work with the Carbon.
Malc.


Thanks Malc

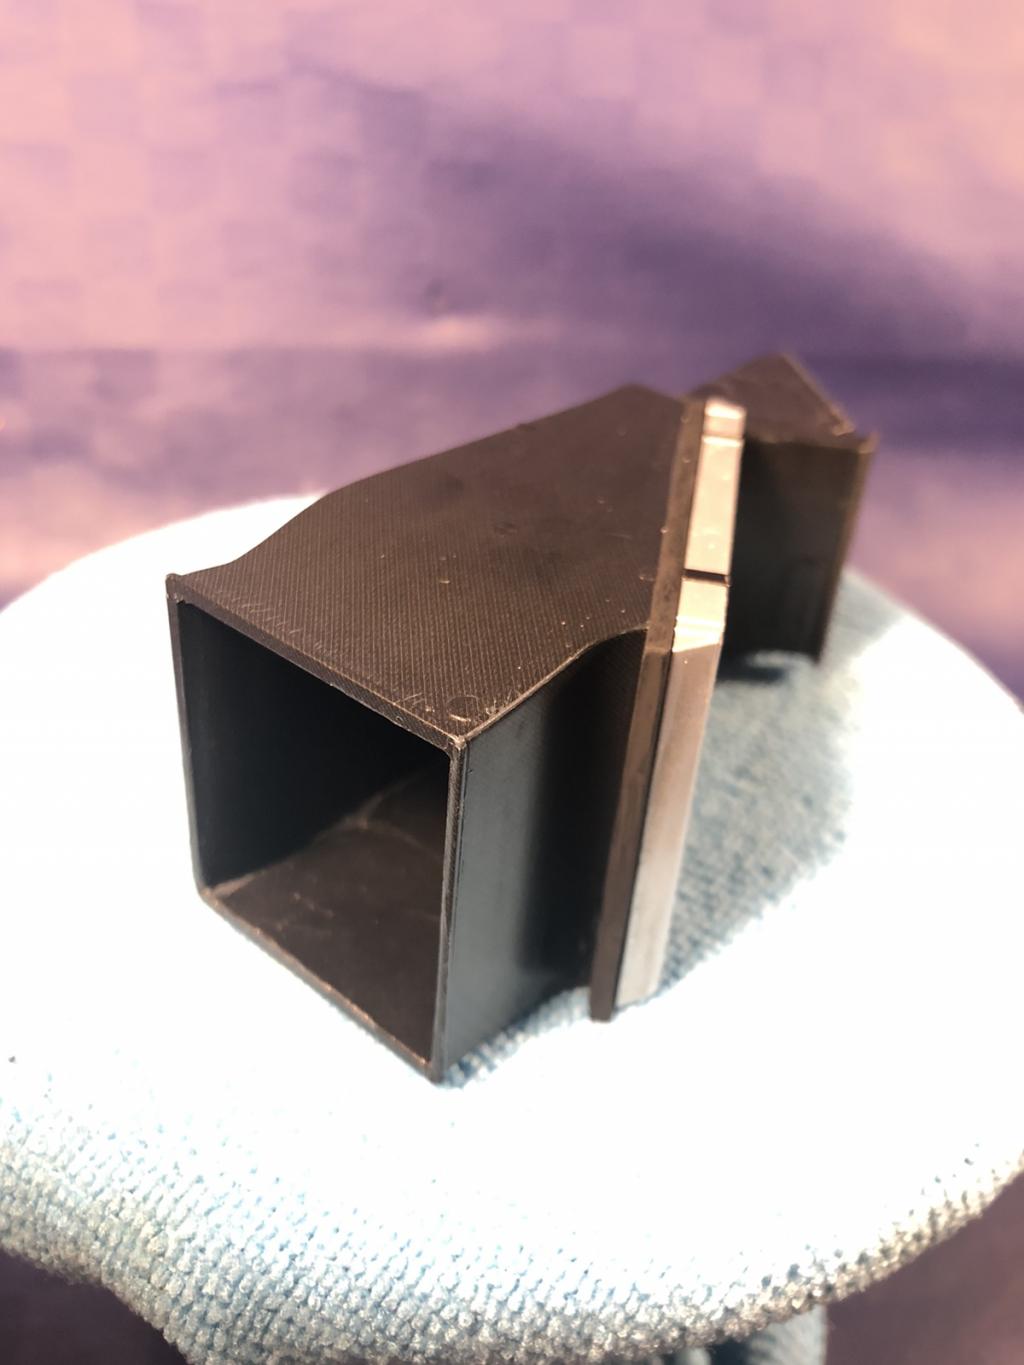
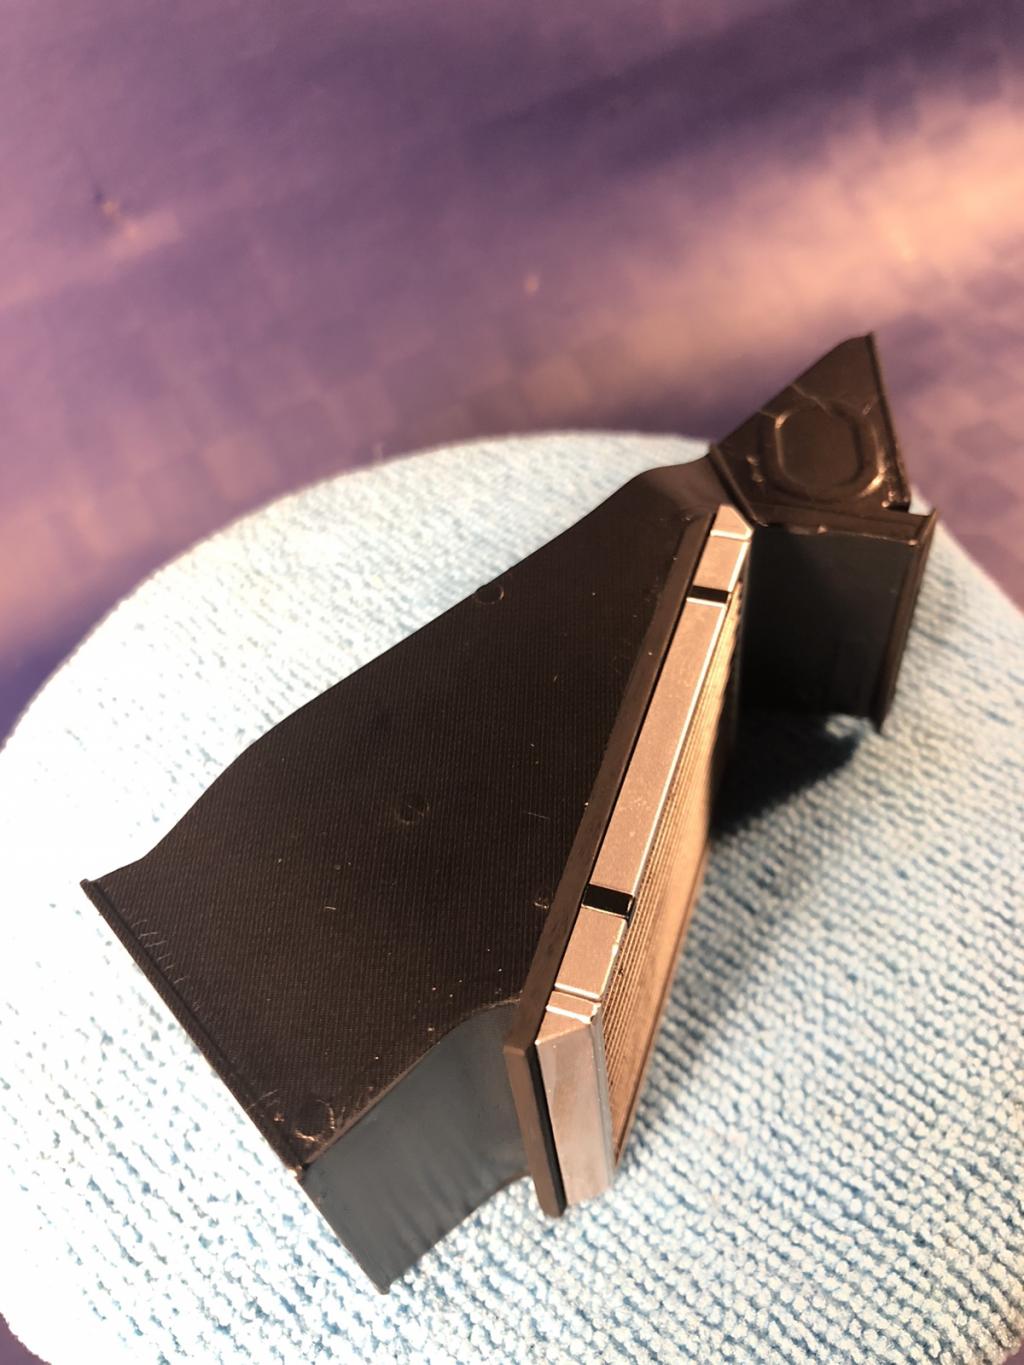
I'm started with a hard/boring carbon work on brake duct

Befor to carbon them, i opended the blanked vent on middle duct.

I finished with a quite result the first rear duct....but it's wrong. Cursing

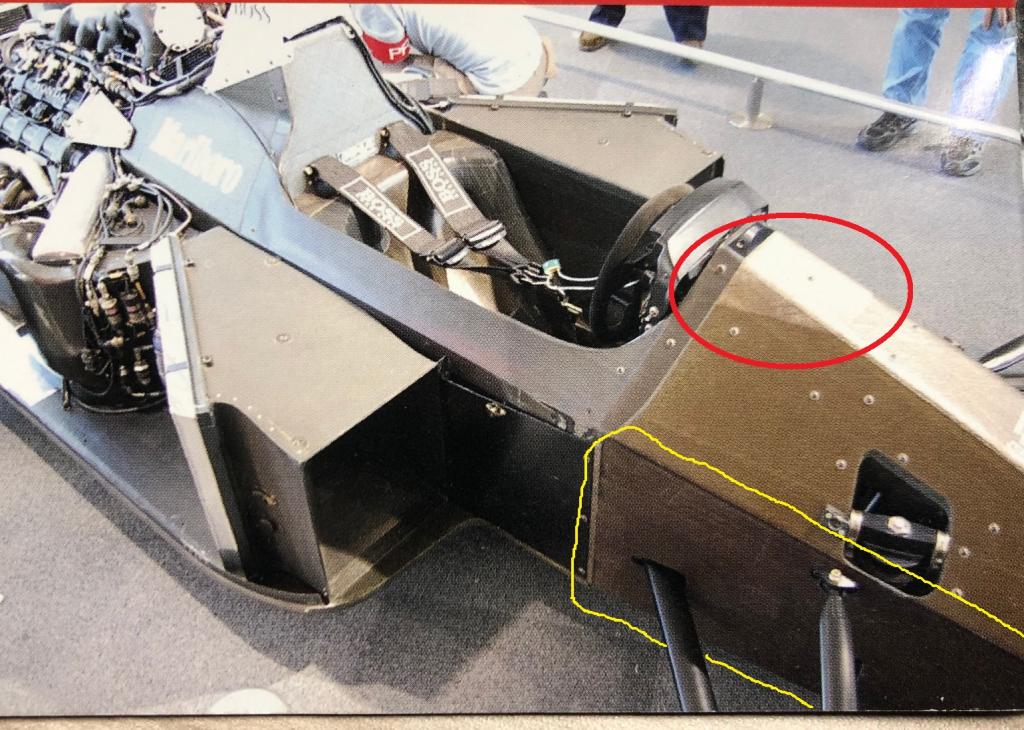
I take as example the front vent taht is full carbon, the rear is not like the front. The rear vent have the other duct (yellow marked) in other material (finest carbon or ABS or metal).

So, i just peel off the decal, I'll resprayed them and then i'll apply the correct decals


Collection active: Lotus 97T, Audi Quattro A2, Vw Maggiolino '60

Work in progress: Porsche 911 RS Turbo

Completed model: Delta WRC Martini, Mclaren MP4/4, Golf GTI 1/8 Tuned
frah2o
#145 Posted : 26 September 2019 07:34:06

Rank: Vice-Master
Publisher Medal: Featured Build of the MonthActive Service Medal: 500 post active service MedalBuild-Diary Medal: Build-Diary Medal of HonourRed Medal: Red MedalOutstanding Build: An award for an outstanding build
Groups: Registered

Joined: 05/04/2016
Posts: 708
Points: 2,127
Location: Ferrara
I correct the mistake on rear ducts.

I paint the last part of this duct in matt black and then i carbon the rest of vent. In the future I'll coat with clear and I'll add some PE rivets and the rubber cowling for driveshaft

I also finished the carbon work on front duct.

A very hard parts to carbon, but i'm quite satisfied with end result.


Collection active: Lotus 97T, Audi Quattro A2, Vw Maggiolino '60

Work in progress: Porsche 911 RS Turbo

Completed model: Delta WRC Martini, Mclaren MP4/4, Golf GTI 1/8 Tuned
frah2o
#146 Posted : 27 September 2019 07:36:40

Rank: Vice-Master
Publisher Medal: Featured Build of the MonthActive Service Medal: 500 post active service MedalBuild-Diary Medal: Build-Diary Medal of HonourRed Medal: Red MedalOutstanding Build: An award for an outstanding build
Groups: Registered

Joined: 05/04/2016
Posts: 708
Points: 2,127
Location: Ferrara
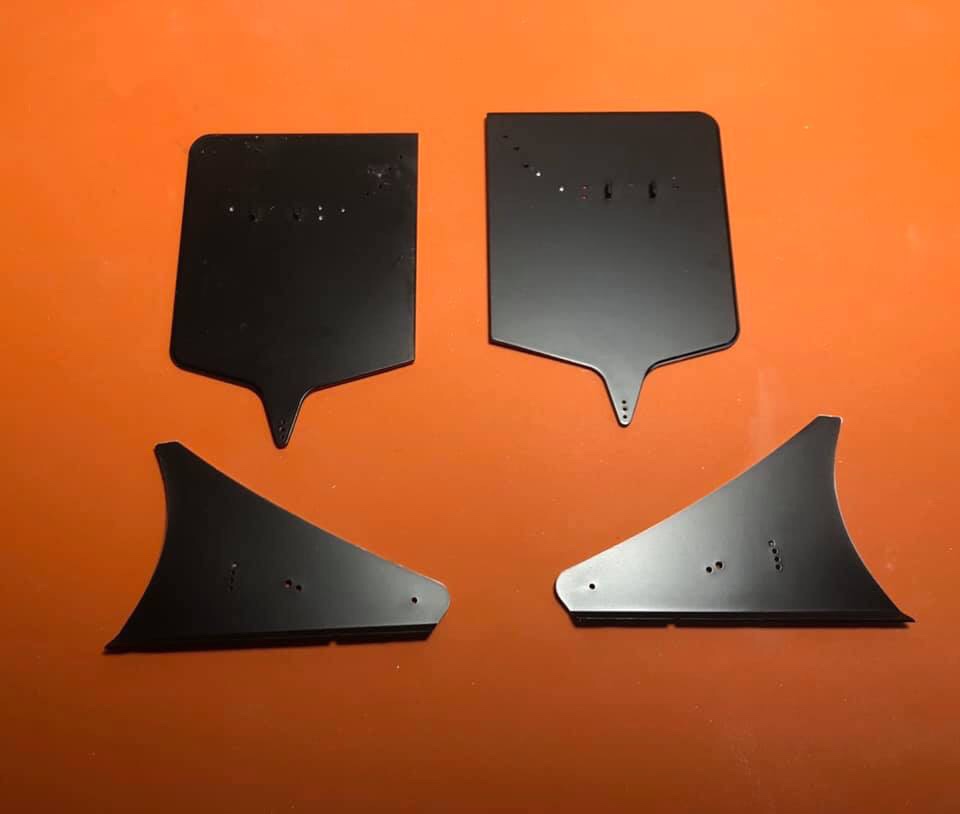
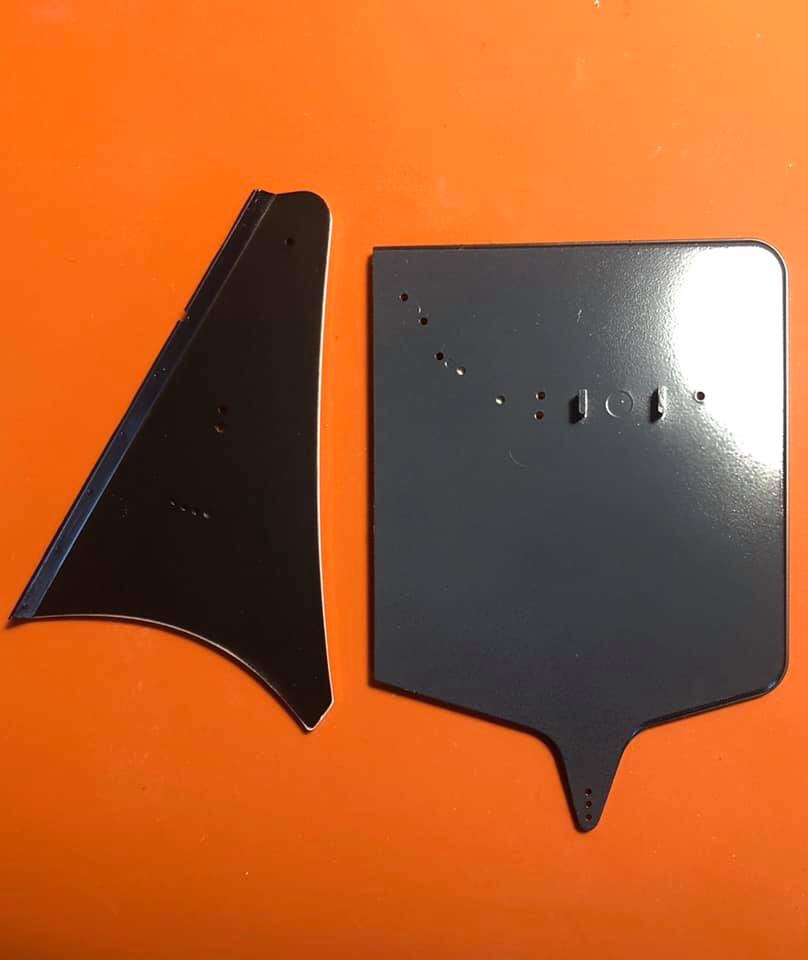
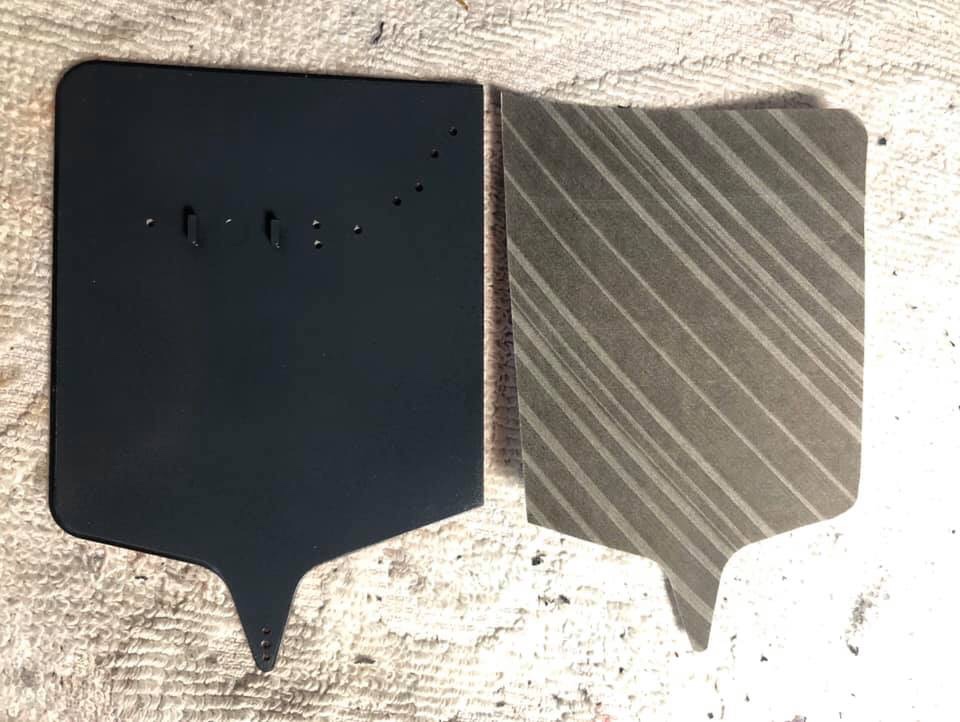
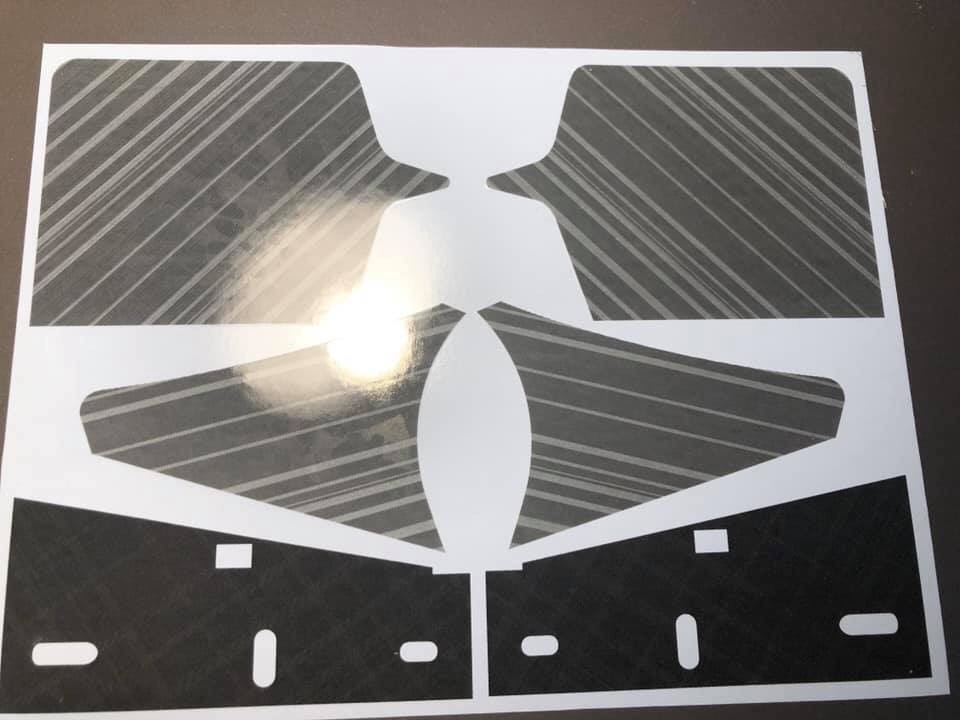
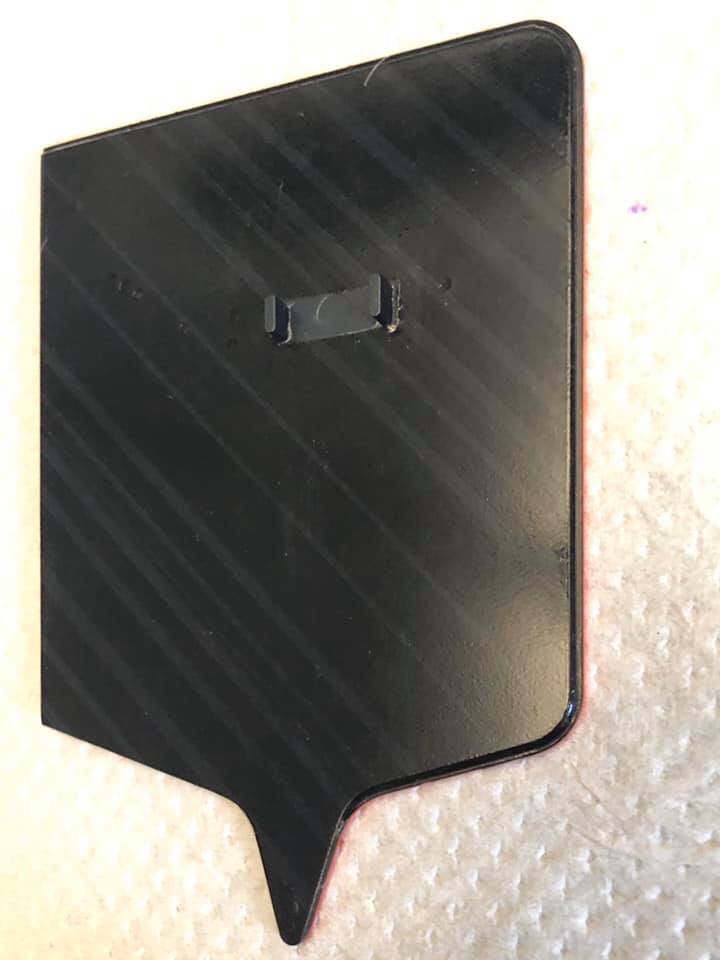
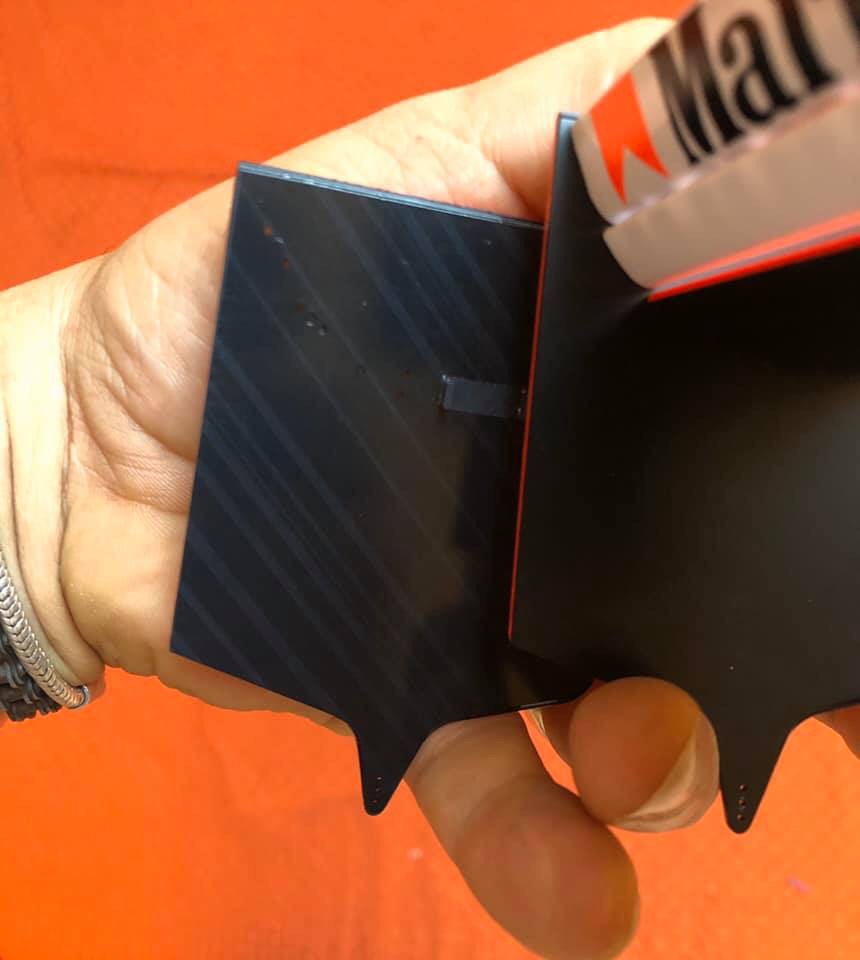
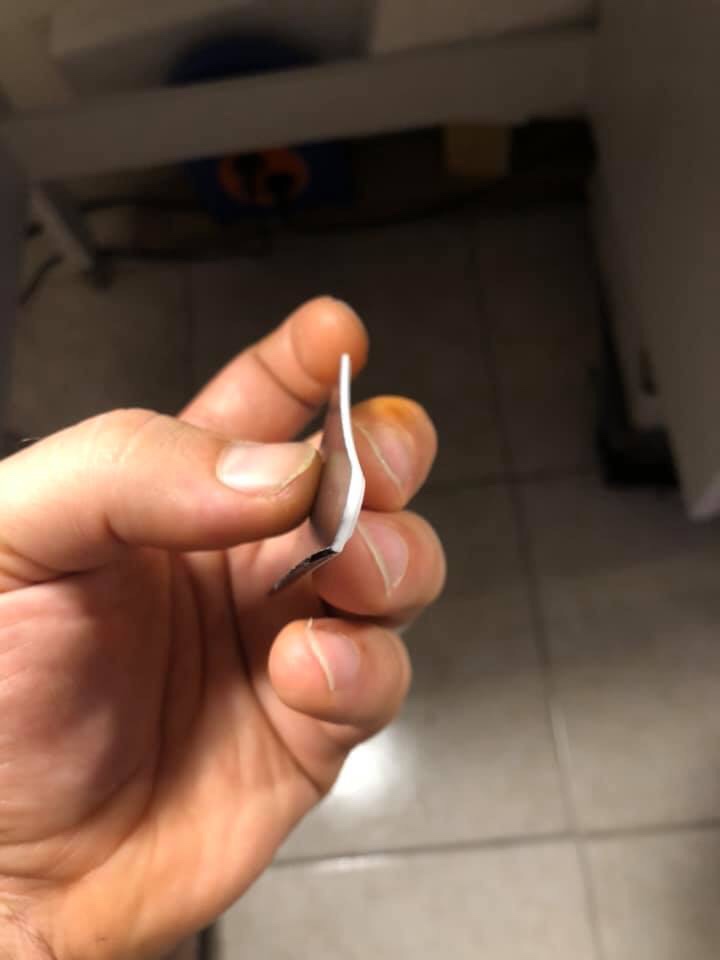
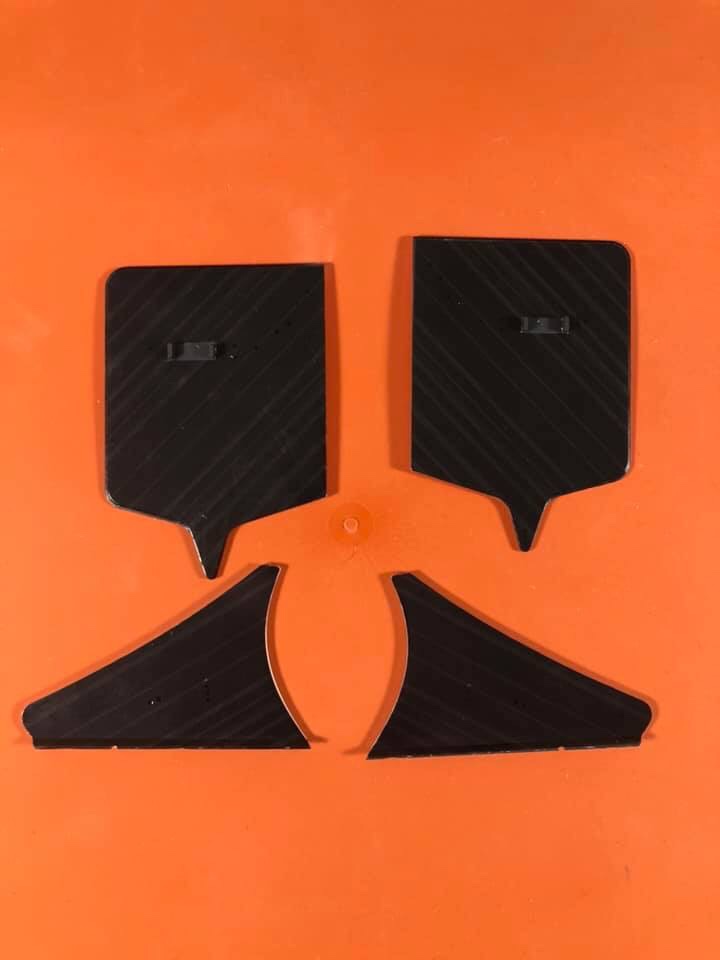
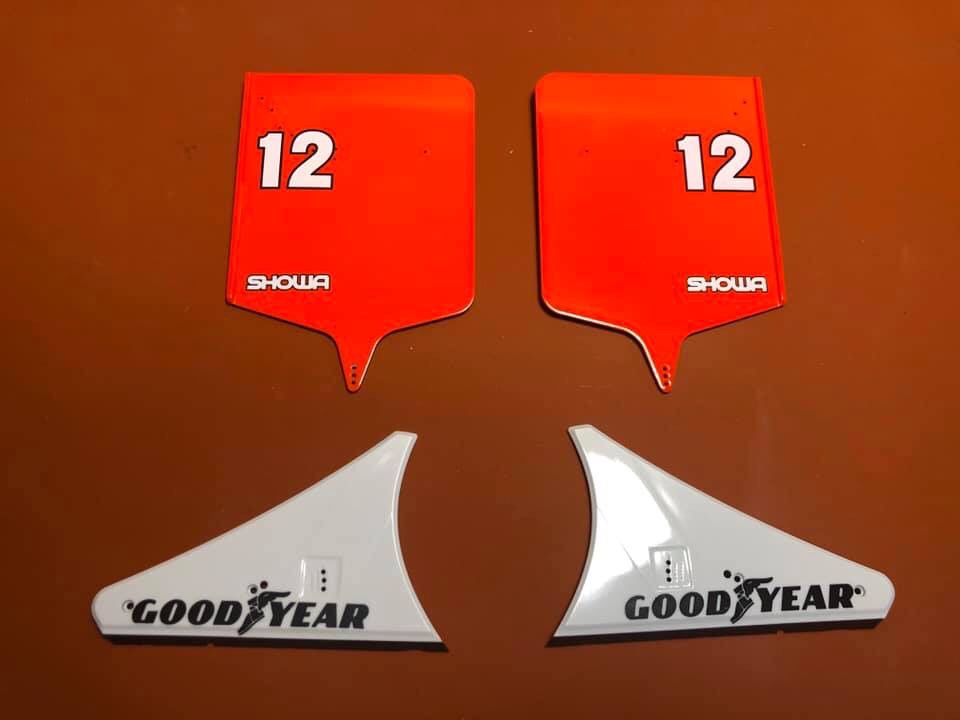
I've started th work with MC decal, it's first time with these...and i' didn't know how are made.

Before to aplly them on wings, i painted the inside of wings with base color graphite.
I saw that the most used base color is alu+smoke....but this color never give me the right response as real mp4:4
En each photo that i saw, the diagonal fibre are almost invisible and imperceptible.
So i made some experiment with color and for me the best match is graphite (not metallic.

After painting and before to apply decal, with copy of same decal, i made the template for open the hole for the bracket for central wing.

Finally i fitted the decal and i waited 30 minuts before to re-profile the exceed of decal

Once they'l be dried, i'll spray some final matt coat because these MC are too glossy.


Collection active: Lotus 97T, Audi Quattro A2, Vw Maggiolino '60

Work in progress: Porsche 911 RS Turbo

Completed model: Delta WRC Martini, Mclaren MP4/4, Golf GTI 1/8 Tuned
frah2o
#147 Posted : 28 September 2019 06:46:57

Rank: Vice-Master
Publisher Medal: Featured Build of the MonthActive Service Medal: 500 post active service MedalBuild-Diary Medal: Build-Diary Medal of HonourRed Medal: Red MedalOutstanding Build: An award for an outstanding build
Groups: Registered

Joined: 05/04/2016
Posts: 708
Points: 2,127
Location: Ferrara
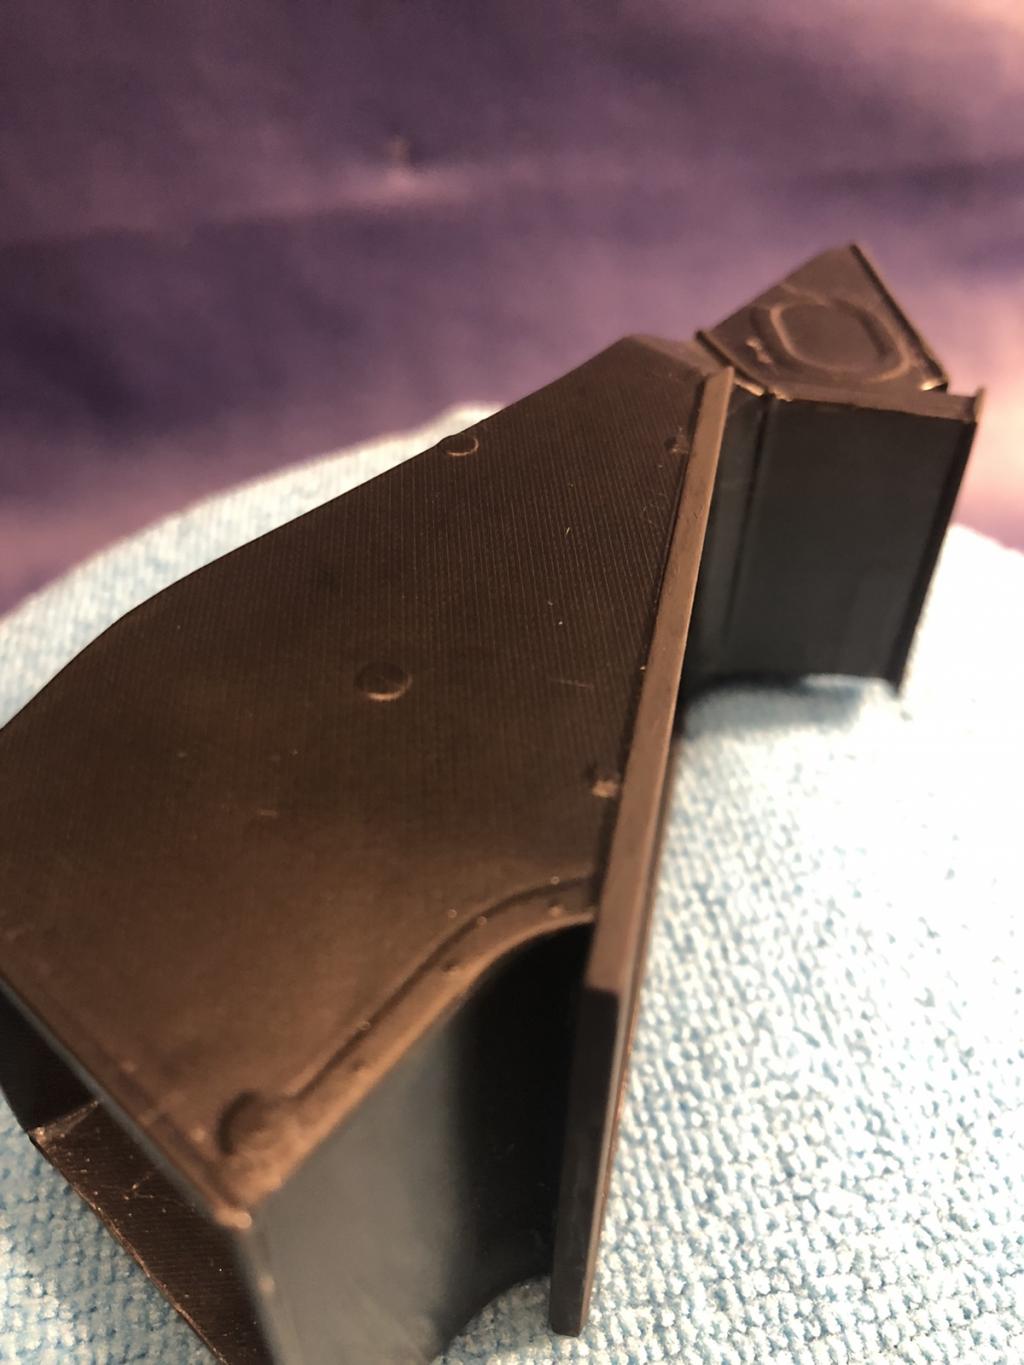
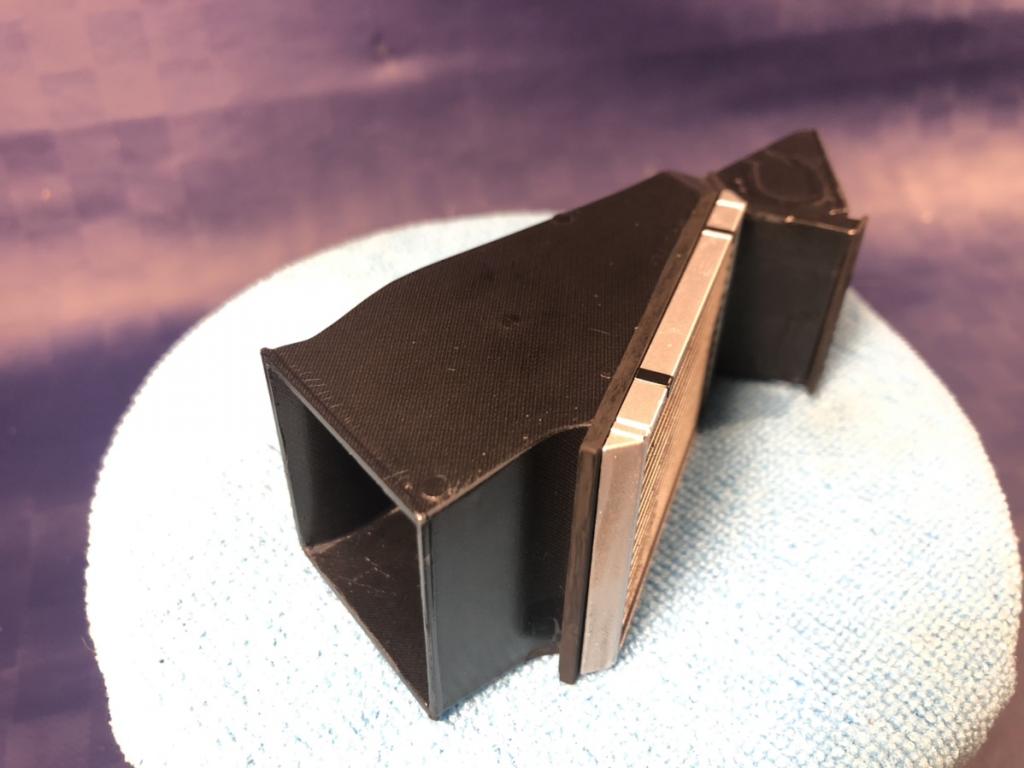
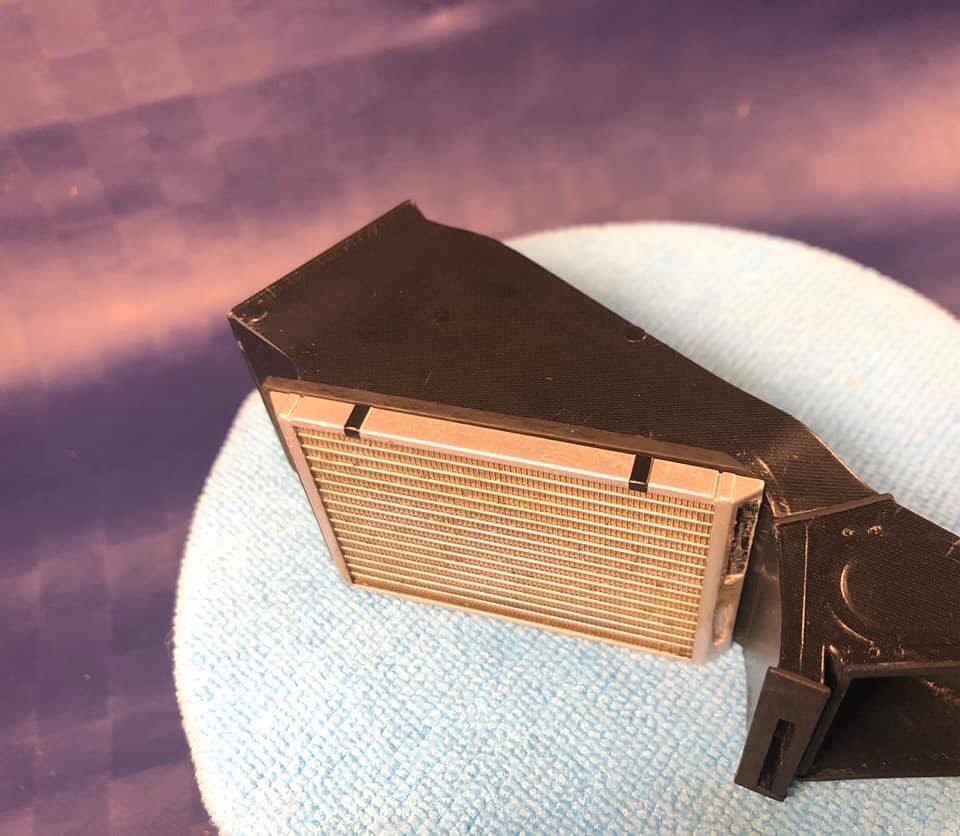
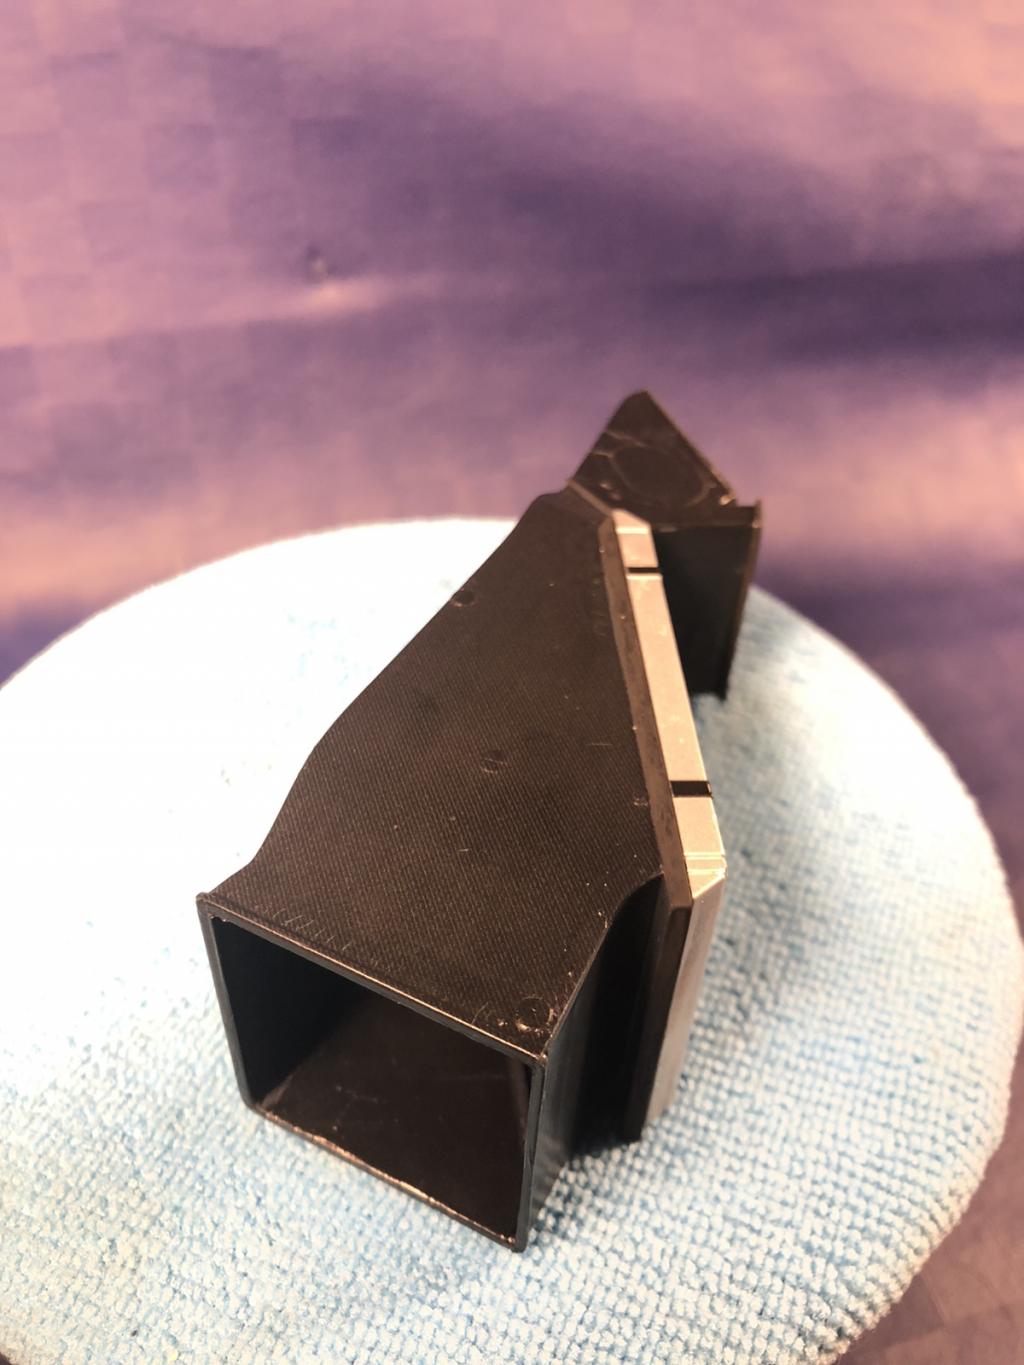
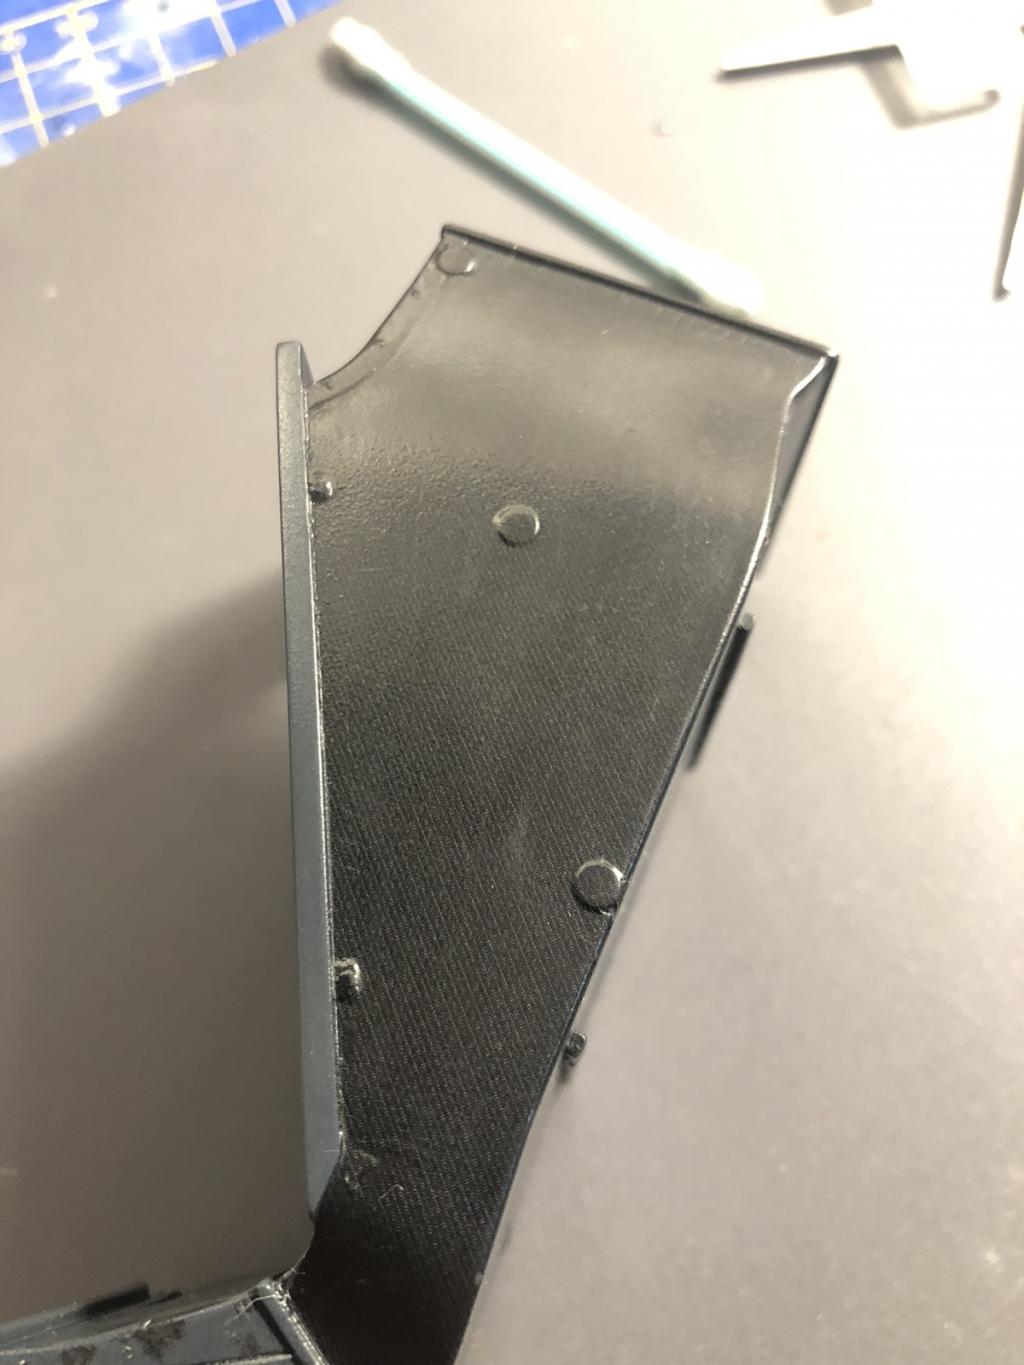
I started the work on radiator boxes that have a really extra fine and really hard carbon to replicate.

Many people paint this parts. In my mind there was only idea to carbon coat with decal

I tested many decals and i found a good match with 1/32 carbon for aircraft.

I use as base color the graphite, the i coated them

I think that is quite similar to real carbon. Looking them closely is possible to see the fiber, loooking them far they should be black....as on real mp4/4

I'll coat with matt gloss and some final details.


Collection active: Lotus 97T, Audi Quattro A2, Vw Maggiolino '60

Work in progress: Porsche 911 RS Turbo

Completed model: Delta WRC Martini, Mclaren MP4/4, Golf GTI 1/8 Tuned
frah2o
#148 Posted : 30 September 2019 09:02:59

Rank: Vice-Master
Publisher Medal: Featured Build of the MonthActive Service Medal: 500 post active service MedalBuild-Diary Medal: Build-Diary Medal of HonourRed Medal: Red MedalOutstanding Build: An award for an outstanding build
Groups: Registered

Joined: 05/04/2016
Posts: 708
Points: 2,127
Location: Ferrara
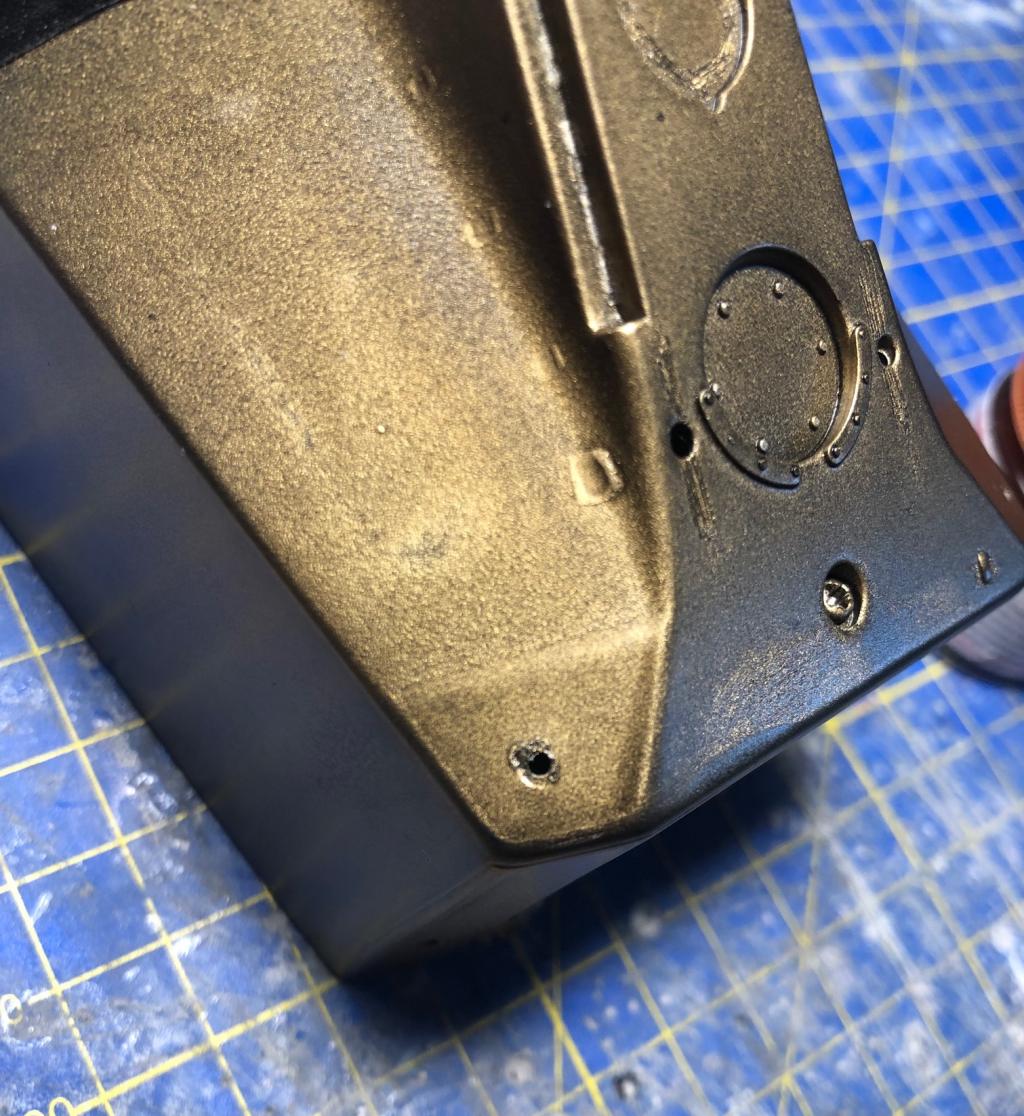
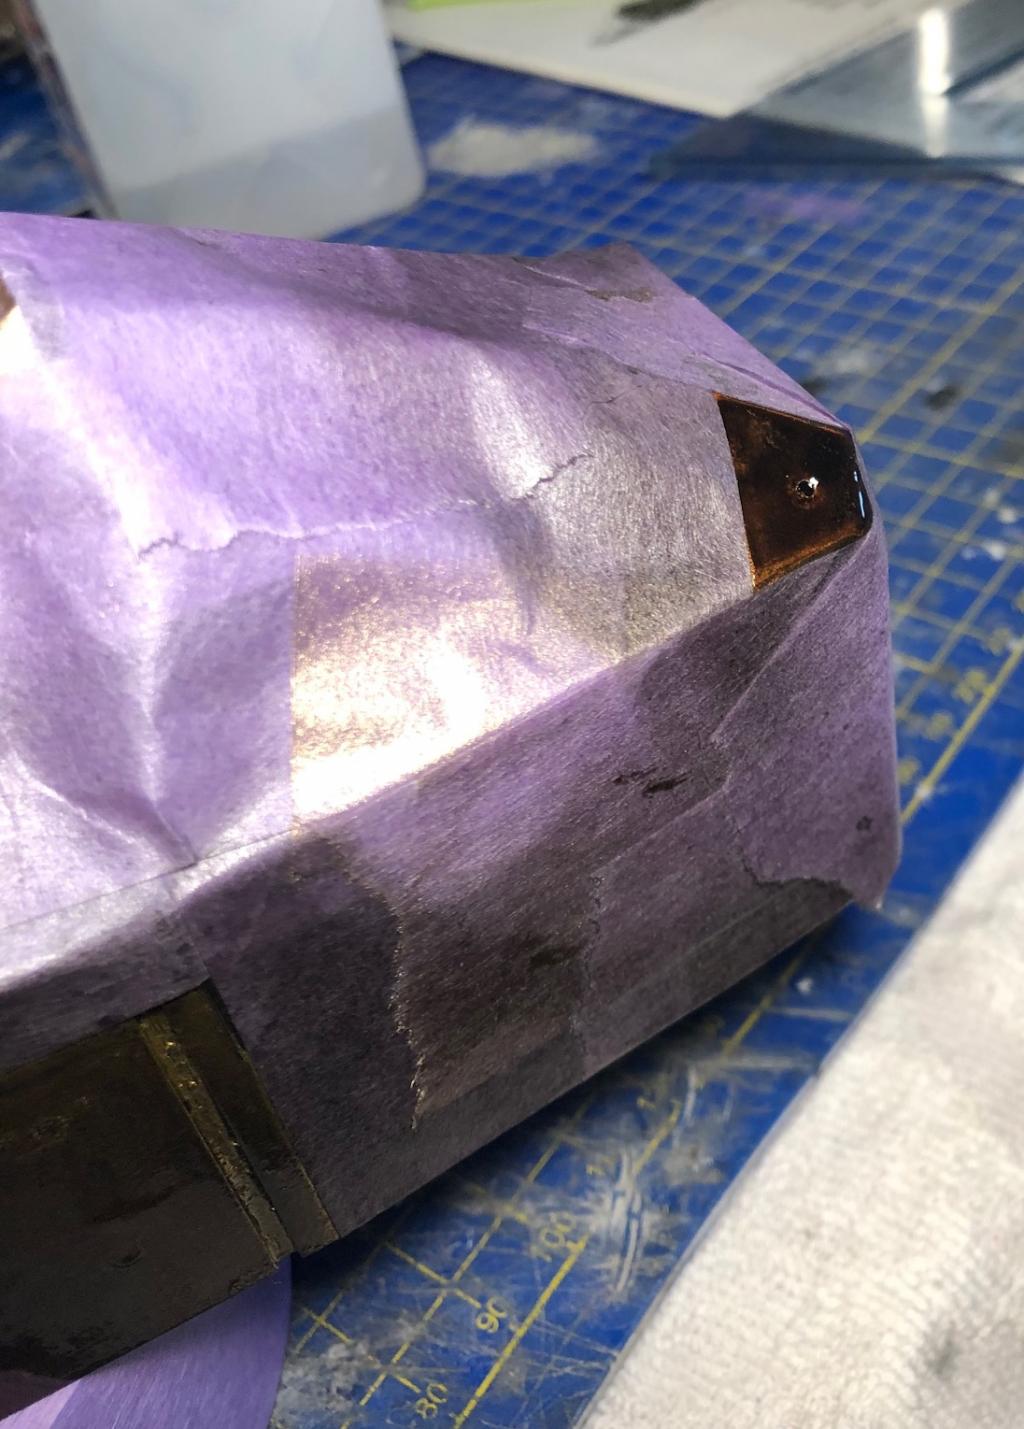
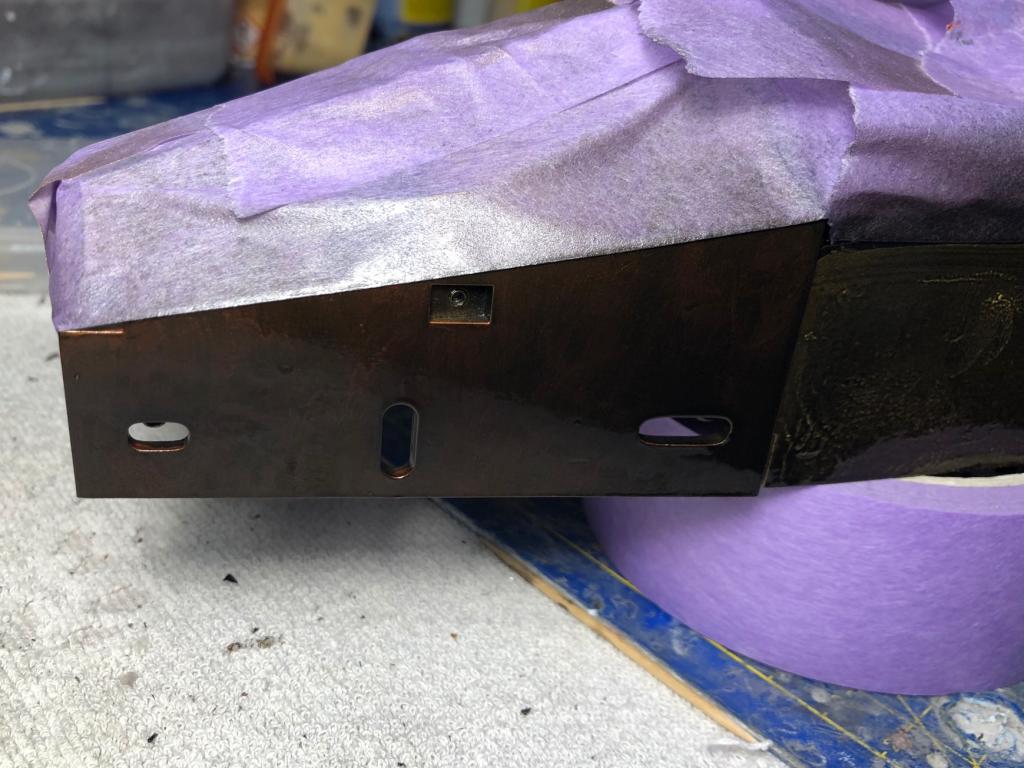
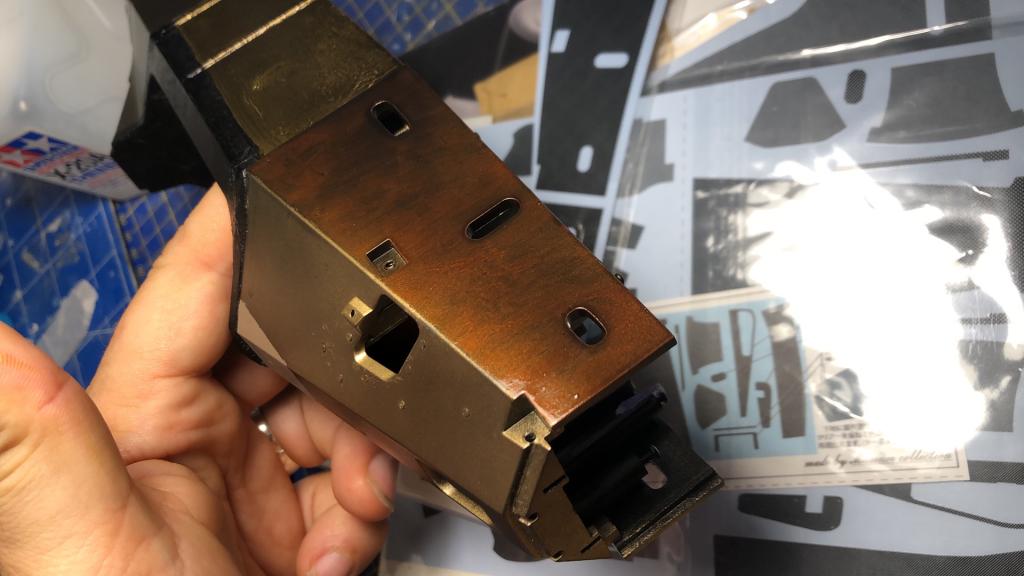
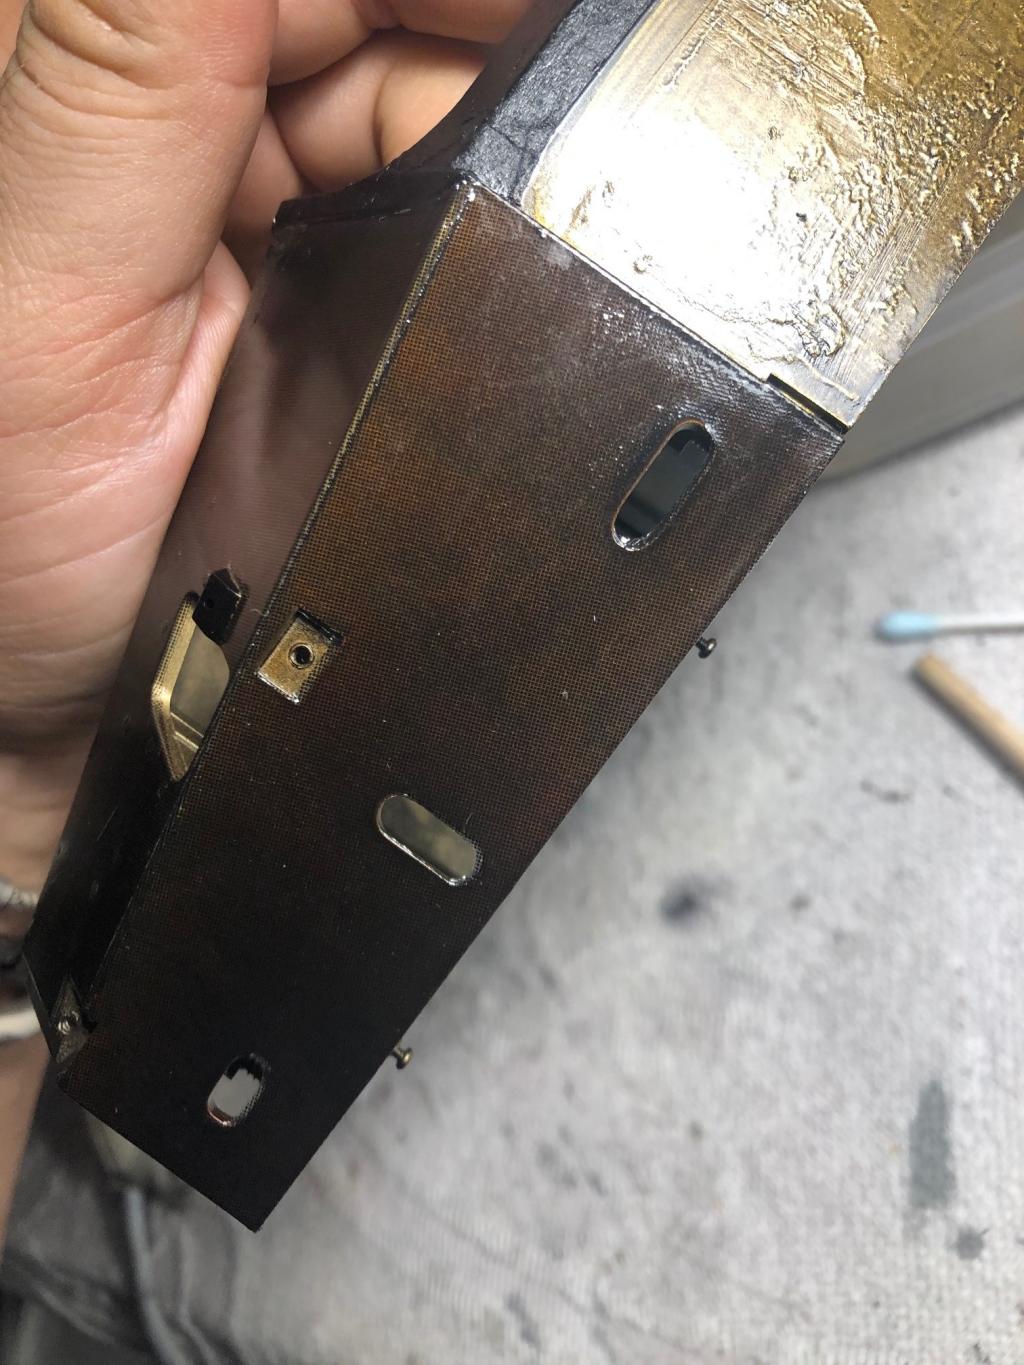
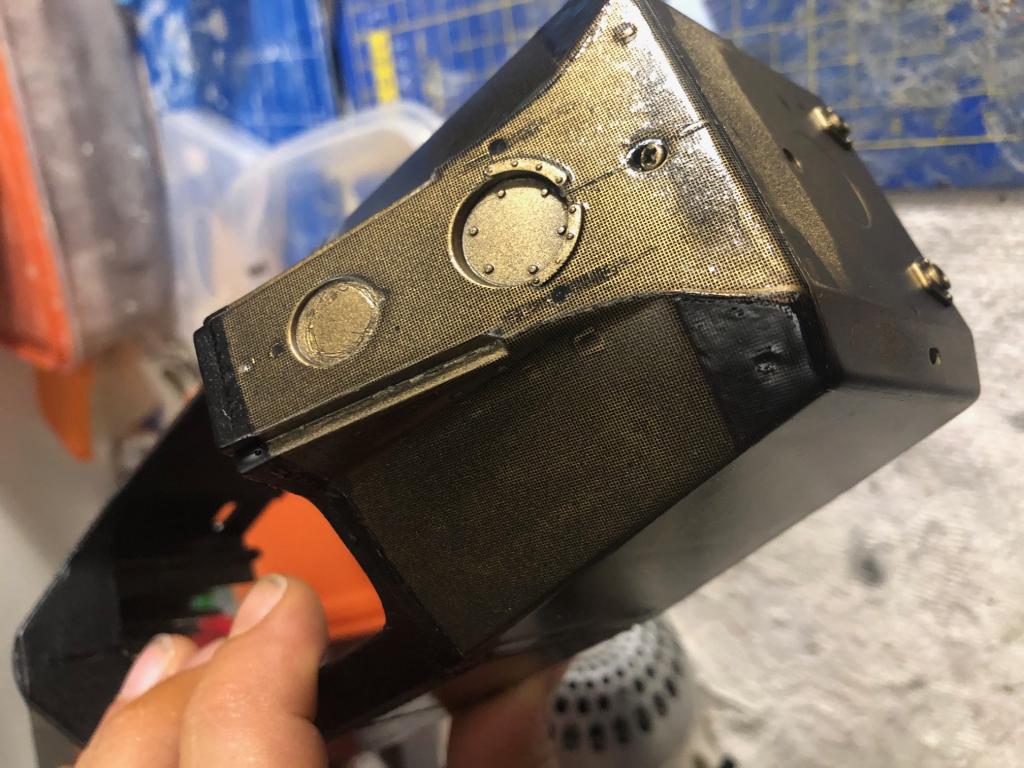
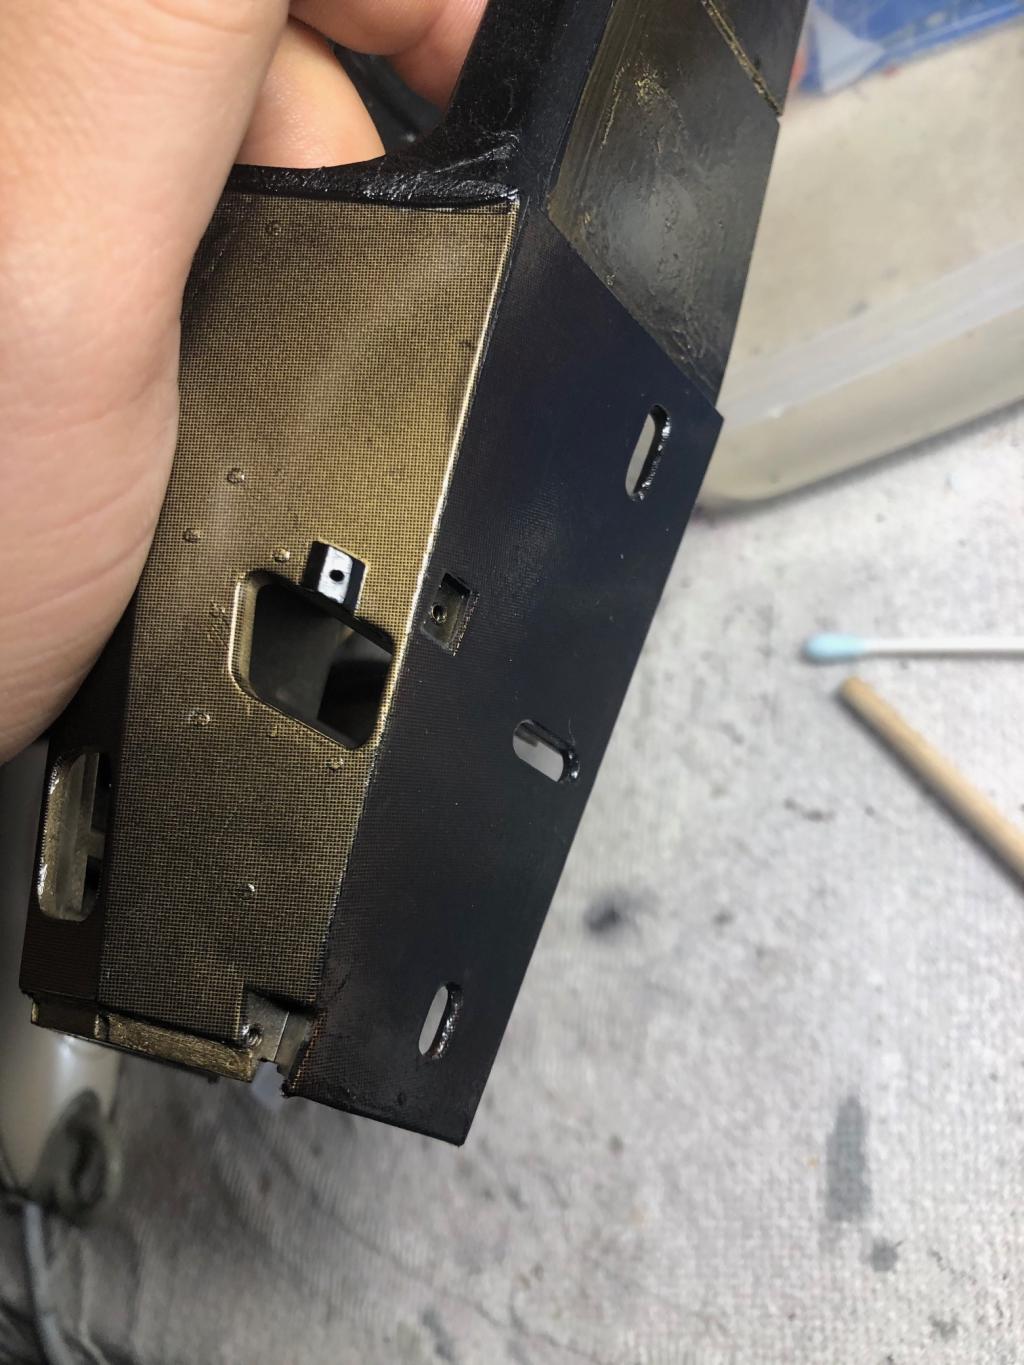
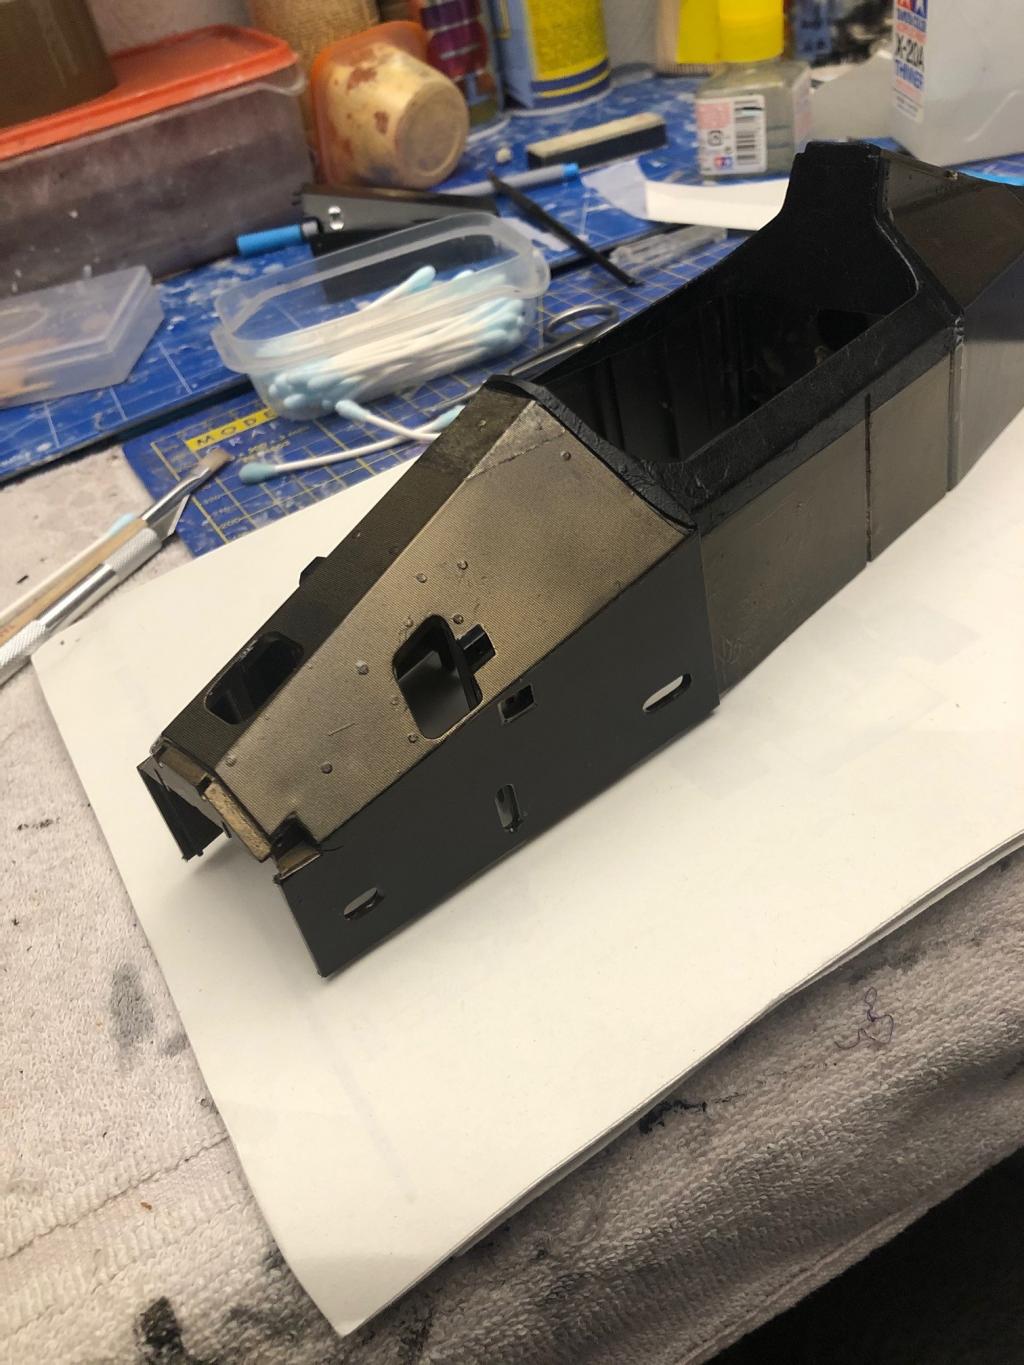
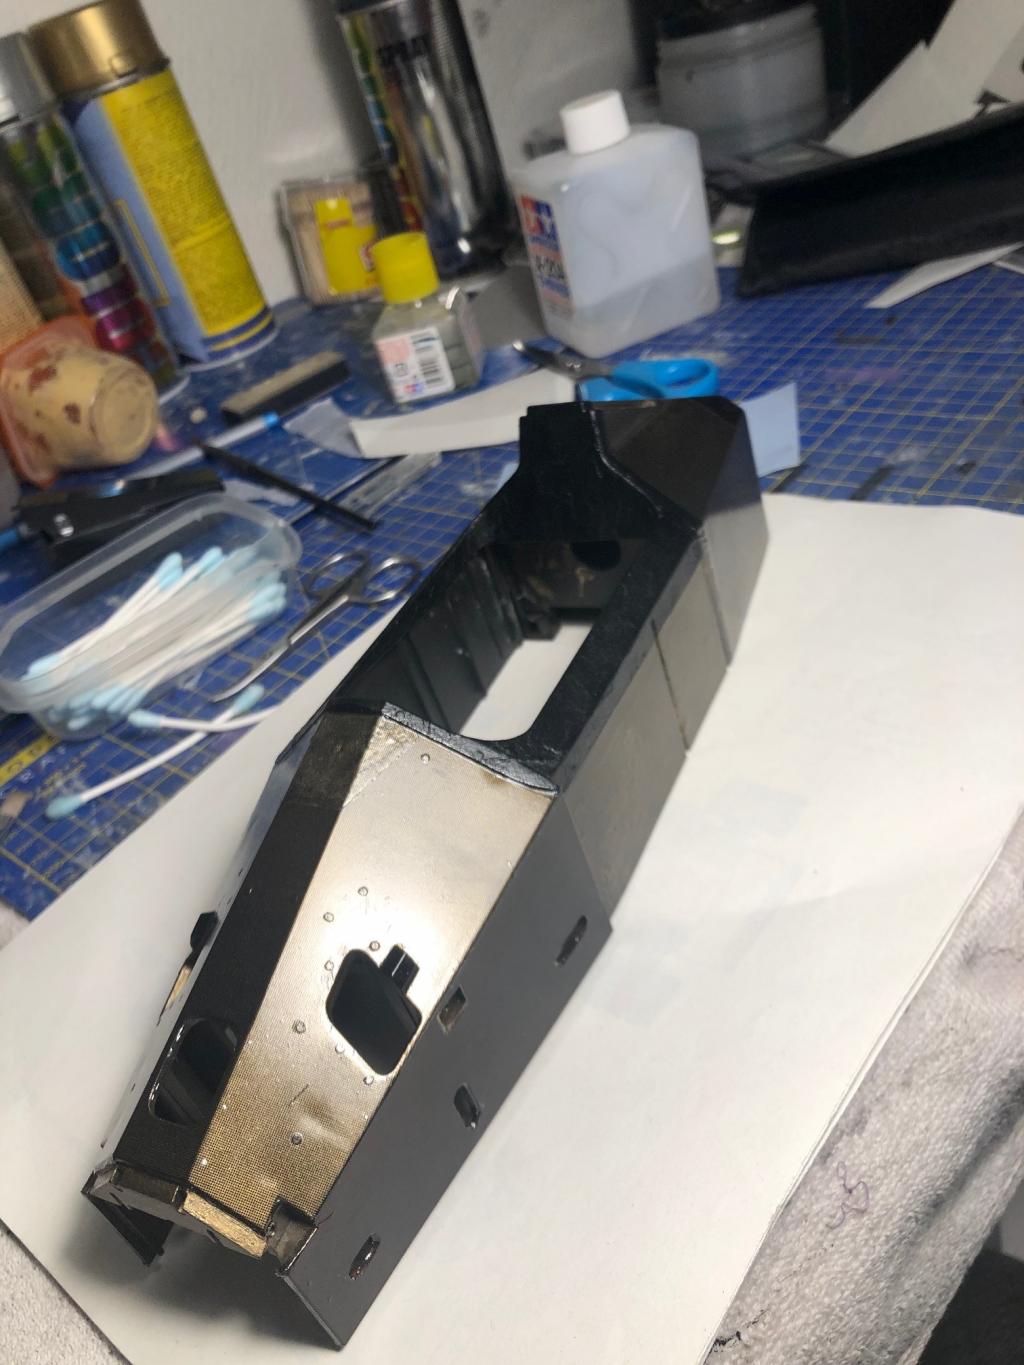
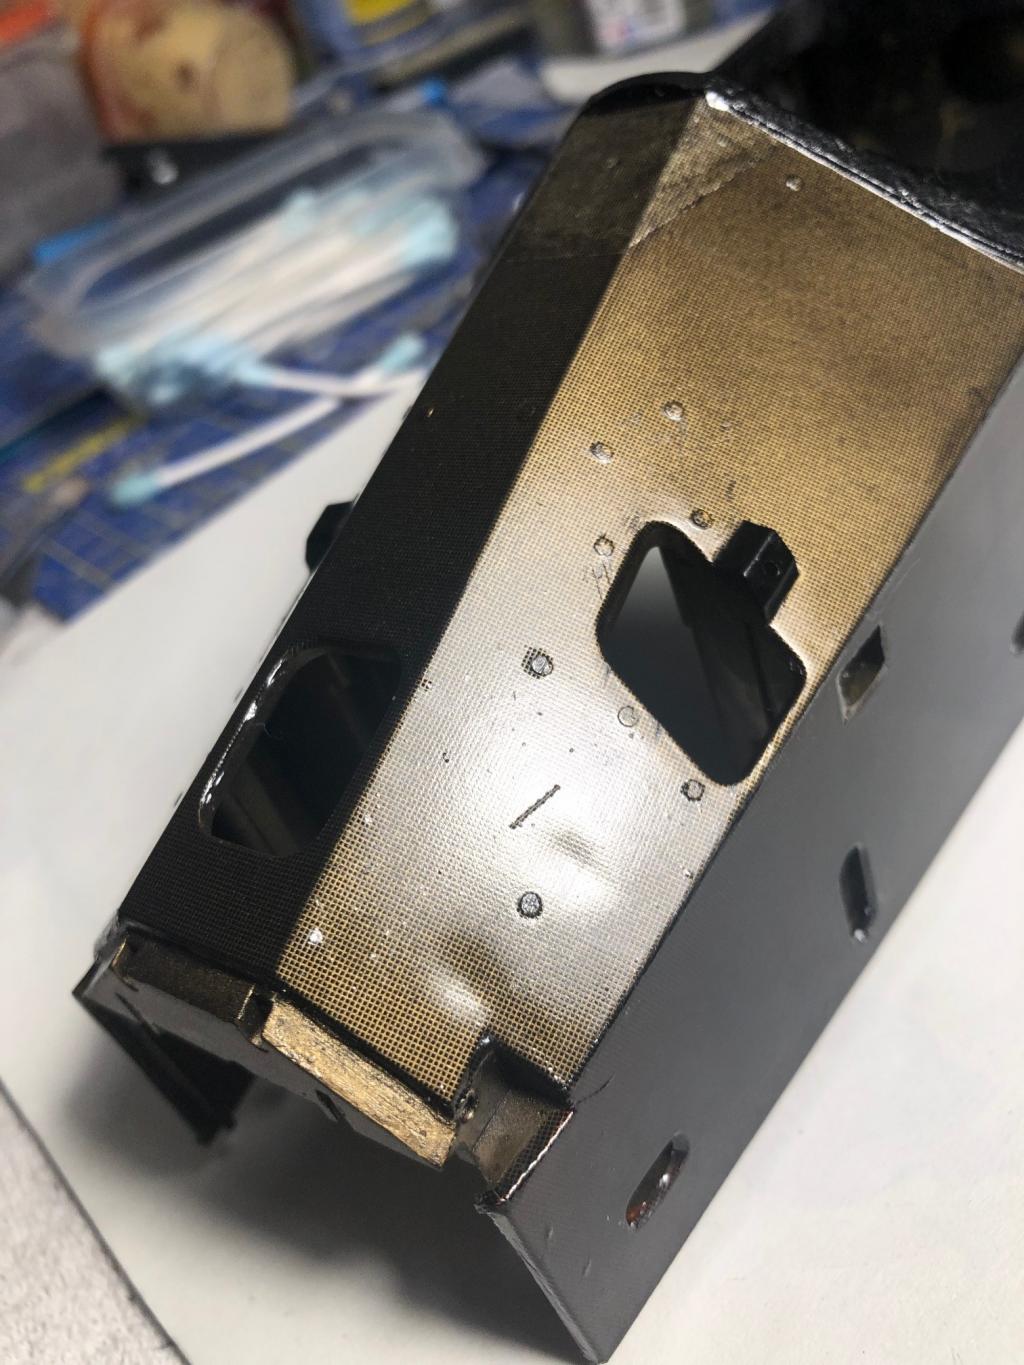
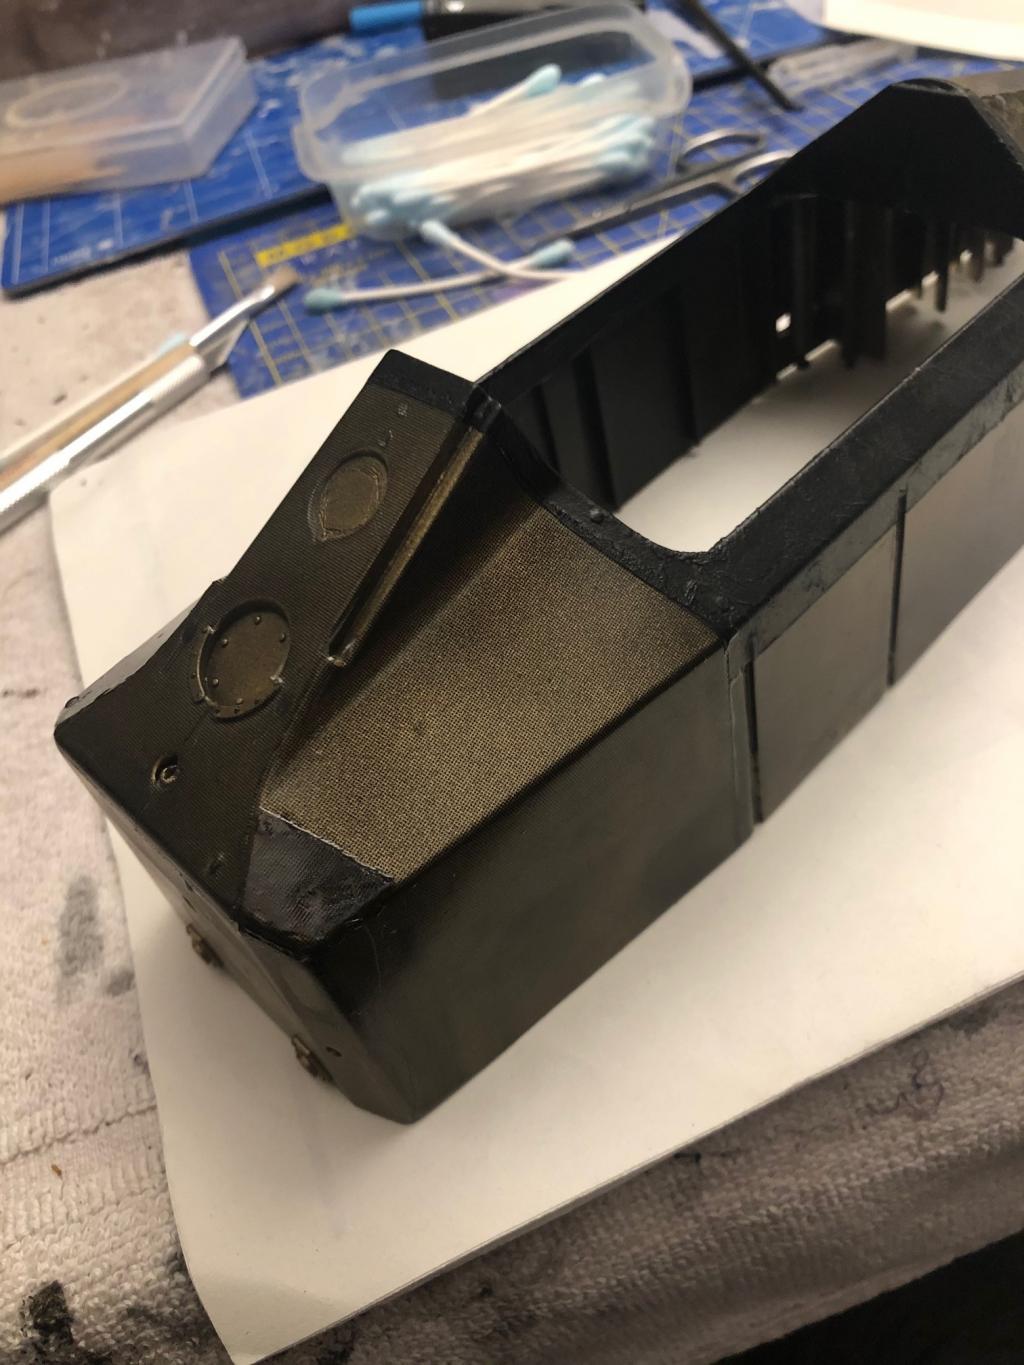
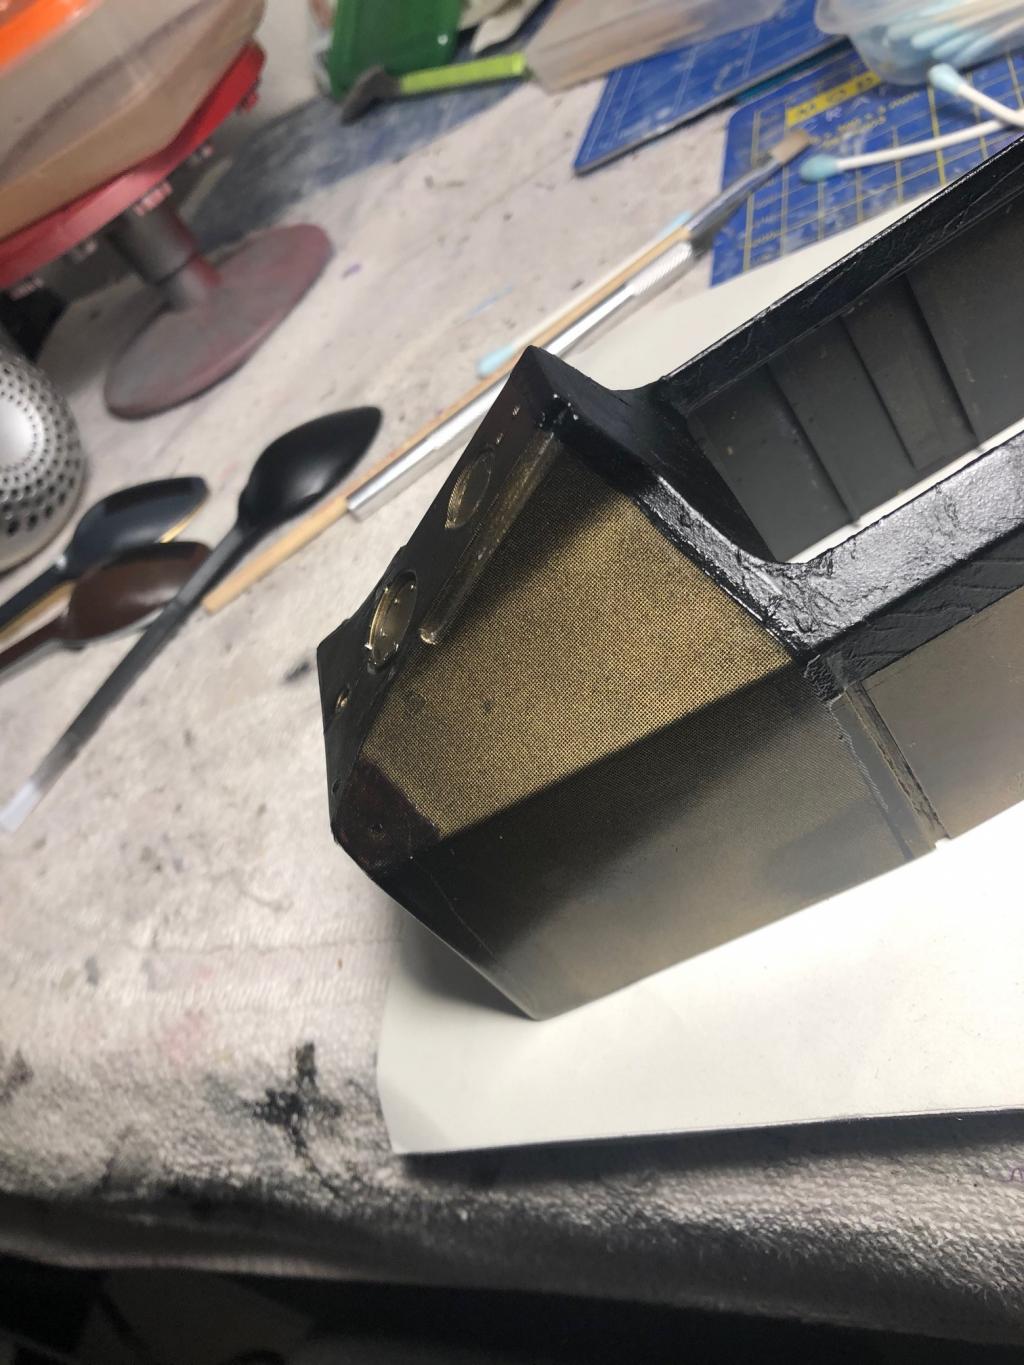
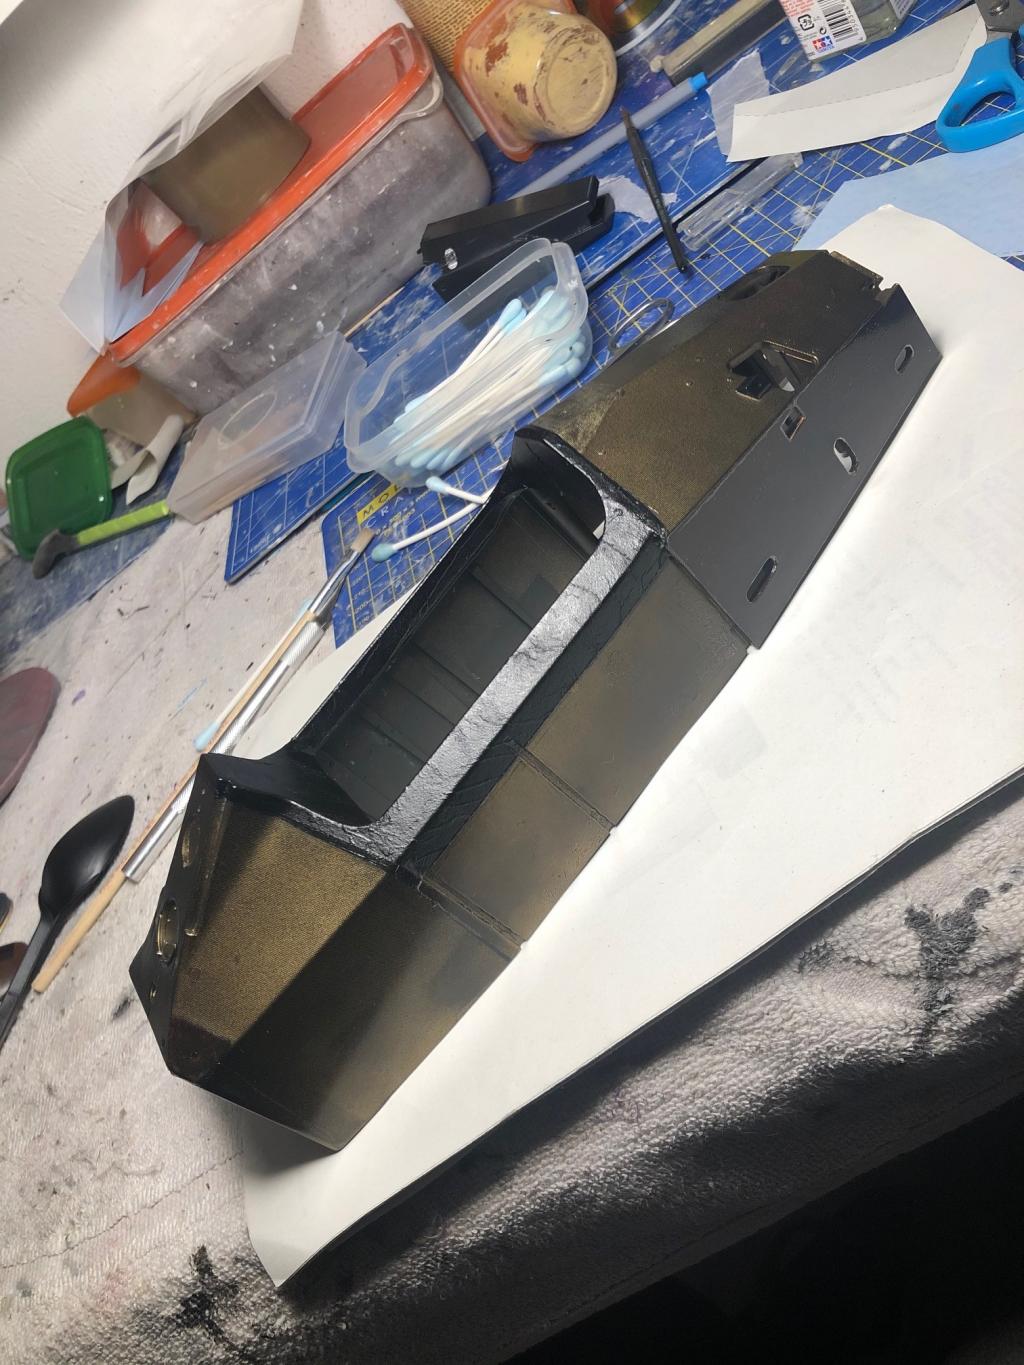
I've painted the front and rear zone of monocoque.

As base color i used a pale gold + 2 coat of TS71 Smoke.


After the painted a starte to work on central zone to try to replicate the rough carbon zone (blue area)


Collection active: Lotus 97T, Audi Quattro A2, Vw Maggiolino '60

Work in progress: Porsche 911 RS Turbo

Completed model: Delta WRC Martini, Mclaren MP4/4, Golf GTI 1/8 Tuned
frah2o
#149 Posted : 01 October 2019 11:17:37

Rank: Vice-Master
Publisher Medal: Featured Build of the MonthActive Service Medal: 500 post active service MedalBuild-Diary Medal: Build-Diary Medal of HonourRed Medal: Red MedalOutstanding Build: An award for an outstanding build
Groups: Registered

Joined: 05/04/2016
Posts: 708
Points: 2,127
Location: Ferrara
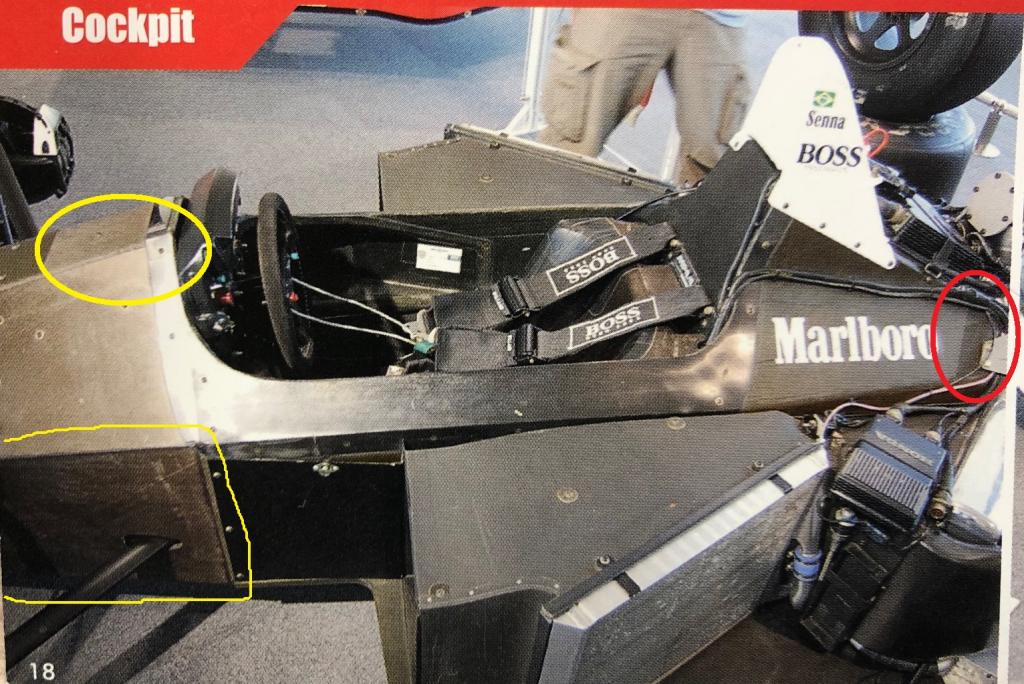
Just bought on amazon this book....it's a real bible to this mp4/4 and his 6 chassis
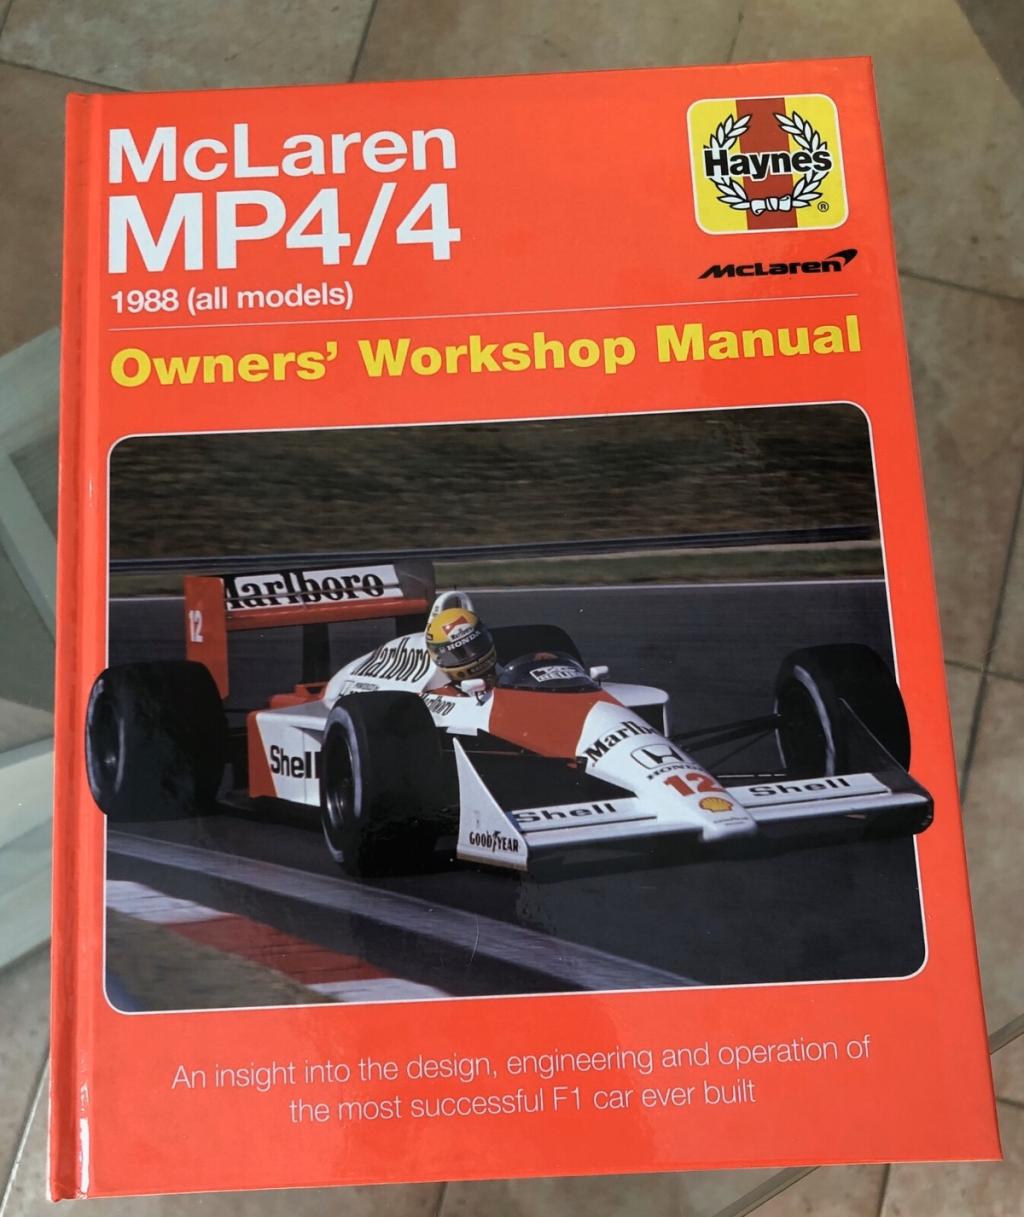


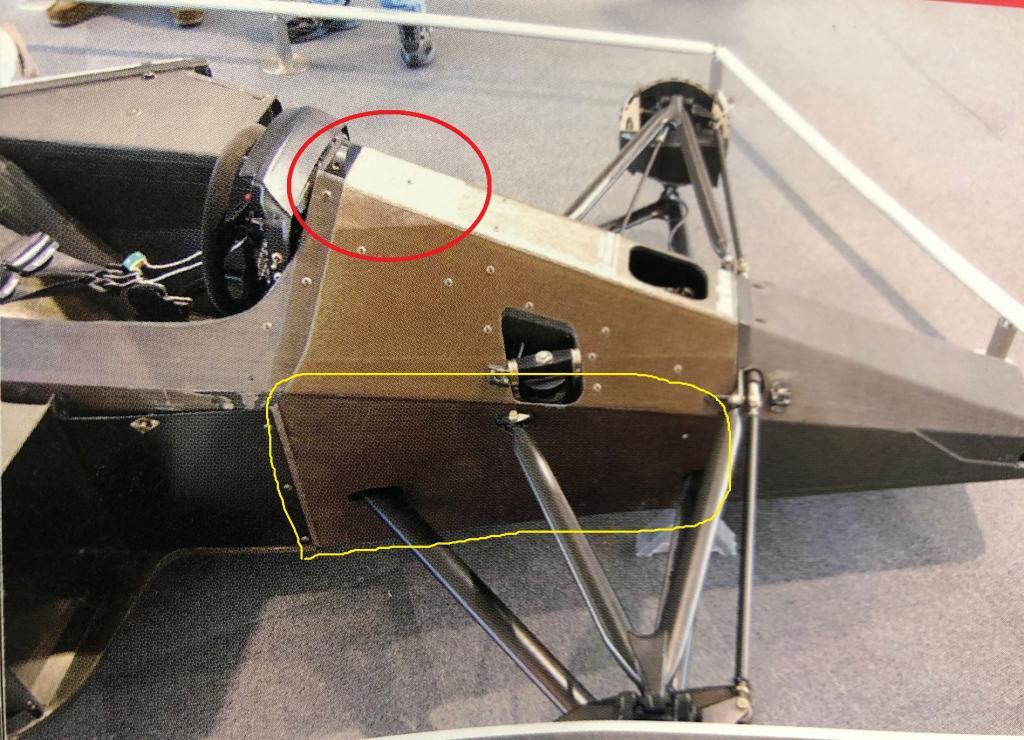
I found some interesting pics of bathtube and monocoque that explain composite material and explain the puzzle carbon of this car
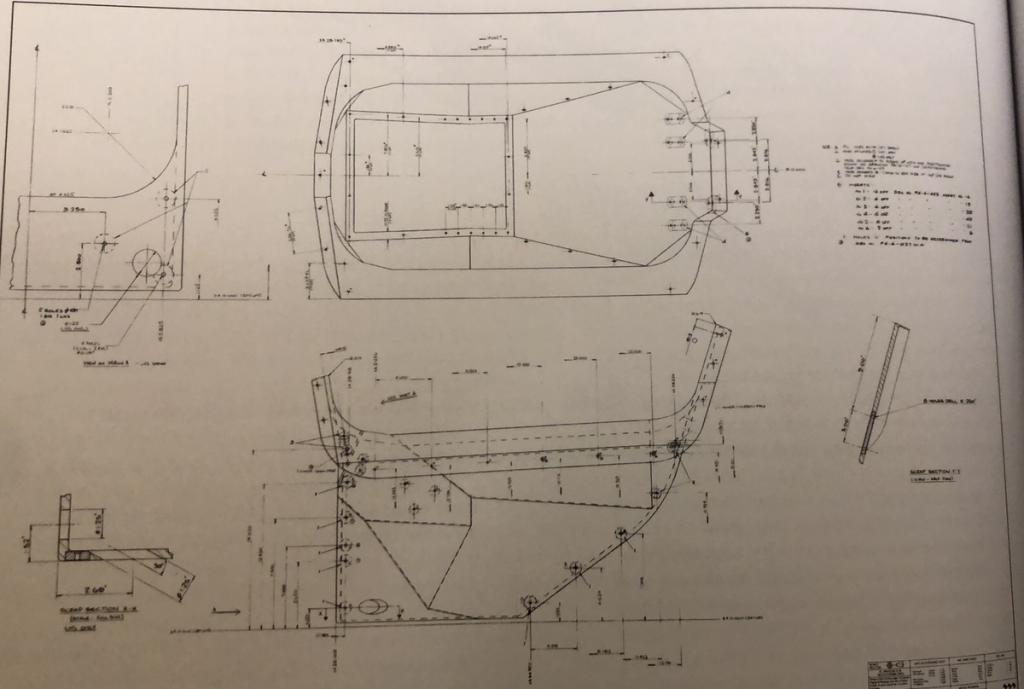

Tratto dal mio libro Haynes Maunal

I understand tha chassis from 01 to 04 have bathube with carbon rough surface
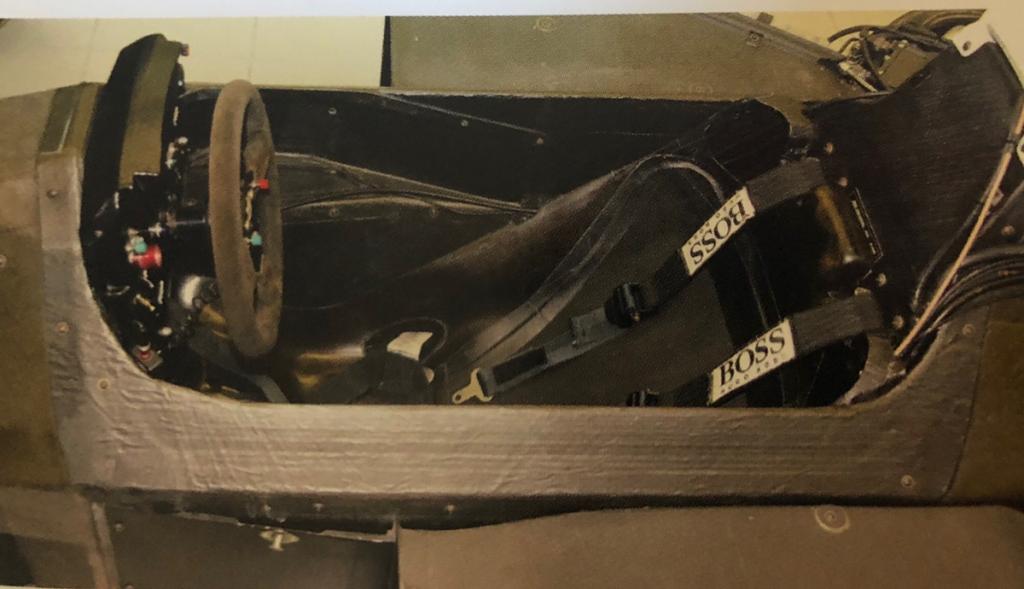

Tratto dal mio libro Haynes Maunal

Chassis from 05 to 06 have smooth surface
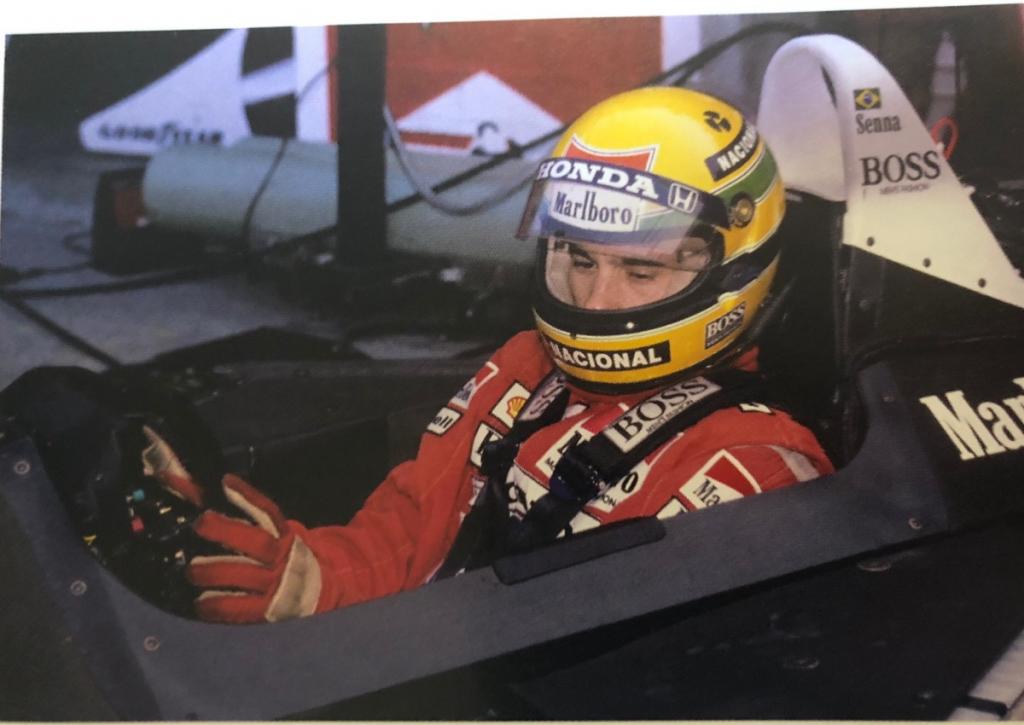

Tratto dal mio libro Haynes Maunal

Kyosho replicate the chassis 02 used by Ayrton in Suzuka race. Ayrton used chassi 05 in practic and qualify, but in race used the Spare car 02...so with carbon rough bathtube
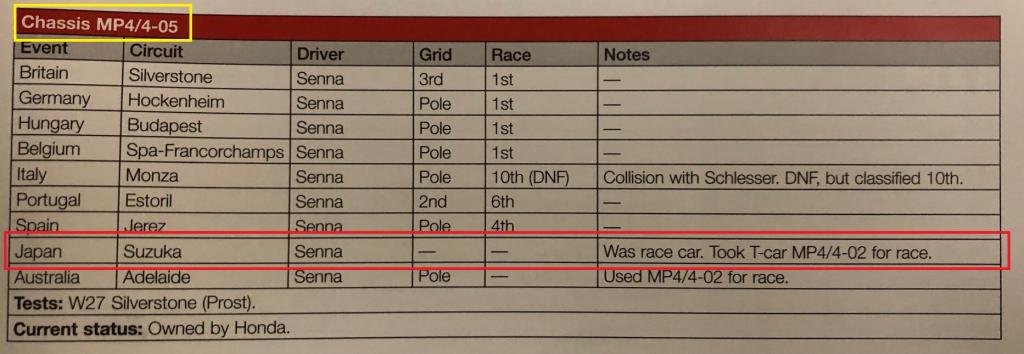

Tratto dal mio libro Haynes Maunal


Tratto dal mio libro Haynes Maunal

The sticker on headrest is clearly the 02 chassis as Suzuka race car


With this great help i'll try to reproduce the 02 chassis on my model.

If you're buliding this fantastic model, it's a great help this book with MFH book of Joe Honda
Collection active: Lotus 97T, Audi Quattro A2, Vw Maggiolino '60

Work in progress: Porsche 911 RS Turbo

Completed model: Delta WRC Martini, Mclaren MP4/4, Golf GTI 1/8 Tuned
RM1
#150 Posted : 01 October 2019 11:34:58

Rank: Elite

Publisher Medal: Featured Build of the MonthActive Service Medal: 500 post active service MedalPurple Medal: Super active service medal for 1000 postsOutstanding Build: An award for an outstanding buildCompetition Winner of Model Builds: Competition Winner of Model BuildsBuild-Diary Medal: Build-Diary Medal of HonourRed Medal: Red Medal
Groups: Registered

Joined: 27/03/2012
Posts: 1,973
Points: 5,963
Location: johannesburg
Very comprehensive build diary as always !! some amazing attention to detail going into this one.
Malc.
frah2o
#151 Posted : 02 October 2019 07:32:44

Rank: Vice-Master
Publisher Medal: Featured Build of the MonthActive Service Medal: 500 post active service MedalBuild-Diary Medal: Build-Diary Medal of HonourRed Medal: Red MedalOutstanding Build: An award for an outstanding build
Groups: Registered

Joined: 05/04/2016
Posts: 708
Points: 2,127
Location: Ferrara
RM1 wrote:
Very comprehensive build diary as always !! some amazing attention to detail going into this one.
Malc.


Thanks Malc, i try to explain every step and research to hope will be useful for next builders of this iconic F1.


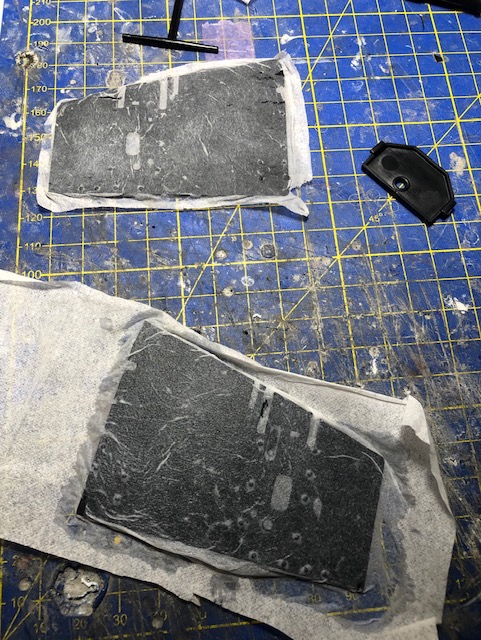
The tricks of my friend is very good. I use vinavil glue + water (1:1)and i places one single foil of towel paper. I reprofile it once dryed and i start to paint.

I painted in mat blak and finally i rolled with finger the excess of wrinkles
Finally i give a light clear coat (matt).

I made a dry assembly to see the carbon differences, than i'll start with decal of bronze areas.


Collection active: Lotus 97T, Audi Quattro A2, Vw Maggiolino '60

Work in progress: Porsche 911 RS Turbo

Completed model: Delta WRC Martini, Mclaren MP4/4, Golf GTI 1/8 Tuned
Markwarren
#152 Posted : 02 October 2019 07:57:28

Rank: Super-Elite

Publisher Medal: Featured Build of the MonthActive Service Medal: 500 post active service MedalPurple Medal: Super active service medal for 1000 postsTurquoise Medal: Turquoise Medal for model making know-how contributionOutstanding Build: An award for an outstanding buildBuild-Diary Medal: Build-Diary Medal of HonourRed Medal: Red Medal
Groups: Registered, Administrators, Global Forum Support, Moderator, Forum Support Team, Official Builds

Joined: 04/01/2016
Posts: 6,541
Points: 19,940
Location: Northamptonshire, England
Some excellent work and tips. Great job.Love Love

Mark
LowOctave
#153 Posted : 03 October 2019 04:20:45

Rank: Amateur Level 1


Groups: Registered

Joined: 25/08/2019
Posts: 31
Points: 93
Location: Texas, USA
This build diary is amazing... you can feel the confidence growing form first post to current. You have well developed building skills, great creativity and bring a love for racing to the model. Being an ex-race driver, I really appreciate what you have done, and am now committed to getting one of these kits. Keep up the pursuit of excellence!! ThumpUp
Kit builder fanatic!
Awaiting arrival: Jaguar E-Type and Suzuki GSX 1300R Hayabusa
Received: Lamborghini Countach 500S - build in progress; Shelby Mustang GT-500 build on hold need Pack 9
frah2o
#154 Posted : 03 October 2019 10:08:24

Rank: Vice-Master
Publisher Medal: Featured Build of the MonthActive Service Medal: 500 post active service MedalBuild-Diary Medal: Build-Diary Medal of HonourRed Medal: Red MedalOutstanding Build: An award for an outstanding build
Groups: Registered

Joined: 05/04/2016
Posts: 708
Points: 2,127
Location: Ferrara
Markwarren wrote:
Some excellent work and tips. Great job.Love Love

Mark


Thanks Mark, i'll try to do my personal bes with this one.

LowOctave wrote:
This build diary is amazing... you can feel the confidence growing form first post to current. You have well developed building skills, great creativity and bring a love for racing to the model. Being an ex-race driver, I really appreciate what you have done, and am now committed to getting one of these kits. Keep up the pursuit of excellence!! ThumpUp


Thanks very much Low, I love too much the motorsport racing (expecially F1, Endurance and Rally) and i'm a big fan of Ayrton.
I'l try do to my best with this iconic McLaren, and i think is one of the hardest car to rty to reproduce.
You're word are amazing and hope my topic will be a help for your future building.


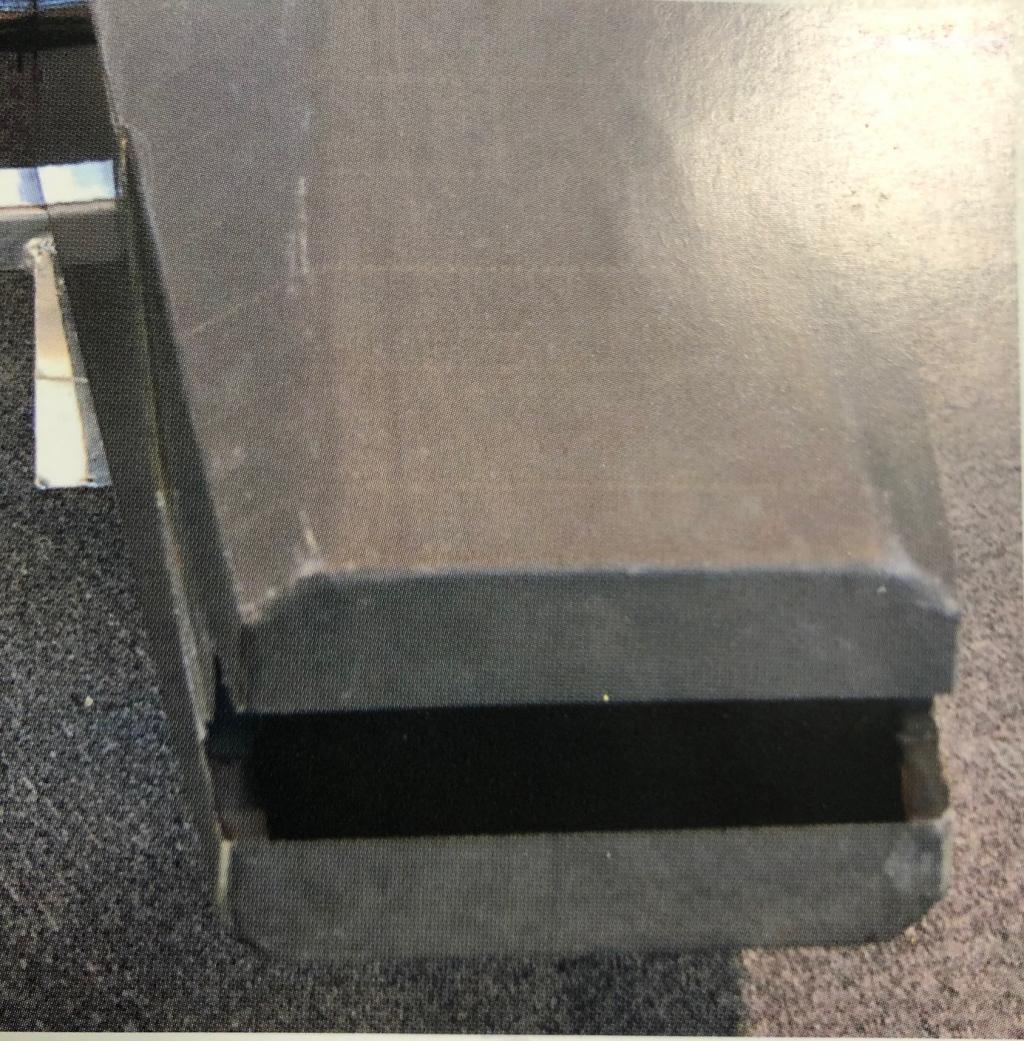
I started the work with decal on monocoque, but before to place them i mmade some extra paint area.
So while i'm waiting the dry of paint, i strated the decal on nose cone.

I bought the kit from MC...these decal are totally wrong. The carbon on nose cone is really extra fine and grey matt color

The MC decal are too big and with a wrong fiber drawing

So i take a new set of decal like the radiator box and i'll do a new decal work on nose cone using as template the wrong mc decal

Before to decal monocoque i watched the real car.

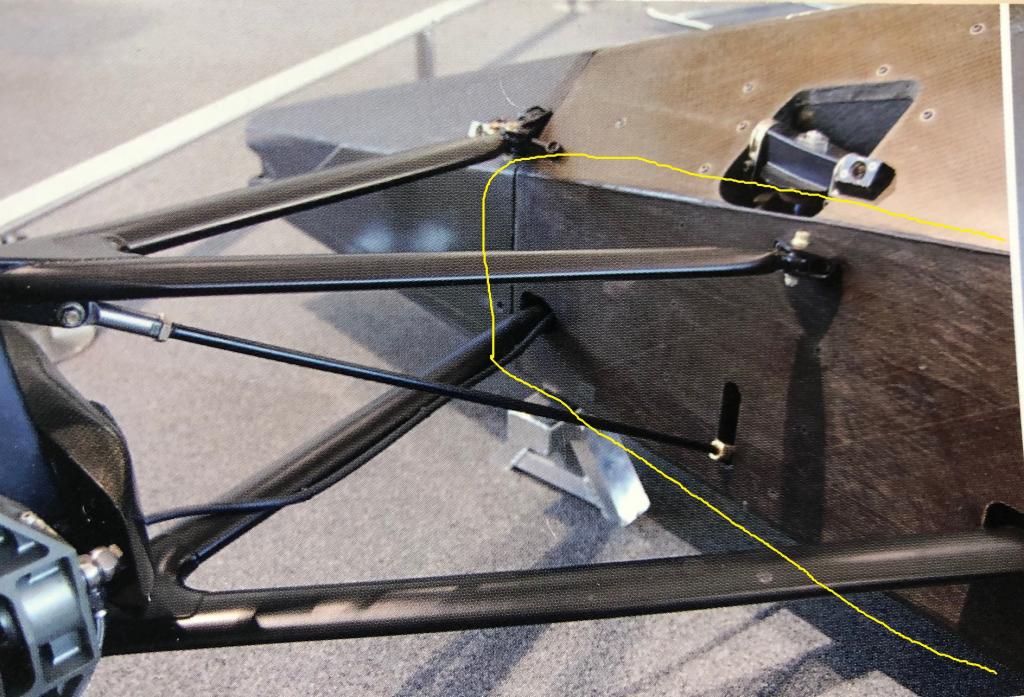
Mp4/4 have 3 different carbon zone

- On both side of front wishbones suspension. In this area there's a darker carbon (is similar a dark wood color)

- on top of front monocoque above the cockpit -dashboard zone: there's a little lighter area ( i think a different carbon composition)

- A little darker area on both sides of engine mount plates. There's a little piece o darker carbon, i think a reinforced area for high engine-monocoque stress


For wishbones arm sides and engine plate i give a first coat of metallic brown and a final smoke coat

For top area of monocoque i used a tintanum gold coat and a little smoke coat

I also paint with semi gloss balck the bracket for bodyshell

I placed the MC decal for monocoque and i think to quite reach the result of real car

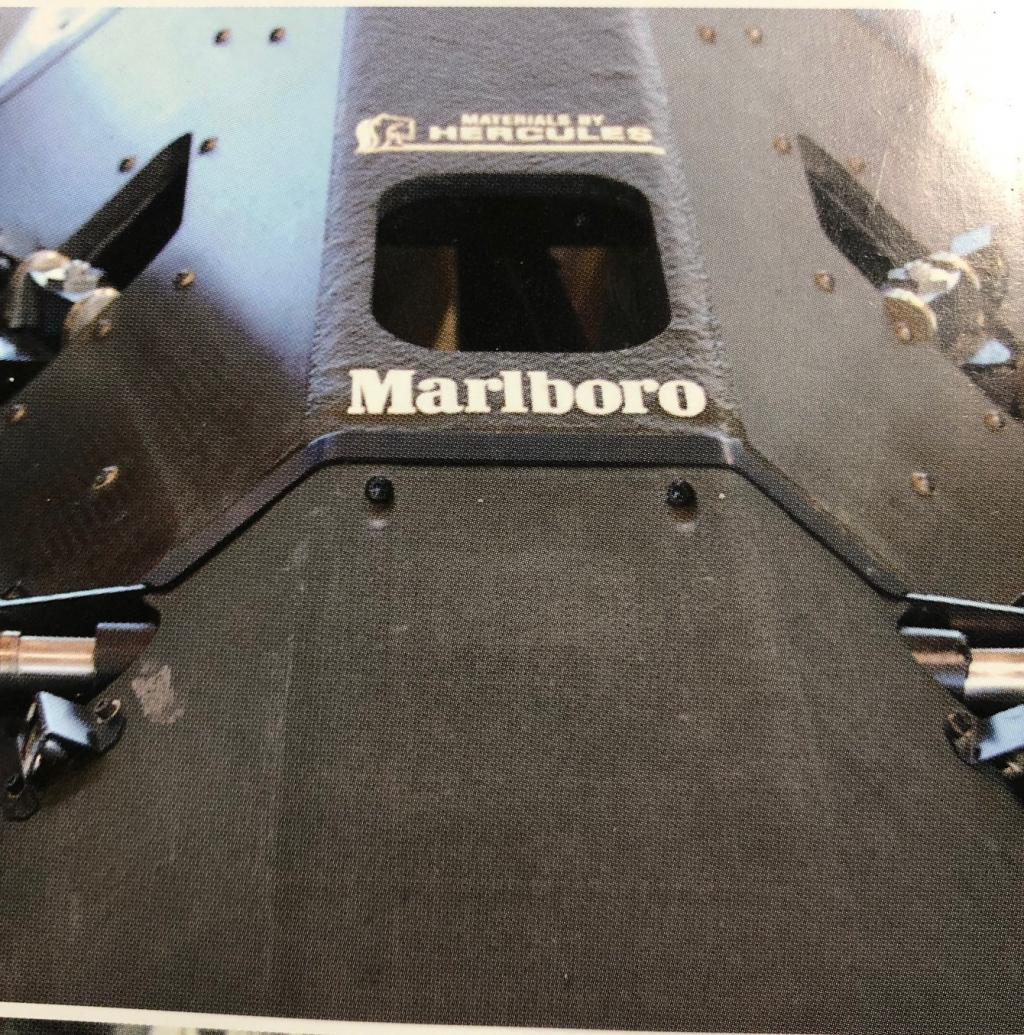
I'll wait the drying of decal and the I'll give a final matt clear coat. Then i started with details work of rivets and Hercules and Malboro Decals


Collection active: Lotus 97T, Audi Quattro A2, Vw Maggiolino '60

Work in progress: Porsche 911 RS Turbo

Completed model: Delta WRC Martini, Mclaren MP4/4, Golf GTI 1/8 Tuned
frah2o
#155 Posted : 05 October 2019 12:14:18

Rank: Vice-Master
Publisher Medal: Featured Build of the MonthActive Service Medal: 500 post active service MedalBuild-Diary Medal: Build-Diary Medal of HonourRed Medal: Red MedalOutstanding Build: An award for an outstanding build
Groups: Registered

Joined: 05/04/2016
Posts: 708
Points: 2,127
Location: Ferrara
1/2

I started the job on Ayrton Seat. Before apply the carbon decal, I reinforced the seat because is rubber. After a light sanding i paninted in matt black and I placed some carbon decals.
There'are some wrinkles. After a matt coat i'll cover the wrinkles with tapes and lombar pad like on original seat (i thnik and hope the wrinkle will be hidden)

I reworked the gearknob frame, i added some missing frame with styrene.
After checking the right fitting, I use as color base a metallic gray tamiya. Then i placed the MC decal.

I used a different carbon for gearknob bezel, I think is so quite similar to 1:1


Tratto dal mio libro MFH


Tratto dal mio libro Haynes Manuals


Collection active: Lotus 97T, Audi Quattro A2, Vw Maggiolino '60

Work in progress: Porsche 911 RS Turbo

Completed model: Delta WRC Martini, Mclaren MP4/4, Golf GTI 1/8 Tuned
frah2o
#156 Posted : 05 October 2019 12:19:33

Rank: Vice-Master
Publisher Medal: Featured Build of the MonthActive Service Medal: 500 post active service MedalBuild-Diary Medal: Build-Diary Medal of HonourRed Medal: Red MedalOutstanding Build: An award for an outstanding build
Groups: Registered

Joined: 05/04/2016
Posts: 708
Points: 2,127
Location: Ferrara
2/2

Another zone that need some extra is the leg tube and pedal zone

I noticed that throttle cable, antiroll bar asdjust cable and footrest are missing

Is also missing the bracket for antiroll bar adjust cable.

I stateds to made some carbon rough on inside of tunnel leg

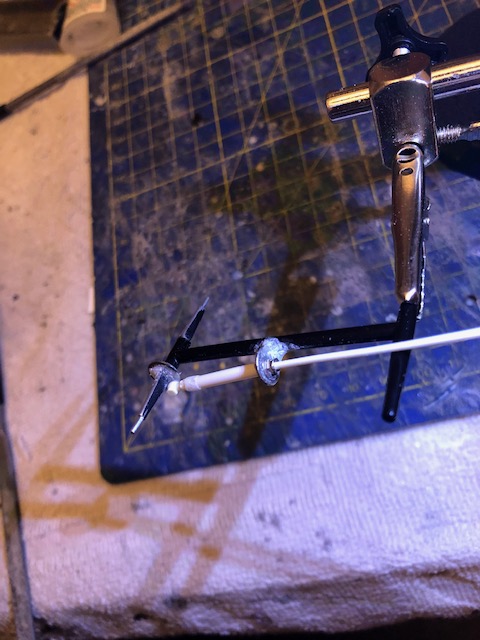
I added on antiroll bar the bracket for cable, with a modified top studio joint i do my best to replicate the uniball and new cable to connect on antiroll lever inside the cockpit zone

Here is a test photo, I'll mould and sand and I'll repaint

In the next days i'll started to self made the brake-bias, the throttle cable and the footrest


Tratto dal mio libro Haynes
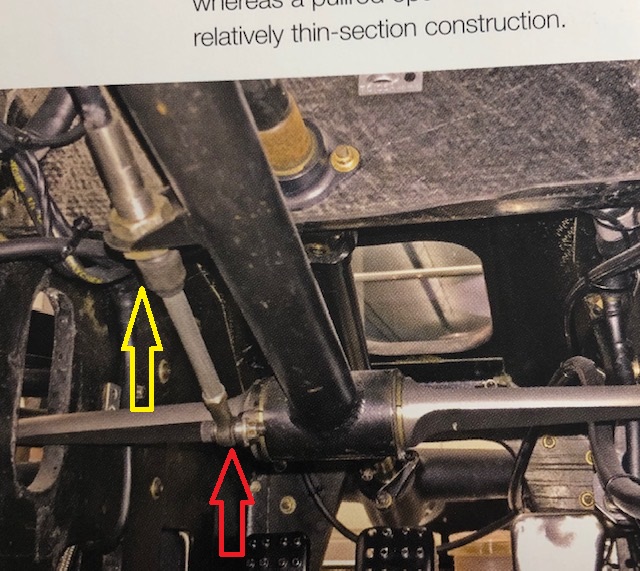

Tratto dal mio libro Haynes
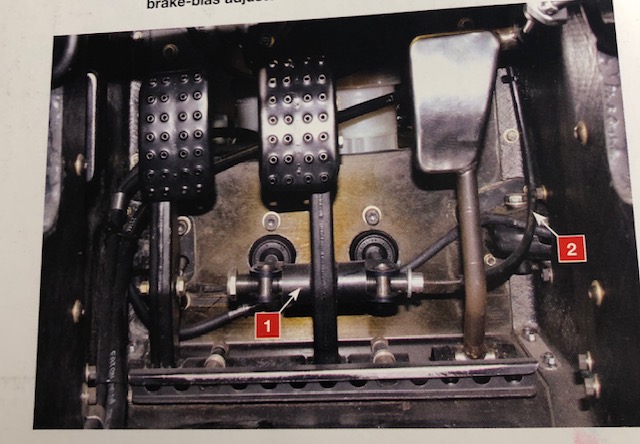

Tratto dal mio libro Haynes
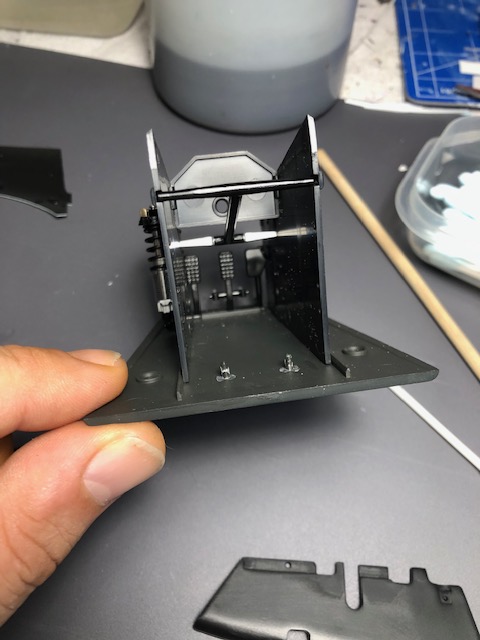


Collection active: Lotus 97T, Audi Quattro A2, Vw Maggiolino '60

Work in progress: Porsche 911 RS Turbo

Completed model: Delta WRC Martini, Mclaren MP4/4, Golf GTI 1/8 Tuned
Markwarren
#157 Posted : 06 October 2019 10:13:35

Rank: Super-Elite

Publisher Medal: Featured Build of the MonthActive Service Medal: 500 post active service MedalPurple Medal: Super active service medal for 1000 postsTurquoise Medal: Turquoise Medal for model making know-how contributionOutstanding Build: An award for an outstanding buildBuild-Diary Medal: Build-Diary Medal of HonourRed Medal: Red Medal
Groups: Registered, Administrators, Global Forum Support, Moderator, Forum Support Team, Official Builds

Joined: 04/01/2016
Posts: 6,541
Points: 19,940
Location: Northamptonshire, England
frah2o
#158 Posted : 08 October 2019 07:44:51

Rank: Vice-Master
Publisher Medal: Featured Build of the MonthActive Service Medal: 500 post active service MedalBuild-Diary Medal: Build-Diary Medal of HonourRed Medal: Red MedalOutstanding Build: An award for an outstanding build
Groups: Registered

Joined: 05/04/2016
Posts: 708
Points: 2,127
Location: Ferrara
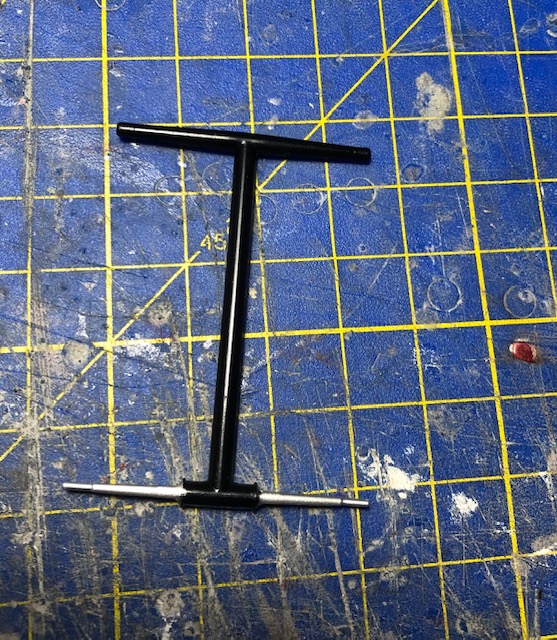
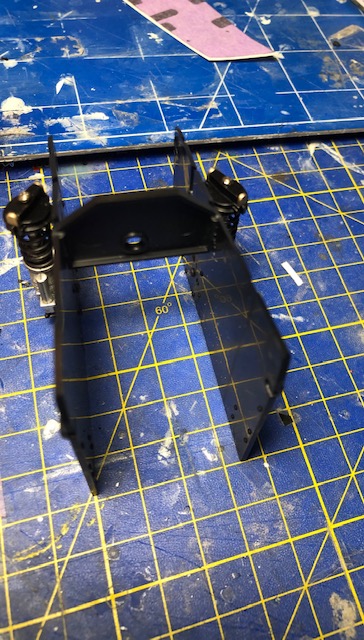
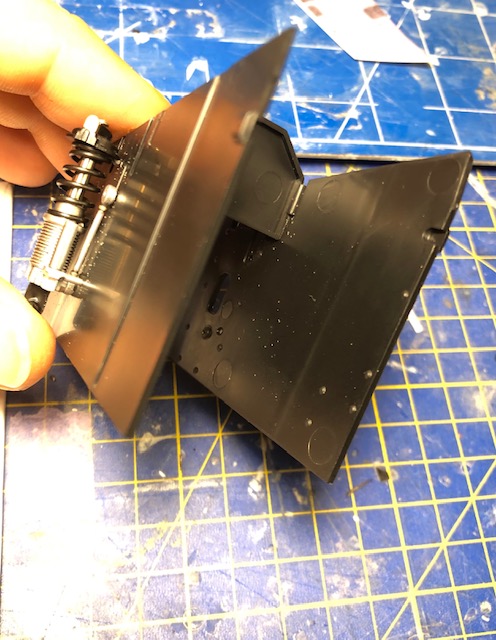
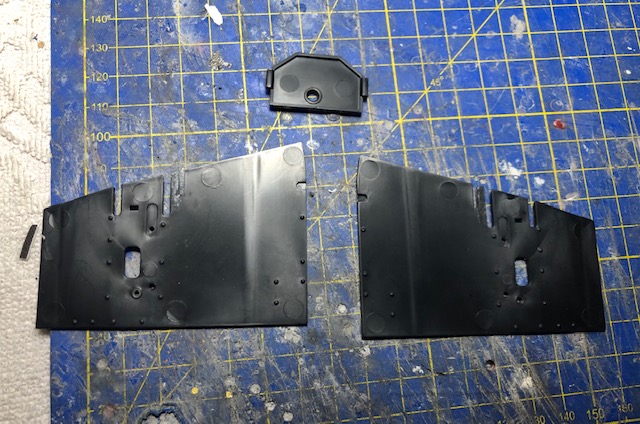
I continued the work on tunnel legs.

The kyosho kit fix the directly in front of the lower part of monocoque.
Fixing this part in this way, is impossible to add or work inside teh tunnel leg

After studing reference a notices some missing details that i’d like to add.

I selfmade a new plate fixed on internal structure of monocoque to fix pedals.

I made this to work easily and add:
- throttle cable with alu bracket and connection pivot on throttle pedal
- adjust cable for brake-bias
- footrest at base of pedal

With Hex Punch&Die Tools i selfmade the hex head nut to cover the bad screw head. I started from front absorber.


Collection active: Lotus 97T, Audi Quattro A2, Vw Maggiolino '60

Work in progress: Porsche 911 RS Turbo

Completed model: Delta WRC Martini, Mclaren MP4/4, Golf GTI 1/8 Tuned
roymattblack
#159 Posted : 08 October 2019 08:29:40

Rank: Super-Elite

Publisher Medal: Featured Build of the MonthActive Service Medal: 500 post active service MedalPurple Medal: Super active service medal for 1000 postsOutstanding Build: An award for an outstanding buildBuild-Diary Medal: Build-Diary Medal of HonourRed Medal: Red Medal
Groups: Official Builds, Administrators, Moderator, Global Forum Support, Registered

Joined: 04/06/2011
Posts: 4,538
Points: 13,774
Location: ipswich
You're doing an amazing job with this one.
It's looking fantastic.

Roy.
RM1
#160 Posted : 08 October 2019 10:59:17

Rank: Elite

Publisher Medal: Featured Build of the MonthActive Service Medal: 500 post active service MedalPurple Medal: Super active service medal for 1000 postsOutstanding Build: An award for an outstanding buildCompetition Winner of Model Builds: Competition Winner of Model BuildsBuild-Diary Medal: Build-Diary Medal of HonourRed Medal: Red Medal
Groups: Registered

Joined: 27/03/2012
Posts: 1,973
Points: 5,963
Location: johannesburg
Brilliant extra details in the Pedal box. Amazing work.
Malc.
Users browsing this topic
Guest (2)
13 Pages «<678910>»
Forum Jump  
You cannot post new topics in this forum.
You cannot reply to topics in this forum.
You cannot delete your posts in this forum.
You cannot edit your posts in this forum.
You cannot create polls in this forum.
You cannot vote in polls in this forum.

Powered by YAF | YAF © 2003-2009, Yet Another Forum.NET
This page was generated in 0.651 seconds.
DeAgostini