|
|
 Rank: Pro    Groups: Registered
Joined: 23/03/2014 Posts: 185 Points: 545 Location: Essex
|
Hi all, having finally received my first two installments I thought it would be time to 'park my bumm on the bench' and claim my space for the build log. I doubt it is going to be as frequently updated as my other build because a wooden model takes just that little bit longer to put together.  My target time is two and a half years. But this is the state of play at the moment. 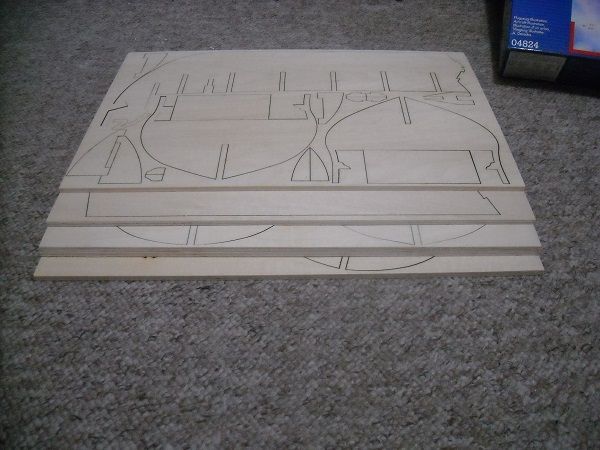 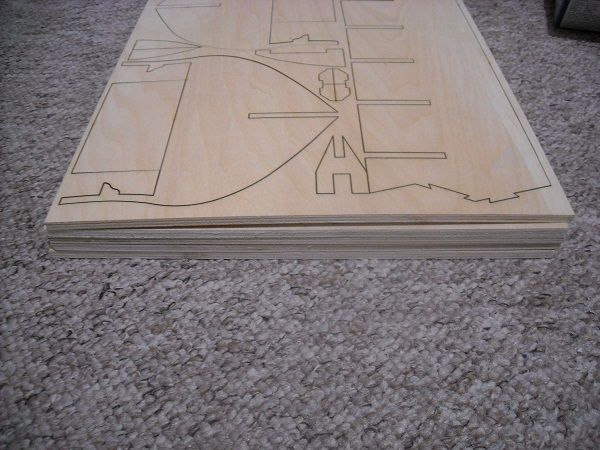 Five sheets of wood in total. For some reason I received a replacement sheet with issue 2 for one of the sheets that was contained in issue 2???????  The two sheets look absolutely the same but is there a known issue with one of the sheets in issue 2? Also there is a slight bow in the first sheet, unfortunately lengthwise. Otherwise the deck would undoubtedly have helped to keep the false keel and formers straight but I think I'll have to water the sheet and keep it flat under weights and let it dry out. Luckily I have a month until the next issue comes so it won't frustrate the build too much.  . And I'll need to visit the lumberyard in the weekend anyway to get some sturdy planks and brackets for the jig. That idea I have already nicked from the forum!!! I hope I'll have a few snapshots of the jig this weekend. And I'll keep you updated on the bend in sheet one. But more about that later! Adrie. 'Where to glue or where not to glue, that is the question'
Building: Hr. Ms. de Ruyter (card), Retourschip Batavia (Revell), HMS Surprise (De Agostini)
Built (and sunk): Too many to list
|
|
|
 Rank: Super-Elite      Groups: Registered
Joined: 30/01/2013 Posts: 4,604 Points: 13,607 Location: Monmouthshire UK
|
Im going to be outrageously premature here and say "nice start to the build, Adrie - looking good"  Seriously though, good luck with it and I will be following all the way Steve
|
|
|
Rank: Pro Groups: Registered
Joined: 23/03/2014 Posts: 185 Points: 545 Location: Essex
|
|
|
|
|
|
Hi Adrie The door has opened and good luck with your build I will follow with interest regards Andy  Current builds:-C57,Zero, Lamborghini Countach, Caldercraft HMS Agamemnon,Robi,R2-D2, MFH Cobra .
|
|
|
|
|
Hi Adrie, welcome to the world of wooden ship building..... look forward to seeing your progress on this one....
Regards
Alan
|
|
|
 Rank: Beginner Level 3  Groups: Registered
Joined: 23/02/2012 Posts: 29 Points: 87 Location: Boston, lincolnshire
|
Good luck with the build, you're not going to be that far behind me!! I have the forward part of the false keel to my build wet and under about 15kg of weight on the kitchen table. Hopefully that will straighten it out.
|
|
|
Rank: Pro Groups: Registered
Joined: 23/03/2014 Posts: 185 Points: 545 Location: Essex
|
arpurchase wrote: Hi Adrie The door has opened and good luck with your build I will follow with interest regards Andy Hi Andy. Thanks for the best wishes, I think I might need it! But what's life without a little bit of a challenge, right? Anyway, one thing is clear. I won't fail for lack of positive waves being sent towards me! Much appreciated!!  Adrie 'Where to glue or where not to glue, that is the question'
Building: Hr. Ms. de Ruyter (card), Retourschip Batavia (Revell), HMS Surprise (De Agostini)
Built (and sunk): Too many to list
|
|
|
Rank: Pro Groups: Registered
Joined: 23/03/2014 Posts: 185 Points: 545 Location: Essex
|
Gandale wrote:Hi Adrie, welcome to the world of wooden ship building..... look forward to seeing your progress on this one....
Regards
Alan
Hi Alan! Thanks! Like I said, I might just going to need it. I never did anything on this scale. And 2 and a half years? What was I thinking! But every walk starts with a single step, no matter how long and my first step will lead me to the lumber merchant. There won't be much progress for the moment. But every step is going to be an interesting one! And good to know that you'll be watching! Adrie 'Where to glue or where not to glue, that is the question'
Building: Hr. Ms. de Ruyter (card), Retourschip Batavia (Revell), HMS Surprise (De Agostini)
Built (and sunk): Too many to list
|
|
|
Rank: Pro Groups: Registered
Joined: 23/03/2014 Posts: 185 Points: 545 Location: Essex
|
jimmcoker wrote:Good luck with the build, you're not going to be that far behind me!!
I have the forward part of the false keel to my build wet and under about 15kg of weight on the kitchen table. Hopefully that will straighten it out. Cheers for the good wishes, Jim! It will be a while still until I can truly start. But I am looking forward to it! As for the kitchen table, my mizzes will kill me if I tie that one up for a week so I am afraid it will have to be the hobby table.  But why do I get the feeling that an irate wife will be the least of my troubles? Well, we'll see. But thanks for your comments. They were much appreciated! Adrie 'Where to glue or where not to glue, that is the question'
Building: Hr. Ms. de Ruyter (card), Retourschip Batavia (Revell), HMS Surprise (De Agostini)
Built (and sunk): Too many to list
|
|
|
Rank: Pro  Groups: Registered
Joined: 29/03/2012 Posts: 108 Points: 327 Location: Gosport
|
Are you planning to kit bash a bit, or just going try and follow the plans? There are lots of good ideas and some very high standards to follow!! (like Johncal's amazing build!)I look forward to to seeing your build come along! ________________________________________________________________________________________ Built Mare Nostrum Google Photo AlbumMatelot (ˈmætləʊ) , Matlo or Matlow
noun
(Nautical Terms) slang chiefly Brit - a sailor
|
|
|
Rank: Pro Groups: Registered
Joined: 23/03/2014 Posts: 185 Points: 545 Location: Essex
|
Hi Matelot. I'm not sure yet. This is my first wooden shipbuild in about 30 years so you'd be right in saying that I would be rusty in some of the required skills. But I guess it depends on how the build goes. If a model is looking good right from the word go, you are automatically drawn in to enhance the looks even further. I have no set plans to change the build as of yet but will follow where the model takes me. So for now I'll just follow the advices and common practices seen on this forum at least until the planking is finished and then take it from there, even though I DO think that the 'homemade' ropes look awesome  . But that might be one step too far for me at the moment. Adrie. 'Where to glue or where not to glue, that is the question'
Building: Hr. Ms. de Ruyter (card), Retourschip Batavia (Revell), HMS Surprise (De Agostini)
Built (and sunk): Too many to list
|
|
|
 Rank: Elite   Groups: registriert, Registered Joined: 20/03/2011 Posts: 2,356 Points: 7,122 Location: UK
|
Hi Adrie.. I'm sure once you really get going you will find you have skills you never thought you had! And I'm sure this is going to turn out to be a beautiful build and look forward to seeing your progress. Spencer
|
|
|
Rank: Beginner Level 3 Groups: Registered
Joined: 23/02/2012 Posts: 29 Points: 87 Location: Boston, lincolnshire
|
GluedFingers wrote:As for the kitchen table, my mizzes will kill me if I tie that one up for a week so I am afraid it will have to be the hobby table. But why do I get the feeling that an irate wife will be the least of my troubles? Well, we'll see. But thanks for your comments. They were much appreciated! Adrie My missus doesn't really have much of a choice in where I build it, nowhere else to do it, it has however driven her mad for the last few days though!!!
|
|
|
Rank: Pro Groups: Registered
Joined: 02/04/2013 Posts: 174 Points: 534 Location: Bethlehem PA, USA
|
GluedFingers wrote:Hi Matelot. I'm not sure yet. This is my first wooden shipbuild in about 30 years so you'd be right in saying that I would be rusty in some of the required skills. But I guess it depends on how the build goes. If a model is looking good right from the word go, you are automatically drawn in to enhance the looks even further. I have no set plans to change the build as of yet but will follow where the model takes me. So for now I'll just follow the advices and common practices seen on this forum at least until the planking is finished and then take it from there, even though I DO think that the 'homemade' ropes look awesome . But that might be one step too far for me at the moment. Adrie. So don't give up on the ropes before you even start. They are really easy to make. It's even better because you've seen what I've done with mine and that is only using 2 different colors of the exact same thread and all the same thickness and look at the infinitely various thicknesses I wound up with. Basically 9 different diameters, and I could do more. All with one thickness of thread. It's a lot easier than trying to get all different thicknesses in the colors you want and being at the mercy of some vendor. You will use way more thread than you think and will constantly be running out. For the hundred bucks you'll spend on making a simple rope walk, I'd say just do it. Like the other guy here said, you'll get started and find out your talents are all still there and more so than you think. I guess you can tell I'm just trying to encourage you. You'll never know just how good you can do unless you push yourself way past your comfort zone. I know I might sound like a coach, but you'll need to coach yourself through this whole project if you're going to do a great job. Keep positive. I can't wait to see what you do with your build. There's just 3 guiding words. Plan, Plan, Plan!
|
|
|
Rank: Pro Groups: Registered
Joined: 23/03/2014 Posts: 185 Points: 545 Location: Essex
|
Many thanks for the supportive words, guys. Much appreciated! Knowing myself I'll probably go all gung-ho on her but for the moment I will take it one step at a time. There is so much information that i still have to digest and understand, like for instance the beginners planking guide. I have read it several times and think I understand some of it but I know that I'll get 'it' when I have the skeleton of the ship in front of me with a plank in my hands. There's going to be a lot of: "Oh, so that's what they meant!" moments (I hope ). But for the moment I am still eagerly waiting for the first sheet which had a twist in the width to come out from under the weights, get the frames out and start sliding things in the right place. For which I will need the jig. I have the plank (a nice inch thick piece of MDF, I remember somebody saying that it needed to be sturdy so sturdy it will be!!! ) and the square brackets which I have already found out aren't really that square. But a few bangs with the hammer should sort them out! Infact most of them already are, just a few are proving more difficult. But they will all listen to the rule of my hammer! And I'll do everything at a leisurely pace to give me time to get my head around what I want/need to do before actually doing it. I am lucky to have a 'secondary' build that I am thoroughly enjoying doing it so there will be no anxious pressure to get things right fast. That's where things go wrong, I think. Trying to do too much too quickly. So first the jig to be made exactly right, then the keel and frames, then the deck and planking it, then glue the frames, then make sure all is faired nicely, then re-read the planking guide again with the framework in hand, and then (with a prayer on my lips) start the planking. And that is for the moment as far as I am willing to take it. So that's the plan so far and no doubt the plan will change as I continue but that should be months from now so for the moment it will do.  But one thing I did learn from modelling before is that you never plan for the step, you have to plan for the next step, BEFORE you start work on the previous step. And not to look too far ahead when you aren't certain about any of the previous steps. But hopefully I will be able to get the jig ready this weekend. I DO have a deadline of two and a half years to meet! But be certain that you will all be kept updated! (Only not just yet ... ) 'Where to glue or where not to glue, that is the question'
Building: Hr. Ms. de Ruyter (card), Retourschip Batavia (Revell), HMS Surprise (De Agostini)
Built (and sunk): Too many to list
|
|
|
Rank: Pro Groups: Registered
Joined: 23/03/2014 Posts: 185 Points: 545 Location: Essex
|
Hi all! After a week of drying under weights it was time to take the sheet of ply out and check for warp. It was completely cured! Here's a photo of the front of the false keel that came from the first sheet. 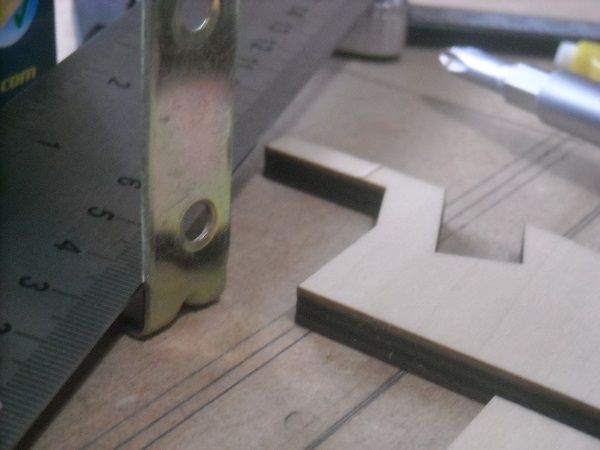 Not even a hint of a warp! Unfortunately the back part of the false keel, which had not been de-warped, was a bit worse. 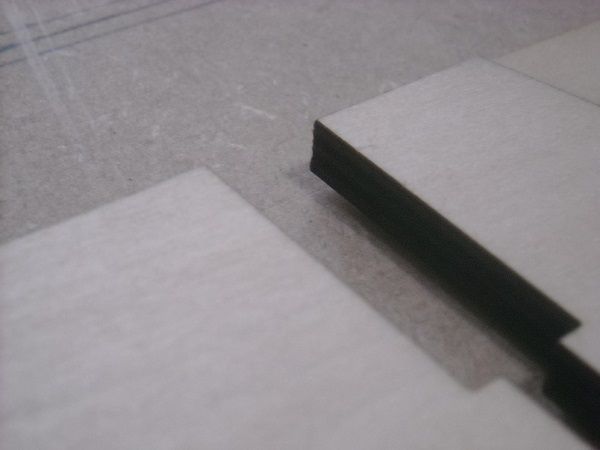 But luckily the warp is not that severe so I am condfident that the deck will cure that one. However, when I tried the two keel pieces together I was not too happy with the connection, which was quite loose.  I also noticed that the bow showed a kink in the curve. 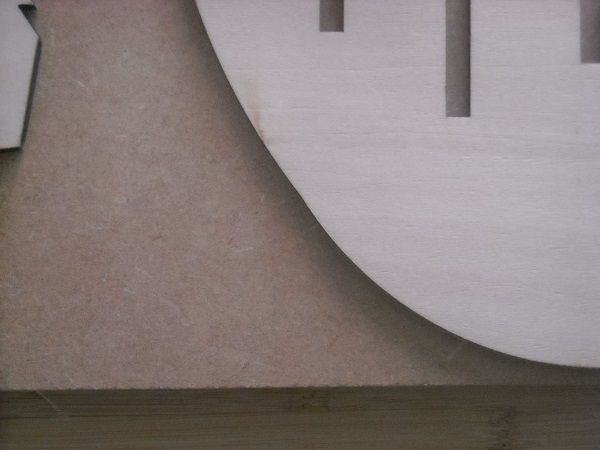 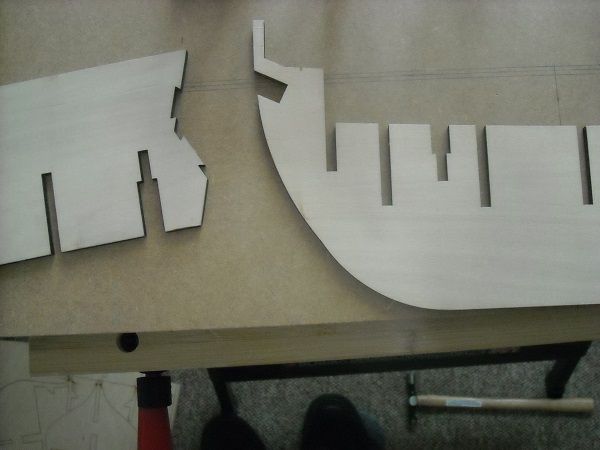 Is this normal, i.e. has every Surprise model this??? But there was little I could do so I left it for the moment. To cure the loose fit, I decided to cut off a strip of printer paper to glue that against the first keel part. If the one strip isn't enough I'll add another strip against the second keel part but it looks like one should suffice. 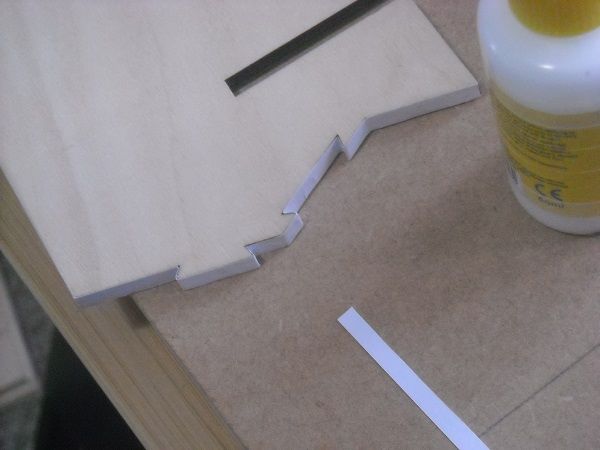 I left it to dry for a while and then brought the keel parts together again. 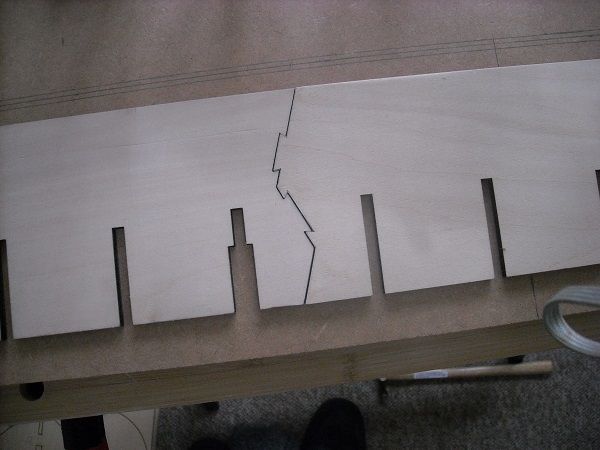 A much better fit with a lot less possible movement, which should be good enough for the rest of the construction. My aliphatic was rock hard when I tried it , so I ordered a new bottle through flea bay and will use tacky PVA for the frames. 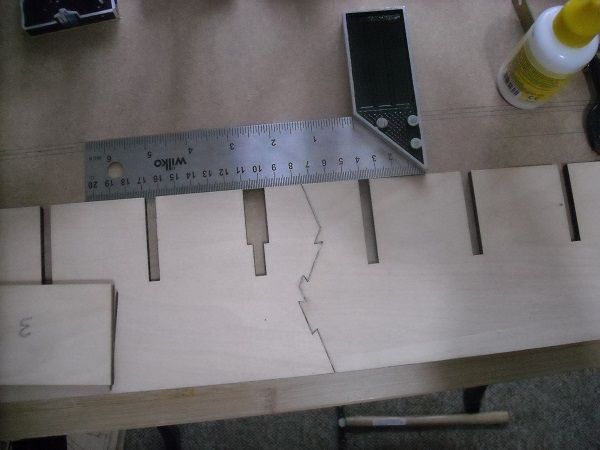 The two pieces were glued together after which the connection covers were glued in place and held with clamps.  The view from the back showed minimal warp which shouldn't be hard to tackle with the decks. 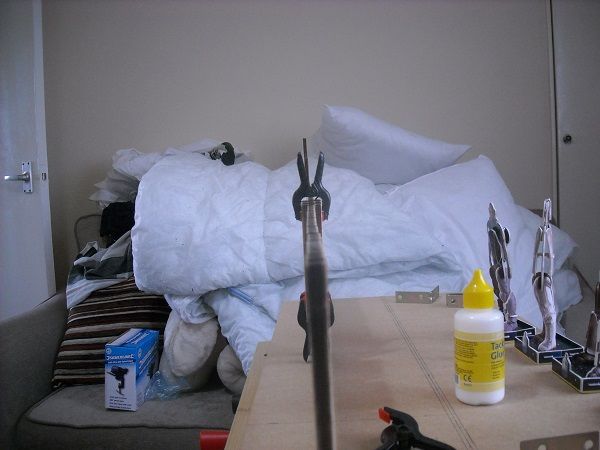 Once dried thoroughly I used the keel to set the brackets. I originally wanted to do the brackets first but without the keel pieces placing of the brackets would be guesswork, since I wouldn't know where the formers would be placed. 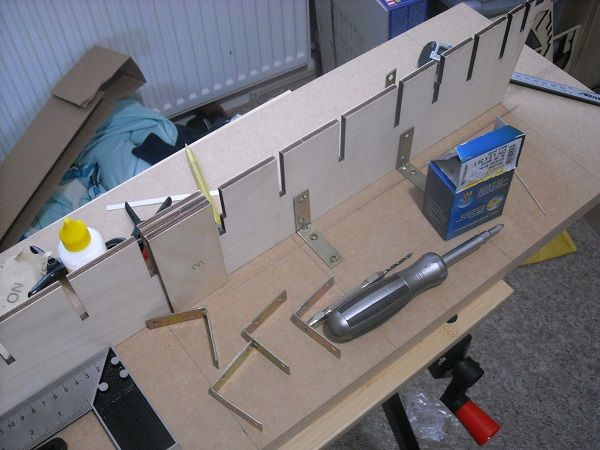 Four more brackets to place and item 4 to glue down and then I have finished the first installment! And with installment 2 already present I can see myself do a bit of sanding tomorrow to prepare all the formers. So far I think it has gone all remarkably well. It's straight, it went together quite well and I didn't break anything. Overall, a good day at the office, I would say! Adrie. 'Where to glue or where not to glue, that is the question'
Building: Hr. Ms. de Ruyter (card), Retourschip Batavia (Revell), HMS Surprise (De Agostini)
Built (and sunk): Too many to list
|
|
|
|
|
Nice start Adrie Current builds:-C57,Zero, Lamborghini Countach, Caldercraft HMS Agamemnon,Robi,R2-D2, MFH Cobra .
|
|
|
Rank: Beginner Level 3 Groups: Registered
Joined: 23/02/2012 Posts: 29 Points: 87 Location: Boston, lincolnshire
|
You'll be overtaking me in no time Adrie!!! I'm very please that you managed to cure the warped keel. I made several attempts but just could not get it straight. As for your Surprise, mine is exactly the same, the joint between the two keel sections was very loose, though I didn't go to the same lengths you did. I dry-fitted the whole assembly, complete with formers and false deck to see how it would all line up. Once I was happy with the fit I marked the strengthening plates against the keel and glued them all together. Mine also has the kink to the curve, but I'm sure I've seen other build logs with the same thing. Hopefully it won't be a factor, I must admit I hadn't noticed it until you mentioned it!! Regards
|
|
|
Rank: Pro Groups: Registered
Joined: 02/04/2013 Posts: 174 Points: 534 Location: Bethlehem PA, USA
|
I made some suggestions on Jims thread you may or may not find helpful.
|
|
|
Rank: Pro Groups: Registered
Joined: 23/03/2014 Posts: 185 Points: 545 Location: Essex
|
@Andy, Thanks for looking and and yeah, baby, we'zz cooking with gas now!!! @Jim, don't worry, mate! I'll be returning to my hibernation soon, waiting for the next installment to arrive! But it is good to know that you had the same issues, it means that nothing is really trying to seriously derail us! @John, thanks for the info! I must admit I am not familiar with the glue that you mentioned. I assume it is an aliphatic glue? My glue of choice for wood and card is Titebound aliphatic. I call it the slurper, because it seems to suck in the parts that are to be glued. Which can be good or bad, especially if you need some time to get the placement right. That is why I only use it when it is really needed and use a tacky PVA otherwise. You mentioned brushing it. Do you do that undiluted? But luckily my life is a bit easier, now that I have Jim to figure it all out before me!  'All' I have to do is watch and learn!!! But I better get back to the subject at hand, so I won't upset anyone any further!! So, without further ado ... The reason that my life is so grand is because of my lady and now I don't have just the one, or two, no, I have three lovely ladies!! 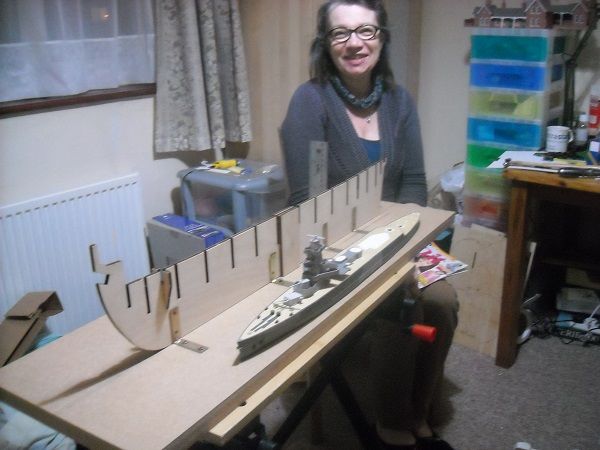 But after some sanding in the shed I was able to put the frames on the keel, all without glue, when it showed that the fit of the frames is .... 'indifferent' at the most. Some frames wouldn't want to slide down, while others slid a bit too easy with quite some twist movement available. 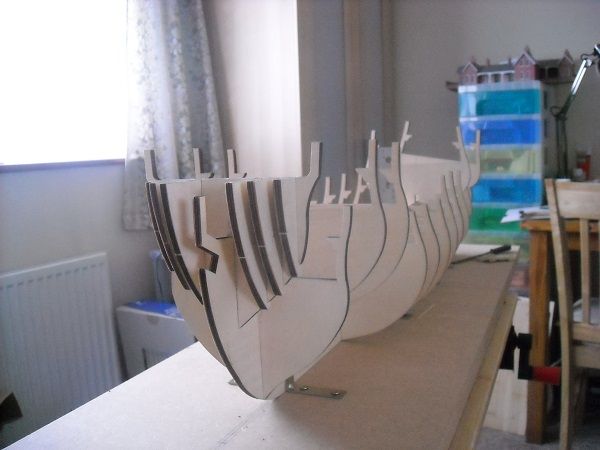 The tight frames needed a bit of filing and as it turned out some of the keel slots required filing as well. But in the end all finally slotted in nicely. The loose ones I will probably add some paper to the slots as before to get a better fit. 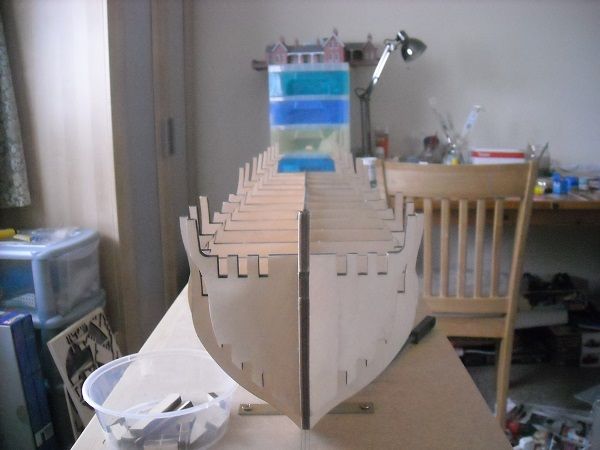 But than can wait until I can start to glue the frames after receiving the decks. So that left: The winding frames glued against frame 5 ... 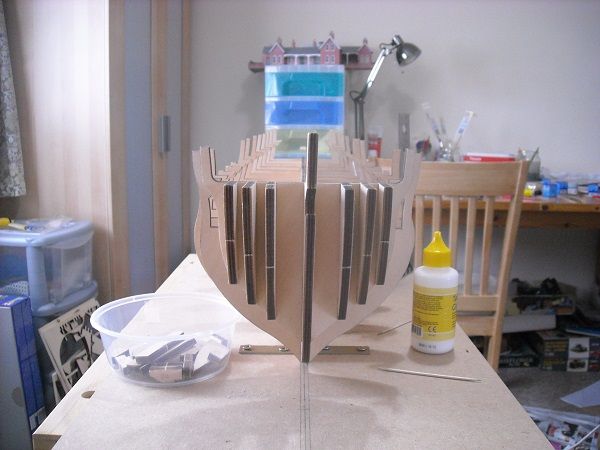 ... and the stern collars and the knightheads. 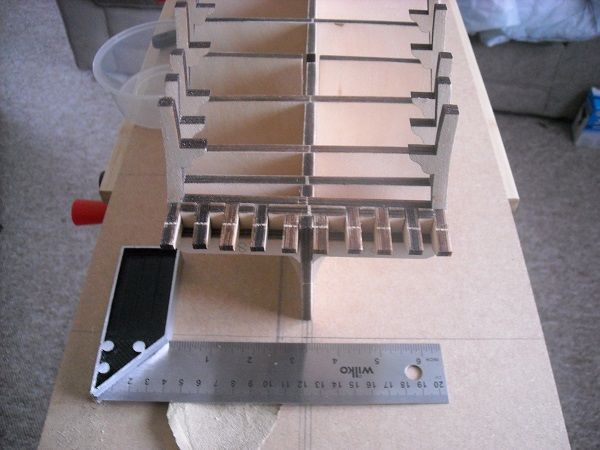 I didn't glue down frame 25 yet although the instructions didn't list 25 as frame that had to be kept loose but glueing it won't take that long. So that was issue two and now we wait again and continue with the little lady! Until laterzzzzz Adrie. 'Where to glue or where not to glue, that is the question'
Building: Hr. Ms. de Ruyter (card), Retourschip Batavia (Revell), HMS Surprise (De Agostini)
Built (and sunk): Too many to list
|
|
|
|
Guest
|
 US
US

