|
|
 Rank: Pro  Groups: Registered
Joined: 25/08/2010 Posts: 170 Points: 537 Location: Germany
|
" All ships to sea" Hello shipmates, while today marks the 252th birthday of Lord Nelson I thought this should be the perfect day to finally start my build. Therefore, as the very first step, a glas port wine and a toast  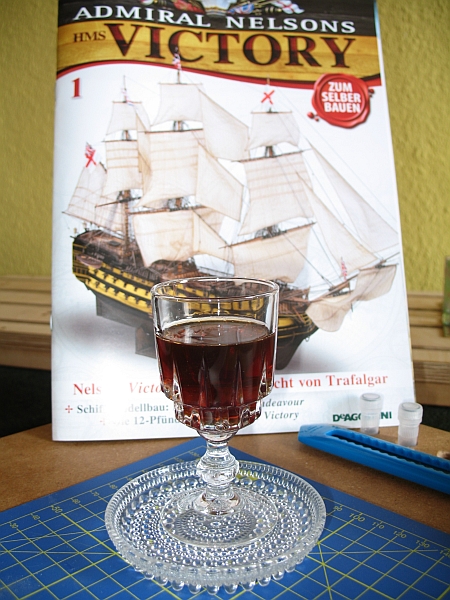 My name is Timm and I am from a small village in the Odenwald-region east of Heidelberg in Germany. Originally from the very north near the coast, tallships fascinated me all my life. In 1990 I had the opportunaty to spend one week as trainee on the ukrainian tallship "Tovarishch", the former german Gorch Fock. Standing in the yards 60 feet above the deck and passing the cliffs of Dover was one on the most thrilling moments of my life. This is going to be my first decent wooden model ship build. I hope I am not going to overextend myself with this. Please keep in mind that DeAgostini has started the H.M.S. Victory project in Germany in August 2010 so most of you guys are way ahead of me. An advantage for me ;-) I will go for the painted version without of cutaway section and probably also without any figures. Keel laying will start when all keel-parts have arrived so I will start with the 12 pounder tonight. Looking forward to any comments and advices and I would already like to thank all of you guys in the forum for your posts, which are a huge pool of information for me. ... and please apologize my english  Regards, Timm My build diary hereCurrent Build:HMS Victory
|
|
|
 Rank: Vice-Master   Groups: Registered
Joined: 25/04/2010 Posts: 748 Points: 2,285 Location: bognor regis
|
yor english is good mr quist..good start to your diary and good luck cheers benny
|
|
|
 Rank: Super-Elite        Groups: Registered
Joined: 04/04/2010 Posts: 3,955 Points: 11,809 Location: uk
|
hi and welcome tim,only one 'm' here,by the way your english is better then mine,hope you have a sense of humour,you'll need it here,we all mad and insane even,do look up the not to serious build,it's hilarious. Current builds: SotS, USS Consitution, San Felipe, D51 loco, HMS Surprise, RB7, Arab Dhow, Jotika HMS Victory Completed builds: HMS Pickel, Thermopylae, Mississipi river boat, Mary Rose, Cutty Sark, San Francisco II, HMS Victory x5, Titanic Lifeboat, Panart HMS Victory Launch, Hachette Titanic, Virginia Schooner, Endeavour Longboat. http://www.model-space.com/gb/
|
|
|
 Rank: Pro Groups: Joined: 24/08/2009 Posts: 48,827 Points: -13,348
|
Welcome Timm!  I see you have started the right way, a nice glass of port. They is lots to do while you wait for the all the hull sections and you need the time to get your tools sorted. Soon you will get the launch, a lot of work in that little thing. I'm still in two minds about painting the Victory or not, enjoy your build hope to see your work soon.  Darron
|
|
|
 Rank: Elite       Groups: Registered
Joined: 22/03/2010 Posts: 2,065 Points: 6,295 Location: Gorleston-on-sea
|
Hi Timm and welcome aboard mate. Good to hear that you have made a start on your build, and hope that you will start a photographic record as you go along. And, as Horatio Nelson quoted " I could not tread these perilous paths in safety, if I did not keep a saving sense of humor. " Rather apt quote for us on this build...Good luck in yours Timm.  Current Builds: Deagostini HMS Victory: Deagostini HMS Sovereign of the seas. Completed Builds: Del Prado: HMAS Bounty: Hachette: RMS Titanic: Del Prado: Cutty Sark...
|
|
|
 Rank: Pro  Groups: Registered
Joined: 30/06/2010 Posts: 242 Points: 720
|
Welcome mate  Look forward to seeing your build progress! I am starting German language classes from next week so I may have to ask you a few things now and then  Regards, Tom
|
|
|
 Rank: Pro Groups: Joined: 24/08/2009 Posts: 48,827 Points: -13,348
|
|
|
|
 Rank: Amateur Level 1 Groups: Registered
Joined: 06/09/2010 Posts: 36 Points: 77 Location: Uitenhage, South Africa
|
Herzlich Willkommen auf unserer Werft, Herr Quist. Und auch aus Südafrika.  Ich hoffe, Sie genießen Ihren so viel wie ich bin zu bauen. Dieses Forum ist Spaß und voller Informationen und Erfahrungen. Mit all diesen helfen sind wir alle Profis bald ....  Mit freundlichen Grüßen Jacques ps. I hope my German is understandable 
|
|
|
 Rank: Newbie Groups: registriert, Registered Joined: 09/06/2010 Posts: 2 Points: 6 Location: Oldenburg,Deutschland
|
huhu,
ich verfolge hier schon länger die berichte im forum.ich komme auch aus deutschland aber mein englisch ist nicht so gut daher schreibe ich nie.
finde eure bauberichte aber alle super und beobachte weiter.
liebe grüsse aus Oldenburg in Niedersachsen
|
|
|
 Rank: Pro  Groups: Registered
Joined: 25/08/2010 Posts: 170 Points: 537 Location: Germany
|
Thank you very much guys for this warm welcome. Still battling the 12 pounder, don't wanna show my "results" now. Glad I bought issue #1 twice......  karl1113 wrote:...hope you have a sense of humour,you'll need it here... I forgot to mention: Sarcasm is my middle name  @ lordmanu: Sobald ich etwas voran komme, will ich eine Art Blog auch in deutsch machen. Bleib dran, ich poste den link, wenn es soweit ist. Cheers, Timm My build diary hereCurrent Build:HMS Victory
|
|
|
 Rank: Pro  Groups: Registered
Joined: 27/03/2010 Posts: 188 Points: 614 Location: Llandudno
|
All the best Timm. I started with a few cans of Fosters.  Bob
|
|
|
 Rank: Pro   Groups: Registered
Joined: 29/03/2010 Posts: 202 Points: 569 Location: sunderland
|
Mind your language!!!!!!!    Wecome to the build Tim, I've seen a few of your post's, so your not totaly new to this 'Forum', keep em coming! I wonder how many countries have representatives on this build?? Jeff
|
|
|
 Rank: Newbie Groups: registriert, Registered Joined: 09/06/2010 Posts: 2 Points: 6 Location: Oldenburg,Deutschland
|
alles klar timm wenn du deinen blog hast lass es mich wissen ich schaue hier jeden tag vorbei.oder schick mir ne pm.
gruss manu
|
|
|
 Rank: Pro  Groups: Registered
Joined: 25/08/2010 Posts: 170 Points: 537 Location: Germany
|
Boy this beggar was a challenge. Basically I tried to do my cannon like it was done by jase in this post including some custom wheels. 1.) Used milliput filler to even the grooves in the sides parts of the carriage. First time I used this stuff. Should remember next time that only very, very little of it is needed. 2.) Added the two brass bolts to the both side parts like jase did ( good idea mate !!) 3.) Now the first obstacle: Gluing both sides to the base was a challenge. After six (!) unsuccessful attempts I build a tiny jig to get it done. Found a small piece of leftover beech wood 16 x 16 mm and painted the contours of the base on the top. Cuted the sides off to end up with a stamp-look-a-like. Then fixed the carriage base on top with a bubblegum-like glue (don't know the proper english term). Now I was finally able to glue the sides on in a almost 90° angle to the base. Without my self-invented-super-duper-high-tech-device the clamps kept flipping off. 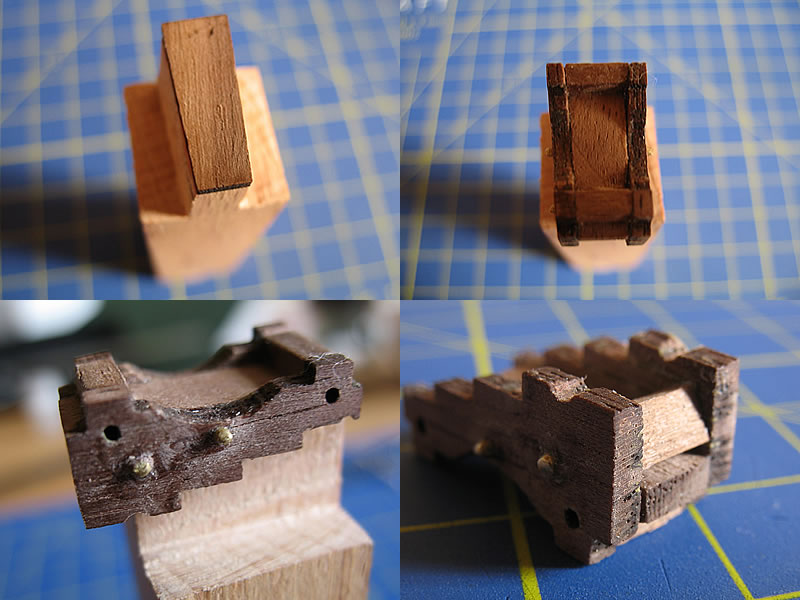 4.) In addition to the instructions of the mag I added two small pieces of wood on the bottom side of the base to form the axis (while I am not going to use the provided trucks) and one in the front between the side parts. 5.) I also extended the hole of the cannon from 1 mm to 1,5 mm with a hand drill and made new axis from a toothpick. This looks more true to scale to me and fits better in the cap squares. 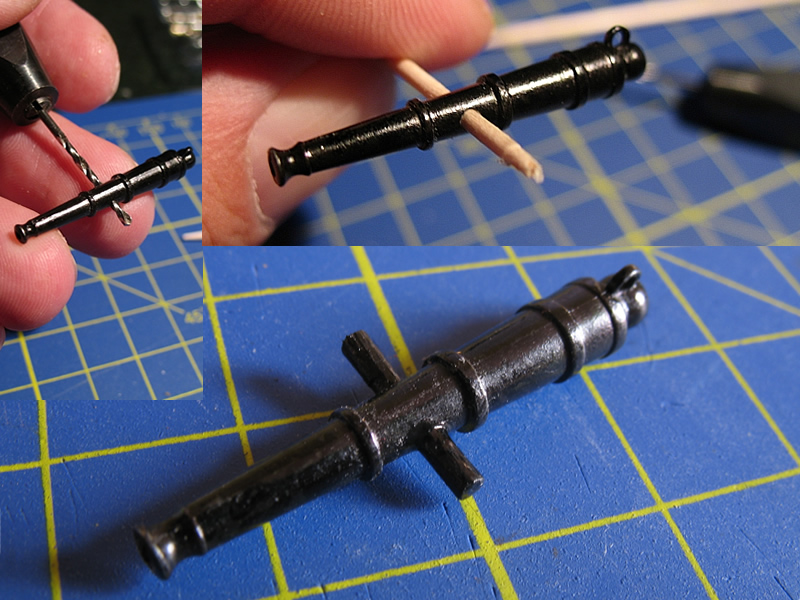 Painting and final assembly will follow, I think I deserve a beer now. Cheers, Timm My build diary hereCurrent Build:HMS Victory
|
|
|
 Rank: Pro   Groups: Registered
Joined: 22/03/2010 Posts: 369 Points: 1,150 Location: Broadstairs
|
Welcome to the forum Timm, looks like you have made a good start and have adapted your cannon frames nicely. Keep up the good work.
TIS
|
|
|
 Rank: Pro  Groups: Registered
Joined: 25/08/2010 Posts: 170 Points: 537 Location: Germany
|
Still figuring on a way do do some custom wheels for the 12 pounder. Here is my third attempt: 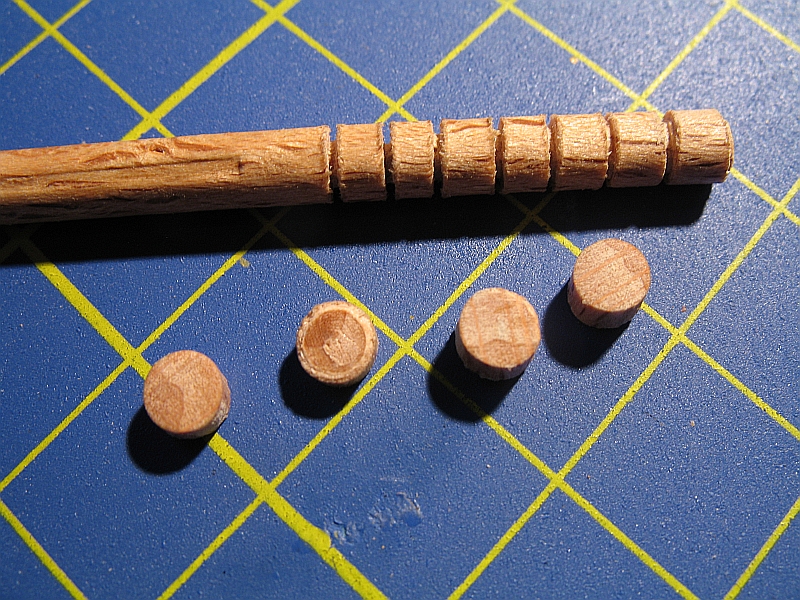 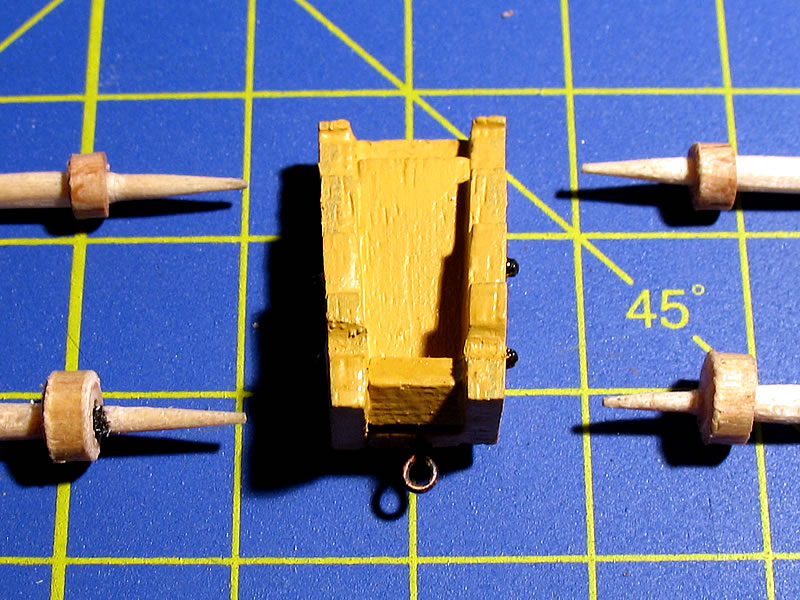 The new wheels are made from 5 mm (front wheels) respectively 4 mm (rear wheels) round beechwood sticks. Cutted to nearly 3 mm width and sanded down to 2,5 mm. Not easy when you have fingers in the size of a sausage ;-) Using a 1,5 mm hand drill I did the holes for the axis which are made from toothpicks again. Hard to hit the center at this scale. Any known tricks to achieve that ?? Haven't thought that it would take that long to finish the first tiny build. But it's fun to think about what materials to use and how to do it and the only person who pushed me ... is me. Regards, Timm My build diary hereCurrent Build:HMS Victory
|
|
|
 Rank: Amateur Level 1 Groups: Registered
Joined: 06/09/2010 Posts: 36 Points: 77 Location: Uitenhage, South Africa
|
Guten Tag Herr Quist,
I had a quick look at your German Diary. VERY IMPRESSIVE!!! Where do you get the time for this also? Are you using Joomla?
Very good build so far. I learnt something new!! Gruss, Jacques
|
|
|
 Rank: Pro  Groups: Registered
Joined: 25/08/2010 Posts: 170 Points: 537 Location: Germany
|
Thank you, Jacques  cham-oo wrote:Where do you get the time for this also? As a good friend said: I don't take time, I make time !cham-oo wrote:Are you using Joomla? No, that is a simple Wordpress Blog and just my playground. By doing the build diary I got used to the software. But I just discovered Joomla the other week and may be using it for another internet project I host. Greeting to Suid-Afrika (...the country I had the privilege to travel for full three months and I fell in love with from the very first moment !!)) My build diary hereCurrent Build:HMS Victory
|
|
|
|
|
fantastic job of the cannon Mattie  love the jig idea will give that a worl myself. Jase  “Whenever you find yourself on the side of the majority, it is time to pause and reflect.”
-Mark Twain
|
|
|
 Rank: Pro  Groups: Registered
Joined: 25/08/2010 Posts: 170 Points: 537 Location: Germany
|
Okay guys, slowly, very slowly I am getting something here. Found a way to drill the holes as close to the center as possible for me. 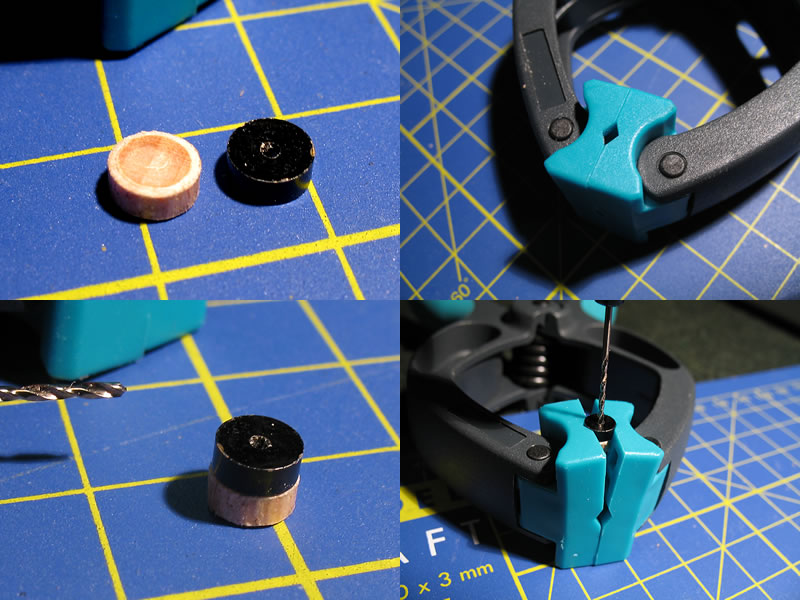 I used a clamp with a groove in the center.  For the new axis I used tooth picks. Sanded them down to 1,5mm, put some shellac primer and ochre paint on them. Don't cut at this stage. 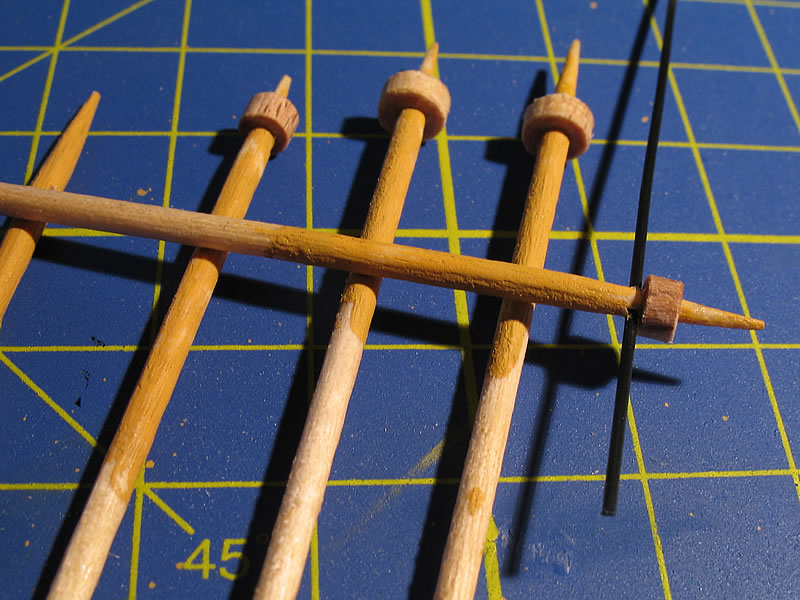 To make the black bolt I sacrificed some bristles of my broom ;-) The bristles are made from black PVC and 0,75mm in diameter. 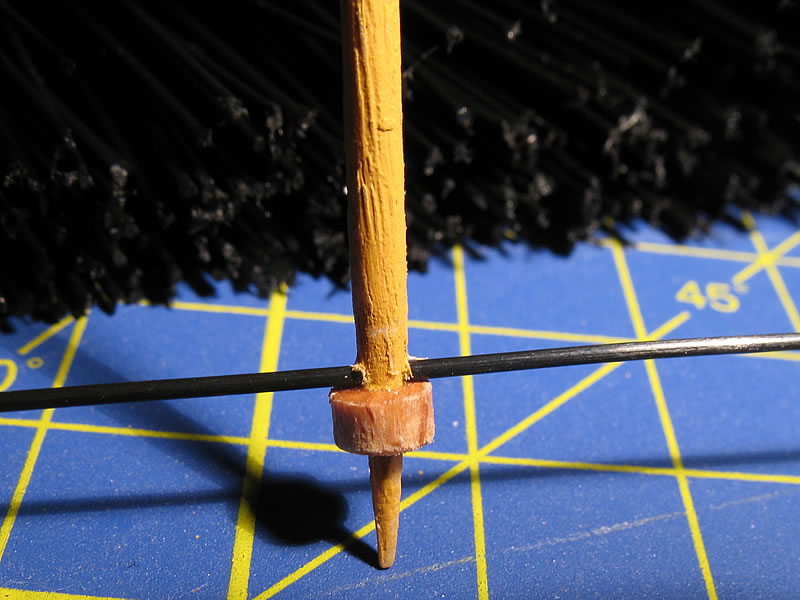 Drilling a hole with a 1mm drill across through the axis and fixed the bristle with super glue. The black line above the bolt is simply made with a small pen. Now I cut the remaining toothpick off and fixed the wheel to the cannon with superglue. 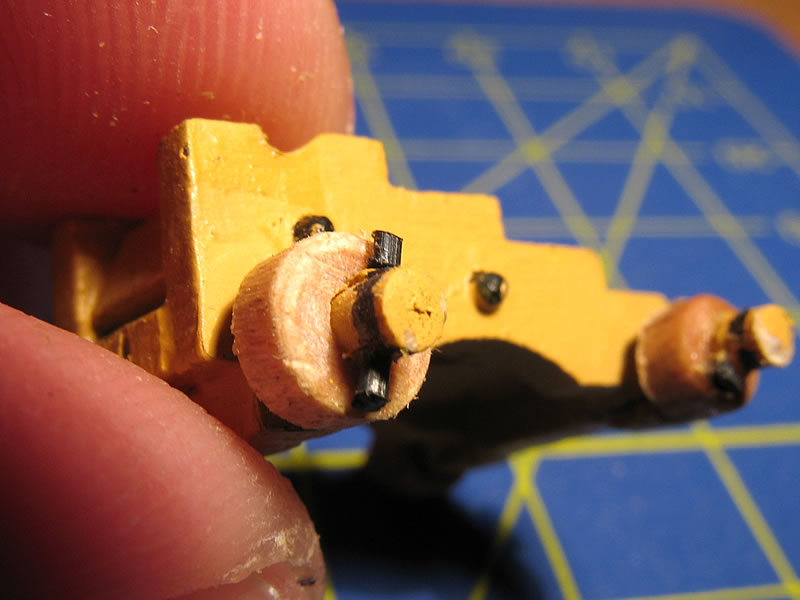 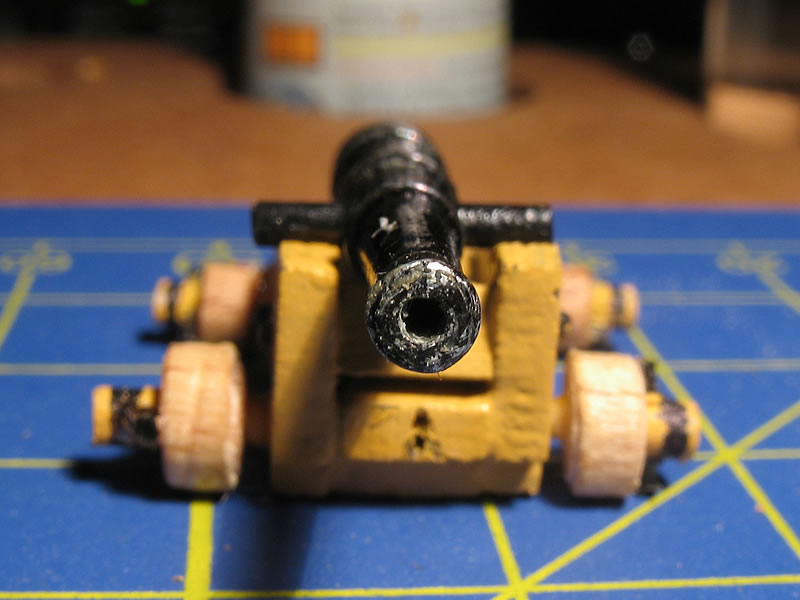 At this stage I am still not 100% satisfied and would like to know your honest opinion. Are the wheels still too wide ?Width is around 2,5 mm. Cannon will be finished when I get my eye bolts and plasticard for the tompion. Regards, Timm My build diary hereCurrent Build:HMS Victory
|
|
|
|
Guest (2)
|