|
|
 Rank: Super-Elite       Groups: Registered
Joined: 27/01/2014 Posts: 5,060 Points: 14,980
|
Thanks Alan  Today was one of those rare days that I was off and didnt have a list of chores that needed doing from SWMBO  I decided to spend some time on my Falcons, with this one I cut, cleaned and added more greebles 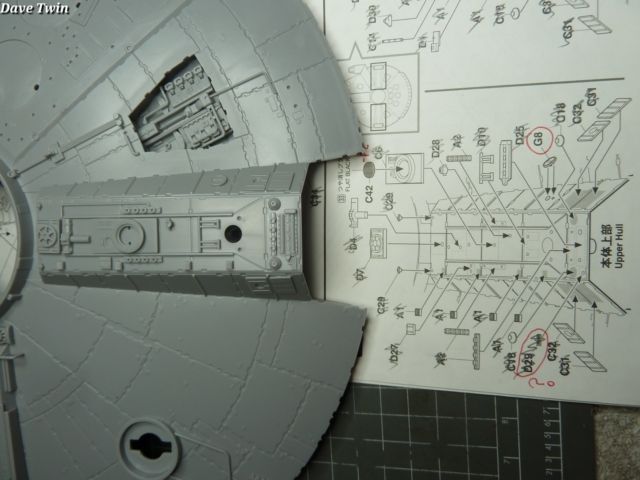 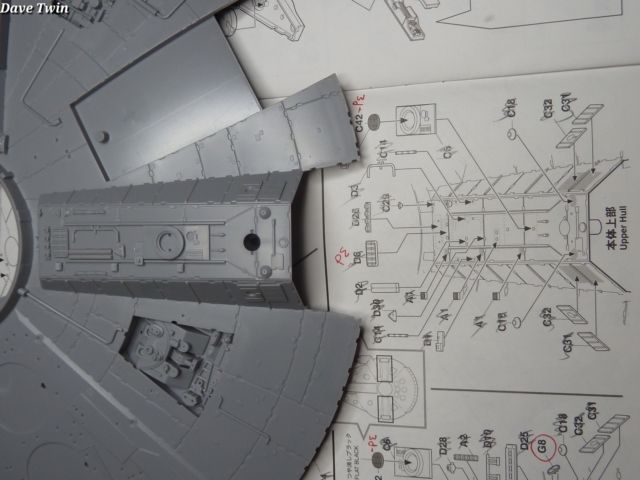
|
|
|
Rank: Super-Elite Groups: Registered
Joined: 27/01/2014 Posts: 5,060 Points: 14,980
|
Today I set about scratch building a light box for the engine, just used 0.5mm styrene sheet then covered it in aluminium ducting tape to block any light leakage. I will be putting in 7 blue LEDs. I also added a layer of Tamiya smoke to the clear nozzles, a couple more layers required I think. 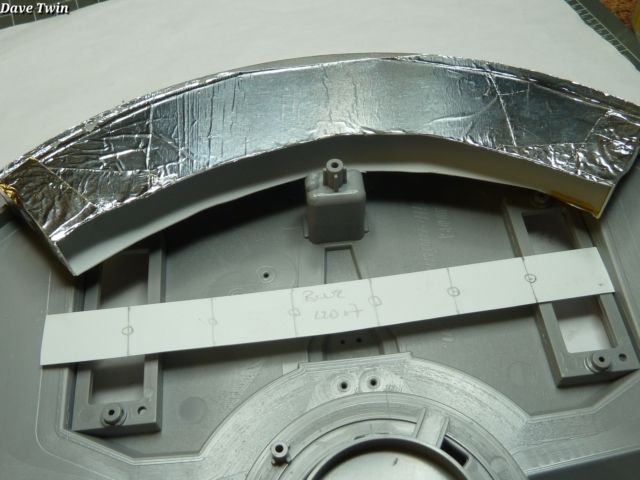 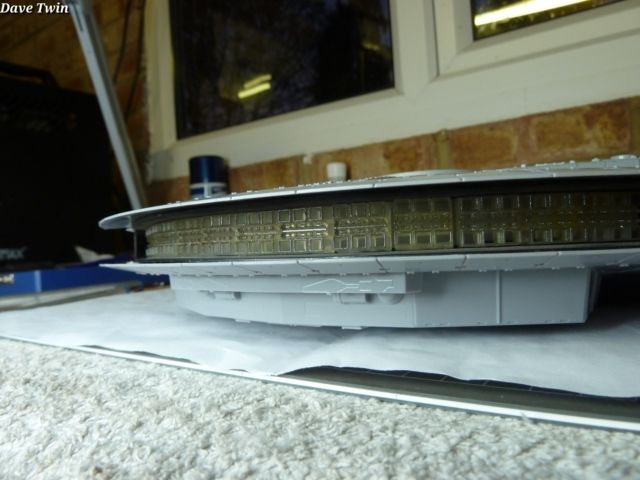 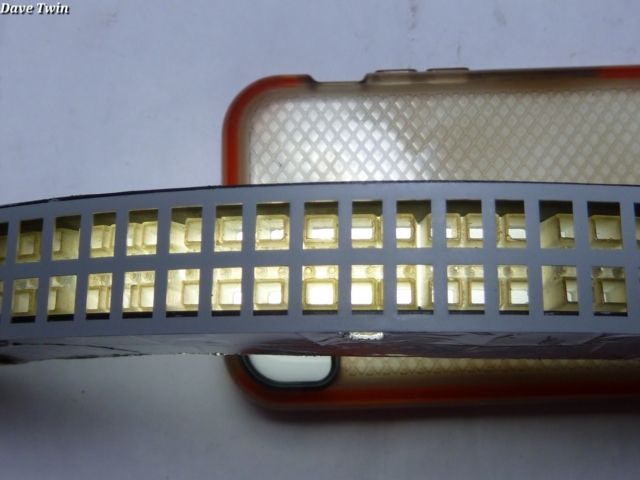
|
|
|
Rank: Super-Elite Groups: Registered
Joined: 27/01/2014 Posts: 5,060 Points: 14,980
|
Sprayed a couple more layers of smoke on the engine nozzles tonight and decided to wire up the engine LEDS for testing. I ended up going with 6 Blue 5mm flat top wide angle LEDs. The light box is still white styrene inside, eventually I will cover the inside with aluminium ducting tape. I'm chuffed to bits with the outcome even though it took me 2 hours to get them all wired up  There is a flickering effect as well but I am still working out how to get this set right 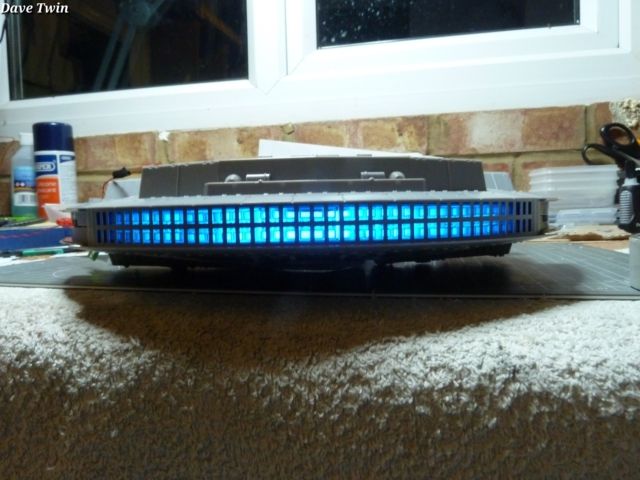 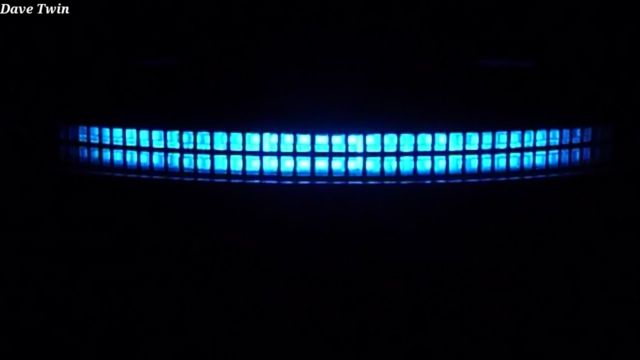 
|
|
|
|
|
 That looks great Dave Current builds:-C57,Zero, Lamborghini Countach, Caldercraft HMS Agamemnon,Robi,R2-D2, MFH Cobra .
|
|
|
|
|
Very nice touch Dave, the effect is brill.....  Chuffed, so you should be.... Regards Alan
|
|
|
 Rank: Elite   Groups: registriert, Registered Joined: 20/03/2011 Posts: 2,356 Points: 7,122 Location: UK
|
Now that is look very cool mate. Looking forward to seeing how you get along with the rest of the lighting too. Spence
|
|
|
Rank: Super-Elite  Groups: Registered
Joined: 30/01/2013 Posts: 4,604 Points: 13,607 Location: Monmouthshire UK
|
Lighting looks amazing Dave Steve
|
|
|
 Rank: Pro Groups: Registered
Joined: 27/06/2011 Posts: 434 Points: 1,309 Location: milton keynes
|
marvellous job so far Dave loving your build Regards Dan Built - MP4/23, Zero, Deagostini Falcon, Model Airways 1903 Wright Flyer, Senna Mp4/4.
Working - Mclaren M23 1/8th scale to complement the Deagostini MP4/23 & Mp4/4
on the bench, Model Airways Sopwith Camel.
|
|
|
Rank: Super-Elite Groups: Registered
Joined: 27/01/2014 Posts: 5,060 Points: 14,980
|
Thanks Andy, Alan, Spencer, Steve and Dan
|
|
|
Rank: Super-Elite Groups: Registered
Joined: 27/01/2014 Posts: 5,060 Points: 14,980
|
A small update. Today I finished off the lightbox by hot gluing the LEDs in place as well as finished applying the aluminium ducting tape to the interier, sprayed the glue blobs black to stop light leakage from there so its all now light proof where it needs to be. I then tidied up the wiring. I also spent some time trying to work out where I was going to put the switch, in the end I went with under the radar dish, which is removable, I made a box out of 1mm styrene to go underneath, you still need to stick something in the hole to flick the switch but making a hole somewhere else and having it sticking out. Next decision is where to put the female power connector for the power pack  
|
|
|
Rank: Super-Elite Groups: Registered
Joined: 27/01/2014 Posts: 5,060 Points: 14,980
|
Got the head ligts all wire up now, 3mm white LEDs, at the moment they are just quickly wired up on LED per terminal on the cercuit board, they will however be wired in series with the red LED for the marker lights as well as the white LED for the landing lights. For the red marker lights I will use 0.5mm Fibre optics. The small landing lights will be 1mm fibre optic with the larger 4 lamp units being a bundle of 4 1mm LEDs held in place with shrink wrap tubing. I am still having a think how to do the landing lights and am currently thinking about mounting them in a 1 or 1.5mm sheet of styrene inside the hull so they are recessed in the holes. 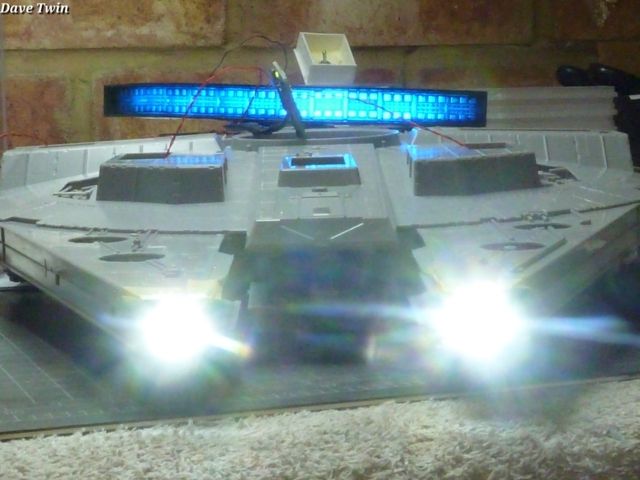 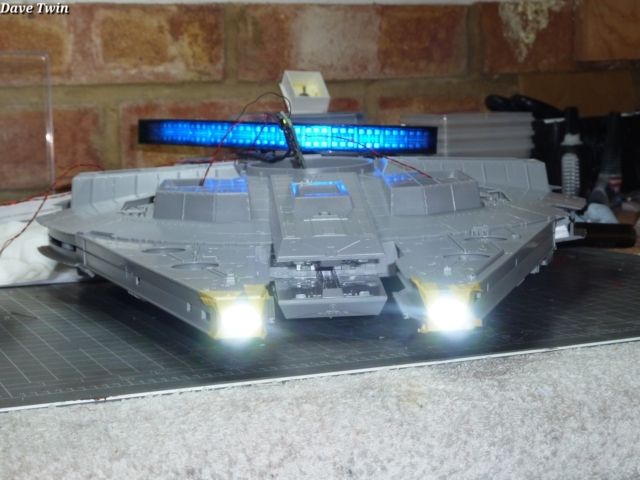 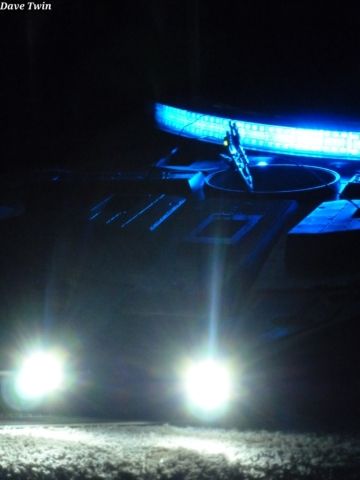
|
|
|
|
|
|
|
|
Rank: Pro Groups: Registered
Joined: 22/04/2015 Posts: 134 Points: 378 Location: San Diego, CA
|
|
|
|
Rank: Super-Elite Groups: Registered
Joined: 27/01/2014 Posts: 5,060 Points: 14,980
|
Thanks guys I have had to learn how to solder to make sure it was all secure after sealing everything up, Im usingna wire wrap tool then solder after that. Ive only managed to kill one LED so far I think the headlights will be dipped a bit Andy when once I wire the and white for the marker and landing lights in series with these two
|
|
|
Rank: Super-Elite Groups: Registered
Joined: 27/01/2014 Posts: 5,060 Points: 14,980
|
I went to mark up where the landing lights will go then decided I need to start filling the bottom with all the add-ons to ensure the holes wont get in the way so thats what I have been doing today. Here you can just make out the holes marked in Pencil, I need to try and work out the correct sizes from reference material  These are the sections that were done, additionlly 13 more of the engine flap parts were also added on the inside as well  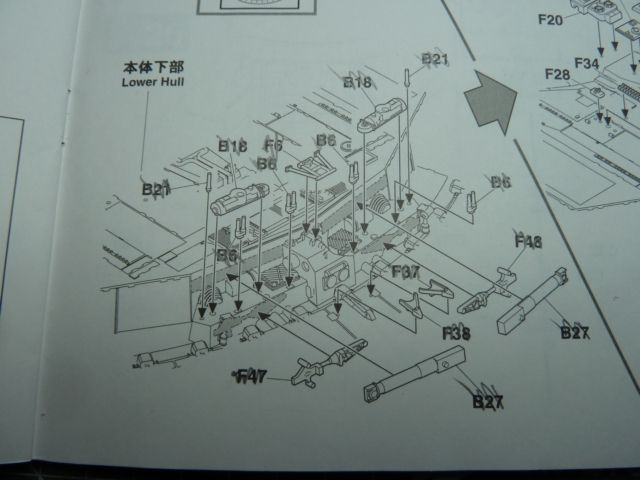 The backend starting to look a nice and busy 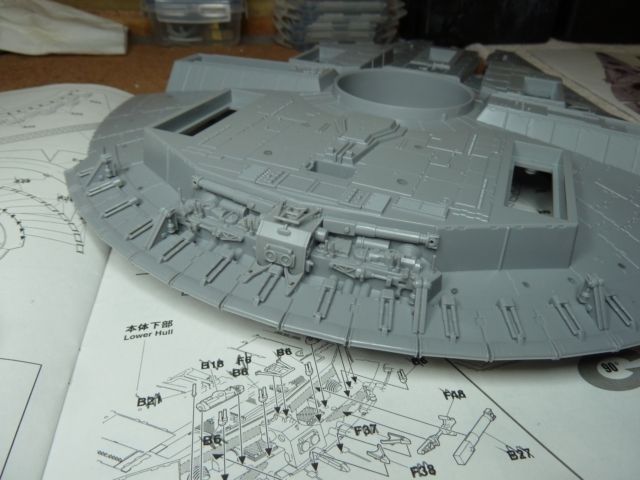 
|
|
|
|
|
Credit to you David, the lighting effects really are superb.. This kit is certainly receiving the justice it deserves in your hands... keep those pics coming, really enjoying this build... Regards Alan
|
|
|
Rank: Super-Elite Groups: Registered
Joined: 27/01/2014 Posts: 5,060 Points: 14,980
|
Gandale wrote:Credit to you David, the lighting effects really are superb.. This kit is certainly receiving the justice it deserves in your hands... keep those pics coming, really enjoying this build... Regards Alan Thanks for the nice comments Alan, Just preparing the next update
|
|
|
Rank: Super-Elite Groups: Registered
Joined: 27/01/2014 Posts: 5,060 Points: 14,980
|
First day off today until next Tuesday, seeing as I am going away for the weekend for my 37th Birthday I thought I would get some modelling in before then. A few more steps in the instructions completed adding more greebles to the lower hull 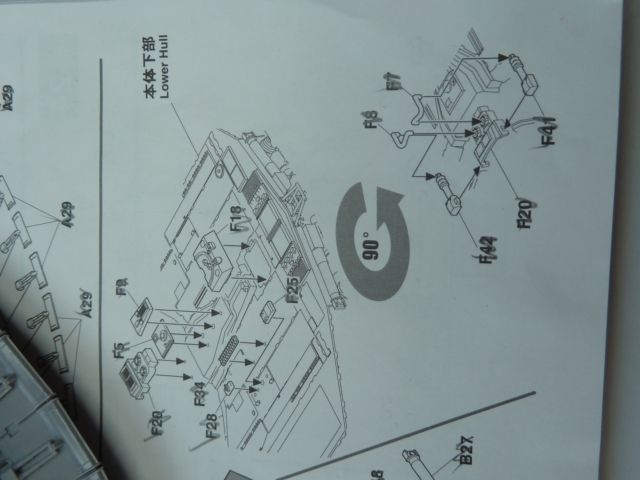 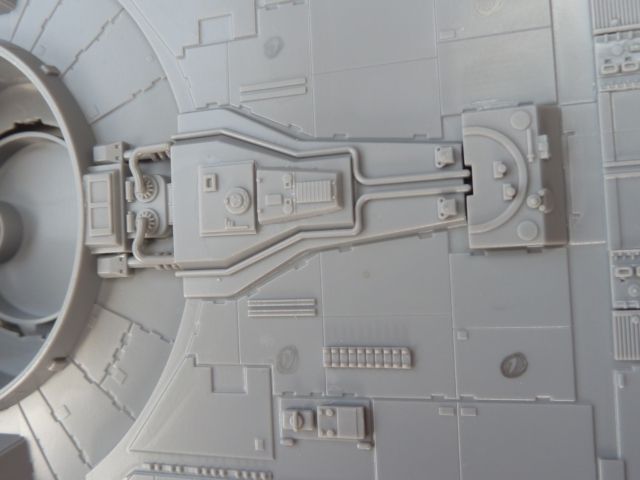 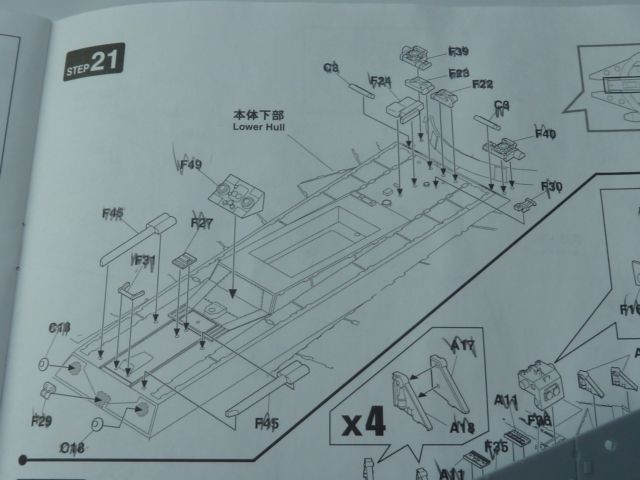 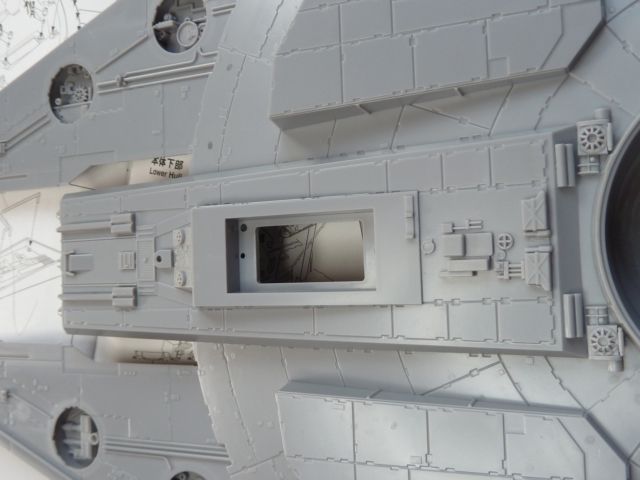 ADVICE / SECOND OPINION NEEDED ADVICE / SECOND OPINION NEEDEDI have marked up the location of the lights based on the Star Wars Blueprints picture. I worked out that the large lamp holes should be 8mm wide with the small ones being 3mm wide. The lamp would then be recessed 2mm inside the hole. My question is, to the more experienced modellers out there do these look about right or do you think they would be a bit over scale. I had originally thought about using 1mm fibre for the small and 4 1mm together for the large, the large were actually 4 lamps. However now I am thinking I need to use 8mm LEDs for the large, and 3mm LEDs for the small, or maybe 3mm fibres for the small. Im not sure if this will be a bit over kill though? The other option is to use say 4mm LEDs for the large and just have the hole 8mm and 1.5mm LED for the small in a 3mm hole? Locations marked 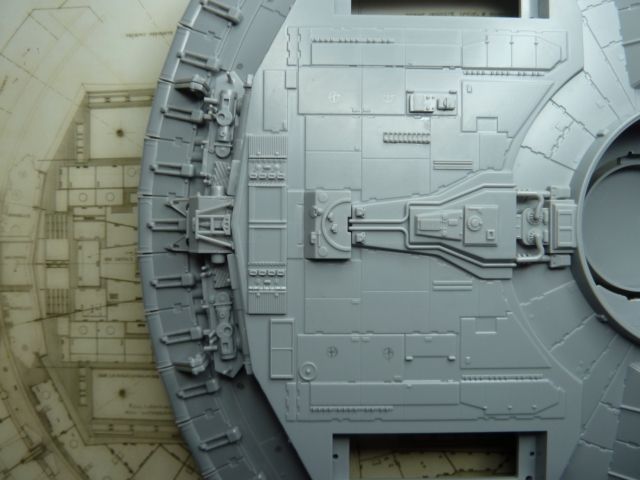  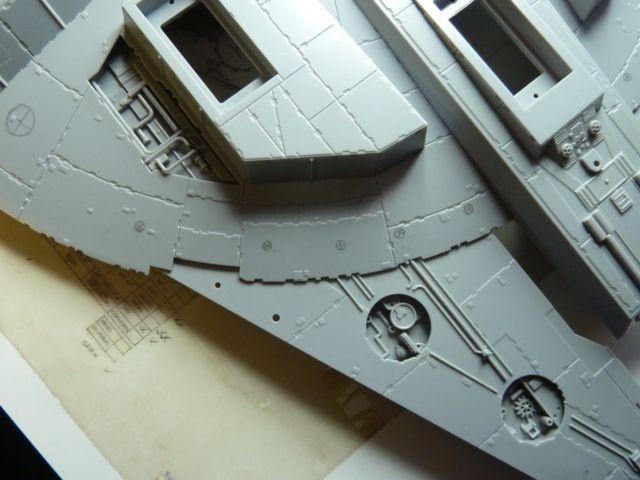 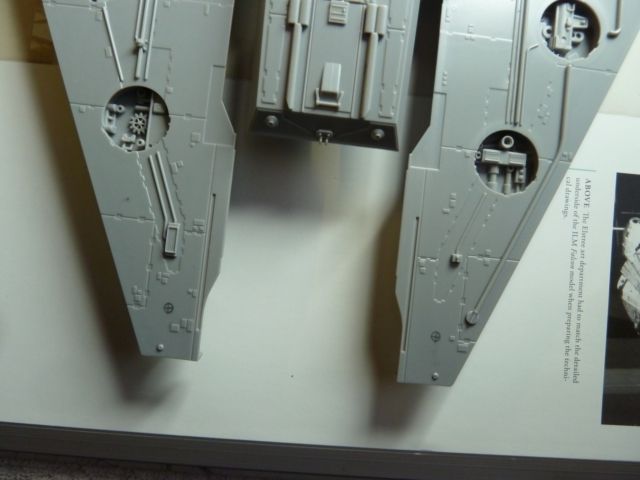
|
|
|
Rank: Super-Elite Groups: Registered
Joined: 27/01/2014 Posts: 5,060 Points: 14,980
|
Well after looking through some Empire Strikes Back screen grabs it looks like the small landing lights are the same size as the headlights so that would make them 3mm LEDs. (See last post on previous page for my quandry)
It also looks like there are 2 more spot lights in the recess bit at the front between the mandibles.
Looks like I need to re-think how I am wiring this up
Would still welcome others thoughts
|
|
|
Rank: Super-Elite Groups: Registered
Joined: 27/01/2014 Posts: 5,060 Points: 14,980
|
Sorry for the deluge of photos the last few days, do let me know if its too much. I have managed to make a lot of progress the last few days. I now have all the piped fitted in the pits on the lower hull, unfortunately the pipes do not meet very well so I need to decide what to do to cover that, perhaps a little filler.  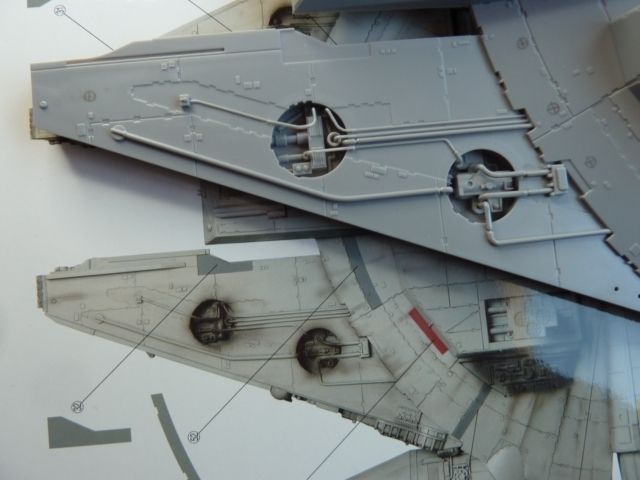 All greebles now added to the bottom hull, landing struts and ramp dry fitted 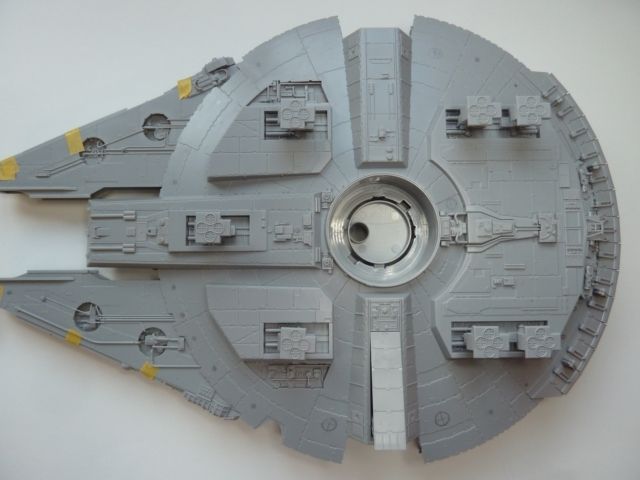 I have decided I am going to use the supplied stand, I actually quite like it, I have also decided that I where I will mount the female power socket, I have also decided I am going to change the switch for a micro slide switch, there will be 2 mounted underneath now. Also thinking of now adding lights to the gun turret interior. All in all I am back at the drawing board stage now with my lighting and wiring. 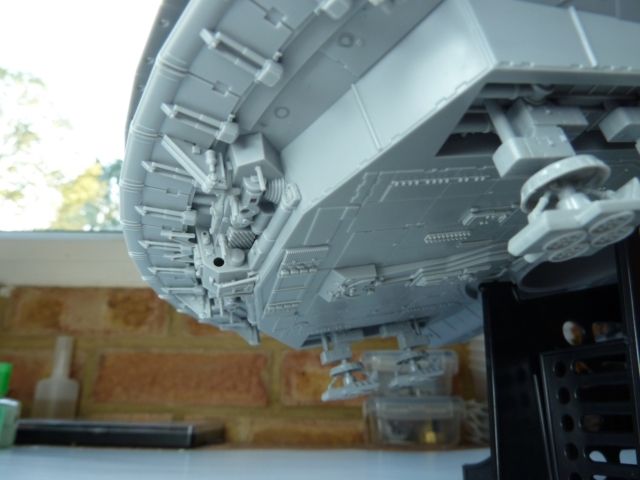 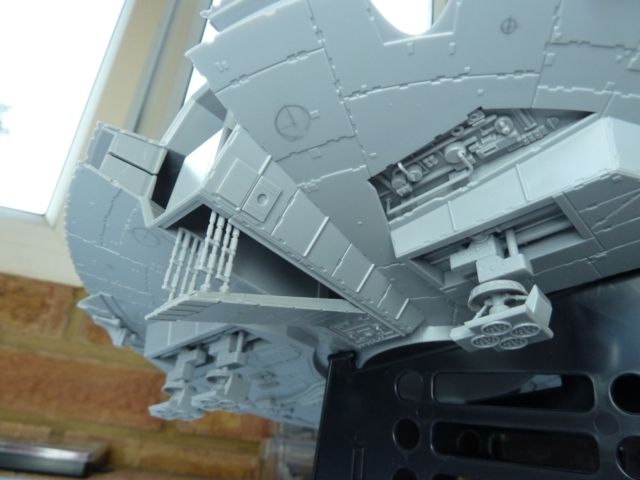 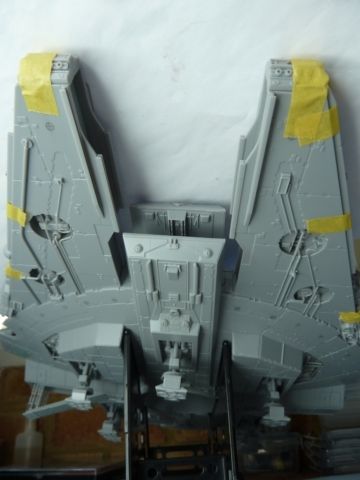
|
|
|
|
Guest
|
 US
US

