|
|
 Rank: Beginner Level 3  Groups: Registered
Joined: 17/07/2011 Posts: 26 Points: 93 Location: Northampton
|
Been waiting for a bit for the kit parts to build up and I decided I can't wait any longer :-)
Started today with the Monocoque and painted the front and back sections in silver in prep for the Museum Collection decals. I wanted to get the full Kevlar effect for these parts as the detailed pictures show the 'gold/yellow' bleed through in certain lights. agonised over airbrushing these parts or brush painting and in the end went for brush painting to deliberately give that 'hand layed' look of the original.
CF/Kevlar techniques were pretty basic back then and looking at the close up shots you can see the underlying surface is pretty rough in places, especially in the cockpit around the gear lever and seat sides. Still experimenting as I don't want it too look 'too' yellow but I want that tint to come through. Being anal I bought two sets of the Monocoque decals and getting the base coat right.
Anyway, while I am waiting on the silver base coat to dry thoroughly I have put the streaky Museum Collection carbon decals on the inside edges of the front wing end plates. Hmm, it is quite subtle... you need the light to catch it to show the lines but I think, in scale it is about right.
|
|
|
 Rank: Elite       Groups: registriert, Registered Joined: 20/03/2011 Posts: 2,356 Points: 7,122 Location: UK
|
Looking forward to seeing your progress Ian  Spencer
|
|
|
 Rank: Pro Groups: Joined: 24/08/2009 Posts: 48,827 Points: -13,348
|
Congrat's on your first medal 
|
|
|
 Rank: Master Groups: Registered
Joined: 26/04/2014 Posts: 1,473 Points: 4,331 Location: Essex
|
it's a fantastic kit. get some pics up of your build Senna mclaren mp4/4 build complete mp4/4 build http://forum.model-space...spx?g=posts&t=12029
Dodge charger build complete https://forum.deagostini....1686229545.1.1.utmcsr=(direct)|utmccn=(direct)|utmcmd=(none)&__utmv=-&__utmk=9709046
|
|
|
Rank: Pro Groups: Registered
Joined: 27/06/2014 Posts: 393 Points: 1,104 Location: st austell
|
Nice to see a another build going.. Be good to see some pics. On this one sounds good. Facebook-model maker
|
|
|
Rank: Master Groups: Registered
Joined: 26/04/2014 Posts: 1,473 Points: 4,331 Location: Essex
|
ian2014 wrote:Nice to see a another build going.
Yes it is. A lot of people seemed to have started build threads and just stopped. Senna mclaren mp4/4 build complete mp4/4 build http://forum.model-space...spx?g=posts&t=12029
Dodge charger build complete https://forum.deagostini....1686229545.1.1.utmcsr=(direct)|utmccn=(direct)|utmcmd=(none)&__utmv=-&__utmk=9709046
|
|
|
Rank: Beginner Level 3 Groups: Registered
Joined: 17/07/2011 Posts: 26 Points: 93 Location: Northampton
|
OK, so after a bit of a lull... I added the Museum decals and was disappointed with the 'instructions'. Two things I am not happy with, first the c/f for the wing endplates and second the Kevlar for the monocoque. First, the Kevlar decals with the Museum Collections instructions are rubbish. If you follow their 'advice' it looks terrible MUCH too yellow so I am starting again on that one. The issue is that the colour shows throw the 'holes' in the decal and the overall effect is Disney not McLaren. So plan B here is to paint a bunch of colours in some card and lay strips of decal over these and get the right effect by trial and error. I have the Japanese detail book and in those shots the front part of the monocoque is a sort of brown-y colour so I'll start there. The difficulty is the show-through effects the overall effect substantially. Second, the c/f MC decals have to be laid over a lighter base otherwise you don't see the lines. Again, a bit of trial and error and I got what I thought was the right amount of show-throw. The colour I landed on was Tamiya XF-63 German Grey. I'll post some pics. 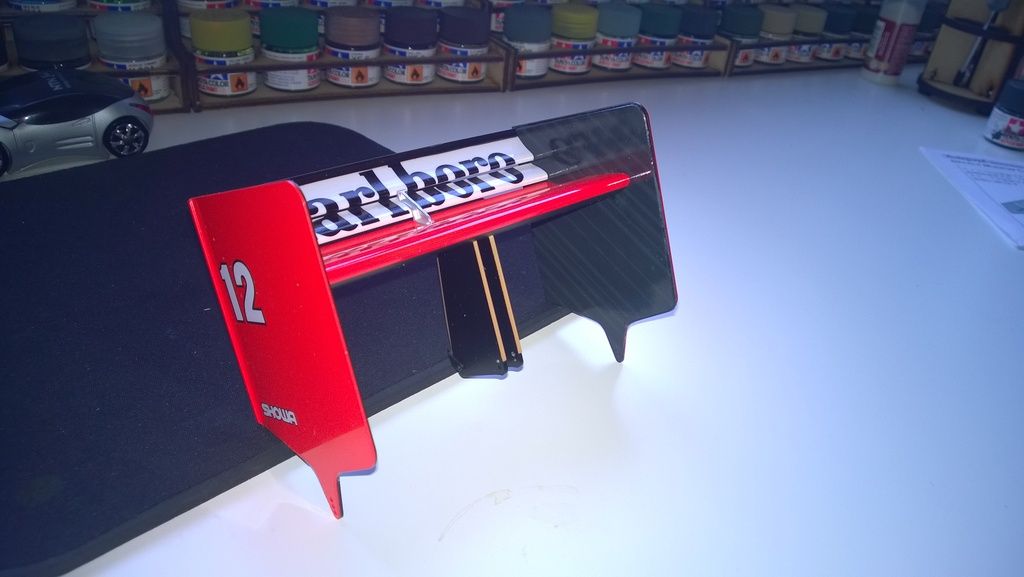
|
|
|
 Rank: Semi-Pro Level 2  Groups: Registered
Joined: 02/03/2015 Posts: 84 Points: 245 Location: England
|
Wow rear wing looks great! Building the MP4/4!
|
|
|
Rank: Pro  Groups: Registered
Joined: 01/12/2014 Posts: 102 Points: 312 Location: Chicago, IL
|
|
|
|
Rank: Pro Groups: Joined: 24/08/2009 Posts: 48,827 Points: -13,348
|
Very nice work Ian, all very neat and tidy and it looks great - well done. 
Kev
|
|
|
Rank: Beginner Level 3 Groups: Registered
Joined: 17/07/2011 Posts: 26 Points: 93 Location: Northampton
|
Senna figure finally arrived. 
|
|
|
Rank: Beginner Level 3 Groups: Registered
Joined: 17/07/2011 Posts: 26 Points: 93 Location: Northampton
|
Here are the seat belts as we do the final build stages. Cutting out the Boss seat belt pads - Not happy that they overlap the belts so will need trimming before fitting. 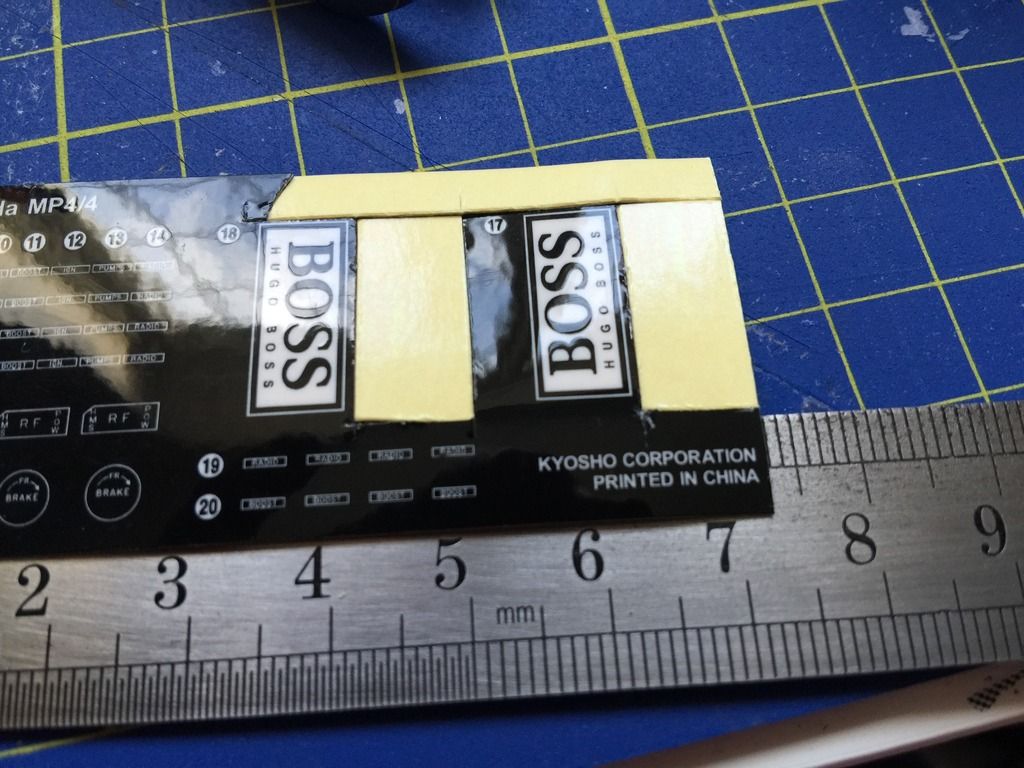 And the finished belts, before trimming and attaching to the seat. 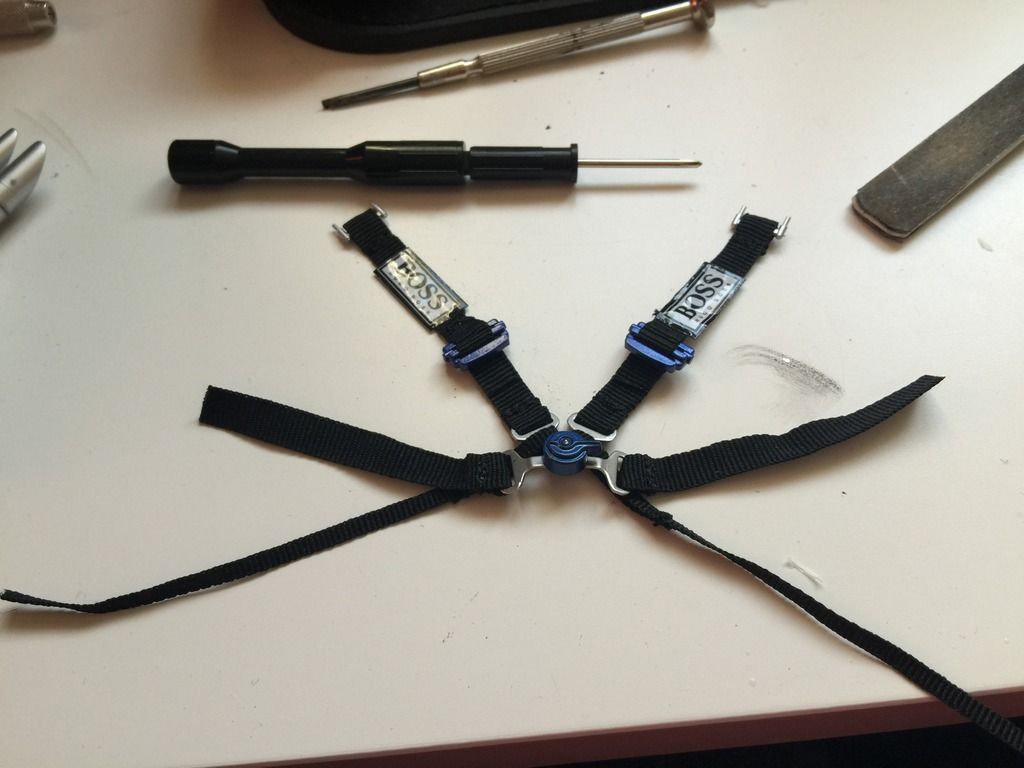
|
|
|
Rank: Beginner Level 3 Groups: Registered
Joined: 17/07/2011 Posts: 26 Points: 93 Location: Northampton
|
Final assembly of the monocoque - Finished the Kevlar on the tub and the Marlboro logo applied. 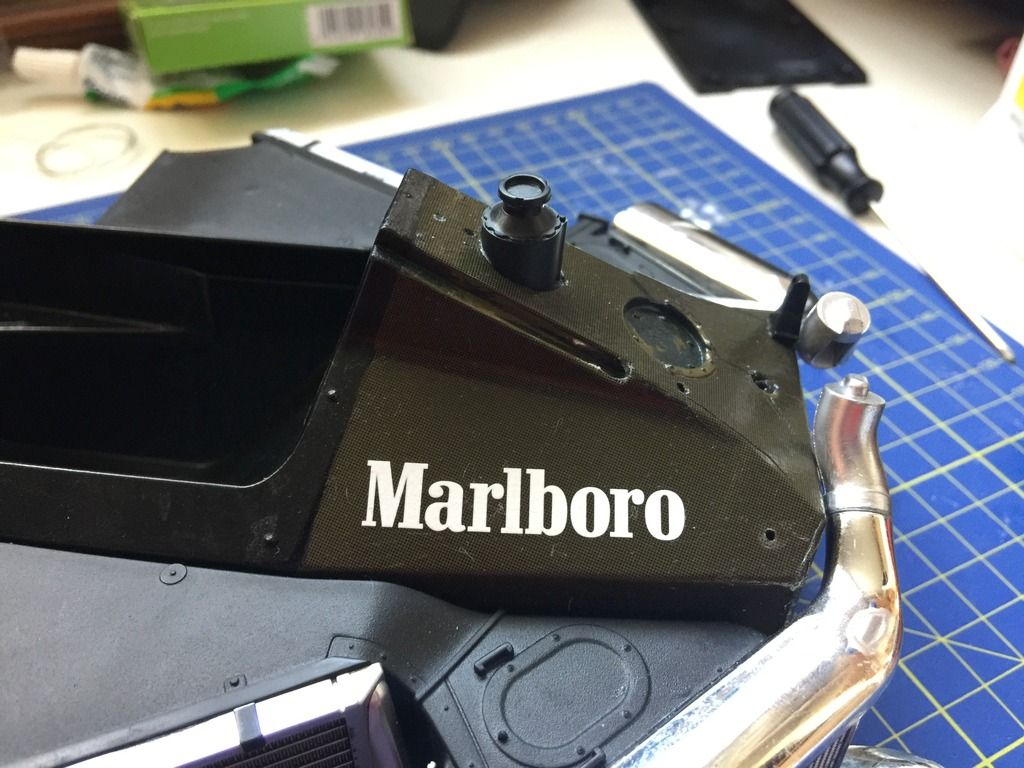 Offset rear shot after taking the engine off ready for final assembly. 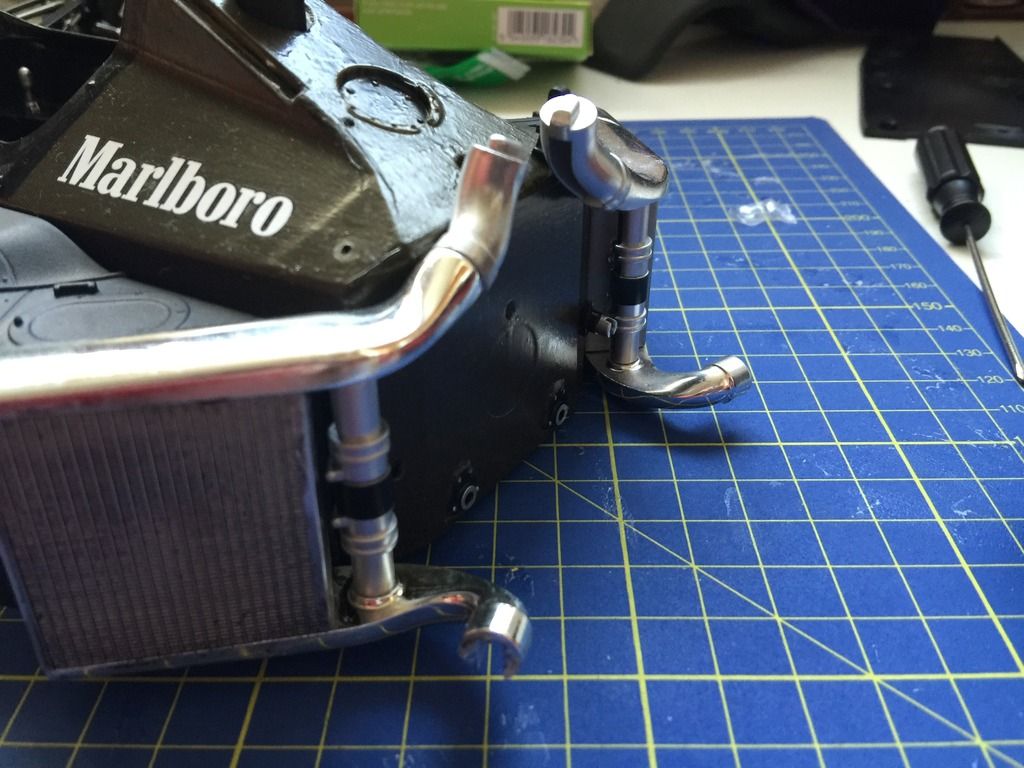
|
|
|
Rank: Beginner Level 3 Groups: Registered
Joined: 17/07/2011 Posts: 26 Points: 93 Location: Northampton
|
This is the nearly complete engine. I do have to do some rework - can you spot the 'deliberate' mistake - grrrr. 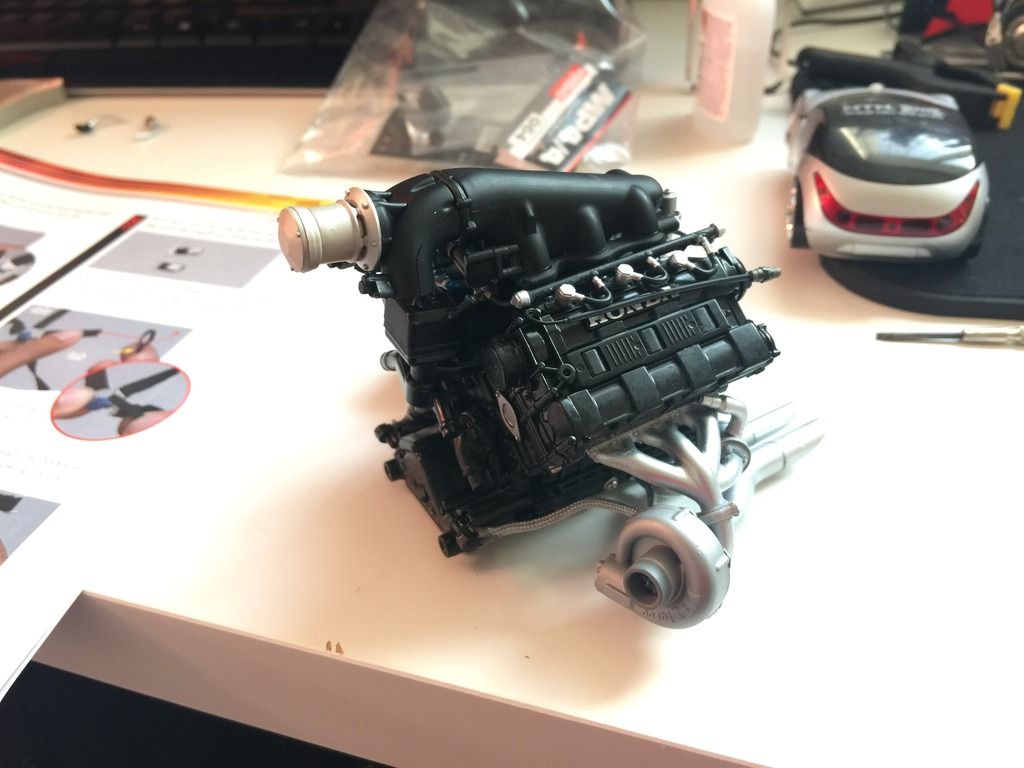 This is the underside of the completed block after aligning the exhaust outlets in the rear floor. 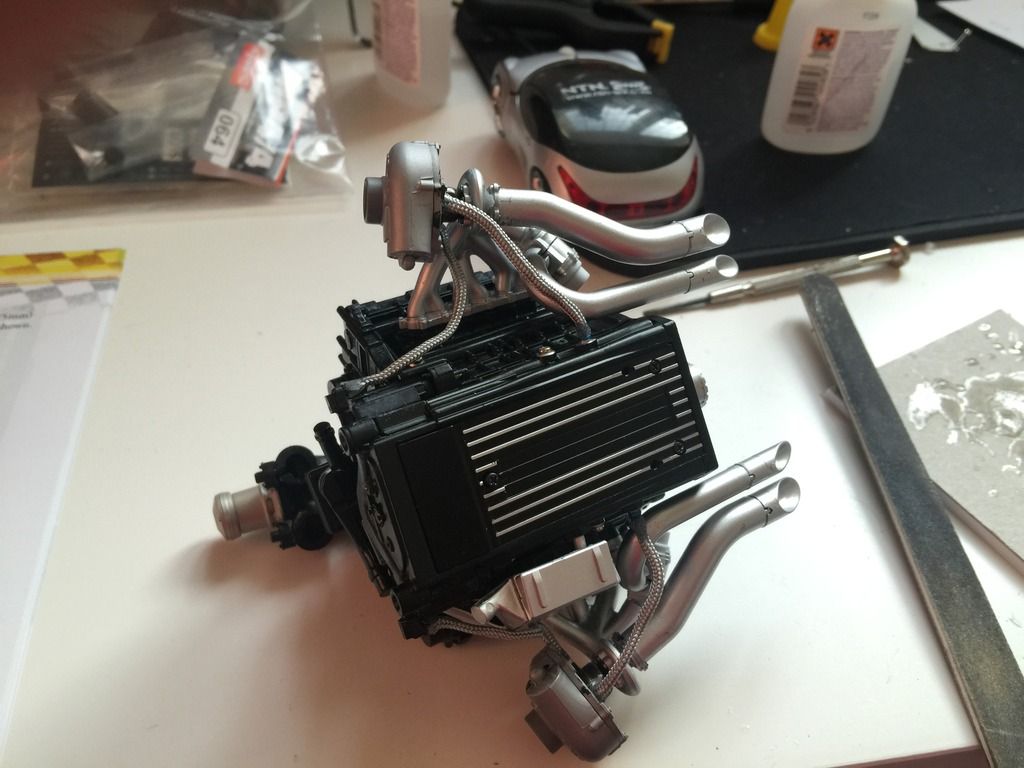 Not that happy with the pipes - it frays really badly - have bought some aeroquip scale hose ends in the anodised blue finish.
|
|
|
Rank: Beginner Level 3 Groups: Registered
Joined: 17/07/2011 Posts: 26 Points: 93 Location: Northampton
|
Turbo plenums carboned with Museum Collection decals - need to smoke them to tone down the silver effect a little and a little more work with the MicroSol Microset but getting there. 
|
|
|
Rank: Beginner Level 3 Groups: Registered
Joined: 17/07/2011 Posts: 26 Points: 93 Location: Northampton
|
This is the instrument panel with the switches and knobs added but before those TINY labels are added... 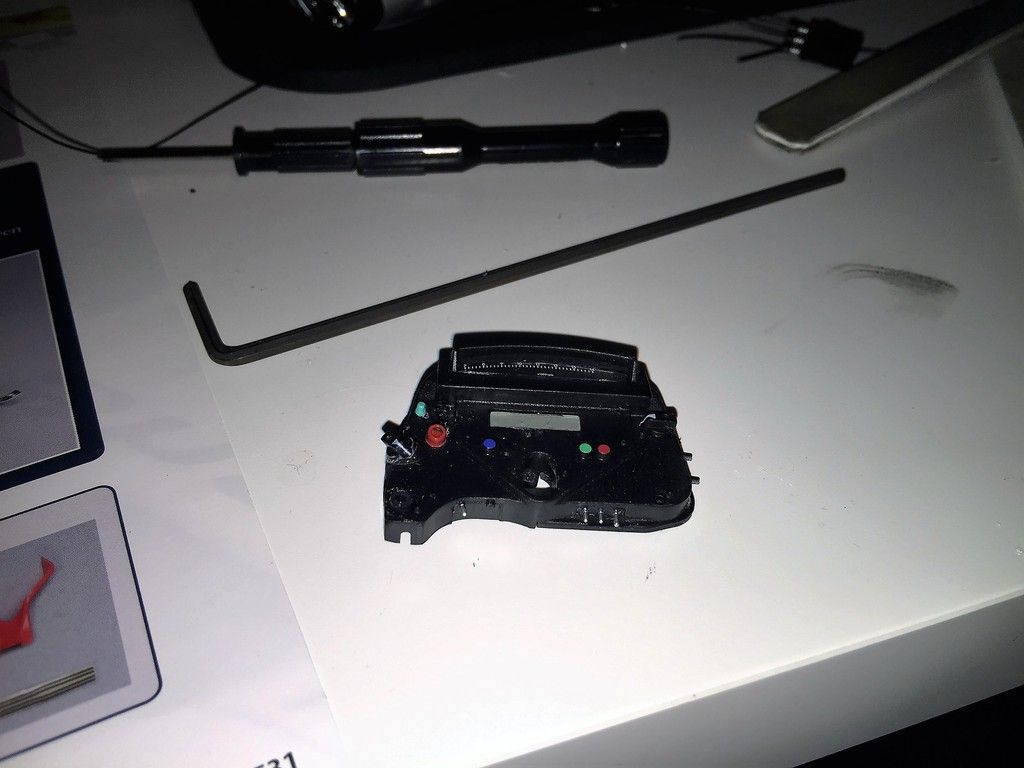 The instrument panel and the electronic boxes and the wires attached. 
|
|
|
Rank: Beginner Level 3 Groups: Registered
Joined: 17/07/2011 Posts: 26 Points: 93 Location: Northampton
|
Here's the monocoque with the front Kevlar and the Marlboro logos added (sorry if that is not PC). And the steering wheel with the tiny labels added. 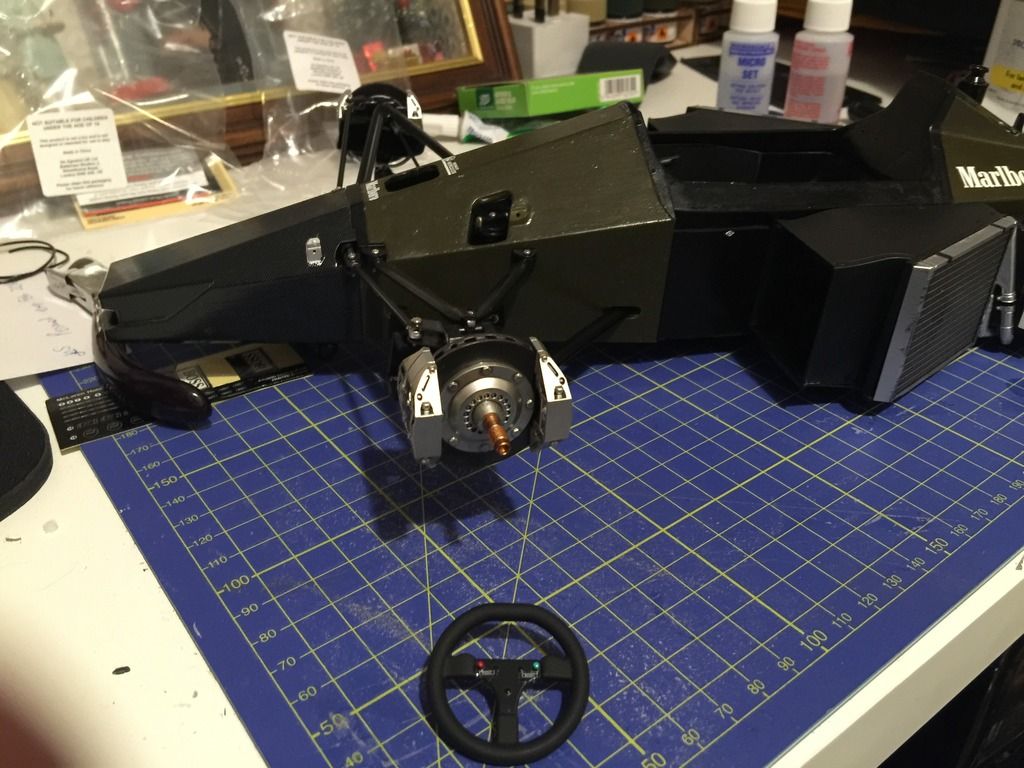
|
|
|
Rank: Beginner Level 3 Groups: Registered
Joined: 17/07/2011 Posts: 26 Points: 93 Location: Northampton
|
And here is the rear transaxle before the touch up process. 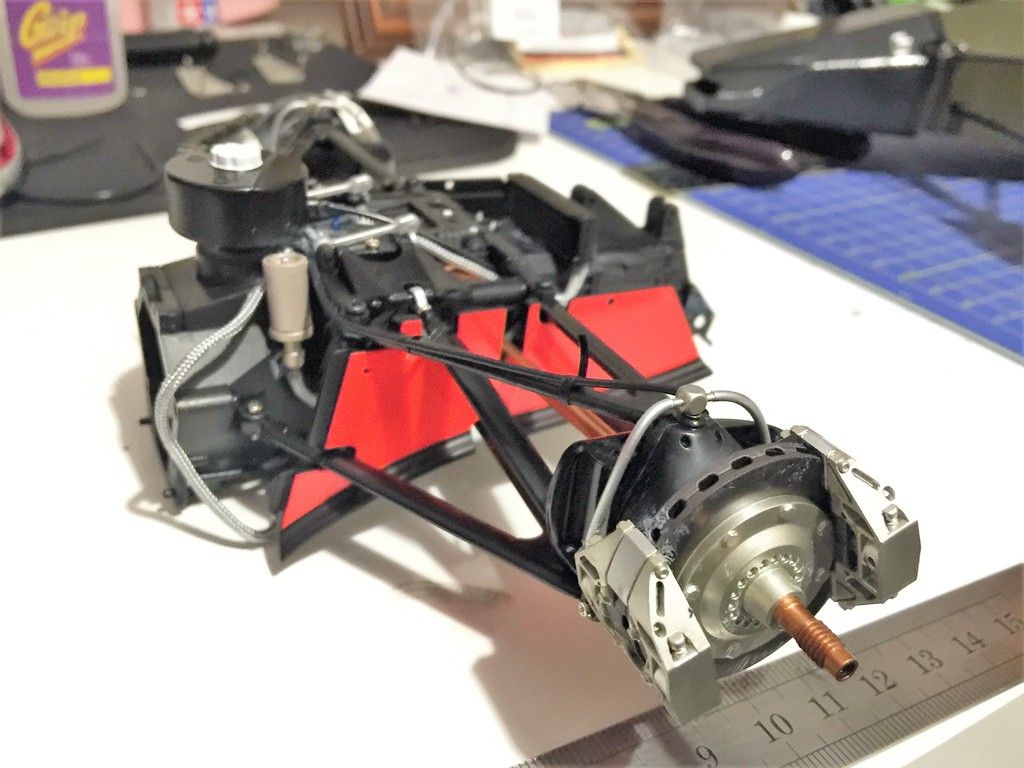 And here is another view.. 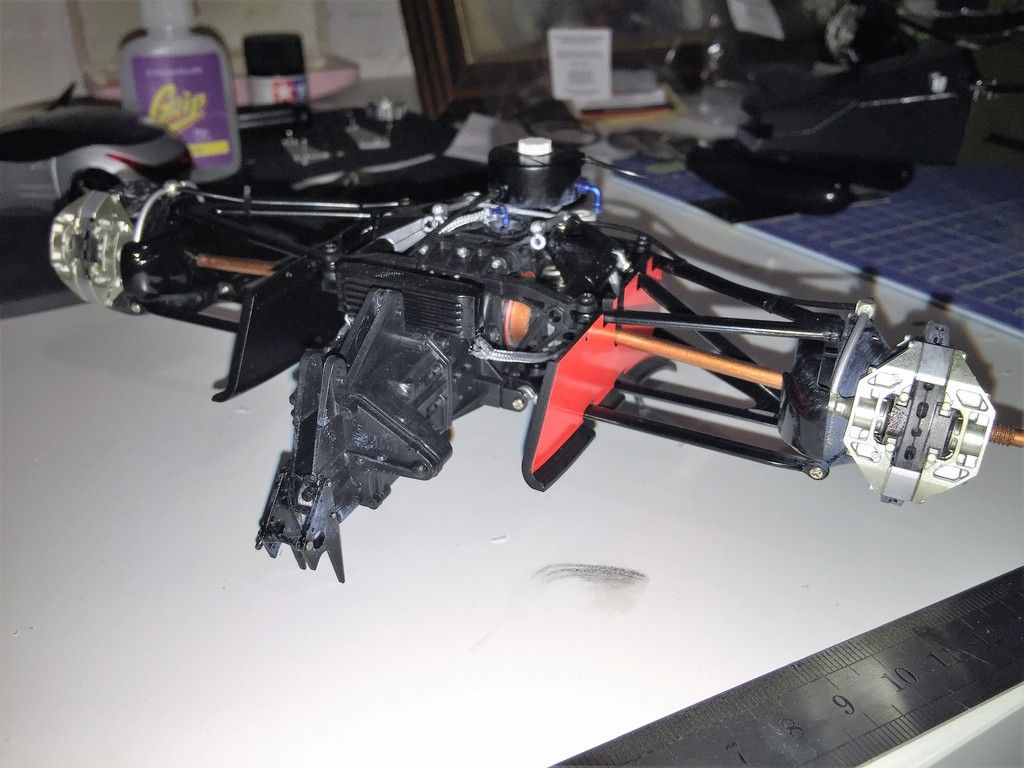  And here is the engine and transaxle joined for the first time. 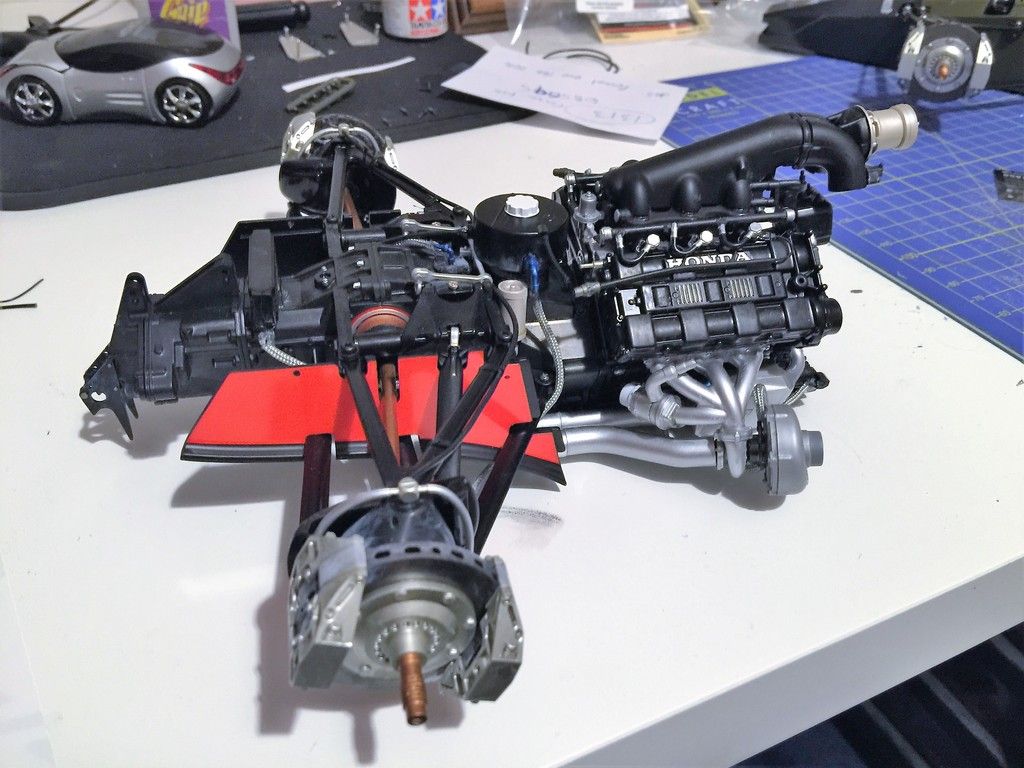
|
|
|
Rank: Master   Groups: Registered
Joined: 20/09/2011 Posts: 1,312 Points: 4,126 Location: Austria
|
Well, i`m not sure if it`s the correct Name of the part in english, but the fuel hoses (?) are mounted in the wrong direction. As maybe you can see in my diary, i also made a similar mistake - and i can tell you - correcting it was a mess! So i wish you good luck! Otherwise nice detail! Greetings,
Walter
Present builds:
Revell B-24D Liberator 1:48
On the shelf:
Italeri "Fiat Mefistofele", Italeri "Moto Guzzi California", Fokker "Red Baron", Revell Bismarck, Revell Tirpitz, Arab Dow, Stage Coach, .....
Completed builds:
McLaren MP4/4, D-51 Steam Locomotive, HMS Victory, GWH F-15D Eagle, St. Stephen`s Cathedral (cardboard), Solar-powered paddle Steamer (little project with my son), HMS Victory X-section, "Geli" Phantom II (cardboard)
|
|
|
Rank: Master Groups: Registered
Joined: 26/04/2014 Posts: 1,473 Points: 4,331 Location: Essex
|
Oops! That might be a bit tricky to correct! Senna mclaren mp4/4 build complete mp4/4 build http://forum.model-space...spx?g=posts&t=12029
Dodge charger build complete https://forum.deagostini....1686229545.1.1.utmcsr=(direct)|utmccn=(direct)|utmcmd=(none)&__utmv=-&__utmk=9709046
|
|
|
|
Guest
|
 US
US

