|
|
 Rank: Semi-Pro Level 1  Groups: Registered
Joined: 10/02/2014 Posts: 63 Points: 189 Location: uk
|
this may take me a while to build what with the time and all but i'll post my build up for all to see, i had started it some time ago and not got very far yet. most mods i have done are taken from some peeps on this site and others mixed with some of my own so thank you to all.
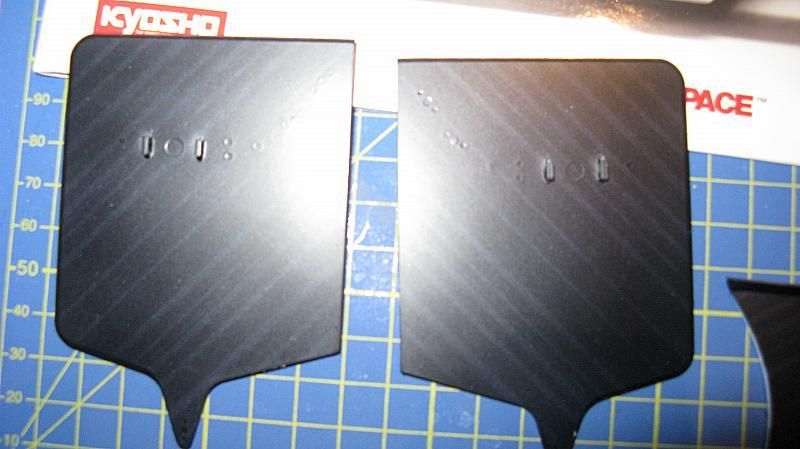
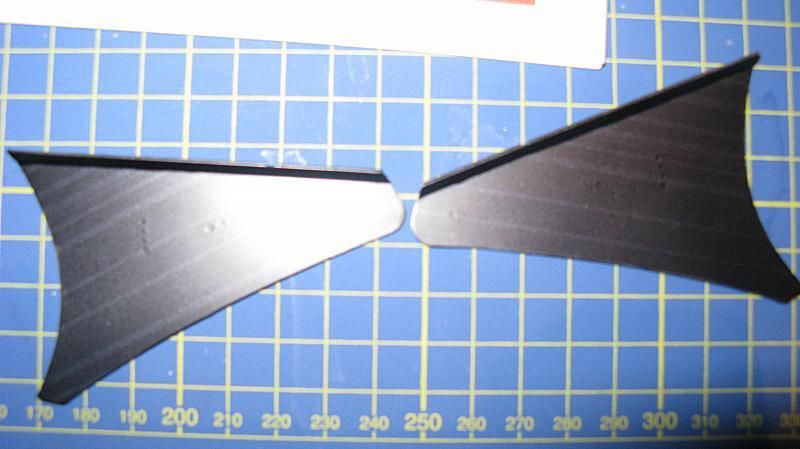
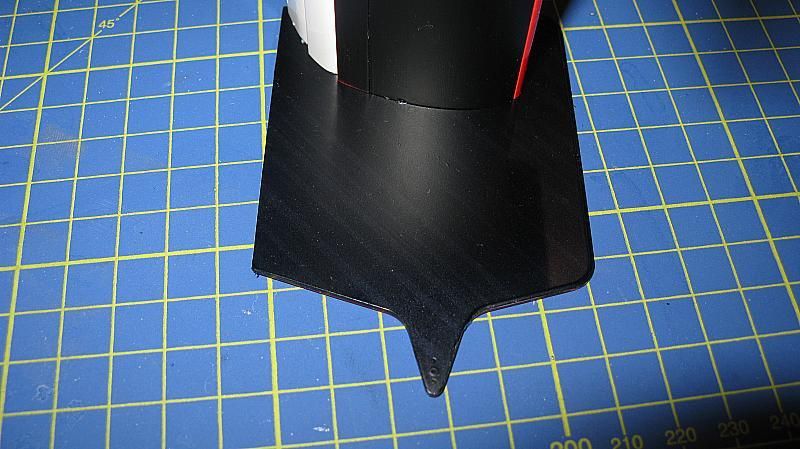
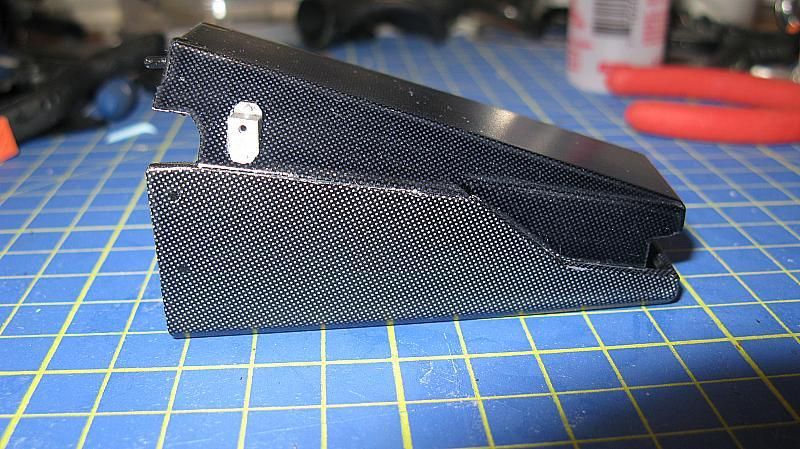
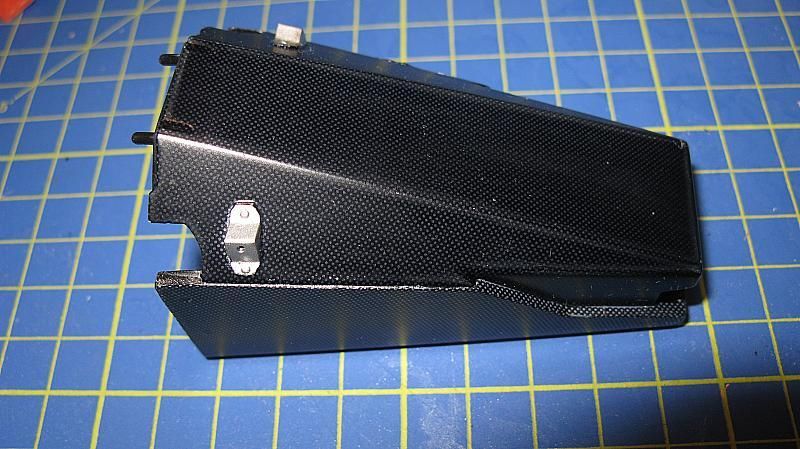
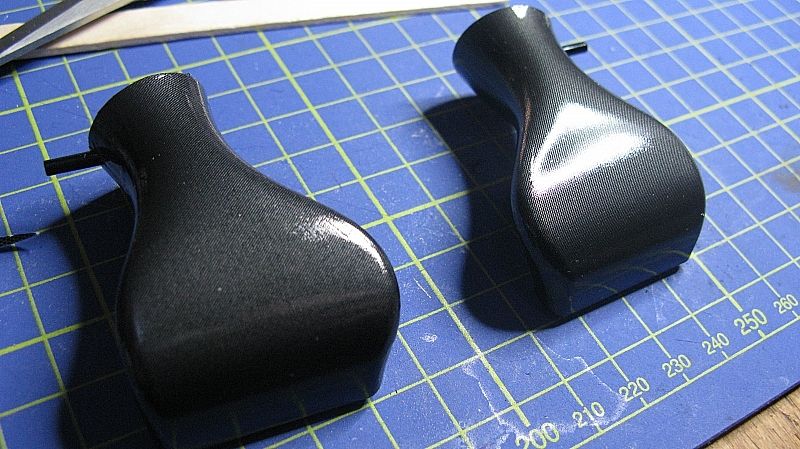
first up i decided to sand down the underside of the front wing to get rid of the mold circle marks and coated the underside with halfords satin black.

finished product, i decided not to coat the underside of the nose.

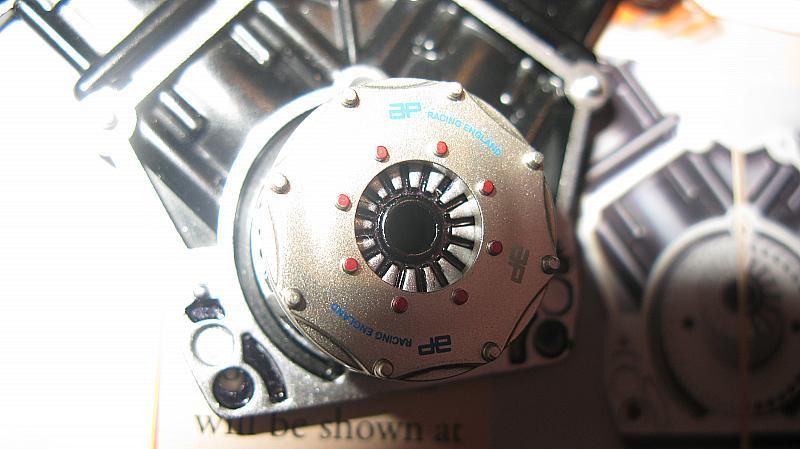
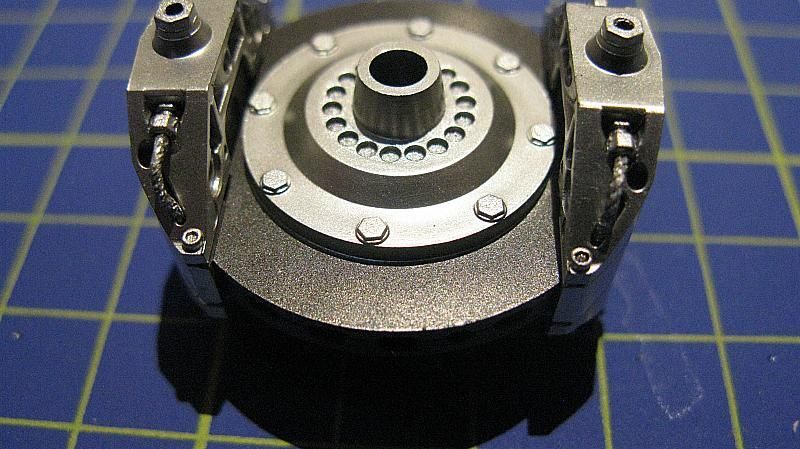
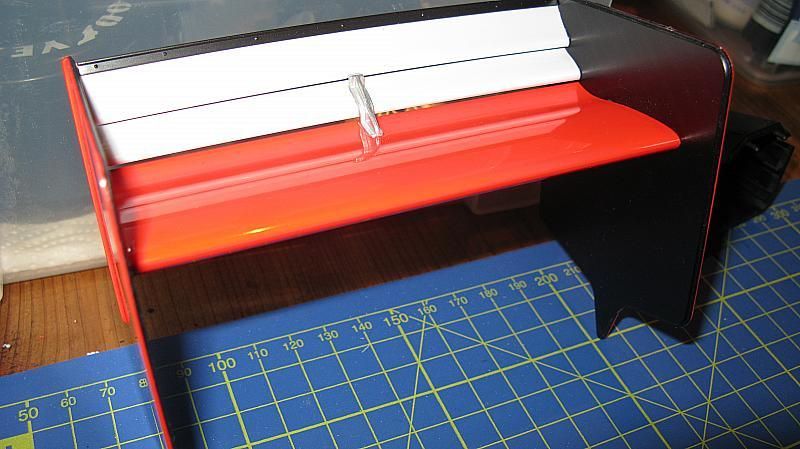
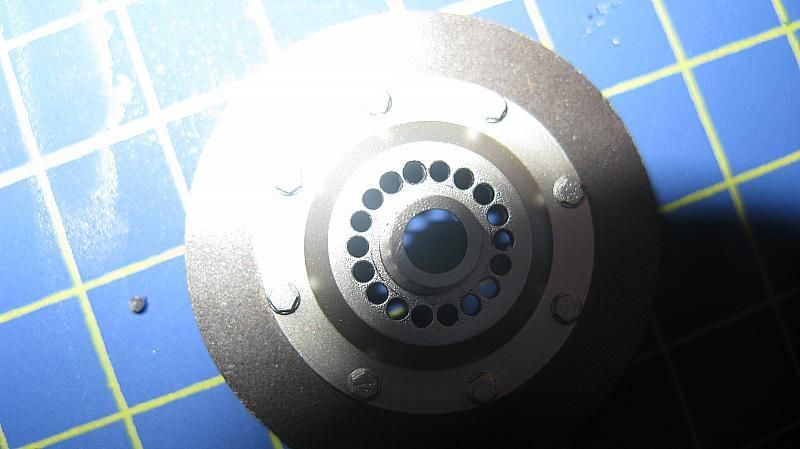
next up was the inner clutch inking and surrounding indents, i did this with a black sharpie and whiped the top off with tissue paper
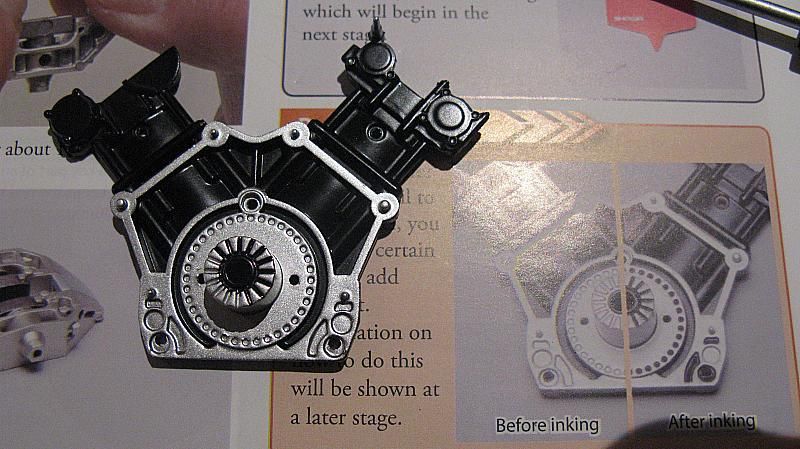
finished product
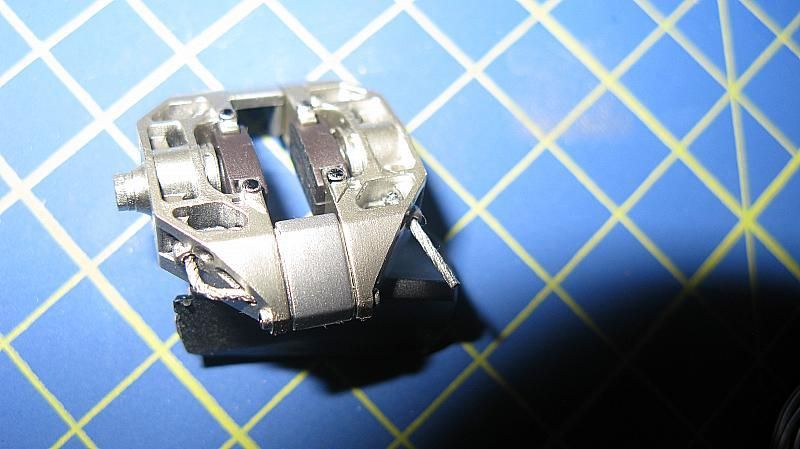
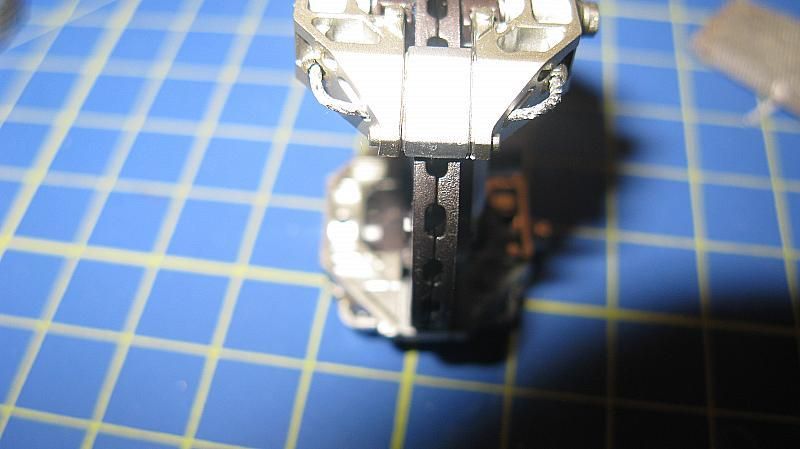
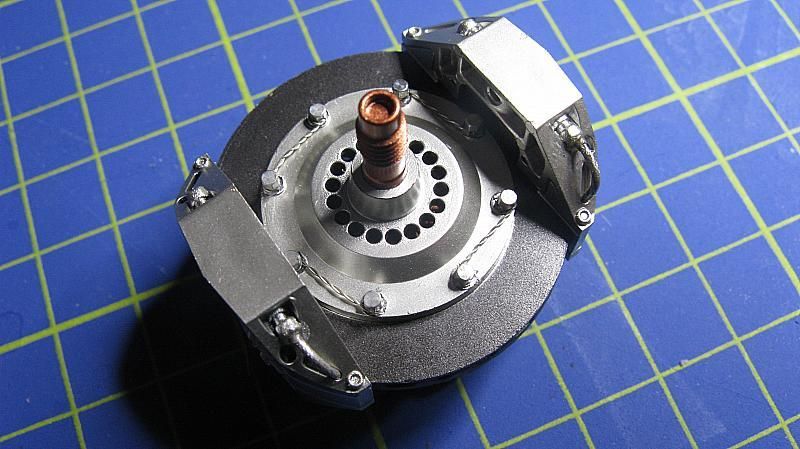
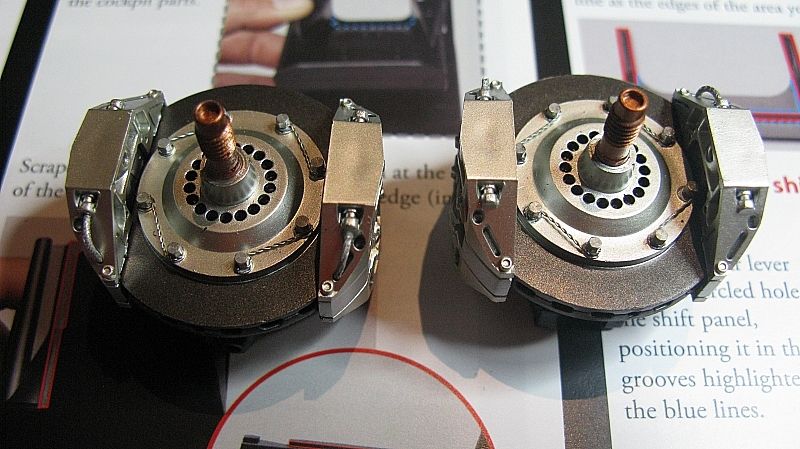
next up the calipers, in the picture you will see that i have drilled 4 holes with a 0.8mm drill in the top of the nuts for the break hoses, now at this point i must say this should have only been on one side which i will be changing
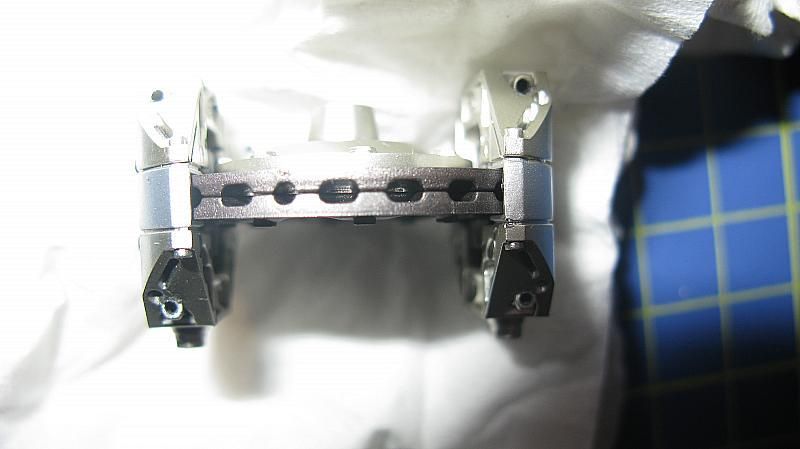
what i used for the break hoses is a 0.76mm solder wire and rolled a small strip on the table with a file to give the braided look. super glued the end into the drilled hole and then cut to size and simply bent over and popped the other end into the recess which would be where the hoses goes through the caliper and out the other side, this is where i made a mistake by drilling the 4 holes so be careful not to make the same mistake. the straight one in the picture - before its bent - is the correct side, the other side will eventually go up and connect to the stub to the left middle.
next up is thanks to dandare.
first i sprayed the inner fasces of the rear wing end plates and front wing end plates with a mix of Tamiya Aluminium & gun metal (mainly aluminium) as suggested by dandare as the decal kit for these failed to show up over the black, at first i thought against this but dan was correct and after applying the decal to one of them i could see that indeed they stood out fine.
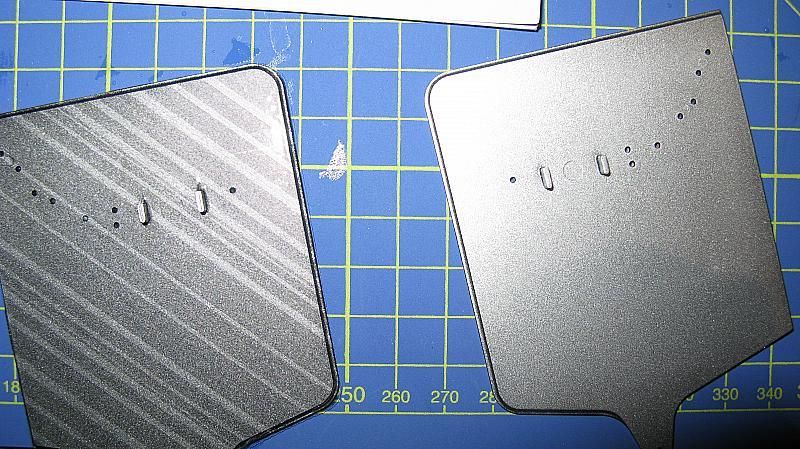
then i applied 2 light coats of "alclad" transparent smoke which toned the decal effect down a little to a good level, the only thing i noticed is that they looked alittle on the blue side so maybe a brown smoke if available would have given a more realistic effect but non the less they look good.
sorry for the poor image
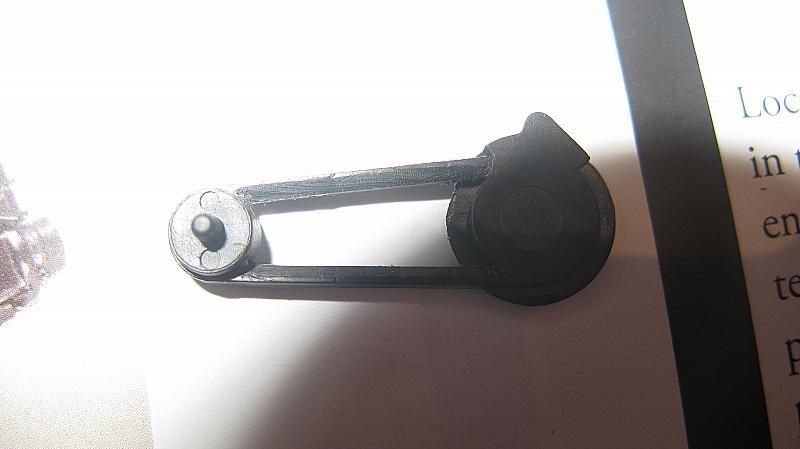
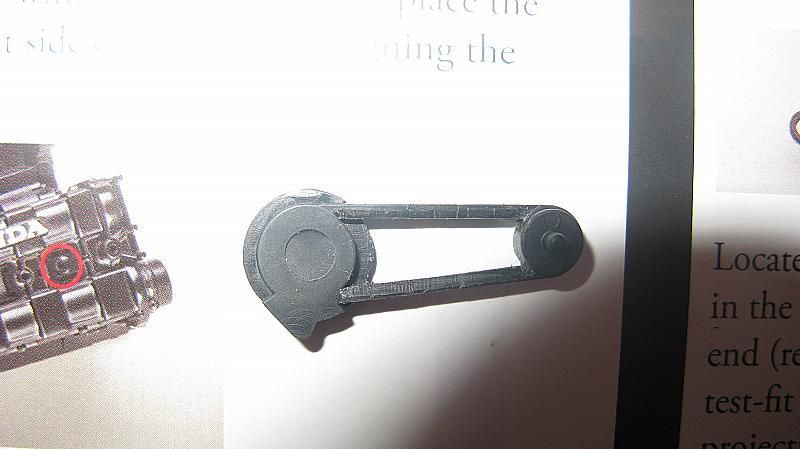
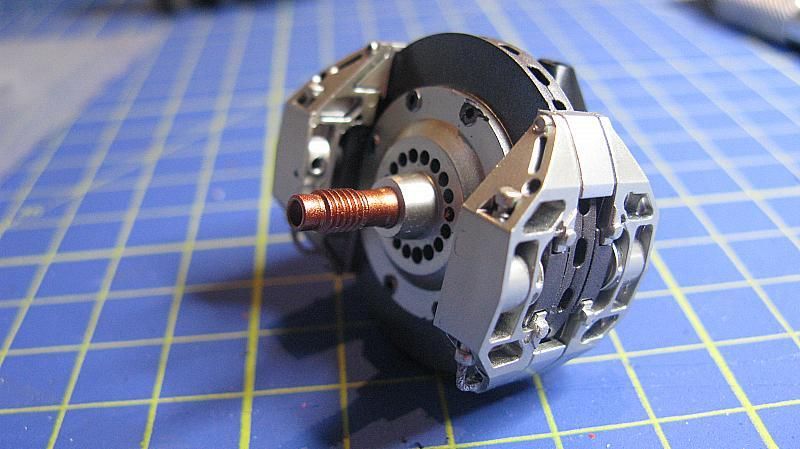
next up is the pulley belt
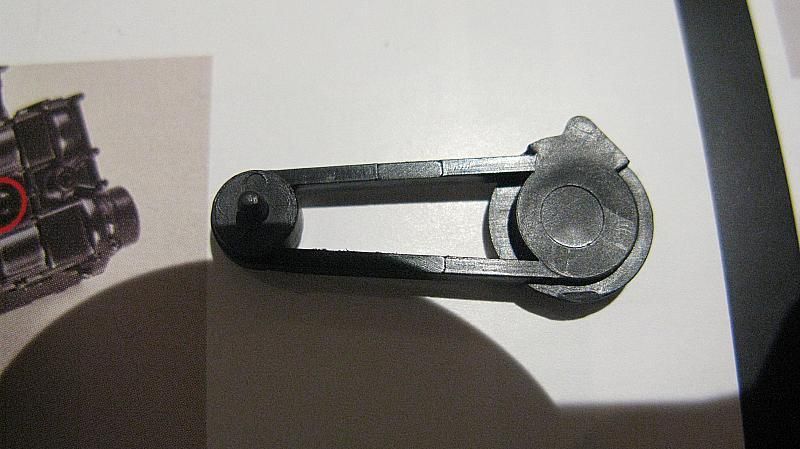
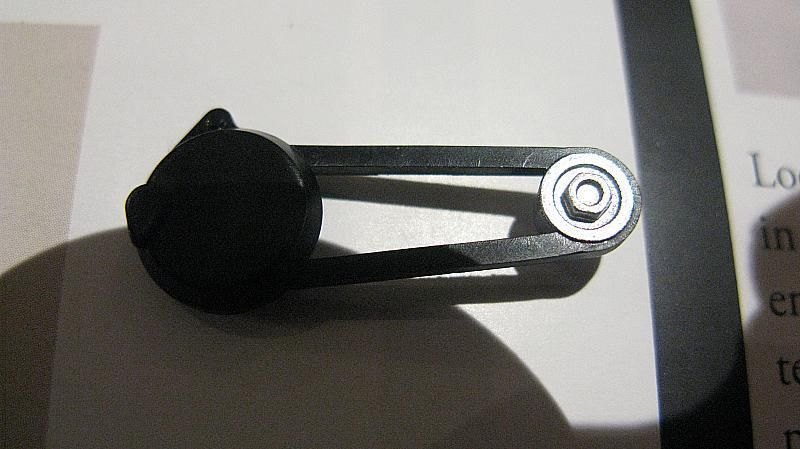
i decided to make this look more like a v belt, the real article is not quite a v belt though but i just decided to do it this way. this was done simply with a craft knife. difficult to see in the photo's though.
|
|
|
Rank: Semi-Pro Level 1 Groups: Registered
Joined: 10/02/2014 Posts: 63 Points: 189 Location: uk
|
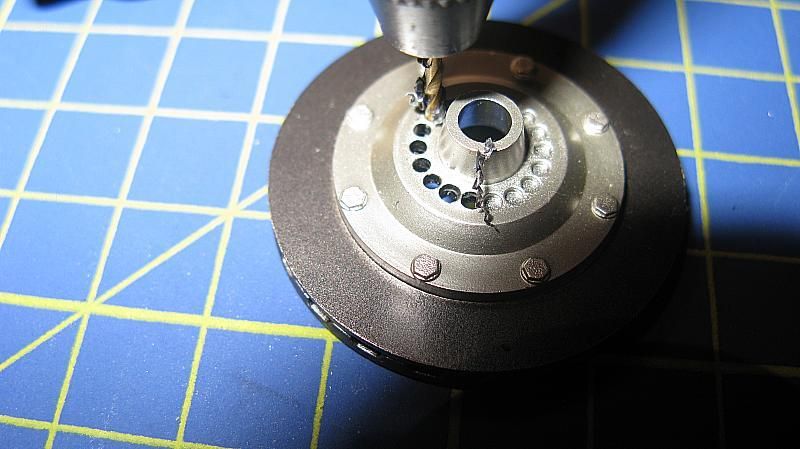
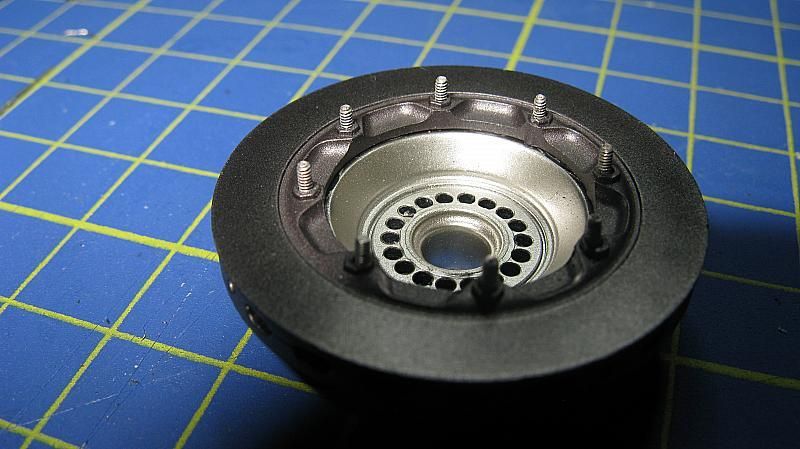
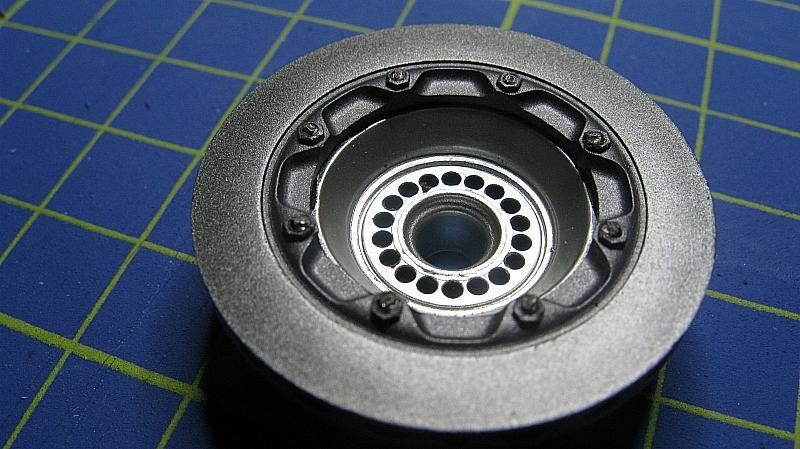
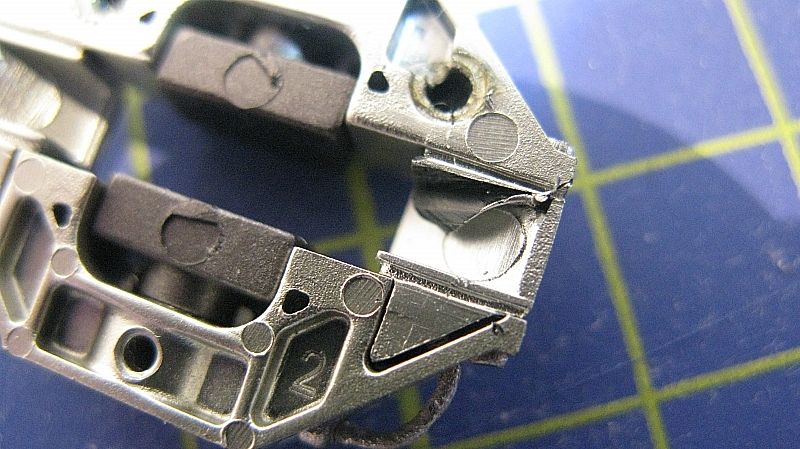
next up the discs. i drilled out the holes round the centre with a 1.3mm drill and found this to be perfect size for the holes and there was no need to clear burs from the rear of the disc

i then drilled through the nuts half way through the disc with a 0.95mm drill and then all the way through from the nuts on the back, i dont have a piccy of this i'm afraid, this ensured that the holes came through in the correct place both sides. i have purchased some 1mm tin bolts to go through these for me to apply the locking wire, i may need to open the holes up with a 1mm drill but i didn't want to go oversize as they just fit through nice and snug without the need to glue them.
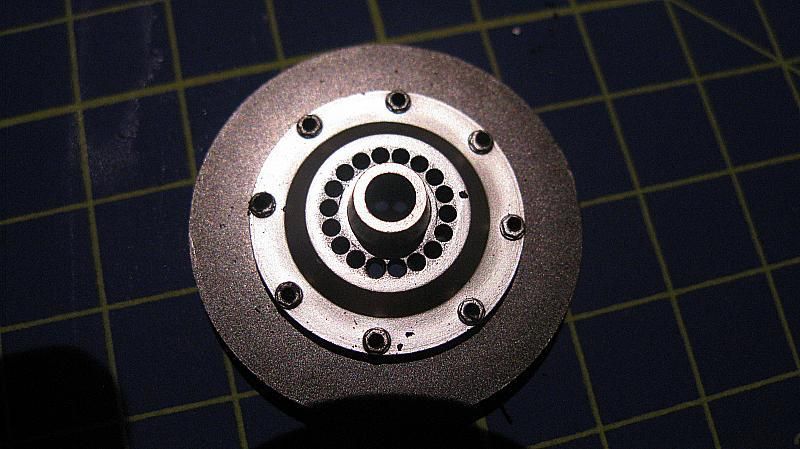

you can see in the below picture i have also stripped off the top of the nuts with a craft knife leaving the molded washer in place, or at least most of it.
|
|
|
 Rank: Master    Groups: Registered
Joined: 26/04/2014 Posts: 1,172 Points: 3,422 Location: Essex
|
Great start Chris. It's a fantastic kit. Senna mclaren mp4/4 build complete mp4/4 build http://forum.model-space...spx?g=posts&t=12029
Dodge charger build https://forum.deagostini....1686229545.1.1.utmcsr=(direct)|utmccn=(direct)|utmcmd=(none)&__utmv=-&__utmk=9709046
|
|
|
Rank: Semi-Pro Level 1 Groups: Registered
Joined: 10/02/2014 Posts: 63 Points: 189 Location: uk
|
thanks steve, i have 2 of these to build and will more than likely start the other when i have found my feet with this one, i'd like a prost one as well. greedy i know. lol.
C
|
|
|
 Rank: Pro Groups: Registered
Joined: 27/06/2014 Posts: 393 Points: 1,104 Location: st austell
|
Nice start Chris be watching this one. Be nice to see both cars together. Facebook-model maker
|
|
|
 Rank: Amateur Level 1 Groups: Registered
Joined: 10/01/2015 Posts: 31 Points: 83 Location: Brazil
|
You are doing a fantastic job Chris! This is an amazing kit. Rod
Building: Senna's 1:8 Mclaren MP4/4; Mustang Shelby 1:8, Le Soleil Royal and San Francisco II
|
|
|
Rank: Pro  Groups: Registered
Joined: 27/06/2011 Posts: 434 Points: 1,309 Location: milton keynes
|
great start Chris, some great mods. waiting on a replacement set of discs and calipers! as my first attempt at the nuts, washers bolts etc did not quite come off the way i wanted first time. regards Dan Built - MP4/23, Zero, Deagostini Falcon, Model Airways 1903 Wright Flyer, Senna Mp4/4.
Working - Mclaren M23 1/8th scale to complement the Deagostini MP4/23 & Mp4/4
on the bench, Model Airways Sopwith Camel.
|
|
|
Rank: Pro Groups: Joined: 24/08/2009 Posts: 48,051 Points: -13,308
|
Nice work so far Chris, well done.  
Kev 
|
|
|
Rank: Semi-Pro Level 1 Groups: Registered
Joined: 10/02/2014 Posts: 63 Points: 189 Location: uk
|
Thanks for the comments guys, appreciated.
@ Dan - yes i messed up some calipers but fortunately i had a spare set, are model space issuing back orders if we email and request does anyone know?
|
|
|
Rank: Semi-Pro Level 1 Groups: Registered
Joined: 10/02/2014 Posts: 63 Points: 189 Location: uk
|
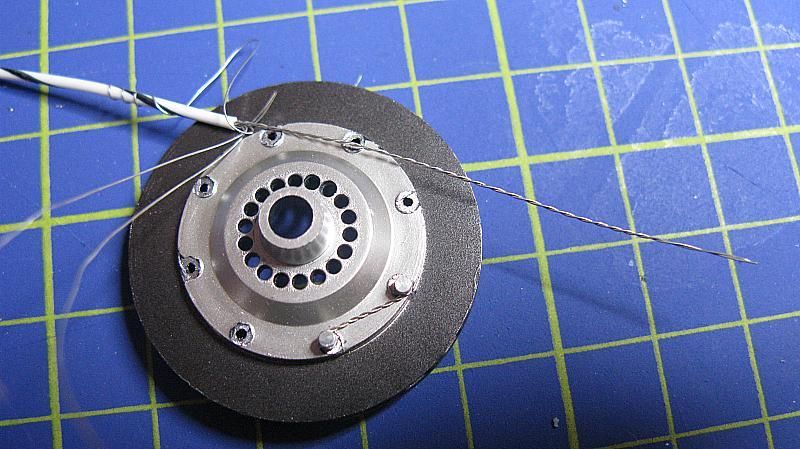
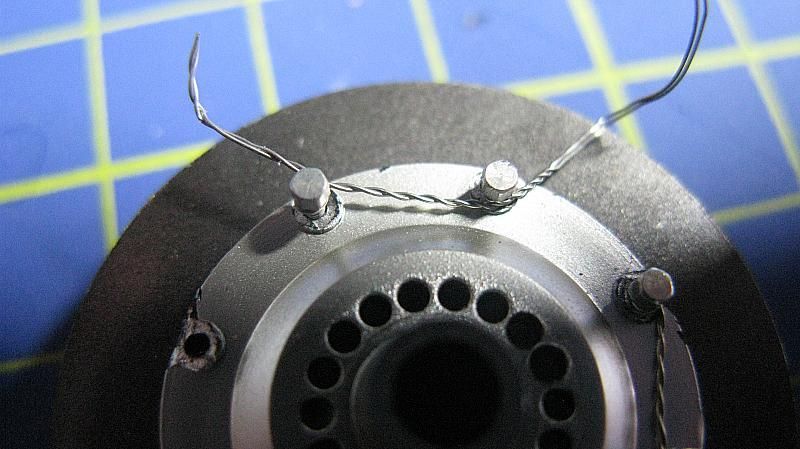
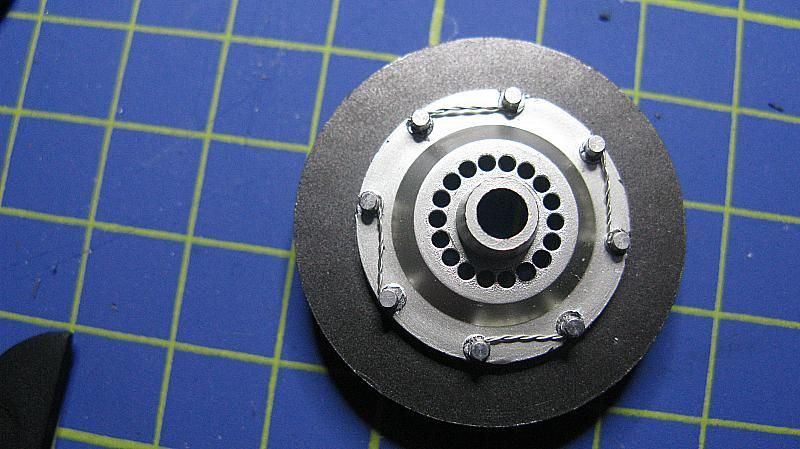
Next up is the bolt retainer wires. first off i touched up the top of the washers with a silver pen. stripping some fine cable and pulling the spare strands down and leaving two up i found it easier to twist the cable and hold the end of the two wires rather than cutting 2 strands off and then twisting them. Then i simply wrapped them around the bolts and pushed the bolts down home trapping the wires. i did use a 0.95 drill bit and i had to open the holes up a little with this drill to enable the 1mm bolts to push in reasonably tight, be careful not to push to hard as you could split the disc in two and have to re-glue. If you was to use a 1mm drill bit you will have to either glue the bolts in or use a nut on the back.
on the rear i snipped the protruding threads off with a small pair of side cutters
i'm pretty happy with the result.
|
|
|
Rank: Pro Groups: Joined: 24/08/2009 Posts: 48,051 Points: -13,308
|
Very nice Chris, those locking wires look cool and a definite improvement? It's all these extra little touches that make a good model into a great model - well done!!
Kev 
|
|
|
Rank: Semi-Pro Level 1 Groups: Registered
Joined: 10/02/2014 Posts: 63 Points: 189 Location: uk
|
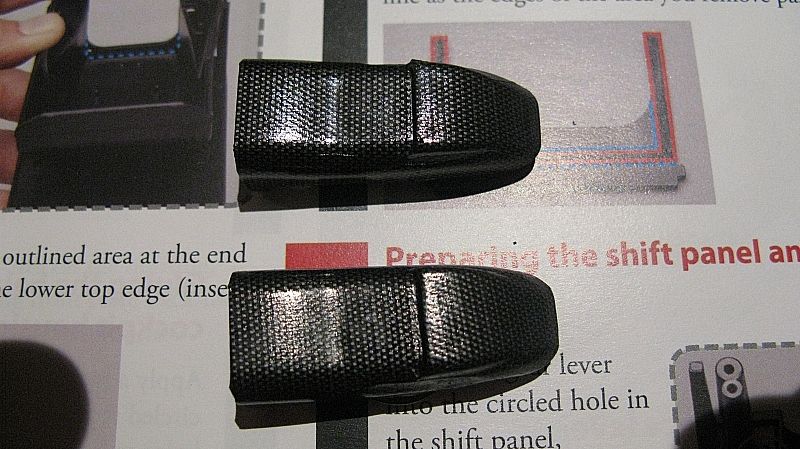
Next up the nose cone which I messed up the first time and had to strip it and start again, i split the top and bottom and painted them both with Tamiya surface primer L and then dropped the musium carbon decal over the top, i then applied some Alclad Smoke ALC-405 over both parts but i opted to apply moe coats on the top half as i have seen pictures of the nose like this, i then applied a few coats of Alcald 2 Laquers light sheen and then glued together.
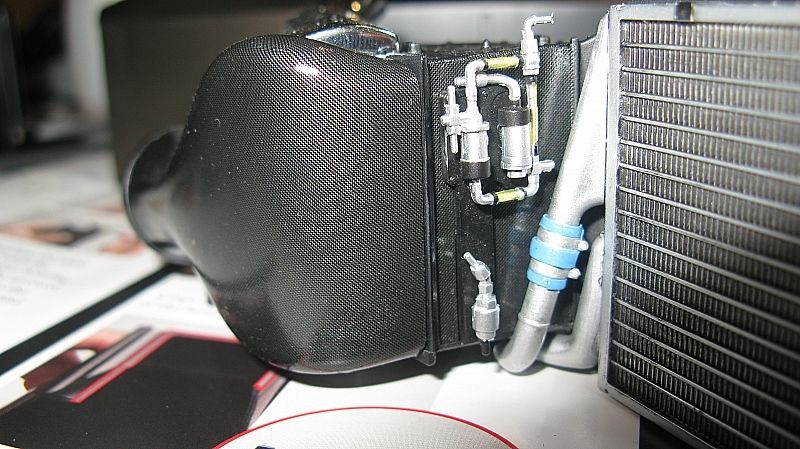
Then washed over the rads with some matt black and wiped off access paint.
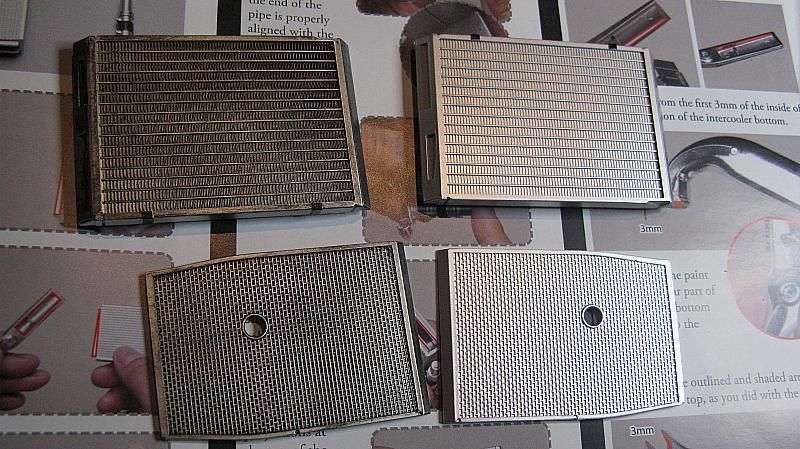
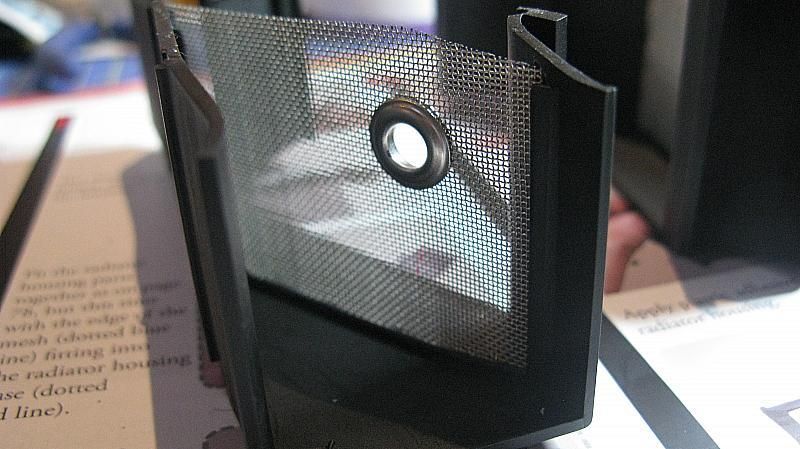
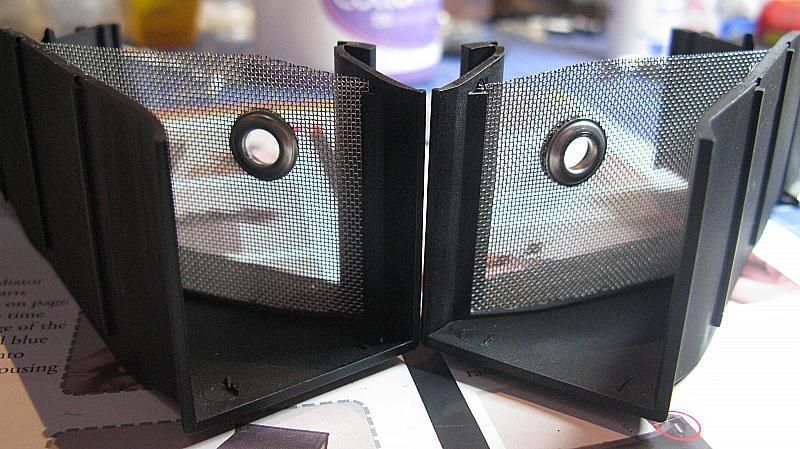
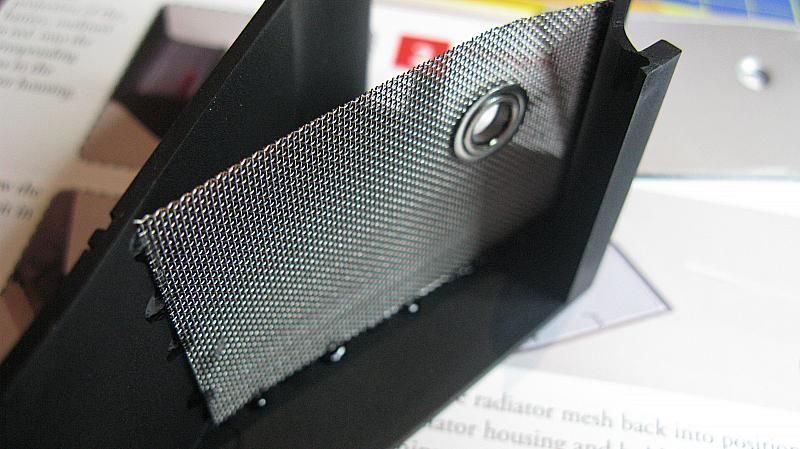
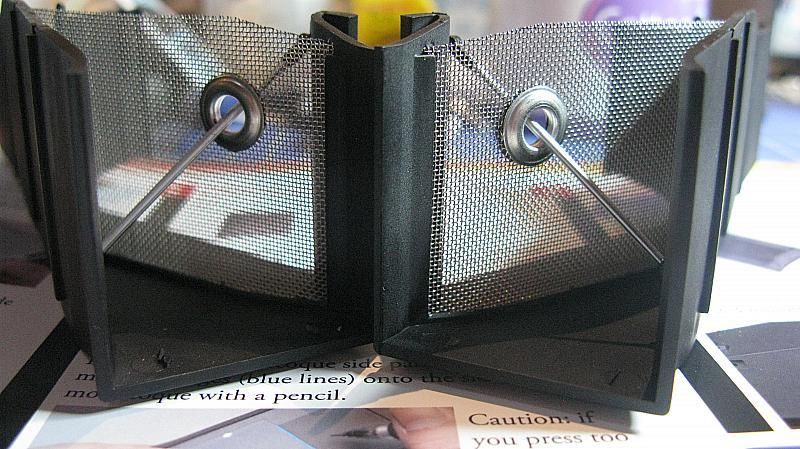
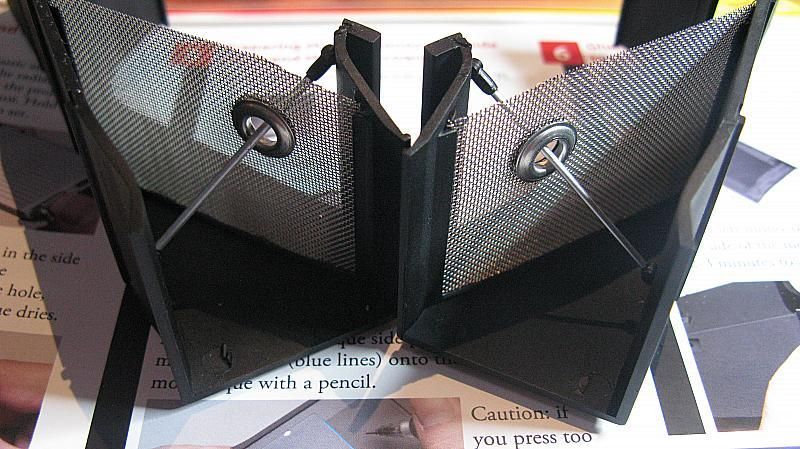
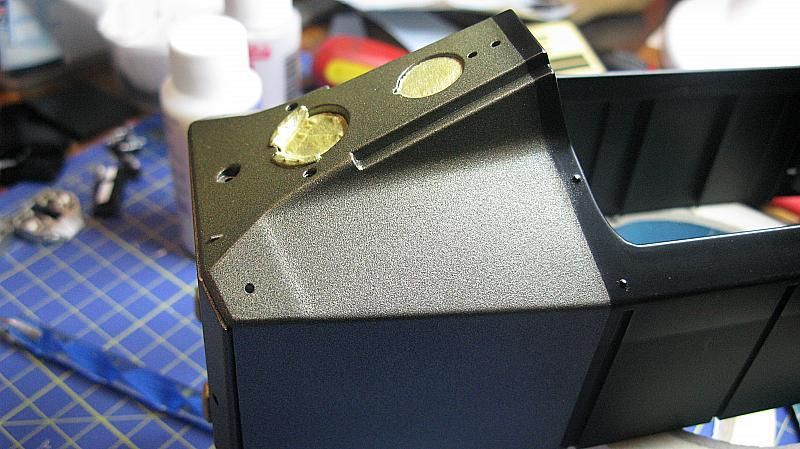
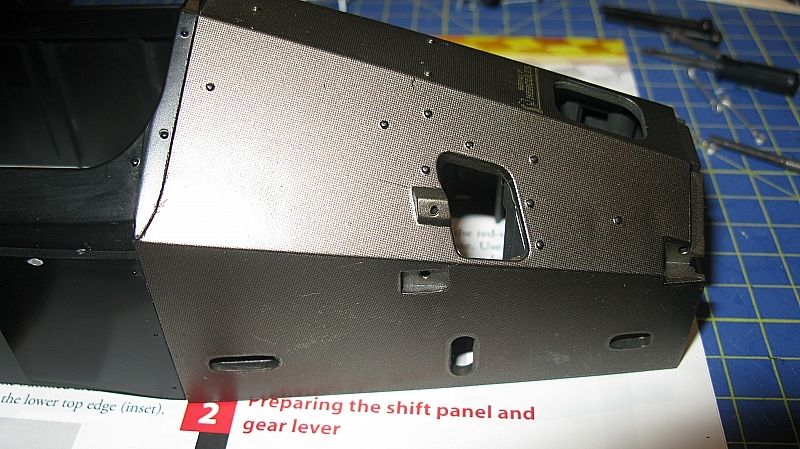
Now with the side pod mesh I wasn't sure what to do, I almost stuck the standard parts in here but I use the fine mesh as filters at my place of work and I have thousands of them so thought I’d give it a go as I did the same with the mp4/23 car.
I cut them out by marking round the original parts but what I did was to glue them in behind the raised edge where the original part would go in front of so that you didn't see any edges of the mesh, it took me a few goes to get the hole in the right place as it will be different to the original part as I am now gluing this behind the raised edge, does that make sense - I hope so. The glue spots sit behind the mesh so you can't see them when finished.
Forgot to add that I painted the side pods in Halfords matt black all over before I added the mesh.
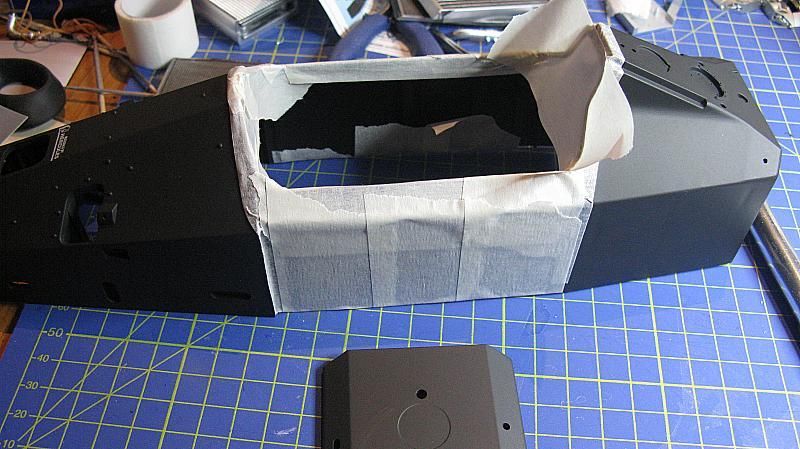
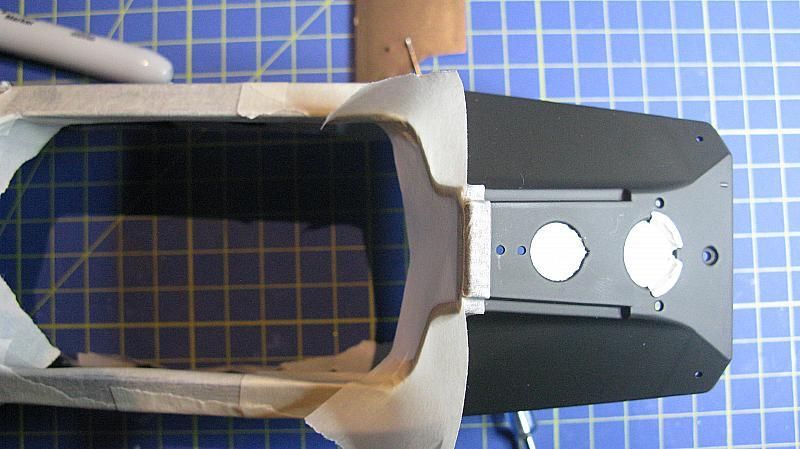
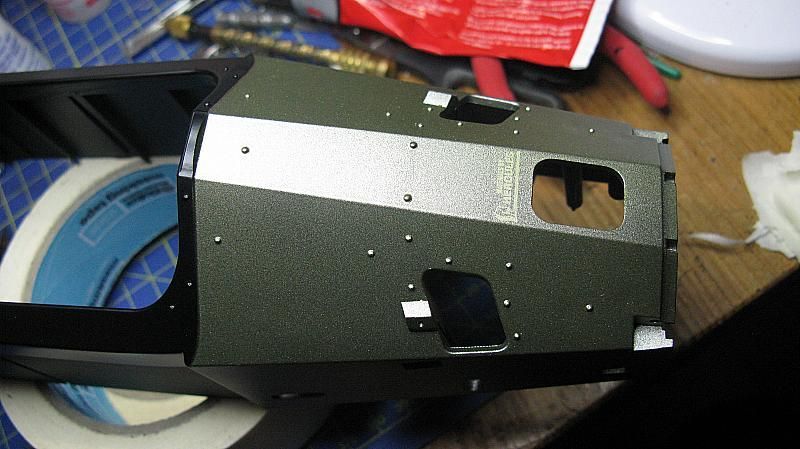
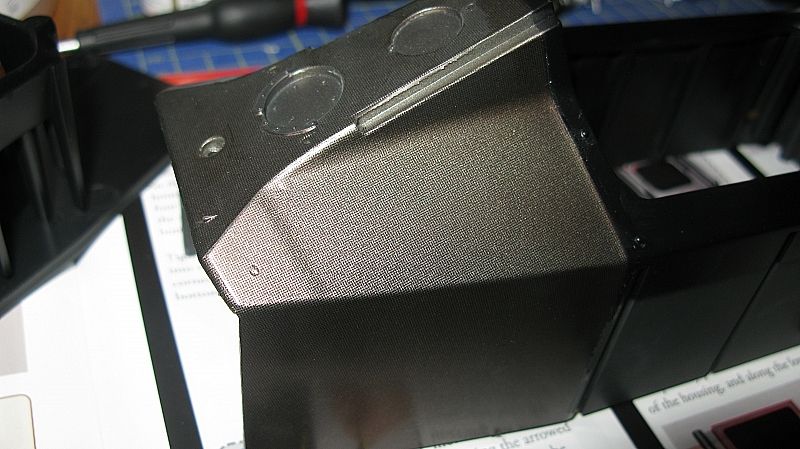
Then with the monocoque I was going to place a yellow carbon Studio27 decal and then smoke over the top but I decided to go a different route, I masked up and dusted over the front and rear with thinned down Tamiya gold leaf X-12 ready for the Museum Collection carbon decals.
The pictures don't show the gold up as it looks in real life but when i apply the decals and tone down with some smoke it should look allot better.
|
|
|
|
|
Looks fantastic, I love the mesh mod!!
|
|
|
 Rank: Elite    Groups: registriert, Registered Joined: 20/03/2011 Posts: 2,356 Points: 7,122 Location: UK
|
Your certainly going to town on this one mate! Some great mods your adding and will set it off nicely.. Keep it coming, she's looking the biz  Spence
|
|
|
Rank: Semi-Pro Level 1 Groups: Registered
Joined: 10/02/2014 Posts: 63 Points: 189 Location: uk
|
i found with the calipers i have to trim of a little inside with a scalpel where the discs would site, i found this much easier to install the calipers onto the hub and still allow the disc to move freely, imo they are to tight a tolerance as is. applied a little vaseline before i put the disc and calipers in place.
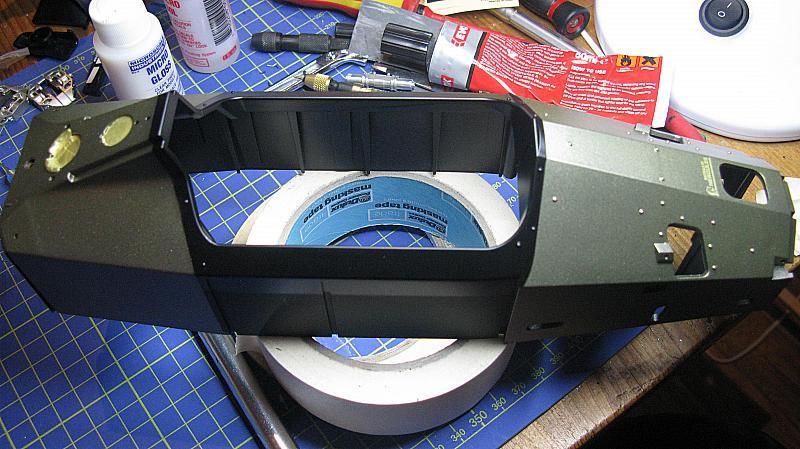
monocoque with the carbon decal on with alclad smoke overlay and finished off with light sheen.
.
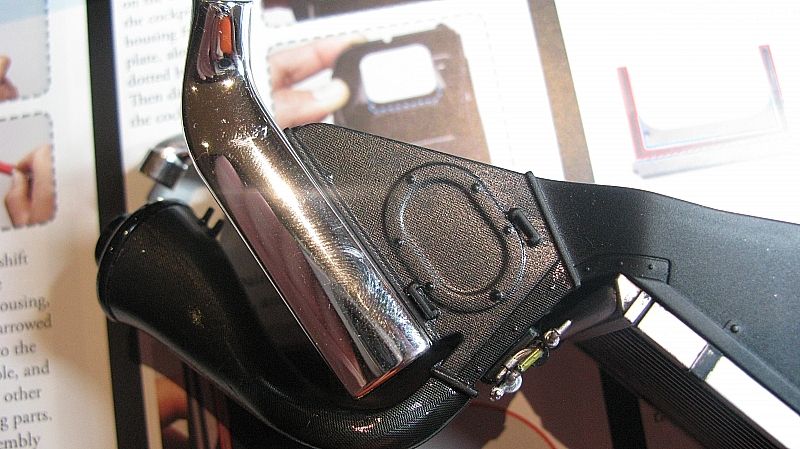
i have covered the end of the side pods with Fartefice SS-2 carbon decal and glossed over the front and up to the line/joine on top. left the rest as is.
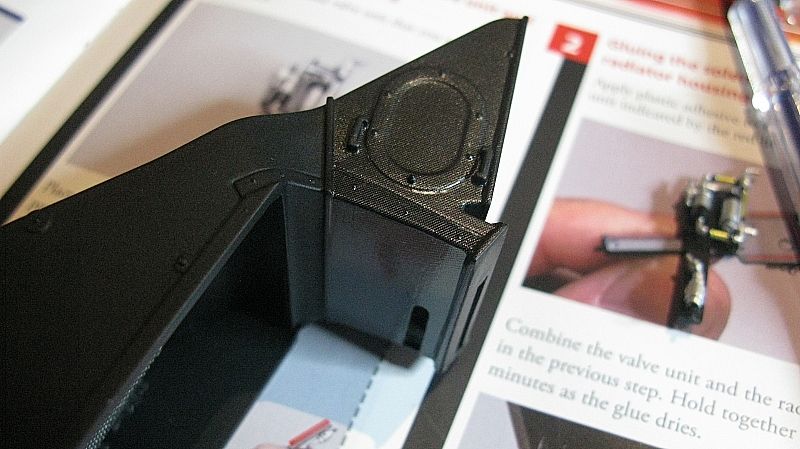
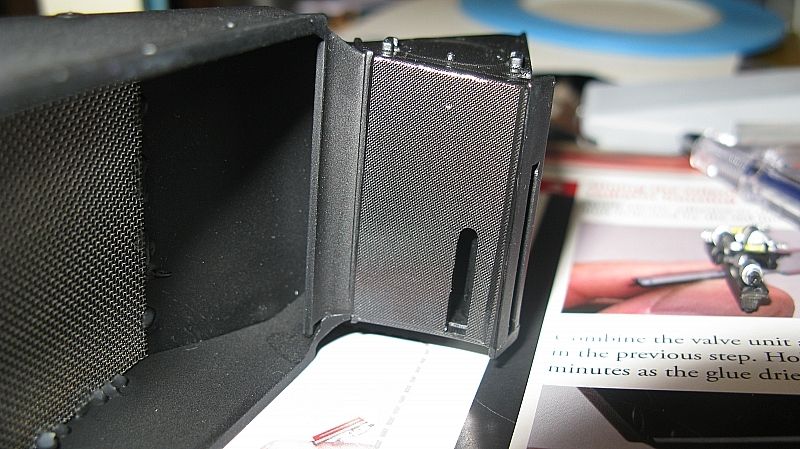
covered the turbo ducts with the same carbon decal and finished with gloss
finished product, i use blue fine line tape on the rad down pipe and covered with crystal klear to keep it in place. coated some of the pipes with a gold paint pen.

brake ducts i covered in scale motorsport 1/12th 1512HD which is the worst carbon decal sheet i have ever used, i have never had success with scale motorsport decals as i find they simply break up, i had to use micro set to wet and remove the sheet.
|
|
|
Rank: Pro Groups: Joined: 24/08/2009 Posts: 48,051 Points: -13,308
|
Some excellent work going on here Casino, loving your various upgrades and carbon decal improvements - well done!!
Watching with interest.
Kev
|
|
|
Rank: Pro  Groups: Registered
Joined: 01/12/2014 Posts: 102 Points: 312 Location: Chicago, IL
|
This is going to be a great build!!!!!
|
|
|
Rank: Master  Groups: Registered
Joined: 20/09/2011 Posts: 1,312 Points: 4,126 Location: Austria
|
Nice build and enhancements!
Walter Greetings,
Walter
Present builds:
Revell B-24D Liberator 1:48
On the shelf:
Italeri "Fiat Mefistofele", Italeri "Moto Guzzi California", Fokker "Red Baron", Revell Bismarck, Revell Tirpitz, Arab Dow, Stage Coach, .....
Completed builds:
McLaren MP4/4, D-51 Steam Locomotive, HMS Victory, GWH F-15D Eagle, St. Stephen`s Cathedral (cardboard), Solar-powered paddle Steamer (little project with my son), HMS Victory X-section, "Geli" Phantom II (cardboard)
|
|
|
Rank: Semi-Pro Level 2  Groups: Registered
Joined: 02/03/2015 Posts: 84 Points: 245 Location: England
|
Wow your brakes and CF decals are fantastic, will be enviously following this build! Building the MP4/4!
|
|
|
|
|
Can see a lot of thought and efforts is going into this one, looking superb so great credit to you....  Regards Alan
|
|
|
|
Guest
|
 US
US

