Welcome Guest Search | Active Topics | Log In | Register

Bulwark Placement Options
stevelow
#1 Posted : 13 February 2015 21:15:41

Rank: Amateur level 2
Build-Diary Medal: Build-Diary Medal of Honour
Groups: Registered

Joined: 04/01/2015
Posts: 44
Points: 108
HI,

It's me again. Sorry but I am new to building a ship of this magnitude and want to make sure I don't make an error that will mess things up down the road. Fixing errors aren't as easy in wood as they are with plastic.

I am placing the smaller bulwark on the rear starboard side. I have the bulwark placed like it is stated in the instructions. Pic 1


The front of it is placed on Frame 8 overlapping the upper bulwark.

The problem is, it is a bit vague when it comes to lining the rest of it up.

In Pic 2:


Is the rear of the bulwark lined up correctly? I am not sure how much it should overlap the upper bulwark.

In addition, as you can see in Pic 3:
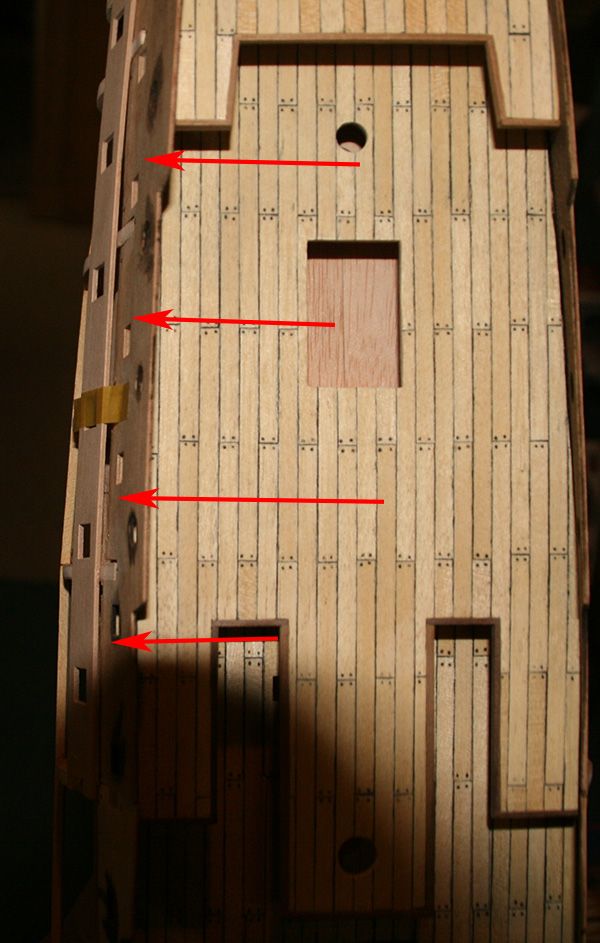


There is a space between the lower bulwark and where it overlaps the upper one. Aside from a little warp, it is separated from the upper one because of how it rests on the hull frames. Is this correct? Should it rest on the upper bulwark? If so, I assume the hull frames need some more sanding to allow it to sit properly.

Thanks for the help,
Steve
Gandale
#2 Posted : 14 February 2015 09:33:19

Rank: Super-Elite

Publisher Medal: Featured Build of the MonthActive Service Medal: 500 post active service MedalPurple Medal: Super active service medal for 1000 postsTurquoise Medal: Turquoise Medal for model making know-how contributionOutstanding Build: An award for an outstanding buildBuild-Diary Medal: Build-Diary Medal of HonourRed Medal: Red Medal
Groups: Registered, Global Forum Support, Moderator, Official Builds, Administrators

Joined: 08/09/2012
Posts: 15,172
Points: 46,151
Location: Aberdeen
Hi Steve, looks as if she coming along very nicely so well done...Cool Cool. As for the fitting of the side panels and what I can see from your pics. Placement looks good although just a little high on the stern so if you can lower the panel just a touch more then you should be good, you don't need much of an overlap. The gap between the upper and lower panel needs to be closed further and from what I see it looks as if you need to carefully take a little more off the ribs ensuring you keep the same continuous flow along the hull, when you're happy pin and glue the panel in place..Cool Cool. Take some time to study the official build pics and of course Karl's diary, both show exactly how it should all look when done....Cool Cool .. Hope this helps and do keep the pics coming, she is a beautiful ship to put together.....Cool Cool .. Hope this helps.

Regards

Alan
Tomick
#3 Posted : 14 February 2015 10:54:23

Rank: Pro

Groups:

Joined: 24/08/2009
Posts: 48,827
Points: -13,348
There is meant to be a step from the panel to the panel above, as the planking will run down the top panle and butt up to the step as can be seen in the phtot below taken from my build forStage 31
Tomick attached the following image(s):
F31-3.JPG
stevelow
#4 Posted : 14 February 2015 14:31:32

Rank: Amateur level 2
Build-Diary Medal: Build-Diary Medal of Honour
Groups: Registered

Joined: 04/01/2015
Posts: 44
Points: 108
Thanks for the kind words Gandale. This is certainly an enjoyable build. And thanks to both, for the help. Bulwark has been confidentially placed now.

Steve
Users browsing this topic
Guest
Forum Jump  
You cannot post new topics in this forum.
You cannot reply to topics in this forum.
You cannot delete your posts in this forum.
You cannot edit your posts in this forum.
You cannot create polls in this forum.
You cannot vote in polls in this forum.

Powered by YAF | YAF © 2003-2009, Yet Another Forum.NET
This page was generated in 0.102 seconds.
DeAgostini