|
|
 Rank: Beginner Level 2 Groups: Registered
Joined: 10/04/2015 Posts: 12 Points: 36 Location: Orem, Utah
|
Hey Guys, I'm starting this thread to address general build questions (I did have an earlier question when I misplaced a part in the wing..... http://forum.us.model-sp...spx?g=posts&t=15104 ... I had moved onto the wing construction while I was waiting for a replacement right lateral fuselage that was warped and unusable) In stage 6 (steps 1-6) you are installing fuselage frame 5. Step 3 says that "the sides will have to be squeezed in". Then in steps 7-10 you are installing the fuselage rear side. Step 9 says to use a flat surface for these steps. My question is this..... Since sides of the main assemble are not totally straight, (bending in slightly towards the end with fuselage frame 5), what do you align the fuselage rear side with? I'm guessing you align this piece with the segment between fuselage frame 4 (stage 4 part 1) and fuselage frame 5 (stage 6, part 1). Thank for your time, Randy
|
|
|
 Rank: Super-Elite        Groups: Registered, Forum Support Team, Administrators, Global Forum Support Team, Moderator, Official Builds Joined: 09/11/2012 Posts: 8,520 Points: 24,651 Location: East midlands
|
Hi Randy,  If I`m reading your query correctly and without pics I might not be, but I`ll give you my best possible answer. When the rear side panels are brought together,, there are formers to be put in place along the length towards the tail end of the planes body. In the top of all these formers there is a notch to take a square sectioned strip of wood called a stringer. This top stringer should lay in a straight line, along the top of all the formers and not flex right or left to fit. As shown here: 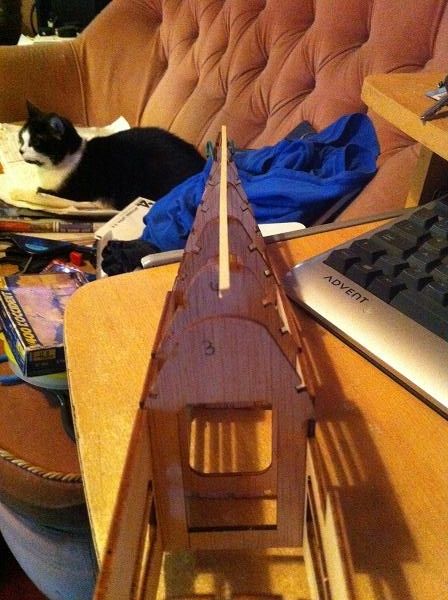 You can clamp all the formers between the side frames, (WITHOUT ADHESIVE) and see if it all lays straight. If my assumption of your question is correct, then I hope this helps. If I`m wrong then a picture of your issue would help greatly to assist you. Regards delboy271155 (Derek) COME BACK GUY FAWKES "YOUR COUNTRY NEEDS YOU"
|
|
|
Rank: Beginner Level 2 Groups: Registered
Joined: 10/04/2015 Posts: 12 Points: 36 Location: Orem, Utah
|
Hey Derek,
Yes, you basically answered my question. I was concerned that the rear fuselage side would not be aligned right (a plane with a fuselage that bent wouldn't fly very well right?).... But making sure one or more "stringers" are in a straight line totally makes sense. NOTE to the actual company.... This should be added to the written instructions.
Thanks for your help,
Randy
|
|
|
Rank: Super-Elite Groups: Registered, Forum Support Team, Administrators, Global Forum Support Team, Moderator, Official Builds Joined: 09/11/2012 Posts: 8,520 Points: 24,651 Location: East midlands
|
RTrotter2015 wrote:Hey Derek,
Yes, you basically answered my question. I was concerned that the rear fuselage side would not be aligned right (a plane with a fuselage that bent wouldn't fly very well right?).... But making sure one or more "stringers" are in a straight line totally makes sense. NOTE to the actual company.... This should be added to the written instructions.
Thanks for your help,
Randy Hi Randy, Glad to be of assistance.  The top spar shown in the picture, has to be straight, as this is where the outer skins will meet and if the tail end is curved in any way, then the skins will have either gaps between them or overlap. Good luck. Regards delboy271155 (Derek) COME BACK GUY FAWKES "YOUR COUNTRY NEEDS YOU"
|
|
|
Rank: Beginner Level 2 Groups: Registered
Joined: 10/04/2015 Posts: 12 Points: 36 Location: Orem, Utah
|
Hey Guys,
Question 1. Im up to Stage 15, step 8. The picture shows applying glue to notches between rib 6 (halfway across) and what looks like rib 11 (the 2nd from the end and the only one that is not parallel). BUT, in furture pictures (like stage 15, step 11) the wooden strip extends past the last rib (rib 1). Do I apply glue to the notch in Rib 1?
Question 2. How far does the wooden strip extend past Rib #1? (stage 15, step 11)
Thanks,
Randy
|
|
|
 Rank: Elite  Groups: registriert, Registered Joined: 20/03/2011 Posts: 2,356 Points: 7,122 Location: UK
|
Hi Randy In stage 10 it does say that the strip should be halfway across rib 6 and then to cut the excess from the other end which would be rib 1. The picture does indeed show the 4x4mm strip extending past rib 1 so I can see why it is a little confusing. I also think that the picture of the hand showing the glue being placed is there as a guide and not as a reference as where the glue should be added. Regards Spencer
|
|
|
Rank: Beginner Level 2 Groups: Registered
Joined: 10/04/2015 Posts: 12 Points: 36 Location: Orem, Utah
|
Warthog wrote:
the strip should be halfway across rib 6 and then to cut the excess from the other end which would be rib 1. The picture does indeed show the 4x4mm strip extending past rib 1 so I can see why it is a little confusing.
Where to put glue or not doesnt worry me as much as how long to cut the wooden strip. Final pictures in stage 16 and 17 both show this piece extending past rib 1. Randy
|
|
|
Rank: Beginner Level 2 Groups: Registered
Joined: 10/04/2015 Posts: 12 Points: 36 Location: Orem, Utah
|
Just to keep everyone updated, (I just a personal message totally answering my latest question)
In stage 18, step 10.... the protruding ends of two wooden strips are cut off... so, the amount they intend in stage 15 (and another one in stage 16) don't matter
Randy
|
|
|
Rank: Beginner Level 2 Groups: Registered
Joined: 10/04/2015 Posts: 12 Points: 36 Location: Orem, Utah
|
FIRST: Note to the main company
The idea of putting a part in one stage, and not using it until later stages is totally dumb!!! What is the purpose? This is expensive model and (to me) only adds to confusion. This is specially confusing in stages 17 & 18 with the Wing Tip Ribs.
Second. I've found a couple of confusing or incorrect steps/photos. This caused me to open both stage 17 & 18 parts, but marked them 17 & 18. Comparing the part photos in the written instructions and the Build Diary I believe that the upper wing tip ribs (stage 17) are the ones in which the smallest/shortest part is "inside" towards the middle of the part sheet.
In Stage 18, step 3... Its talks about the sheet that came in the "previous stage", BUT the photo shows the same parts sheet shown in the parts photo in stage 18. The photo in Stage 18, step 4 shows a different parts sheet (same parts sheet as in the stage 17 parts photo).
I've noticed that the upper wing tips ribs should slightly thicker than the lower wing tip ribs... And I'm going to proceed with this assumption, unless someone tells me otherwise.
(sorry, this post is more complaining than asking questions)
Randy
|
|
|
|
Guest
|
 US
US

