|
|
 Rank: Pro  Groups: Registered
Joined: 30/04/2015 Posts: 263 Points: 795 Location: Los Angeles
|
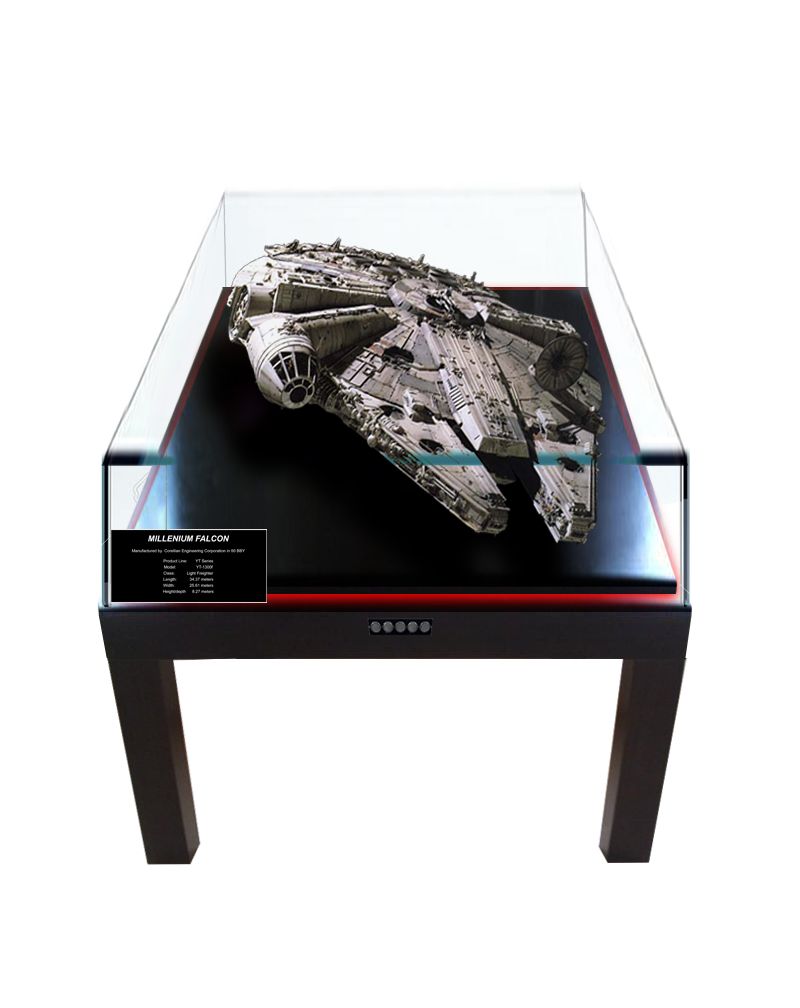
I've decided to post updates of my Falcon build as well. For starters I did up a little mockup photo of my ultimate intentions with this model. I plan on building a table with a glass case to house the Falcon and protect it. Beneath the Falcon will be a layer of glowing LED around the table top. I'm also planning on doing an Arduino board to run lights and sounds for the model from buttons on the edge of the table. UPDATE: Because Photobucket has messed up and not allowed hosting of photos anymore for free users, I have had to delete my account. So, to view photos or videos of my Falcon, please check out these links below.
Video build series https://www.youtube.com/...NMhdthR1CPIwXhCC8PFlhhq
Complete build photo gallery https://www.flickr.com/p...lbums/72157686932001266
blog build http://falconmodelbuild....enium-falcon-build.html
|
|
|
Rank: Pro Groups: Registered
Joined: 30/04/2015 Posts: 263 Points: 795 Location: Los Angeles
|
I'll be adding fiber optic lighting throughout my build.  I'm using .25mm colored fibers. This makes it a lot easier, so I don't need multiple colored LED's. I can just run all the different colored fibers to 1 single LED bulb. 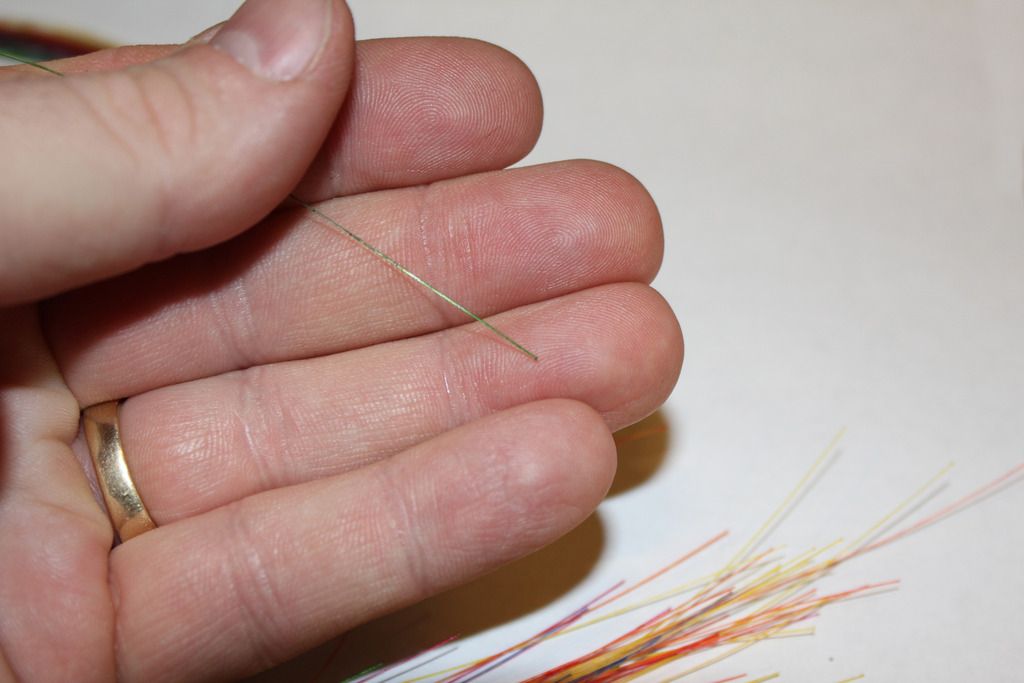 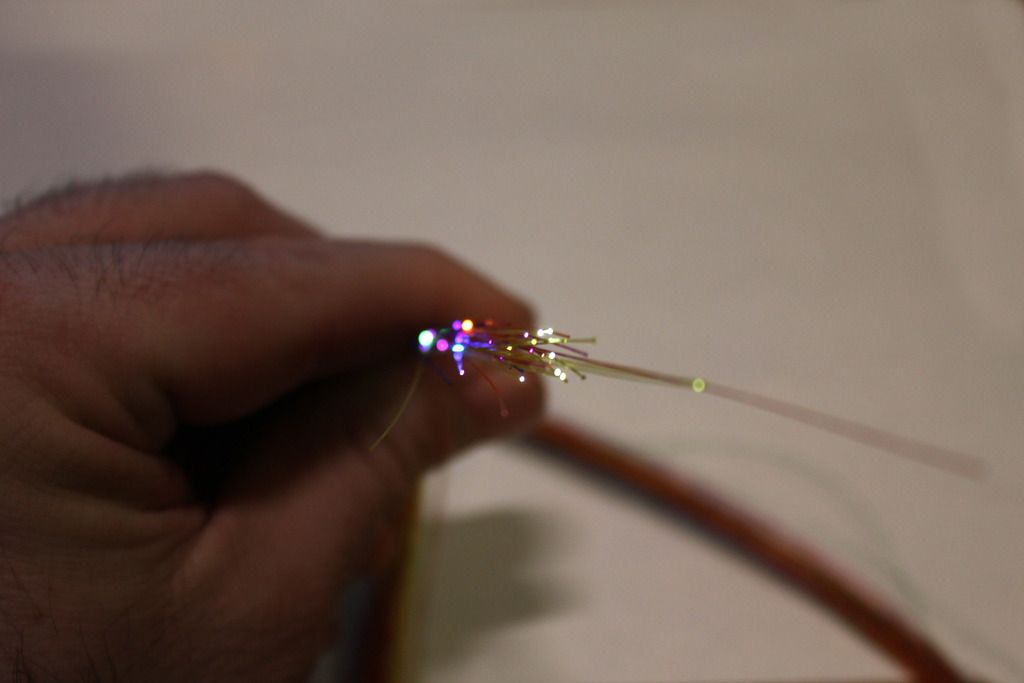
|
|
|
Rank: Pro Groups: Registered
Joined: 30/04/2015 Posts: 263 Points: 795 Location: Los Angeles
|
|
|
|
Rank: Pro Groups: Registered
Joined: 30/04/2015 Posts: 263 Points: 795 Location: Los Angeles
|
And my doorway. I started by painting it tan, then did a brown wash. 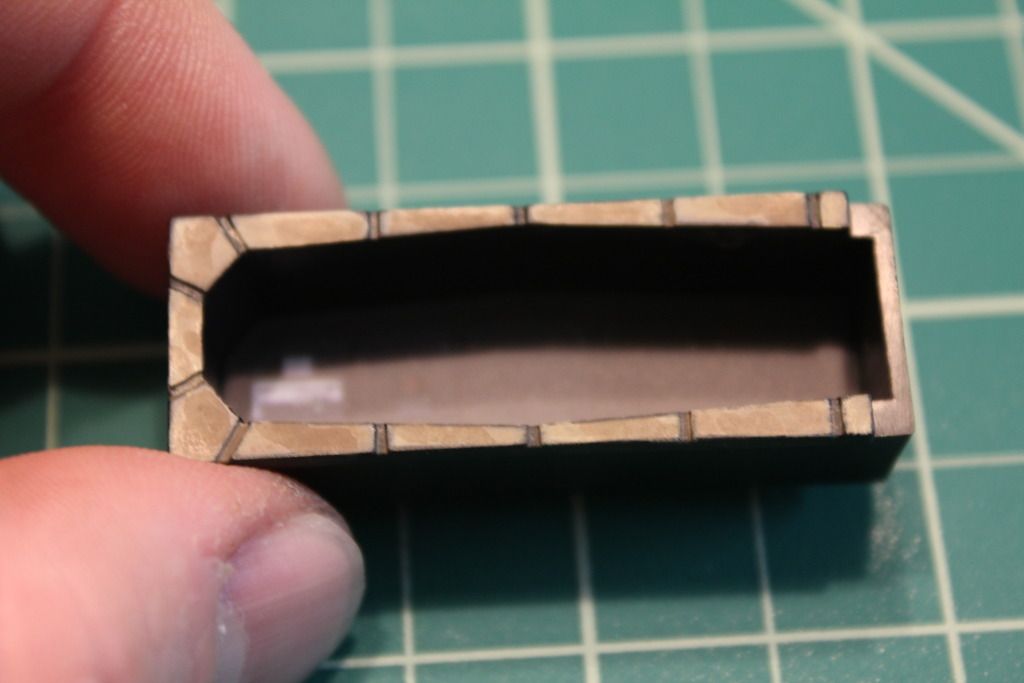 Then painted black over the top and rubbed away exposing the brown washed tan beneath. I think it gave it a pretty nice look. 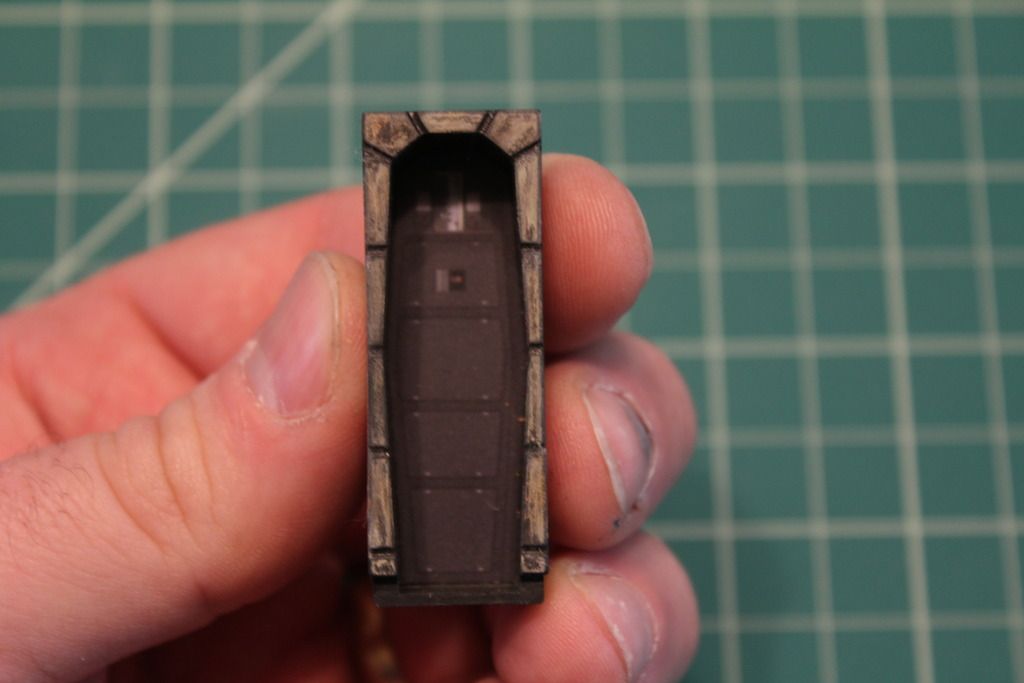 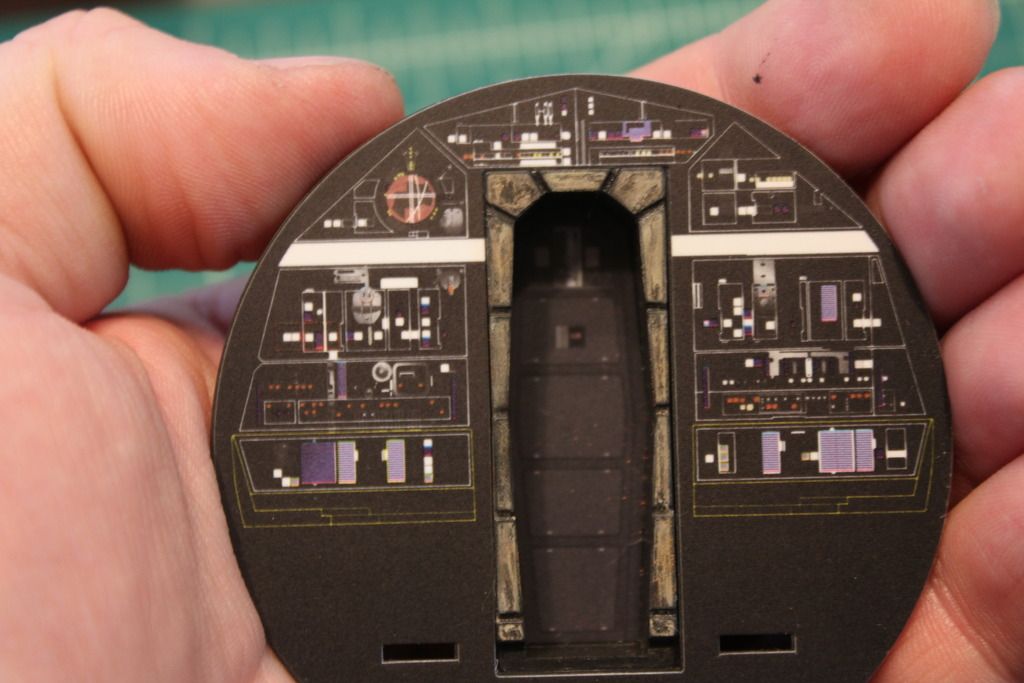
|
|
|
Rank: Pro Groups: Joined: 24/08/2009 Posts: 48,827 Points: -13,348
|
Fantastic work and congrat's on your first medal 
|
|
|
 Rank: Super-Elite      Groups: Registered
Joined: 27/01/2014 Posts: 5,060 Points: 14,980
|
Lovely start Colson, look forward to more
|
|
|
Rank: Super-Elite Groups: Registered
Joined: 17/12/2013 Posts: 3,982 Points: 11,974 Location: NY, USA
|
Really nice work there Colson. I love the glowing LEds for the base idea.I think it will look great.
Carl
|
|
|
Rank: Pro Groups: Registered
Joined: 30/04/2015 Posts: 263 Points: 795 Location: Los Angeles
|
|
|
|
Rank: Pro Groups: Registered
Joined: 30/04/2015 Posts: 263 Points: 795 Location: Los Angeles
|
|
|
|
Rank: Pro Groups: Registered
Joined: 30/04/2015 Posts: 263 Points: 795 Location: Los Angeles
|
|
|
|
Rank: Pro Groups: Registered
Joined: 30/04/2015 Posts: 263 Points: 795 Location: Los Angeles
|
|
|
|
Rank: Pro Groups: Registered
Joined: 30/04/2015 Posts: 263 Points: 795 Location: Los Angeles
|
And last up for pack 1, the turret. Unlike many others, since the model is cast in the actual color by Panetone (according to the video on Model Space) I've decided to just add my own weathering to the existing paint job and adjust where needed. Unless I come across something that just won't work that way, that's my plan for now. So for the turret, I mixed some paint to match and did a light dusting over the red, yellow and grey areas to tone them down a bit. Then with and blade, did some scraping away of the paint for the large chipping. 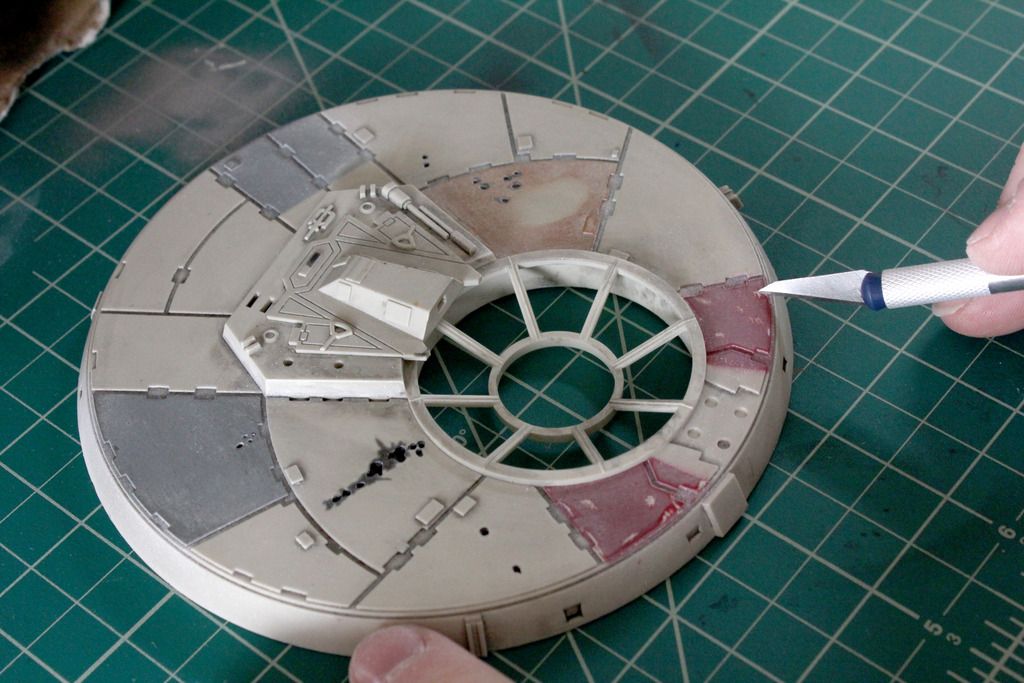 After the chipping, I then went over the turret with a black wash and did a little airbrushing around the laser blast scorch hits. 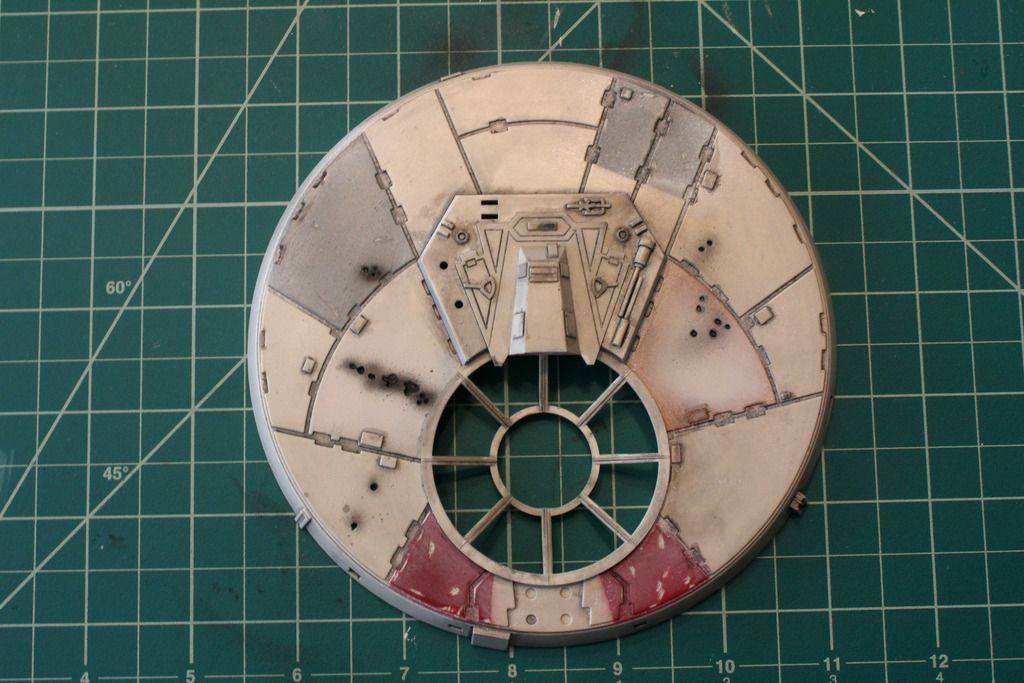 While I'm pretty pleased with how this has turned out, until I get more hull parts, this is where it's gonna stand for now. I know I'll add more weathering later. This was only a black wash. No rust or anything at this point. 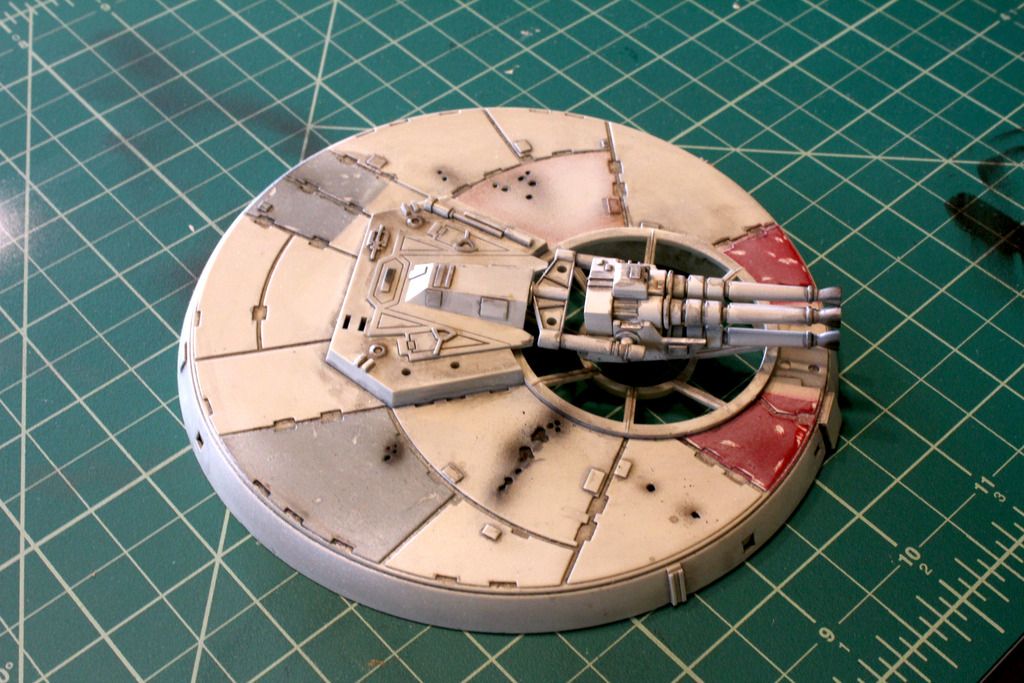 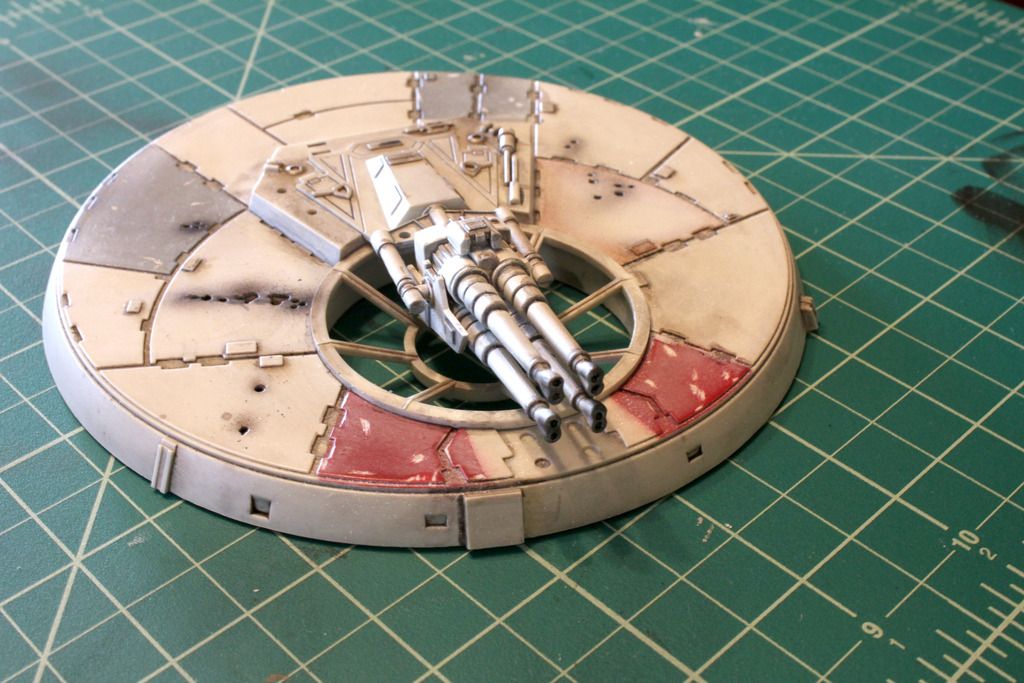
|
|
|
Rank: Pro Groups: Registered
Joined: 30/04/2015 Posts: 263 Points: 795 Location: Los Angeles
|
So this now brings me up to the current point where I just received my pack 2 yesterday. So once I've begun work on that, I'll have some more updates.
|
|
|
Rank: Pro  Groups: Registered
Joined: 22/04/2015 Posts: 134 Points: 378 Location: San Diego, CA
|
Let me just say WOW! The fiber optic lighting of the panel is truly amazing!! I'm really looking forward to seeing the rest of your build. So I'm assuming you are just using white LED's but different colored strands of fiber optics to produce the colors? Current Build: Millennium FalconWish List: Lamborghini Countach LP 500S, Red Bull Racing RB7
|
|
|
Rank: Super-Elite Groups: Registered
Joined: 27/01/2014 Posts: 5,060 Points: 14,980
|
Excellant work Colson, love what you did with the console, might have to steal that illuminated console myself
|
|
|
Rank: Pro Groups: Registered
Joined: 30/04/2015 Posts: 263 Points: 795 Location: Los Angeles
|
Impatience wrote:Let me just say WOW! The fiber optic lighting of the panel is truly amazing!! I'm really looking forward to seeing the rest of your build. So I'm assuming you are just using white LED's but different colored strands of fiber optics to produce the colors? Yes, Impatience, a single white LED with colored fibers for the constantly lit lights. I'm also going to have 2 or 3 blinking white LED's, which various colored fibers will run to so I have alternately blinking lights as well.
|
|
|
 Rank: Amateur Level 1 Groups: Registered
Joined: 18/04/2015 Posts: 31 Points: 93 Location: SW Virginia, USA
|
Amazing work Colson. I'd love to know where you get your fiber optics from. I don't if it's something I'd consider but I'd love to at least price it out. Nice work on the guns. I really like how you cleaned up the lines from the mold and the holes you drilled on the canons. First rate work all around. 
|
|
|
Rank: Amateur level 2 Groups: Registered
Joined: 01/05/2015 Posts: 43 Points: 132 Location: Clearwater, Florida USA
|
Really like the cockpit console. Using the colored fibers and cutting out the scanner looks fantastic. Looking forward to seeing more.
|
|
|
Rank: Pro Groups: Registered
Joined: 30/04/2015 Posts: 263 Points: 795 Location: Los Angeles
|
Thanks guys. The fiber optics are actually very cheap. I got them on Ebay. 175 ft of various colored .25mm fiber optics WITH and LED illuminator for $10.99. Here's a link. If this auction is done, just look at the seller. He's got tons of fiber optics. For me I got them in 2 days since I'm local. But anywhere in the states should be really quick. http://www.ebay.com/itm/...%3D2%26sd%3D371303479438
|
|
|
Rank: Pro Groups: Registered
Joined: 27/06/2011 Posts: 437 Points: 1,321 Location: milton keynes
|
Colson Bloomim fantastic start, great job with the Fibre optics. will be watching with great interest  regards Dan Built - Deagostini MP4/23, deagostini Zero, Deagostini Falcon, Deagostini R2D2, Model Airways 1903 Wright Flyer, Deagostini Senna Mp4/4.
Entex Mclaren M23 1/8th scale to complement the Deagostini MP4/23 & Mp4/4, deagostini Ferrari 312T4, Pocher lotus 72D, Pocher porche, Deagostini Lotus 97T
on the bench, Model Airways Sopwith Camel, HK Models B-17F flying fortress, Galactica Viper, Stap droid
|
|
|
|
Guest (2)
|
 US
US

