|
|
 Rank: Semi-Pro Level 1  Groups: Registered
Joined: 25/05/2015 Posts: 66 Points: 204 Location: Minneapolis
|
Hello, fellow forum users. I'm excited to share my work on the kit so far - my first since I stowed my half-built MPC Falcon in a cupboard 20 years ago. It's been dusted off and resprayed as a test case for what I hope to do with the paint job for this one (see picture at the end). Some personal modifications so far: I bought the Shapeways console, hoping it would fit the DeAg cockpit, which of course it doesn't. I hacked it down to fit, breaking off all the tiny levers in the process. I drilled holes for the supplied ones, and got to use the metal control yokes, which are a great part of this design. Rotated the gun turret window, filled in the inverse cupcake damage on the cockpit tube, and have started painting it all with oil, which is tremendous for its flexibility and durability. As mentioned, I broke out the MPC kit to plan what I'll do with the lower hull. I'm into the idea of accuracy - up to a point. I've realized the fun thing to do with a model of this scale is to compose with colour, working transparent glazes of warm/ cool grays across the surface, and pick out panel lines and weathering to move the eye around a bit. More as I make it, and thanks.  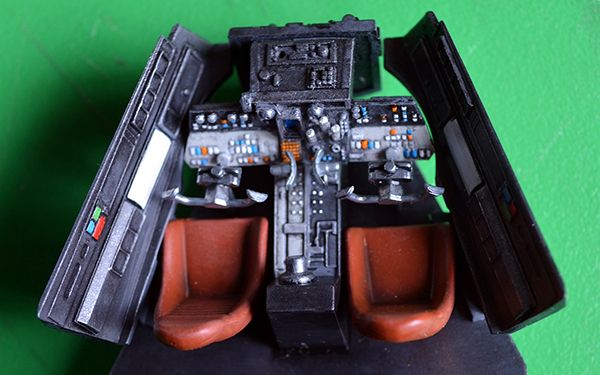 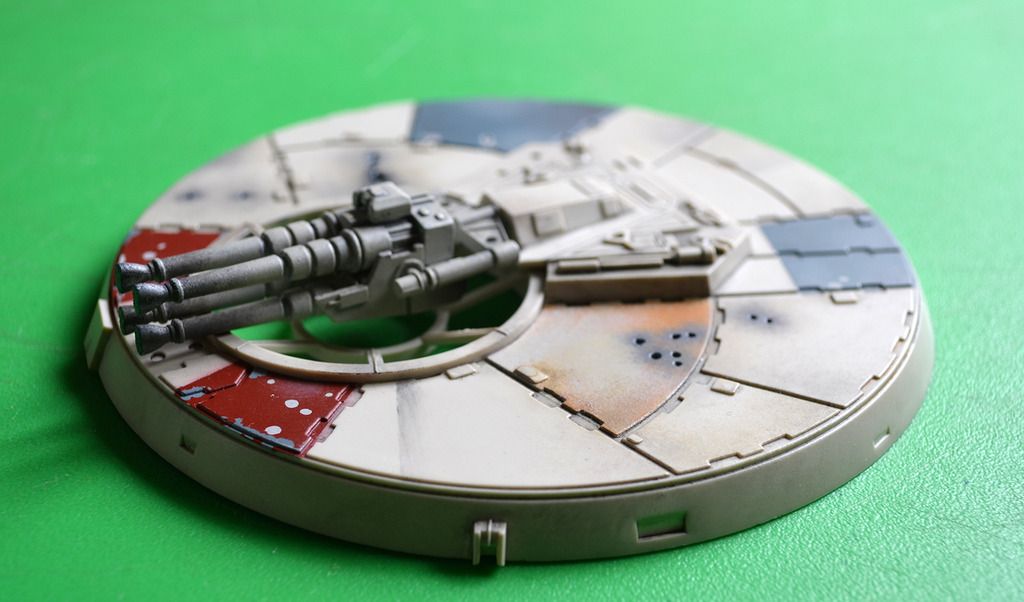 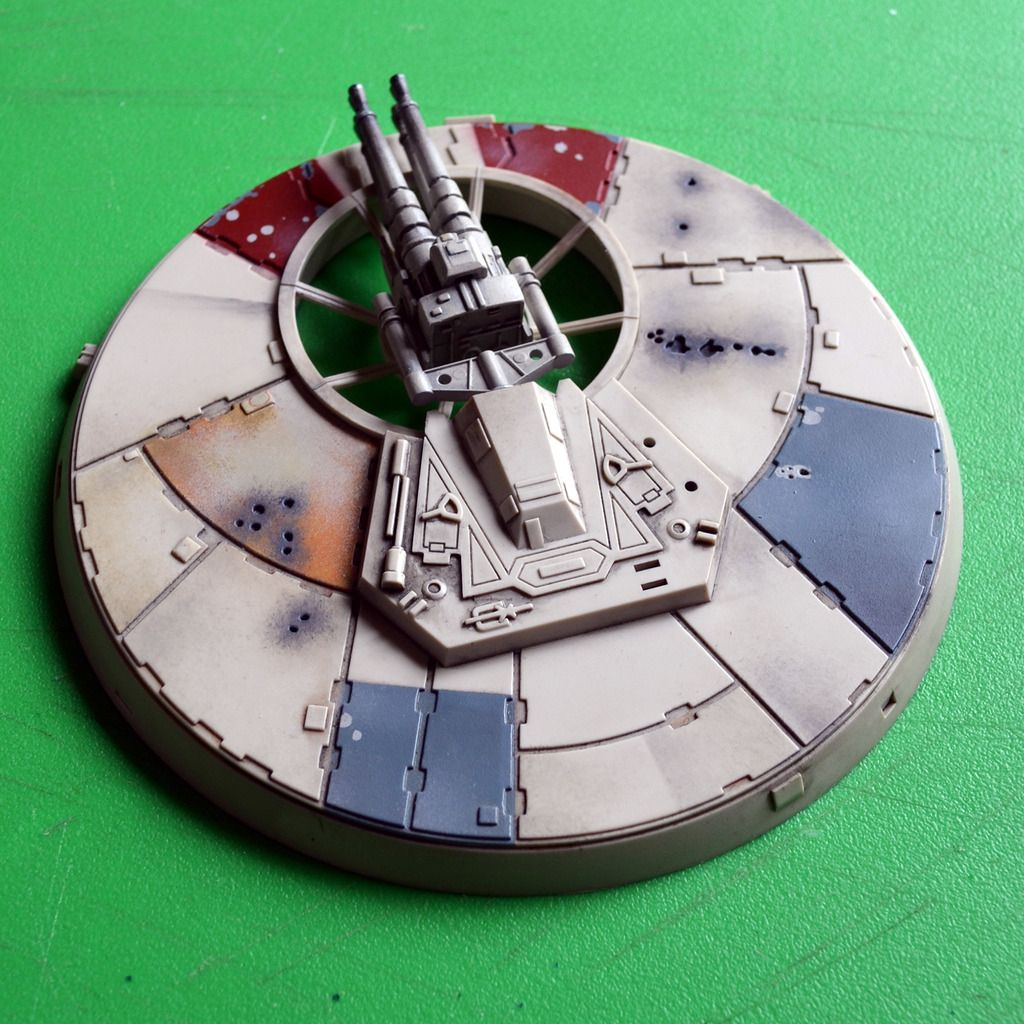 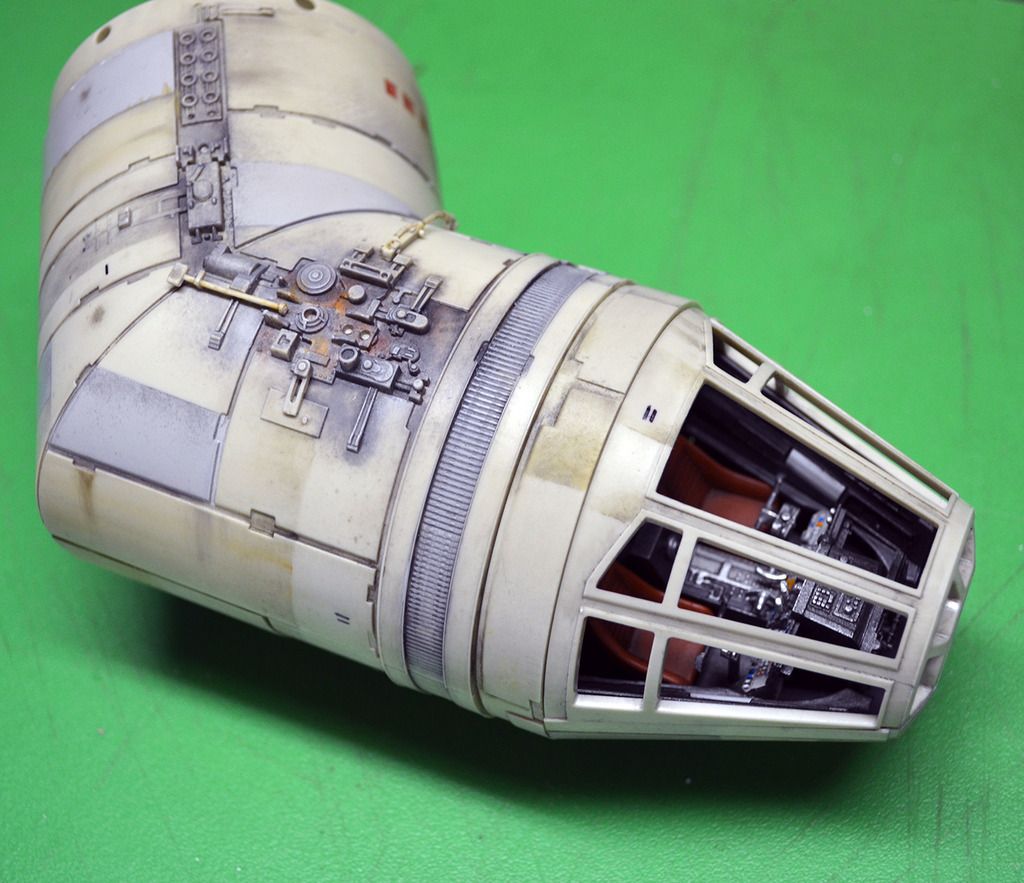 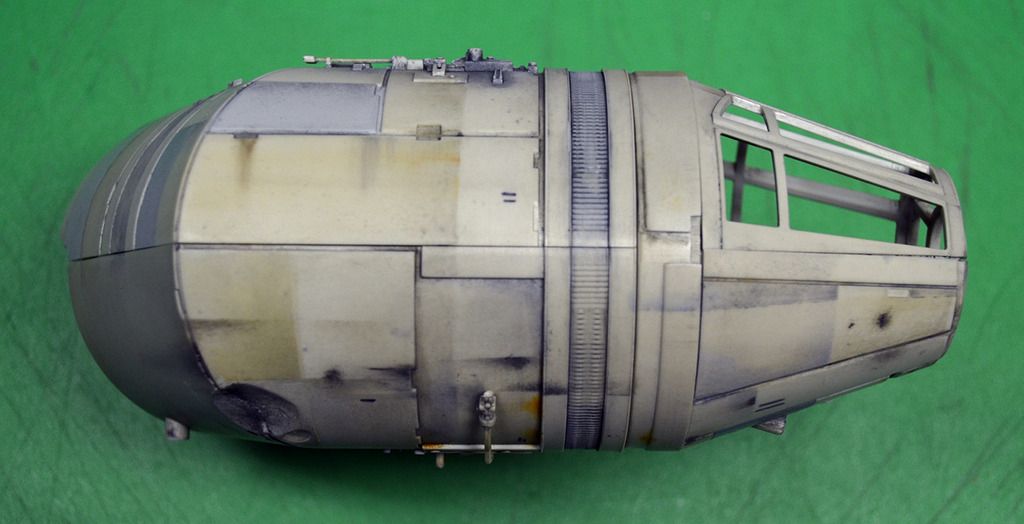 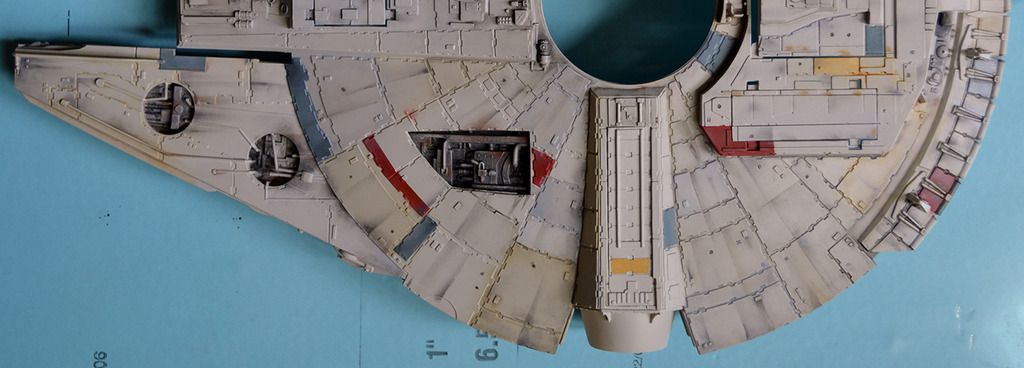
|
|
|
 Rank: Super-Elite     Groups: Registered
Joined: 17/12/2013 Posts: 3,982 Points: 11,974 Location: NY, USA
|
Welcome to the forum A thumbs. I am forum support for USA so let me know if I can help in any way.Great start on your falcon. We have a ton of USA builders now.Great to finally have a studio scale Falcon to build-And new Star Wars movies coming out.
Carl
|
|
|
 Rank: Beginner Level 1  Groups: Registered
Joined: 31/05/2015 Posts: 5 Points: 18 Location: Mississippi
|
I like what you did with your turret! How exactly did you tone down the yellow on it?
|
|
|
Rank: Semi-Pro Level 1 Groups: Registered
Joined: 25/05/2015 Posts: 66 Points: 204 Location: Minneapolis
|
Thanks Hansyt - thanks for the welcome Carl.
For the turret, I partially sprayed the yellow area with a Testor's light grey enamel, which I used for the quad gun. I then sanded it back a bit, and stippled oil paint to tie it to the rest of the turret.
|
|
|
Rank: Beginner Level 1 Groups: Registered
Joined: 31/05/2015 Posts: 5 Points: 18 Location: Mississippi
|
A Thumbs wrote:Thanks Hansyt - thanks for the welcome Carl.
For the turret, I partially sprayed the yellow area with a Testor's light grey enamel, which I used for the quad gun. I then sanded it back a bit, and stippled oil paint to tie it to the rest of the turret. Thank you for the great tip!
|
|
|
Rank: Beginner Level 3 Groups: Registered
Joined: 28/05/2015 Posts: 26 Points: 78 Location: Oklahoma
|
Great work so far... your skills look pretty fresh for having taken a 20 year break.
|
|
|
Rank: Semi-Pro Level 1 Groups: Registered
Joined: 25/05/2015 Posts: 66 Points: 204 Location: Minneapolis
|
Thanks, Galactiboy, It's all trial and error at this point, although I've learned a lot from other forum participants - courage being one of them. Took a drill to my practice Falcon today to emulate the big lower hull gauge. 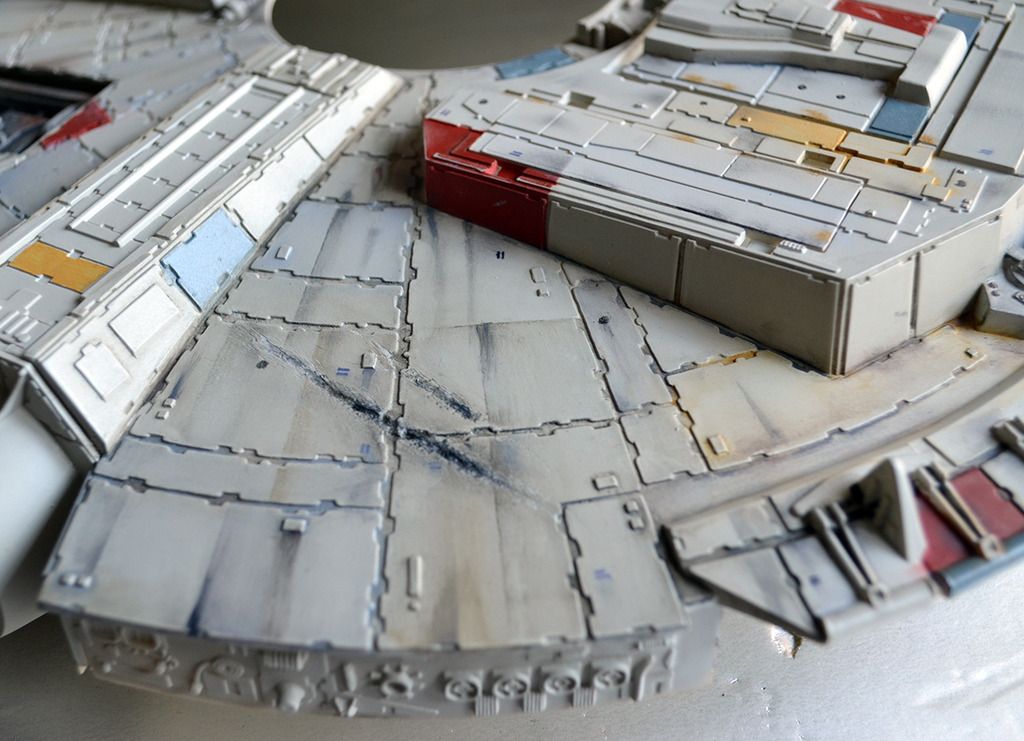
|
|
|
Rank: Semi-Pro Level 1  Groups: Registered
Joined: 17/05/2015 Posts: 61 Points: 189 Location: PIckerington, Ohio USA
|
looking great, cant wait to see more
Adam
|
|
|
Rank: Super-Elite  Groups: Registered
Joined: 27/01/2014 Posts: 5,060 Points: 14,980
|
Some nice work on show here! Looking forward to more
|
|
|
 Rank: Amateur level 2 Groups: Registered
Joined: 01/05/2015 Posts: 43 Points: 132 Location: Clearwater, Florida USA
|
Great weathering. Thanks for posting.
|
|
|
 Rank: Pro  Groups: Registered
Joined: 22/04/2015 Posts: 134 Points: 378 Location: San Diego, CA
|
Looking really impressive!!! Current Build: Millennium FalconWish List: Lamborghini Countach LP 500S, Red Bull Racing RB7
|
|
|
Rank: Semi-Pro Level 1 Groups: Registered
Joined: 25/05/2015 Posts: 66 Points: 204 Location: Minneapolis
|
Hey everyone - thanks for all the supportive comments. I'm chuffed to be part of the forum, and am looking forward to sharing my progress, bit by bit. Here's my stab at some hull painting - trying to keep it subtle. I'm sure once the whole thing is assembled sometime in 2017 I'll revisit it. 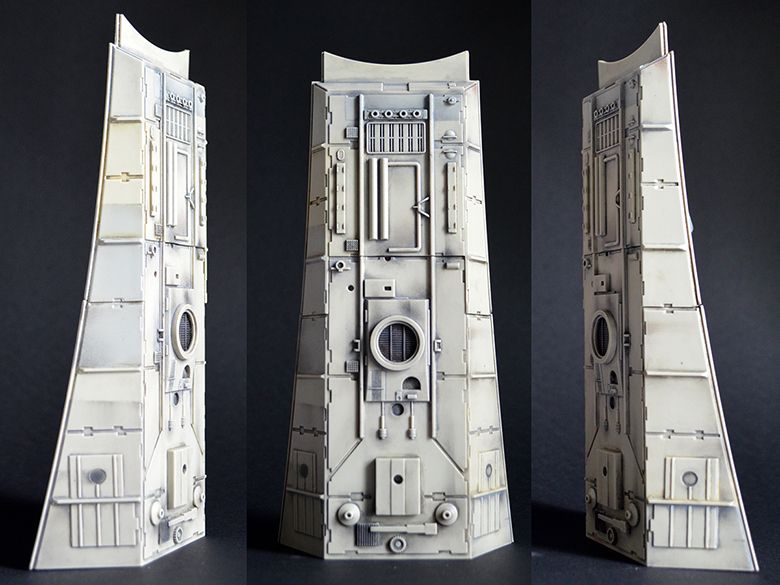
|
|
|
Rank: Beginner Level 3 Groups: Registered
Joined: 28/05/2015 Posts: 26 Points: 78 Location: Oklahoma
|
|
|
|
Rank: Semi-Pro Level 1 Groups: Registered
Joined: 25/05/2015 Posts: 66 Points: 204 Location: Minneapolis
|
It's hard to get excited about the interior. I 'd still take a cheaper outside with nothing inside except a great cockpit. However, my way in has been to try converting some parts, inspired by many of the talented contributors here and elsewhere. Every modification required emergency surgery as I bodged my way through it. But photography is kind, so here's my first step, with more to follow as I assemble it and try building some parts of my own. By the way, the awesome floor is Shapeways; my attempt to modify that went horribly wrong. 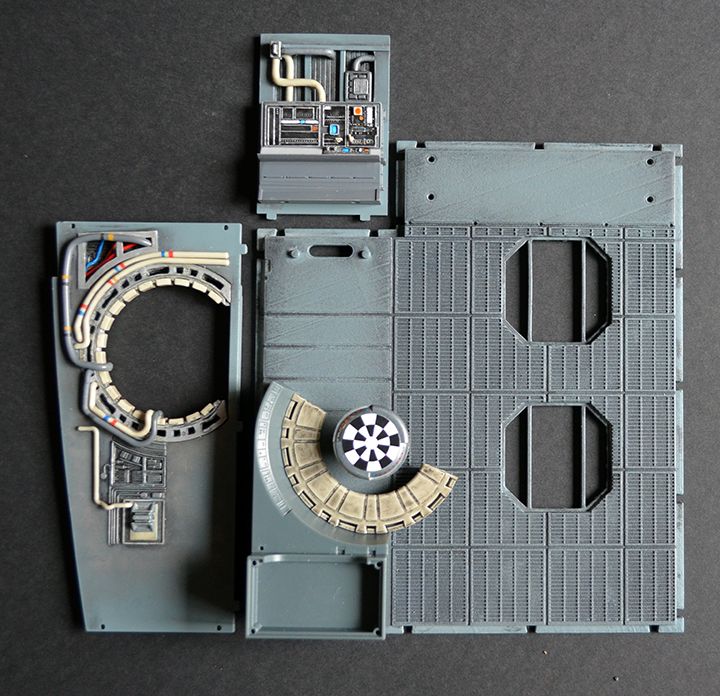
|
|
|
Rank: Semi-Pro Level 1 Groups: Registered
Joined: 13/06/2015 Posts: 66 Points: 198 Location: South Dakota, USA
|
 I love it. I think you did a really good job in detailing without going too gonzo in it. I love the detailing behind the console you did. Is the floor the only Shapeways part? The computer has more detailing than I thought the stock model has.
|
|
|
Rank: Semi-Pro Level 2 Groups: Registered
Joined: 02/06/2015 Posts: 82 Points: 237
|
Your cockpit looks amazing!! Would you happen to have the link to the shapeways panel you purchased?
|
|
|
Rank: Super-Elite Groups: Registered
Joined: 27/01/2014 Posts: 5,060 Points: 14,980
|
Lovely work with the detailing 
|
|
|
Rank: Semi-Pro Level 1 Groups: Registered
Joined: 25/05/2015 Posts: 66 Points: 204 Location: Minneapolis
|
Thanks for your thoughts!
Dan - the console is DeAg's; I painted it as best I could to bring out the very low relief details.
BradM73 - the cockpit console is TonyRR's on Shapeways' site. I hacked it to pieces to get it to fit the DeAg cockpit, and used about 30% of all the parts I bought. Not sure if that's a good route, but I did it because I left myself no choice.
Davetwin - thank you, and thanks for your inspiring work.
We're all pulling together!
|
|
|
Rank: Semi-Pro Level 1 Groups: Registered
Joined: 25/05/2015 Posts: 66 Points: 204 Location: Minneapolis
|
|
|
|
Rank: Beginner Level 2  Groups: Registered
Joined: 11/07/2015 Posts: 10 Points: 30
|
Love the work so far!! It's great to see what the Shapeways console looks like in place, how much chopping was involved? I was thinking of the immortal words of Socrates who said... "I Drank What?!?!"
|
|
|
|
Guest
|
 US
US

