|
|
 Rank: Pro  Groups: Registered
Joined: 30/04/2015 Posts: 263 Points: 795 Location: Los Angeles
|
Looking good. Upper hull paint job looks great.
|
|
|
 Rank: Semi-Pro Level 2 Groups: Registered
Joined: 08/05/2016 Posts: 79 Points: 251 Location: Perth, W.Australia
|
Simply beautiful work mate . Just wondering how you've overcome the joints/panel issues you brought up earlier in your thread ( the ones concerning what's obvious with the Deagostini compared to the FineMolds ) around the the engine exhaust area/s ? Cheers , Ged .
|
|
|
 Rank: Beginner Level 1 Groups: Registered
Joined: 24/12/2016 Posts: 8 Points: 30 Location: Bismarck
|
wow awesome work! Looks great! That is the exact look I want on mine. Did you copy from the original replica photos? Did you say this was your first model done in 20 years? if so, your paint job is amazing for a first timer! Who helped you the most in your model painting planning? There are so many people with builds, I don't know where to start! Some people are going all out painting, some are only doing stock, so best just to ask someone who knows who is the best builds to follow! Please let me know, as your paint job is great! Thanks!
|
|
|
Rank: Semi-Pro Level 1 Groups: Registered
Joined: 25/05/2015 Posts: 66 Points: 204 Location: Minneapolis
|
First off, thanks to Colson, Ged and vader’79 for checking in. Ged, I was planning on replying with an image of the engine cover in development, but until the last few issues reach me here in the Outer Rim, it’s stalled as of now. Vader – thanks for the comments; many builds and builders have influenced my approach to painting this thing. I was a complete newbie when I decided to give it a go, and experimenting with techniques – plus building and painting the Fine Molds Falcon – gave me a lot to learn from. And yes, I’ve gathered a lot of photos of the original studio model and use them constantly. I’ve found that this ship is very forgiving of a novice’s technique; the original is beautifully rough around the edges, so it fits my skill level pretty well. I’ve had a go at the airlocks. The blast damage as cast on the kit seemed so flat, so I tried to Dremel it and build out the torn edges with putty to make them feel as though they were peeling back a little. The studio model looked melted too, so I tried to do that with a lighter but managed to set fire to it instead! 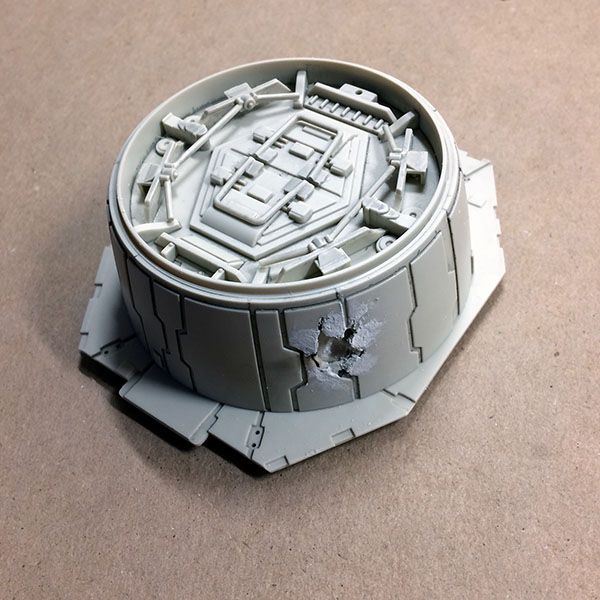 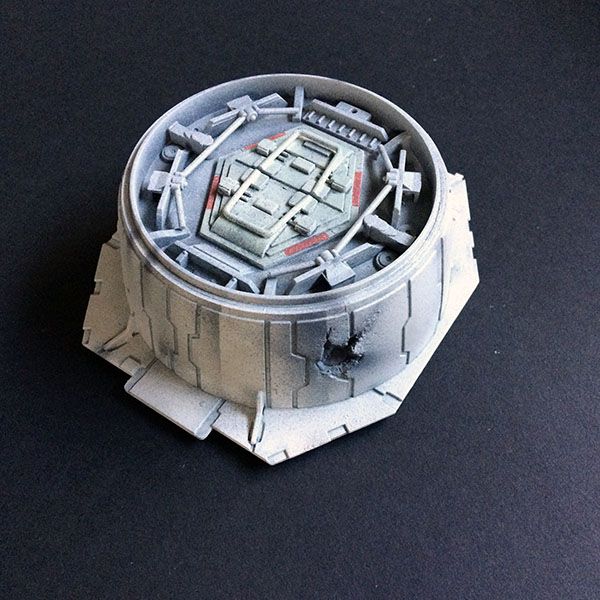 The central hexagon looked greenish to me, so I use Tamiya jn grey, which seemed right. 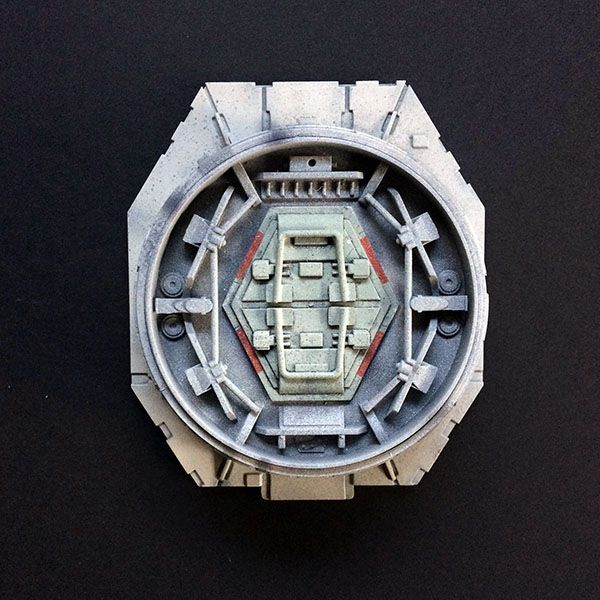 Also, all the pits are now in place, so here are the other two in situ. None of the surrounding hull sections are complete, but it makes the whole thing come together once they’re installed. 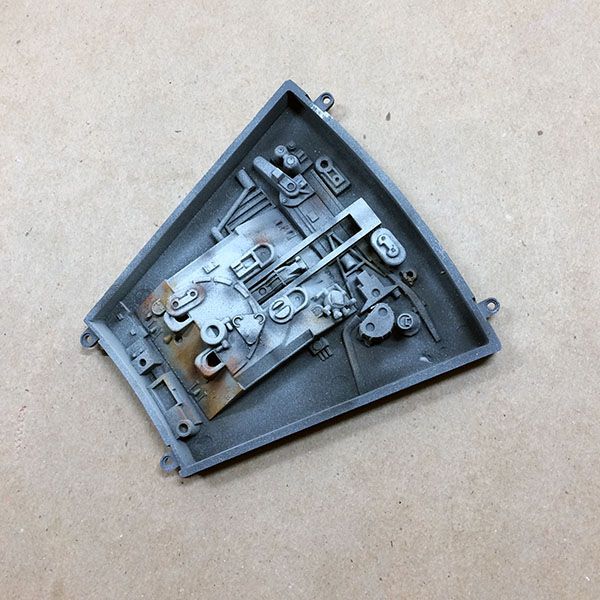 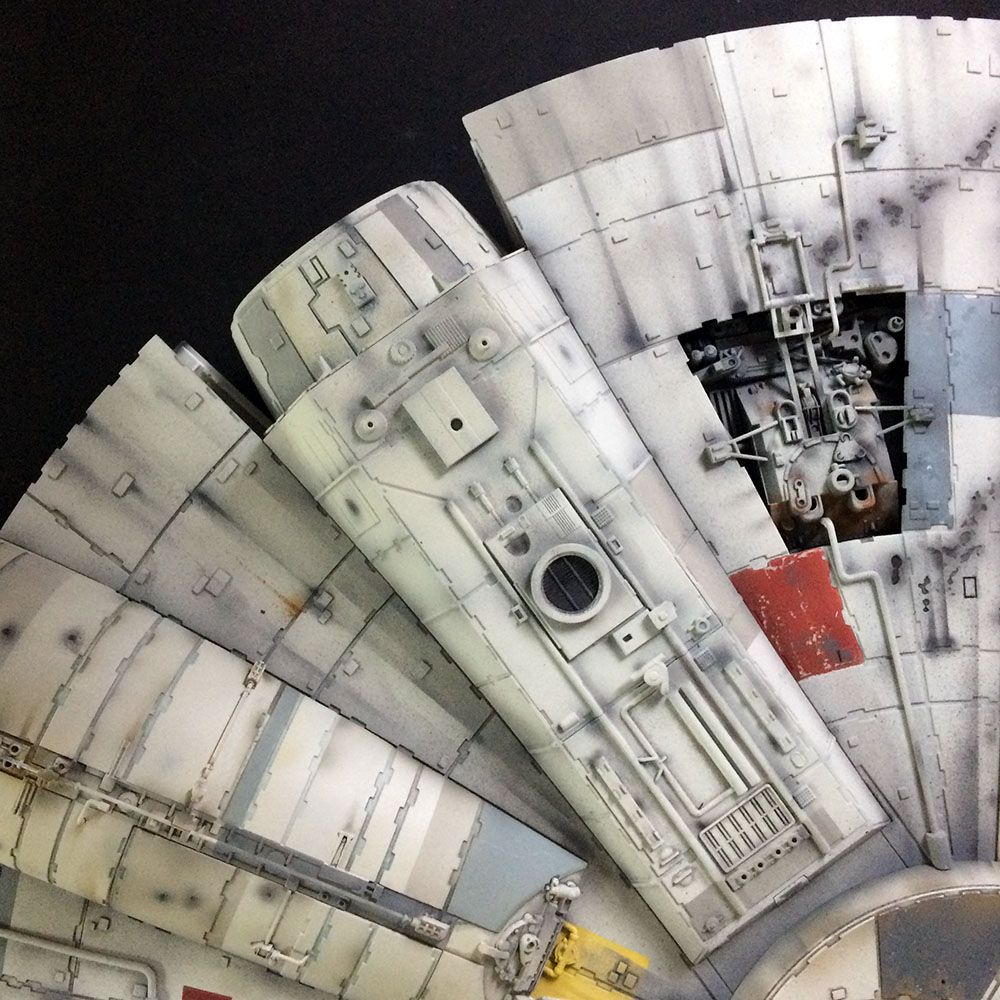 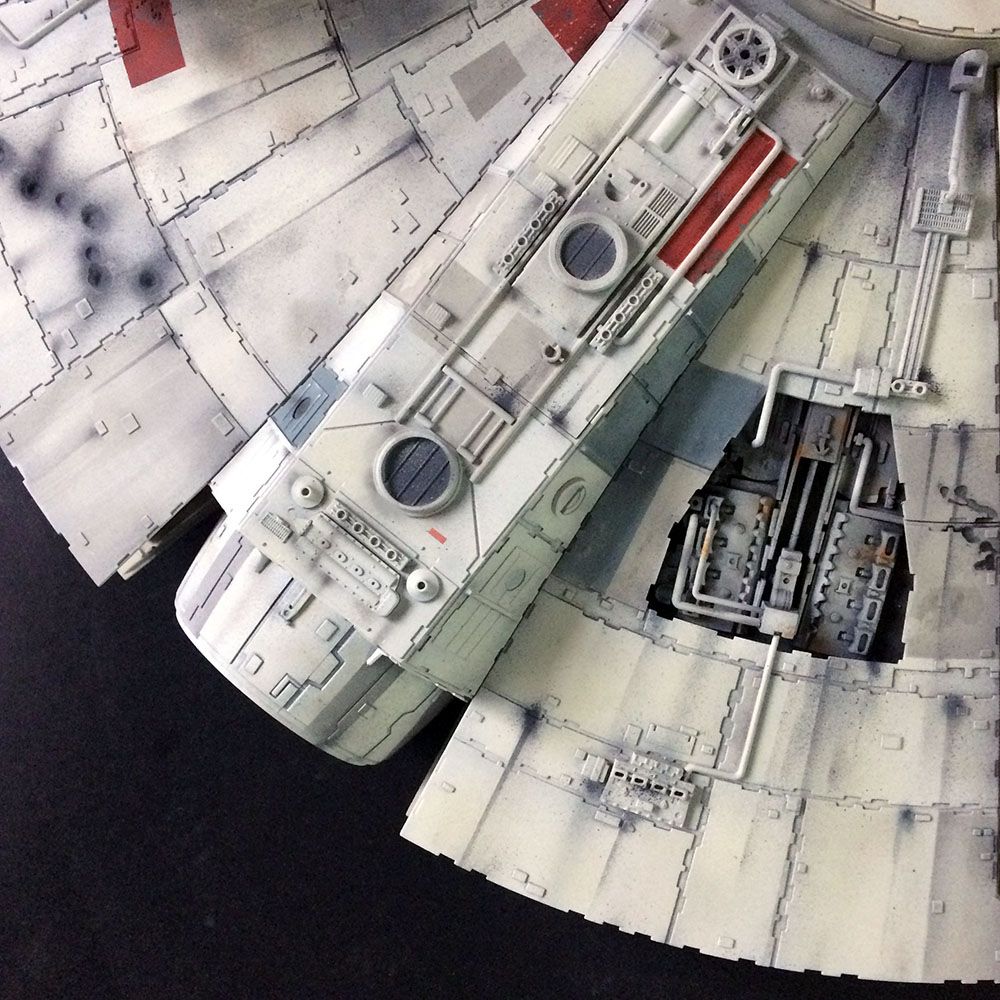
|
|
|
|
|
Excellent work, you've nailed that part to perfection.  Regards Mark
|
|
|
 Rank: Vice-Master  Groups: Registered
Joined: 05/03/2015 Posts: 561 Points: 1,713 Location: South Carolina
|
Excellent work so far my friend... love the damage on the outside of the docking port!
|
|
|
Rank: Semi-Pro Level 1 Groups: Registered
Joined: 25/05/2015 Posts: 66 Points: 204 Location: Minneapolis
|
The engine cover - the most fun part of the whole thing to build and paint. I see why it was left until last to complete. Here it is built, primed, pre-shaded and base-coated, then with a first round of airbrushing: 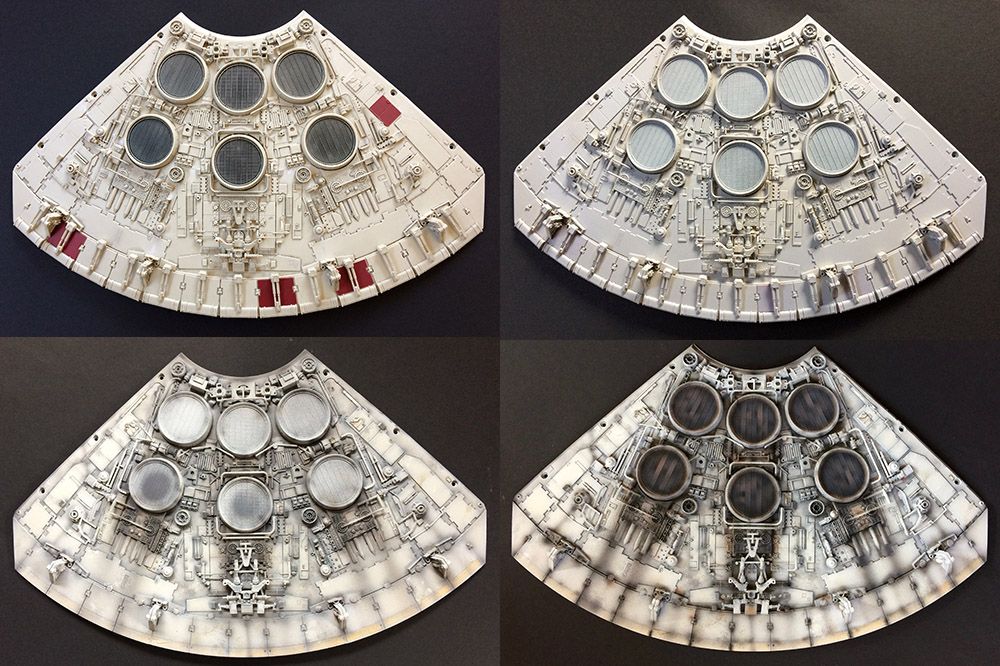 And here it is with a (nearly) completed paint job: 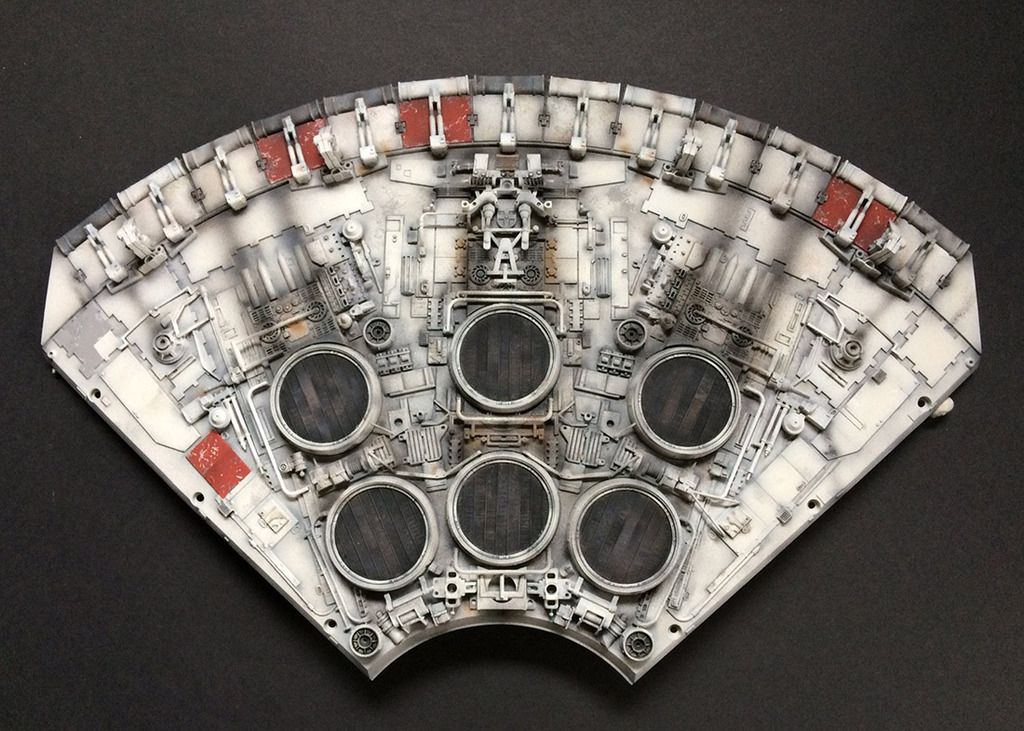 Installation shots coming soon.
|
|
|
Rank: Pro Groups: Registered
Joined: 30/04/2015 Posts: 263 Points: 795 Location: Los Angeles
|
Looking good. I like that you didn't make the streaks from the vents to dark and long.
|
|
|
|
|
Looks excellent, light the subtle weathering, very effective.  Mark
|
|
|
Rank: Pro  Groups: Registered
Joined: 13/05/2016 Posts: 130 Points: 386 Location: Murrieta, CA (USA)
|
looking good keep up the good work Make things as simple as possible but not simpler... - Albert Einstein
|
|
|
Rank: Semi-Pro Level 1 Groups: Registered
Joined: 25/05/2015 Posts: 66 Points: 204 Location: Minneapolis
|
Thanks Colson, Mark and Bill. So, here's the engine cover installed (although not screwed down). Painting this has been addictive, and I'm sure I'll be revisiting it again. However, it's starting to take on the look I'm after. Now, all those little '=' marks to do, and I still haven't found a satisfying way of doing them. It's been a Sharpie and a very small ruler so far. Thanks for looking! 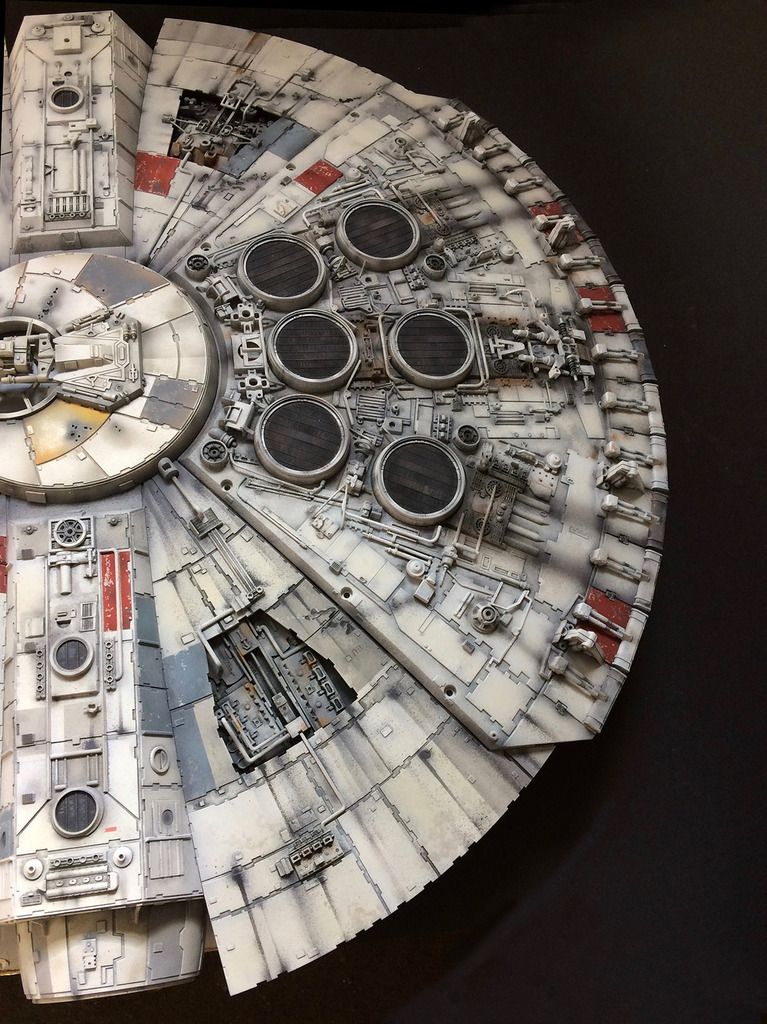
|
|
|
|
|
Fantastic job, love the detail you've done. I did the dashes and dots by freehand using black paint and a very small brush. And a very steady hand!!! Good luck Mark
|
|
|
Rank: Semi-Pro Level 1 Groups: Registered
Joined: 25/05/2015 Posts: 66 Points: 204 Location: Minneapolis
|
Thanks again for your comments, Mark. I really appreciate the support! I'm following your custom build closely and might have a go at your solution to the sub-light engines. The rest is way beyond my skill level, however. I decided to modify the big gash on the underside. Having spent quite a lot of time getting this thing to approach the feel of the studio model, the damage just seemed too cartoony. Funny how a lot of the cast details are very good but the blast marks seem so poorly realized. I filled it in - partially - then Dremelled it away to get the archipelago of holes and zig-zag edges of the original, although I've inadvertently made the wound a bit smaller. 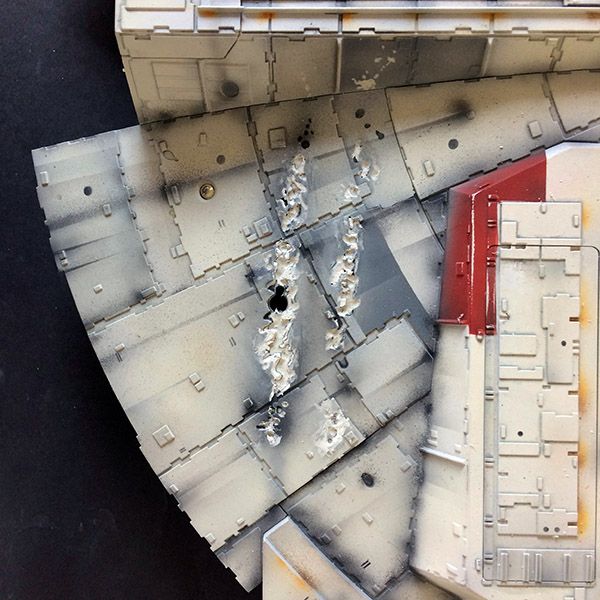 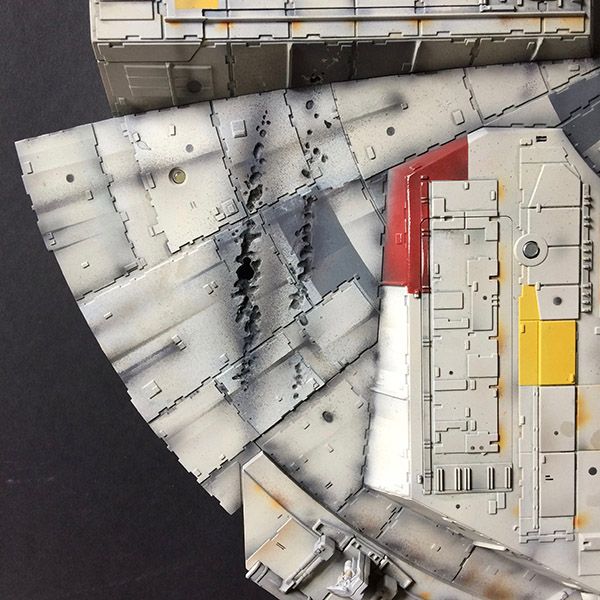 So now the underside is pretty much complete, apart from the odd beauty mark and dash. There's some mind-blowing Falcon scholarship out there, and I've tried for some degree of accuracy, but it's more the spirit of the whole that I'm after; I hope that comes across. I put a grey panel on the wrong docking ring, and made a couple of other errors (the colour's all wrong, I expect), but this is essentially it. 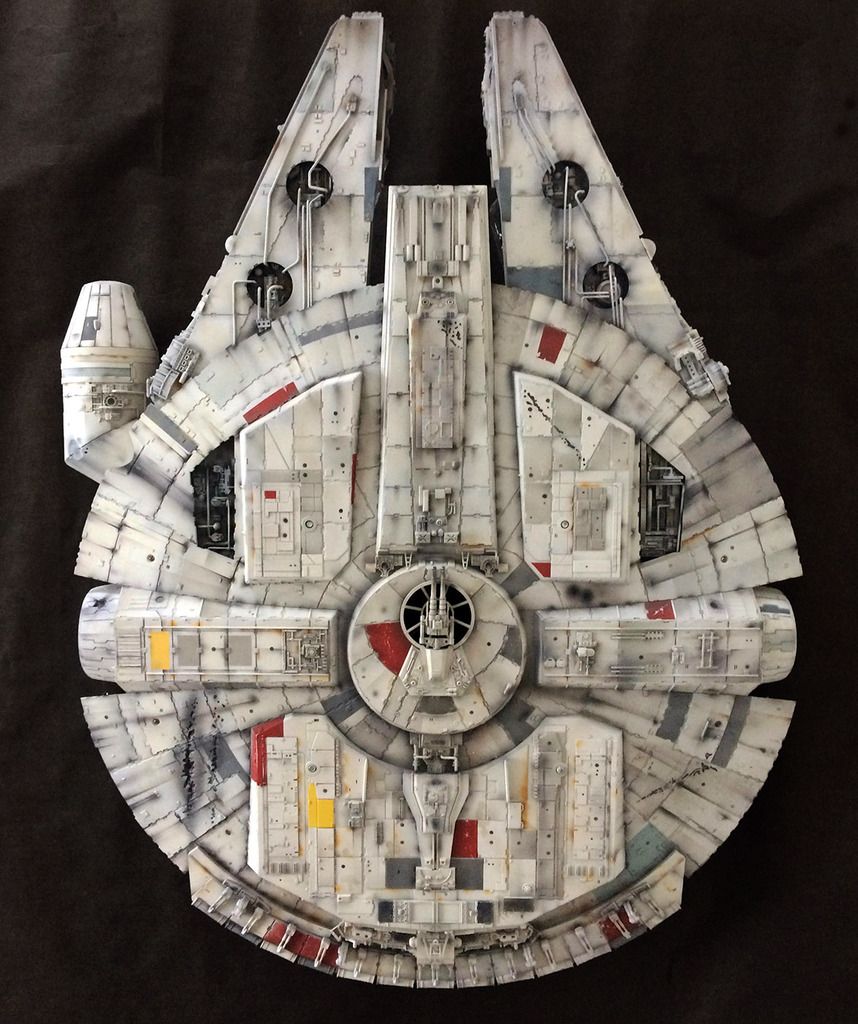 Thanks again for taking the time to look!
|
|
|
Rank: Administration      Groups: Registered, Forum Support Team, Administrators, Global Forum Support Team, Moderator, Official Builds Joined: 09/11/2012 Posts: 7,963 Points: 23,078 Location: East midlands
|
Looks great to me.  I`d be a proud chappy if I`d produced that result. WTG Regards delboy271155 (Derek) COME BACK GUY FAWKES "YOUR COUNTRY NEEDS YOU"
|
|
|
Rank: Semi-Pro Level 1 Groups: Registered
Joined: 25/05/2015 Posts: 66 Points: 204 Location: Minneapolis
|
Although the top and bottom aren't connected, the wiring's not done and there's no interior, I wanted to give a sense of how it's going. I can't tell if I've pushed it too far or not far enough! There are areas that need more, but I'm tempted to mask off the coloured panels and spray the rest back with Insignia White and make it all a bit more unified, perhaps bringing some of the streaks and blast marks back out again if necessary. I still feel like an amateur at this, so any feedback would be appreciated! Thanks for looking!  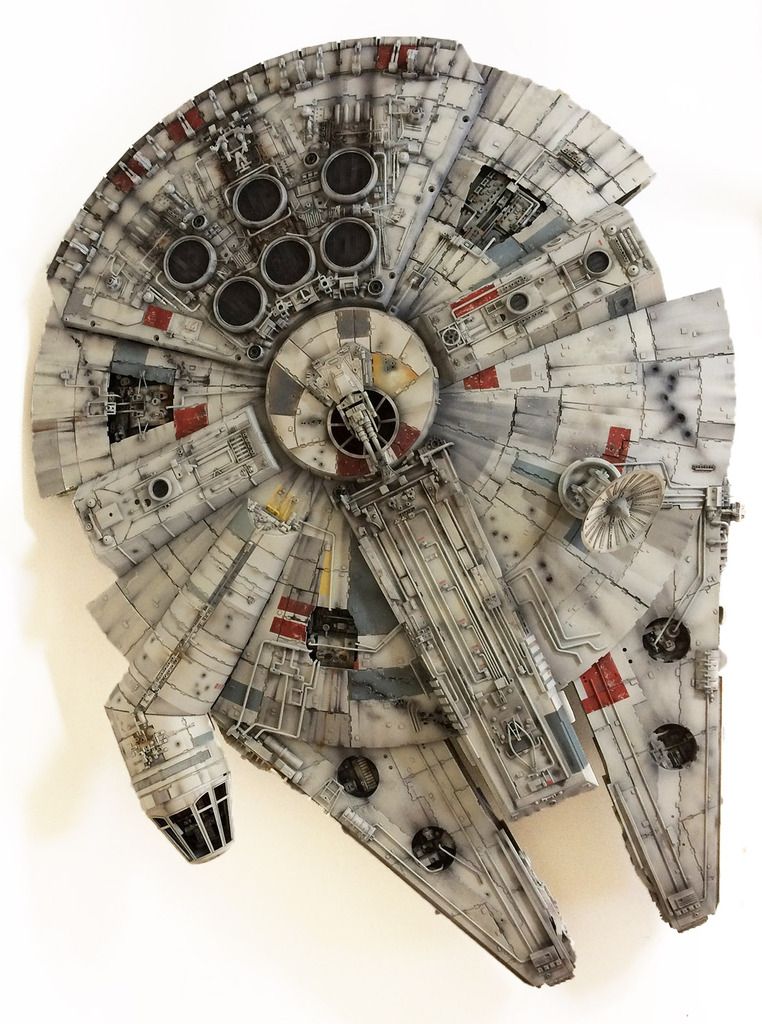
|
|
|
Rank: Semi-Pro Level 2 Groups: Registered
Joined: 08/05/2016 Posts: 79 Points: 251 Location: Perth, W.Australia
|
Geez mate , if my finished version of this looks half as good as yours does now , I'll be well pleased ( only up to #53 ) over here . It really is a marvellous looking ship , and though I'm certainly no expert on her , I wouldn't think she had much more ' tweaking ' to do . Cheers for sharing , Ged
|
|
|
|
|
Very impressive, looks stunning.  Mark
|
|
|
Rank: Semi-Pro Level 1 Groups: Registered
Joined: 25/05/2015 Posts: 66 Points: 204 Location: Minneapolis
|
Thanks for the support, Ged and Mark. Nearly there now, perhaps. Just another year or two and she'll be done!
|
|
|
 Rank: Newbie Groups: Registered
Joined: 06/12/2016 Posts: 1 Points: 3 Location: Las Vegas
|
I think you nailed it. You're in the sweet spot zone for sure, just the right amount of weathering.
|
|
|
Rank: Pro Groups: Registered
Joined: 30/04/2015 Posts: 263 Points: 795 Location: Los Angeles
|
I think it looks great the way it is. I don't think it's overboard or too little. Just about right. If that were mine, I'd probably leave it as is. Just personal preference though. Depends on how beat you want it to look.
|
|
|
|
Guest
|
 US
US

