|
|
 Rank: Pro    Groups: Registered
Joined: 26/05/2015 Posts: 121 Points: 366 Location: Wexford, Ireland
|
Ok, lets start this build. Have my kit for couple of weeks and I was studying the plans and looking on other members dairies for really long time.
As this is my first wooden ship build I want to test my skills and patience before I move in to some bigger builds. From what I can see following other members diaries the biggest problem could be hull planking and rigging but we will se as ship will start coming along together.
For the moment my plan is to add some flickering lights, dummy cannons on lower decks and some additional details on decks.
This is definitely not going to be quick build as my time and working space are limited but will try update my progress regularly.
At the end I want to say sorry for my bad English.
So here we go
I'm putting together "electric installation" for my SF so in meantime I was working on decks.
Decide to use cocktail sticks for tree nails imitation. So the decks are ready just need some varnish, have to say that I really enjoyed that part.
All comments and suggestions are more than welcome!!!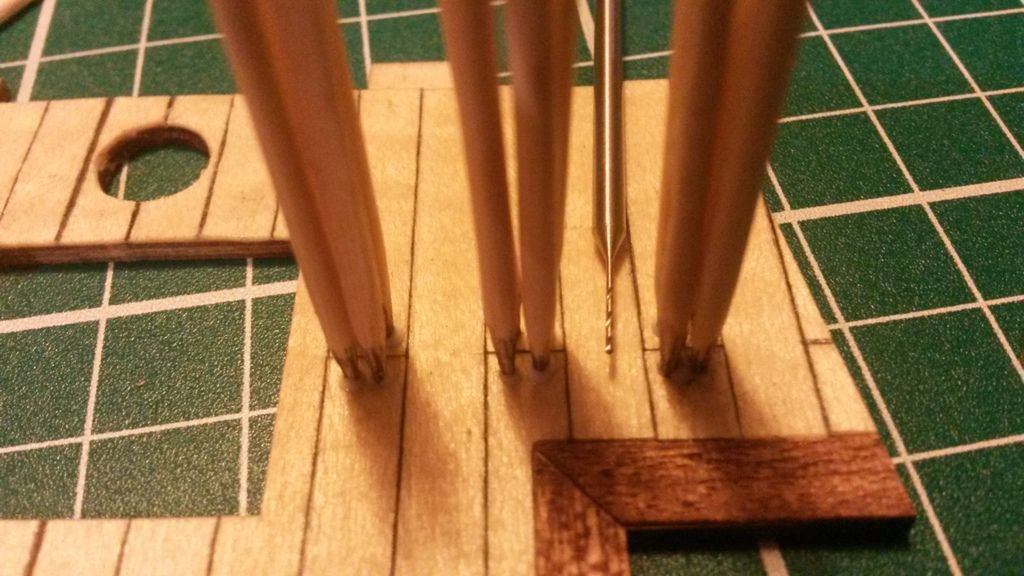 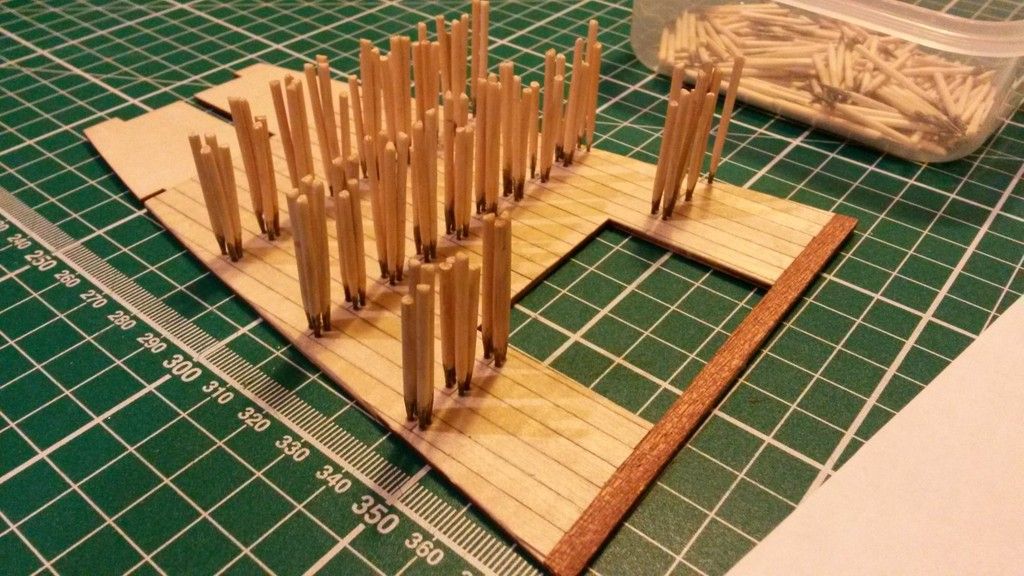 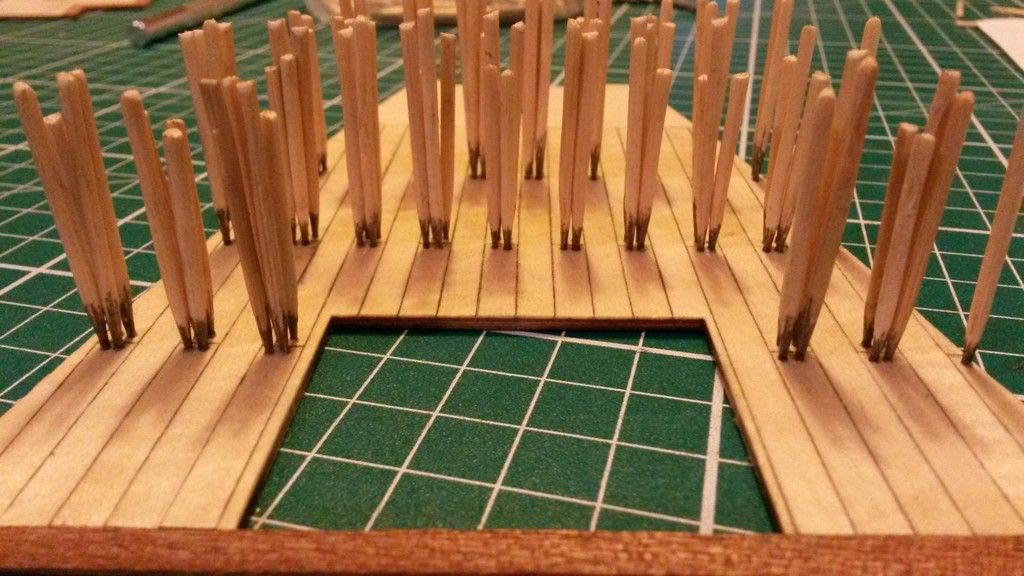  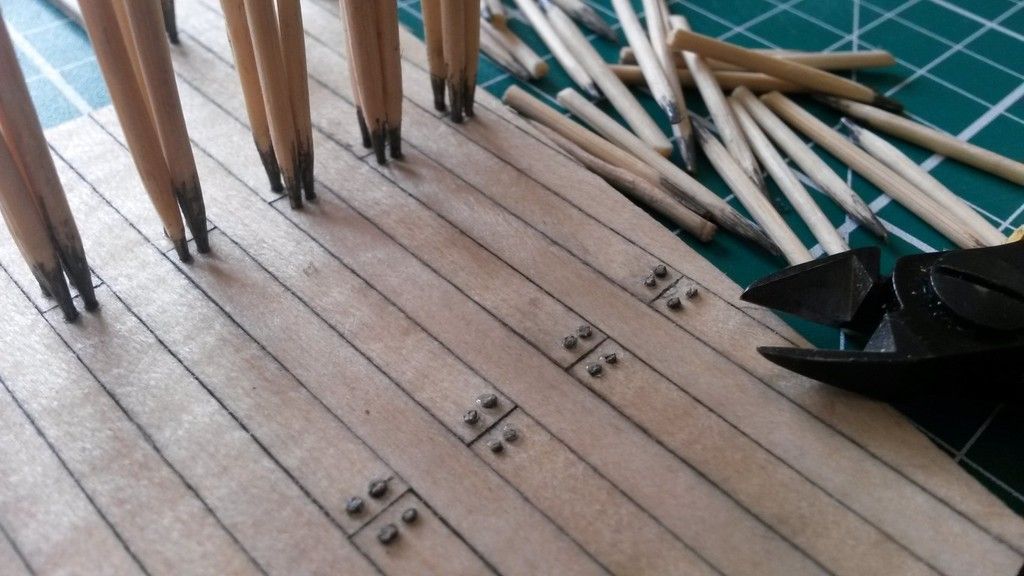 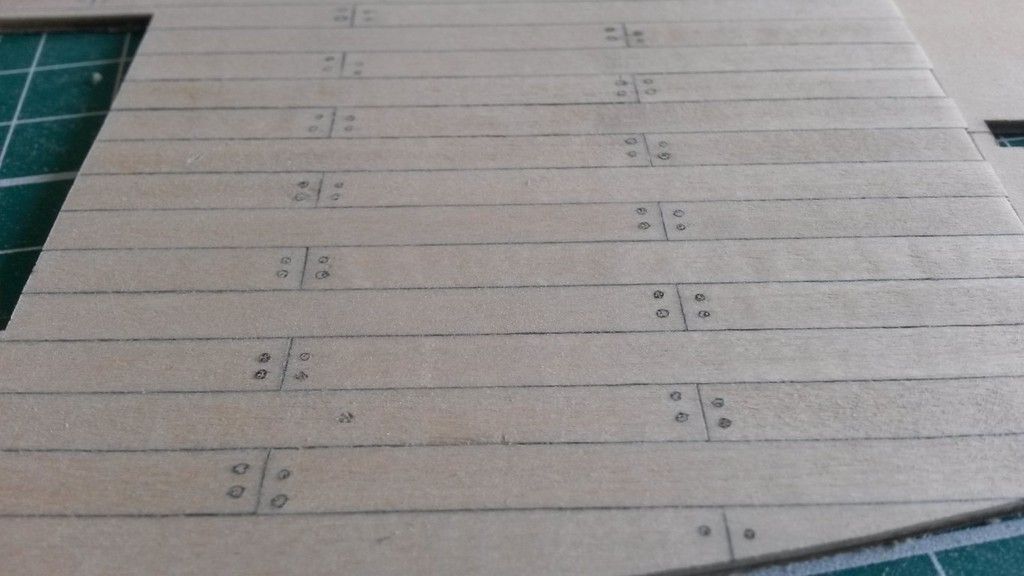 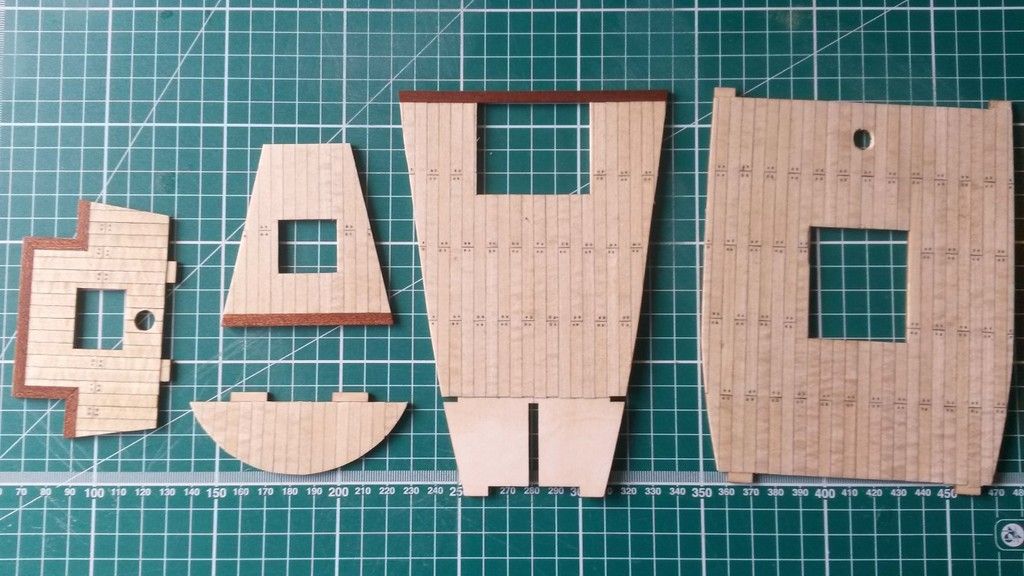
|
|
|
|
|
Deck looks great, will be following this with much interest great start “Whenever you find yourself on the side of the majority, it is time to pause and reflect.”
-Mark Twain
|
|
|
|
|
 Hi Arek Nice job on the decks and the trenailing, just be careful when you sand the cocktail stumps as they are grain end on and harder than the planking. Regards Andy  Current builds:-C57,Zero, Lamborghini Countach, Caldercraft HMS Agamemnon,Robi,R2-D2, MFH Cobra .
|
|
|
 Rank: Super-Elite     Groups: Registered
Joined: 27/01/2014 Posts: 5,060 Points: 14,980
|
Decks are looking very nice indeed, great work
|
|
|
|
|
You've done a great job on the planking. Your tree nails look good too. Look forward to your next update. Chris. On the bench 1/350 Revell Tirpitz Platinum Edition (Pontos PE and Wooden deck) plus extra Eduard PE set and extra MK1 door sets.
|
|
|
|
|
Off to a great start Arek, decking looks fab. Great to see someone else using cocktail sticks, I used them to treenail the hull planking on my SOTS. Long job but think the results really paid off.... .. Will be following your progress on this one.... Regards Alan
|
|
|
Rank: Pro Groups: Registered
Joined: 26/05/2015 Posts: 121 Points: 366 Location: Wexford, Ireland
|
Thank all for stopping by and kind comments. The tree nails were really time consuming but the final effect is really rewarding. As I mentioned I'm about to modify my kit in some points just to test my skills.
|
|
|
Rank: Pro Groups: Registered
Joined: 26/05/2015 Posts: 121 Points: 366 Location: Wexford, Ireland
|
|
|
|
|
|
Nice find an they will look much better than the metal carriages Current builds:-C57,Zero, Lamborghini Countach, Caldercraft HMS Agamemnon,Robi,R2-D2, MFH Cobra .
|
|
|
 Rank: Elite  Groups: Registered
Joined: 14/10/2014 Posts: 1,715 Points: 5,087 Location: Leicester england uk
|
Hi off to very good start there.decks look great.cheers mick. Builds hms victory, suzuki gsx 1300 R hayabusa, honda C B 750, lamborghini countach L P 500 S, tamiya 1/16 rc full option tiger 1 tank,
built, Mclaren M P 4 - 23. Occre london tram,
Stash.airfix 1/24 mosquito. Diag Virginia schooner, tamiya 1/6 honda 750, tamiya 1/35 famo, tamiya 1/35 flak 88.
|
|
|
Rank: Super-Elite  Groups: Registered
Joined: 30/01/2013 Posts: 4,604 Points: 13,607 Location: Monmouthshire UK
|
Nice clean start to the build, looks good Steve
|
|
|
Rank: Pro Groups: Registered
Joined: 26/05/2015 Posts: 121 Points: 366 Location: Wexford, Ireland
|
|
|
|
|
|
It will look good lit up. But be careful on how bright the led's are. The lighting on ships was very dull. The defused light you show is good although a little bright. You might also consider having the light slightly to the side of the gratings, so as to not see the source of light. Chris On the bench 1/350 Revell Tirpitz Platinum Edition (Pontos PE and Wooden deck) plus extra Eduard PE set and extra MK1 door sets.
|
|
|
Rank: Pro Groups: Registered
Joined: 26/05/2015 Posts: 121 Points: 366 Location: Wexford, Ireland
|
magpie1832 wrote:It will look good lit up. But be careful on how bright the led's are. The lighting on ships was very dull.
The defused light you show is good although a little bright. You might also consider having the light slightly to the side of the gratings, so as to not see the source of light.
Chris Hi Chris, Thanks for taking your time for the comments. Picture abowe show light brighter than it is when you actually looking at it but you are right anyway. This are the smallest LED lights I could find, later this evening i will try double diffusers or reposition LED. Other option probably is to change resistor but my knowledge about that is really close to zero   . To create my lights I just simply followed tutorial.
|
|
|
Rank: Pro  Groups: Registered
Joined: 19/09/2012 Posts: 101 Points: 245 Location: Wirral
|
arek wrote:Picture abowe show light brighter than it is when you actually looking at it but you are right anyway. This are the smallest LED lights I could find, later this evening i will try double diffusers or reposition LED. Other option probably is to change resistor but my knowledge about that is really close to zero . To create my lights I just simply followed tutorial. If you increase the resistor size, then the LED brightness will reduce (higher resistance, lower current). What resistor have you got in there currently, and what power source? Completed: Earth, Moon, Sun Orbiter
Build a Model Solar System
Under Constuction: HMB Endeavour
HMS Victory
Mitsubishi Zero
Tiger Tank
D51
|
|
|
Rank: Pro Groups: Registered
Joined: 26/05/2015 Posts: 121 Points: 366 Location: Wexford, Ireland
|
WildRover wrote:arek wrote:Picture abowe show light brighter than it is when you actually looking at it but you are right anyway. This are the smallest LED lights I could find, later this evening i will try double diffusers or reposition LED. Other option probably is to change resistor but my knowledge about that is really close to zero . To create my lights I just simply followed tutorial. If you increase the resistor size, then the LED brightness will reduce (higher resistance, lower current). What resistor have you got in there currently, and what power source? Hi WildRover, Thanks for offering your help This is a schematic I followed Hope this is helpful. 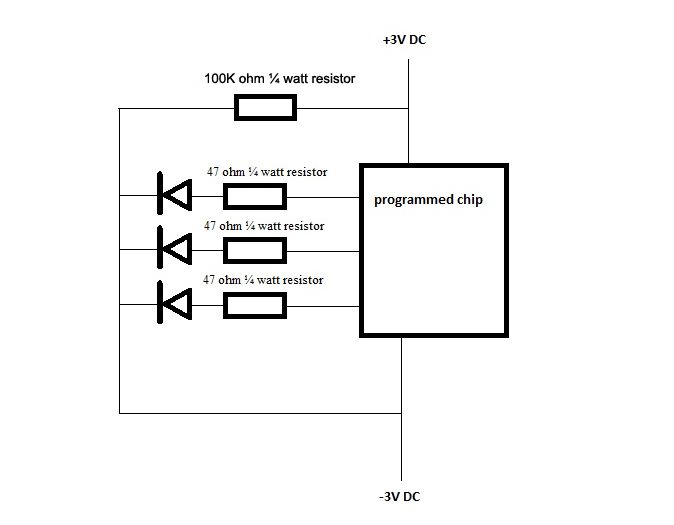
|
|
|
Rank: Pro Groups: Registered
Joined: 19/09/2012 Posts: 101 Points: 245 Location: Wirral
|
The 100k resistor is the key here, the 47 ohm ones will make naff all difference because of the huge one in there(The 47 ohm ones are there to help with voltage regulation to stop the leds going pop). If I were doing it, I'd replace the 100k resistor with a variable resistor, then you have control over the brightness, get say a 500k ohm one. Completed: Earth, Moon, Sun Orbiter
Build a Model Solar System
Under Constuction: HMB Endeavour
HMS Victory
Mitsubishi Zero
Tiger Tank
D51
|
|
|
Rank: Pro Groups: Registered
Joined: 26/05/2015 Posts: 121 Points: 366 Location: Wexford, Ireland
|
Hi WildRover, Thank you so much for helping me with that. Will try this as soon as I get one!
|
|
|
Rank: Pro Groups: Registered
Joined: 26/05/2015 Posts: 121 Points: 366 Location: Wexford, Ireland
|
|
|
|
|
|
You certainly have a good end result. is the intention to see the light from the gratings? If you are adding dumb cannons you will have to build boxes for each one, so as long as you carefully seal them that should stop any light leaking through. Following with great interest Jase “Whenever you find yourself on the side of the majority, it is time to pause and reflect.”
-Mark Twain
|
|
|
|
Guest
|
 US
US

