Welcome Guest Search | Active Topics | Log In | Register

7 Pages <1234>»
San Francisco II build by Arek (first wooden ship build) Options
stevie_o
#21 Posted : 09 August 2015 00:08:59

Rank: Super-Elite

Active Service Medal: 500 post active service MedalPurple Medal: Super active service medal for 1000 postsTurquoise Medal: Turquoise Medal for model making know-how contributionOutstanding Build: An award for an outstanding buildBuild-Diary Medal: Build-Diary Medal of HonourRed Medal: Red Medal
Groups: Registered

Joined: 30/01/2013
Posts: 4,604
Points: 13,607
Location: Monmouthshire UK
Gandale
#22 Posted : 09 August 2015 00:13:03

Rank: Super-Elite

Publisher Medal: Featured Build of the MonthActive Service Medal: 500 post active service MedalPurple Medal: Super active service medal for 1000 postsTurquoise Medal: Turquoise Medal for model making know-how contributionOutstanding Build: An award for an outstanding buildBuild-Diary Medal: Build-Diary Medal of HonourRed Medal: Red Medal
Groups: Registered, Global Forum Support, Moderator, Official Builds, Administrators

Joined: 08/09/2012
Posts: 15,172
Points: 46,151
Location: Aberdeen
This is turning out to be a really interesting project to follow. Looking forward to seeing how it all works out.....Cool Cool . Very well done...

Regards

Alan
arpurchase
#23 Posted : 09 August 2015 01:20:04

Rank: Super-Elite

Publisher Medal: Featured Build of the MonthActive Service Medal: 500 post active service MedalPurple Medal: Super active service medal for 1000 postsTurquoise Medal: Turquoise Medal for model making know-how contributionOutstanding Build: An award for an outstanding buildBuild-Diary Medal: Build-Diary Medal of HonourRed Medal: Red Medal
Groups: Registered

Joined: 27/09/2011
Posts: 15,196
Points: 45,687
Location: Dudley
BigGrin The lights look great and should set her off atreatCool
Current builds:-C57,Zero, Lamborghini Countach, Caldercraft HMS Agamemnon,Robi,R2-D2, MFH Cobra .

davetwin
#24 Posted : 09 August 2015 03:20:52

Rank: Super-Elite
Publisher Medal: Featured Build of the MonthActive Service Medal: 500 post active service MedalPurple Medal: Super active service medal for 1000 postsOutstanding Build: An award for an outstanding buildBuild-Diary Medal: Build-Diary Medal of HonourRed Medal: Red Medal
Groups: Registered

Joined: 27/01/2014
Posts: 5,060
Points: 14,980
arek wrote:
It took me some time but wiring of my SF is almost over!BigGrin

I used a variable resistor for the entire system and now I have a complete control over LED brightness (again thanks to WildRover for advice). When resistor is set at a minimum my camera was not able to catch the light so I'm happy. When I was looking for resistor I came across a remote control switch and I decided to use it as well . The problem is that to many elements have to be installed in the hull and yet I have to make room for dummy canons so the battery holder, variable resistor and sensor for remote switch I will to install in ship stand.

I have to admit, the building becomes more complicated than I thought.Cursing It looks like I'll have to build the boxes around some of the LED lights that the light is not leaked by some parts of the ship and plan carefully placement of the dummy cannons.

It will be a long way before I even start planking the hull .....but seeing all this adds-on working is very rewarding.Cool Cool


Really nice work! I dont suppose you have a link to where you purchased the remote control from?
arek
#25 Posted : 09 August 2015 11:19:28

Rank: Pro
Turquoise Medal: Turquoise Medal for model making know-how contributionBuild-Diary Medal: Build-Diary Medal of HonourRed Medal: Red Medal
Groups: Registered

Joined: 26/05/2015
Posts: 121
Points: 366
Location: Wexford, Ireland
jase wrote:
You certainly have a good end result. is the intention to see the light from the gratings?

If you are adding dumb cannons you will have to build boxes for each one, so as long as you carefully seal them that should stop any light leaking through.

Following with great interest

Jase


Hi Jase, thanks for stooping by.BigGrin

Yes, the light is going too be seen from the each grating as I showed in this post but will be more dim

As for the dummy cannons I was thinking to add support beams along the way (similar to SotS) from balsa wood to not have problems when fairing the hull.
So far I'm waiting for dummy cannons to be delivered, when I have them then I will decide what way to fit them.Confused
arek
#26 Posted : 09 August 2015 11:23:11

Rank: Pro
Turquoise Medal: Turquoise Medal for model making know-how contributionBuild-Diary Medal: Build-Diary Medal of HonourRed Medal: Red Medal
Groups: Registered

Joined: 26/05/2015
Posts: 121
Points: 366
Location: Wexford, Ireland
HI davetwin,

You will find remote controll here- http://www.ebay.ie/itm/3...Name=STRK%3AMEBIDX%3AIT

arek
#27 Posted : 09 August 2015 21:34:52

Rank: Pro
Turquoise Medal: Turquoise Medal for model making know-how contributionBuild-Diary Medal: Build-Diary Medal of HonourRed Medal: Red Medal
Groups: Registered

Joined: 26/05/2015
Posts: 121
Points: 366
Location: Wexford, Ireland
Hi all, need help from someone who finished this build.
I'am working now on gun-ports position.Confused Confused

To make sure where to place support beams or boxes for my dummy cannons I've made some kind of template taking measurements from overall plan.Blushing

As this is very important for my build can any one who finished SF can confirm my measurements shown on the photo below? Most important is the distance between lower and upper row.
arek attached the following image(s):
20150809_201334 (Small).jpg
20150809_190750 (Small).jpg
20150809_194603 (Small).jpg
arek
#28 Posted : 12 August 2015 21:24:58

Rank: Pro
Turquoise Medal: Turquoise Medal for model making know-how contributionBuild-Diary Medal: Build-Diary Medal of HonourRed Medal: Red Medal
Groups: Registered

Joined: 26/05/2015
Posts: 121
Points: 366
Location: Wexford, Ireland
My dummy cannons finally arrived!
They have slightly different front, but with little of grinding and drilling they look very similar. One is finished 21 more need to be done !
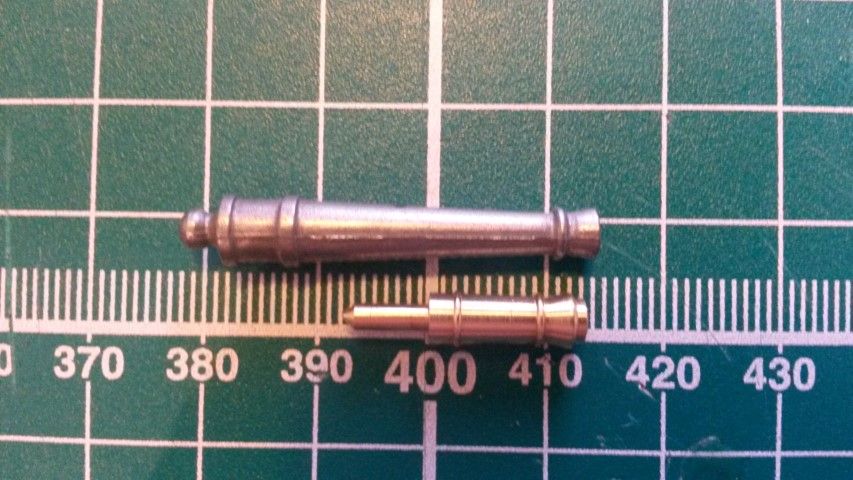
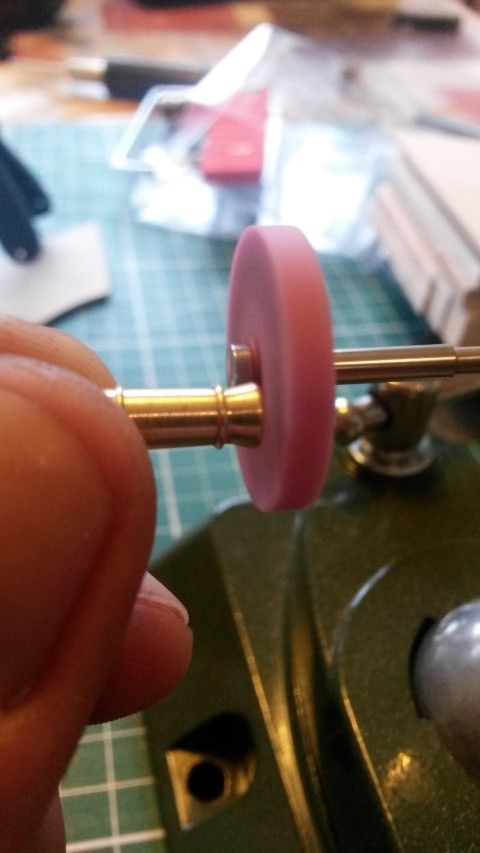
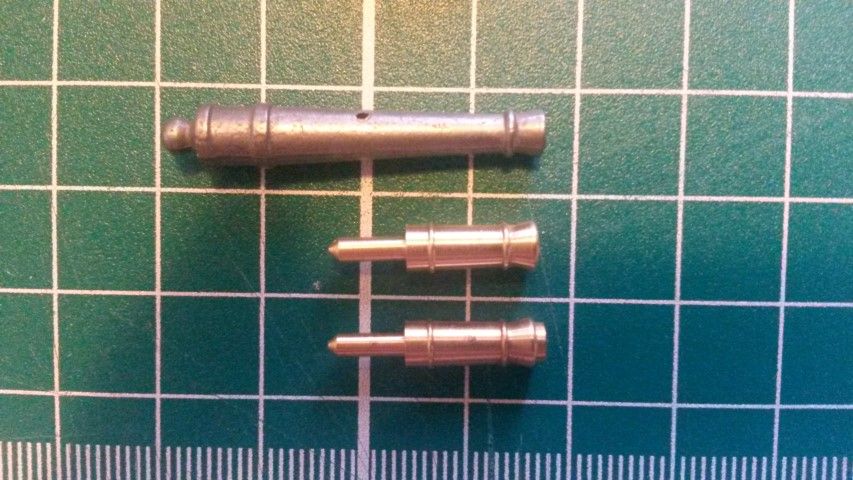
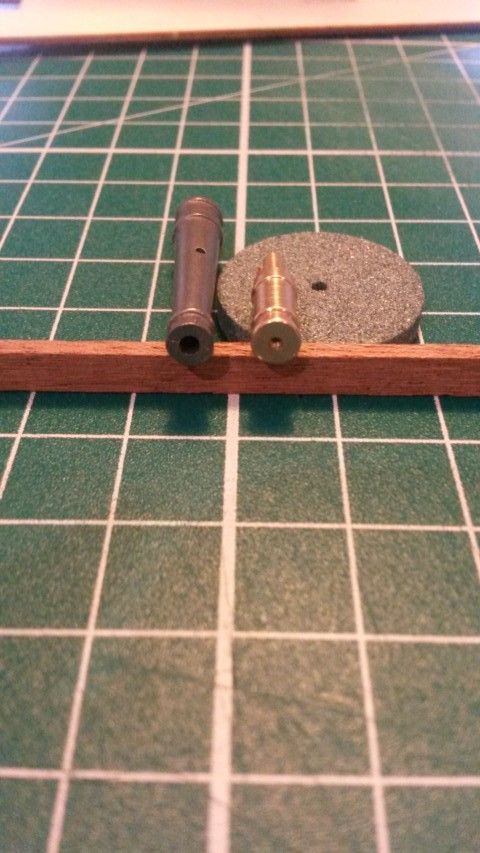


arpurchase
#29 Posted : 12 August 2015 22:30:33

Rank: Super-Elite

Publisher Medal: Featured Build of the MonthActive Service Medal: 500 post active service MedalPurple Medal: Super active service medal for 1000 postsTurquoise Medal: Turquoise Medal for model making know-how contributionOutstanding Build: An award for an outstanding buildBuild-Diary Medal: Build-Diary Medal of HonourRed Medal: Red Medal
Groups: Registered

Joined: 27/09/2011
Posts: 15,196
Points: 45,687
Location: Dudley
BigGrin Nice looking cannonsCool
Current builds:-C57,Zero, Lamborghini Countach, Caldercraft HMS Agamemnon,Robi,R2-D2, MFH Cobra .

magpie1832
#30 Posted : 13 August 2015 08:20:56

Rank: Super-Elite

Publisher Medal: Featured Build of the MonthActive Service Medal: 500 post active service MedalPurple Medal: Super active service medal for 1000 postsTurquoise Medal: Turquoise Medal for model making know-how contributionBuild-Diary Medal: Build-Diary Medal of HonourRed Medal: Red Medal
Groups: Registered

Joined: 11/11/2009
Posts: 3,432
Points: 10,280
Location: Bâe Colwyn, Wales
Hi Arek, yes all the ports look in the correct position. Just comparing with the side of mine and looks pretty much.
I do like you idea of the dummy cannons.
Chris.
On the bench

1/350 Revell Tirpitz Platinum Edition (Pontos PE and Wooden deck) plus extra Eduard PE set and extra MK1 door sets.


stevie_o
#31 Posted : 13 August 2015 11:49:55

Rank: Super-Elite

Active Service Medal: 500 post active service MedalPurple Medal: Super active service medal for 1000 postsTurquoise Medal: Turquoise Medal for model making know-how contributionOutstanding Build: An award for an outstanding buildBuild-Diary Medal: Build-Diary Medal of HonourRed Medal: Red Medal
Groups: Registered

Joined: 30/01/2013
Posts: 4,604
Points: 13,607
Location: Monmouthshire UK
arek
#32 Posted : 13 August 2015 18:59:01

Rank: Pro
Turquoise Medal: Turquoise Medal for model making know-how contributionBuild-Diary Medal: Build-Diary Medal of HonourRed Medal: Red Medal
Groups: Registered

Joined: 26/05/2015
Posts: 121
Points: 366
Location: Wexford, Ireland
magpie1832 wrote:
Hi Arek, yes all the ports look in the correct position. Just comparing with the side of mine and looks pretty much.
I do like you idea of the dummy cannons.
Chris.


Hi Chris,

Thank you so much for taking your time to check measurement on your model.

So when I have that confirmed should start building some supports for cannons during the weekend.BigGrin BigGrin
arek
#33 Posted : 15 August 2015 10:57:48

Rank: Pro
Turquoise Medal: Turquoise Medal for model making know-how contributionBuild-Diary Medal: Build-Diary Medal of HonourRed Medal: Red Medal
Groups: Registered

Joined: 26/05/2015
Posts: 121
Points: 366
Location: Wexford, Ireland
Hi Everyone. BigGrin
I started to working on the dummy cannon supports.
For back strip where cannon is mounted I use 3mm plywood, height of the strip is about 17 mm h to give me some room for errors.Cool As for top and bottom strips balsa is handy.

I decided to use one long strip for the top roll.


Bottom roll is going to be made from small pieces glued between frames. Each piece have to be cut and shaped individually.
To ensure that they are installed at the same depth and height i made small jig witch rally helped a lot.


]http://[/url]


Gandale
#34 Posted : 15 August 2015 11:07:21

Rank: Super-Elite

Publisher Medal: Featured Build of the MonthActive Service Medal: 500 post active service MedalPurple Medal: Super active service medal for 1000 postsTurquoise Medal: Turquoise Medal for model making know-how contributionOutstanding Build: An award for an outstanding buildBuild-Diary Medal: Build-Diary Medal of HonourRed Medal: Red Medal
Groups: Registered, Global Forum Support, Moderator, Official Builds, Administrators

Joined: 08/09/2012
Posts: 15,172
Points: 46,151
Location: Aberdeen
Very nice, great improvisation too....Cool Cool Look forward to your next update...

Regards

Alan
arpurchase
#35 Posted : 15 August 2015 12:38:05

Rank: Super-Elite

Publisher Medal: Featured Build of the MonthActive Service Medal: 500 post active service MedalPurple Medal: Super active service medal for 1000 postsTurquoise Medal: Turquoise Medal for model making know-how contributionOutstanding Build: An award for an outstanding buildBuild-Diary Medal: Build-Diary Medal of HonourRed Medal: Red Medal
Groups: Registered

Joined: 27/09/2011
Posts: 15,196
Points: 45,687
Location: Dudley
BigGrin Nicely done and great workCool
Current builds:-C57,Zero, Lamborghini Countach, Caldercraft HMS Agamemnon,Robi,R2-D2, MFH Cobra .

davetwin
#36 Posted : 15 August 2015 15:22:57

Rank: Super-Elite
Publisher Medal: Featured Build of the MonthActive Service Medal: 500 post active service MedalPurple Medal: Super active service medal for 1000 postsOutstanding Build: An award for an outstanding buildBuild-Diary Medal: Build-Diary Medal of HonourRed Medal: Red Medal
Groups: Registered

Joined: 27/01/2014
Posts: 5,060
Points: 14,980
Nice work, great idea with the jig it looks like it worked a treat ThumpUp
arek
#37 Posted : 21 August 2015 17:42:32

Rank: Pro
Turquoise Medal: Turquoise Medal for model making know-how contributionBuild-Diary Medal: Build-Diary Medal of HonourRed Medal: Red Medal
Groups: Registered

Joined: 26/05/2015
Posts: 121
Points: 366
Location: Wexford, Ireland
Thanks all for stopping by and kind comments!
There should be some updates this weekend!
arek
#38 Posted : 24 August 2015 20:10:49

Rank: Pro
Turquoise Medal: Turquoise Medal for model making know-how contributionBuild-Diary Medal: Build-Diary Medal of HonourRed Medal: Red Medal
Groups: Registered

Joined: 26/05/2015
Posts: 121
Points: 366
Location: Wexford, Ireland
Hello everyone,

Small update but loads of work was involved.
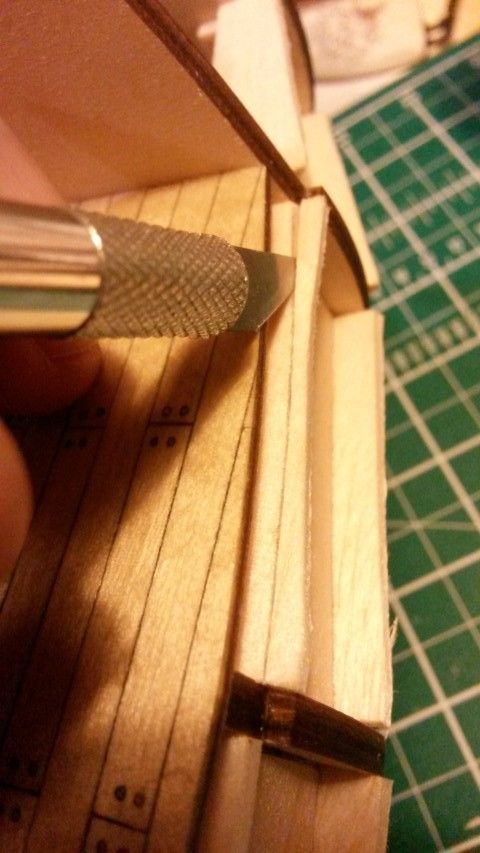
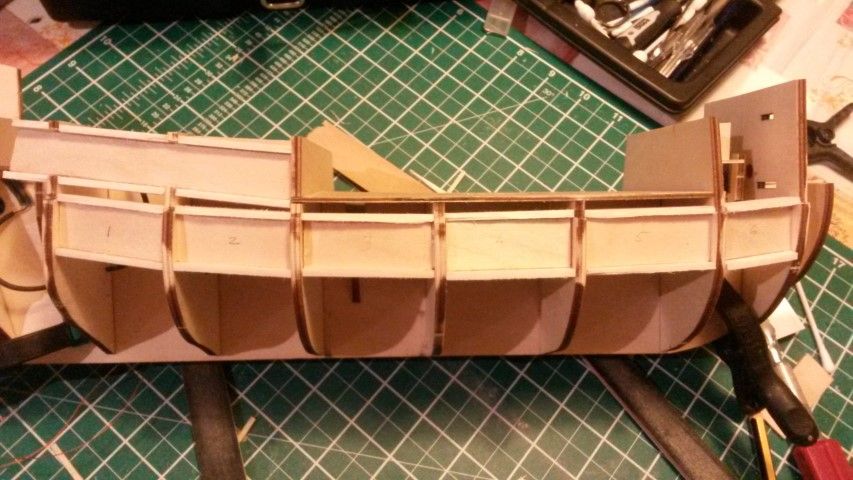
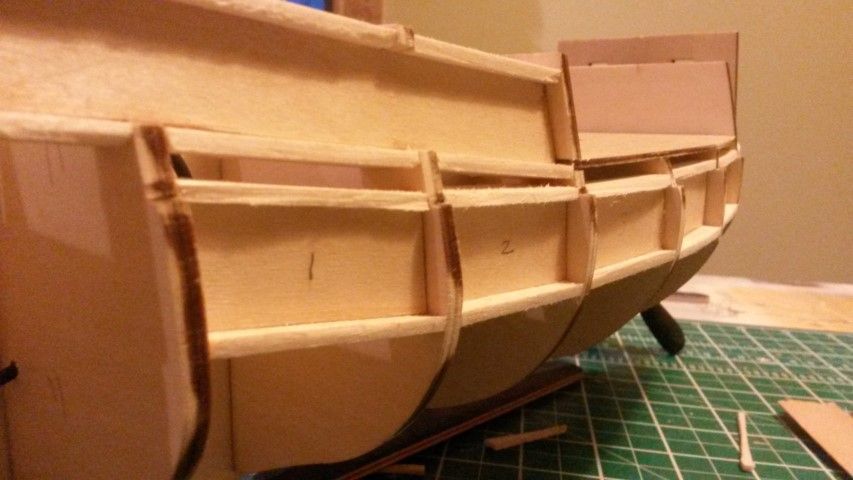
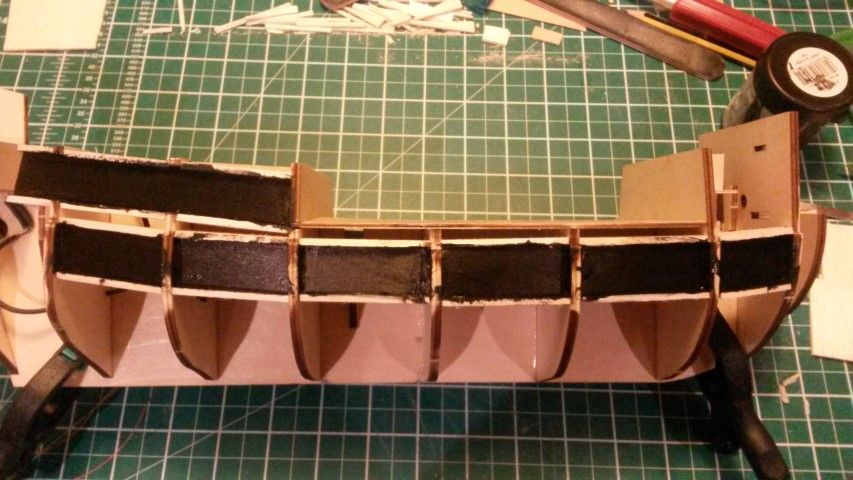
After gluing all pieces between frames, I simply cut excess of balsa with craft knife and finished witch sand paper in similar way that fairing the hull. When have all that done just painted inside witch black paint. Next step is to finally glue in rest of the decks .....


arek
#39 Posted : 02 April 2018 09:28:41

Rank: Pro
Turquoise Medal: Turquoise Medal for model making know-how contributionBuild-Diary Medal: Build-Diary Medal of HonourRed Medal: Red Medal
Groups: Registered

Joined: 26/05/2015
Posts: 121
Points: 366
Location: Wexford, Ireland
Hi All,
It has been a very long time since my last post but there was so many things happening in my personal life. My ship was safely storedCool but not abandoned and I'm back now to the build witch new ideas.BigGrin BigGrin

I decided to add some windows to took advantage of all work that I put into adding lights in to my build. Im not really sure how historically accurate is the placement and look of them but this build is more about learning and checking my skills.

I started working on the bulkheads fitting windows and dors first then I worked around them. I decided to replace metal dors that comes with the kit, they only dry fitted for the moment as I'm still working on details.


Gandale
#40 Posted : 02 April 2018 09:46:54

Rank: Super-Elite

Publisher Medal: Featured Build of the MonthActive Service Medal: 500 post active service MedalPurple Medal: Super active service medal for 1000 postsTurquoise Medal: Turquoise Medal for model making know-how contributionOutstanding Build: An award for an outstanding buildBuild-Diary Medal: Build-Diary Medal of HonourRed Medal: Red Medal
Groups: Registered, Global Forum Support, Moderator, Official Builds, Administrators

Joined: 08/09/2012
Posts: 15,172
Points: 46,151
Location: Aberdeen
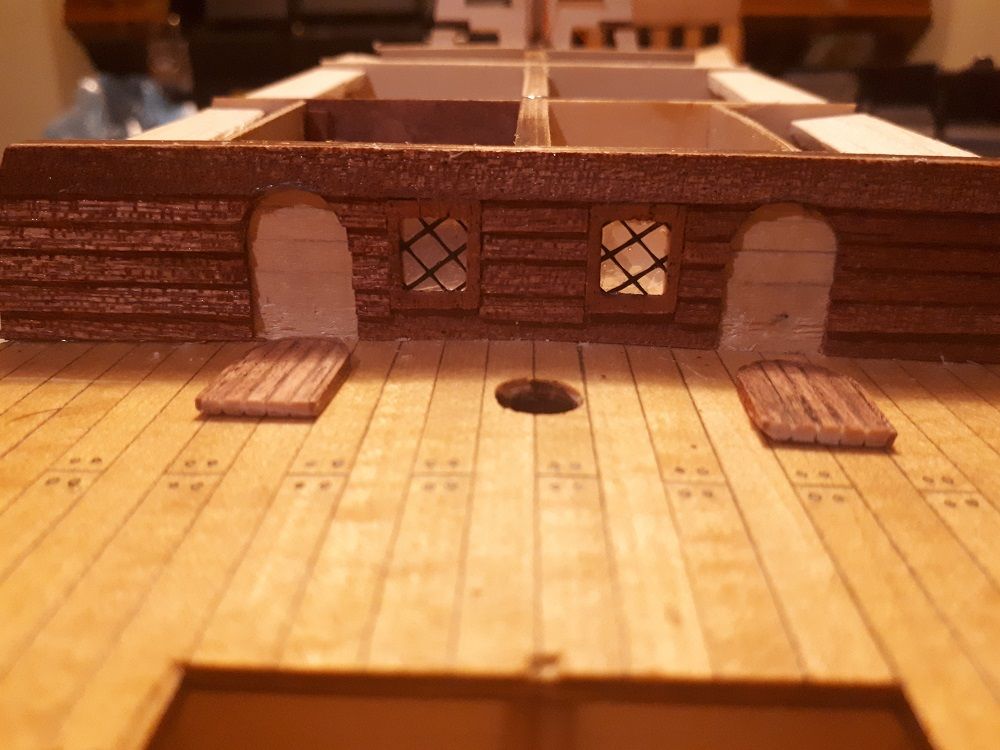
Looks really good, hope we see some more of your build very soon....Cool Cool

Regards

Alan
Users browsing this topic
Guest (2)
7 Pages <1234>»
Forum Jump  
You cannot post new topics in this forum.
You cannot reply to topics in this forum.
You cannot delete your posts in this forum.
You cannot edit your posts in this forum.
You cannot create polls in this forum.
You cannot vote in polls in this forum.

Powered by YAF | YAF © 2003-2009, Yet Another Forum.NET
This page was generated in 0.334 seconds.
DeAgostini