|
|
|
|
Hi Arek, planking is always a daunting task when you are faced with it for the first time however, many beginners tend to get an equally important part of building these ships wrong and that is the fairing of the hull in preparation for applying the planks. There are two very useful guides here, the first on the principles of fairing and the other is planking techniques for beginners. Have a look, I'm sure you'll find these very useful.... https://forum.model-spac...spx?g=posts&t=19140
https://forum.model-spac...aspx?g=posts&t=5669
If you encounter any problems then you know we're here to help.... Regards Alan
|
|
|
 Rank: Pro    Groups: Registered
Joined: 26/05/2015 Posts: 121 Points: 366 Location: Wexford, Ireland
|
Hi, Thanks for the links Alan. I remember reading that before but I couldn't find now. Especially second link have very useful information and is very good written. Stern part is finished now. Because I changed shape and size of the windows so many times it turned out that holes for the windows are way to big for my final design. I have to add layer of 0.5x5 mm to fit my windows before i used 2.0x5mm. 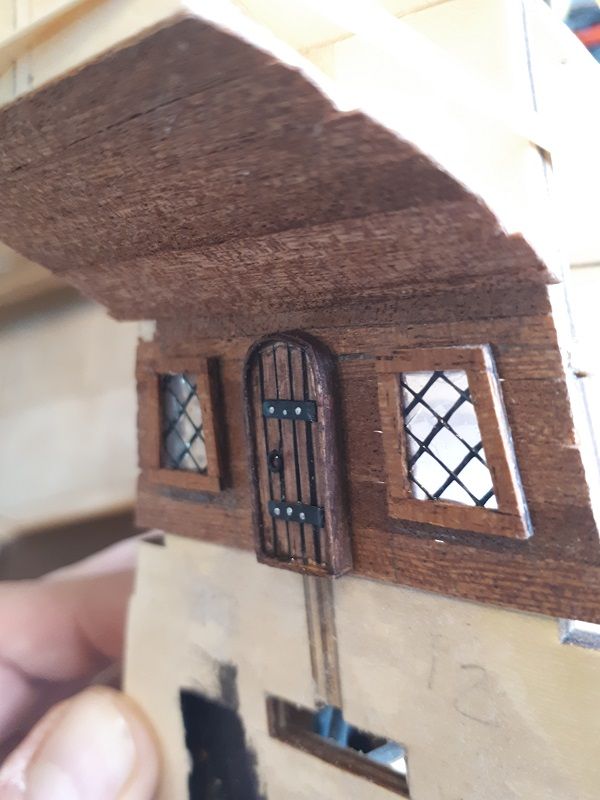 You can see here how wrong I was.  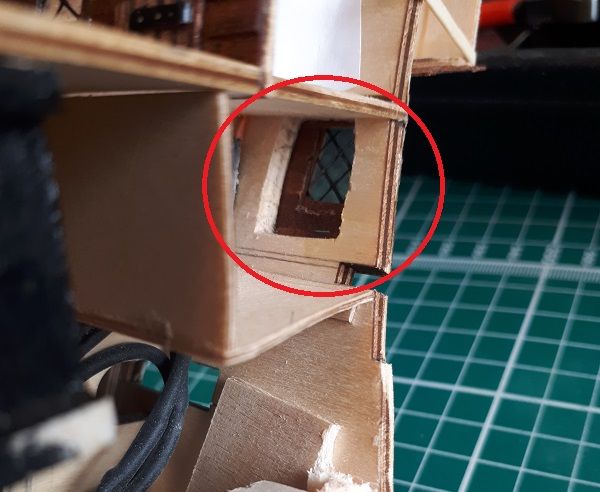 Here is the bow finished witch some sanding done. Dors are dry fitted for now because more sanding will be done after finishing the planking.Also I have to cut hole for the helm, I have this marked but is not visible on the picture. As you can see I decided to use 45 degree pattern on top part of the bow and I have to say I really like final result.  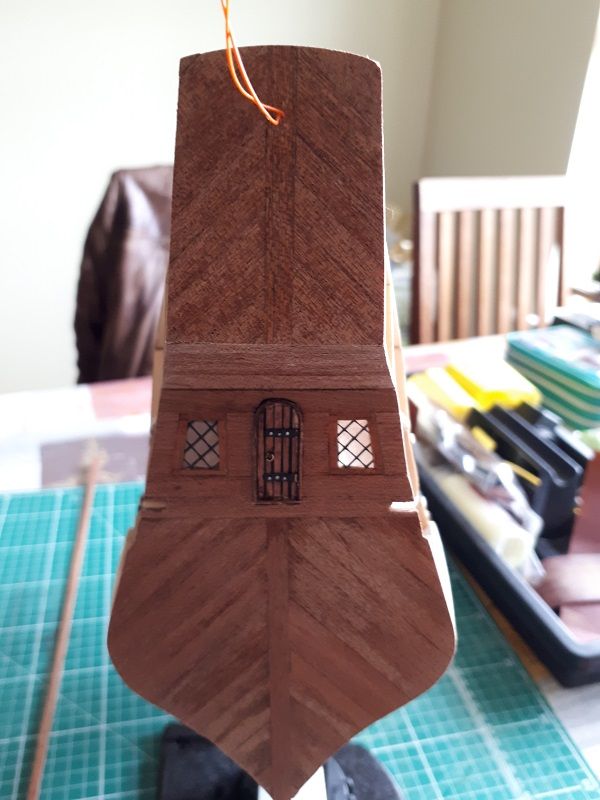 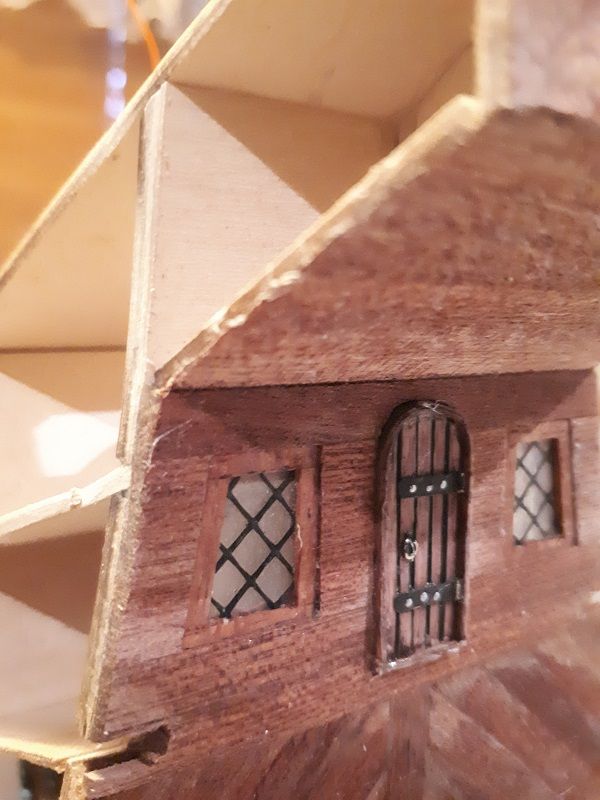 Have a good weekend everyone! Arek
|
|
|
|
|
Happy to be of help Arek.... I do like the changes you've made, looking great and very well done too.... Regards Alan
|
|
|
Rank: Pro Groups: Registered
Joined: 26/05/2015 Posts: 121 Points: 366 Location: Wexford, Ireland
|
Hi, After long time of browsing through other members dairies, and some consultations I finally started planking! I have to say this forum is great resource for information also all help from other members is much appreciated! When I was looking for some examples of planking in google i came across pictures of bow section San Francisco 1 and I really like the way that plank follows the curve of the hull to the head rails.  without splitting between those two parts. Supplied planks are long enough to achieve that with one piece and I want to use that on my model. I just have to find some way to fit falconets at the bow. Because off all that I started planking slightly higher than instruction says. When I removed all laser catted parts I stored what left. Using part from the bottom of the bulwark I transferred bottom curve of the bulwark on to my ship and used this as my starting point for planking. 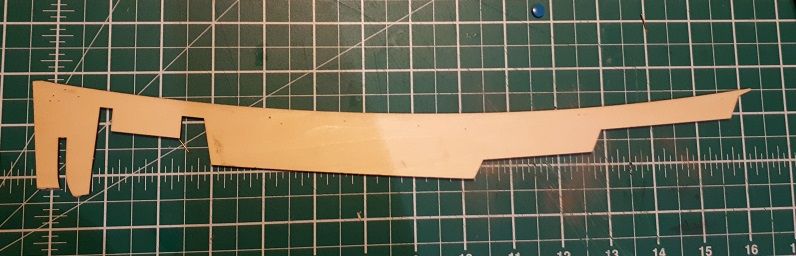 After that I nailed this piece in to the plywood and used as a template for my first plank. Timber was soaked in the hot water for about 20 min then simply using clamps I created curve and left this for couple hours to dry. I don't think I'm going to use this for all my planks as curve probably will change when I progress with planking but it was really helpful for the start especially doing planking for the first time. 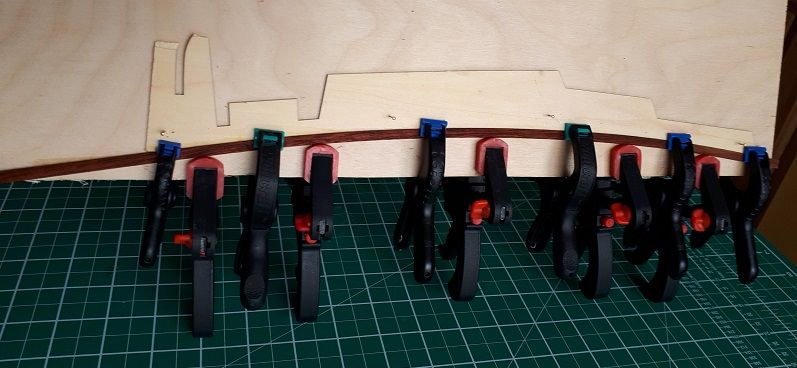 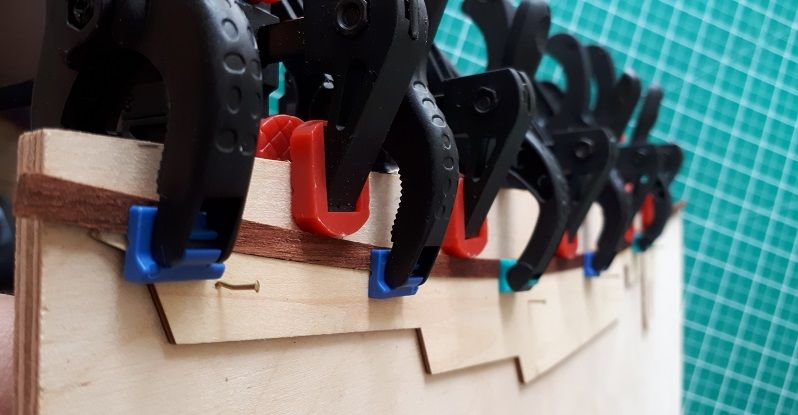 Then I marked part that need to be curved around bow , soaked that part again in hot water and using electric plank bender I created desired curve. Have to say that was my first experience with this tool and it was very easy to create curve, just have to take your time when doing this. Here is first plank ready to fit. By looking at the shadow of the plank you can see upward bend on the stern part and nice curve on the bow. 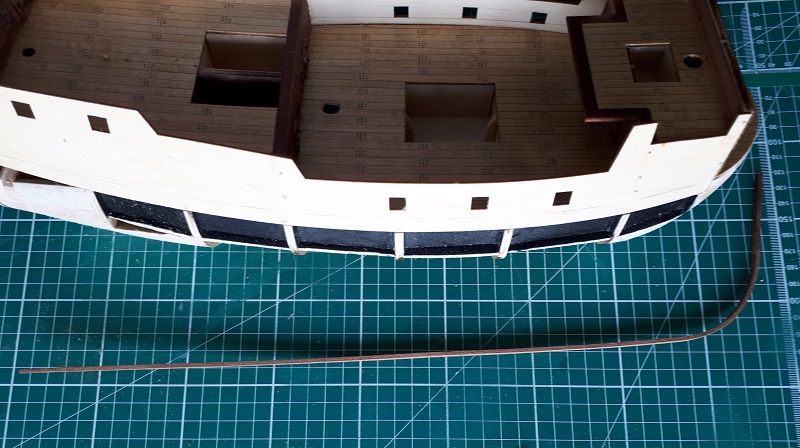 After all that i fitted first two planks on the top and garboard on the one side. 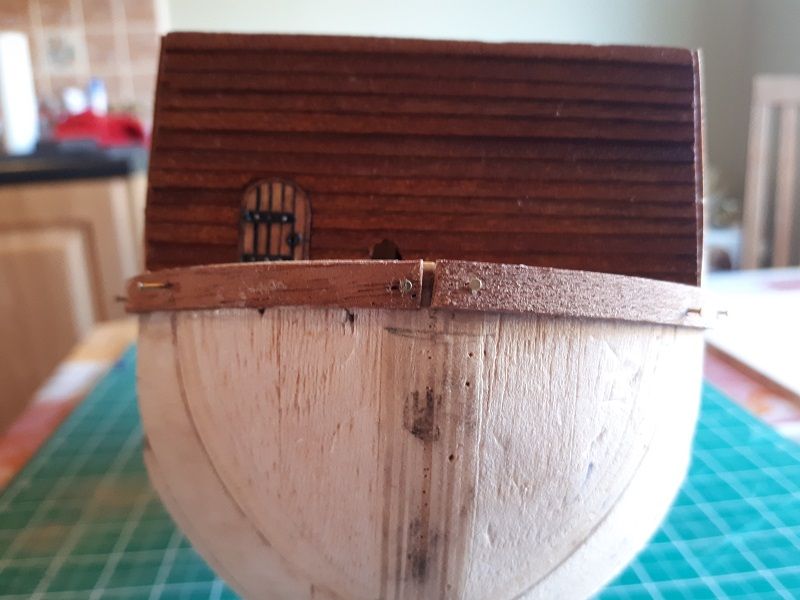 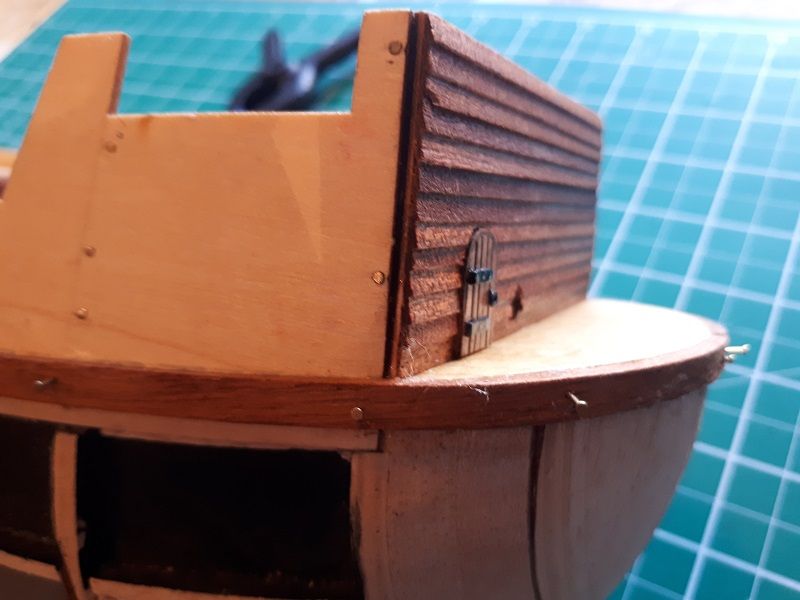 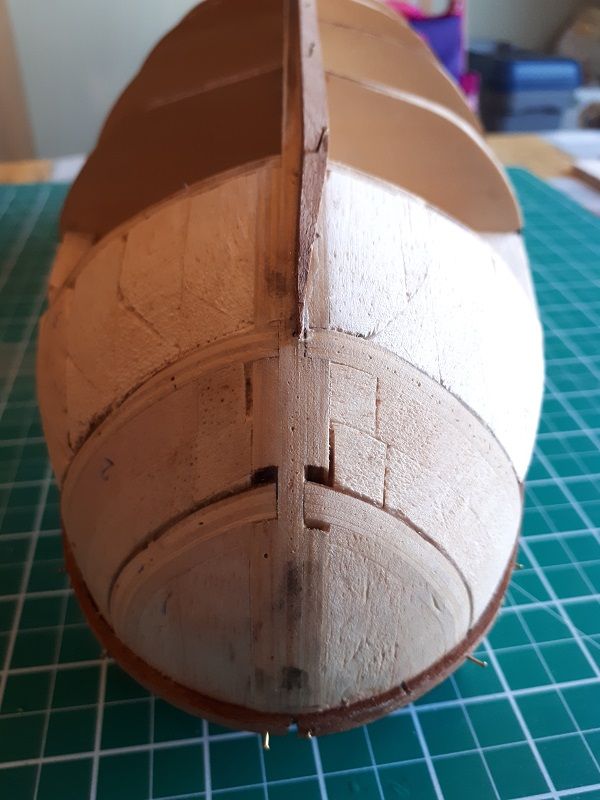 That was the easiest part, for now my plan is to fit second plank beside the garboard plank then I will start adding planks on the top moving downwards. I will start tapering them slightly an the bow part and see what is going to happened  Any thoughts, suggestions and comments are more than welcome !
|
|
|
 Rank: Super-Elite     Groups: Registered
Joined: 11/11/2009 Posts: 3,432 Points: 10,280 Location: Bâe Colwyn, Wales
|
great update, look forward to seeing more progress. Chris On the bench 1/350 Revell Tirpitz Platinum Edition (Pontos PE and Wooden deck) plus extra Eduard PE set and extra MK1 door sets.
|
|
|
Rank: Pro Groups: Joined: 24/08/2009 Posts: 48,051 Points: -13,308
|
Coming along well
|
|
|
Rank: Pro Groups: Registered
Joined: 26/05/2015 Posts: 121 Points: 366 Location: Wexford, Ireland
|
magpie1832 wrote:great update, look forward to seeing more progress. Chris Hi Chris, Thanks for stopping by and kind comment. I was looking in to your dairy for some inspiration but unfortunately apart from first page all photos are not displaying. Anyway your second photo with information about not to file part on the stern saved me from a loot of trouble. Thanks. Arek
|
|
|
Rank: Pro Groups: Registered
Joined: 26/05/2015 Posts: 121 Points: 366 Location: Wexford, Ireland
|
Hi all, Here where I'am at the moment after whole weekend of soaking, bending, tapering and gluing I start tapering planks on the bow from second row. For all planks "work flow" was as follows: 1 - marking area at the bow that need bend and taper 2 - soaking for approx 20 min in hot water 3 - bending using electric plank bender 4 - tapering using sand paper 5 - pre-drilling holes for nails 6 - fitting Some of planks need to be soaked again and bend again to achieve better fit. Here is plank ready to fit 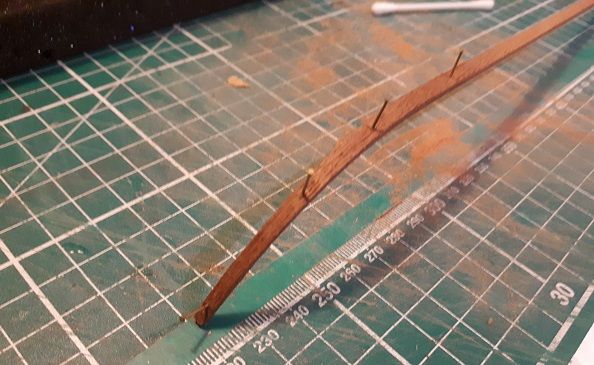 End result. Sides look fine to me but I'm getting small clinker effect on the bow. I'm assuming that all this will be gone after sanding down  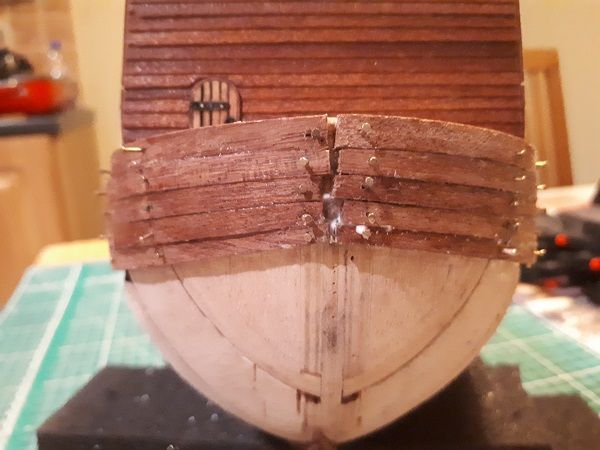 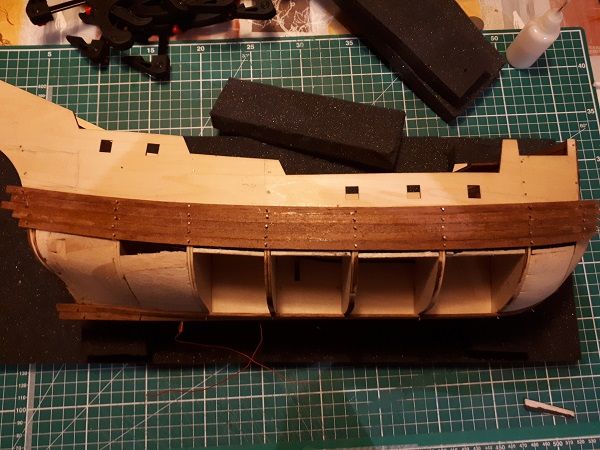 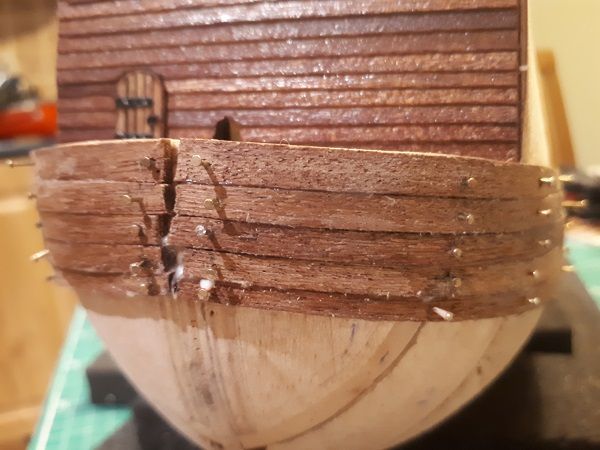 Garboard palnk. 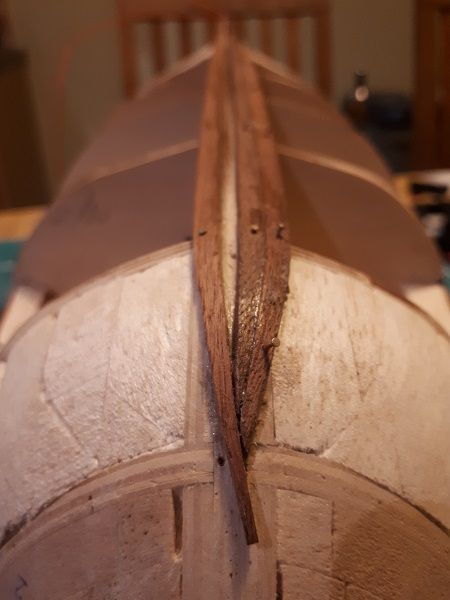 I don't like the look of that but by looking at other member dairies that how it should look, again more sanding I assume. 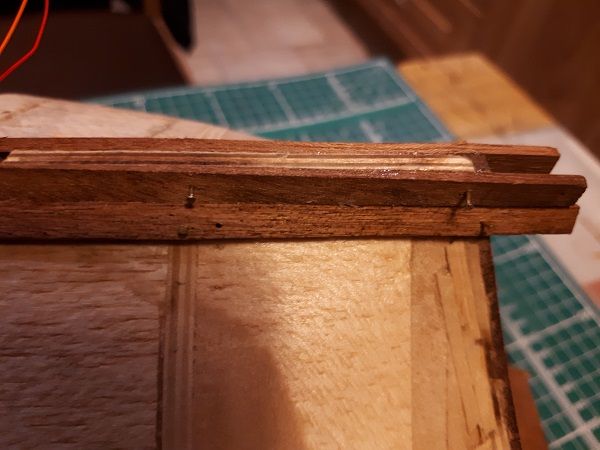 Bussy wekeend... Thanks all for looking Kind regards, Arek
|
|
|
|
|
Nice work Arek and nice progress.... As a tip, always ensure the planks sit flush on the frames and let the plank lie the way it wants to around the bow, don't force the plank laterally to get it to sit against the plank already fitted. If the plank wants to climb up over the plank already fitted then that marks the start of your taper... Look forward to your next update..... Regards Alan
|
|
|
Rank: Pro Groups: Registered
Joined: 26/05/2015 Posts: 121 Points: 366 Location: Wexford, Ireland
|
Hi Alan, Thanks for the tip, any help is much appreciated. Regards, Arek
|
|
|
|
|
 Looking good and nice work Current builds:-C57,Zero, Lamborghini Countach, Caldercraft HMS Agamemnon,Robi,R2-D2, MFH Cobra .
|
|
|
Rank: Administration  Groups: Registered, Forum Support Team, Administrators, Global Forum Support Team, Moderator, Official Builds Joined: 09/11/2012 Posts: 7,951 Points: 23,039 Location: East midlands
|
Planking looking good. Congrats on your "Blue" medal for running a diary along with apologies that it has been overlooked for such a time. Regards delboy271155 (Derek) COME BACK GUY FAWKES "YOUR COUNTRY NEEDS YOU"
|
|
|
Rank: Pro Groups: Registered
Joined: 26/05/2015 Posts: 121 Points: 366 Location: Wexford, Ireland
|
delboy271155 wrote:Planking looking good. Congrats on your "Blue" medal for running a diary along with apologies that it has been overlooked for such a time. Regards delboy271155 (Derek) Thank you very much! To be honest I always wander what is meaning of all those medals At least now I know what I have to do to be awarded blue medal Regards, Arek
|
|
|
 Rank: Elite  Groups: Registered
Joined: 20/04/2012 Posts: 1,787 Points: 5,292 Location: Thurso
|
Nice start with the planking, looking good.
Graeme
|
|
|
Rank: Pro Groups: Registered
Joined: 26/05/2015 Posts: 121 Points: 366 Location: Wexford, Ireland
|
Hi all, First I decided to add some planks on the keel. Noticed that this required bending plank in two directions. So... I made template from thin balsa wood, transferred curve on the plywood, soaked my planks and left in the jig for about 24 hours. 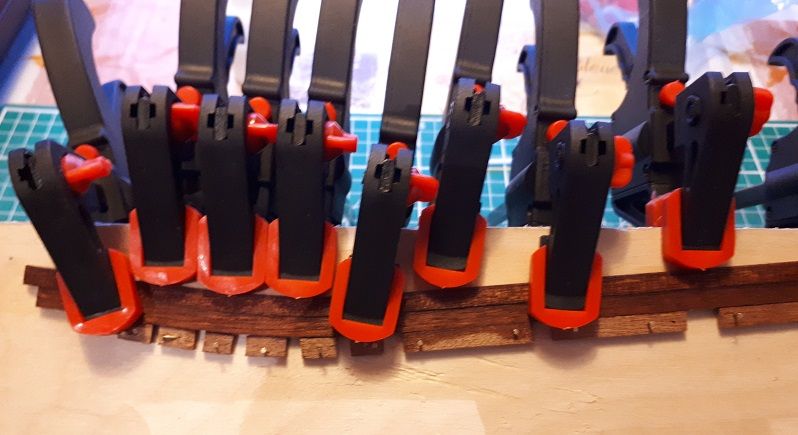 Then bend again using electric plank bender and added some taper. 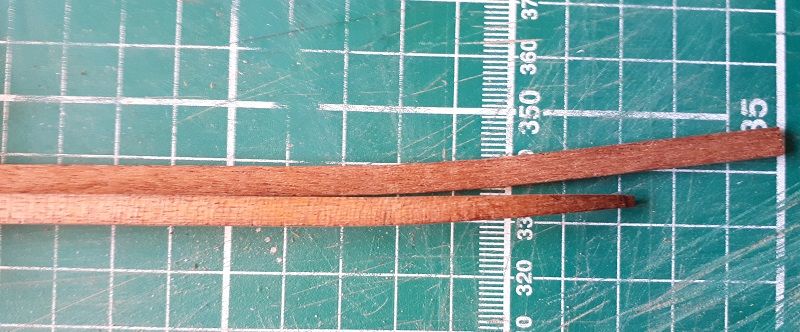 I think it actually work well but if I continue on the kell that curve is going to increase dramatically with next 2 or 3 planks as I move towards the top.  Because of that I decided to add more planks on the top and move towards the keel. I think that this actually works better for me. Also shortly I gonna have too add stealer and dropper when I get closer to the keel. From what I measure at the moment if I keep same thickness of the planks on the bow I gonna need one or two droppers. 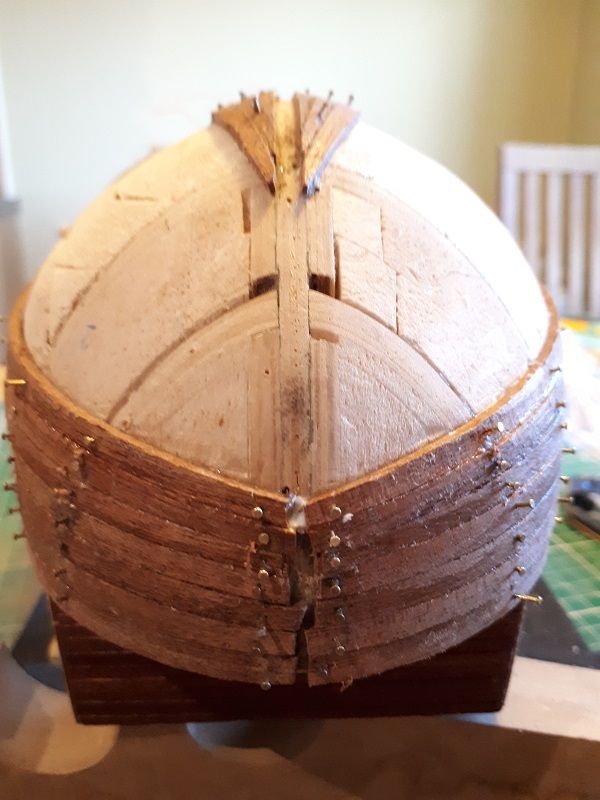 So this is the plan for the moment: work from top towards the keel and pray for the best when all the planks meet in some point Ad finally I have to trim tops of those nails, as my daughter said today my ship look more like hedgehog at the moment Another busy weekend ahead.. Regards, Arek
|
|
|
|
|
Hi Arek Looking good so far as for your planking I would add another two strips to the keel rows then start working down towards them. As you progress you may need to add more to the keel or upper hull as you go. As for the nails once the glue is dry you can simply pull them all out and then apply warm water on to the holes to swell them shut. Any holes that are still there when it comes to the sanding stage just squirt pva into the holes and as you sand the sawdust will mix with the PVA and fill them. Hope this helps. Andy Current builds:-C57,Zero, Lamborghini Countach, Caldercraft HMS Agamemnon,Robi,R2-D2, MFH Cobra .
|
|
|
|
|
Looks like you have everything under control Arek, looking good... Regards Alan
|
|
|
Rank: Super-Elite  Groups: Registered
Joined: 28/07/2014 Posts: 4,269 Points: 12,713 Location: Scotland
|
You are doing excellent work on this well done regards Phil COMING SOON =1/72 Italeri diorama`s Battle for the Reichstag and Stalingrad battle at the tractor factory 1/16 Trumpeter King Tiger with loads of extras ON THE GO= refurbishment of 1/25 Tamiya tiger 1 , amt Star trek kits and space 1999 models
So Much to Build,But What a Hobby!
|
|
|
Rank: Pro Groups: Registered
Joined: 26/05/2015 Posts: 121 Points: 366 Location: Wexford, Ireland
|
arpurchase wrote:
Looking good so far as for your planking I would add another two strips to the keel rows then start working down towards them. As you progress you may need to add more to the keel or upper hull as you go.
I will follow your advice on this. Thanks for the tip. arpurchase wrote:
As for the nails once the glue is dry you can simply pull them all out and then apply warm water on to the holes to swell them shut. Any holes that are still there when it comes to the sanding stage just squirt pva into the holes and as you sand the sawdust will mix with the PVA and fill them.
This is actually very interesting because I really don't like the idea of having the visible and I was already wandering how to get rid of those holes if I remove nails. Just one question on this: Should I thin PVA using water and literary spray? or simply "inject" some in holes just before sanding? Regards, Arek
|
|
|
Rank: Pro Groups: Registered
Joined: 26/05/2015 Posts: 121 Points: 366 Location: Wexford, Ireland
|
Gandale wrote:Looks like you have everything under control Arek, looking good... Regards Alan Hi Alan, Only looks like that on the pictures Regards, Arek
|
|
|
|
Guest
|
 US
US

