|
|
 Rank: Pro    Groups: Registered
Joined: 06/08/2015 Posts: 276 Points: 817 Location: Monrovia, Ca
|
Nice work on the cockpit. As far as photos, I use photobucket. You can set up an account for free and upload your pictures to it. Then you can cut and paste into your posts to the forum. There is a tutorial explaining how to do it at the top of the Model Space forum. Hope that helps. Stephen Current Builds: HMS Sovereign of the Seas /// Lamborghini Countach /// Eaglemoss BTTF DeLorean
Finished Builds: Millennium Falcon
|
|
|
 Rank: Semi-Pro Level 2 Groups: Registered
Joined: 04/09/2015 Posts: 92 Points: 256 Location: Atlantis
|
I just purchased a set of the cockpit photo etchings and am really enjoying your experience with this upgrade. Keep up the good work!
|
|
|
 Rank: Amateur Level 1 Groups: Registered
Joined: 20/07/2015 Posts: 35 Points: 108 Location: Marietta, GA, USA
|
I've done quite a bit of work since I last updated my diary -- so I'm going to post several updates at once. Rather than dump them all in one big update I'll try to do one post per topic. First topic -- finishing up the ParaGraphix cockpit. Previously I'd finished up the main control console, so what was left was the rear shell. After finishing the front pieces, this assortment is what I called my Cockpit Construction Set: 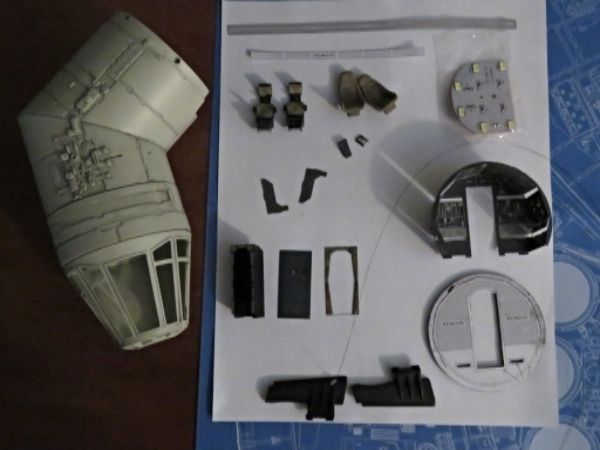 I modified the bulkhead and added some foil tape in the door -- I'm doing this anywhere there are LEDs, but in this case I'm not sure it was really needed since the LED is positioned directly behind the small opening, so trying to 'smooth out' the light was not really needed. I didn't hack away as much of the outer bulkhead as suggested because I'm putting additional LEDs on the shell and I'm not counting on the standard LED board to light up the side panels. I also drilled holes under the floor where the wires for the LEDs and the fiber optics will pass. 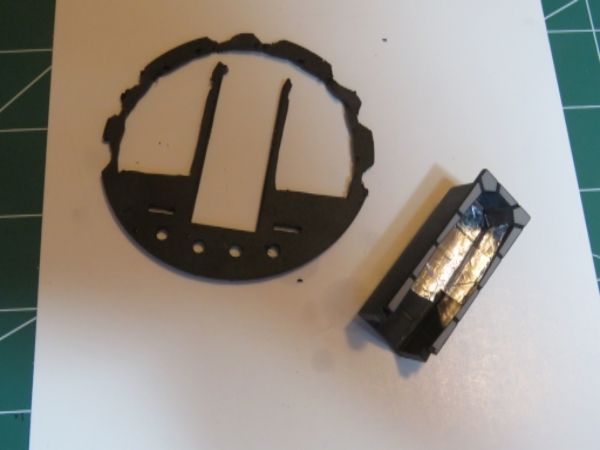 Adding some fiber optics to the side panels. I also added a few next to the 'knob' on the center console but didn't get a picture of that. 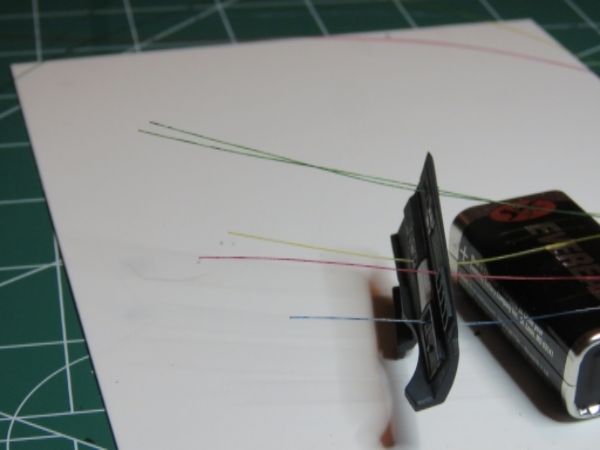 The fully decaled rear shell. Strips cut from a .010" styrene sheet were glued over the light bars. Tamiya transparent paints were used to get the colors to pop a bit more -- really love the way that turned out. 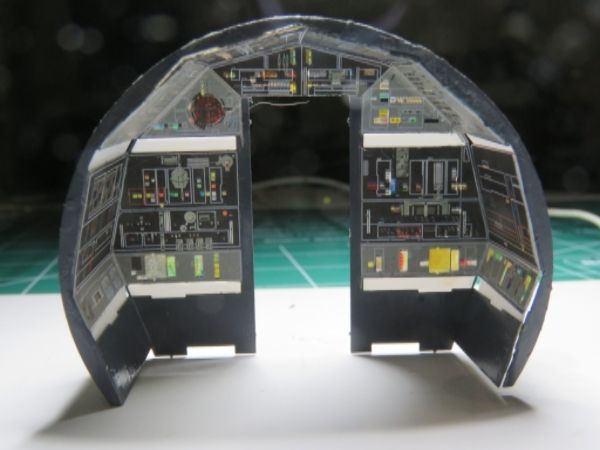 After attaching the blackout tape provided with the kit, I added another layer of foil tape to help the LEDs mounted on the side of the shell reflect back. After this photo I added more foil tape forward of where the bulkhead mounts. 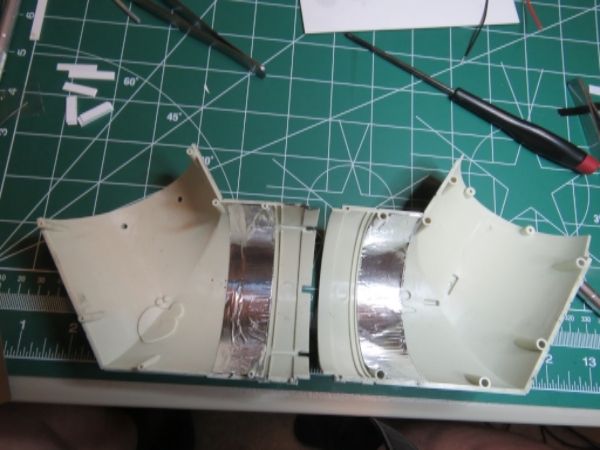 The photoetch brass mounted to the bulkhead and installed in the cockpit tube  Showing the additional LEDs added on the shell. I used two circuits of 4 LEDs each. Positioning was mainly based on where there weren't cutouts, but I also tried to stagger them a little so there wasn't just a bright line of LEDs down the middle. 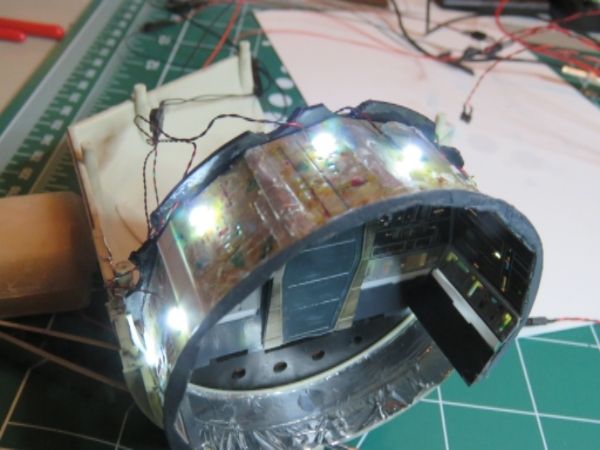 Everything lit 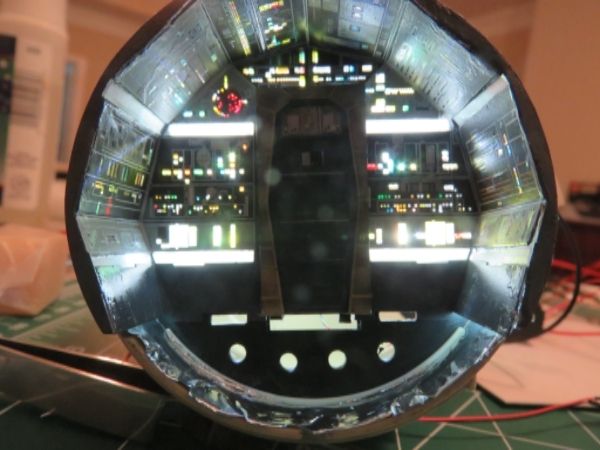 Now the front part of the cockpit finished previously can be attached to the completed bulkhead 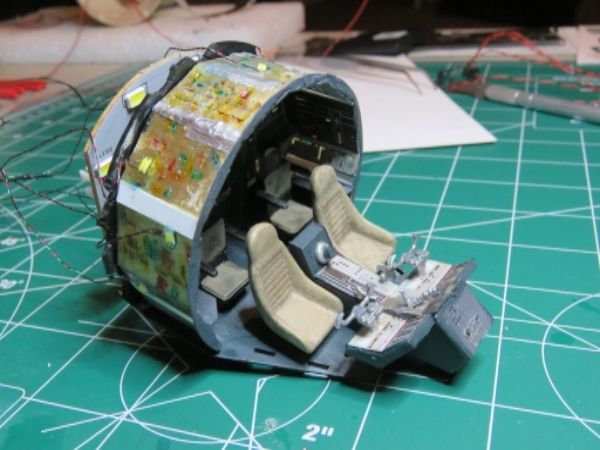 The completed assembly was put back in the cockpit tube. I found it kept trying to 'pop up' so I glued it in on the bottom. I find the cockpit tube doesn't close up well and there is some real light leakage where the top and bottom meet .. I need to track down the problem and fix that (no photos of that here). I also haven't attached the cockpit nose cone so in the pictures that include it, it's really just sitting unattached in front of the cockpit tube (and rotated slightly out of position that I didn't notice when doing the pictures). (I didn't get the fiber lit up for these pictures so I may do some additional shots later that catch that .. but for the moment I've moved on to the hold :-) ) 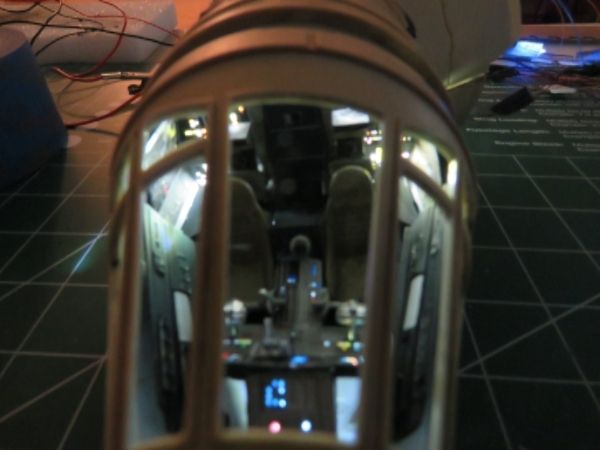 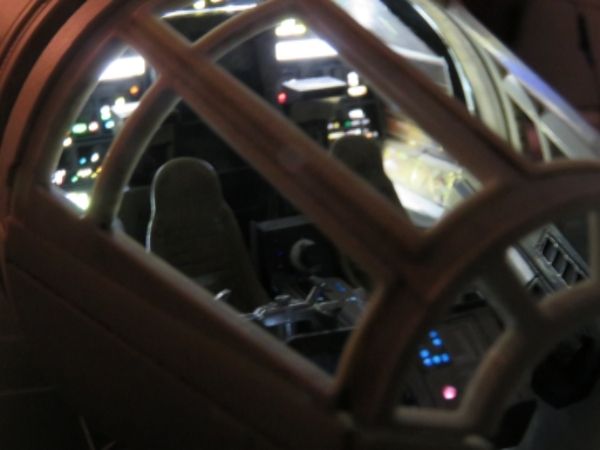 This last shot shows that I managed to really get the center console mounted with a definite tilt to it ... but it most angles it's not noticeable. It's just that way because Chewie is taller and wants his side of the console a bit easier to reach. (The unattached nose is also skewed a bit but that will get corrected when it's attached for real) 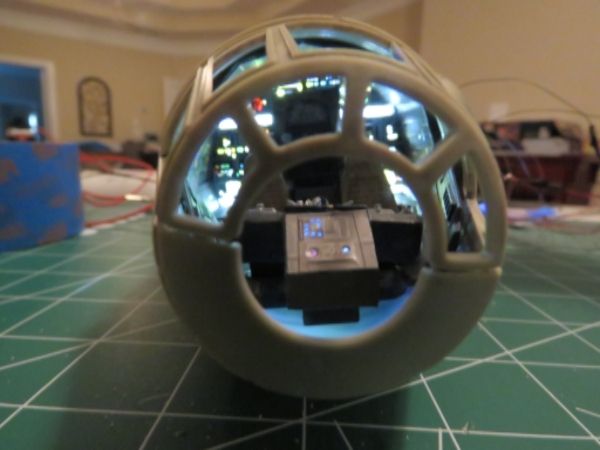
|
|
|
Rank: Amateur Level 1 Groups: Registered
Joined: 20/07/2015 Posts: 35 Points: 108 Location: Marietta, GA, USA
|
(Update #2 for today) The remaining updates all all for bits and pieces of the ParaGraphix hold kit. None of these are complete so all are showing where I've made it to so far with the build. Starting with the floor - after laying the photoetch over the standard piece and marking where the maintenance pits need to be cut: 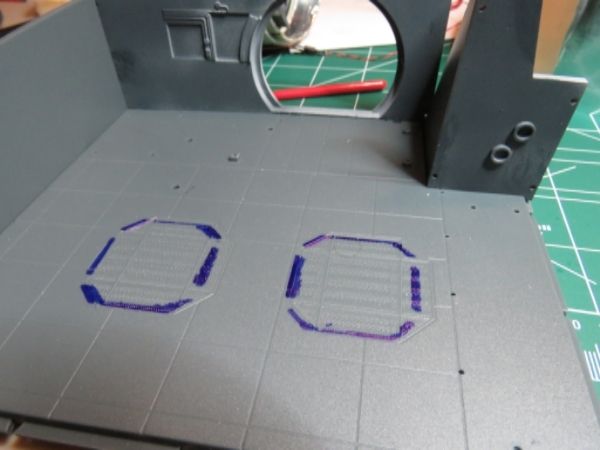 Used a drill to start the pit removal 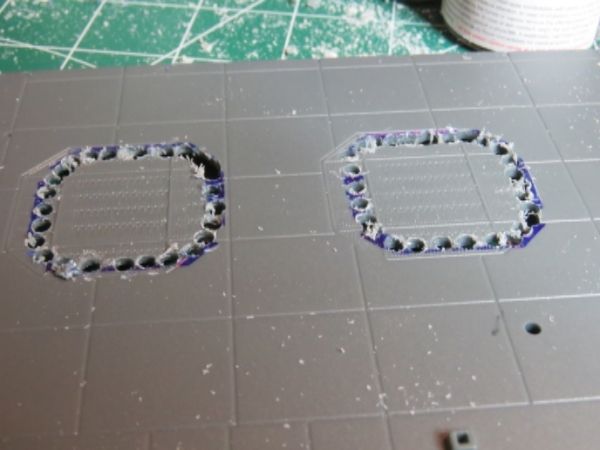 Then used a Dremel cutting disc to remove the centers, and various files to clean up the edges somewhat. Did some trial-and-error test fits of the drop-in pit sidewalls to find places where I hadn't quite removed enough. With the sidewalls in place, I scribed some lines showing where I should remove a little bit of the floor to allow the sidewalls to sit flush -- but I haven't figured out how to do this. Anyone tackled this task yet and have a suggestion? 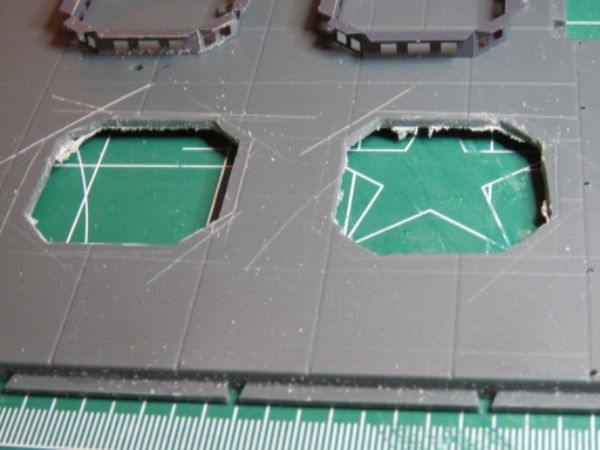 That's where things currently stand with the floor
Now on to the seating area. Filed off the raised detail -- I guess I could have skipped this and gone straight for the drilling. 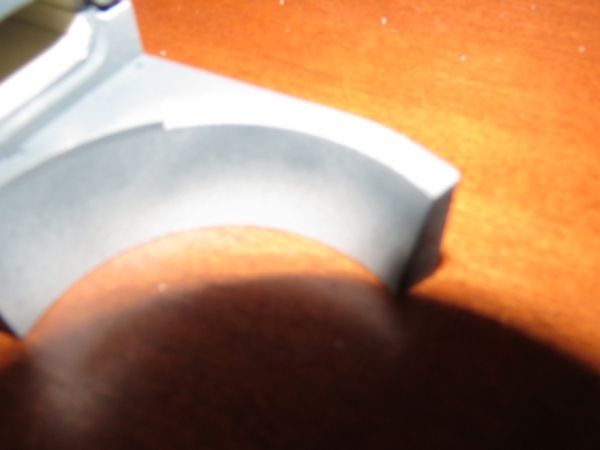 Drilling 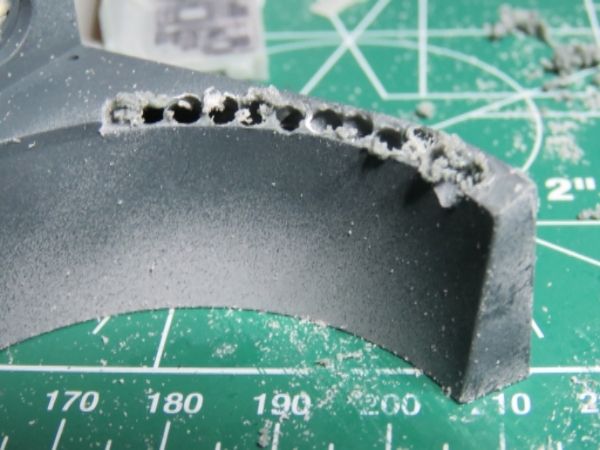 Filing and cleaning up best I could 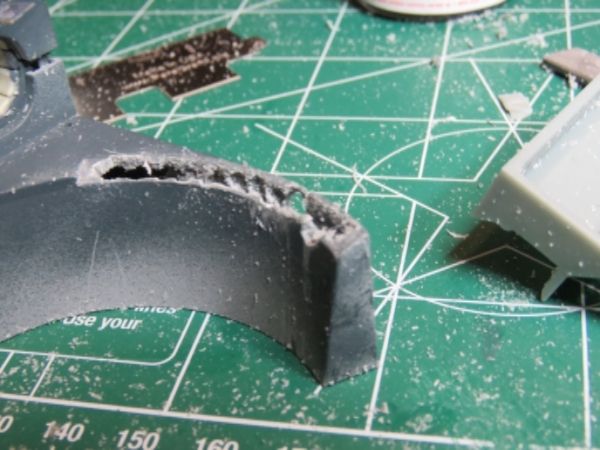 As much as that last pic looks like a disaster, with the photoetch laid in place it looks like things are actually in pretty good shape. 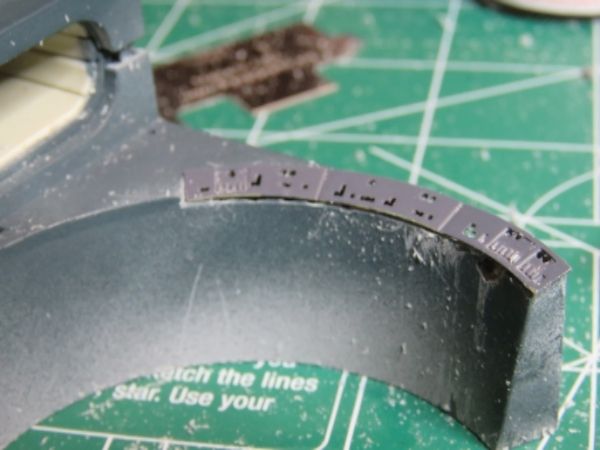 That's where things stand with the seating area. My todo list: - I have a Shapeways hold bunk on order because I didn't get the pads the right way around on mine and it won't really go together. So I'll be lopping that off and putting in a replacement. - Need to shove some LEDs up under the control panel and glue it into place. - Decals, Micro Kristal Klear, transparent paints as needed for the control panel. - Haven't yet tried installing the smaller control panel that goes on the seating area, will get to that soon. (Nav computer and hold circular door will be in Update #3 - I hope to get that up today, but I've got a little more I want to try to do on the door this afternoon so I'll see if that goes well I'd like to document it in the next update).
|
|
|
|
|
Fabulous work, looking the biz.....  Regards Alan
|
|
|
 Rank: Super-Elite     Groups: Registered
Joined: 27/01/2014 Posts: 5,060 Points: 14,980
|
Brilliant work Myawn, I really must crack on and get some more of mine done
|
|
|
|
|
 Looking good  Current builds:-C57,Zero, Lamborghini Countach, Caldercraft HMS Agamemnon,Robi,R2-D2, MFH Cobra .
|
|
|
Rank: Amateur Level 1 Groups: Registered
Joined: 20/07/2015 Posts: 35 Points: 108 Location: Marietta, GA, USA
|
Update #3 for today -- Navigation computer (partial) and hold door (complete) Here's the original navigation computer part  Now drilled out the parts that will be replaced by the photoetch 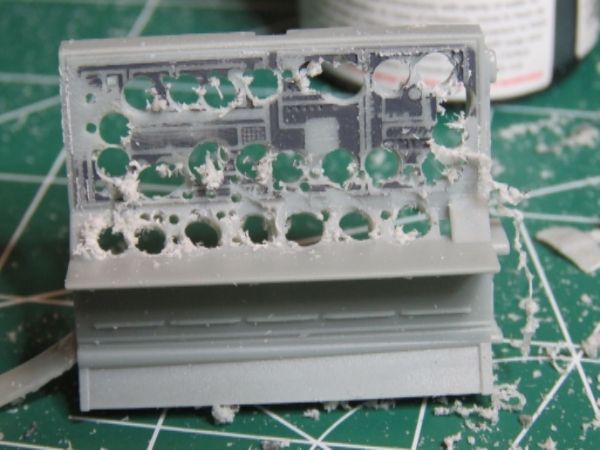 Cleaned that up by filing 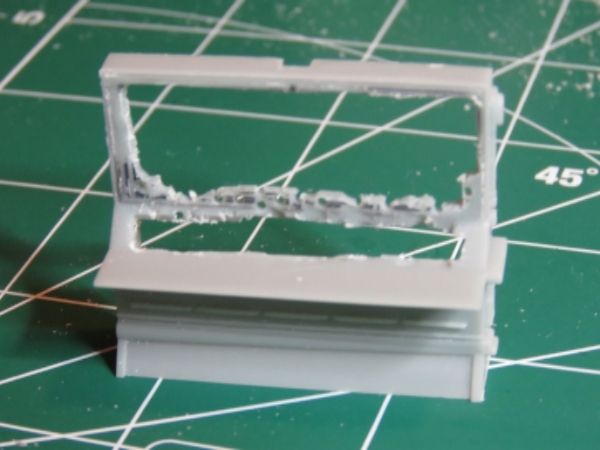 Glued on the photoetch pieces 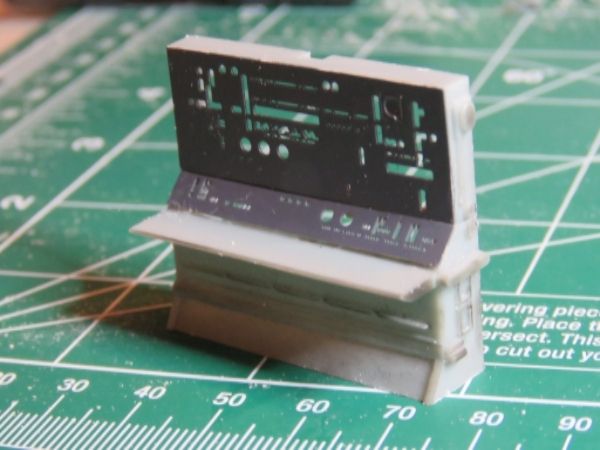 Micro Kristal Klear added (shown before dry) 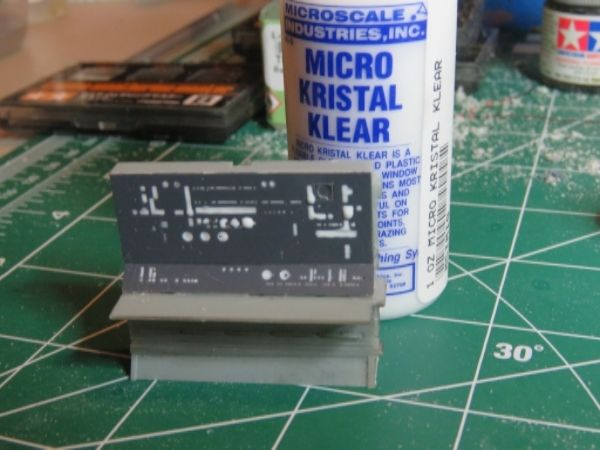 The remaining work here is to add transparent paints, lighting, and decals. Then there is the optional step of adding on some styrene pieces to give it a bit of dimension. I've got some small styrene rod but couldn't find hollow tubing in the 1/16" size need for the binocular viewer. I may see if I can drill out the styrene, the other option is go try copper tubing there. I'd like to try to have something hollow there so the lighting can shine through -- although I'm not sure how visible it will be.
Here's the hold wall -- plant on details just laid in place just as taken from the sprue 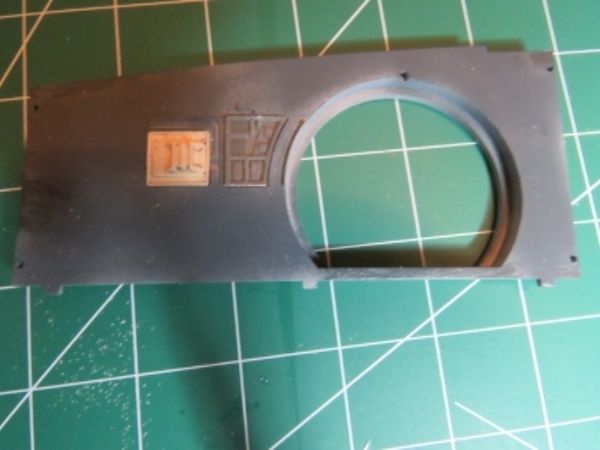 A jeweler's saw turned out be to just the thing to remove most of the detail from the outer ring (the dividers will be replaced by the photoetch) 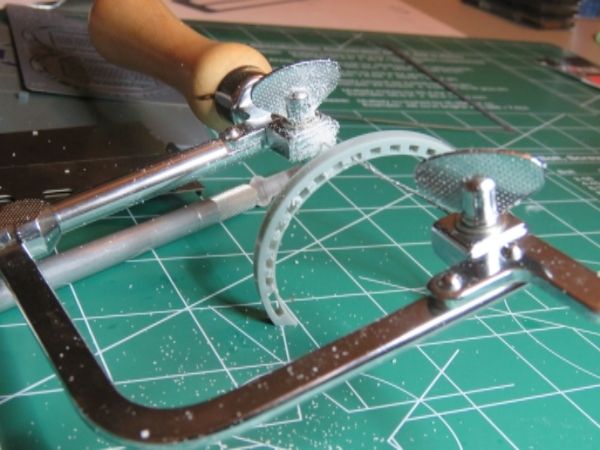 Painted and weathered plant-on pieces. The modified outer ring was glued into place. With all the cross pieces removed, it's pretty flimsy so needed to be clamped when glued to the inner ring. 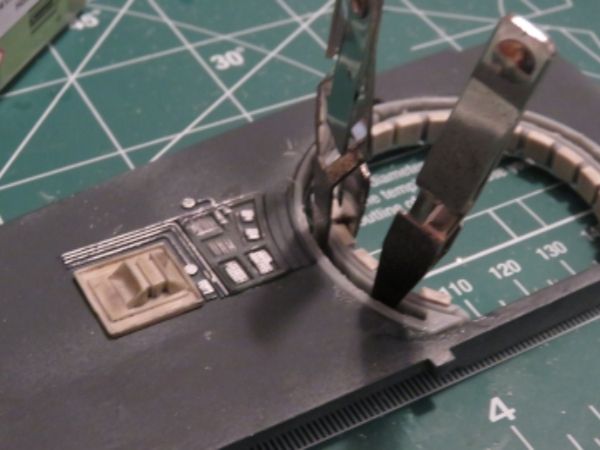 Inner and outer rings complete, just need the photoetch to complete it. 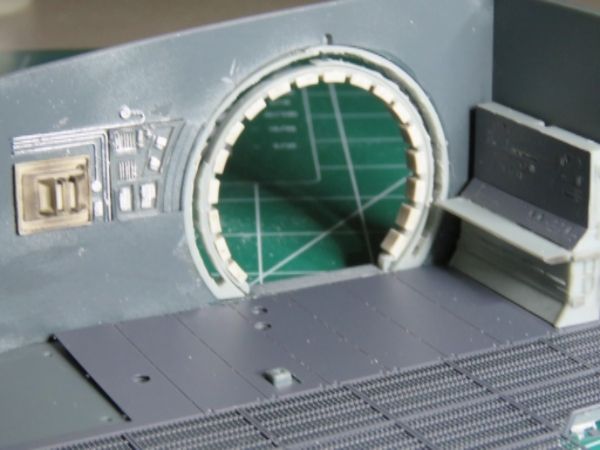 36 gauge wire was woven through the photoetch piece and then that was glued into place 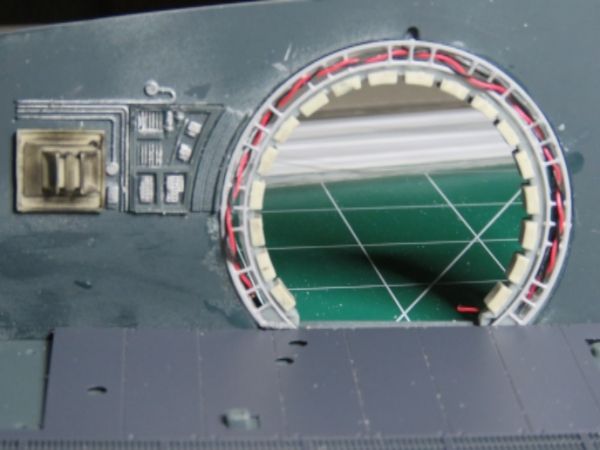 Still need to add the pipes but otherwise this is done.
|
|
|
Rank: Administration   Groups: Registered, Forum Support Team, Administrators, Global Forum Support Team, Moderator, Official Builds Joined: 09/11/2012 Posts: 7,951 Points: 23,039 Location: East midlands
|
Congratulations on your blue medal. Your build is looking good. Regards delboy271155 (Derek) COME BACK GUY FAWKES "YOUR COUNTRY NEEDS YOU"
|
|
|
Rank: Pro Groups: Registered
Joined: 06/08/2015 Posts: 276 Points: 817 Location: Monrovia, Ca
|
Looking great. Always love seeing how others are customizing their builds. I will be watching with interest. Current Builds: HMS Sovereign of the Seas /// Lamborghini Countach /// Eaglemoss BTTF DeLorean
Finished Builds: Millennium Falcon
|
|
|
Rank: Semi-Pro Level 2 Groups: Registered
Joined: 04/09/2015 Posts: 92 Points: 256 Location: Atlantis
|
Your build is really progressing and your step by step photos are extremely helpful. The cockpit lighting is amazing!
|
|
|
Rank: Amateur Level 1 Groups: Registered
Joined: 20/07/2015 Posts: 35 Points: 108 Location: Marietta, GA, USA
|
A few updates today on various parts of the hold ... awaiting the month 4 shipment for the final hold wall, and a Shapeways replacement bunk, and then I'll be able to finish this up. At least until I think of something else or get inspired again by one of you guys :-). The hold door was nearly complete in my last update -- I just needed to add the pipes 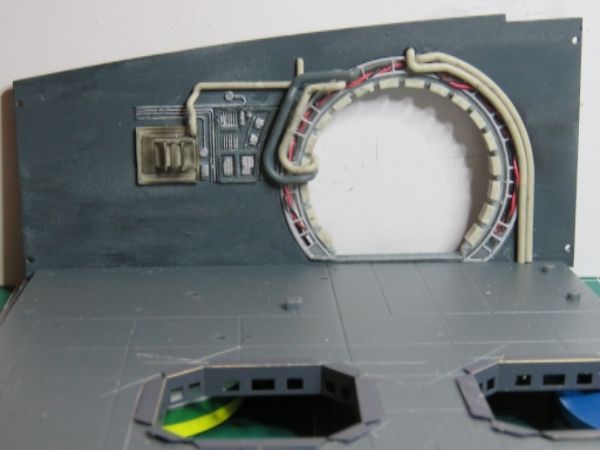 The technical station was also fairly far along; I'd finished adding the photoetch but hadn't yet done the transparent paint or decals. This is after the transparent paints; light source is my desk lamp. 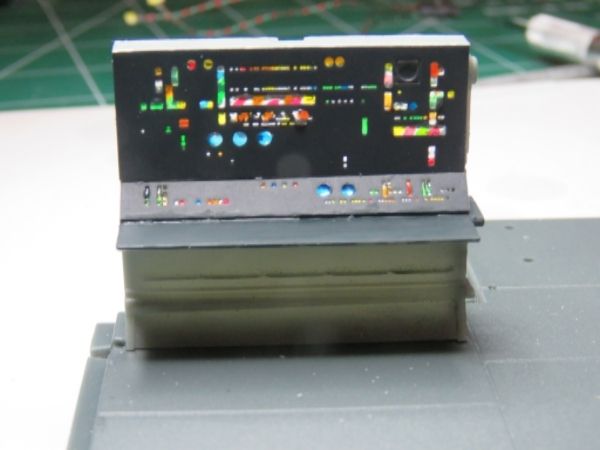 The station is too narrow to put the LEDs inside, so I drilled some holes in the wall and put the LEDs there. 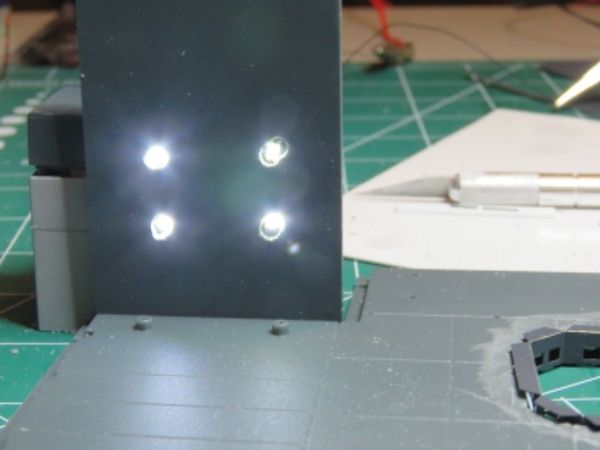 Now the Technical Station is placed in front of the wall -- the lighting is still a bit uneven but I think it's OK. There's a little bit of light bleed through the bottom part of the station, that I'll try to improve with a few strips of styrene 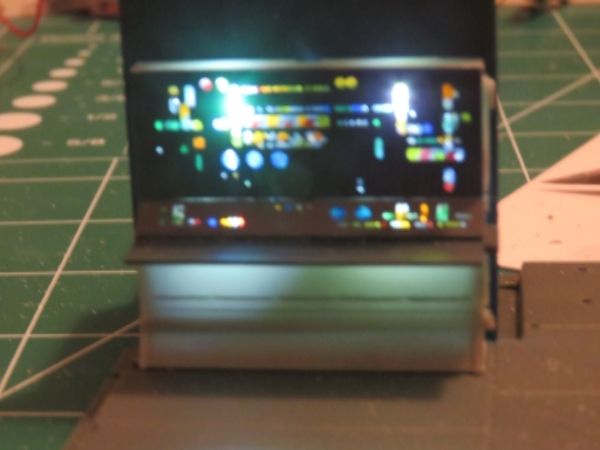 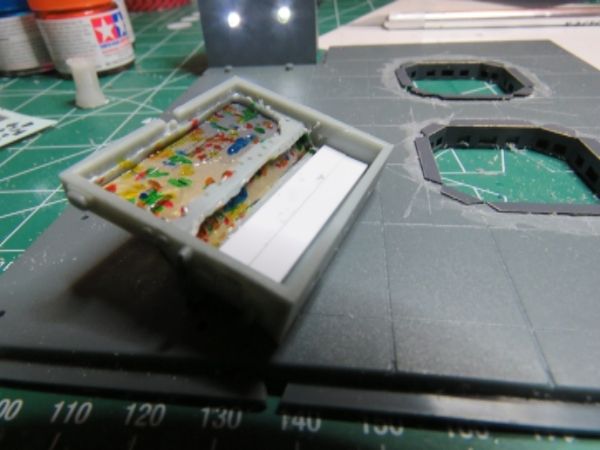 Now I can add the decals 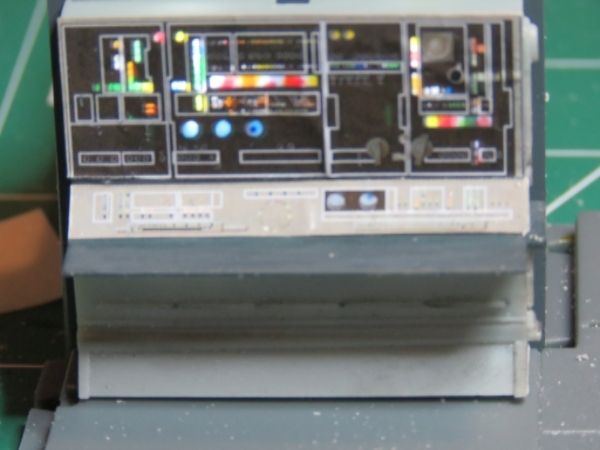 I've cut and painted some styrene rod and copper tubing to use for some plant-on details, but won't put those in place until the final hold assembly so they don't get knocked around. So that's all with the station for now. I had a bit of a mini-disaster with the floor. I painted the stock floor black, and the photoetch a gunship gray. When it came time to attach the floor, I decided to use Gorilla Glue -- it has a longer set time (vs. superglue) and I thought I might need to slide around the pit sidewalls in relation to the floor, or just otherwise tweak things. Unfortunately, the glue seeped through the holes in the floor, and I ended up with a shiny lumpy mess all over the place. To recover, I just sprayed the entire assembly a flat black -- which took care of most of the shiny but there was still a bit of ugly texture. We'll just call it wear and tear. I then repainted the non-grill areas with a neutral gray and drybrushed the same color over the grill. The end result is a bit rougher than ideal -- but I think it's not too bad a recovery. Here's test fitting the sidewalls, with the main floor primered but not yet painted. 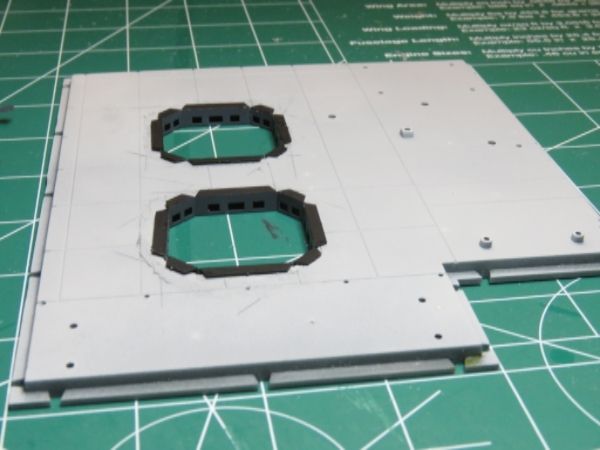 I guess I never took a picture of the glue mess stage -- so here it is after repainting everything black. You can certainly see the roughness caused by the glue seepage. 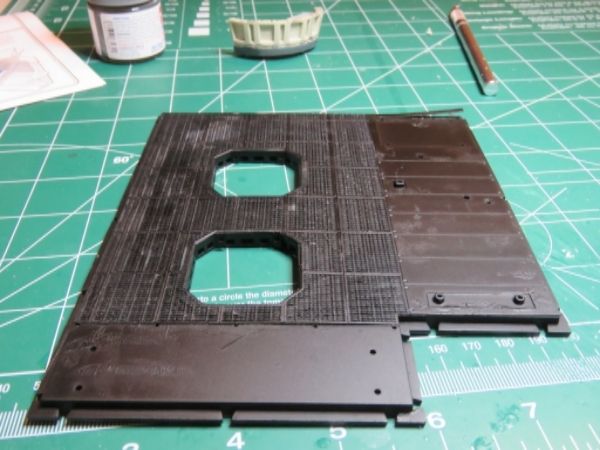 And then here is after the neutral gray coat -- I'm thinking not too bad, all things considered. 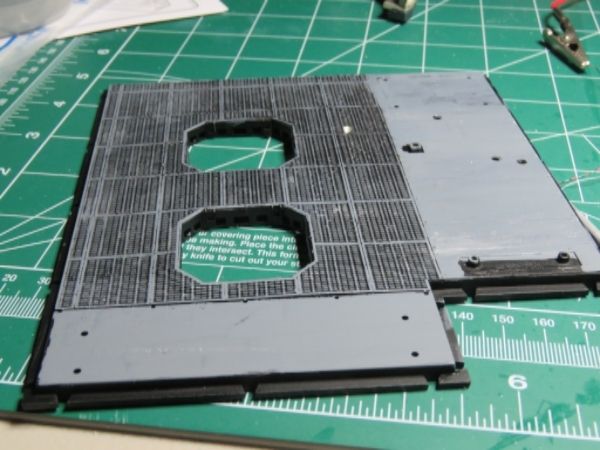 Since I'm waiting on the ShapeWays bunk, I can't do the main part of the seating area. But the ParaGraphix kit includes a small control panel that sits across the backless end of the seating area -- I decided to tackle that next. While it's not suggested in the instructions, I decided to detach that section. Partly it's because since I glued the cushion to the base already, I though maybe if I cut the end piece off I'd have access from the cut side to stick in an LED -- that turned out not to be the case so I had to drill through the bottom to create a path for the light. I decide, similarly to the technical station, to not put the lighting into the piece but let it come from outside the room -- in this case from under the floor, where there was already a conveniently located hold. Here's the intact couch before I started. 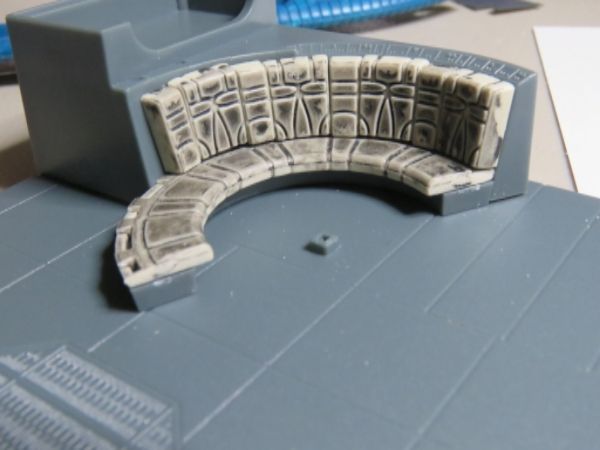 Now the end piece has been cut off, and the area to be covered by the panel has been drilled and filed. An LED was placed under the floor at the location where the positioning peg for this piece of the couch should go (and the positioning peg itself was cut off). 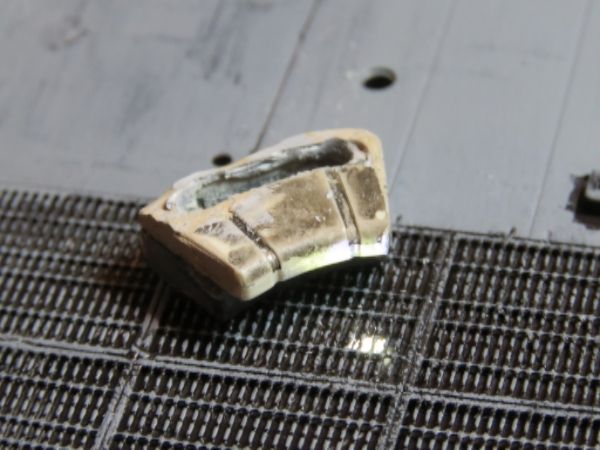 In order to give the control panel a bit of a forward tilt, I added some putty (shown here before it dried and was filed). 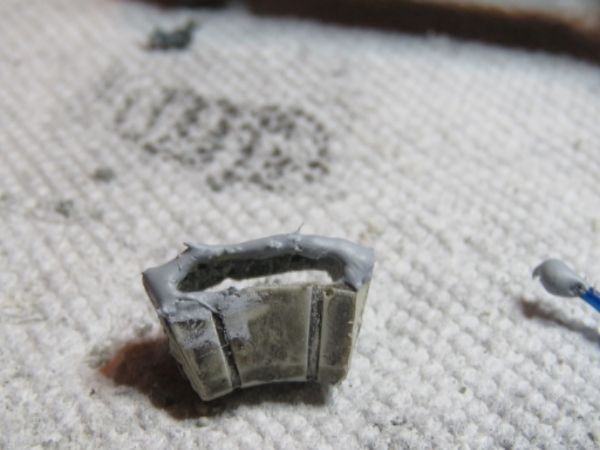 After filing and painting the putty, test fit the piece over the light. 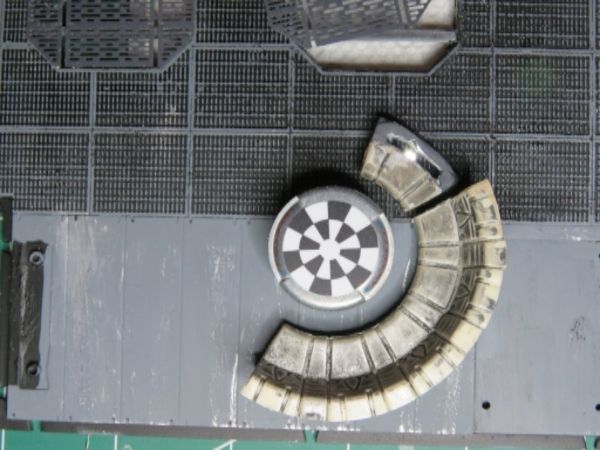 Added transparent paint (after Micro Kristal Klear). Did both the control panels while I was at it. 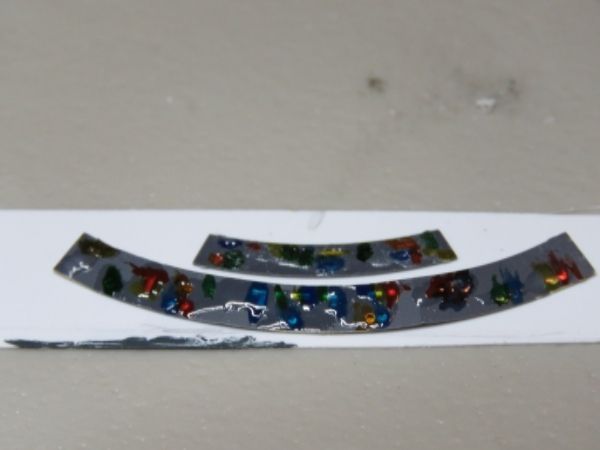 Checking the effect 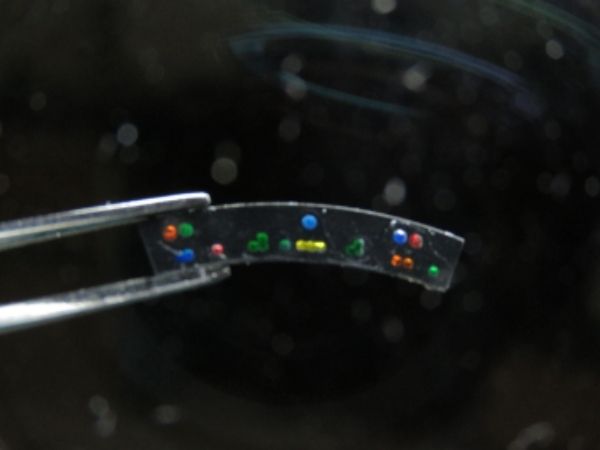 That's where I've left it for now; I hope to finish up over the weekend.
|
|
|
 Rank: Vice-Master Groups: Registered
Joined: 05/03/2015 Posts: 561 Points: 1,713 Location: South Carolina
|
Very nice work so far. Even if it is your first time with PE, you're doing a great job. Keep up the good work and am looking forward to see more of your progress!
|
|
|
Rank: Amateur level 2 Groups: Registered
Joined: 29/09/2015 Posts: 41 Points: 123 Location: USA
|
Your nav computer looks excellent. Love it!
|
|
|
Rank: Amateur Level 1 Groups: Registered
Joined: 20/07/2015 Posts: 35 Points: 108 Location: Marietta, GA, USA
|
Happy Thanksgiving to all the US folks! Enjoying a quiet morning before heading off to the family events, so taking the opportunity to upload a mixed bag of photos from recent build activity. I ordered a number of things from ShapeWays from the hold. The bunk and Dejarik table involved the most work, for the most part other things were just painting. Here's the assortment before any painting: 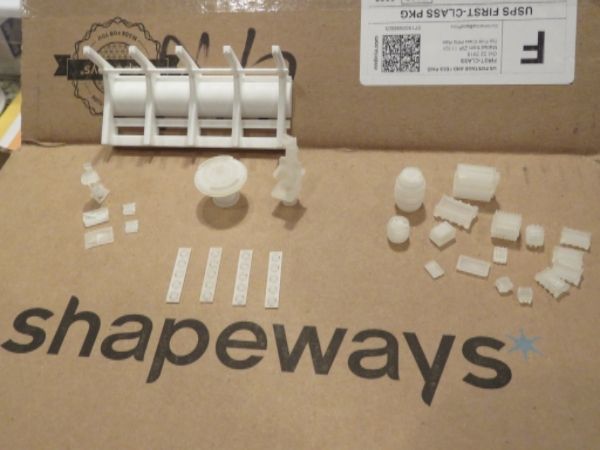 And here's after painting -- with a few other hold pieces stuck in that I was working on around the same time: 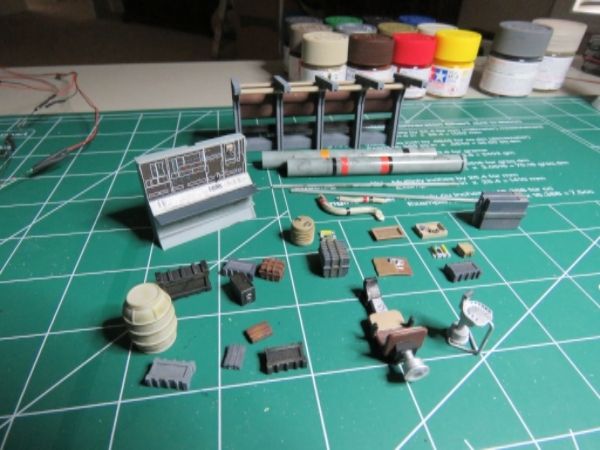 Here's the bunk, before cutting away the standard one: 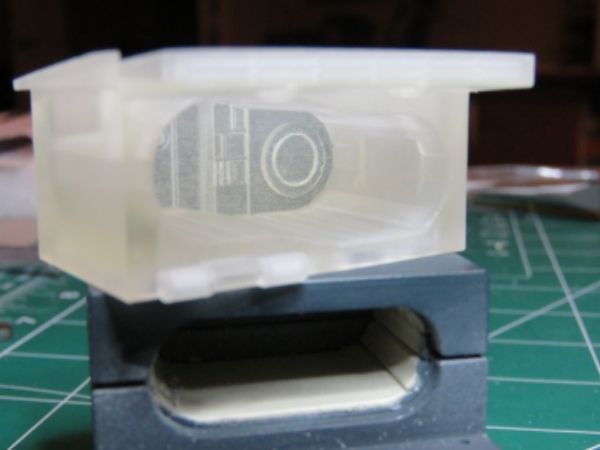 Here's the bunk after painting. It hasn't yet been glued into place: 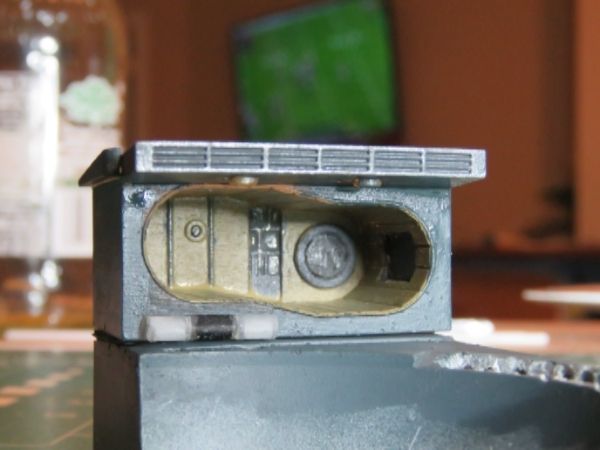 Here are the lights in the front overhang of the bunk. These .5mm fiber optics don't show up that well in standard lighting, unfortunately. 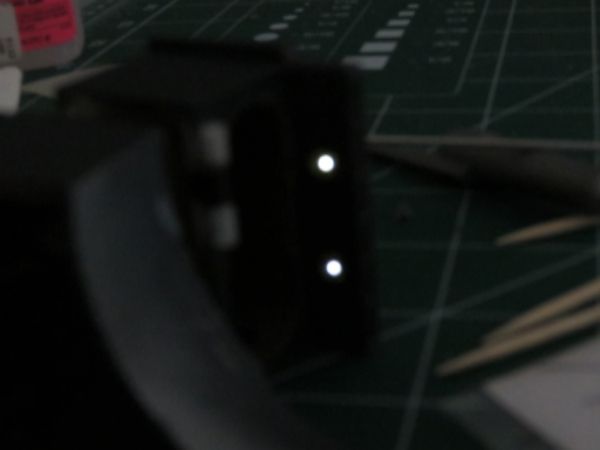 The small pico LEDs in the 'reading light' have the opposite problem -- they're probably too bright for the location. Not that I'm unhappy with the overall look -- just commenting :-) 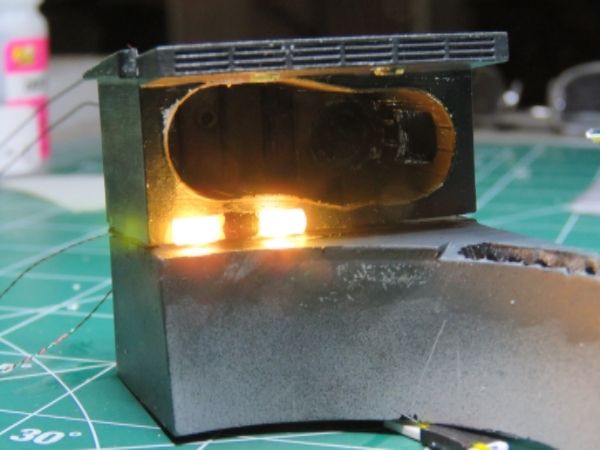 Here's the dejarik table, painted and with fiber optic installation underway. I'll use the decal that came with the ParaGraphix hold kit instead of trying to paint the squares on this myself.  Dejarik table installed, as well as the bunk and the ParaGraphix panels on the seating area: 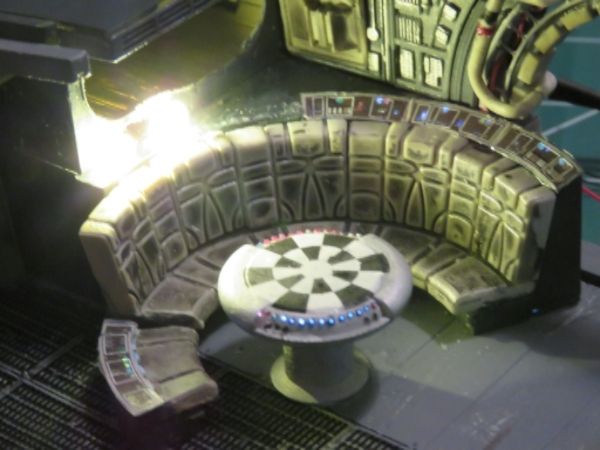 Starting to assemble the hold -- 2 walls up at this point 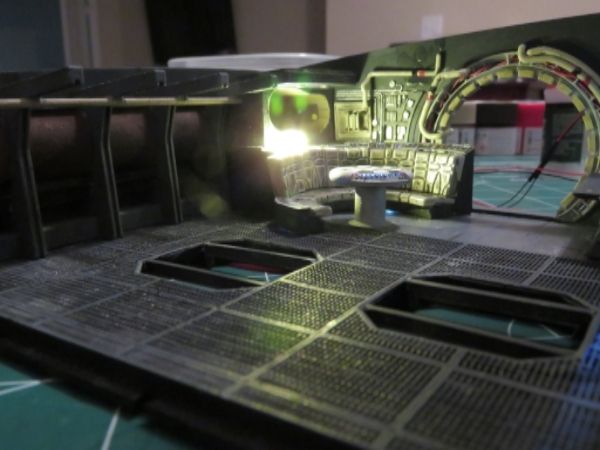 All but the last wall in now: 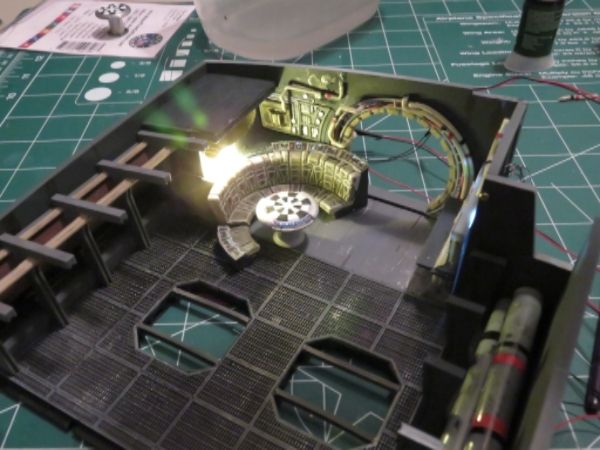 View into the hold with the last wall in place: 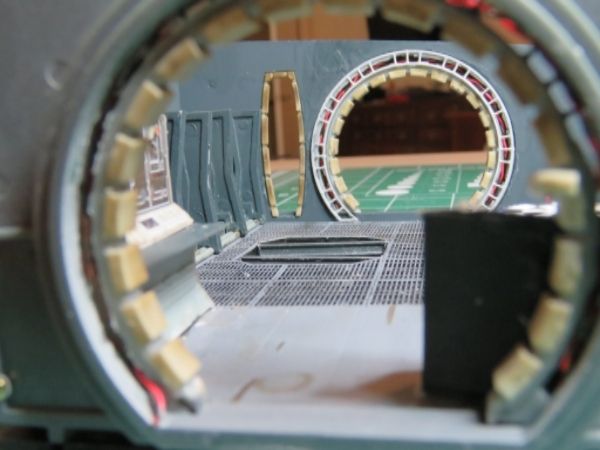 Another angle: 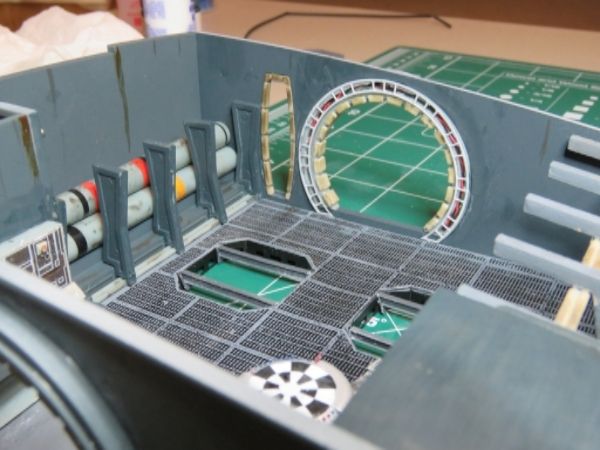 This doesn't really fit with the overall theme of this upload but here it is anyway: 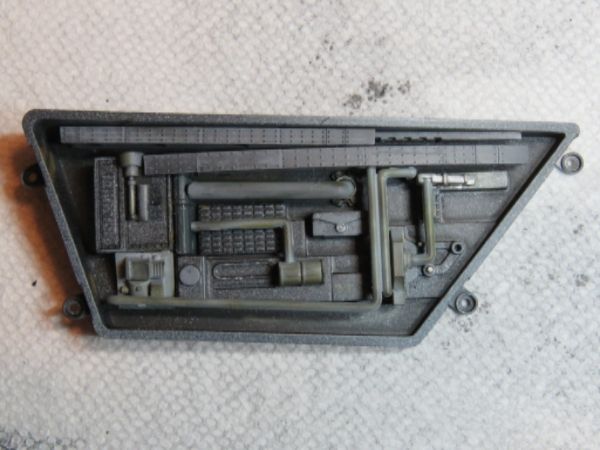 I haven't installed most of the ShapeWays bits into the hold yet -- I kind of want to avoid having easily knocked off detail in there as long as I'm handling it, and I think there may be a lot of handling associated with getting the corridors in place. I plan to put something under the maintenance pits and in the small equipment room. I think I will do the corridors all at once when I have all the parts (January). I have pre-ordered the ParaGraphix corridors set and plan to light the sides of the corridor floors, as well as around the maintenance pits, with a single loop of EL wire. So I think the way this is going to go is: - Drill holes as needed in the corridor bottom halves to allow routing the EL wire. - Glue the corridor bottoms to the hold, without flooring in place. - Run the EL wire loop and glue it down - Install corridor floors, then the rings and wall pads. - Install lighting in the upper corridor pads, then attach corridor tops to the corridor bottoms.
|
|
|
Rank: Pro Groups: Registered
Joined: 06/08/2015 Posts: 276 Points: 817 Location: Monrovia, Ca
|
Very nice work on the hold, Myawn. Love all the detail. The Shapeways extras definitely add to the overall look, but they are pricey. I look forward to seeing how you do your corridor. Keep up the excellent work and have a good holiday. Stephen Current Builds: HMS Sovereign of the Seas /// Lamborghini Countach /// Eaglemoss BTTF DeLorean
Finished Builds: Millennium Falcon
|
|
|
Rank: Pro Groups: Registered
Joined: 30/04/2015 Posts: 263 Points: 795 Location: Los Angeles
|
myawn wrote:
The small pico LEDs in the 'reading light' have the opposite problem -- they're probably too bright for the location. Not that I'm unhappy with the overall look -- just commenting :-)
Just slap a resistor in there and it'll drop the voltage lowering the brightness.
|
|
|
Rank: Pro  Groups: Registered
Joined: 11/11/2015 Posts: 273 Points: 792 Location: Minneapolis, Minnesota USA
|
Your build is looking very nice Myawn. How are you feeling about trying new techniques you haven't tried before? Was curious where you purchased the colored fiber optics filaments. Best Regards,
Ron
On the bench: DeAgostini '67 Ford Shelby Mustang, Hachette Space Battleship Yamato 2202, Agora Models T-800 Terminator
Finished builds: DeAgostini Toyota 2000GT
In the Stash: Losing count...
|
|
|
Rank: Super-Elite Groups: Registered
Joined: 27/01/2014 Posts: 5,060 Points: 14,980
|
Looks like you've been quite busy, great job 
|
|
|
Rank: Amateur Level 1 Groups: Registered
Joined: 20/07/2015 Posts: 35 Points: 108 Location: Marietta, GA, USA
|
Nytetrain wrote:Your build is looking very nice Myawn. How are you feeling about trying new techniques you haven't tried before? Was curious where you purchased the colored fiber optics filaments. I've been nervous every time I try something new but I'm starting to get past that. The photos can be unforgiving but the flaws I see in the photos aren't really noticeable at normal viewing distance. Colson posted a link a while back to a fiber optic seller on eBay named me80. I bought a set of .25mm and later added a set of .5mm.
|
|
|
|
Guest
|
 US
US

