|
|
 Rank: Pro  Groups: Registered
Joined: 30/04/2015 Posts: 263 Points: 795 Location: Los Angeles
|
myawn wrote:The photos can be unforgiving but the flaws I see in the photos aren't really noticeable at normal viewing distance. Definitely true. The camera picks up so much your eye really doesn't. And when you're dealing with a light source, it's always much brighter in camera than to the eye.
|
|
|
 Rank: Amateur Level 1 Groups: Registered
Joined: 20/07/2015 Posts: 35 Points: 108 Location: Marietta, GA, USA
|
Been working on the Paragraphix corridors set for the past week or so. Cutting away the edges was a bit tedious but I think it all went well enough in the end. I went with a semi-gloss black finish for the corridor floors. (I'm only up to Issue 24 so I don't have the final corridor pieces yet). 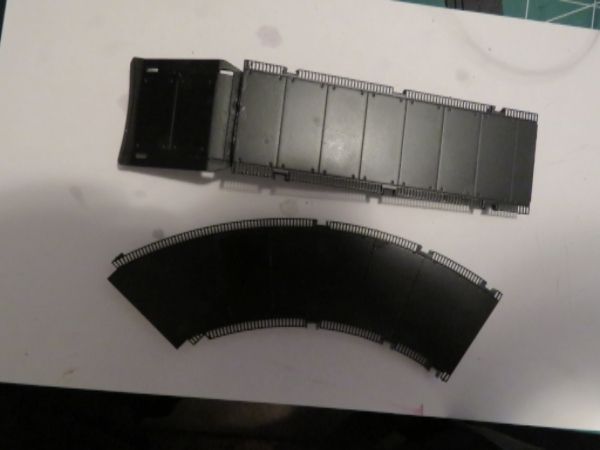 My first though on lighting was to use the Easy LED strips (also from Paragraphix). Colson got great results with these based on his photos; I wasn't as happy with the way mine turned out here. Maybe the difference being the curved vs. straight corridor -- with the straight LED strips and curved corridor, the light-to-grill spacing is uneven along the length resulting in variation in the light intensity. (Just noticed this photo was before I soldered jumpers between the sections, but my solder work was ugly enough that I'm probably happier not showing it :-) ). 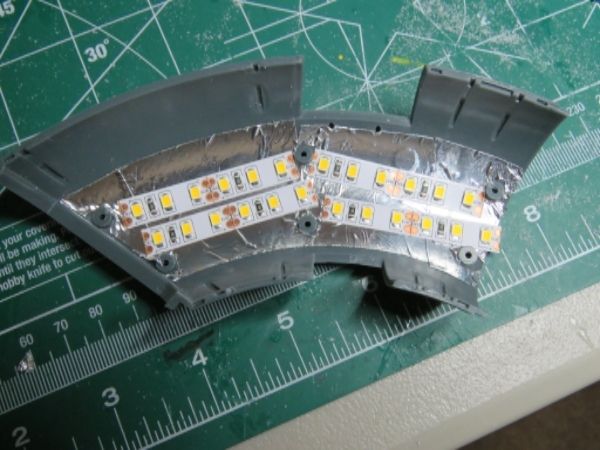 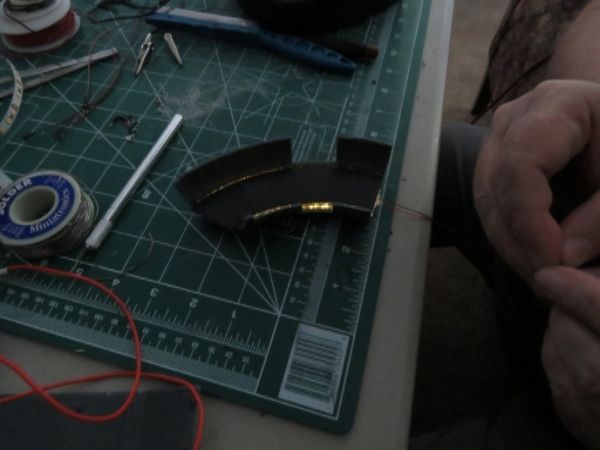 So I decided to take a different approach and go for EL tape along the sides of the straight corridor ... Was much happier with the way this one turned out (I've only done one side so far) 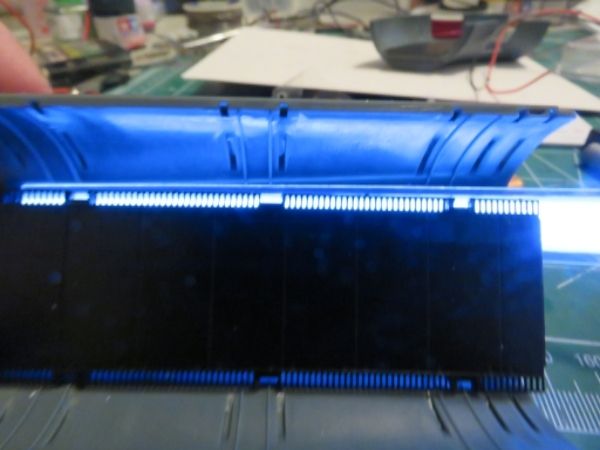 I like the effect, but the tape doesn't bend well so that won't work for the curved corridors. I've ordered some EL panel material and when that comes in I'll try cutting some custom shapes for the curved corridors -- will post those when I have them. I've just started on the light sconces, only having one done as a prototype at this point. I've actually combined the base of the sconce from the Paragraphix set with the center portion from Shapeways. Here's the unattached panel and assembled sconce after drilling the pad 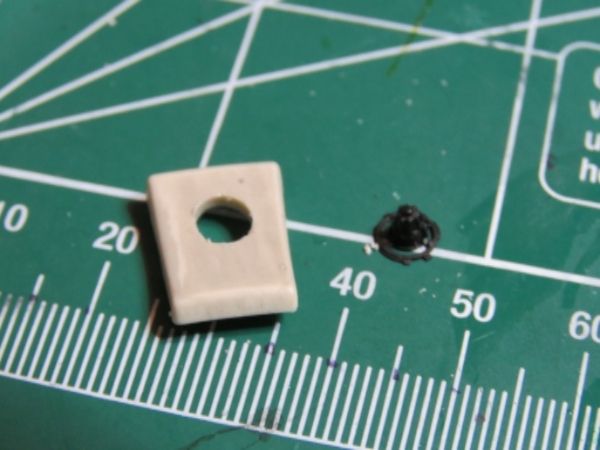 Here it is laid in place with a piece of EL tape behind -- nothing glued up at this point, just checking the effect, which I liked. I decided to go with the green even though white would be more correct for ESB ... must admit that was mostly influenced by early shots from Ep VII. 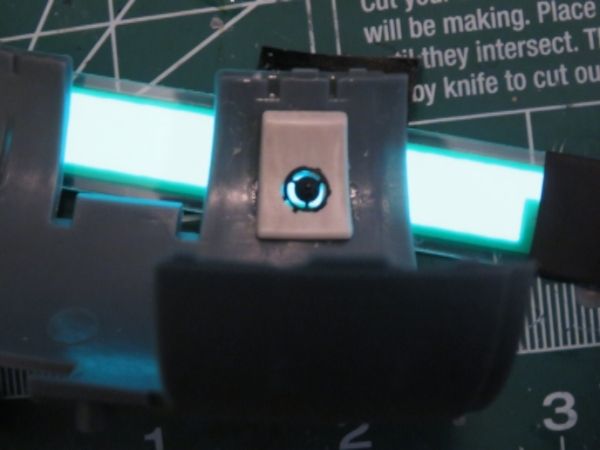 Better angle showing some of the light sconce detail 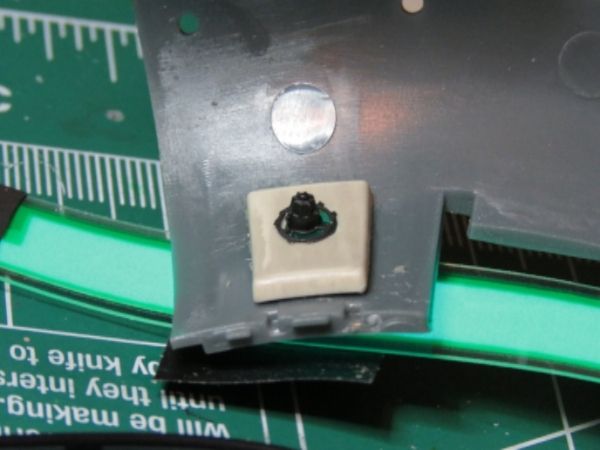 So I think that came out well and will be assembling the rest of the sconces using the same process, while waiting on the EL panel to arrive so I can continue with the floor lighting.
|
|
|
 Rank: Beginner Level 3 Groups: Registered
Joined: 18/11/2015 Posts: 20 Points: 60 Location: West Coast Canada
|
|
|
|
Rank: Amateur Level 1 Groups: Registered
Joined: 13/10/2015 Posts: 28 Points: 76 Location: Las Vegas
|
I have different EL tape, but the intensity is nothing compared to the EL tape you have. Would you mind sharing your source for that bright of EL tape? The green is perfect for the corridor button lights.
|
|
|
Rank: Amateur Level 1 Groups: Registered
Joined: 20/07/2015 Posts: 35 Points: 108 Location: Marietta, GA, USA
|
Supercoolin wrote:I have different EL tape, but the intensity is nothing compared to the EL tape you have. Would you mind sharing your source for that bright of EL tape? The green is perfect for the corridor button lights. I got mine from Adafruit, specifically Green EL tape
|
|
|
Rank: Amateur Level 1 Groups: Registered
Joined: 20/07/2015 Posts: 35 Points: 108 Location: Marietta, GA, USA
|
This update is all about the corridors -- I used a green EL tape to backlight the light sconces (which were assembled from Paragraphix bases and Shapeways centers), and white EL panels to light the grilles along the sides of the floor pieces. Here's a template I made to cut the EL panel for the larger curved corridor. This was a very tight fit, I had to angle the template oddly to be able to cover all the lighting locations. It worked out well that the power feed comes in right at the location of the side corridor for access to the gun wells. 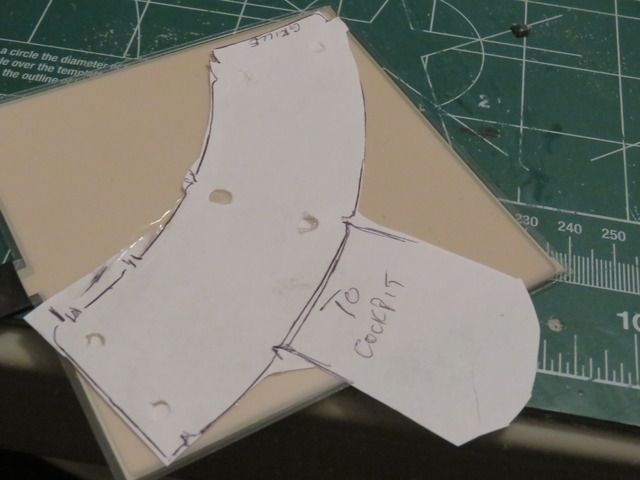 Once I'd figured out the orientation, I drew a cutting outline a little larger than needed -- can always trim down a bit after the test fitting 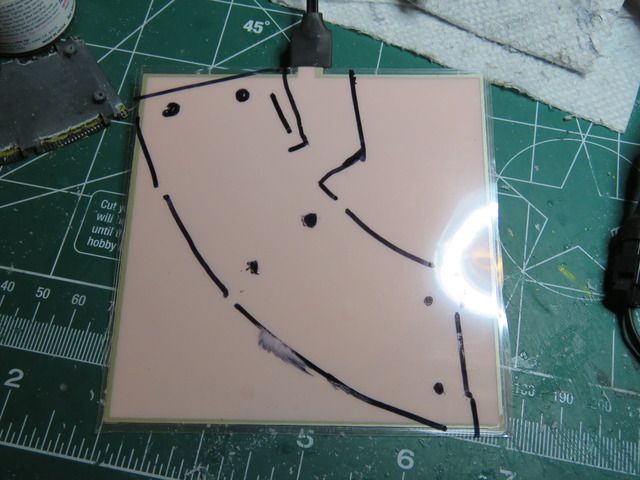 Here's after a rough cut and install. I originally thought I might have this EL panel light the grille at the 'step down' on the cockpit corridor, but later decided that was better done by the panel on that section, so the extension on that side was later cut off. 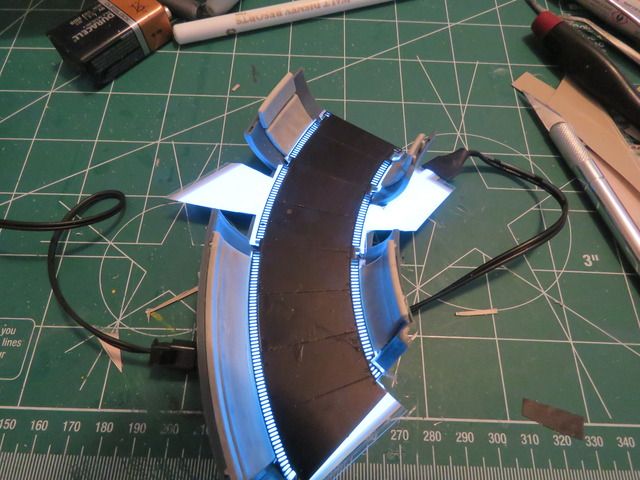 Here's where I filed down an area to allow the EL panel's power feed to come in under the side tunnel 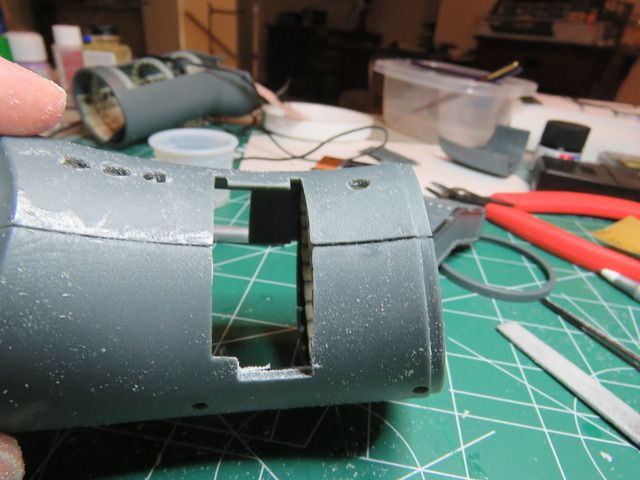 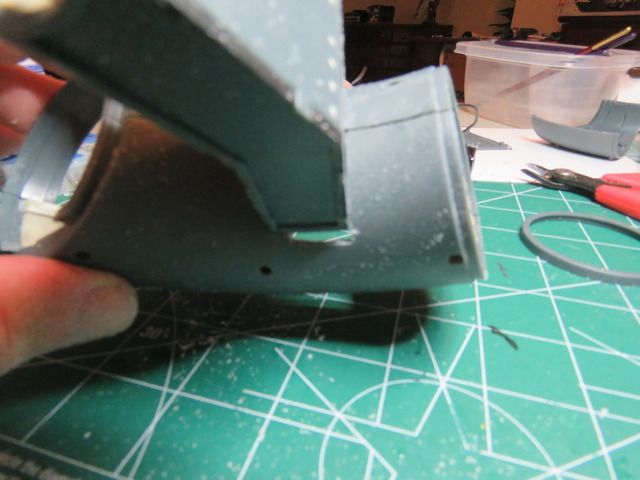 Moving on to the straight corridor, here's the EL panel cut and drilled. It was a bit short, so the end closest to the cockpit isn't fully lit -- but I don't think that will be visible when installed in the model 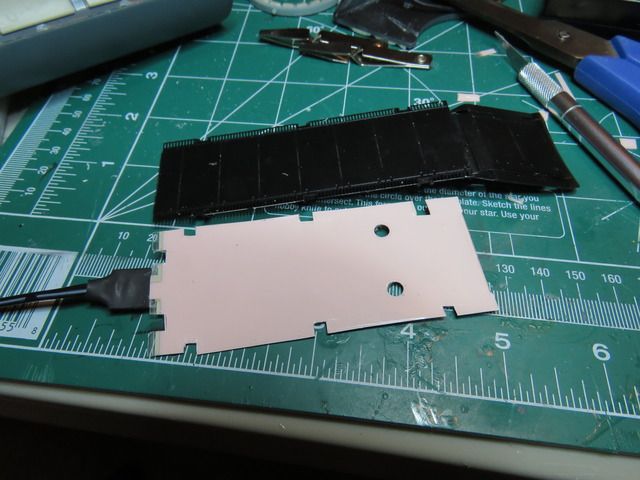 Here it is installed, the front edge was bent down at a 90 degree angle to light the back of the step-down grille. 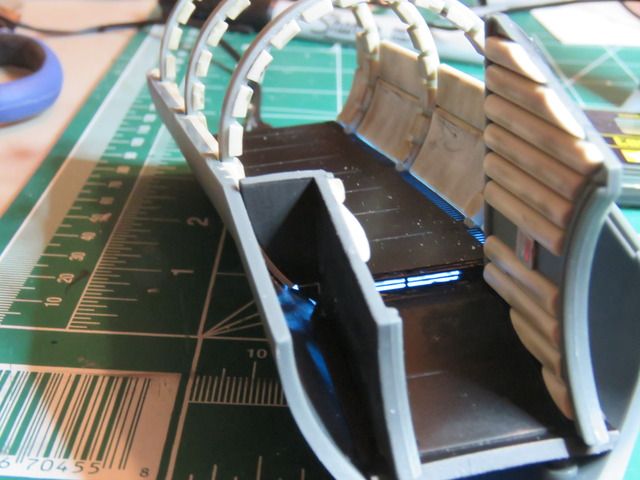 And here again, showing the power lead, and that the panel doesn't quite reach to the very last few grilles at the cockpit end. 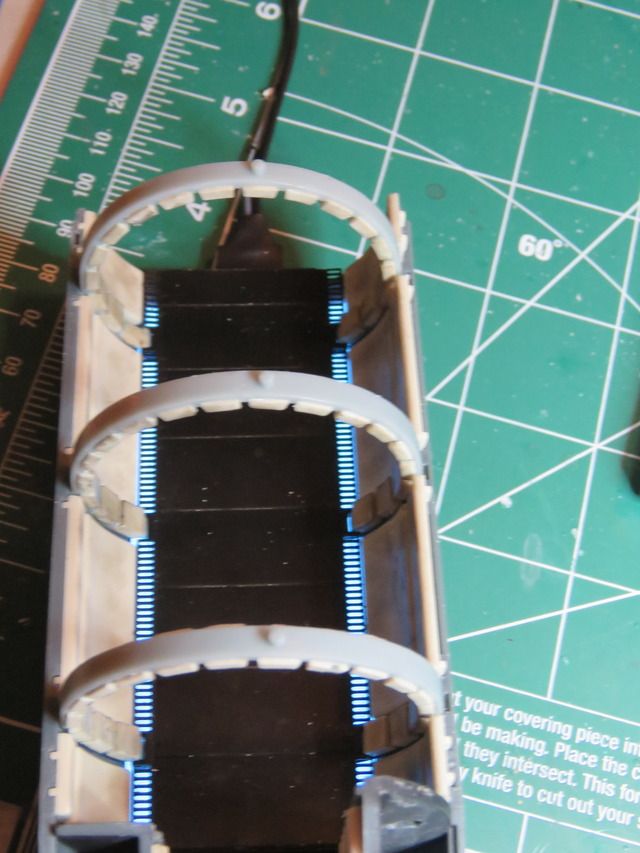 Moving over to the small port-side corridor, I did a little additional work to taper down the edges of the plastic floor. The EL looks best when it's as close as possible to the grille -- it always looks good from above, but from a shallow angle it can disappear if it's too far away. This should help a bit. 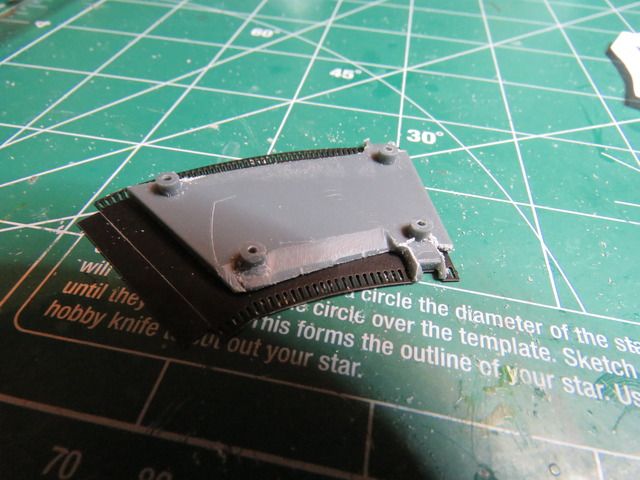 Here's the template I made for cutting the EL panel 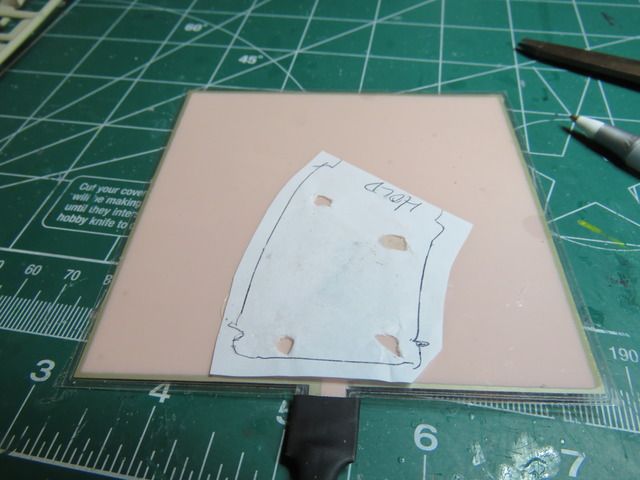 Here's a test fit  Here I've drilled out the threshold to the hold so that the grille can be backlit. 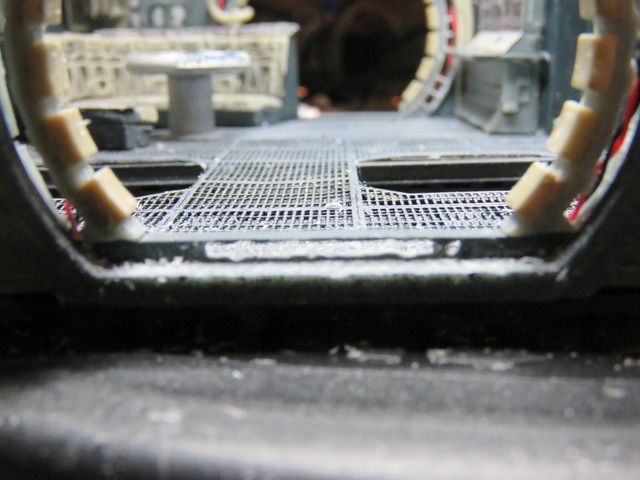 Here's the lighted grille. In hindsight, the panel is too far back -- while it looks OK from this low angle, if looking down into the hold from above you can't really see the lighting at all. (This is after the upper sconces had been done as well, I'll come back to those in a minute)> 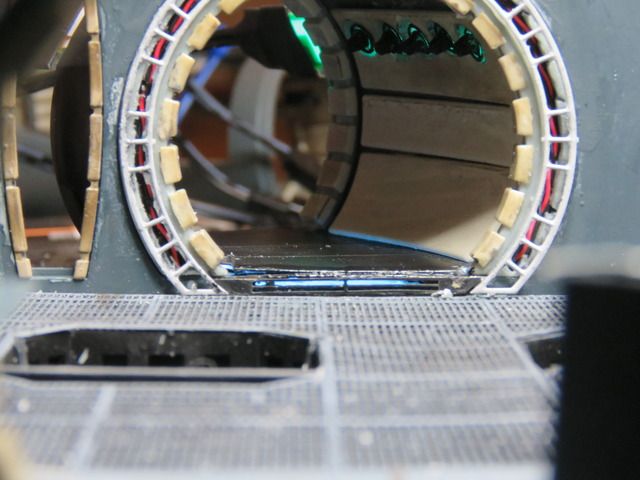 Here are the tiny displays for the tilted hallway section coming from the cockpit (shown from the back, where the transparent paint is applied)  Here's one panel installed. A single LED was sufficient to light both panels on this side; I didn't light the panel on the opposite side since it faces away from anyone viewing the model. (Actually this isn't a very good photo, it was before the decal was installed. I have photos coming up that show the finished panel with decal but none that are very close-up) 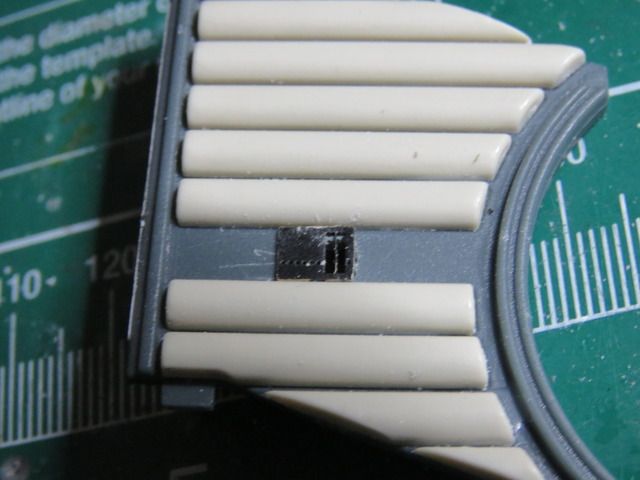 Moving on to the upper light sconces -- here I've created some drilling templates to help, attached them temporarily using rubber cement, and then drilled out the holes (first in just the pads, then attached the pads and used them as a guide to drill through the corridor walls) 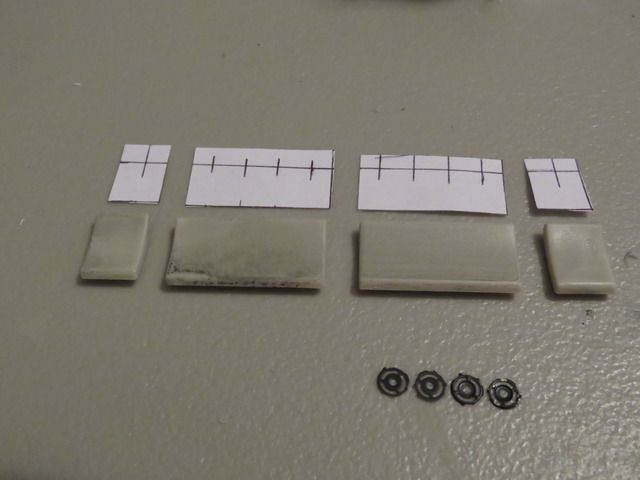 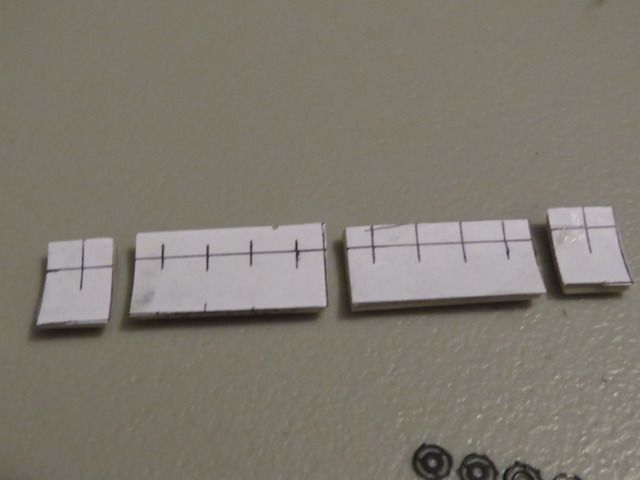  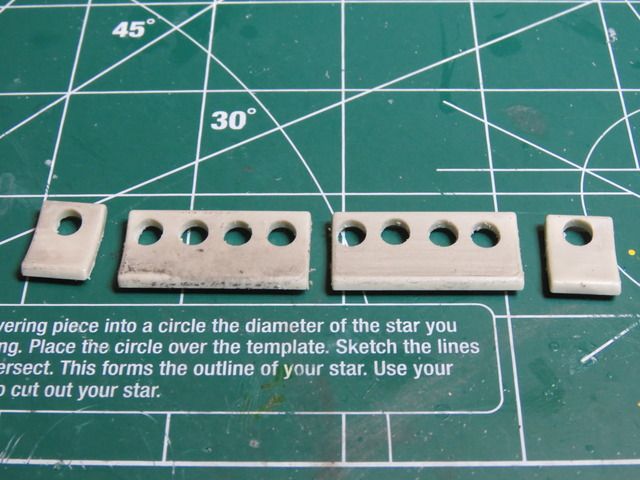 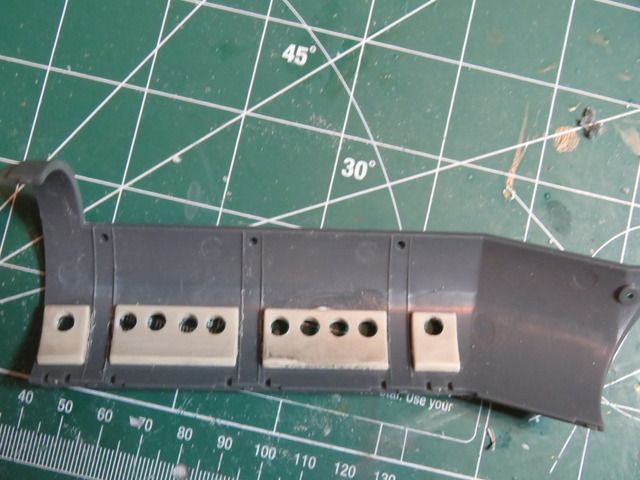 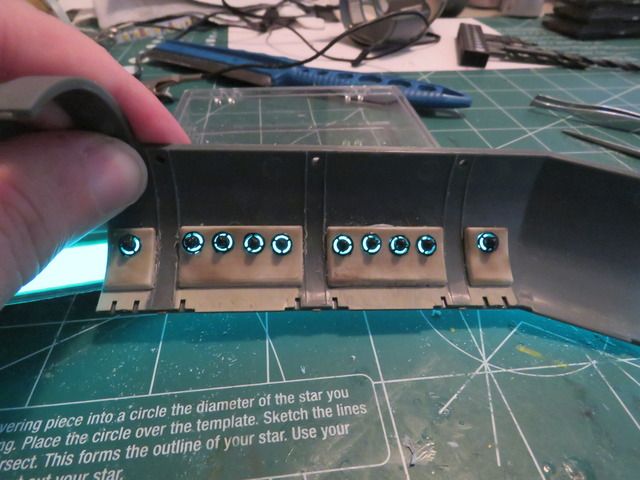 Here are photos of everything assembled 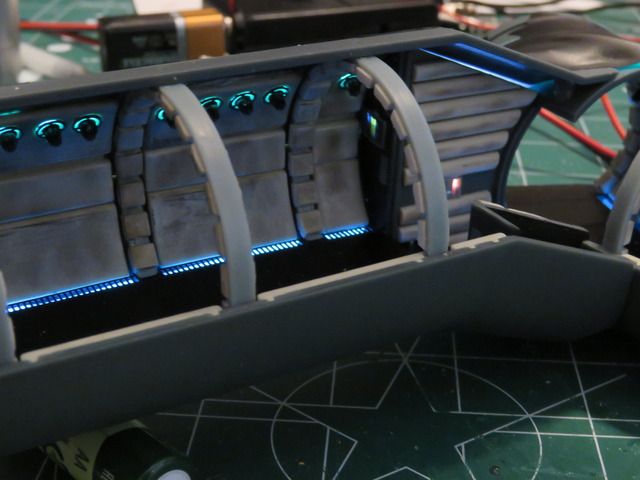 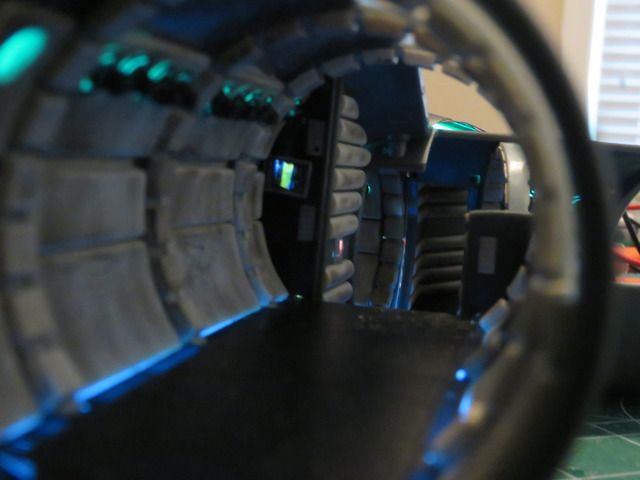 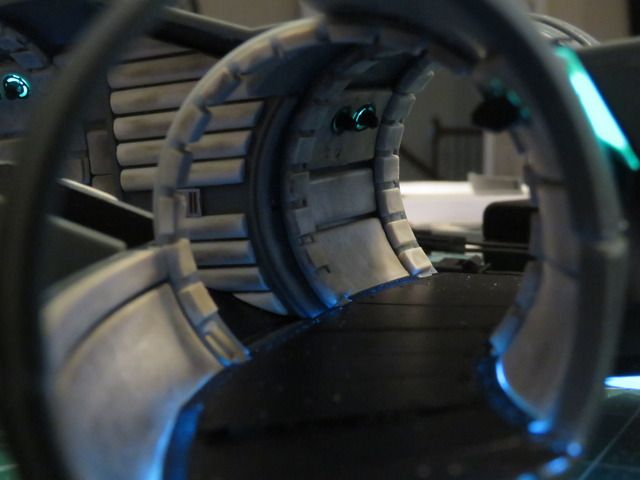  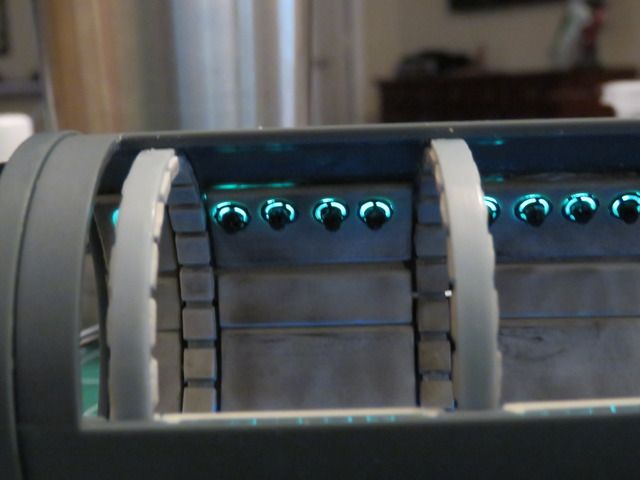
|
|
|
Rank: Pro Groups: Registered
Joined: 04/07/2015 Posts: 99 Points: 309 Location: north wales
|
Very nice results there.... Love the subtle glow that the EL tape gives behind the sconces..... They are fiddly little beggars to install but the end result is well worth it....
|
|
|
 Rank: Super-Elite      Groups: Registered
Joined: 27/01/2014 Posts: 5,060 Points: 14,980
|
Fantastic work!! The EL tap is quite effective 
|
|
|
 Rank: Master  Groups: Registered
Joined: 07/07/2015 Posts: 1,292 Points: 3,928 Location: Allentown PA
|
Awesome work. At first I was like "aw man he is doing the same thing I planned." Now I am glad you did because I can learn from you experience. Thanks for sharing your source for the EL tape. I remember trying to find this stuff when it first got popular after Tron: Legacy and having a hard time. This is going to totally make me rethink some of my lighting ideas for this and other models.
DeAgostini kit builds:
Millennium Falcon: 18% Complete
Shelby GT-500: 28% Complete
Thunderbird 2: 13.75% Complete
|
|
|
Rank: Pro  Groups: Registered
Joined: 16/04/2011 Posts: 328 Points: 998 Location: Anglesey
|
Very excellent work on the extra lighting detail. You might need your own nuclear power station to run them  Darren
Have an AWSOME day and may the Force be with you always 😉 Building: Millennium Falcon https://forum.model-spac...sts&t=14381&p=7 - Building: BTTF Delorean - Building: Dom's Dodge Charger - Building : X-Wing https://forum.model-spac...aspx?g=posts&t=34899
|
|
|
Rank: Amateur Level 1 Groups: Registered
Joined: 20/07/2015 Posts: 35 Points: 108 Location: Marietta, GA, USA
|
Does anyone know what the electrical plugs and connector types for the main circuit board are called? Or better yet, a supplier for them? I'm wondering if there are splitters / Y connectors available that would allow me to run some of my own lighting off the board. Maybe combine the two headlights onto a single circuit and thus free up another circuit for added hold and cockpit lighting.
I think the unusual inverter used for the EL tape means I will have to power that separately but the fewer things that have to come out of the hull, the better.
|
|
|
Rank: Amateur Level 1 Groups: Registered
Joined: 09/01/2016 Posts: 31 Points: 93 Location: UK
|
They look like JST-XH Connectors to me - Connector Plugs Male & Female I don't have any on hand to compare yet , there are 3, 4, 5 and 6 pin connectors too On the WorkBench : DeAg Millennium Falcon , Deag R2-D2
To Build : various 1/72 , 1/32 WW II Military Planes
|
|
|
Rank: Super-Elite   Groups: Registered
Joined: 31/05/2010 Posts: 5,679 Points: 17,011 Location: Wiltshire
|
Very nice result and interested to see your use of EL products which i have not seen used on models for a long time now. It gives a much more in scale glow and looks very nice. Happy Modelling
BUILDING: Hachette Spitfire Mk 1A, Constructo Mayflower
SUBSCRIPTION COMPLETE (Awaiting building): USS Constitution, Sovereign of the Seas, 1:200 Bismarck (Hachette)
COMPLETED: Porsche 911, E-Type Jaguar, Lam Countach
|
|
|
Rank: Pro Groups: Registered
Joined: 16/04/2011 Posts: 328 Points: 998 Location: Anglesey
|
rj1265 wrote:They look like JST-XH Connectors to me - I second that  Darren
Have an AWSOME day and may the Force be with you always 😉 Building: Millennium Falcon https://forum.model-spac...sts&t=14381&p=7 - Building: BTTF Delorean - Building: Dom's Dodge Charger - Building : X-Wing https://forum.model-spac...aspx?g=posts&t=34899
|
|
|
Rank: Amateur Level 1 Groups: Registered
Joined: 20/07/2015 Posts: 35 Points: 108 Location: Marietta, GA, USA
|
Based on that, I found the following: Y-ConnectorConnectors for additional lightingSo, if I use the Y connector to free up a plug, and then connect my added LED harness to the connector and add it to the board, I'm hoping all will be OK -- just not sure if there is a risk of overloading something. (Edited to correct URLs)
|
|
|
Rank: Beginner Level 2 Groups: Joined: 03/05/2015 Posts: 11 Points: 33
|
rj1265 wrote:They look like JST-XH Connectors to me... If anyone can please confirm this positively it would be appreciated, thx.
|
|
|
Rank: Beginner Level 2 Groups: Joined: 03/05/2015 Posts: 11 Points: 33
|
myawn wrote:Based on that, I found the following: Y-ConnectorConnectors for additional lightingSo, if I use the Y connector to free up a plug, and then connect my added LED harness to the connector and add it to the board, I'm hoping all will be OK -- just not sure if there is a risk of overloading something. (Edited to correct URLs) Hey myawn, supposing that is the correct connector type (JST-XH) I am still not sure about the Y-connector you linked above, it seems to be using 3 wires instead of the two we see on our LEDs (it could just be that they are using the wrong image though??) Also, does anyone know the voltage of the batteries and LEDs? It would be good to know so we use the proper resistors when adding additional LEDs?
|
|
|
Rank: Amateur Level 1 Groups: Registered
Joined: 20/07/2015 Posts: 35 Points: 108 Location: Marietta, GA, USA
|
You're right -- that seems to be a 3-pin connector. I looked around the site and didn't see an obvious 2-pin equivalent, so I may have to keep looking.
They also have connectors that go from 1 male plug to multiple (from 3 up to 6) female so if the voltages all worked out you could run a lot of lighting off just one connector on the board ... but that's not really my area of expertise so hoping to watch someone else go first and learn that way :-).
|
|
|
Rank: Pro Groups: Registered
Joined: 30/04/2015 Posts: 263 Points: 795 Location: Los Angeles
|
imurme wrote:
Also, does anyone know the voltage of the batteries and LEDs? It would be good to know so we use the proper resistors when adding additional LEDs?
According to the buildmillenniumfalcon.com website, it says that it powers with the battery pack or 9v power supply. Which is good for me, because all of my additions are 9v. So I shouldn't have a problem there. Otherwise I'd just have to run 2 pwr lines, or put a buck converter in line before the build LEDs.
|
|
|
Rank: Amateur Level 1 Groups: Registered
Joined: 20/07/2015 Posts: 35 Points: 108 Location: Marietta, GA, USA
|
Paragraphix gun turret interiors ... Interiors for both turrets come in the set, here they are straight out of the package. 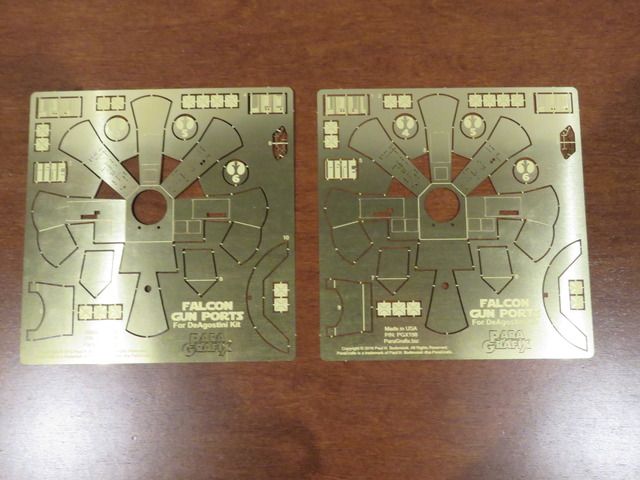 Here with a bit of primer 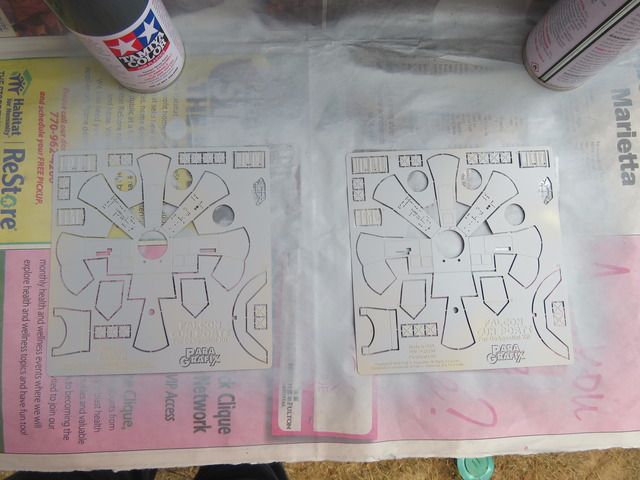 Masked to paint the rear wall a contrasting color (used Insignia White for the rear wall and German Gray for the side walls) 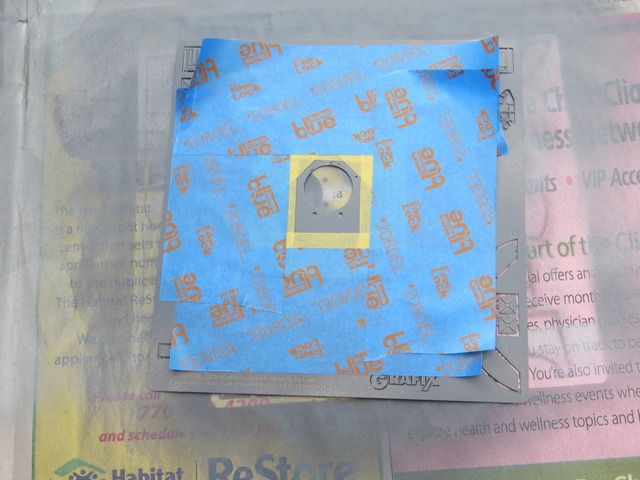 After painting all the walls 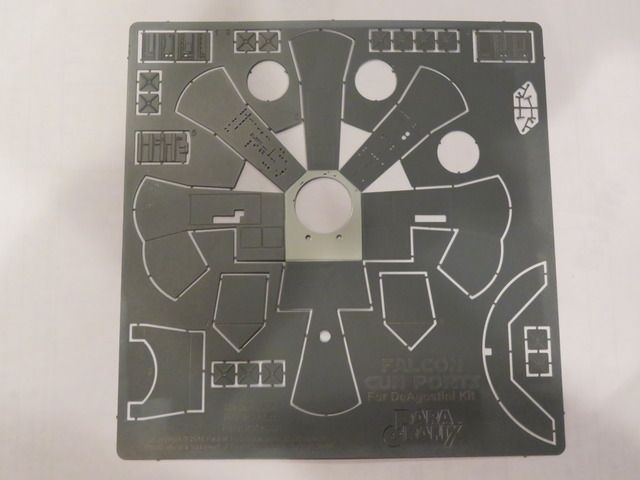 With plant-on pieces added, and transparent paint, but before applying decals 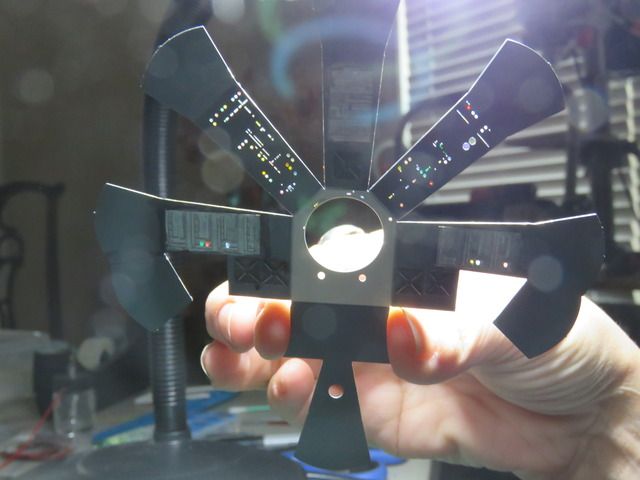 After adding decals  Folding it up 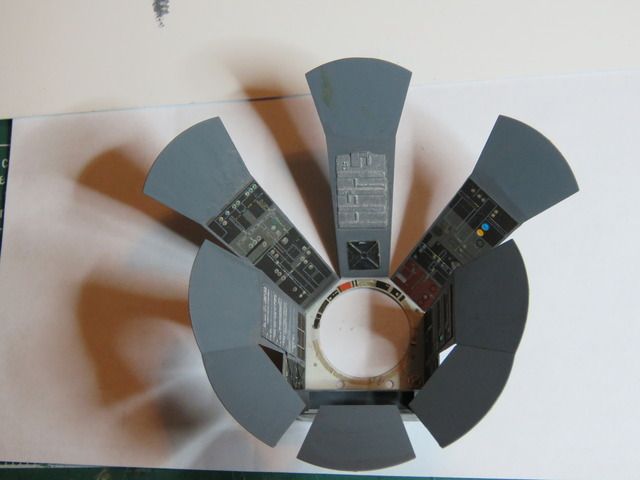 The transparent paint didn't "pop" as much as I wanted so I applied it a bit thicker, here are a few shots after that 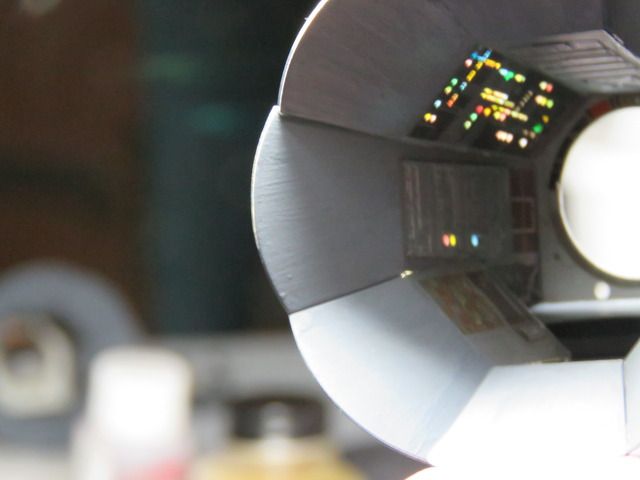  Finished part 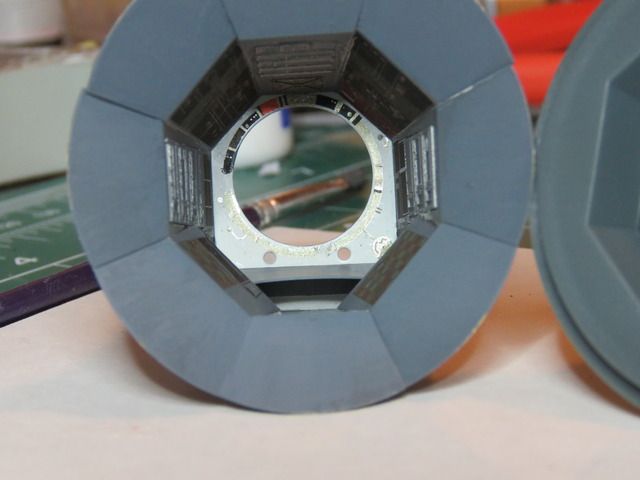 Showing the photoetch compared to the kit part -- I'll be adding ShapeWays seats into the photoetch parts. 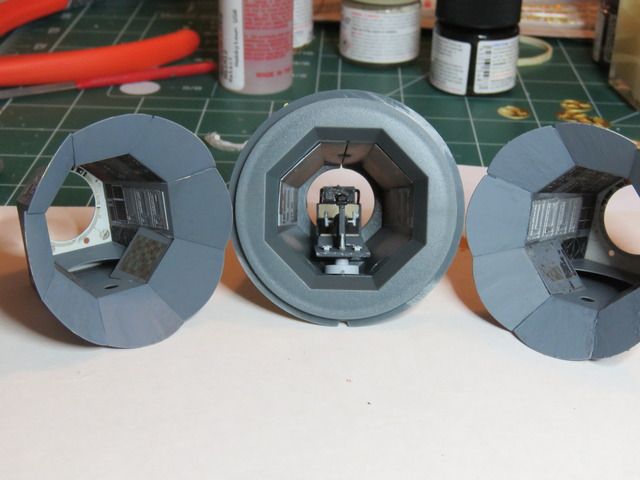
|
|
|
|
Guest
|
 US
US

