|
|
 Rank: Vice-Master     Groups: Registered
Joined: 26/09/2010 Posts: 851 Points: 2,565 Location: Walsall
|
Hi All Having a go at the Victory and here is were i am at the moment. No were near as far as i shoul be but i only get the weekends to work on her. Any advice would be welcome as i am new to wooden ship building.    
|
|
|
 Rank: Pro Groups: New Members, Unapproved Joined: 24/08/2009 Posts: 48,827 Points: -13,348
|
Looks good so far, just a word of caution about the bulldog clips, if you intend to keep her natural, by putting too much pressure on those clips can mark/dent the wood. I found this out on the first plank and have since added small off cuts to prevent this. Also as you go along you will find that soaking in hot water for 20 odd mins and using the ship itself to shape the wood the bulldog clip WILL dent as the wood is wet, just be aware of it. just a heads up 
|
|
|
Rank: Vice-Master Groups: Registered
Joined: 26/09/2010 Posts: 851 Points: 2,565 Location: Walsall
|
Thanks for that Collin.
Im goining to paint mine as i like the look of the yellow and black on the real one in portsmoth.
Alan
|
|
|
Rank: Vice-Master Groups: Registered
Joined: 26/09/2010 Posts: 851 Points: 2,565 Location: Walsall
|
After looking at Jase's supurb barrels i thought i would have a go. I got the size of the bands different but for me they do not look to bad. 
|
|
|
Rank: Pro  Groups: Registered
Joined: 27/03/2010 Posts: 188 Points: 614 Location: Llandudno
|
Nice one Foz Neat job  Bob
|
|
|
Rank: Pro  Groups: Registered
Joined: 24/01/2010 Posts: 131 Points: 398 Location: North Yorkshire FILEY By The Sea
|
|
|
|
 Rank: Beginner Level 3  Groups: Registered
Joined: 07/05/2010 Posts: 25 Points: 96 Location: Sussex by the Sea
|
Foz, all looks clean and shipshape. Good work.
John
|
|
|
Rank: Vice-Master Groups: Registered
Joined: 26/09/2010 Posts: 851 Points: 2,565 Location: Walsall
|
Thanks for the comments guys, much appreciated
|
|
|
Rank: Vice-Master Groups: Registered
Joined: 26/09/2010 Posts: 851 Points: 2,565 Location: Walsall
|
|
|
|
Rank: Pro Groups: New Members, Unapproved Joined: 24/08/2009 Posts: 48,827 Points: -13,348
|
Wow, nice work......i wonder if i can build like that 
|
|
|
Rank: Vice-Master Groups: Registered
Joined: 26/09/2010 Posts: 851 Points: 2,565 Location: Walsall
|
Haggis killer, there are a lot beeter builds on here than mine
|
|
|
 Rank: Elite    Groups: Registered
Joined: 22/03/2010 Posts: 2,065 Points: 6,295 Location: Gorleston-on-sea
|
Looking pretty good Foz, what I did when drilling the gun ports was to drill the hole into the planking first, cut the ports out then using a sharp implement(bradawl)to start a small guide hole into the gun deck supports then used 2mm drill bit to drill the necessary hole centrally as possible into the gun deck supports themselves..many of our shipmates will probably have other ways of going about it, but this was mine...hope that this helps... Current Builds: Deagostini HMS Victory: Deagostini HMS Sovereign of the seas. Completed Builds: Del Prado: HMAS Bounty: Hachette: RMS Titanic: Del Prado: Cutty Sark...
|
|
|
Rank: Vice-Master Groups: Registered
Joined: 26/09/2010 Posts: 851 Points: 2,565 Location: Walsall
|
Thanks for that Johnny 7, is there a way of making sure the hole in the rear beam is in the right place
|
|
|
Rank: Pro  Groups: Registered
Joined: 22/03/2010 Posts: 369 Points: 1,150 Location: Broadstairs
|
Good build so far Fozy, although I would point out that the second gun port from the bow should be aligned centrally between those narrow ribs. Hope you don't mind me mentioning it.
TIS
|
|
|
Rank: Vice-Master Groups: Registered
Joined: 26/09/2010 Posts: 851 Points: 2,565 Location: Walsall
|
TISWAS
Thank you very much for that. I would have messed things up there if not for you.
Thanks again.
Hopefully tomorrow ill cut them out before its time to get back to work.
|
|
|
 Rank: Super-Elite   Groups: Registered
Joined: 04/04/2010 Posts: 3,955 Points: 11,809 Location: uk
|
hi foz,your doing a great job,just thought I would pass on a little info,the bow on your vic looks like the planks were put on wet and suffered a bit of shrinkage,hence the small gaps,a bit of filling and a paint job will cure that,try and pre bend the bow planks and put on the bow dry,I've done it loads of time and did'nt twig why I was getting gaps? but I found out on this forum,prob now solved. keep up the good work,and keep the pics coming. Current builds: SotS, USS Consitution, San Felipe, D51 loco, HMS Surprise, RB7, Arab Dhow, Jotika HMS Victory Completed builds: HMS Pickel, Thermopylae, Mississipi river boat, Mary Rose, Cutty Sark, San Francisco II, HMS Victory x5, Titanic Lifeboat, Panart HMS Victory Launch, Hachette Titanic, Virginia Schooner, Endeavour Longboat. http://www.model-space.com/gb/
|
|
|
Rank: Vice-Master Groups: Registered
Joined: 26/09/2010 Posts: 851 Points: 2,565 Location: Walsall
|
Karl, thanks got that i did wonder, the shrinkage never even crossed my mind. Was looking at collins build and that thing he did with the cocktail sticks so am trying it that way befofre i start to cut the gun ports out.  Everything seems to be ok so ill attempt to cut them out today. Hopefully if all goes well the pics will be on later. Cheers lads
|
|
|
Rank: Vice-Master Groups: Registered
Joined: 26/09/2010 Posts: 851 Points: 2,565 Location: Walsall
|
Well it took me most of today but have final finished cutting the gun ports out, well one side at least. So thats another weekend gone and back to work tomorrow so will leave the beloved Victory alone for another week. Any comments and help are greatly appreciated. 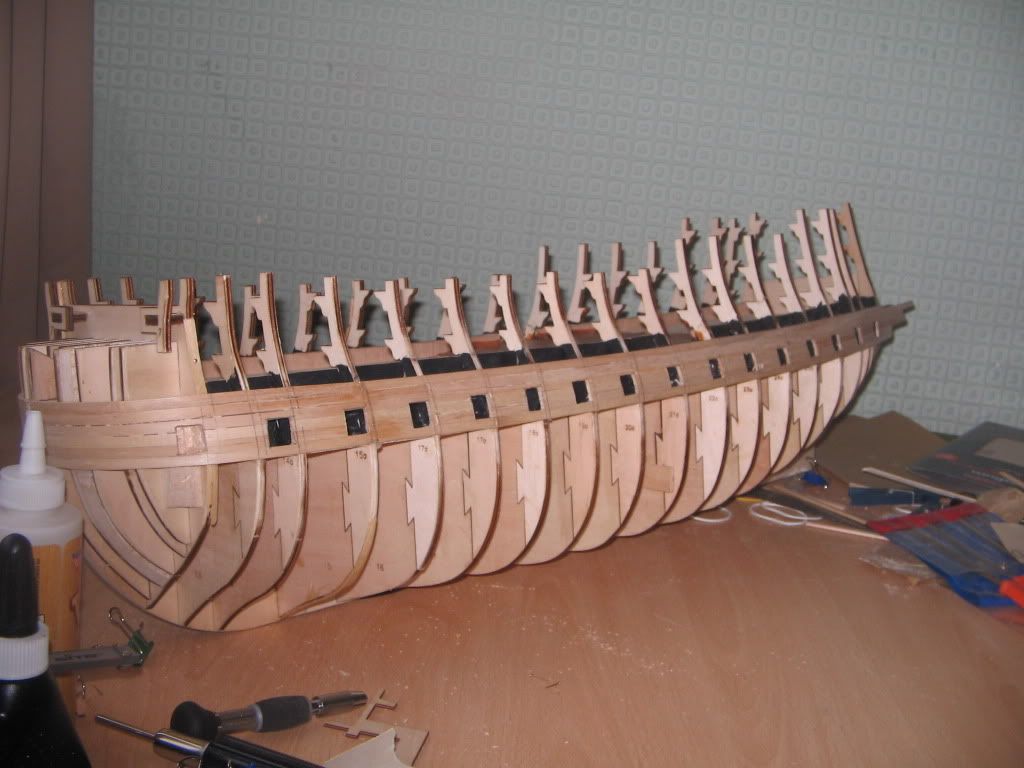  As i did not start this diary from the begining, thought i would add the launch on. Not the best in the world, far from it, but for me it turned out fairly good.   So back to work and ill continue next weekend. Roll on christmas im on leave, i might get something done.
|
|
|
Rank: Vice-Master Groups: Registered
Joined: 26/09/2010 Posts: 851 Points: 2,565 Location: Walsall
|
Well i was suposed to be at work this week but somethings came up so have taken a weeks leave. The plus side on that is i can work on the ship. Have today finished the first lot of gun ports. The start   And the finished product. I had 1 or 2 hickups with the size of the gun ports but they were fractional, hope it will not matter and when it comes to lining them it will get sorted out.   Its a good job im single now as i dont think anyone would put up with the mess in my spare room here which is now the workshop. Must clean it up as im starting not t be able to find the tools i need. 
|
|
|
Rank: Vice-Master Groups: Registered
Joined: 26/09/2010 Posts: 851 Points: 2,565 Location: Walsall
|
I have started to trim the galley planking today but before i proceed id like some help please. I have a gap at the rear of it, do i need to add a thin plank in here or will the rest of the hull planking and a little filler fill this in.  The gap seems considrable to be so any advice is appreciated.
|
|
|
|
Guest
|
 US
US

