|
|
 Rank: Pro     Groups: Registered
Joined: 11/11/2015 Posts: 278 Points: 807 Location: Minneapolis, Minnesota USA
|
Ok, well, I have been sitting on this build for a while waiting for parts and supplies and I am building a new bigger spray booth to handle this beastie. I won't be going over the basic things everyone else has already covered in their builds, like frame assembly and such. I have stripped off all the weathering on the Issue 1 and 3 hull parts to use them as practice for my weathering techniques. I am waiting on new TP1 and TP3 parts that should arrive soon. When my shipment 2 gets here then this build will begin in earnest. Today I received my upgraded parts from Shapeways. Some parts are better then others but the detail on them is incredible. This will challenge my painting skills no doubt. 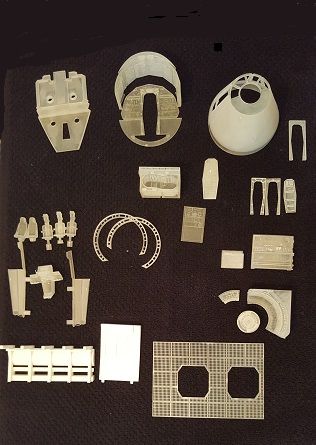 Lots of goodies here 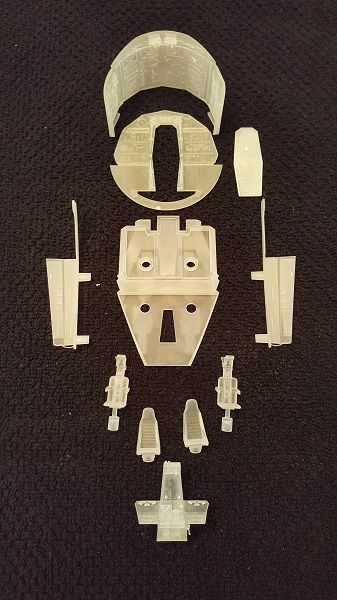 This is the upgraded cockpit 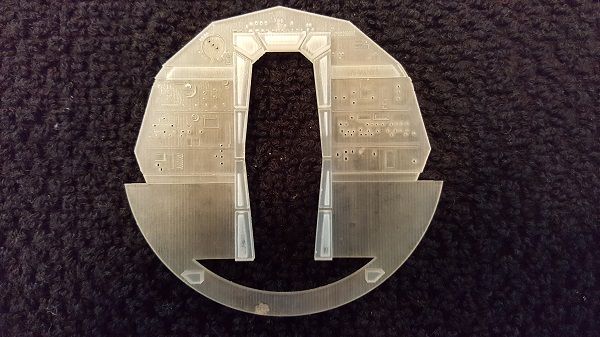 Cockpit bulkhead 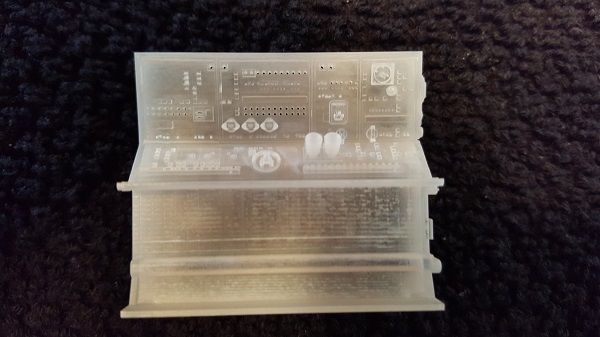 Hold Nav computer 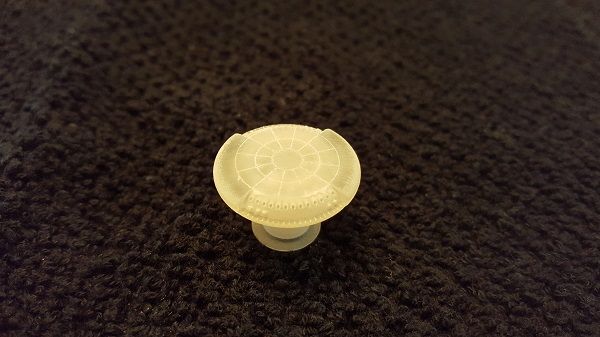 Dejarik Table 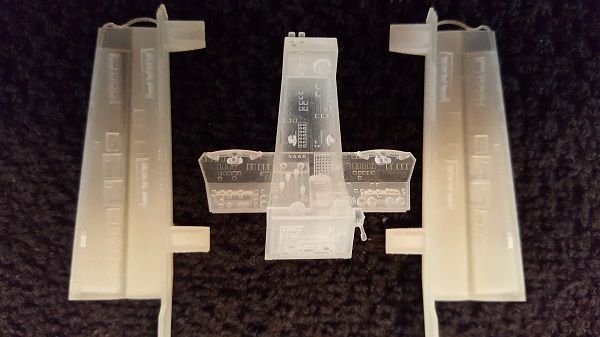 Close up of cockpit and side panels. Note the details... Some of the parts are really rough. Going to try and buff them a little smoother with a Dremel and a buffing wheel. Overall, I am happy with the results and the quality of the parts. Everything was packed individually in bubble wrap and nothing was damaged in shipping. I feel like I am cheating with these parts after seeing some of the beautiful scratch built mods some of the guys have done to fix these issues. But there was some other reasons for getting these. For one the Dejarik table sticker was so badly printed off center that it is unusable. The other reason is that I am a perfectionist to a fault sometimes, NOT a rivet counter by any means. But, if I am going to justify spending this much money on a great model like this I want things to look good and professional. Ron Best Regards,
Ron
On the bench: DeAgostini '67 Ford Shelby Mustang, Hachette Space Battleship Yamato 2202, Agora Models T-800 Terminator
Finished builds: DeAgostini Toyota 2000GT
In the Stash: Losing count...
|
|
|
|
|
 Hi Some nice stuff there as for polishing I would try using a surfacer type undercoat first like Mr Hobby it comes in 1200 and 1000 this should fill any pits and leave a smooth surface for painting. Link below but any good surfacer/primer will do the trick. http://www.ebay.co.uk/it...0e02:g:7KQAAOxy4fVTAa5r
Regards Andy  Current builds:-C57,Zero, Lamborghini Countach, Caldercraft HMS Agamemnon,Robi,R2-D2, MFH Cobra .
|
|
|
 Rank: Pro     Groups: Registered
Joined: 11/11/2015 Posts: 278 Points: 807 Location: Minneapolis, Minnesota USA
|
arpurchase wrote: Hi Some nice stuff there as for polishing I would try using a surfacer type undercoat first like Mr Hobby it comes in 1200 and 1000 this should fill any pits and leave a smooth surface for painting. Link below but any good surfacer/primer will do the trick. http://www.ebay.co.uk/it...0e02:g:7KQAAOxy4fVTAa5r
Regards Andy  Nice, too bad. they ship everywhere but the US   Best Regards,
Ron
On the bench: DeAgostini '67 Ford Shelby Mustang, Hachette Space Battleship Yamato 2202, Agora Models T-800 Terminator
Finished builds: DeAgostini Toyota 2000GT
In the Stash: Losing count...
|
|
|
 Rank: Pro     Groups: Registered
Joined: 11/11/2015 Posts: 278 Points: 807 Location: Minneapolis, Minnesota USA
|
Oh yes, I will be doing some scratch building as well. 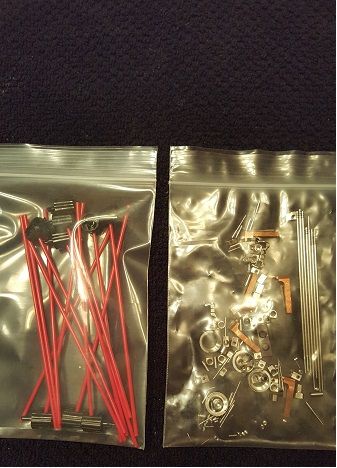 Greeblies... lots of greeblies  I work at a machine shop so I pick up random bits of this and that that interest me. The red straws are from degreaser spray cans. You would be amazed what you can do with them. Best Regards,
Ron
On the bench: DeAgostini '67 Ford Shelby Mustang, Hachette Space Battleship Yamato 2202, Agora Models T-800 Terminator
Finished builds: DeAgostini Toyota 2000GT
In the Stash: Losing count...
|
|
|
 Rank: Pro   Groups: Registered
Joined: 16/04/2011 Posts: 328 Points: 998 Location: Anglesey
|
Hi Ron, Welcome aboard the falcon, enjoy this fantastic build and I wish all the best with the extra parts you have. Keep posting, no matter what it is. Darren
Have an AWSOME day and may the Force be with you always 😉 Building: Millennium Falcon https://forum.model-spac...sts&t=14381&p=7 - Building: BTTF Delorean - Building: Dom's Dodge Charger - Building : X-Wing https://forum.model-spac...aspx?g=posts&t=34899
|
|
|
 Rank: Pro     Groups: Registered
Joined: 11/11/2015 Posts: 278 Points: 807 Location: Minneapolis, Minnesota USA
|
HAPPY NEW YEAR EVERYONE!!!     I have had some issues right off the bat. When I went to remove the window I got the one person in the factory who likes to use a lot of glue. It was spread all around the window frame. As I was trying to pop it out, it split the frame in half. So, I carefully cleaned out the excess glue (there was so much it softened the plastic). I also rebuilt up the window frame where it split. Then Christmas came and I put off the build a bit. Yesterday, the wife and I went to IKEA and bought some stuff to do a bit of adding on the hobby room workspace. So the rest of the day and part of today was spent assembling furniture. I love all the extra space and storage. Window removed and excess glue cleaned out of slot: 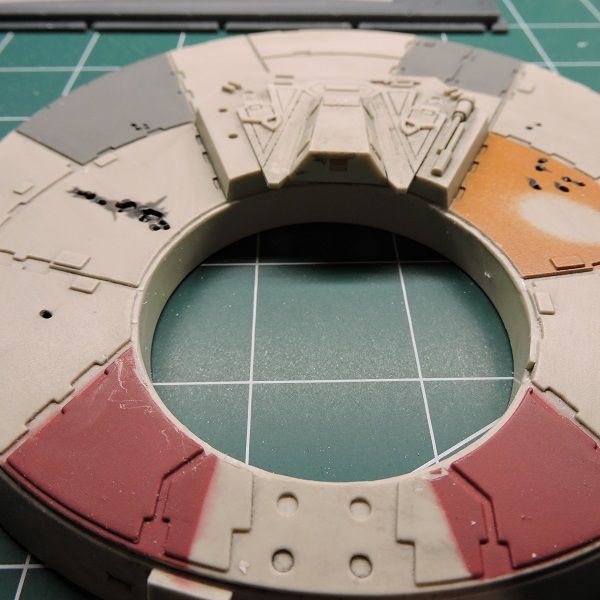 Had to rebuild up the frame with modelling putty. Waiting for it to dry so I can reshape it to its former glory. 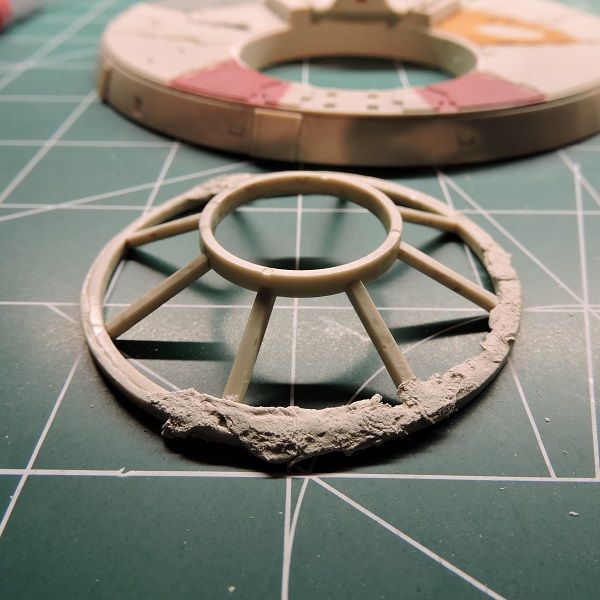 Some cockpit parts with an initial coat of primer ready for clean up, resurfacing, and painting. 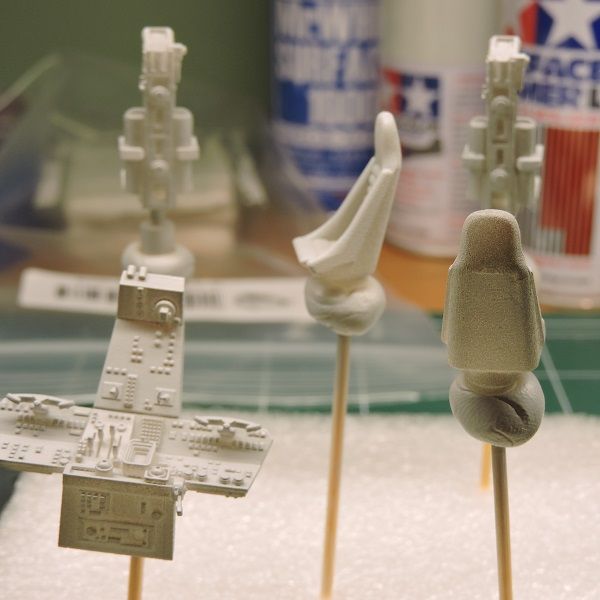 Original working space: 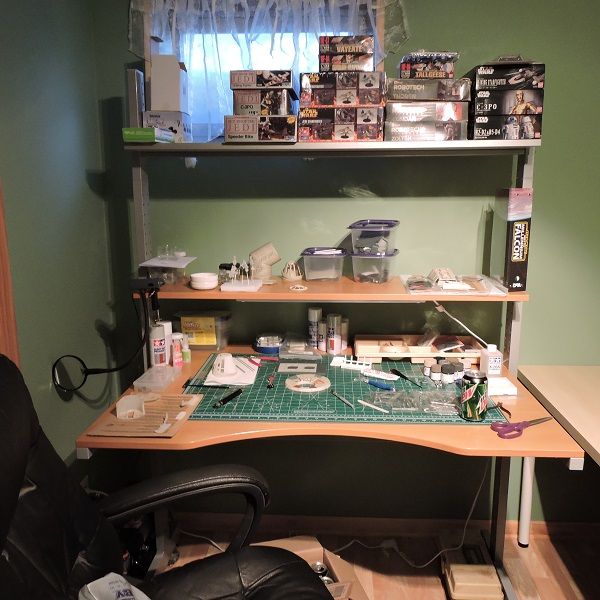 New additional working space: 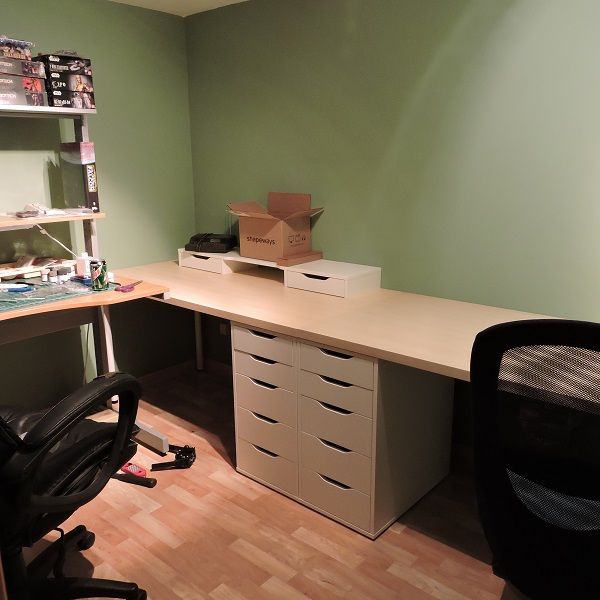 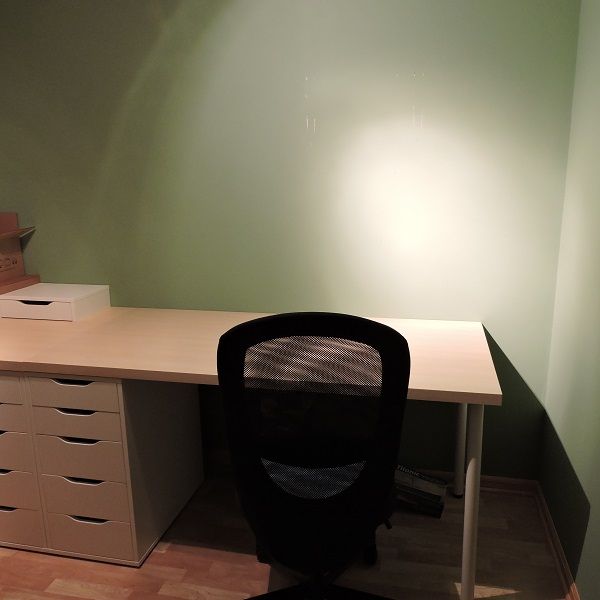 Will provide an update as soon as these bits are fixed and I am further along with the build. Ron Best Regards,
Ron
On the bench: DeAgostini '67 Ford Shelby Mustang, Hachette Space Battleship Yamato 2202, Agora Models T-800 Terminator
Finished builds: DeAgostini Toyota 2000GT
In the Stash: Losing count...
|
|
|
 Rank: Pro   Groups: Registered
Joined: 16/04/2011 Posts: 328 Points: 998 Location: Anglesey
|
Nice work area, shame about the turret  If it doesn't work out, the bottom turret and window are separate in issue 48, so could use that window  Darren
Have an AWSOME day and may the Force be with you always 😉 Building: Millennium Falcon https://forum.model-spac...sts&t=14381&p=7 - Building: BTTF Delorean - Building: Dom's Dodge Charger - Building : X-Wing https://forum.model-spac...aspx?g=posts&t=34899
|
|
|
 Rank: Pro     Groups: Registered
Joined: 11/11/2015 Posts: 278 Points: 807 Location: Minneapolis, Minnesota USA
|
Not much of an update here as I have been busy working on my build of the year entry this weekend. I unpacked all the boxes I received from DeAgo and sorted and put everything in its place. I have worked on the frames quite a bit. My lower frame is about 3/4ths of the way done and I will post more pics of that later. I fixed the upper turret but was not happy with it so I tore it apart again and its awaiting a second rebuild. Upper Frame start: 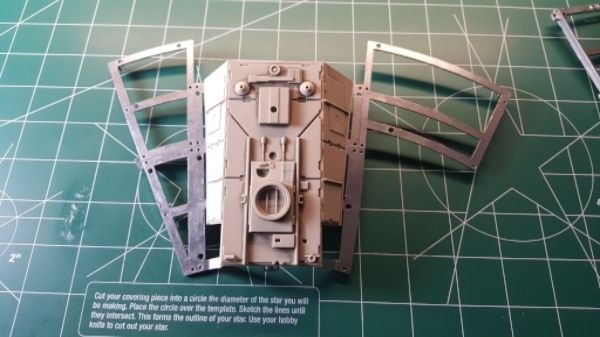 Lower frame start: 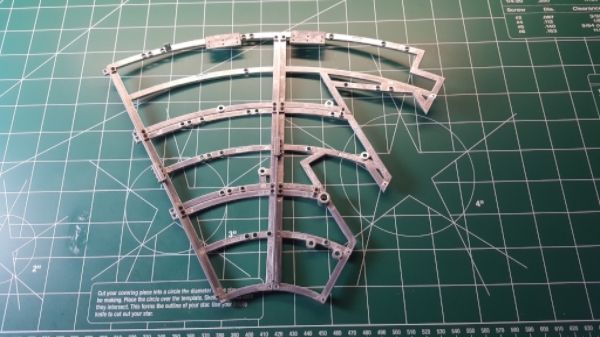 Hopefully, here in the near future I can get to work in earnest on the cockpit. More updates soon. Ron Best Regards,
Ron
On the bench: DeAgostini '67 Ford Shelby Mustang, Hachette Space Battleship Yamato 2202, Agora Models T-800 Terminator
Finished builds: DeAgostini Toyota 2000GT
In the Stash: Losing count...
|
|
|
 Rank: Pro     Groups: Registered
Joined: 11/11/2015 Posts: 278 Points: 807 Location: Minneapolis, Minnesota USA
|
Just a pic of my frame completed with the parts I have so far: 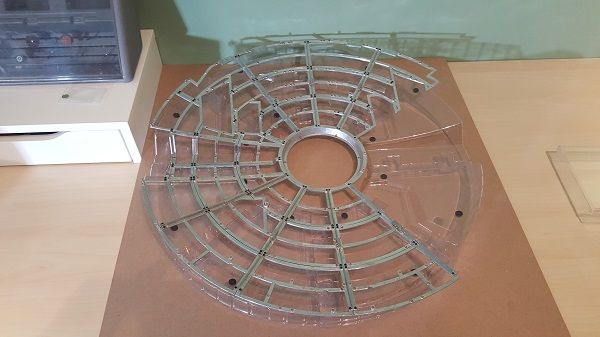 I have learned some things putting this together... There are some typos in the magazines... 1) When you build the second section of the frame in issue 15 it tells you to use BF-16, 15, and 14. Well as many of you already know BF-15 and 14 where used in the previous frame build. What you really need is BF-16, 17 and 18. 2) As noted in a previous post in Issue 24 it asks you to use 9 2-hole connectors. You only need 8. 3) All the holes for the black button head screws are tapped at an angle. If you try and tighten them all the way parallel to the frame you might strip the thread. 4) Assemble everything loosely until you have all the frame pieces in place, especially the rib connectors. I then went back and took out all the screws one at a time and put a small amount of blue Thread-Loc on them so that they stay secure. Hope this helps all the new guys starting their builds. Until later  Ron Best Regards,
Ron
On the bench: DeAgostini '67 Ford Shelby Mustang, Hachette Space Battleship Yamato 2202, Agora Models T-800 Terminator
Finished builds: DeAgostini Toyota 2000GT
In the Stash: Losing count...
|
|
|
 Rank: Super-Elite       Groups: Registered
Joined: 27/01/2014 Posts: 5,060 Points: 14,980
|
Looking good Ron  I really love the frame work and actually did consider building one with just the framework 
|
|
|
 Rank: Master      Groups: Registered
Joined: 07/07/2015 Posts: 1,292 Points: 3,928 Location: Allentown PA
|
Looking good. Hope to start mine soon. I am building the frame first so waiting till I get the final jig pieces. Why are you getting new TP-1 and TP-3 parts? Where yours broken or had DeAg actually said they will change those? I have one off bottom panels with a snapped stud so they are sending me a new one. Gonna use the broken one for test painting. Also you can get a new window from shape ways as well.
DeAgostini kit builds:
Millennium Falcon: 18% Complete
Shelby GT-500: 28% Complete
Thunderbird 2: 13.75% Complete
|
|
|
 Rank: Pro     Groups: Registered
Joined: 11/11/2015 Posts: 278 Points: 807 Location: Minneapolis, Minnesota USA
|
Thanks for looking in and your comments. The tp-1 and tp-3 parts are missing a feature on them that's fairly noticeable. The armor plates on the sides aren't slotted correctly. They are missing the spacing along the top edge. The window was easily fixed. I just didn't like the way I glued it back on. Ron Best Regards,
Ron
On the bench: DeAgostini '67 Ford Shelby Mustang, Hachette Space Battleship Yamato 2202, Agora Models T-800 Terminator
Finished builds: DeAgostini Toyota 2000GT
In the Stash: Losing count...
|
|
|
 Rank: Super-Elite        Groups: Registered, Forum Support Team, Administrators, Global Forum Support Team, Moderator, Official Builds Joined: 09/11/2012 Posts: 8,520 Points: 24,651 Location: East midlands
|
Hi Ron,  Coming on well.    Apologies for missing your blue medal, but please accept my belated congrats. Regards delboy271155 (Derek) COME BACK GUY FAWKES "YOUR COUNTRY NEEDS YOU"
|
|
|
 Rank: Super-Elite        Groups: Registered
Joined: 31/05/2010 Posts: 5,679 Points: 17,011 Location: Wiltshire
|
Ron Looks like you have yourself a very nice work area for your building. Hope the rest of the build goes well for you. Happy Modelling
BUILDING: Hachette Spitfire Mk 1A, Constructo Mayflower
SUBSCRIPTION COMPLETE (Awaiting building): USS Constitution, Sovereign of the Seas, 1:200 Bismarck (Hachette)
COMPLETED: Porsche 911, E-Type Jaguar, Lam Countach
|
|
|
 Rank: Super-Elite        Groups: Registered
Joined: 31/05/2010 Posts: 5,679 Points: 17,011 Location: Wiltshire
|
Ron Looks like you have yourself a very nice work area for your building. Hope the rest of the build goes well for you. Happy Modelling
BUILDING: Hachette Spitfire Mk 1A, Constructo Mayflower
SUBSCRIPTION COMPLETE (Awaiting building): USS Constitution, Sovereign of the Seas, 1:200 Bismarck (Hachette)
COMPLETED: Porsche 911, E-Type Jaguar, Lam Countach
|
|
|
 Rank: Amateur level 2  Groups: Registered
Joined: 29/09/2015 Posts: 41 Points: 123 Location: USA
|
Looks like you have a good start. I look forward to seeing what you do with all the shapeways parts as I have purchased the cockpit parts and the nose cone as well.
|
|
|
 Rank: Vice-Master   Groups: Registered
Joined: 05/03/2015 Posts: 561 Points: 1,713 Location: South Carolina
|
Looks like you got a good start to get going bro! I too broke my turret window and ended up getting the 3d printed one. Nice thing, the little peg on it was in the proper position so the frame sat right without having to judge where it goes. Will keep my eyes on this on! Welcome to the Falcon Family!
|
|
|
|
Guest
|