|
|
 Rank: Pro Groups: Joined: 24/08/2009 Posts: 48,051 Points: -13,308
|
I want to make a realistic, lived on, slightly abused, but thoroughly loved looking Falcon. I won't be following the Dymszo method for painting and detailing the exterior. While some may value recreating the studio prop exactly, I'm more interested in not cutting as many corners as ILM did and making a more lifelike ship. Also not following the traditional build diary video format. It's essentially a collection of stills taken during the build and at several points upon completion of the Packs. The plus side is you get to see how it looks at various stages of painting and assembly. The down side is you don't get to see me fumble the really small parts and listen to me talk to myself for 15-20 minutes. Oh wait, that's another plus. Part 1 (packs 1-6) https://www.youtube.com/watch?v=RK-OMomFoYw
Part 2 (packs 7-9) https://www.youtube.com/watch?v=249UCuE0VJE
*updated* Part 3 (packs 10-13) https://www.youtube.com/watch?v=YnVTPxD5DIQ
|
|
|
 Rank: Amateur level 2  Groups: Registered
Joined: 07/12/2015 Posts: 40 Points: 120 Location: South Dakota
|
Looking good, I liked the work you did on the center console of the cockpit. Nice!
|
|
|
Rank: Pro Groups: Joined: 24/08/2009 Posts: 48,051 Points: -13,308
|
|
|
|
Rank: Administration       Groups: Registered, Forum Support Team, Administrators, Global Forum Support Team, Moderator, Official Builds Joined: 09/11/2012 Posts: 7,967 Points: 23,090 Location: East midlands
|
Looking good and great to see a new falcon diary started. Congrats on your blue medal. Regards delboy271155 (Derek) COME BACK GUY FAWKES "YOUR COUNTRY NEEDS YOU"
|
|
|
Rank: Amateur level 2 Groups: Registered
Joined: 07/12/2015 Posts: 40 Points: 120 Location: South Dakota
|
Looking good! I have question though. How does that ramp work? The end piece; do you have fold that up before the motor lifts the ramp?
|
|
|
Rank: Pro Groups: Joined: 24/08/2009 Posts: 48,051 Points: -13,308
|
I can't really test it to give a definitive answer because the control board and power supply don't come for quite a while. Mechanically it seems like it must be flipped out by hand and replaced before you close it. I considered running a small steel cable down the side to extend and retract it at specific points but I want to wait until I can see it in action.
|
|
|
Rank: Pro Groups: Joined: 24/08/2009 Posts: 48,051 Points: -13,308
|
Had a thought when putting the detachable landing gear covers on the bottom this week:
With as many layers of primer, preshading, base color as I'll spraying on soon, what should I do to avoid having the panels being sealed to the hull?
Should I just take them off and paint them alongside it until I'm ready to do the washes? Put some laytex masking medium on the inside of the panels? What did those of you who've already painted the bottom do for this?
|
|
|
Rank: Pro Groups: Joined: 24/08/2009 Posts: 48,051 Points: -13,308
|
|
|
|
Rank: Pro Groups: Joined: 24/08/2009 Posts: 48,051 Points: -13,308
|
Posted a completed build of the Bandai Falcon to show the paint, damage, and weathering techniques I plan to use. Bandai 1:144 completed.
|
|
|
Rank: Pro Groups: Registered
Joined: 04/07/2015 Posts: 99 Points: 309 Location: north wales
|
great stuff.....love the work you've done on the Bandai falcon....to get that level of detailing at that scale must require the patience of a saint!!!....very nice
|
|
|
Rank: Pro Groups: Joined: 24/08/2009 Posts: 48,051 Points: -13,308
|
It's time to talk about damage. I don't mean what the post office does to your packs. I mean the damage that's visible on the hull of the Falcon. I know a lot of builders heave been turned off by the idea of altering the hull and will be attempting to do as much as they can with a detailed paint job. My suggestion is before you start painting this monster, you do a little work on improving the damaged panels. The small rounded depressions that approximate the shape of the damaged areas just don't look right when you start detailing this build. 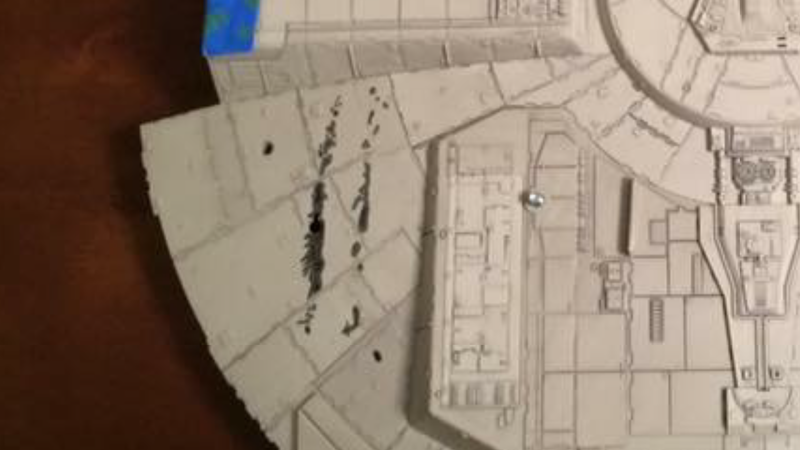 I can't complain about it because the kind of effects I am looking to achieve isn't remotely practical as something to expect out of the box. 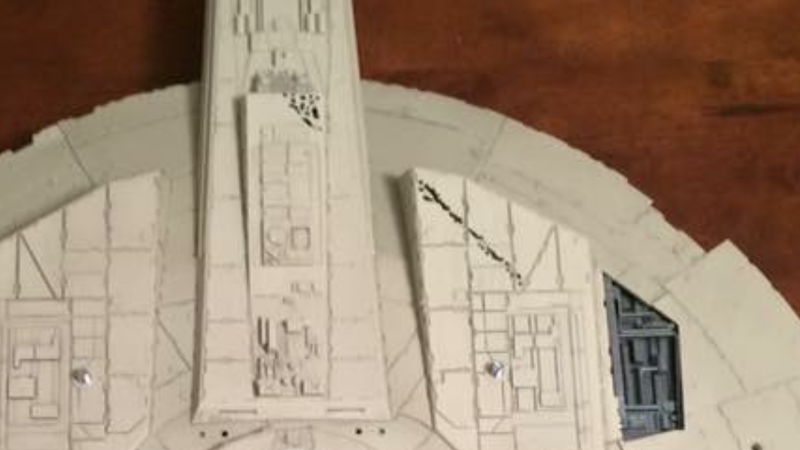 So here's a small preview of where I'm at and what to expect in my next build video. 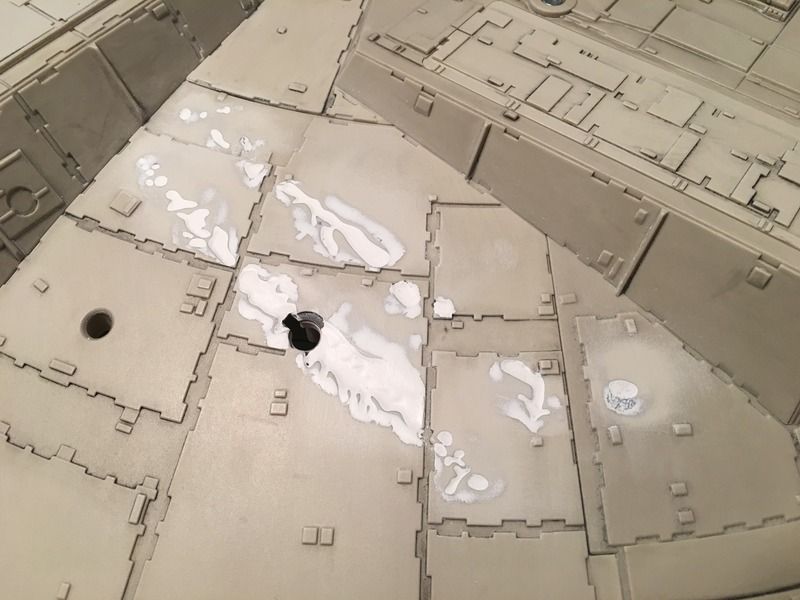 I started by filling in the existing damage with modeling putty and giving it plenty of time to dry before sanding it down flush with the hull. 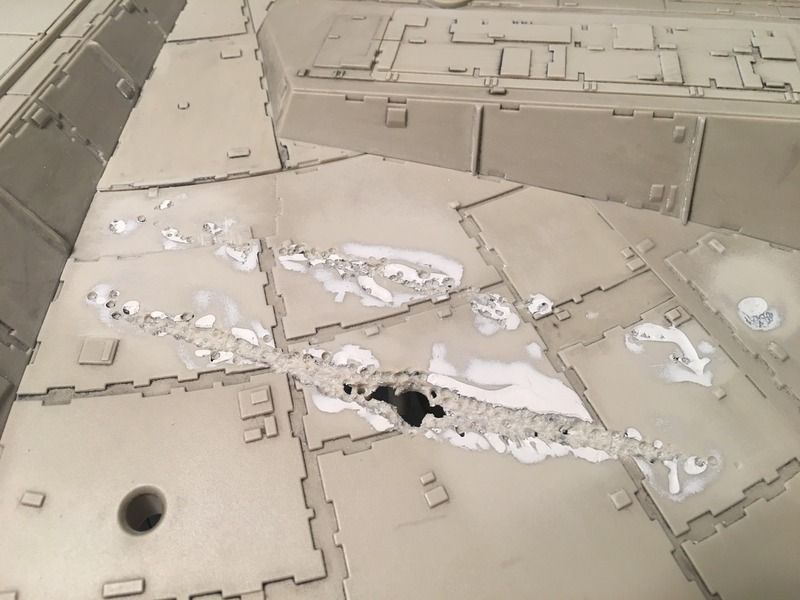 I then used a Dremel and hand drill to replicate the damage as closely as possible to reference pictures (that I can't show here for comparison due to odd forum rules). 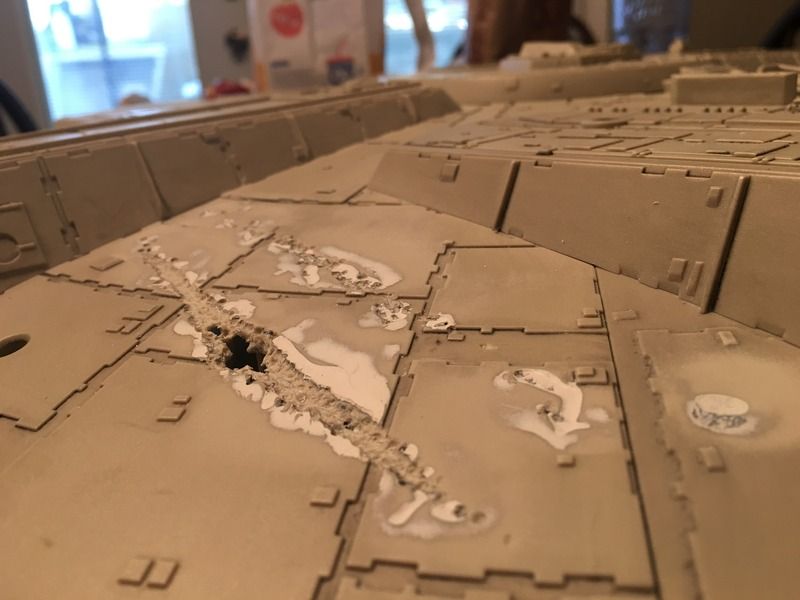 Shows off the depth and overhang a bit better. I won't be able to replicate the length of the hull breech due to framework sitting directly under this section. I won't be using this location for the external power supply due to its location from the angle I'll want to have displayed. I'll probably be relocating that to somewhere on the port side panels if I end up having one at all. 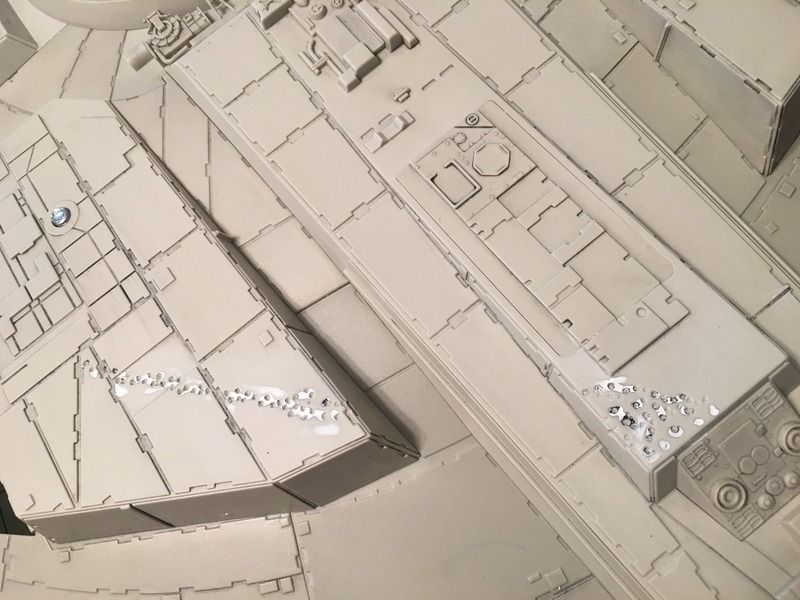 More accurate representation of the forward port section damage. I'll have more when I sit down to edit and look at what I've got. I know this all looks horrible and tacky at the moment, but after it gets primer on it and more so when the detailing is finished, the improvement should be obvious.
|
|
|
|
|
looking good so far, look forward to seeing it when weathered. keep up the good work.
|
|
|
Rank: Pro Groups: Joined: 24/08/2009 Posts: 48,051 Points: -13,308
|
What's this garbage?  Remember when I did decent looking work? Yeah, I know. Looks like trash. But it serves a purpose. Some of you guys build with styrene, I use sprues made of the same plastic as the rest of the model. It let me add some depth for making the battle damage show some piping, and frayed wire / conduit. 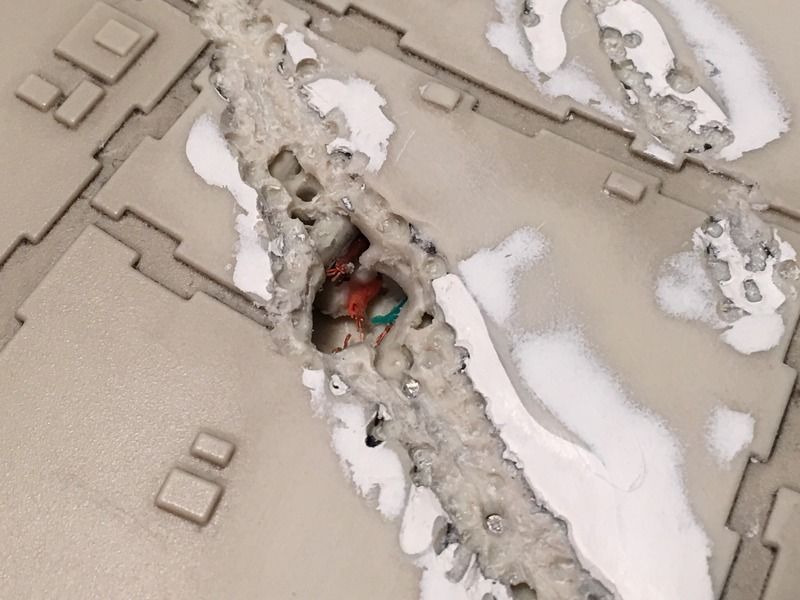 Thoughts? Perhaps I should hold off on posting things like this until it's painted?
|
|
|
|
|
It will look a lot different when painted, but the idea is good, just be careful not to electrocute yourself, use a rubber handled brush. Ha ha. 
|
|
|
 Rank: Vice-Master Groups: Registered
Joined: 05/03/2015 Posts: 561 Points: 1,713 Location: South Carolina
|
Hey Levi... you do realize that hole is where the outside power source is suppose to go right? :) Would hate to think you put all this effort into this so far only to realize you covered up the hole so much you couldn't fit the power plug into the hole anymore! :)
|
|
|
 Rank: Semi-Pro Level 2 Groups: Registered
Joined: 04/09/2015 Posts: 92 Points: 256 Location: Atlantis
|
Personally, I really like seeing the various steps you have taken to achieve the final result. I agree that the battle damage on the hull needs more detail to achieve a more realistic appearance. Looking forward to seeing this feature once you have applied the base coat etc.
|
|
|
Rank: Pro Groups: Joined: 24/08/2009 Posts: 48,051 Points: -13,308
|
Thanks. My plan for tonight is to at least get it primed.
|
|
|
Rank: Pro Groups: Joined: 24/08/2009 Posts: 48,051 Points: -13,308
|
Ran into my first outright defective part. Oddly enough it was the ramp motor. It went down beautifully with everything moving smoothly and no stalling or shuddering as other videos I've seen. Then I tried to retract it. Apparently the thing didn't recognize the cut off switch on the retract side. When the ramp came back up it smashed the switch against itself, tried to pull the ramp inside the hull, snapped the connection point off the ramp, and proceeded to keep running until I killed the power. 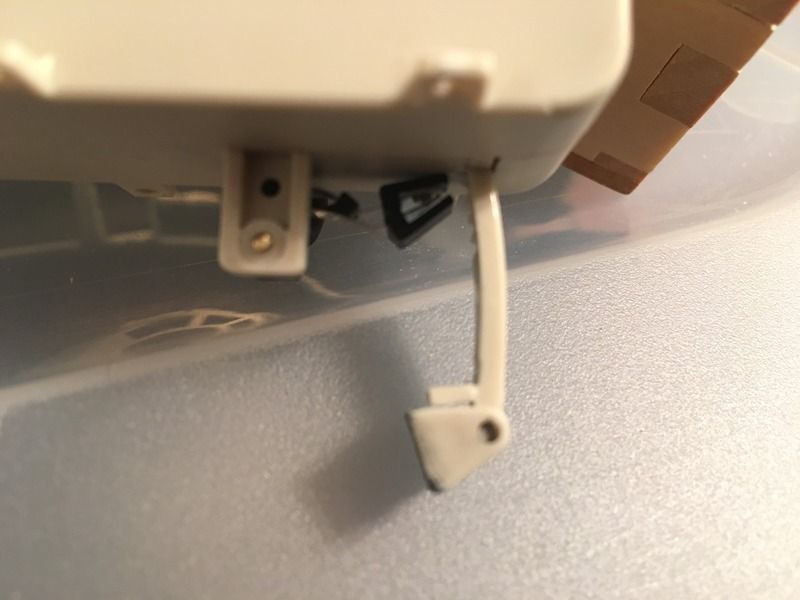 On the plus side I got a first coat of primer on the lower hull. I have to say the battle damage looks much better already now that it doesn't look like a half finished repair job. 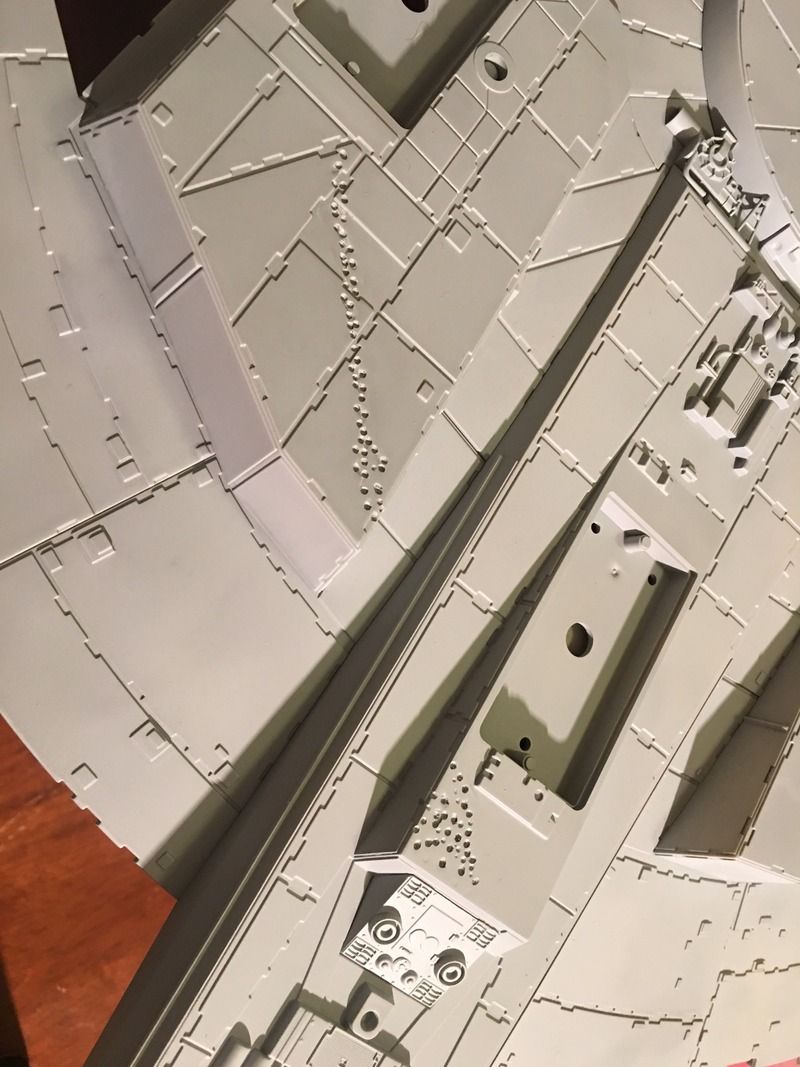 Forward port side to center. 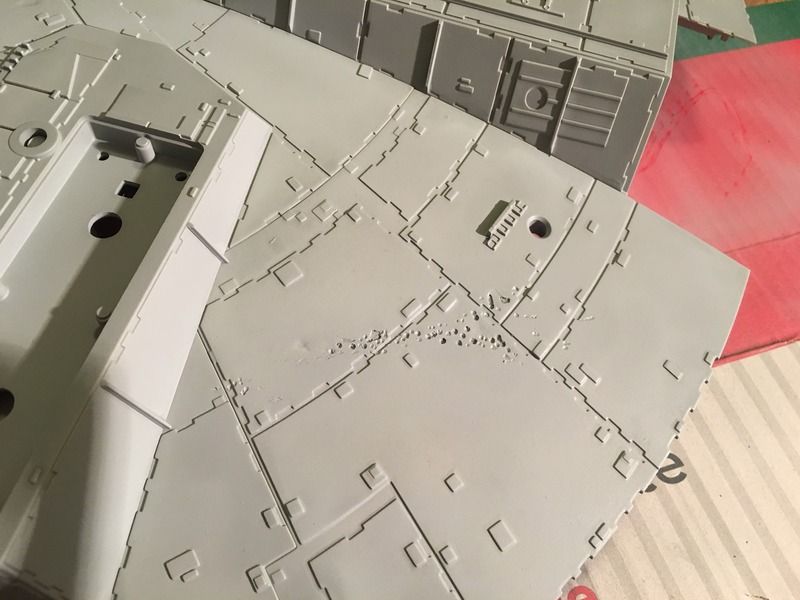 Rear port side. 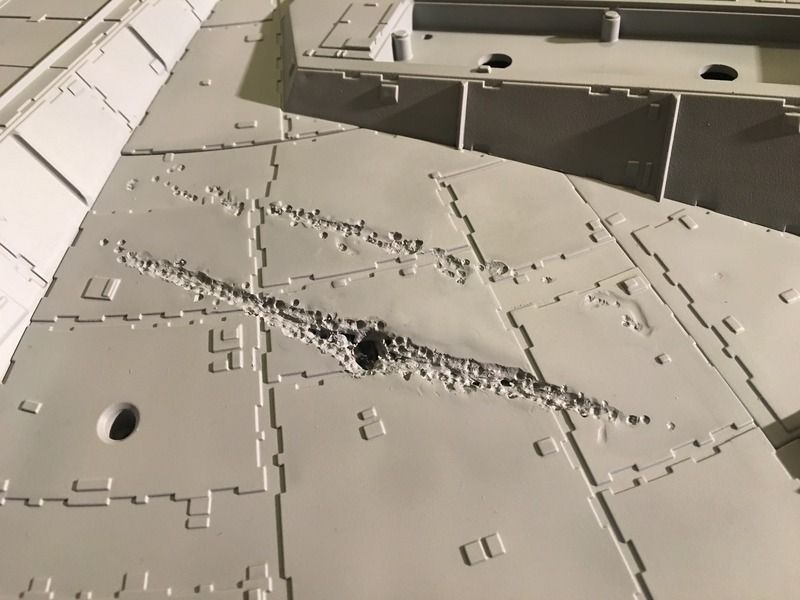 Rear starboard side.
|
|
|
Rank: Pro  Groups: Registered
Joined: 10/05/2011 Posts: 204 Points: 631 Location: Morayshire
|
Nice work with the battle damage, I like the detail inside what should be the power switch. If you don't mind I might copy this. Keep us posted. Regards Bob Builds in progress
1/12 Spitfire (Deagostini)
1/8 McLaren (Deagostini)
1/16 Stuka (Hatchete)
1/16 Zero (Deagostini)
|
|
|
|
|
Nice work, you can see your damaged area better now primed.
|
|
|
|
Guest
|
 US
US

