|
|
 Rank: Pro   Groups: Registered
Joined: 16/03/2016 Posts: 122 Points: 381 Location: Layton, Utah
|
While I'm saving up for the Millennium Falcon build, I at least have something to work on. I started this back in Nov of 2014, got stuck for about a year, worrying about planking the hull. I'd never planked a hull before, and I was really worried about screwing it up. Finally in Feb of this year, I decided to suck it up and get started with planking and just figure it out as I went. Of course, I'd be lying if I said that needing the work-space for the Falcon wasn't an additional motivating factor.  Anyways...most of these pics are old, and there will be a huge gap between the last of them and where I'm at now. But here goes... If at first you don't succeed,
maybe you should skip the chainsaw juggling...
|
|
|
Rank: Pro Groups: Registered
Joined: 16/03/2016 Posts: 122 Points: 381 Location: Layton, Utah
|
So, this being only my second wood model kit ever, I didn't have a lot of supplies on hand, and after buying both the kit and the tools I deemed absolutely necessary, I didn't have much left over to buy a commercially available jig to hold the false keel in place and prevent it from warping, so I had to create one of my own. 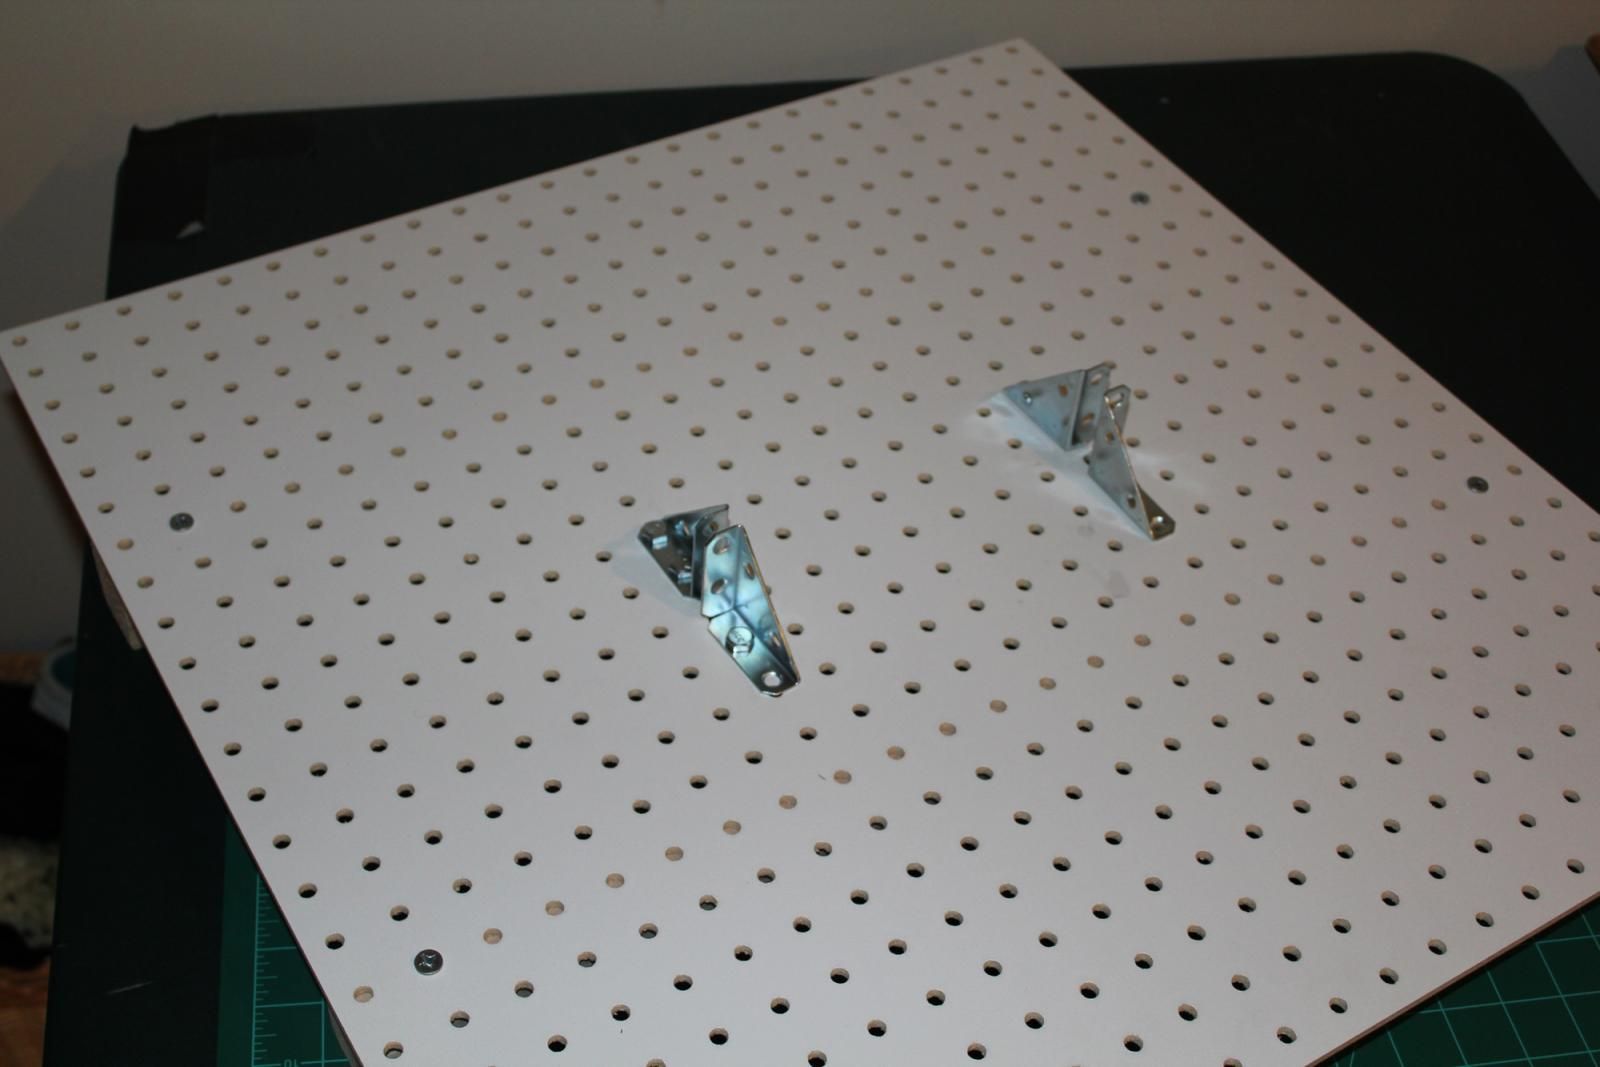 Here you can see that I've attached 4 corner braces to a peg-board table, The two braces in the rear are fixed, while the two in front are able to slide back and forth to create clamps to hold the keel in place. A side benefit to using this type of brace is that the triangular side of the brace attached to the two arms creates yet another 90 degree angle allowing me to use it to butt up against the individual bulkhead frame to ensure that they are perfectly perpendicular to the keel. 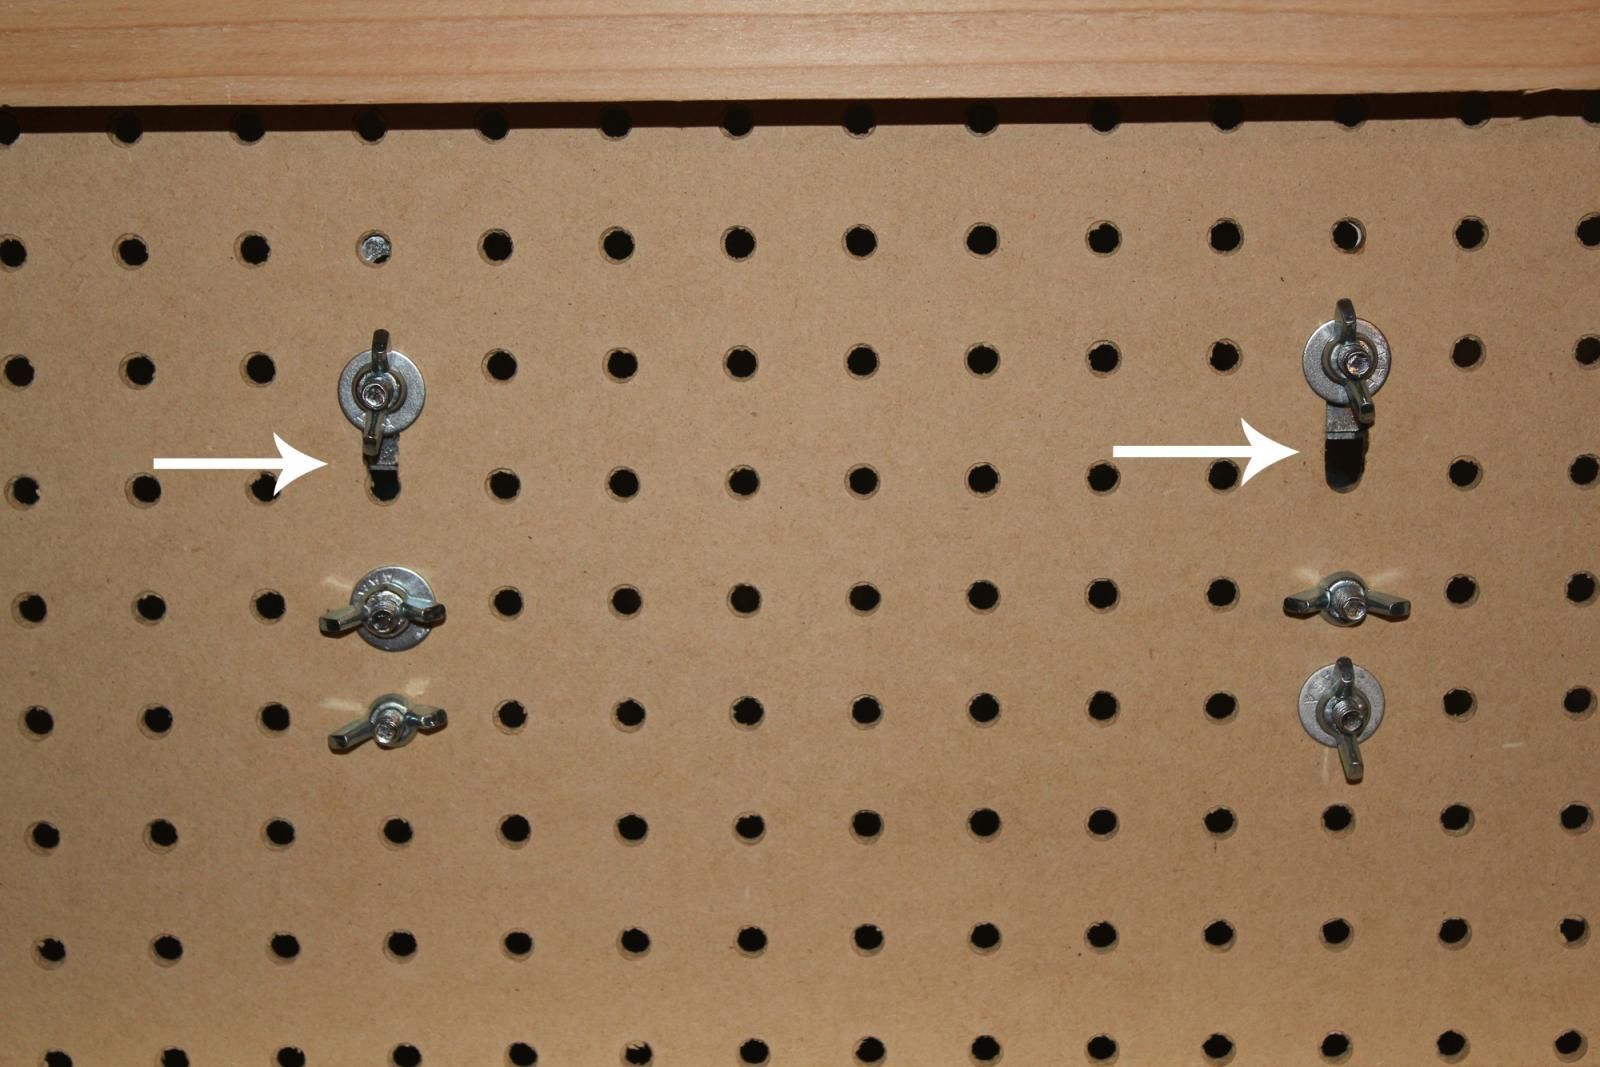 Here you can see the underside of the jig table showing where I cut away the material between two holes to allow the corner braces to slide together with the fixed braces. 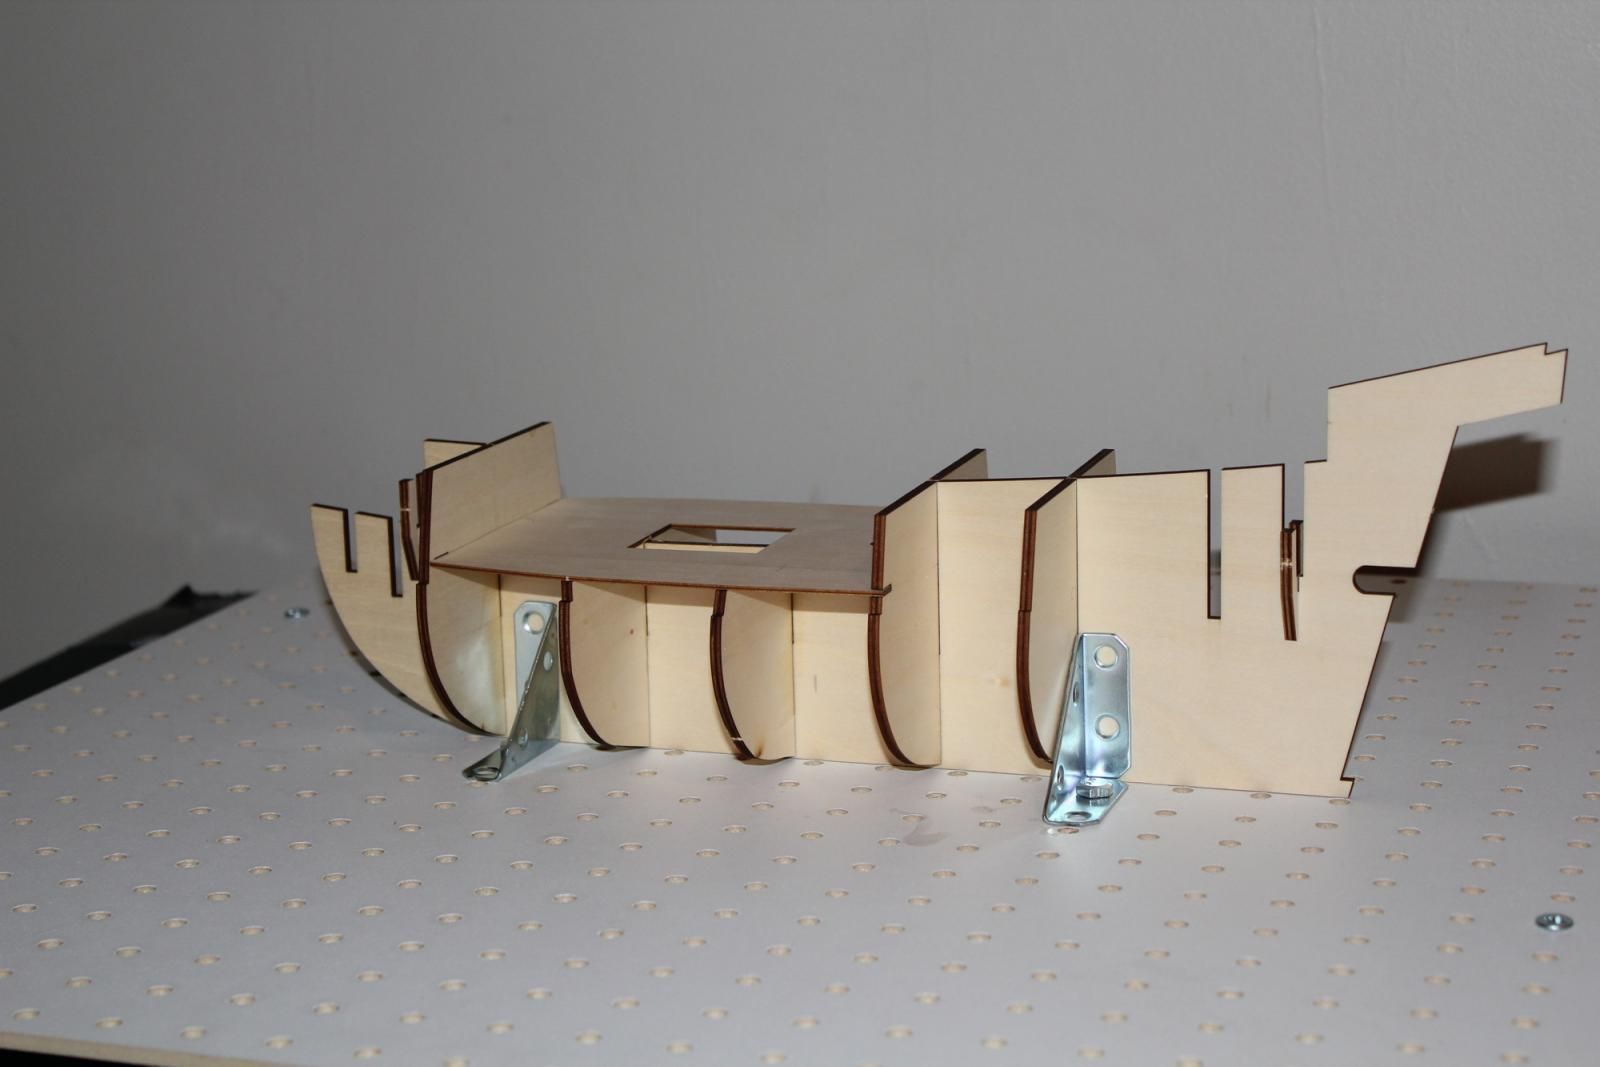 And here you can see the jig in action. A pretty quick and dirty jig, but I feel like I got out of it what I needed. If at first you don't succeed,
maybe you should skip the chainsaw juggling...
|
|
|
Rank: Pro Groups: Registered
Joined: 16/03/2016 Posts: 122 Points: 381 Location: Layton, Utah
|
Here, I've got all of the framing done. 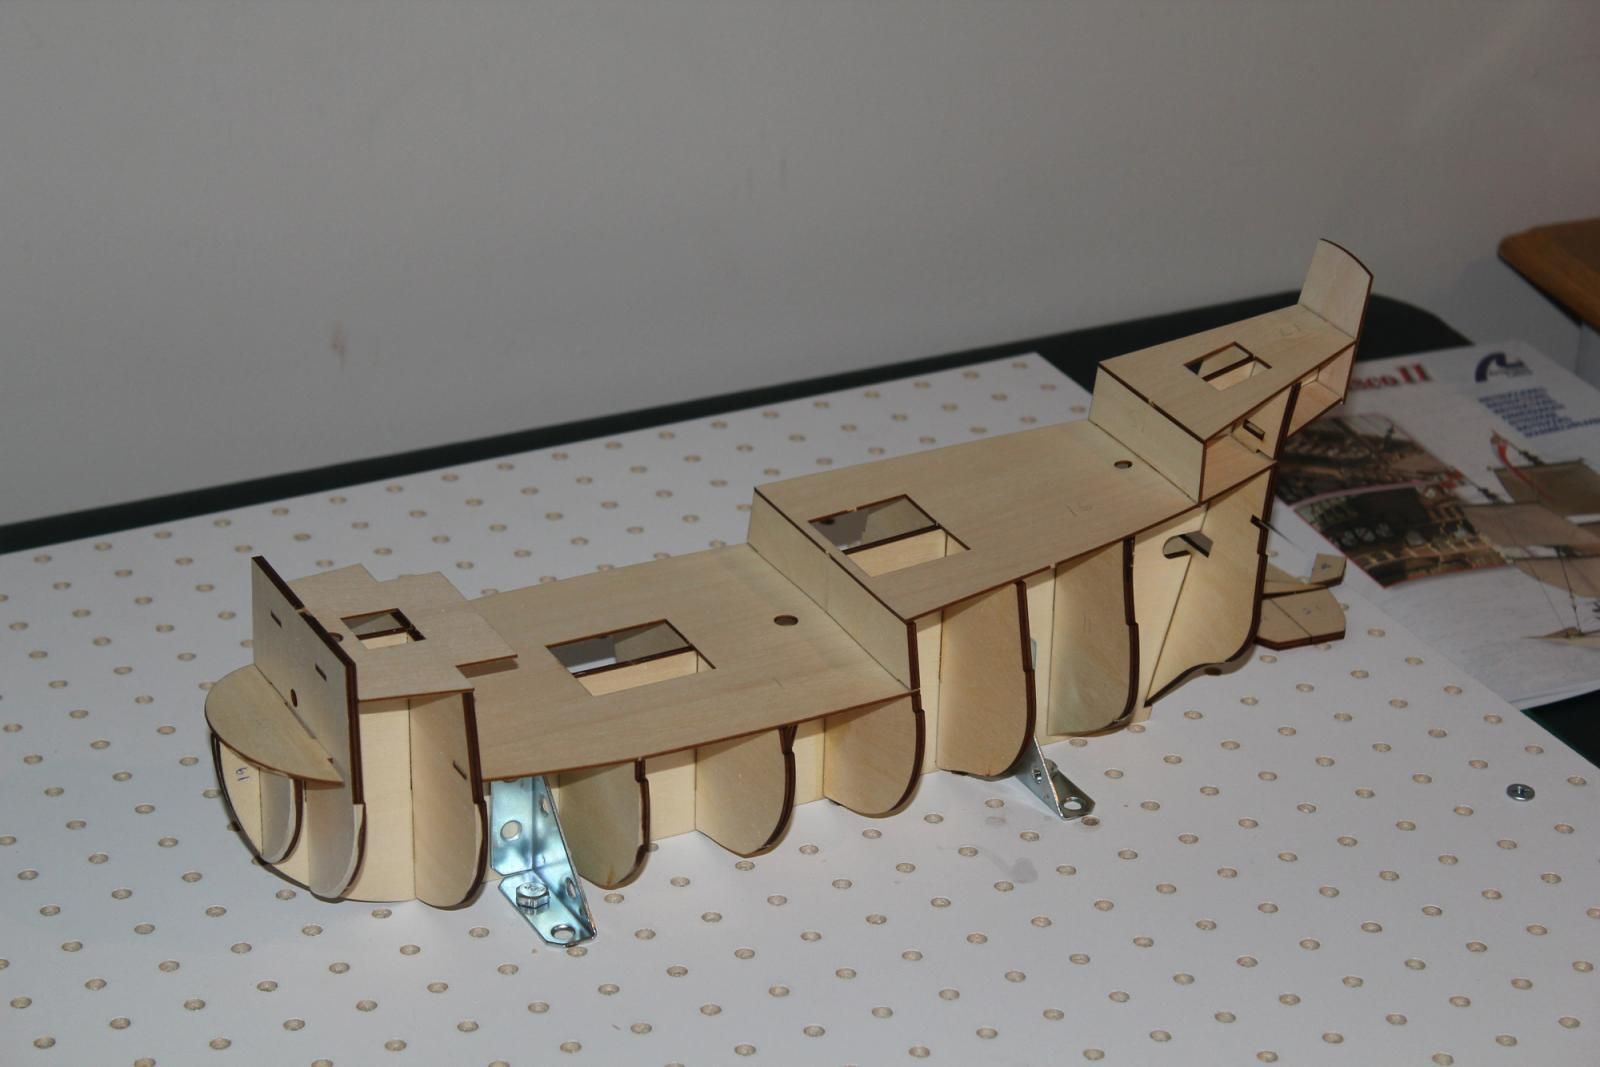 Here, you can see the decks have been installed. 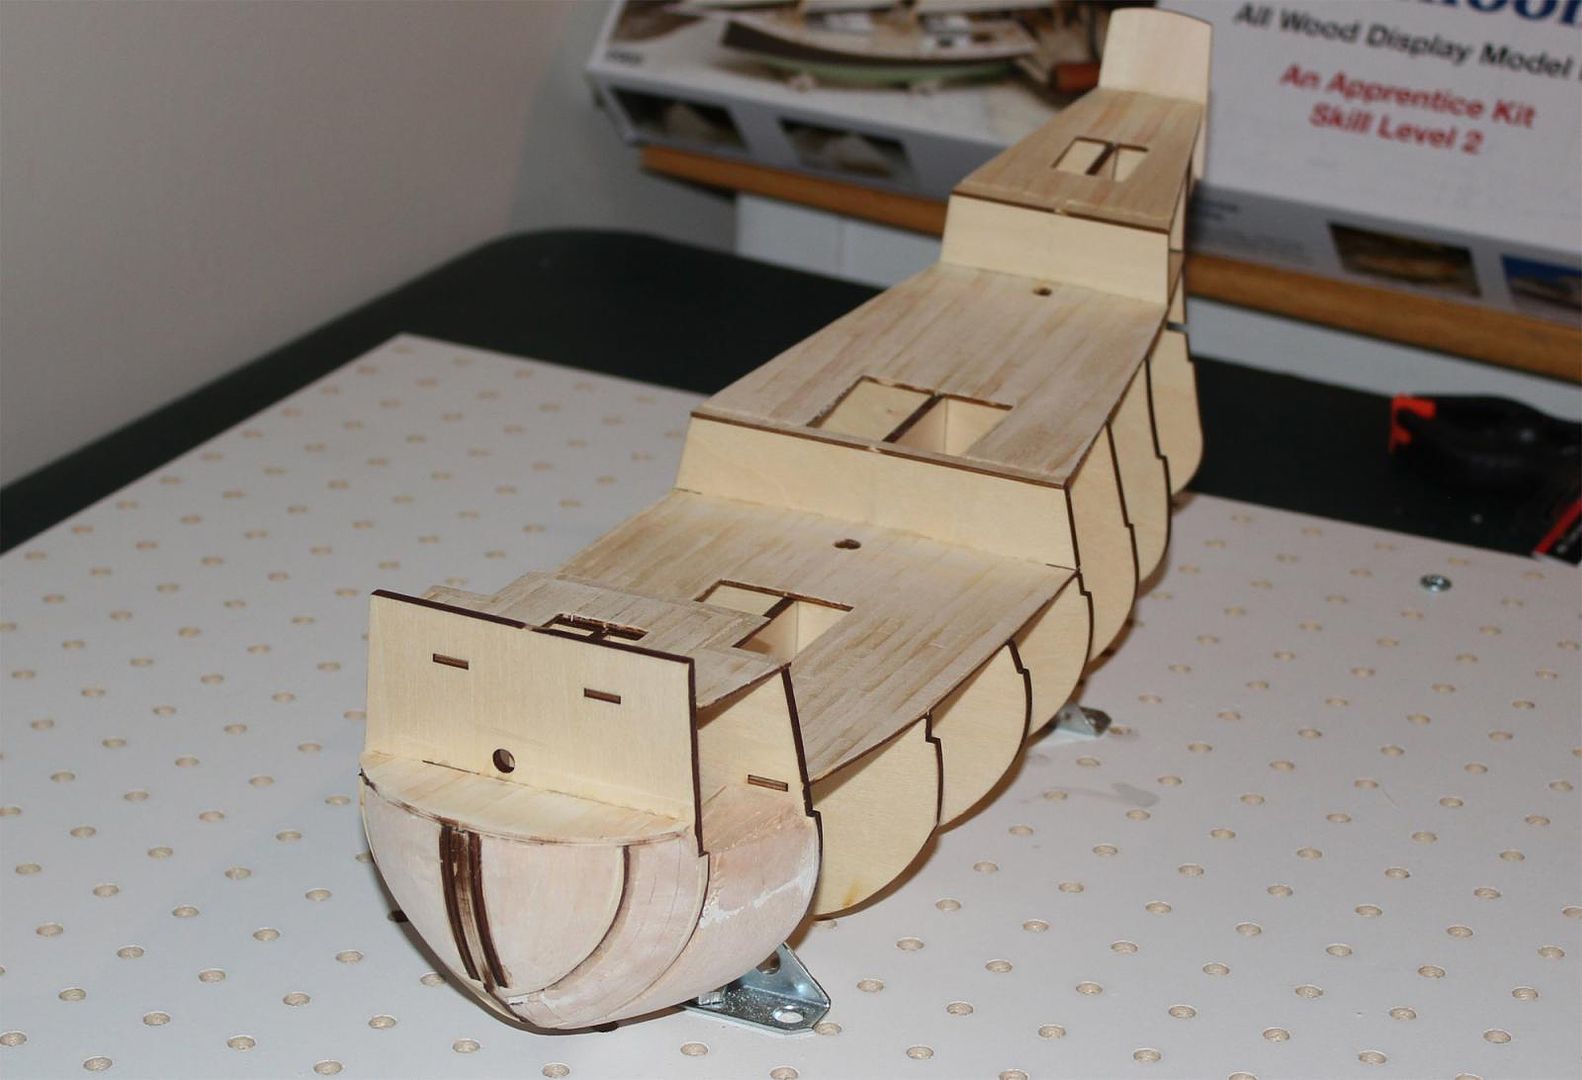 ...and here you can see the deck planking done. I made a conscious decision to not depict the trenailing on the deck planking as I didn't care for the looks. Additionally, you can see where I've filled the bulkhead sections near the bow with balsa to help provide a better surface for the hull planking to adhere to. If at first you don't succeed,
maybe you should skip the chainsaw juggling...
|
|
|
Rank: Pro Groups: Registered
Joined: 16/03/2016 Posts: 122 Points: 381 Location: Layton, Utah
|
I did some experimenting with deck finishing by taking a bunch of scraps of the deck planking wood and gluing them together into a false "deck". I then attempted to "age" the wood by applying a thin wash of lt brown/grey. Unfortunately, I was not happy with the results so I decided I would just go ahead and paint the deck with a Minwax Polycrylic Clear Coat with a flat satin finish. Before starting this, I tested the Polycrylic on a small section of a thin mahogany strip, to see if I could get away with not staining the mahogany. This was also unsatisfactory, as I felt it didn't really bring out the rich red of the wood. So, I tested Minwax Cherry Wood Finish on a similarly small strip of the mahogany, and liked the results. 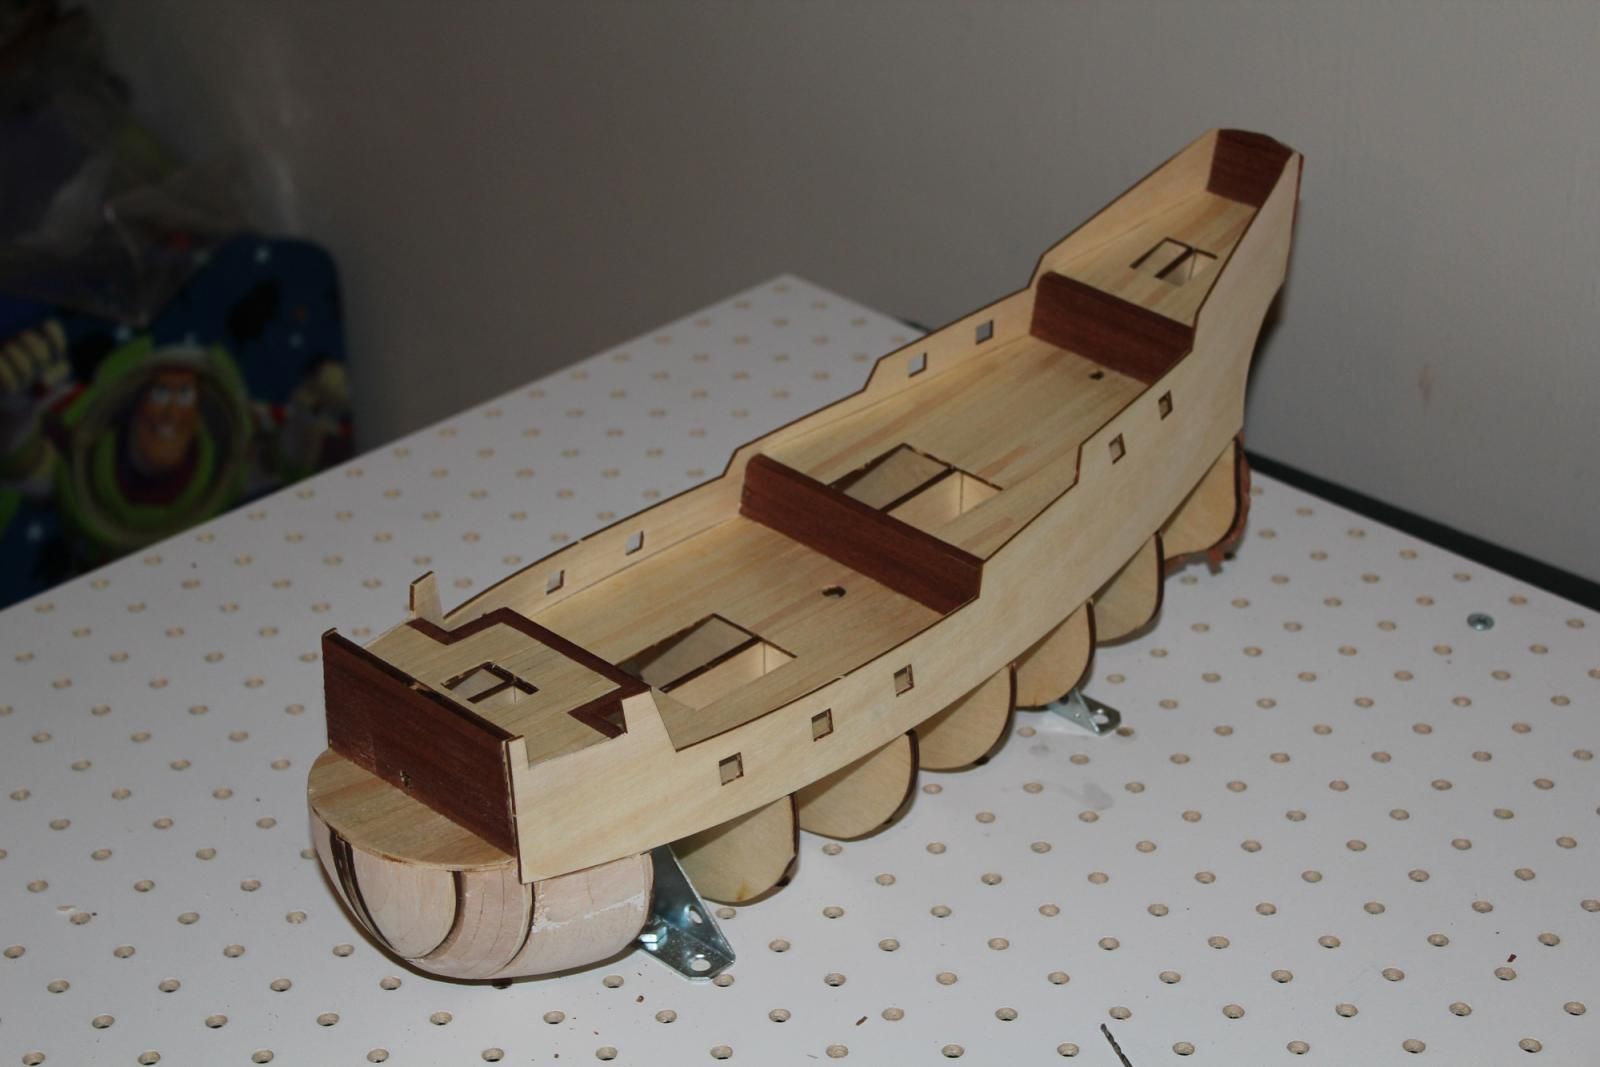 You can also see here that I've attached the bulwarks to the sides of the hull. If at first you don't succeed,
maybe you should skip the chainsaw juggling...
|
|
|
Rank: Pro Groups: Registered
Joined: 16/03/2016 Posts: 122 Points: 381 Location: Layton, Utah
|
Here is the last photo from before I got stuck. 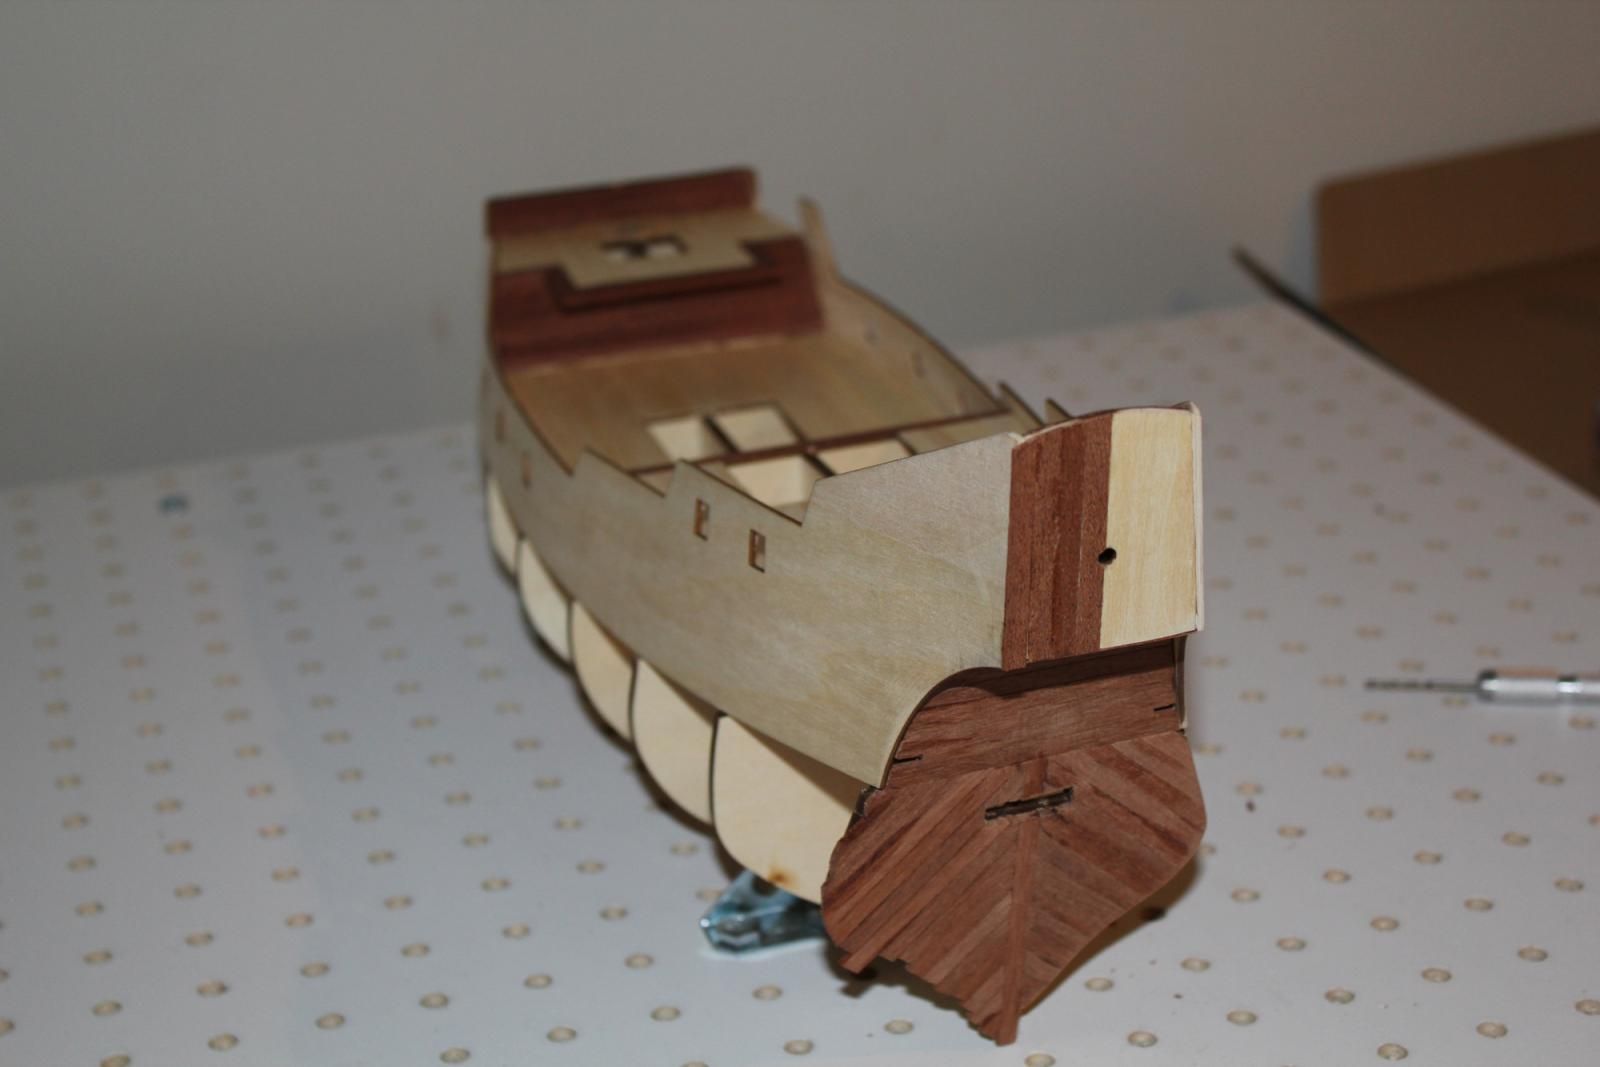 Here you can see that I've started adding the mahogany strips to the rear of the hull. Later tonight I'll take some pictures of where the build is at right now, and I'll continue to update with further progress. If at first you don't succeed,
maybe you should skip the chainsaw juggling...
|
|
|
|
|
 Very nicely done  looking forward to the next update Rgd Martyn Building ?
Completed. Soliei Royal . Sovereign of the Seas . Virginia . Scotland . San Felipe . Corel vasa , Santisima Trinadad X section , Vasa
Next Build ?
When sailors have good wine, They think themselves in heaven for the time. John Baltharpe
|
|
|
Rank: Administration       Groups: Registered, Forum Support Team, Administrators, Global Forum Support Team, Moderator, Official Builds Joined: 09/11/2012 Posts: 7,931 Points: 22,979 Location: East midlands
|
Good stuff, glad to see you carried on with this build. Keep up the good work and look forward to your next update. Congrats on your blue medal for starting your diary. Regards delboy271155 (Derek) COME BACK GUY FAWKES "YOUR COUNTRY NEEDS YOU"
|
|
|
 Rank: Super-Elite  Groups: Registered
Joined: 31/05/2010 Posts: 5,679 Points: 17,011 Location: Wiltshire
|
Hope you are really enjoying your build - its looking great. Happy Modelling
BUILDING: Hachette Spitfire Mk 1A, Constructo Mayflower
SUBSCRIPTION COMPLETE (Awaiting building): USS Constitution, Sovereign of the Seas, 1:200 Bismarck (Hachette)
COMPLETED: Porsche 911, E-Type Jaguar, Lam Countach
|
|
|
Rank: Super-Elite  Groups: Registered
Joined: 11/11/2009 Posts: 3,432 Points: 10,280 Location: Bâe Colwyn, Wales
|
You've made a really good start on her. The mahogany isn't the easiest to use for planing but looks really nice when finished. Chris On the bench 1/350 Revell Tirpitz Platinum Edition (Pontos PE and Wooden deck) plus extra Eduard PE set and extra MK1 door sets.
|
|
|
|
|
Looks good am sure you'll get used to the planking as you progress, its' not too difficult if you take your time and be patient. Soak the strips well before you try to bend them and ensure you plank the hull evening, ie, when you have completed one strip add the same trip to the other side.... Will be looing out for you next post to see you you've got on with it..... Good luck.....
Regards
Alan
|
|
|
Rank: Pro Groups: Registered
Joined: 16/03/2016 Posts: 122 Points: 381 Location: Layton, Utah
|
So here you can see where I am at this point. I've completed the planking, and in fact have nearly completed the entire body of the ship. I chose not to use the nails in the hull planking as I didn't like the look of them. I hope it doesn't come back to bite me later. I've also skipped some of the steps because I wanted to varnish as much of the woodwork together w/o any of the metal on it. I'll install the gun-port doors, the doors, windows, cannons etc once I have everything varnished. 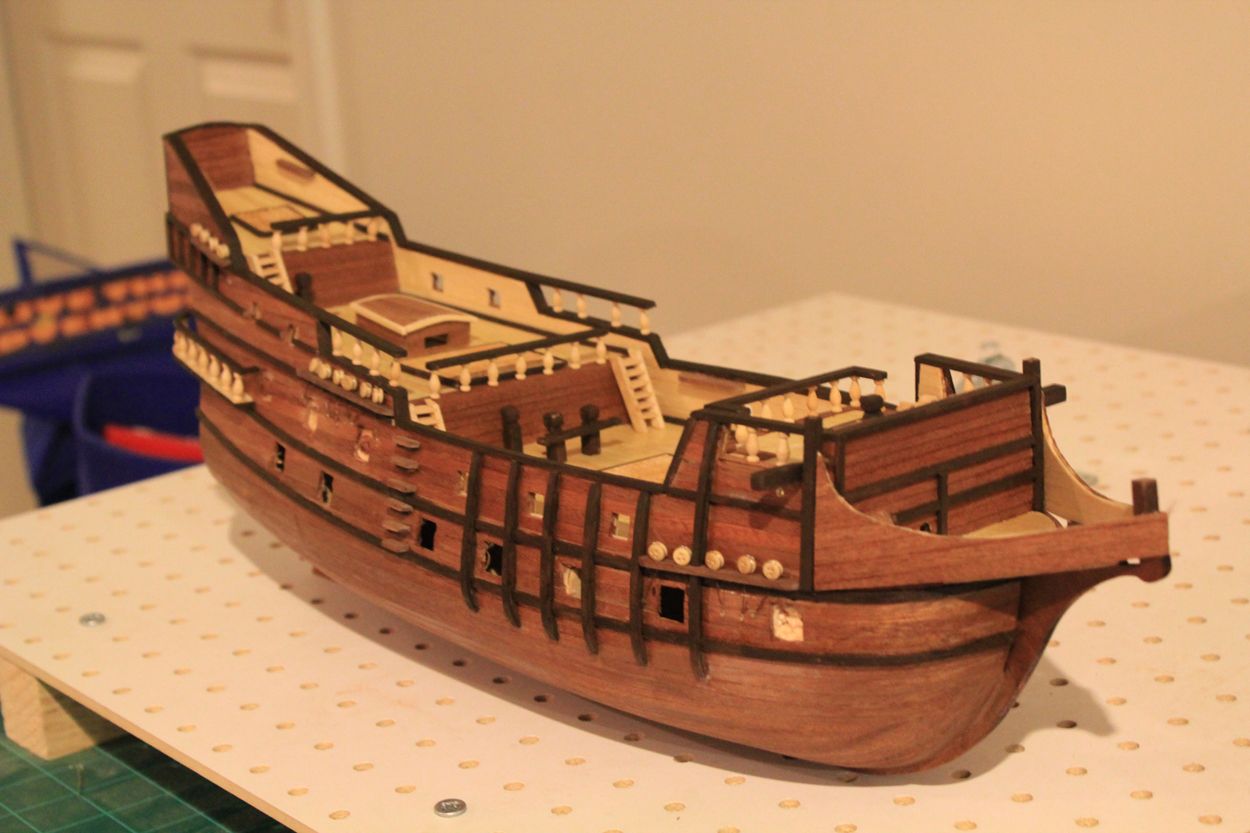 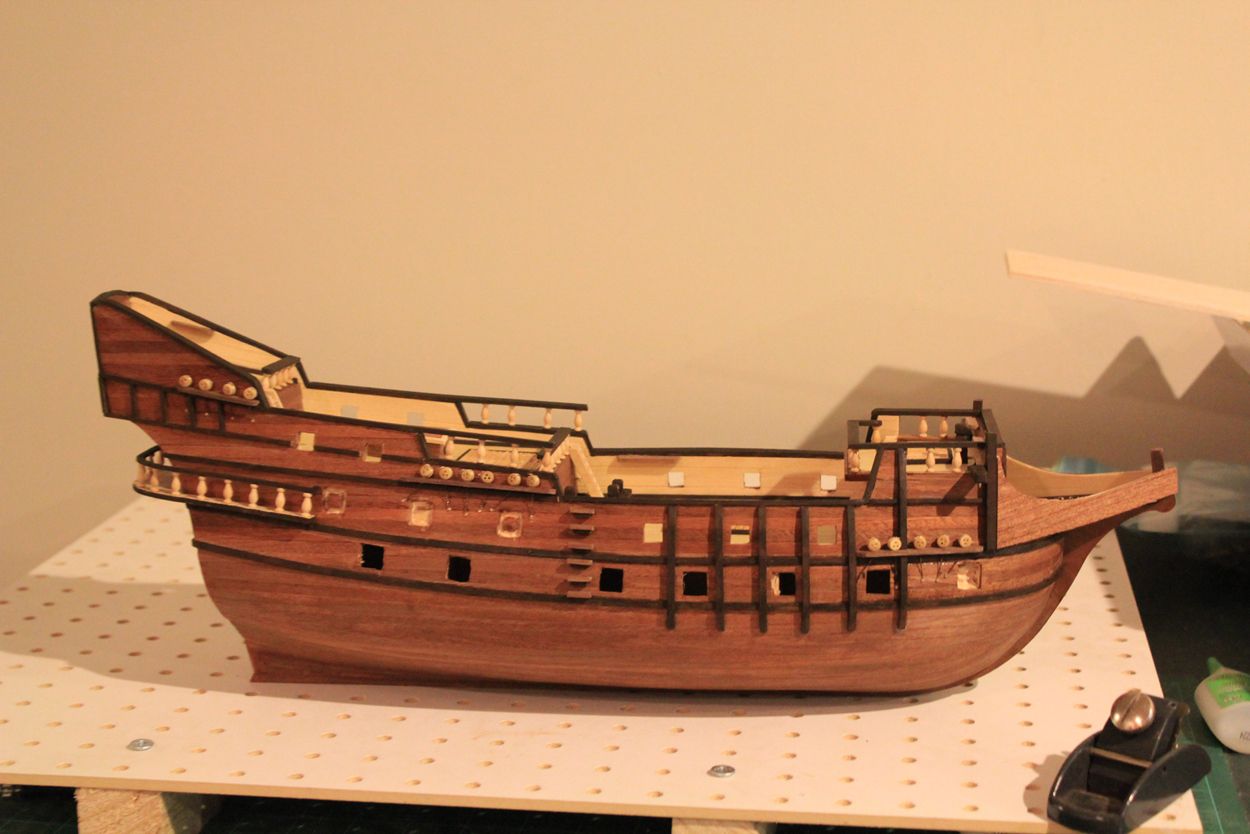 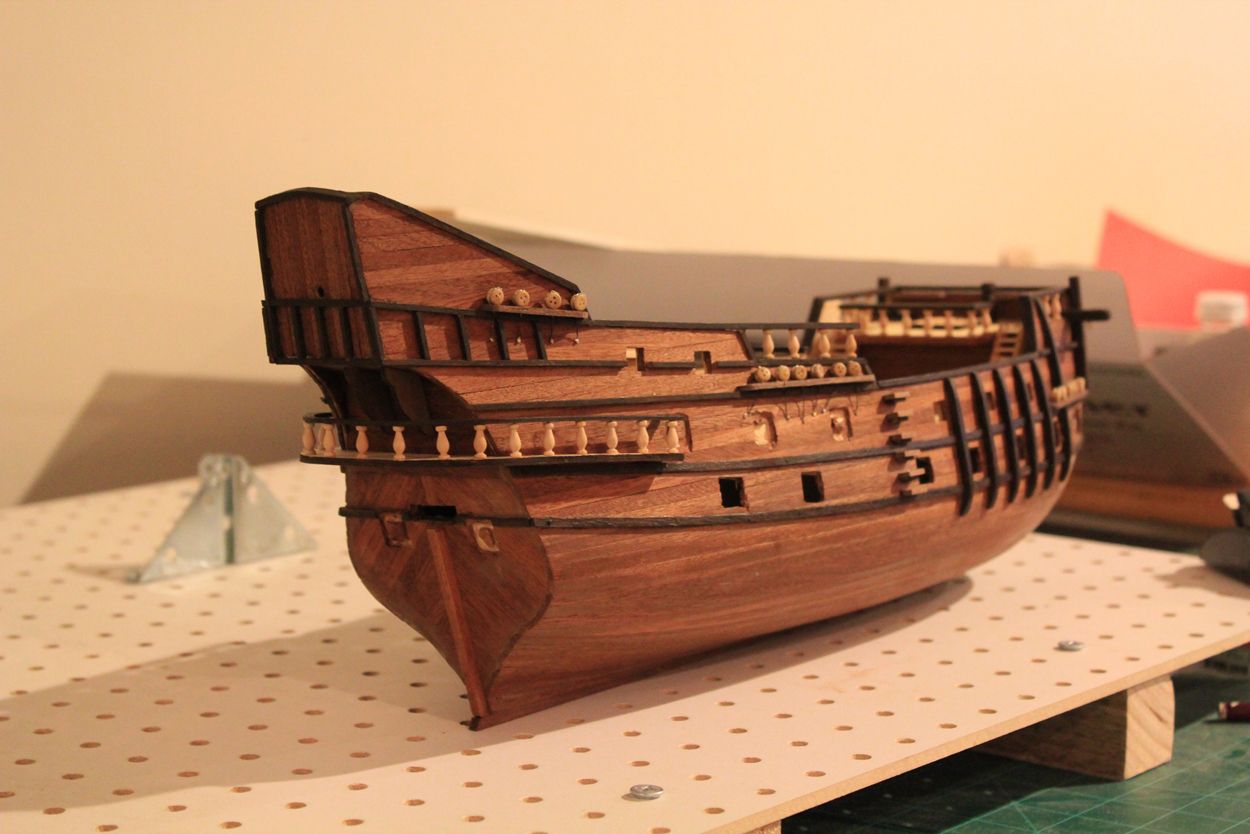 If at first you don't succeed,
maybe you should skip the chainsaw juggling...
|
|
|
Rank: Pro Groups: Registered
Joined: 16/03/2016 Posts: 122 Points: 381 Location: Layton, Utah
|
Okay...time to work on the cannons. First, I had to file down the casting seams. In the image below, you can see one that I've filed down on the left, next to one straight out of the box on the right. 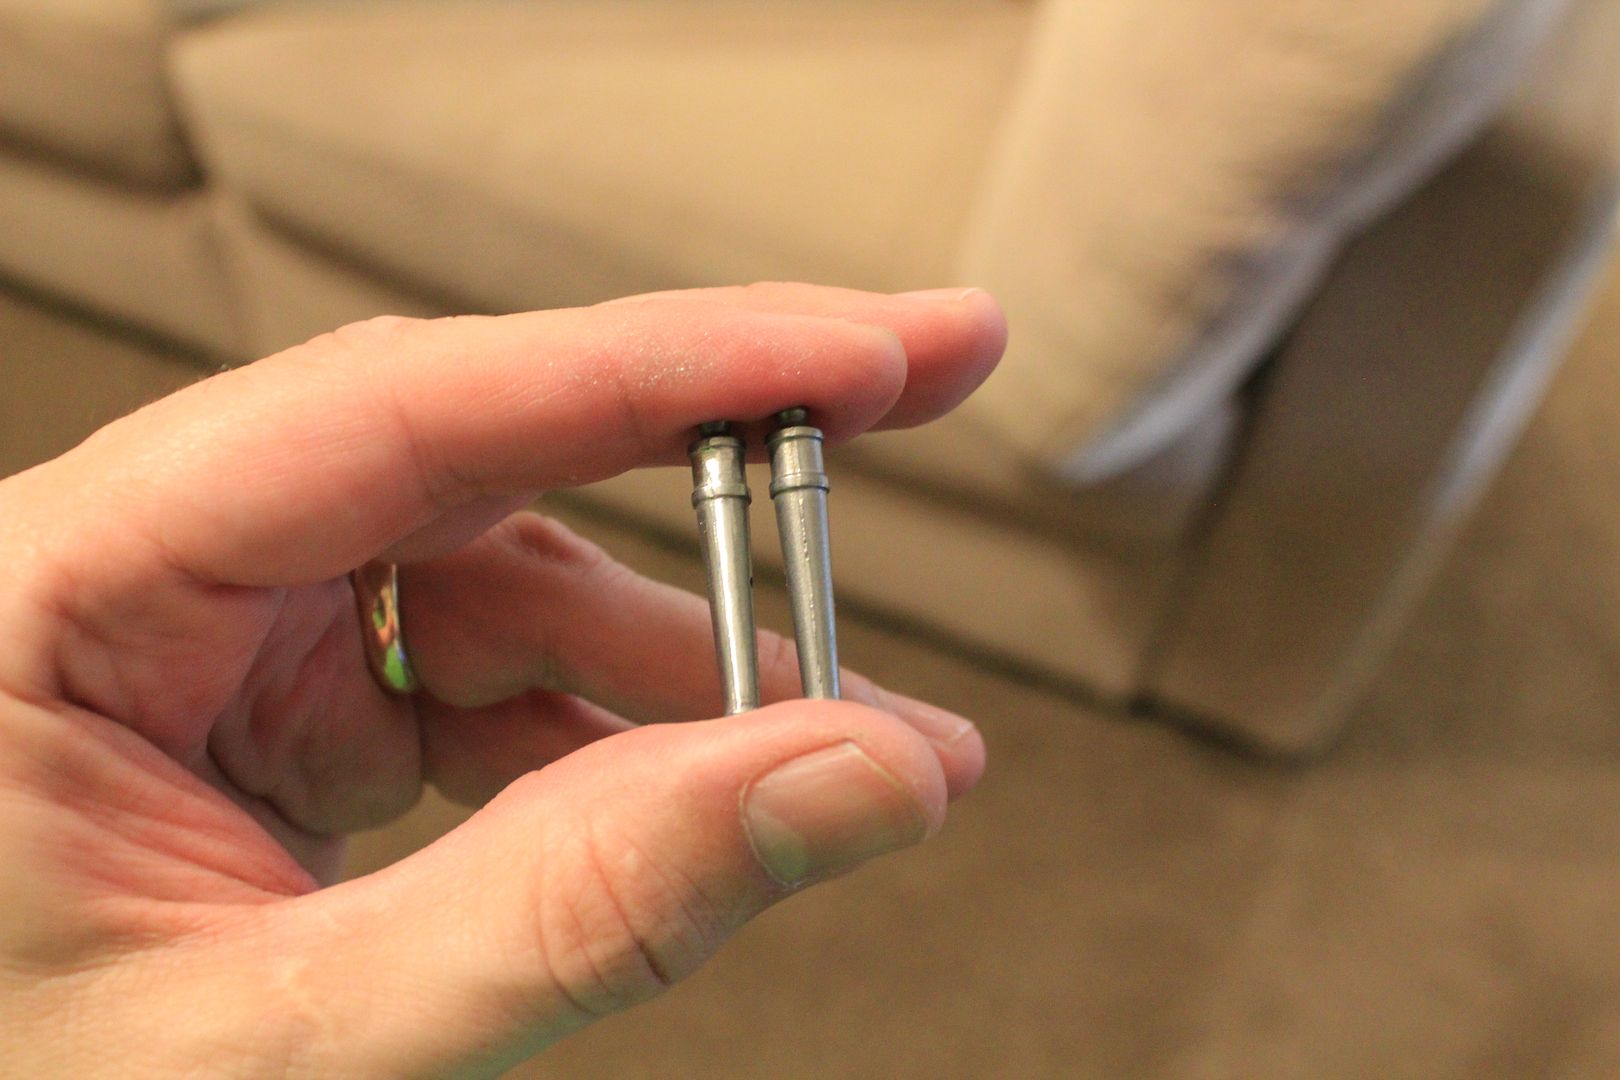 Once I had them all filed down, I needed to prime them. Here you can see that I've mounted each of the cannons to an old sanding sponge using toothpicks, and then sprayed with a cheap can of metal primer I picked up at Walmart. 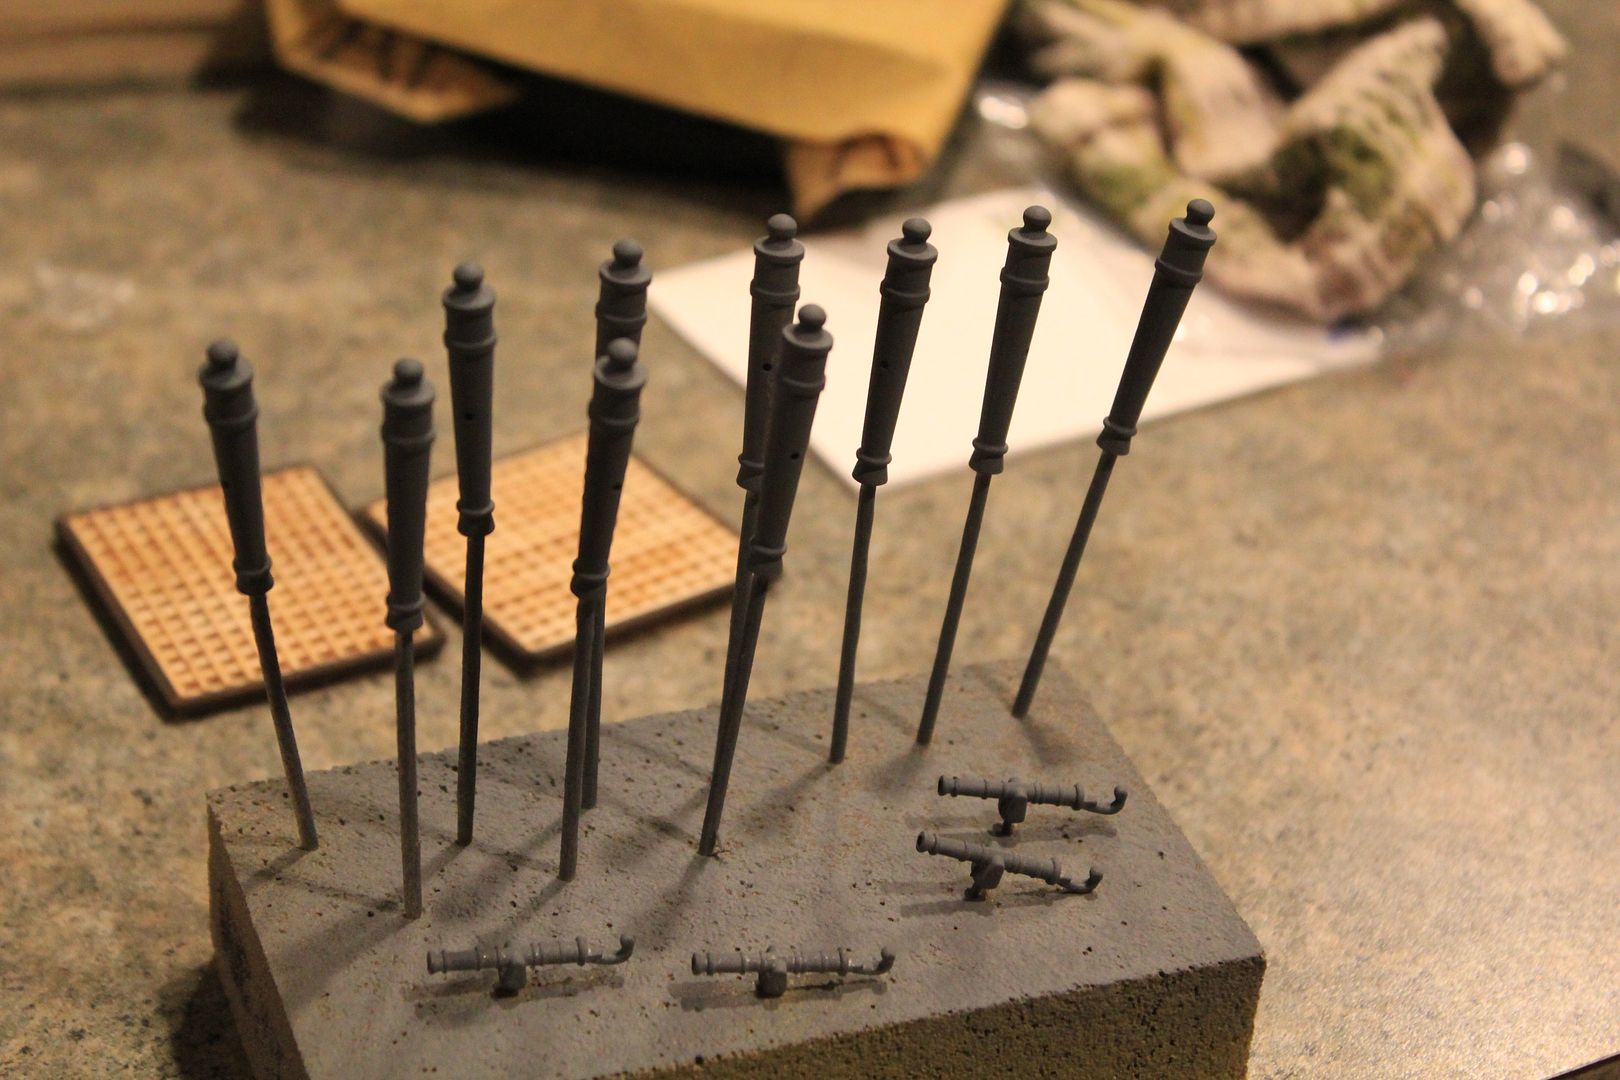 I then painted each of them with Testor's Gold enamel and glued them down to their mounts. In this picture, you an see me using a dental floss threader to pull the cannon ropes through the holes in the mounts. 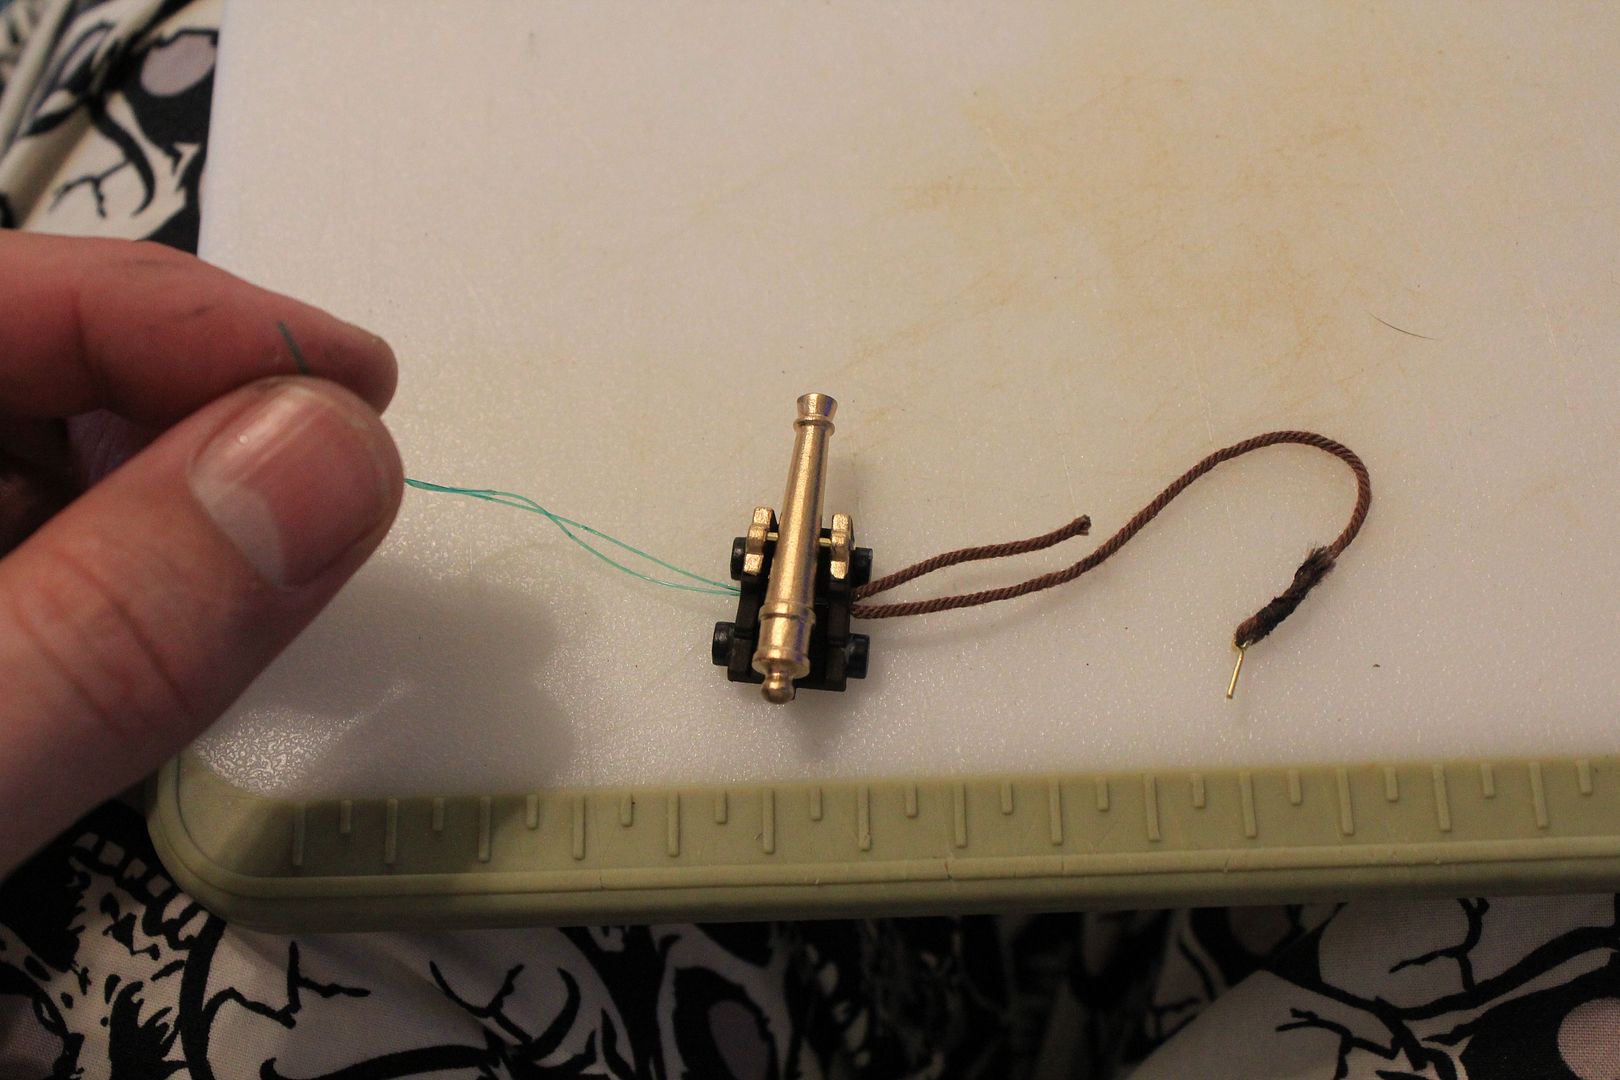 Now, I don't know if this was the right or wrong thing to do, but the next three pictures show a technique I thought of after I had done a few of the cannon ropes. I think I remembered seeing something like this before, so I tried it, and I liked the results better than the first few I had tried. Basically, I threaded a smaller thread along with the rope through the eye-hook, as seen here. 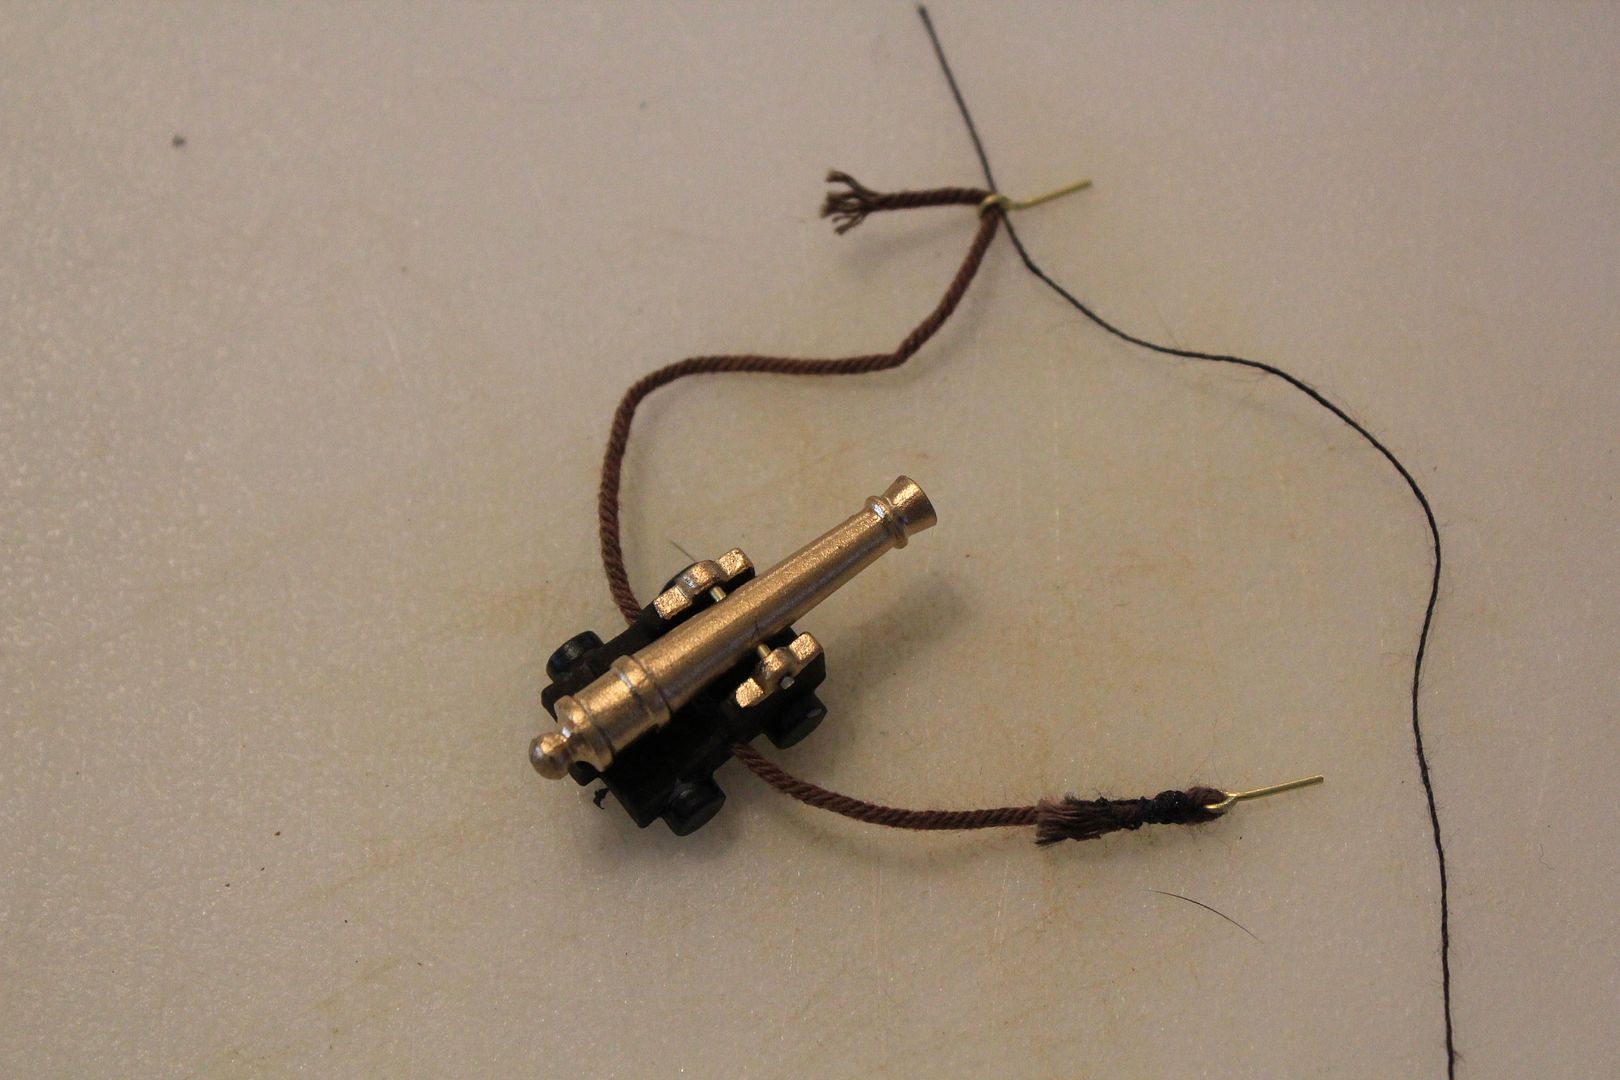 Then I pinched the end of the cannon rope against the main section of the rope on the other side of the eye-hook, and wrapped the smaller thread around the pinched section of rope, like so... 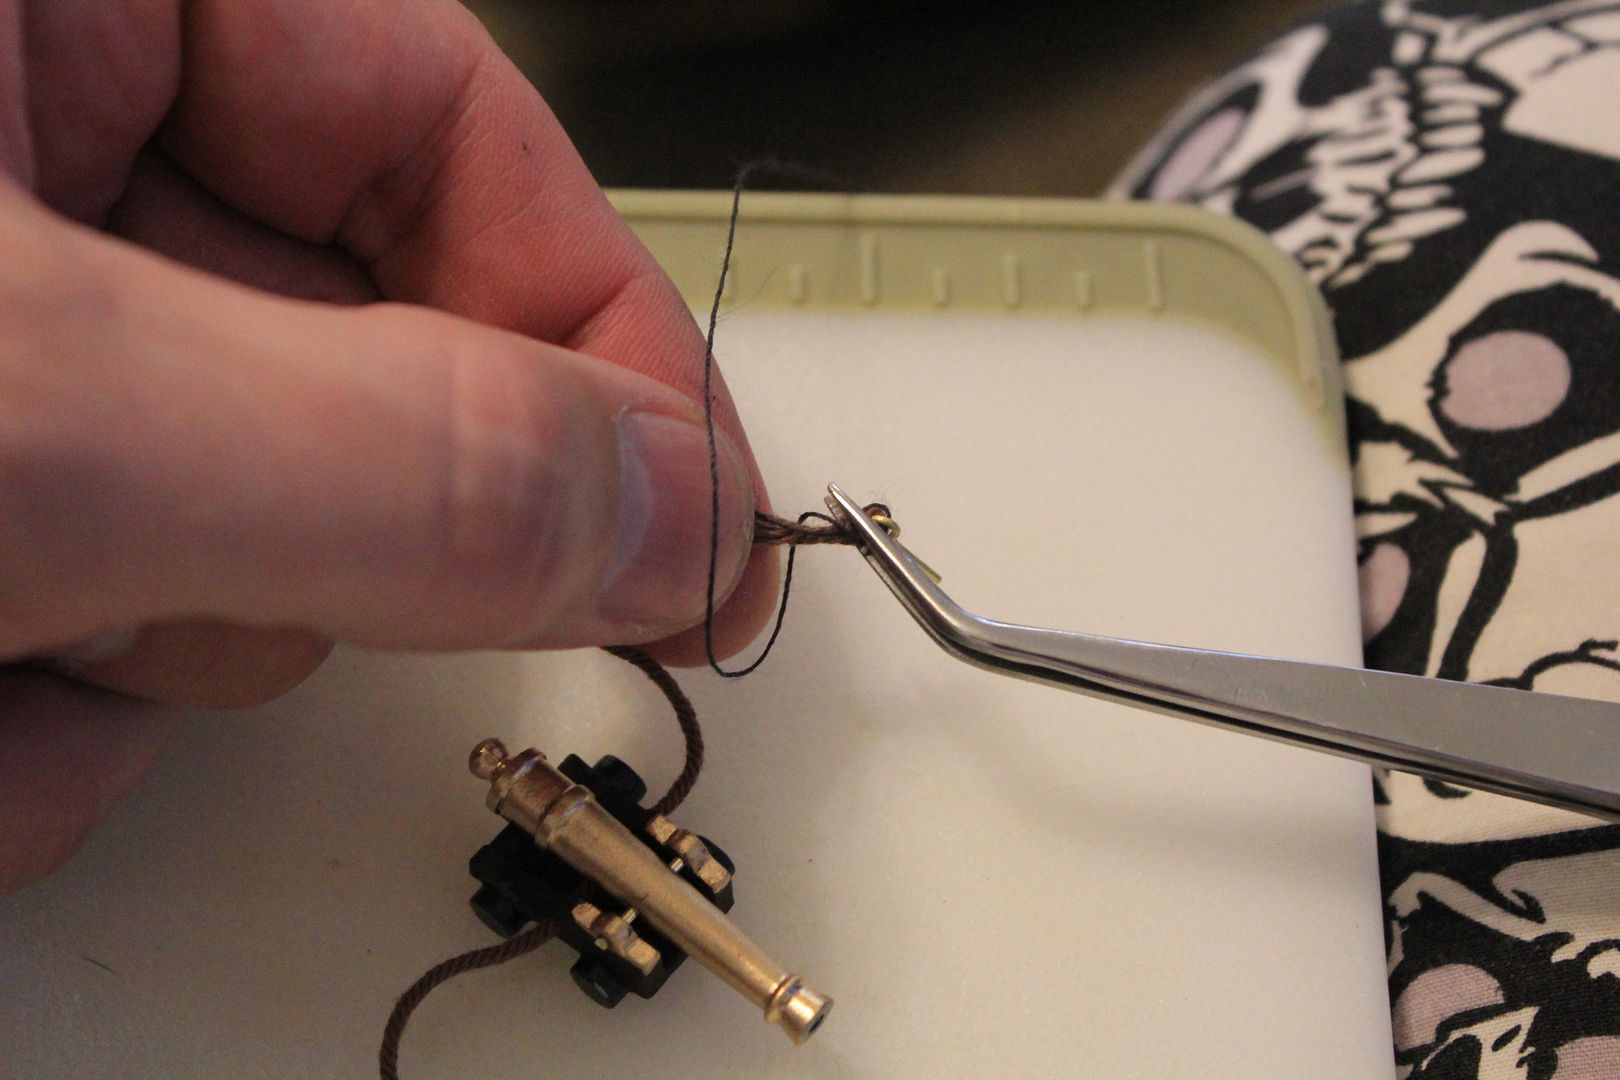 Then, once it was all wrapped up, I used a small dab of glue to secure the thread to the rope, and snipped off the end, like so. 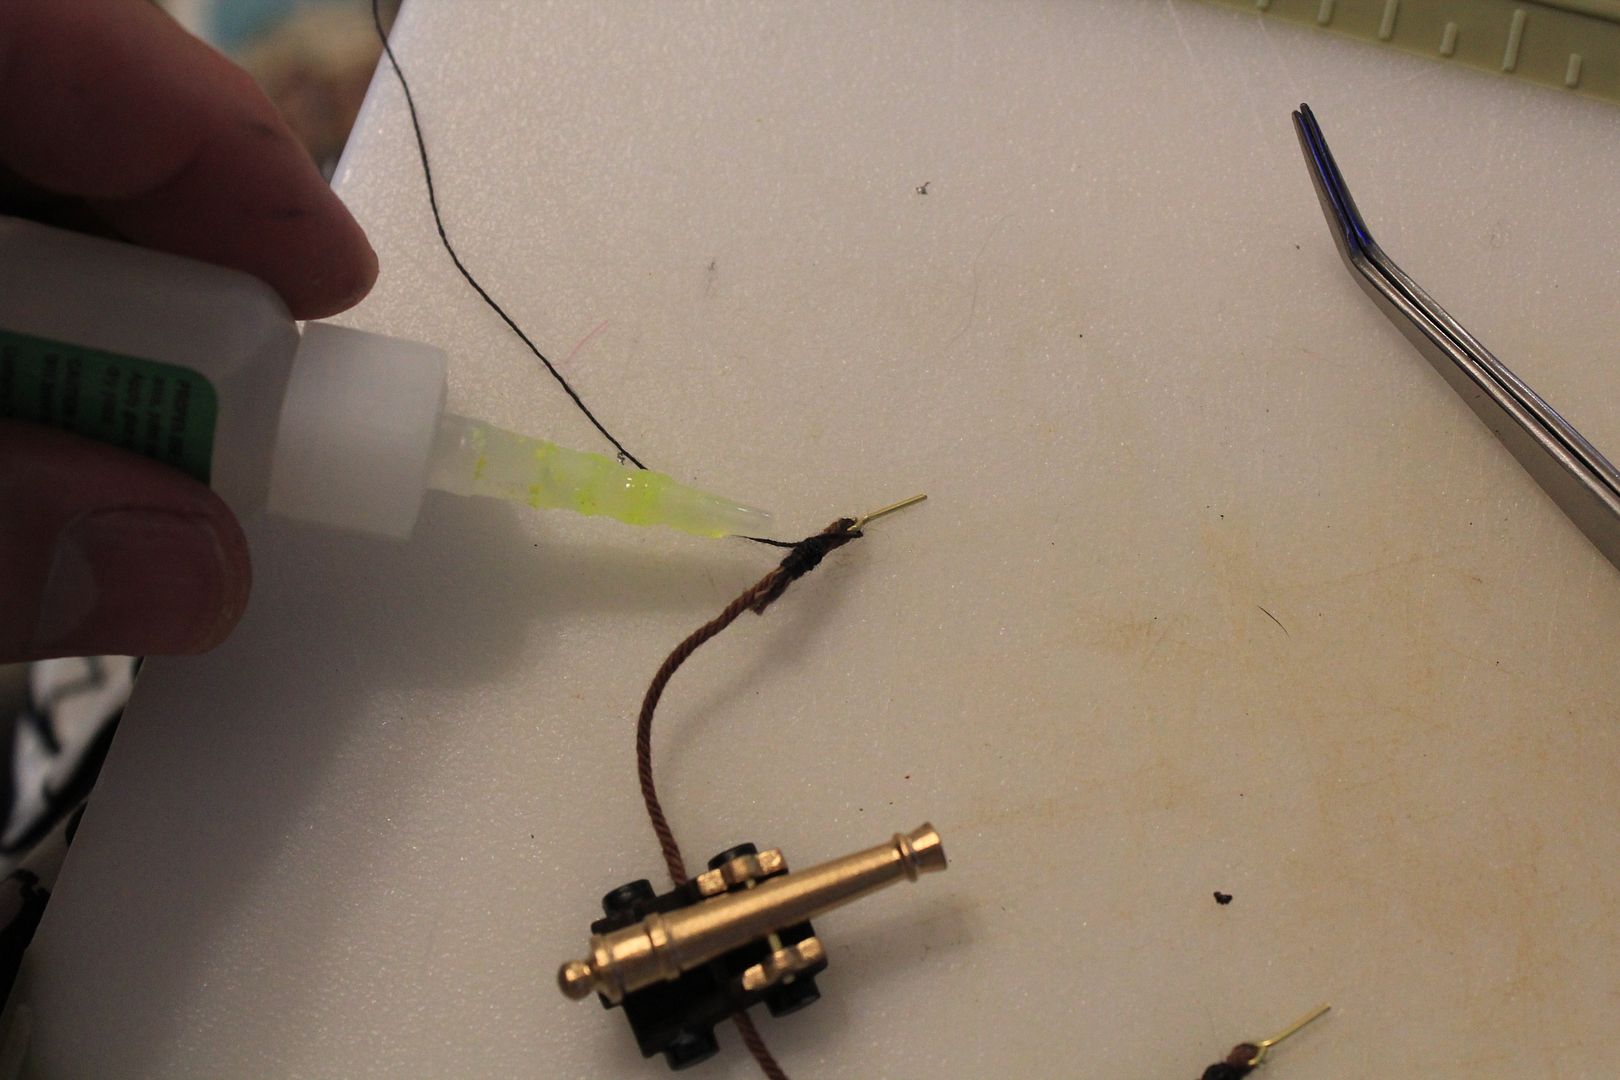 It was pretty fiddly, but I think it looked better than just gluing the pinched ends of the rope to themselves. If at first you don't succeed,
maybe you should skip the chainsaw juggling...
|
|
|
Rank: Pro Groups: Registered
Joined: 16/03/2016 Posts: 122 Points: 381 Location: Layton, Utah
|
The last photo I'll share this morning is of an impromptu jig I set up for creating the squared off section at the top of the main mast. Using the ring that fits over the mast and secures to the deck, with a rubber band to keep it from sliding down the mast, I used it as a sanding stop to keep myself from sanding too far down the mast. It wasn't perfect, but it worked pretty well, and I continued to use that same technique for the fore and mizzen masts as well. 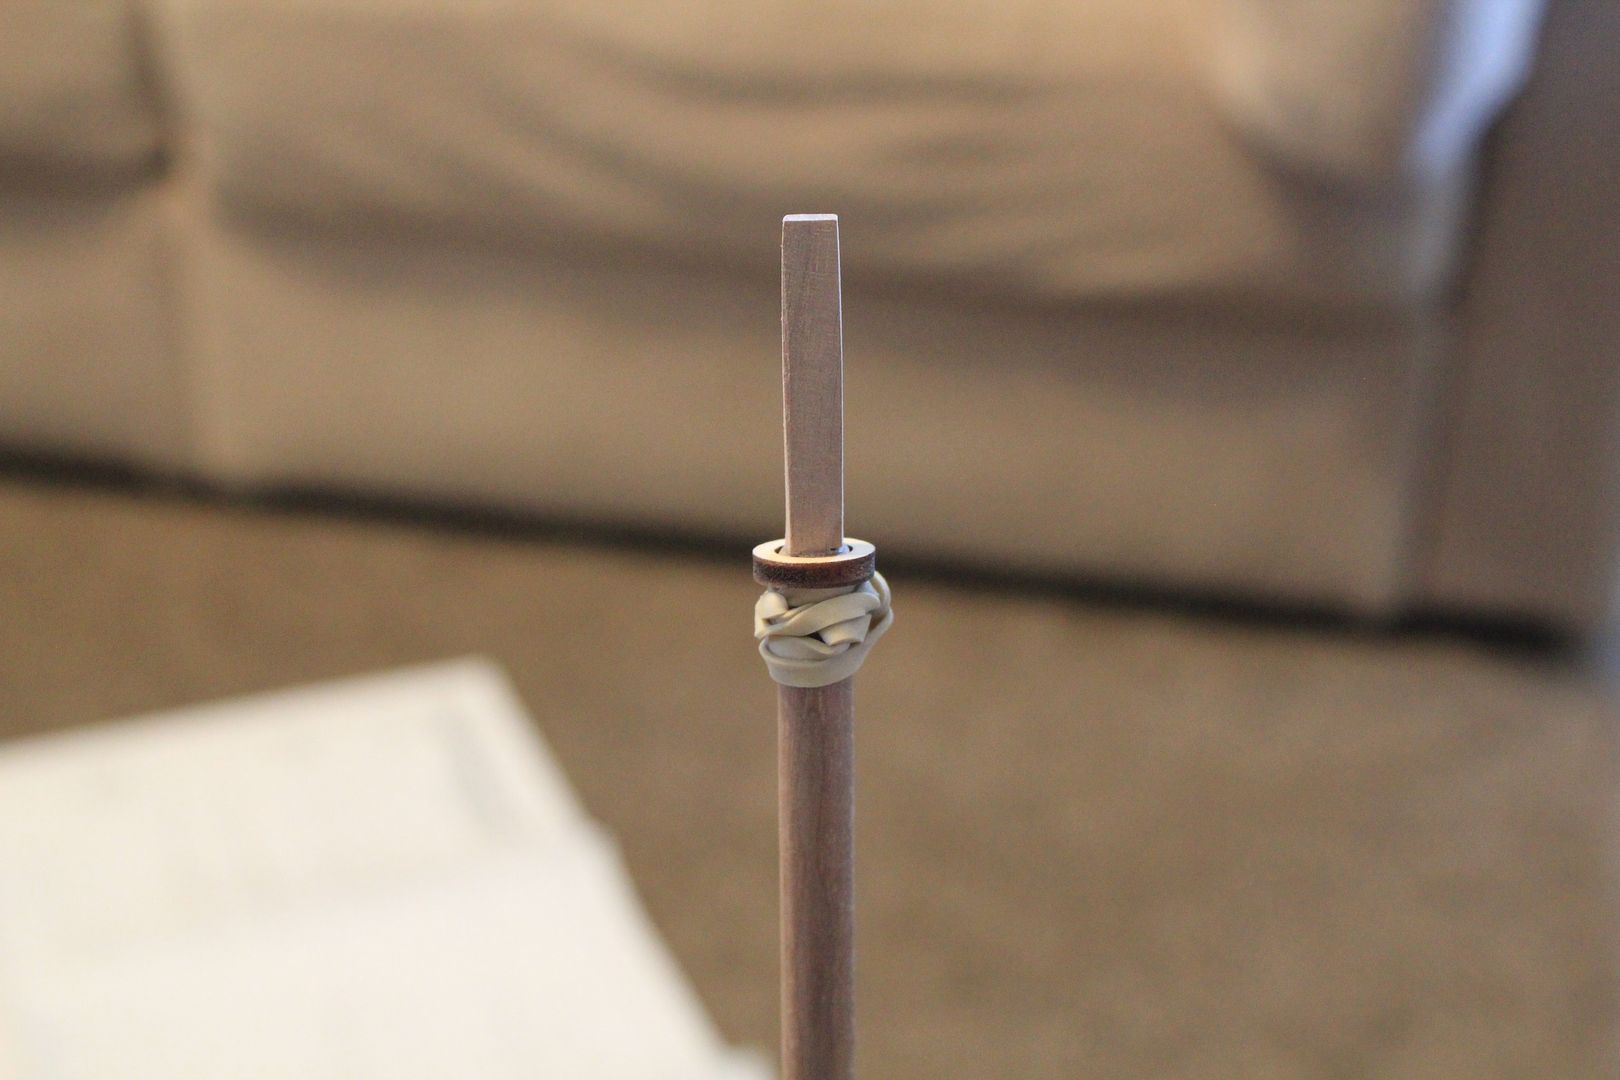 If at first you don't succeed,
maybe you should skip the chainsaw juggling...
|
|
|
Rank: Pro Groups: Registered
Joined: 16/03/2016 Posts: 122 Points: 381 Location: Layton, Utah
|
I did take some more photos that I won't be sharing at this time. I had finished lacquering the hull and attached all of the metal parts and took photos, but the photos made the lacquer look awful. The problem was, prior to laquering I used a wood putty to seal up gaps and dings in the hull that sanding wasn't able to fix, and the putty didn't match very well. To the naked eye, its not noticeable unless you're looking for it, but in the photos it looked like wood where the finish had worn away in places and had weathered due to exposure. Its quite disappointing to look at. I supposed I could sand it down and try to sand away more to the exposed putty, but I'm really worried about ruining the model at this point when it looks pretty good to the naked eyes, so I haven't decided what to do about it yet.  If at first you don't succeed,
maybe you should skip the chainsaw juggling...
|
|
|
Rank: Super-Elite  Groups: Registered
Joined: 16/08/2010 Posts: 2,771 Points: 8,344 Location: Brighton
|
Hi Goffyfoot. it sometimes pays to put up pictures of mistakes. As there are lots of experienced modlers who me be able to give you advice on how to get around your problems. look forward to seeing your progress Ian. Current builds.Hachettes build the bismark,HMS Victory, HMS Hood.
Finished Builds Corel HMS Victory cross section.
|
|
|
|
|
Looking good very nicely done You could sand the filler down abit and touch up with a wash of watered down brown paint and then lacquer over the top Rgd Martyn Building ?
Completed. Soliei Royal . Sovereign of the Seas . Virginia . Scotland . San Felipe . Corel vasa , Santisima Trinadad X section , Vasa
Next Build ?
When sailors have good wine, They think themselves in heaven for the time. John Baltharpe
|
|
|
Rank: Super-Elite Groups: Registered
Joined: 31/05/2010 Posts: 5,679 Points: 17,011 Location: Wiltshire
|
Very nicely put together. Should end up with a very good model at the end of your build. Happy Modelling
BUILDING: Hachette Spitfire Mk 1A, Constructo Mayflower
SUBSCRIPTION COMPLETE (Awaiting building): USS Constitution, Sovereign of the Seas, 1:200 Bismarck (Hachette)
COMPLETED: Porsche 911, E-Type Jaguar, Lam Countach
|
|
|
Rank: Super-Elite Groups: Registered
Joined: 11/11/2009 Posts: 3,432 Points: 10,280 Location: Bâe Colwyn, Wales
|
Very nicely done. Your doing such a great job on her. Chris On the bench 1/350 Revell Tirpitz Platinum Edition (Pontos PE and Wooden deck) plus extra Eduard PE set and extra MK1 door sets.
|
|
|
|
|
Lovely work and some very nice techniques being shared.... .. Keep the pics coming... Regards Alan
|
|
|
Rank: Pro Groups: Joined: 24/08/2009 Posts: 48,051 Points: -13,308
|
Nice work and well done
|
|
|
|
Guest
|
 US
US

