|
|
 Rank: Pro   Groups: Registered
Joined: 16/03/2016 Posts: 122 Points: 381 Location: Layton, Utah
|
Okay, so I decided to re-sand the hull as best as I could. After one coat of lacquer, it does look significantly better. It's still not perfect, but it's going to have to do. And as I said before, its not very noticeable to the naked eye, and now, even less so. Before: 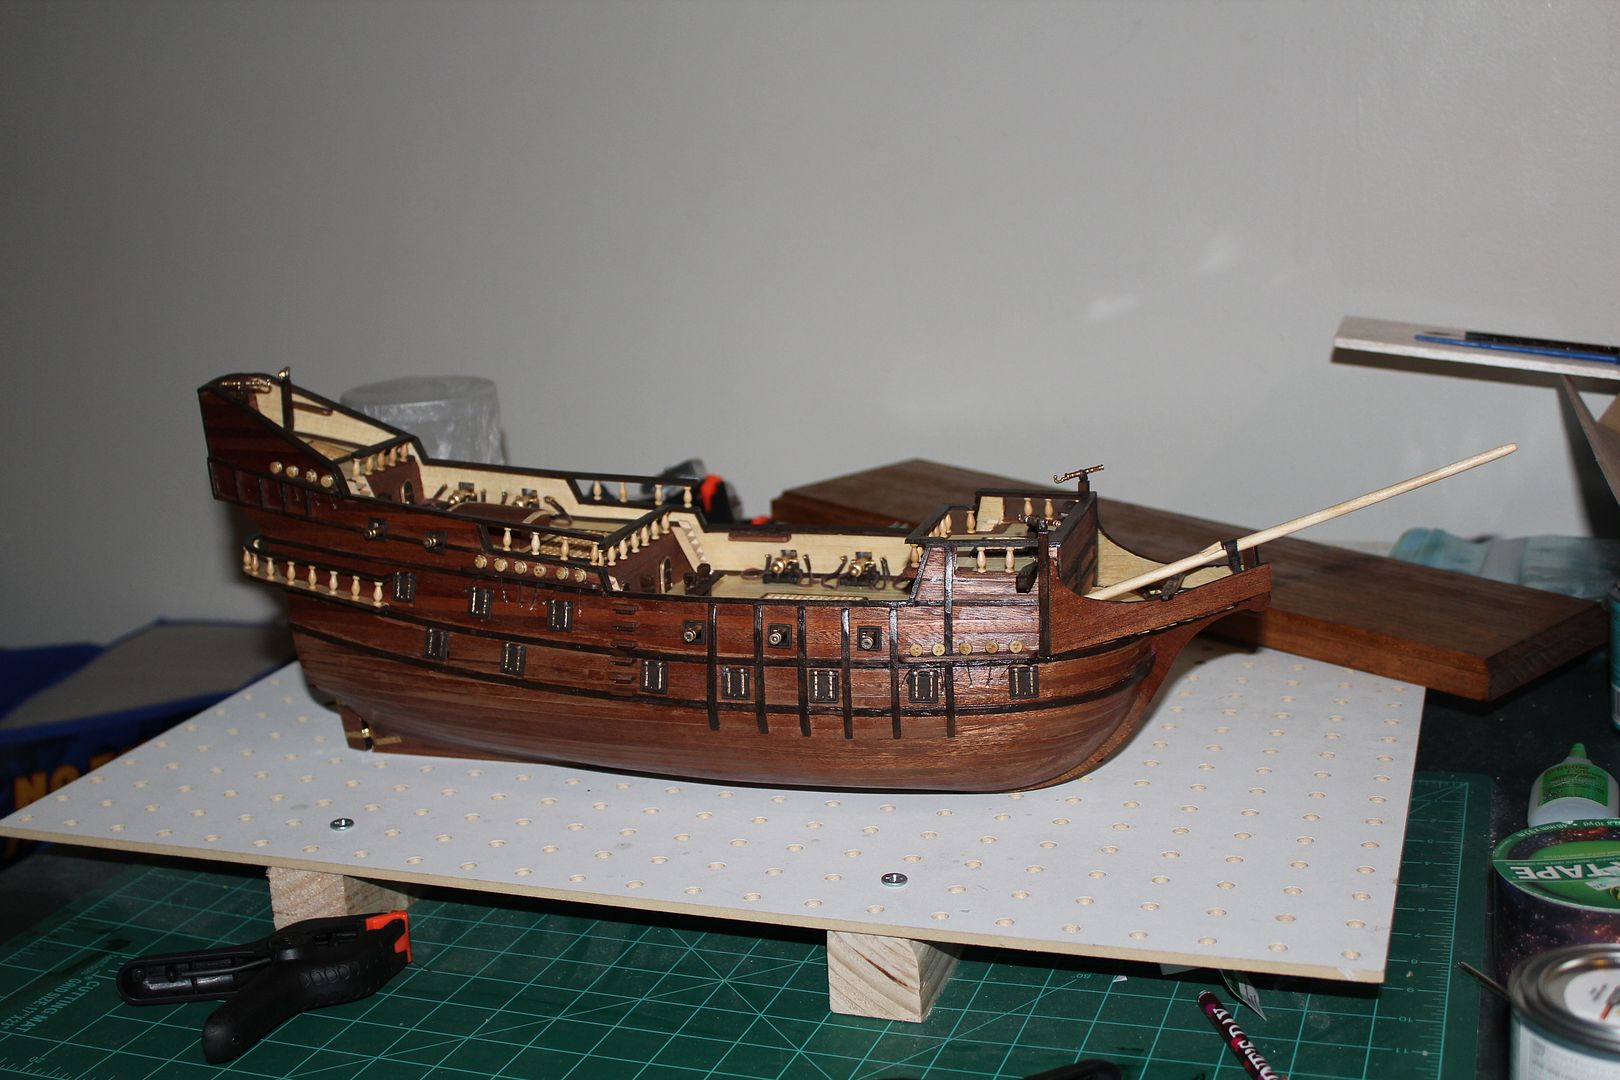 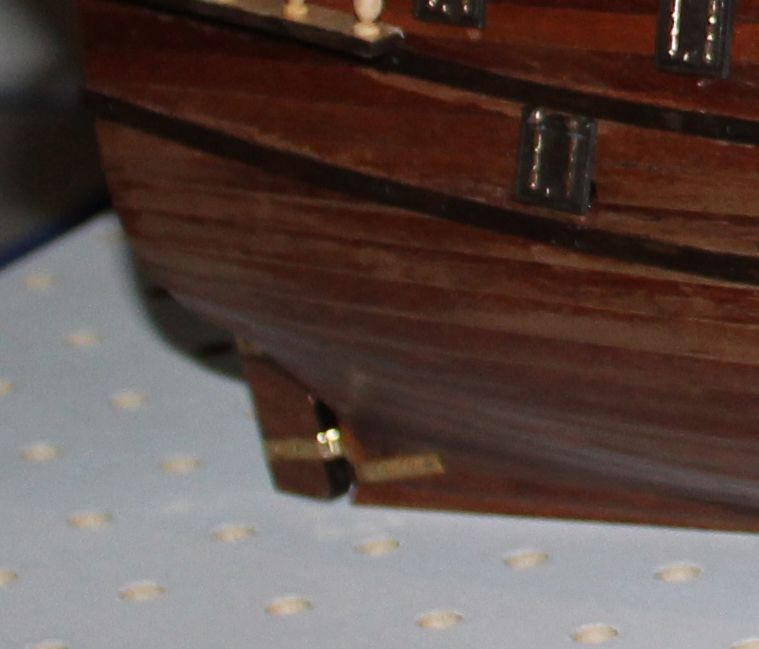 After: 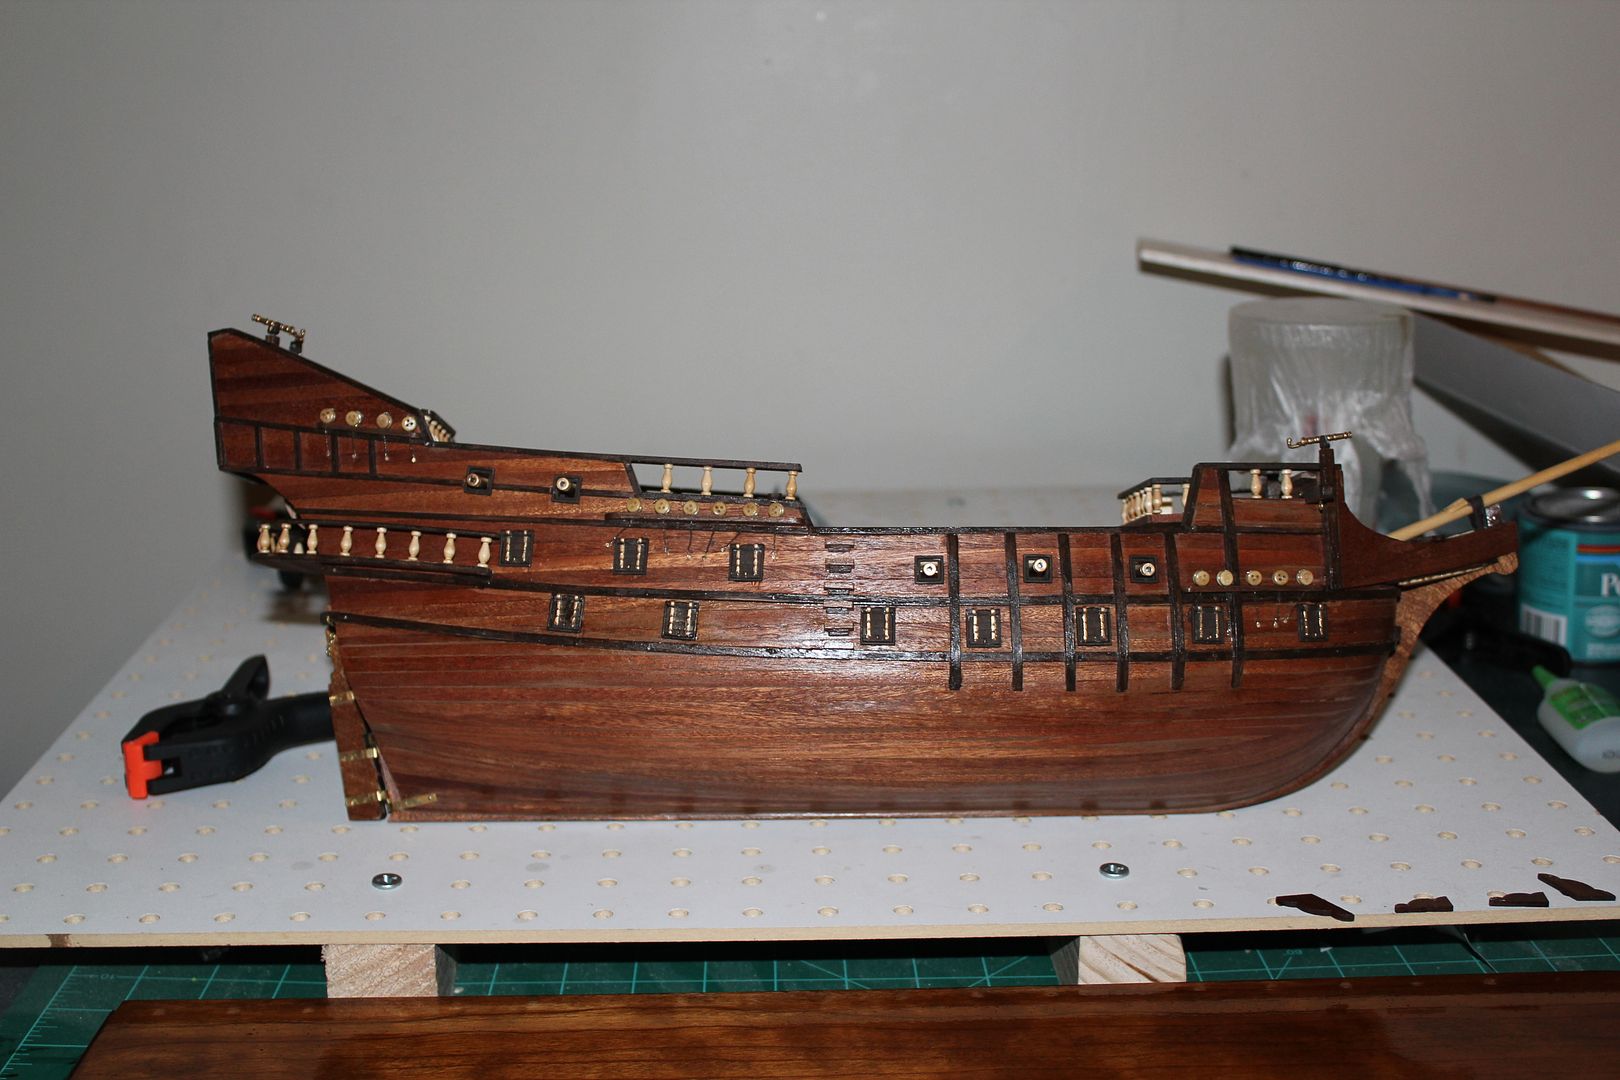 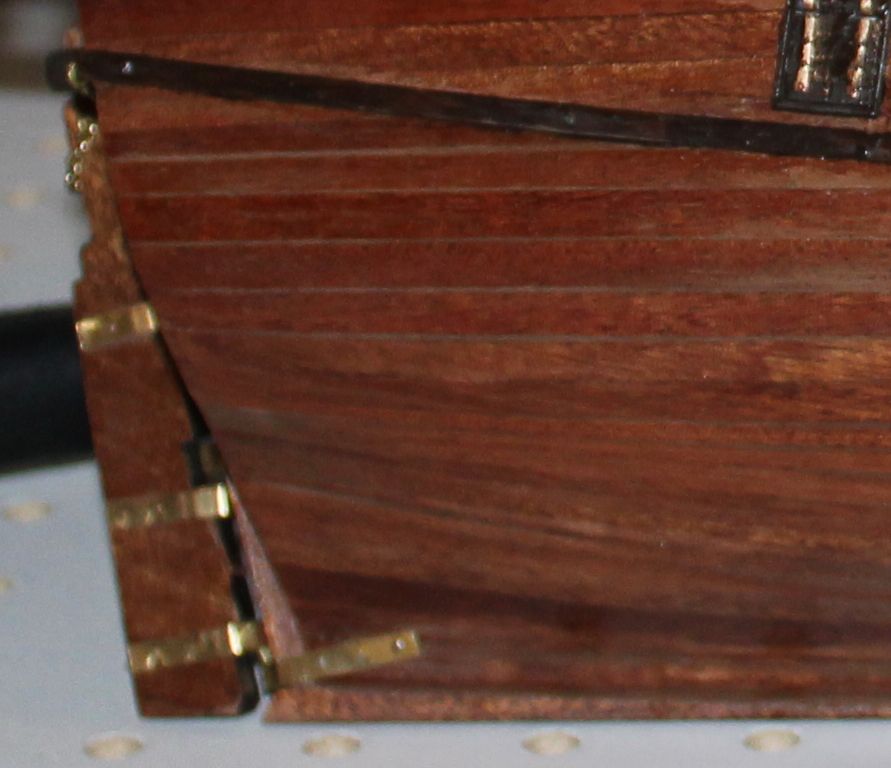 If at first you don't succeed,
maybe you should skip the chainsaw juggling...
|
|
|
 Rank: Super-Elite      Groups: Registered
Joined: 16/08/2010 Posts: 2,771 Points: 8,344 Location: Brighton
|
Hi Goofyfoot. Glad to see you sorted your problem out. looking very nice. keep the pictures coming. Ian Current builds.Hachettes build the bismark,HMS Victory, HMS Hood.
Finished Builds Corel HMS Victory cross section.
|
|
|
Rank: Pro Groups: Registered
Joined: 16/03/2016 Posts: 122 Points: 381 Location: Layton, Utah
|
Okay, it's been a few days since I've posted any new progress, and I've got quite a bit done. I've completed all of the masts (including drilling holes in the metal crow's nests for the upper shrouds...I can't believe those weren't pre-drilled)in the pictures below you can see me working on the fore-stay, and then a shot with all three stays installed. 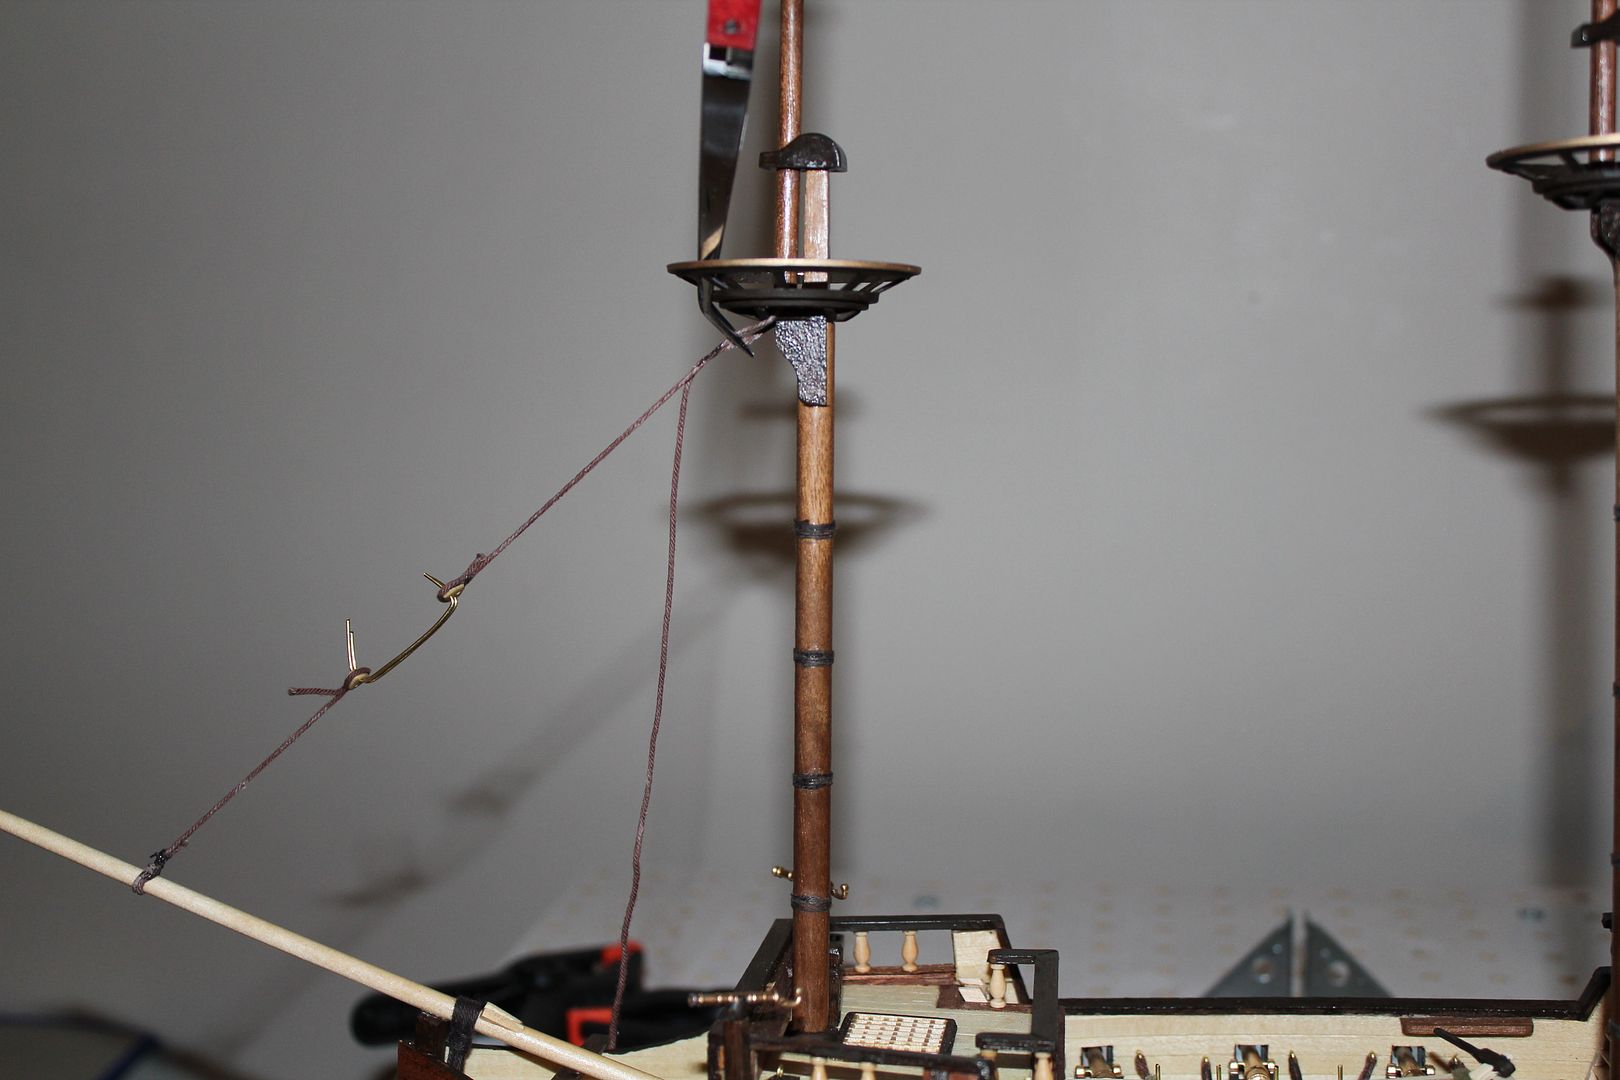 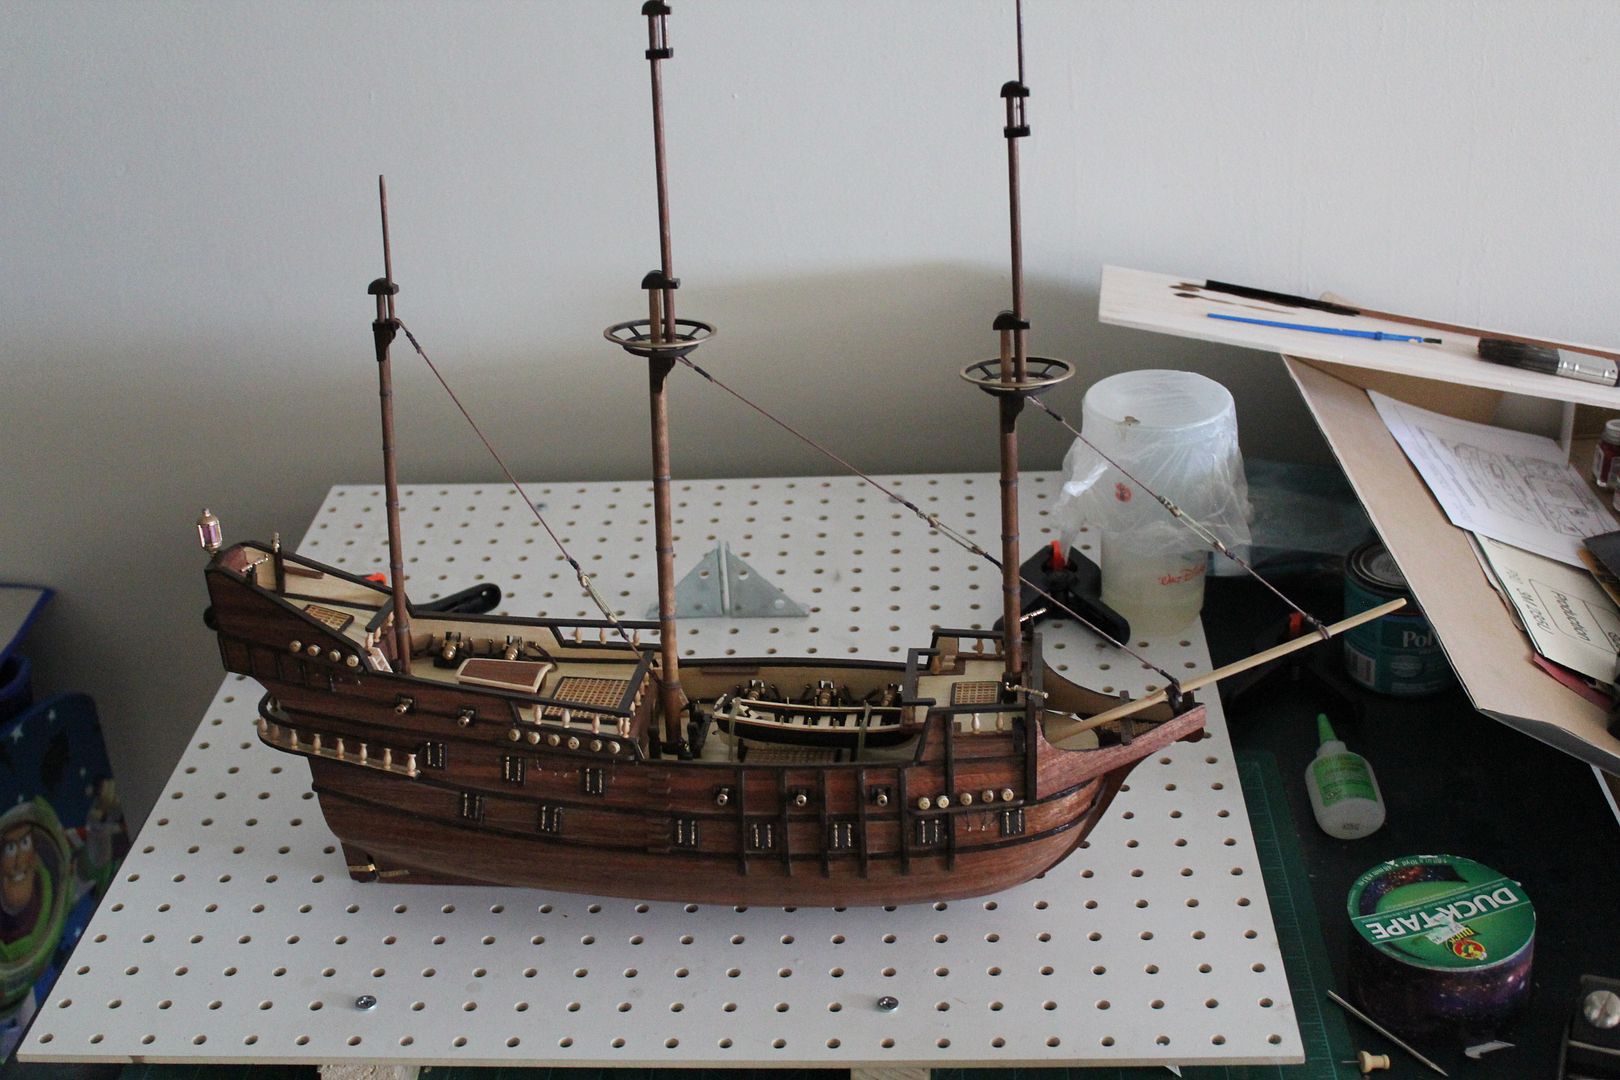 If at first you don't succeed,
maybe you should skip the chainsaw juggling...
|
|
|
Rank: Pro Groups: Registered
Joined: 16/03/2016 Posts: 122 Points: 381 Location: Layton, Utah
|
In the next few pictures, I show what I'm doing to put together the shrouds, right or wrong. Its pretty close to a step-by-step progression of shots, so if I'm doing something wrong, feel free to point it out so others can learn from my mistakes. If I'm doing it right, then hopefully this will be useful to someone. I start with a dead eye and apply a small drop of glue and work it around the inside of the groove and wrap the thread around it, pinching it tightly at the base. 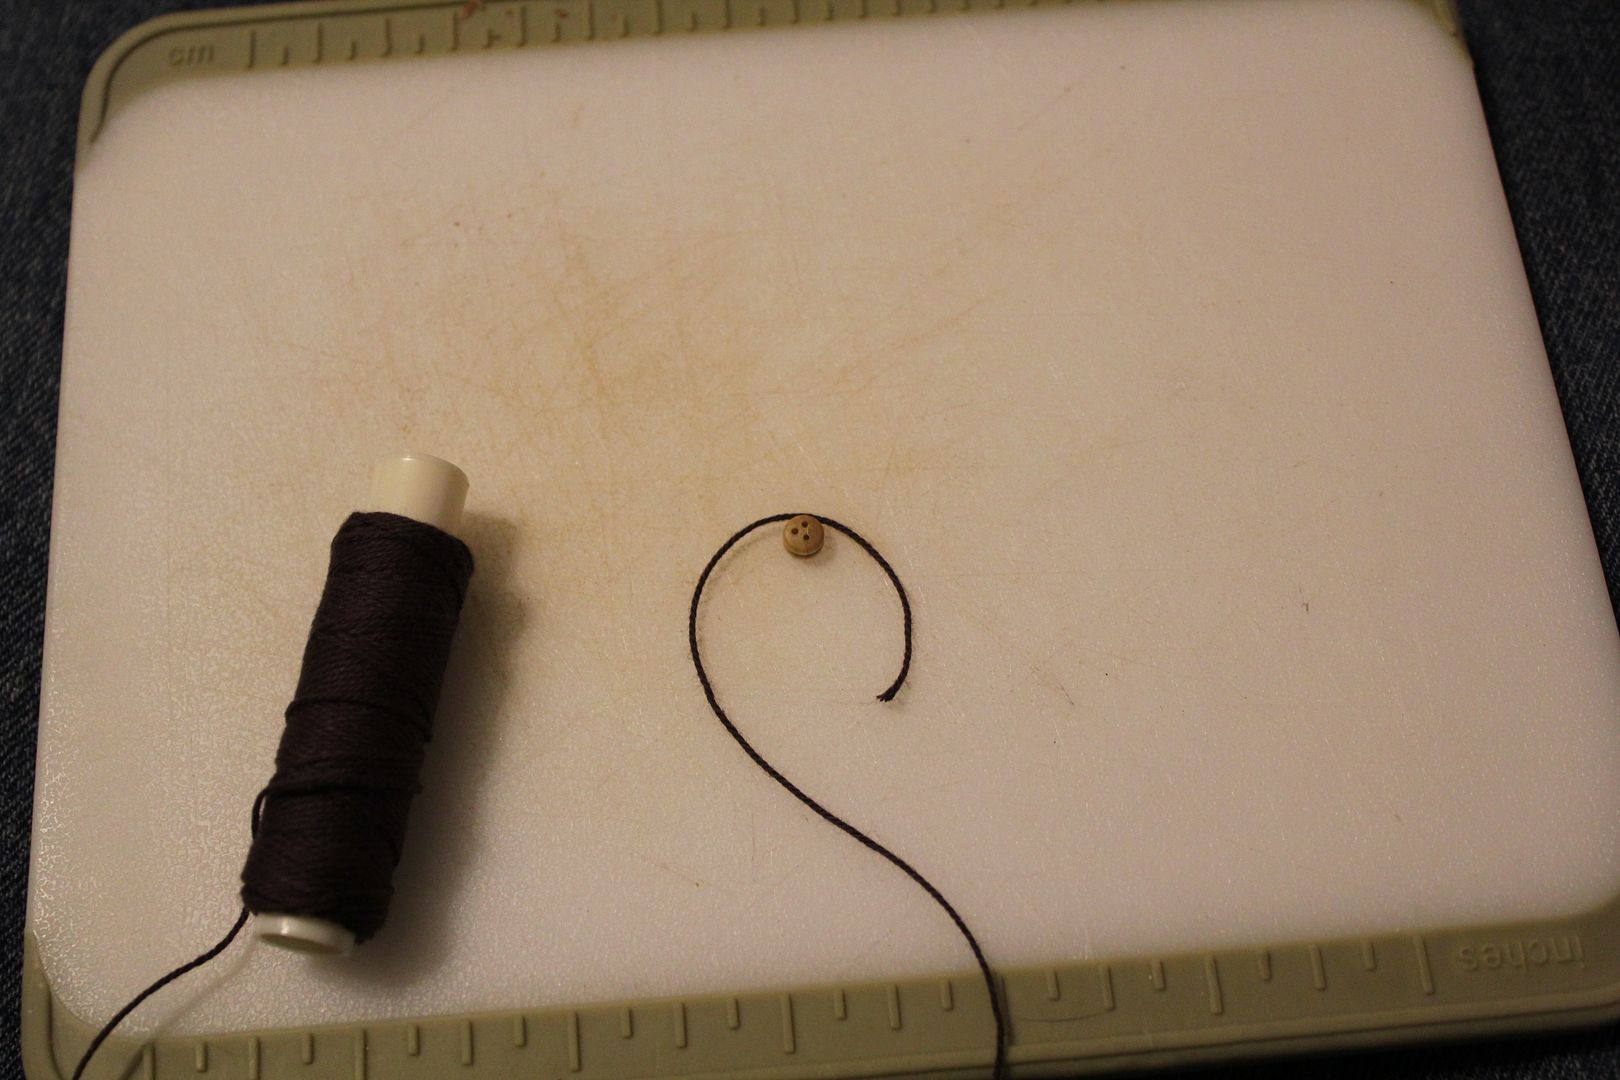 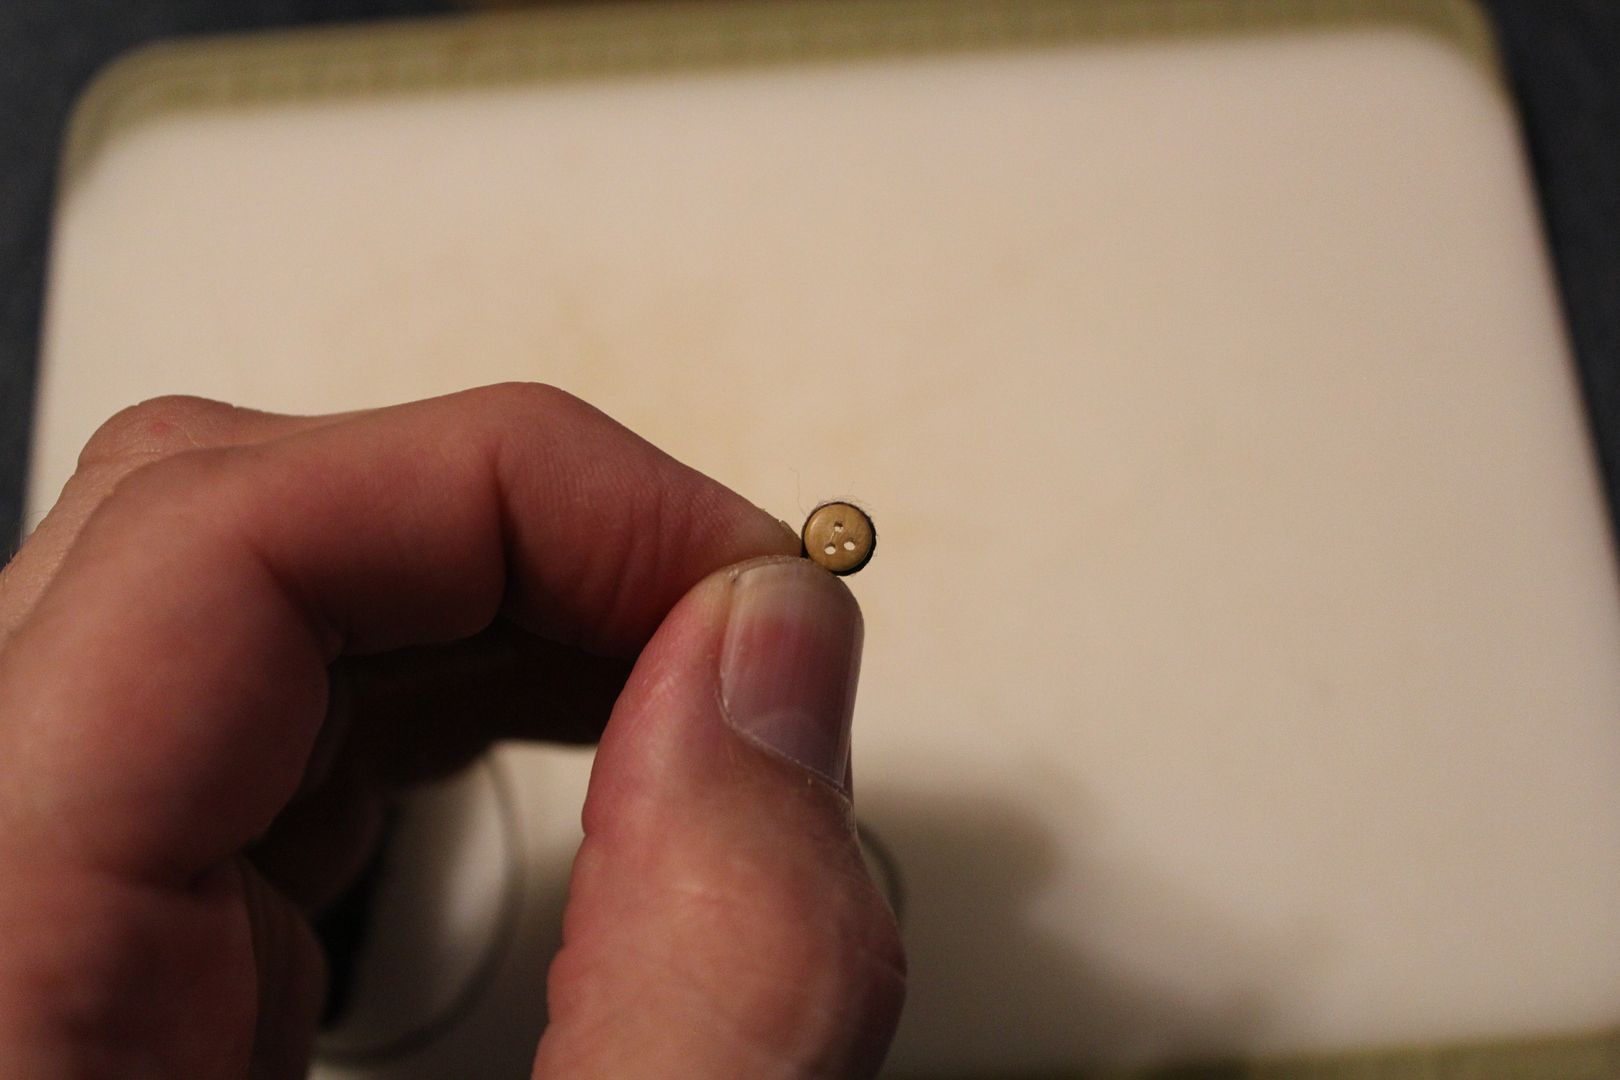 Then, once the glue has set, I adhere the tip of a thinner thread to the base of the dead-eye, and wrap it around the two parts of the shroud thread, much like I did for the cannon rope I showed earlier. 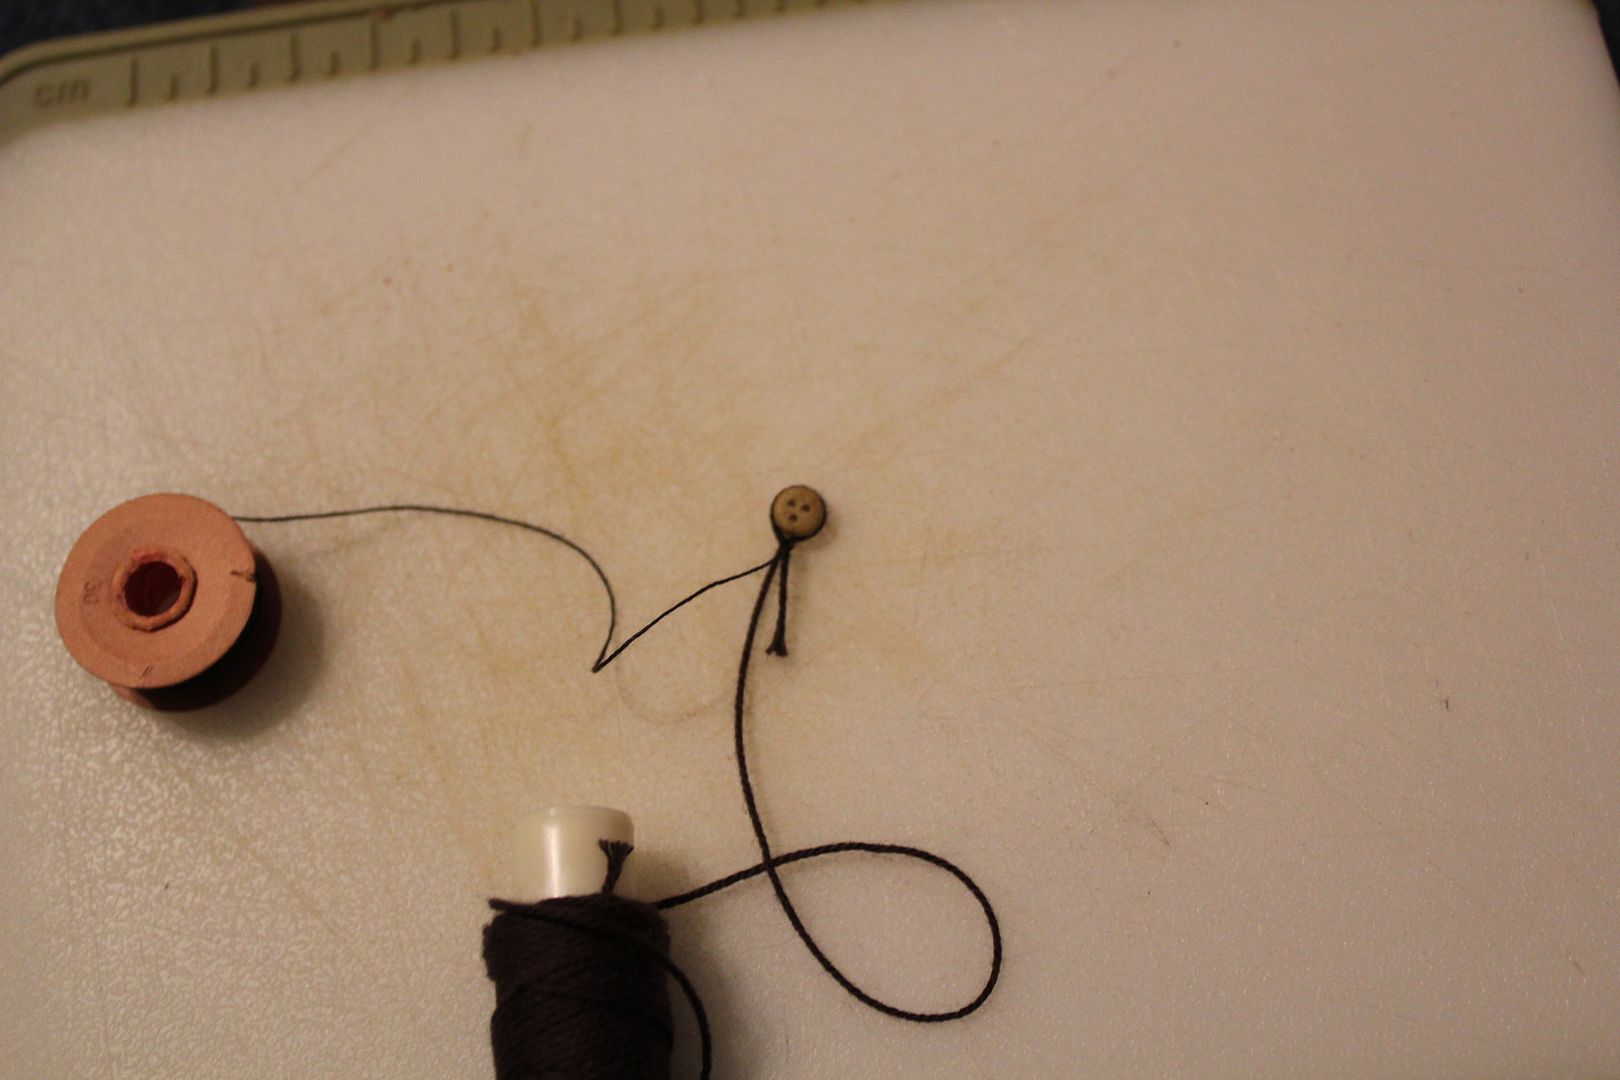 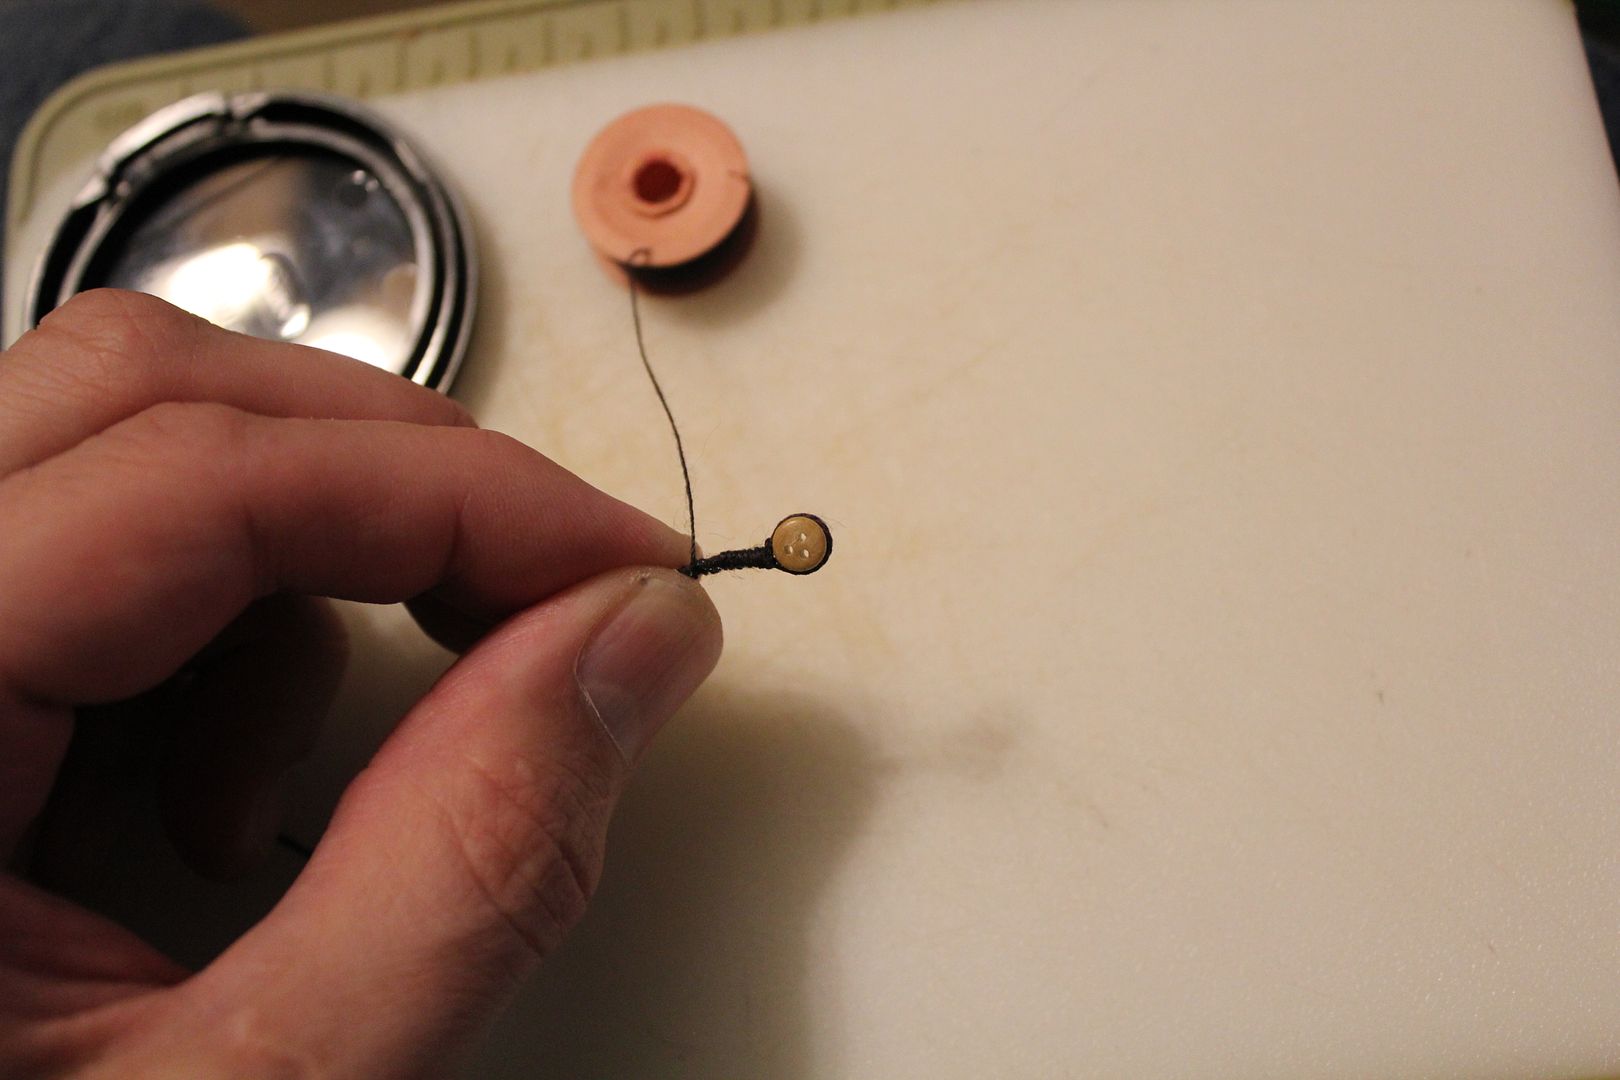 If at first you don't succeed,
maybe you should skip the chainsaw juggling...
|
|
|
Rank: Pro Groups: Registered
Joined: 16/03/2016 Posts: 122 Points: 381 Location: Layton, Utah
|
The, once I've secured the wrapped thread around the bottom of the shroud at the dead-eye, I thread the other end of the shroud up through the crow's nest and around the mast. 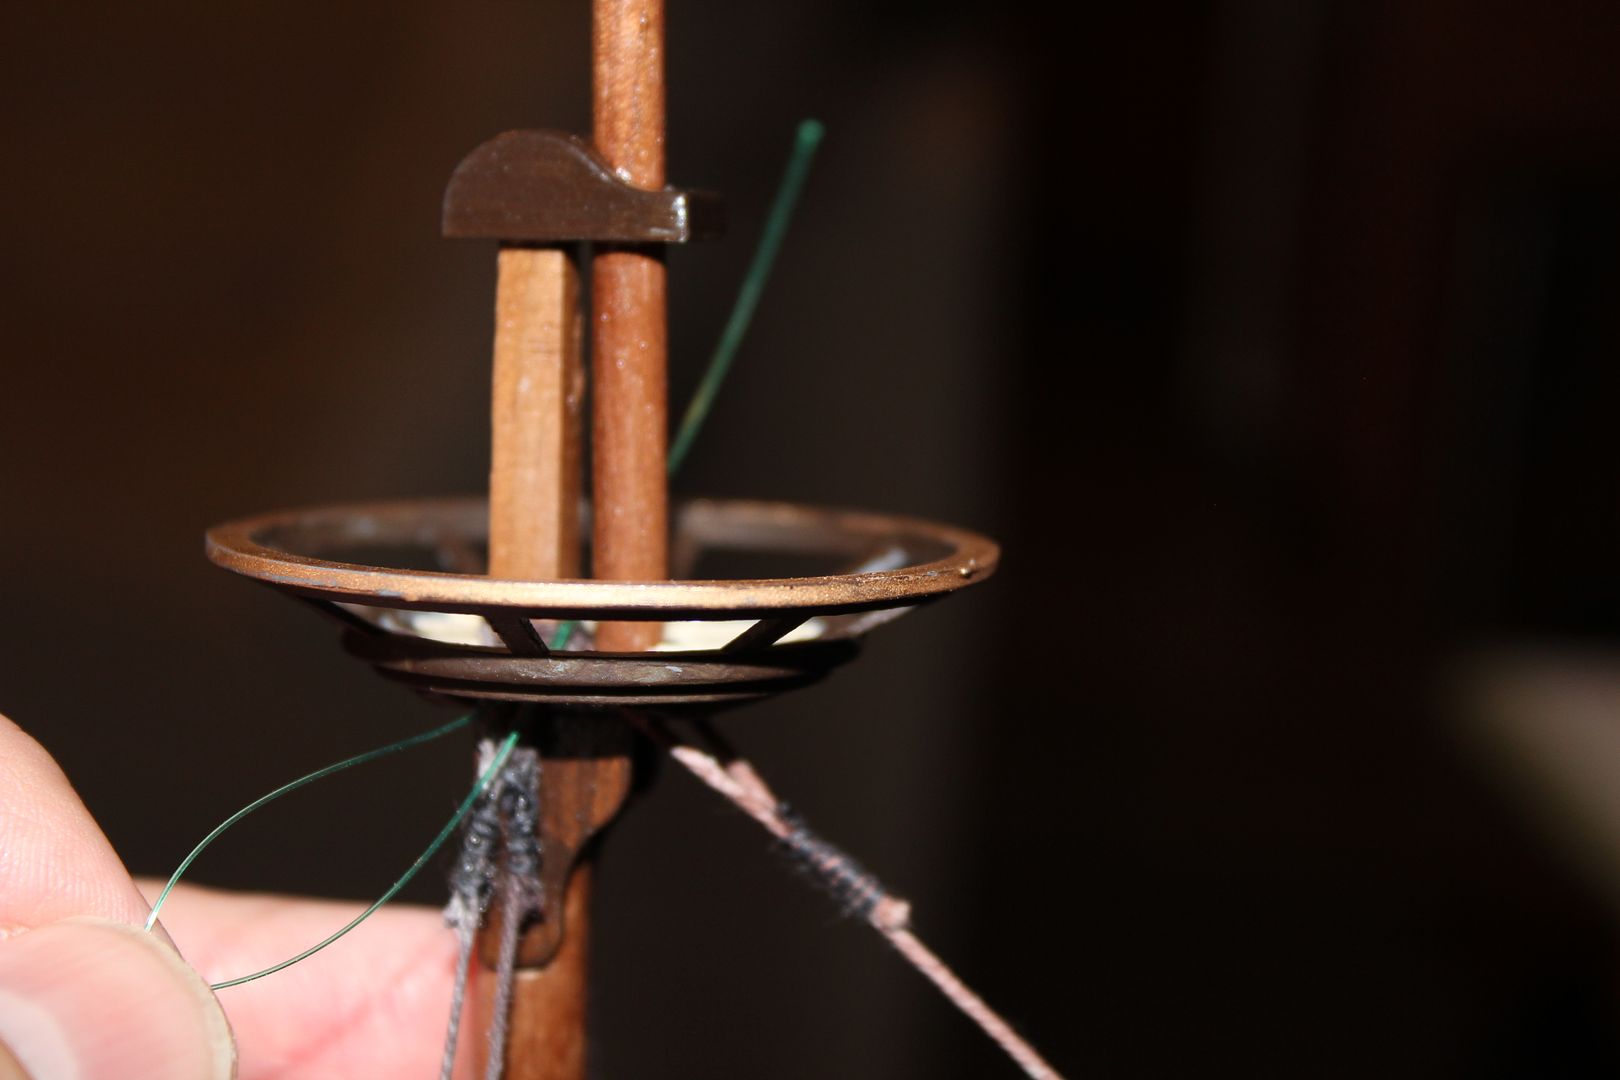 Then I attach the dead-eye at the bottom of the shroud to the dead-eye previously attached to the hull using a jig to ensure conformity of length in the thread that will connect the two dead-eyes (not sure what that is called). I pull on the trailing end of the shroud thread at the top until the shroud is nice and tight, and i'll put a drop of glue between the shroud and the mast above the crow's nest to keep it in place while I secure the trailing end of the shroud thread to the body of the shroud using the same wrapping technique I used at the dead-eye end. 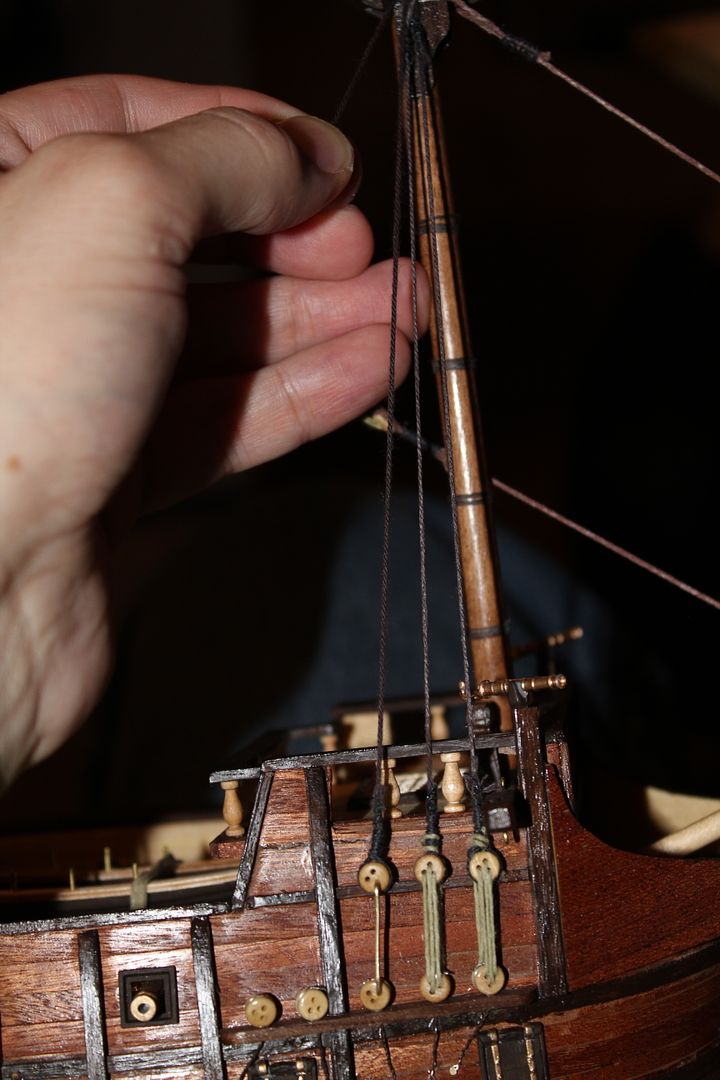 Next I wax the thread with bee's wax to help get rid of the fuzzies. I do this after the glue is all set, because I assume that the glue will not adhere as well to the waxed thread. 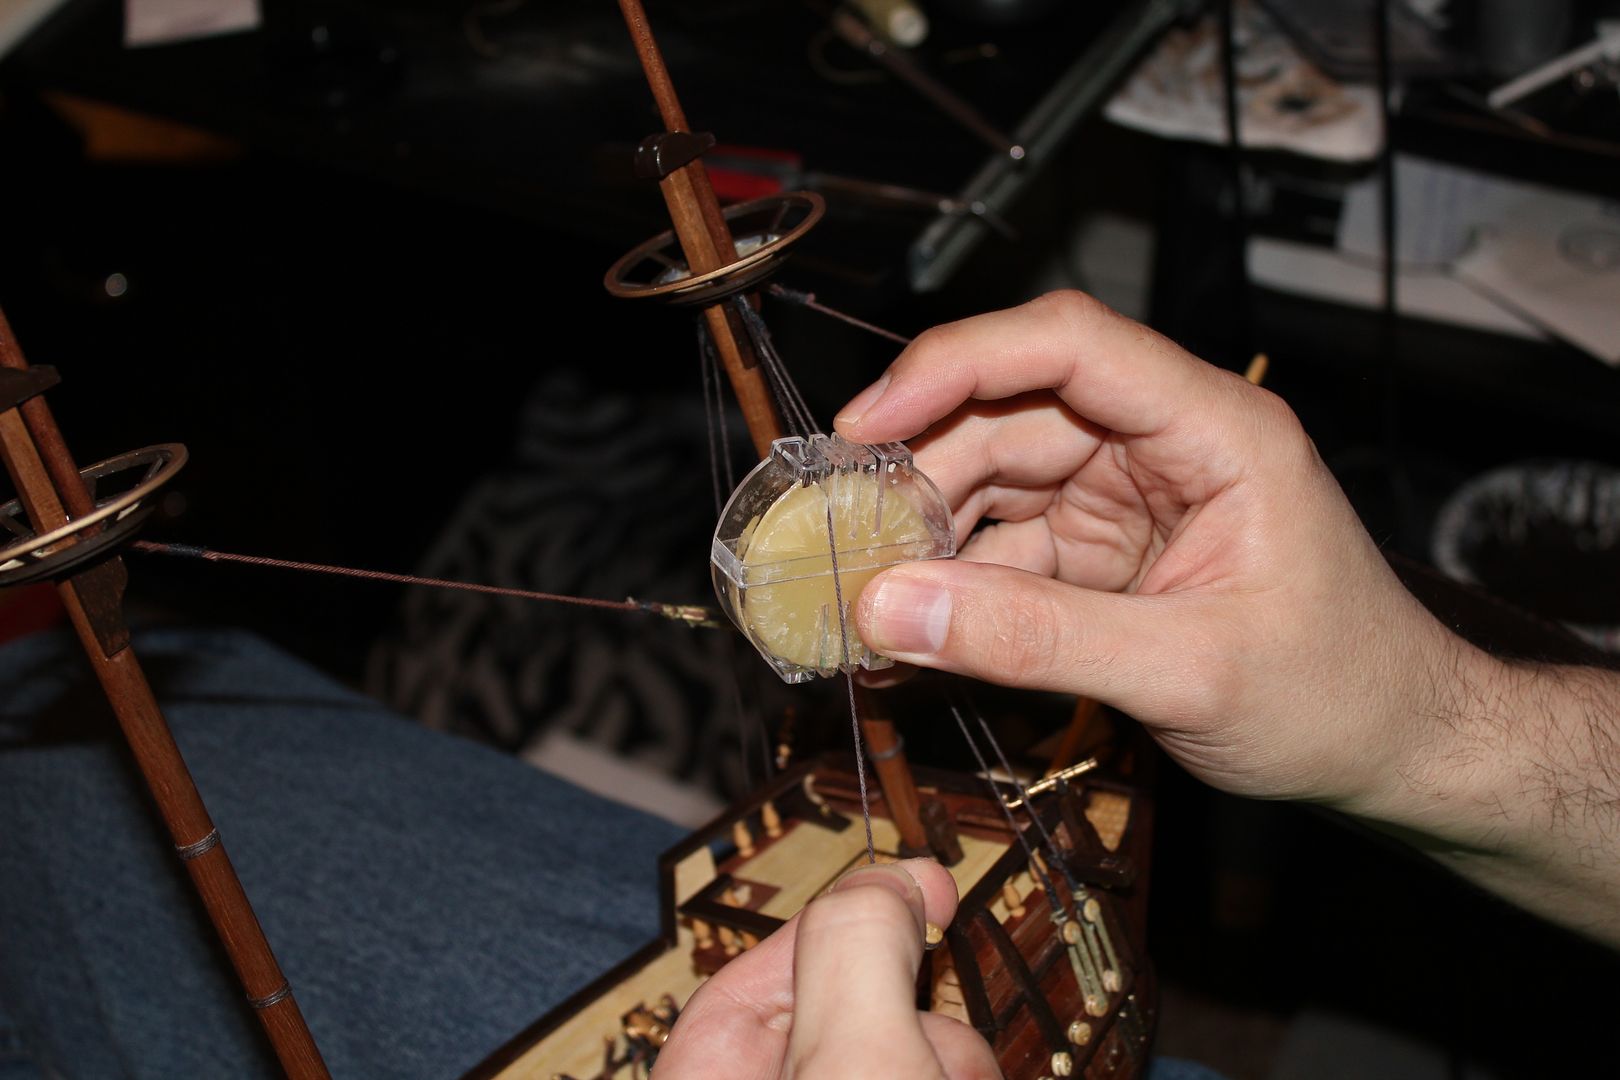 If at first you don't succeed,
maybe you should skip the chainsaw juggling...
|
|
|
Rank: Pro Groups: Registered
Joined: 16/03/2016 Posts: 122 Points: 381 Location: Layton, Utah
|
Next, I attach the two dead-eyes to complete the shroud. I start by tying a small knot at one end of the connecting thread. 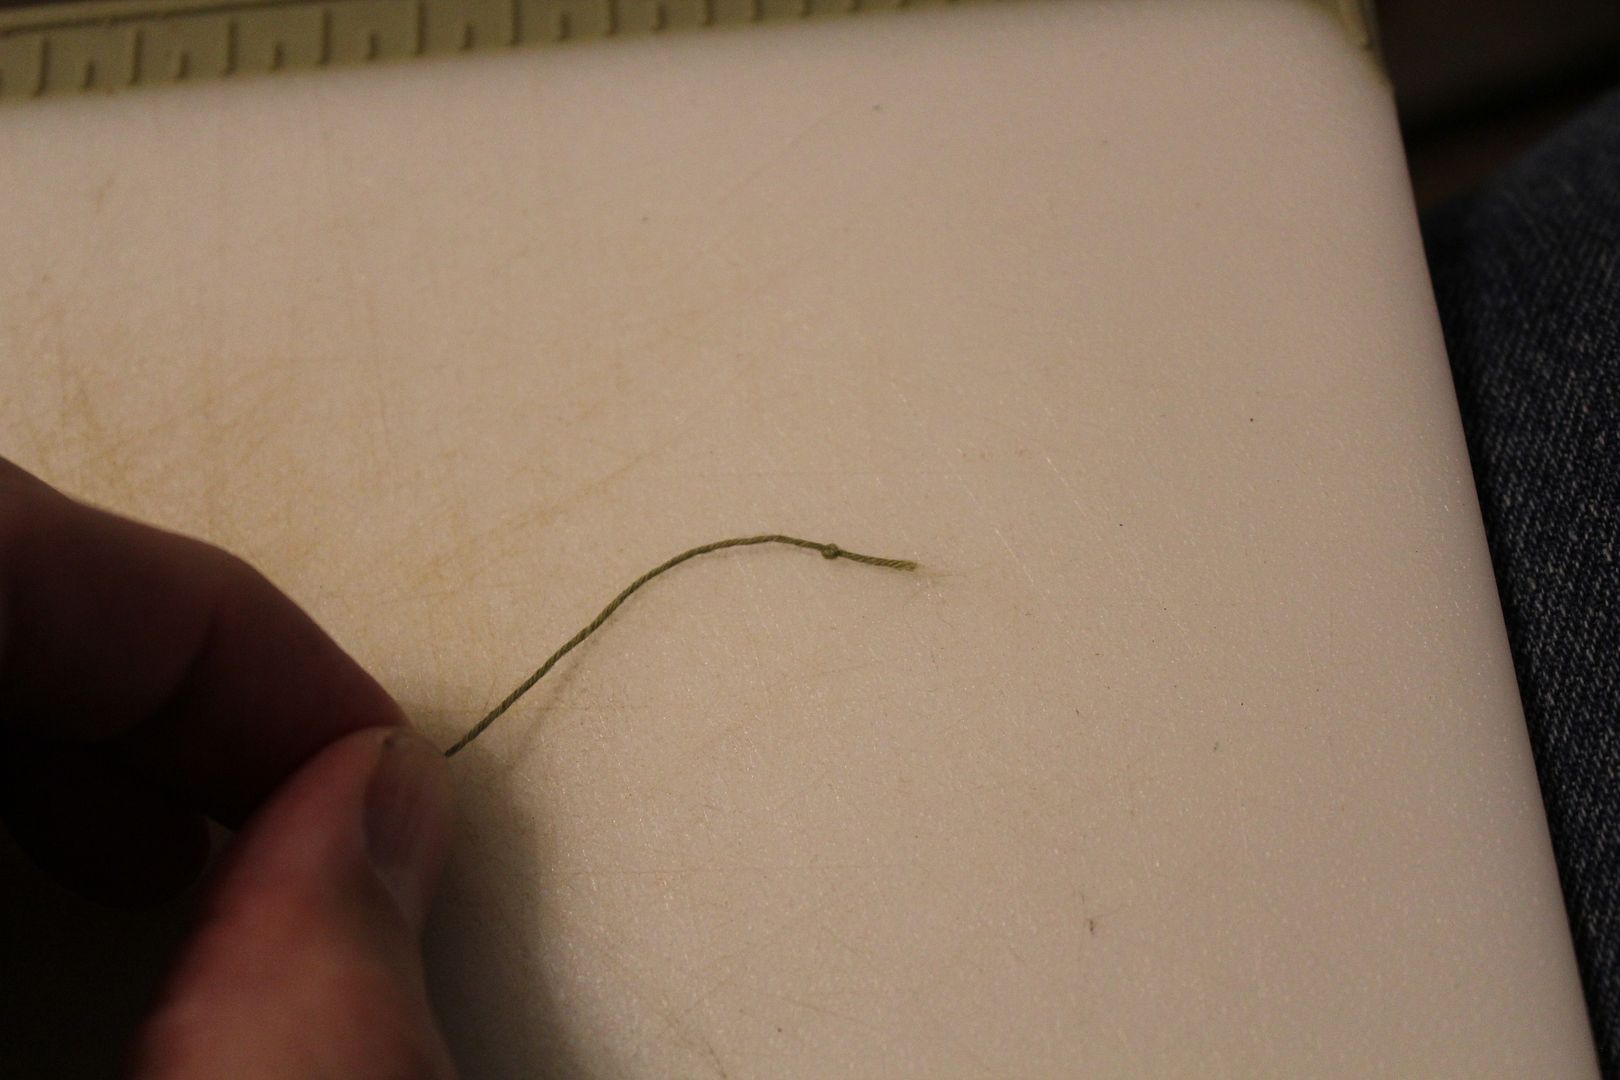 Then I thread the connecting thread through the bottom left hole of the dead-eye at the bottom of the shroud until it comes to a stop at the knot I tied at the other end. I apply a small touch of glue at the knot to keep it from fraying and to secure it to the dead-eye. 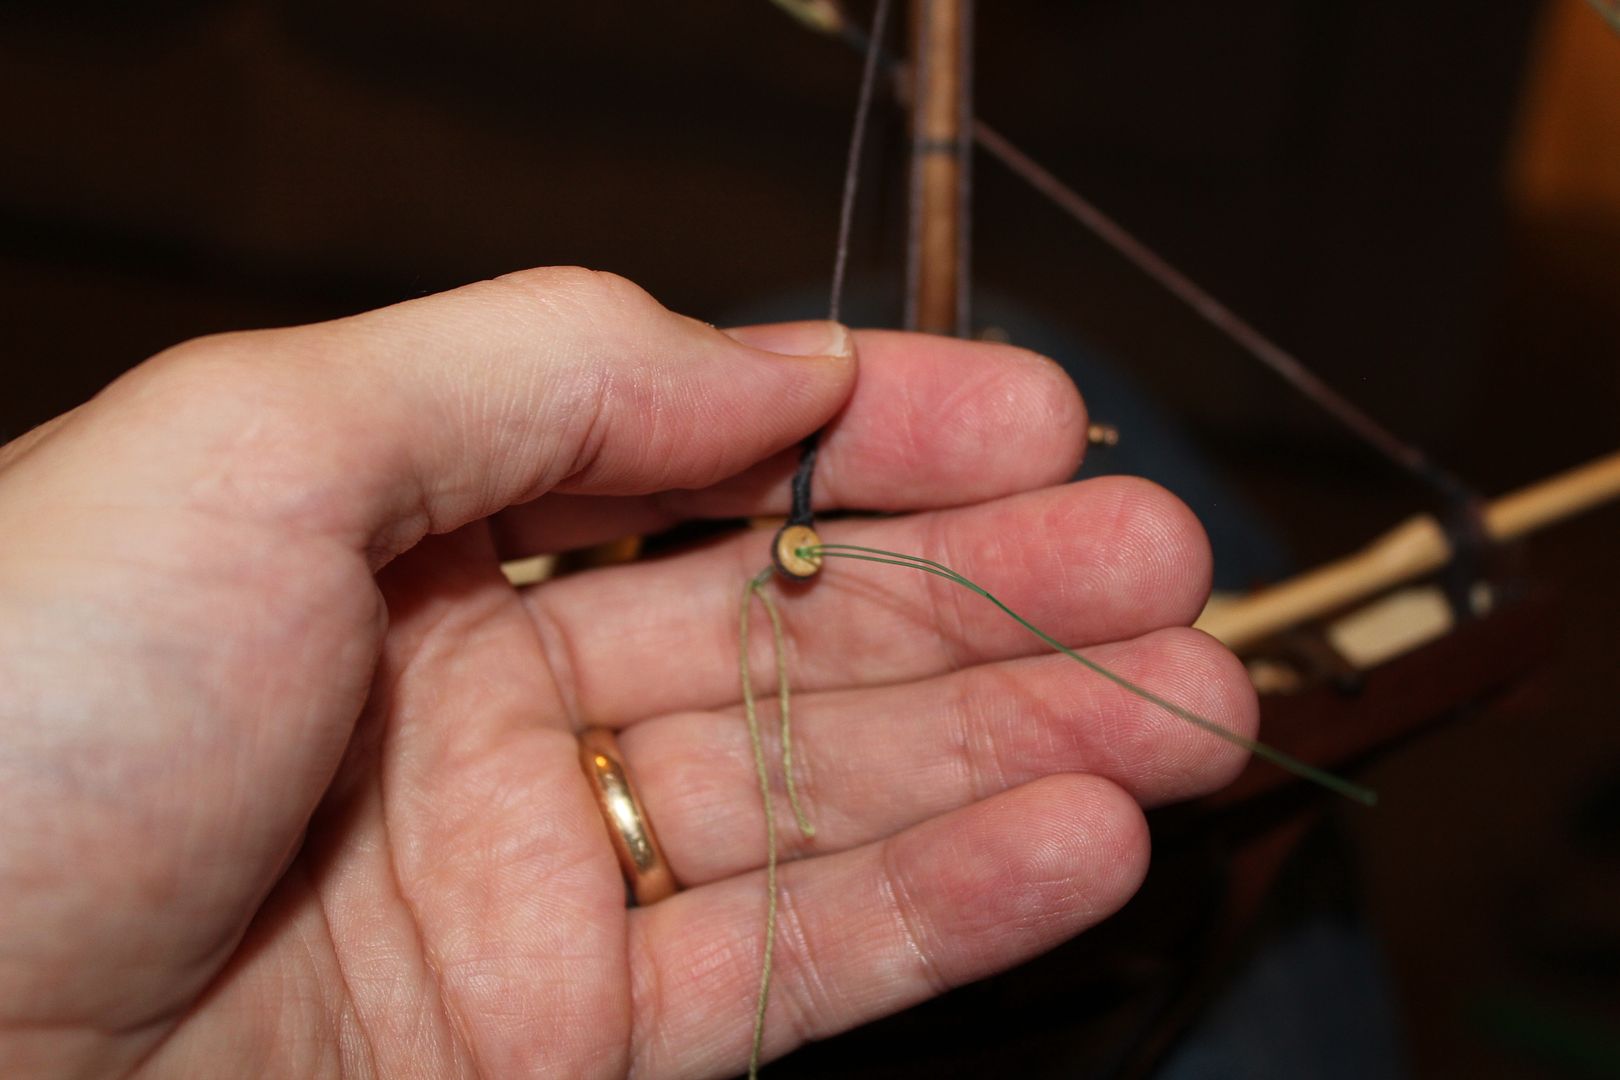 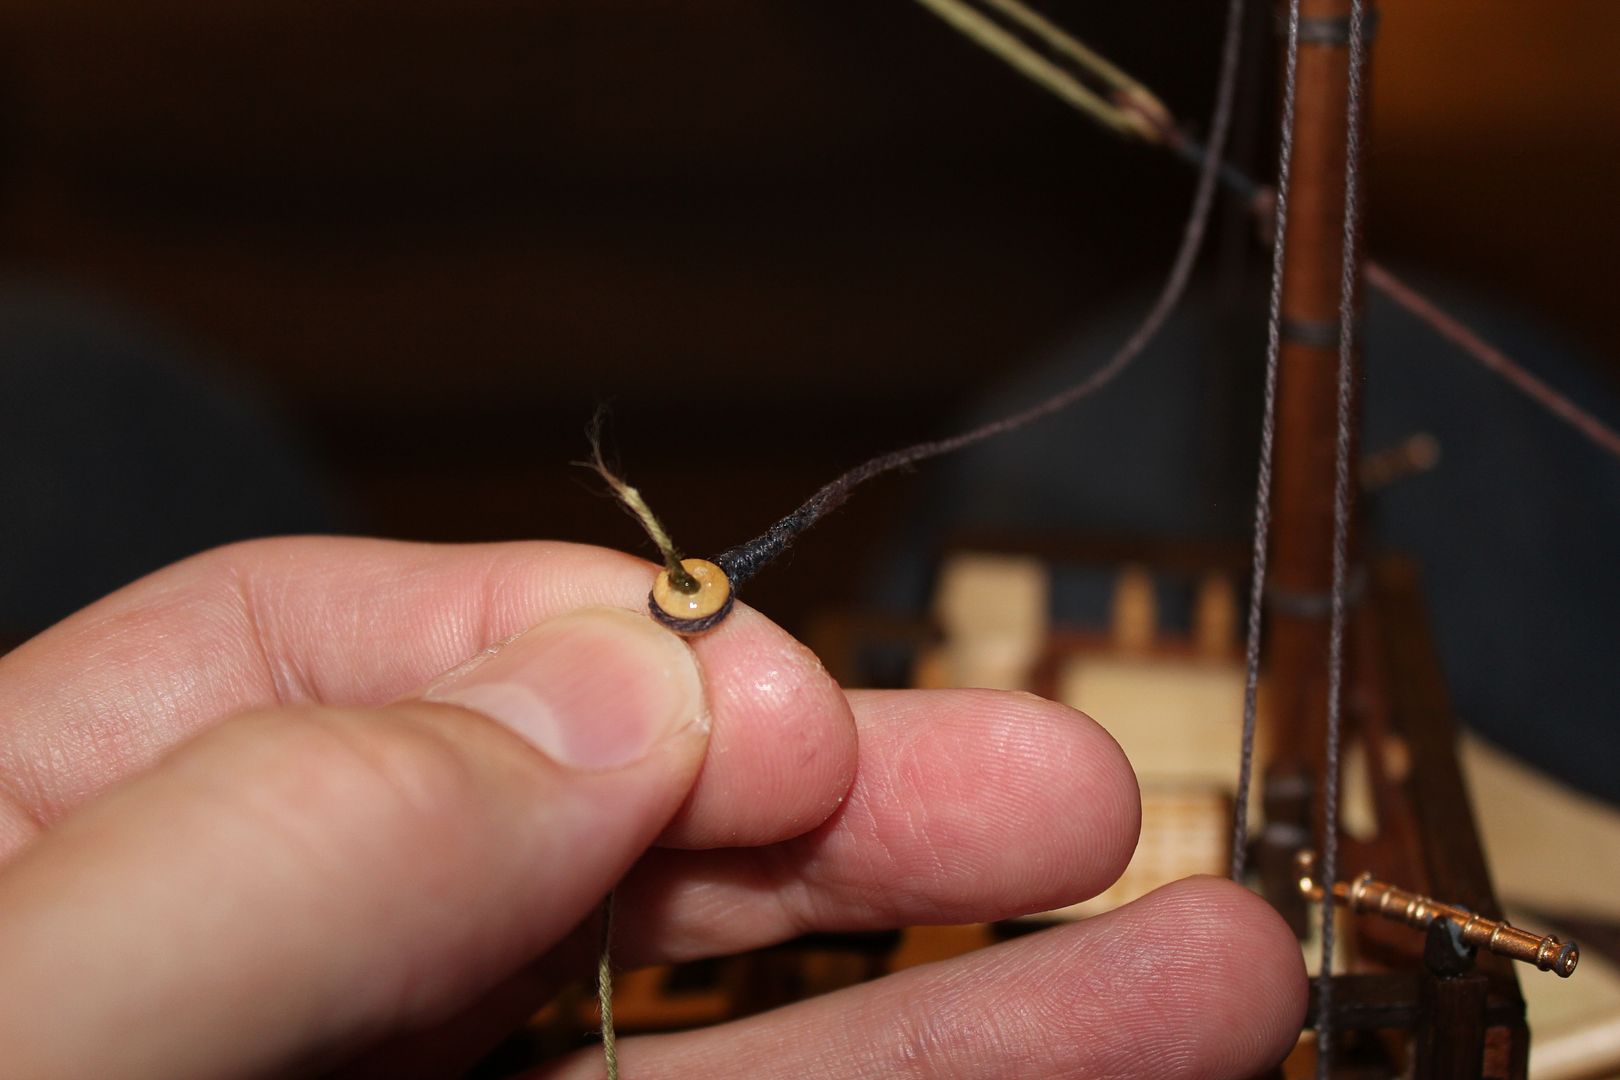 Continued later.... If at first you don't succeed,
maybe you should skip the chainsaw juggling...
|
|
|
Rank: Super-Elite Groups: Registered
Joined: 16/08/2010 Posts: 2,771 Points: 8,344 Location: Brighton
|
Hi GoofyFoot. Looking Very Neat and Tidy. Look forward to seeing your progress. Ian   Current builds.Hachettes build the bismark,HMS Victory, HMS Hood.
Finished Builds Corel HMS Victory cross section.
|
|
|
|
|
Looking good, credit to you.... .. Carry on the way you are doing and you will have a very nice display piece when finished.... Regards Alan
|
|
|
Rank: Super-Elite   Groups: Registered
Joined: 11/11/2009 Posts: 3,432 Points: 10,280 Location: Bâe Colwyn, Wales
|
Doing an amazing job Goofyfoot. Shes magnificent. Chris On the bench 1/350 Revell Tirpitz Platinum Edition (Pontos PE and Wooden deck) plus extra Eduard PE set and extra MK1 door sets.
|
|
|
Rank: Pro Groups: Registered
Joined: 16/03/2016 Posts: 122 Points: 381 Location: Layton, Utah
|
Thanks guys! Ok...continuing from where I left off. I then thread the line through the top left hole in the lower dead-eye. 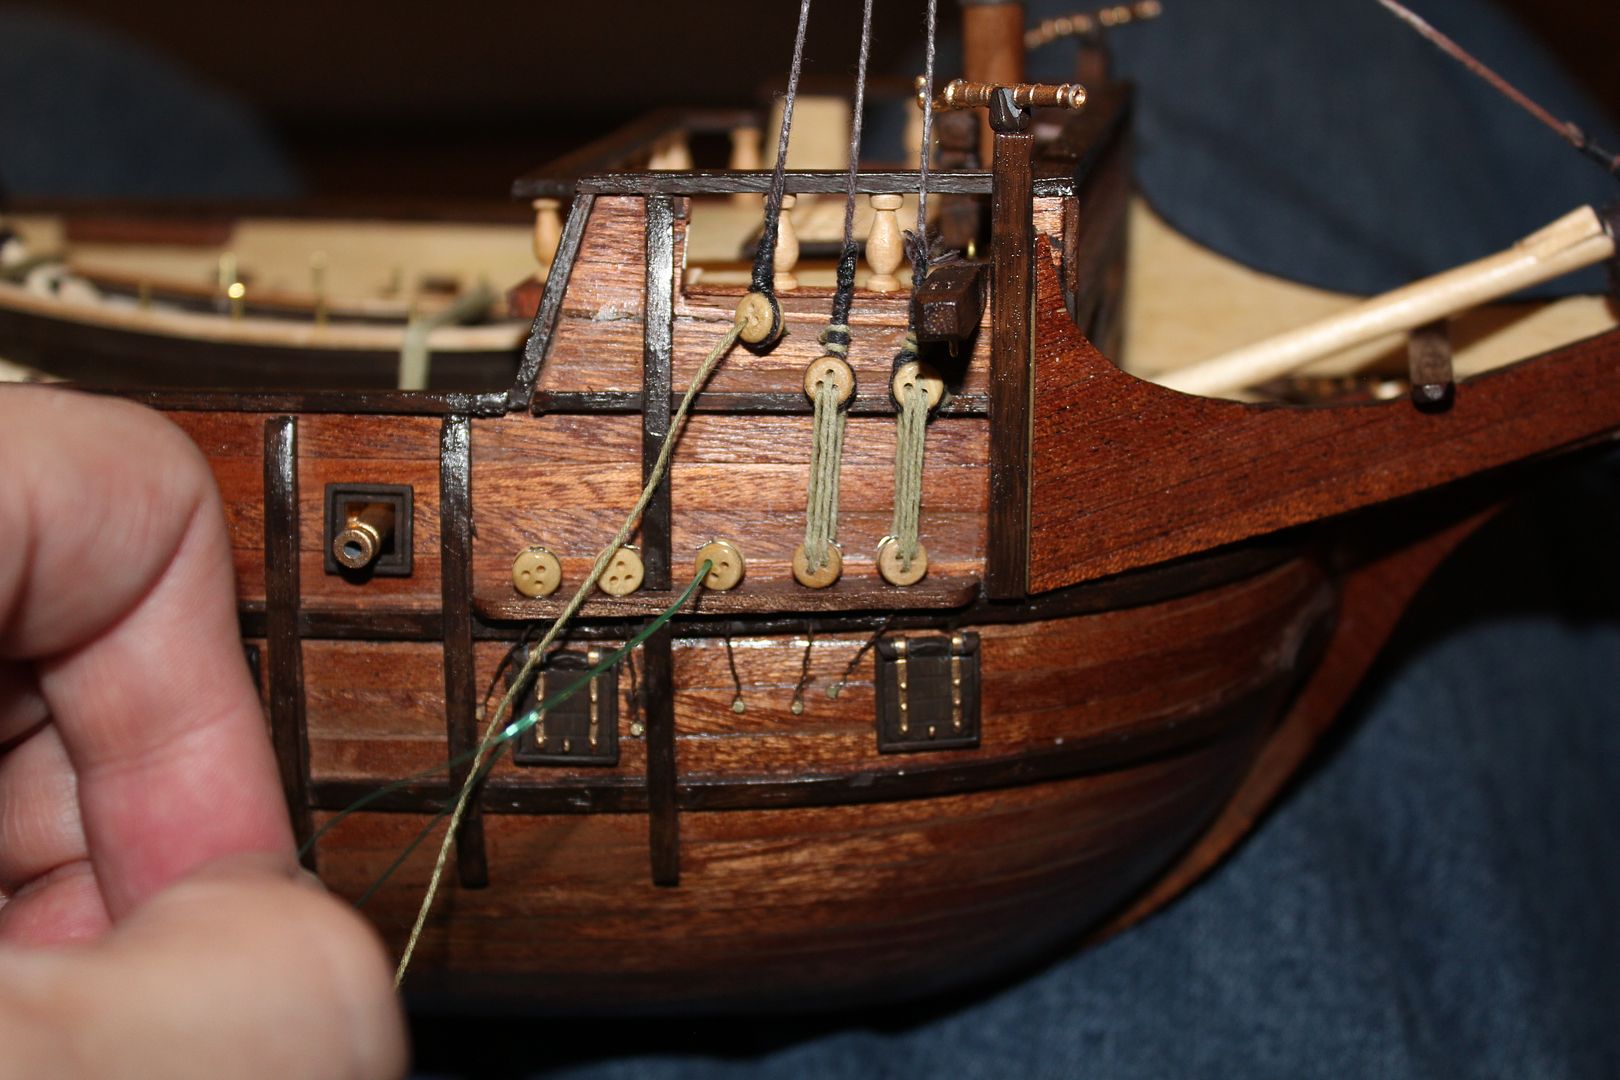 I pull the thread tight until the upper dead-eye lines up with the other dead-eyes to the side of it. 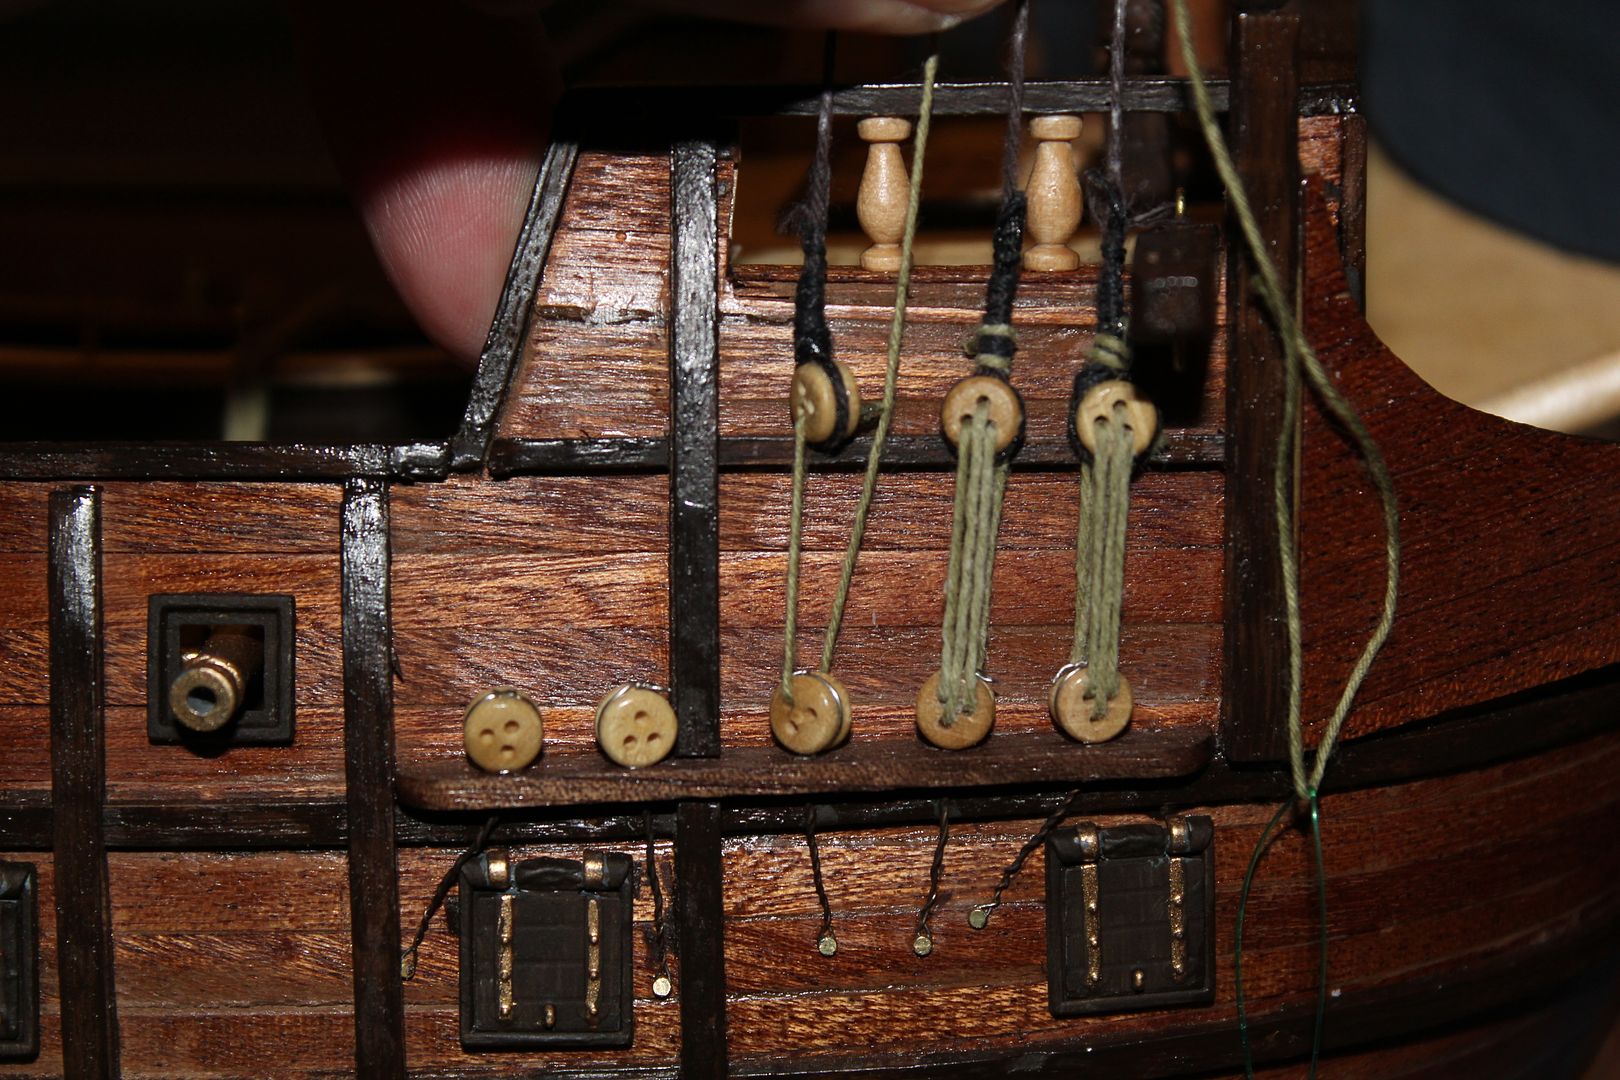 Then, I continue looping the thread through the rest of the eyes, top dead-eye to bottom, going from left, to right, to center. And finally, I tie it off above the upper dead-eye, and seal the knot in the back with a small spot of glue.  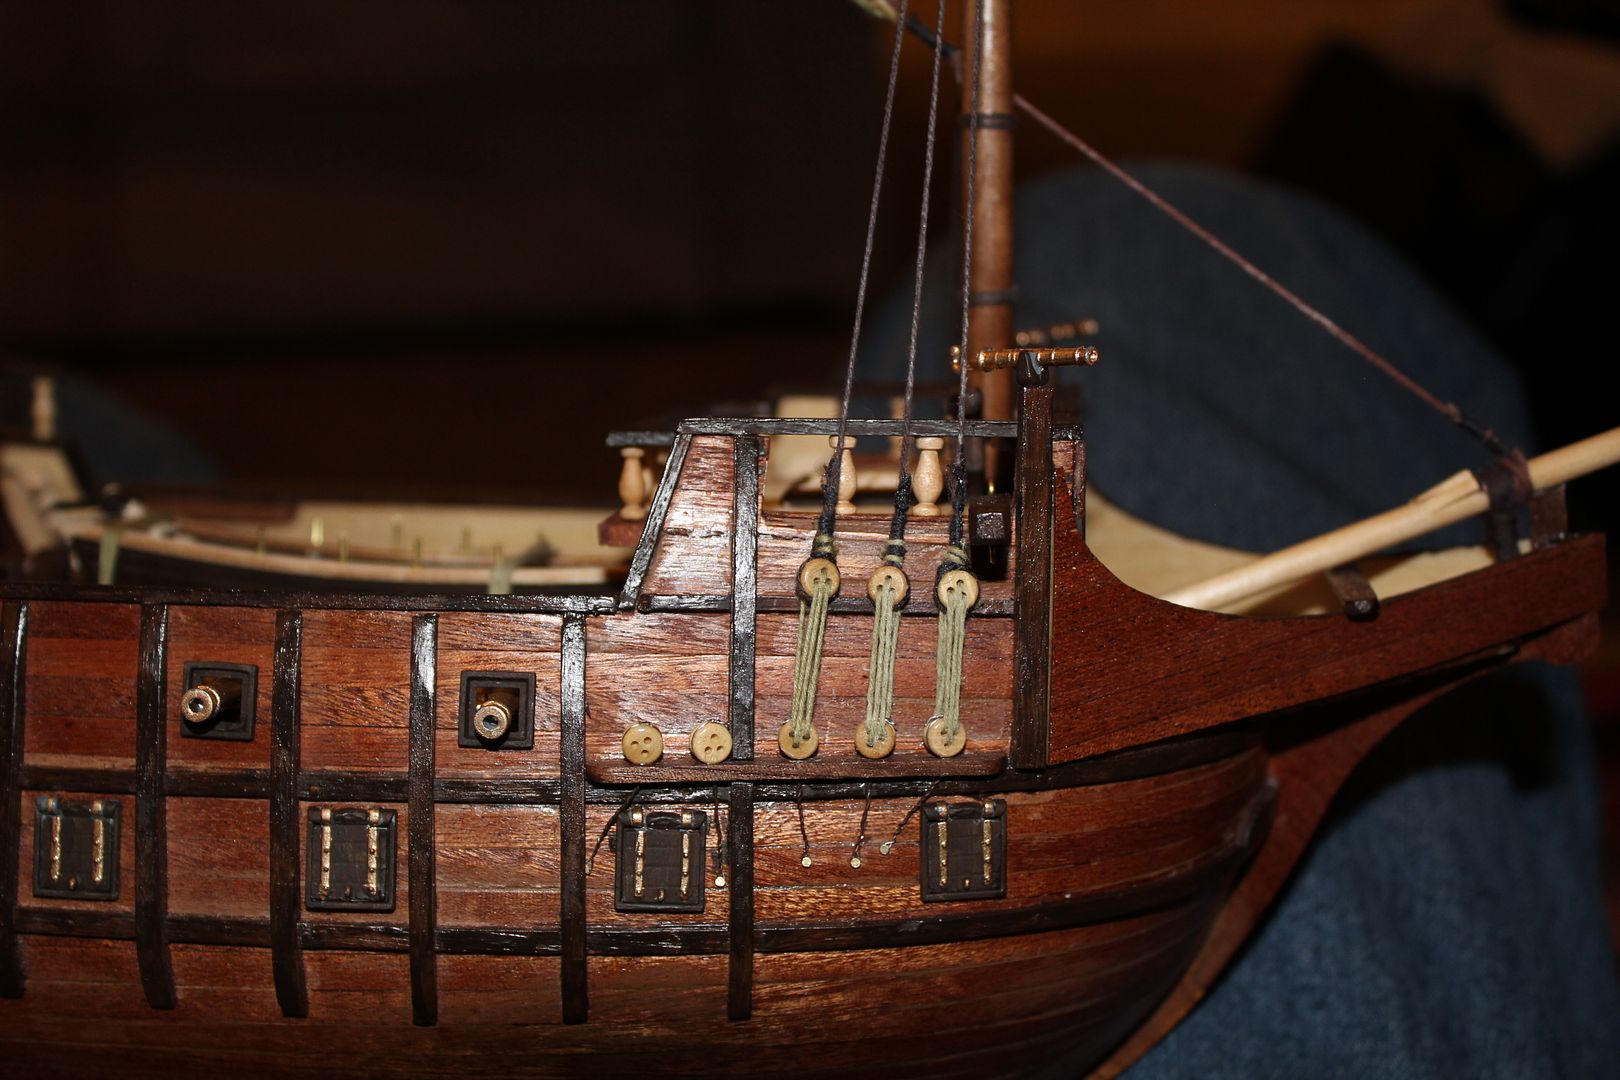 If at first you don't succeed,
maybe you should skip the chainsaw juggling...
|
|
|
Rank: Pro Groups: Registered
Joined: 16/03/2016 Posts: 122 Points: 381 Location: Layton, Utah
|
At this moment, I have 18 of the 30 lower shrouds done. Once those are all done, then it will be time to try my hand at the rat lines. If at first you don't succeed,
maybe you should skip the chainsaw juggling...
|
|
|
Rank: Pro Groups: Registered
Joined: 16/03/2016 Posts: 122 Points: 381 Location: Layton, Utah
|
I just realized something that I forgot, and that's to give credit where credit is due. I got the idea to use a jig spacer between the two dead-eyes while checking out Jase's build log. I would have never thought of that had I not taken a gander at some of the fine diaries here. You guys have already helped me make this a better piece! Cheers! If at first you don't succeed,
maybe you should skip the chainsaw juggling...
|
|
|
Rank: Pro Groups: Registered
Joined: 16/03/2016 Posts: 122 Points: 381 Location: Layton, Utah
|
Okay folks...I need some help. I've finished all of the lower shrouds and have started working on the ratlines. However, I've not even got half way done with one set of ratlines and I'm realizing I have nowhere near enough thread. I've check with the local fabric shops and hobby stores, and no one around here carries the right thickness of thread. Its either too thin, or too thick. Google hasn't been much help either, as I've found the right thickness of thread, but the absolute wrong color. Can anyone tell me where I can get my hands on some .15 mm chocolate brown thread? Thanks! If at first you don't succeed,
maybe you should skip the chainsaw juggling...
|
|
|
 Rank: Beginner Level 1 Groups: Registered
Joined: 07/04/2016 Posts: 5 Points: 15 Location: Louisiana, USA
|
Hi GoofyFoot, I've been referencing this board at lot, and mainly Magpie's build as a reference. I've been building this ship on Model Ship World. Anyway, I'm around the same step as you. I did the ratline, but didn't like the suggesting tan thread for rat lines against brown shrouds. I've been buying extra thread from here: http://www.syrenshipmodelcompan...offset=0&sort=normalhowever, I don't think AL thread size is correct (what they call 0.15mm is bigger than the 0.20mm from siren, so somebody is wrong). Because I bought the smallest (.20mm brown) from above and it was way too small. So, maybe try the next two up. The thread is darker brown than the kit's brown used for the shrouds, but not that noticeable. This is an example of where I am now: http://pic90.picturetrail.com/V...24675746/l-412372978.jpg
|
|
|
Rank: Pro Groups: Registered
Joined: 16/03/2016 Posts: 122 Points: 381 Location: Layton, Utah
|
Thanks LMDAVE! I'll probably order a spool of each to see which is closest to the thread I have. Our kits must be slightly different, as the thread called for in my instructions was the brown thread that was labeled .15 mm, though the illustrations in the instructions show "raw" thread used for the ratlines. I appreciate the heads up! If at first you don't succeed,
maybe you should skip the chainsaw juggling...
|
|
|
Rank: Beginner Level 1 Groups: Registered
Joined: 07/04/2016 Posts: 5 Points: 15 Location: Louisiana, USA
|
Keep in mind, the thread comes coiled up in a bag, not on a spool.
|
|
|
Rank: Pro Groups: Registered
Joined: 16/03/2016 Posts: 122 Points: 381 Location: Layton, Utah
|
LMDAVE wrote:Keep in mind, the thread comes coiled up in a bag, not on a spool. I've got some spools to wind it about. If at first you don't succeed,
maybe you should skip the chainsaw juggling...
|
|
|
Rank: Super-Elite  Groups: Registered
Joined: 27/01/2014 Posts: 5,060 Points: 14,980
|
Lovely neat work Goofy 
|
|
|
Rank: Super-Elite Groups: Registered
Joined: 11/11/2009 Posts: 3,432 Points: 10,280 Location: Bâe Colwyn, Wales
|
Nicely done. Looking top notch. Well done Chris On the bench 1/350 Revell Tirpitz Platinum Edition (Pontos PE and Wooden deck) plus extra Eduard PE set and extra MK1 door sets.
|
|
|
Rank: Pro Groups: Registered
Joined: 16/03/2016 Posts: 122 Points: 381 Location: Layton, Utah
|
Thanks magpie and davet! Appreciate it! Still waiting on my thread. Hopefully it'll get here soon and I can continue tying ratlines. If at first you don't succeed,
maybe you should skip the chainsaw juggling...
|
|
|
|
Guest
|
 US
US

