|
|
 Rank: Pro   Groups: Registered
Joined: 22/03/2016 Posts: 175 Points: 552 Location: Merseyside
|
This will be my '2016 Build Of The Year' entry First of all, thank you for taking the time to take a look at my build diary.
This will be my first diary and your comments and views are more than welcome.
I have decided to keep this kit all original (for now at least) but I will include any modification ideas I have in each section and your feedback is much appreciated.
In each section I will also include a parts list, pictures, problems I may run into, or defective parts and any hints and tips I can offer along the way. I subscribed to this kit via post and will receive 4 issues monthly so will update and picture overall progress once a month. ISSUE 1 Ok first issue and I’m already more than impressed with the quality of the kit. Very detailed, a nice finish and bigger than expected
Sadly, the free gift (the Shelby hat) wasn’t included but a quick email sorted this and it’s on its way.
A large poster and a good informative magazine telling the Shelby story along with the following parts:
• Nose
• Lower grille
• Front bumper
• Left and right headlights
• Front licence plate
• And all the relevant fixings as pictured below. 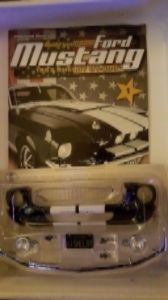 The build
Nothing too difficult here, easy to follow instructions, however I did run into a problem – one of the projections on the bumper was slightly longer than the other preventing the bumper from sitting flush along the nose panel but a quick file down and problem solved.
Spare screws provided as said in the guide and overall pleased with the quality and finish so far.
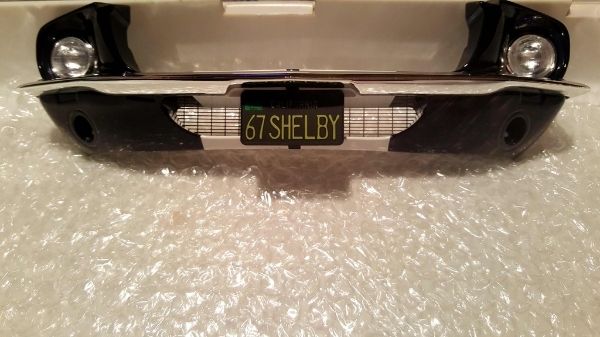 Suggested modifications: • Paint lower grille black Issue 2 First thing I noticed here was how heavy the wheel is, again just showing the quality of this kit.
Parts list: • 1 x front wheel and tyre
• steering knuckle
• brake disc
• brake calliper
• Shelby logo wheel cover
• Screwdriver and fixings The build: Again nothing too difficult with this section parts all in good shape with a nice detailed finish. Hint!! Soak the tyre in HOT (not boiling) water to soften making it easier to get onto the wheel then allow to cool again being careful not to distort the shape. Suggested modifications: • Paint brake calliper in the matching blue of the car
• Highlight lettering on tyre in white
• Wheels – fully black or maybe white rim with blue spokes Issue 3: Onto issue 3 and I can honestly say I am enjoying every minute of this build and the added Shelby story. Hopefully those following are also enjoying this diary so far. Parts list: • Intake manifold
• Left and right rocker covers
• Air cleaner base, element and cover
• Rocker cap
• Carburettors
• Fixings The build: Easy to follow instructions and an enjoyable stage to complete. Again good quality but rocker covers could have a better finish. Hints: • Make sure you don’t over tighten the screw on the underside of the air filter casing as it will cause a dip in the centre of the top cover. Suggested modifications: • Lettering on rocker covers and rocker cap Blue
• White lines and blue lettering on filter cover
• Air filter element painted Issue 4 Not a lot to do on this section really, the size of the bonnet really does give a perspective of the overall completed size of this kit and.. WoW!! Parts list: • Upper Grille
• Shelby logo
• Right and left fog lamp
• Bonnet (Hood)
• Relevant fixings The build: Chasing back to issue 1 we now have the upper grille and fog lamps with the all-important Shelby badge to complete. As said above not a great deal to do here but the satisfaction factor is completing the nose section. Installing the grille, fog lamps and Shelby badge onto the previously assembled nose section is the task in hand.
A few minor imperfections on the bonnet but nothing to write home about but having read other build diaries and the defected parts reported I'm considering myself quite lucky at this point. Suggested Modifications: Paint upper grille black
Ok that concludes this section of the build. Issues 5,6,7 and 8 will follow very shortly, so remember to check back soon.
I hope your enjoying the diary so far and remember your comments and suggestions are welcome
Built- Shelby Mustang, Lamborghini Huracan
Building-Spitfire, Redbull racing RB7, 3d printer, Honda CB750, Stage coach and Revell 1/400 Titanic
|
|
|
Rank: Pro Groups: Joined: 24/08/2009 Posts: 48,827 Points: -13,348
|
Great start 
|
|
|
 Rank: Vice-Master     Groups: Registered
Joined: 07/01/2015 Posts: 856 Points: 2,479 Location: Sevenoaks, UK
|
That's a great start and I love the format of your build diary, very informative! Any images I post on my personal builds are free to be used and shared under Creative Commons Attribution license, which means you can do what you want with them, on the condition you mention I'm the author.
Happy building :-) http://www.model-space.com/gb/
|
|
|
 Rank: Super-Elite   Groups: Registered
Joined: 27/01/2014 Posts: 5,060 Points: 14,980
|
Welcome to the Forum Steve  It's great to see another Mustamg build diary get started, it's a great kit and looks like you are off to a good start. Look forward to seeing some of your mods
|
|
|
 Rank: Semi-Pro Level 1  Groups: Registered
Joined: 03/03/2016 Posts: 64 Points: 192 Location: Darfield UK
|
Another one who has had issues with the bumper, thought I was alone.......... I'm also subscribing monthly and I've had the first 8 issues, waiting with bated breath for my next 4 issues. I'm enjoying the build too, good luck with yours Tony
|
|
|
|
|
|
|
|
Rank: Super-Elite  Groups: Registered
Joined: 31/05/2010 Posts: 5,679 Points: 17,011 Location: Wiltshire
|
Very nice kit indeed - hope you get lots of enjoyment from your build. Happy Modelling
BUILDING: Hachette Spitfire Mk 1A, Constructo Mayflower
SUBSCRIPTION COMPLETE (Awaiting building): USS Constitution, Sovereign of the Seas, 1:200 Bismarck (Hachette)
COMPLETED: Porsche 911, E-Type Jaguar, Lam Countach
|
|
|
Rank: Pro Groups: Registered
Joined: 22/03/2016 Posts: 175 Points: 552 Location: Merseyside
|
Thanks for the warm welcome and kind words. I currently have upto issues 12 so further updates won't be to far ahead. Then hopefully settle into the once a month updates. To be continued...... Built- Shelby Mustang, Lamborghini Huracan
Building-Spitfire, Redbull racing RB7, 3d printer, Honda CB750, Stage coach and Revell 1/400 Titanic
|
|
|
Rank: Super-Elite Groups: Registered
Joined: 27/01/2014 Posts: 5,060 Points: 14,980
|
Hi Steve How are you getting on with your next part of the build, would love to see more
|
|
|
Rank: Pro Groups: Registered
Joined: 22/03/2016 Posts: 175 Points: 552 Location: Merseyside
|
Hi sorry for big delay on build diary but house move has put me behind. Will update shortly Built- Shelby Mustang, Lamborghini Huracan
Building-Spitfire, Redbull racing RB7, 3d printer, Honda CB750, Stage coach and Revell 1/400 Titanic
|
|
|
Rank: Pro Groups: Registered
Joined: 22/03/2016 Posts: 175 Points: 552 Location: Merseyside
|
Ok firstly sorry for the delay but moving home and work has given me 0 time lately. But finally on with the build……… Issue 5 To start part 2 of this diary we have issue 5. The first bit of good news is the free gift (Shelby Hat) has arrived as promised. With this issue we have the left seat back rest and yet again im amazed at the quality and how realistic these parts look. Parts List: • Left Seat Back – Rear • Left Seat Back – Frame • Left Seat Back – Front • Relevant screws 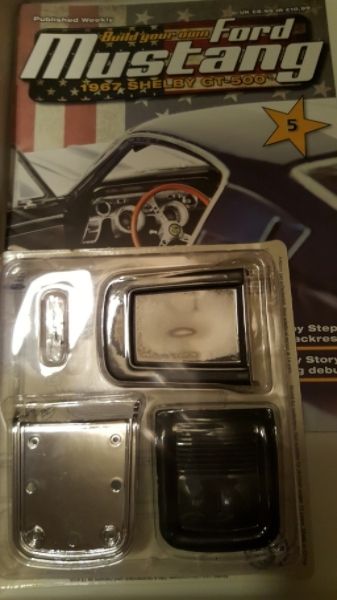 The build: Very simple stage to complete, just 4 screws and the rest just pushes together. The guide does say to use a dab of glue to improve the strength but I didn’t feel the need for this.  Issue 6 Onto issue 6 and we have the exhaust system. Parts list: • Lower and upper silencers • Right and left silencer inlets • Right and left exhaust pipes • Right and left tail pipes • Relevant screws 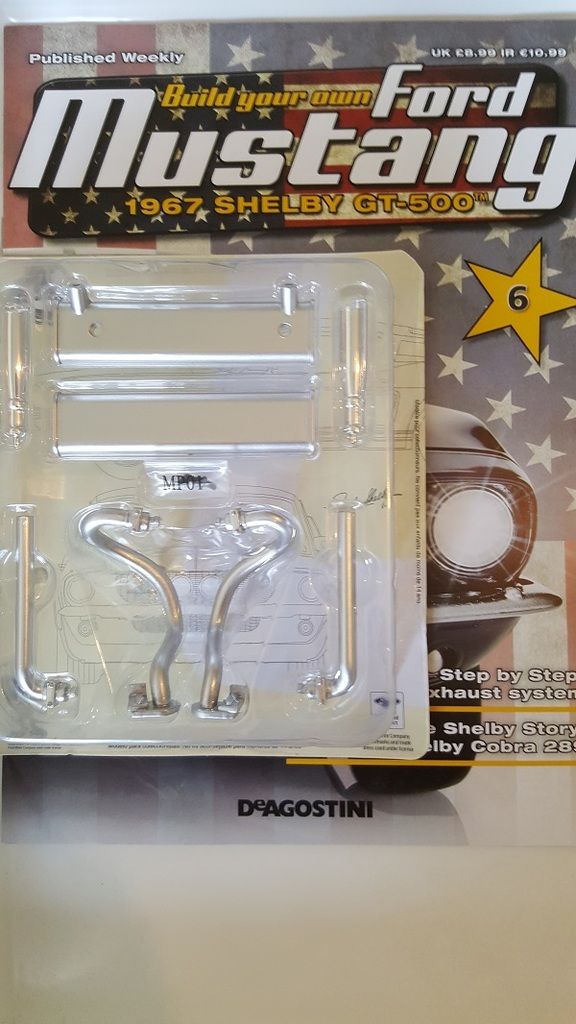 The Build: The Build:This part can be a bit fiddly and a tad confusing as to which side is which, once you get to grips with this it is simple enough though. 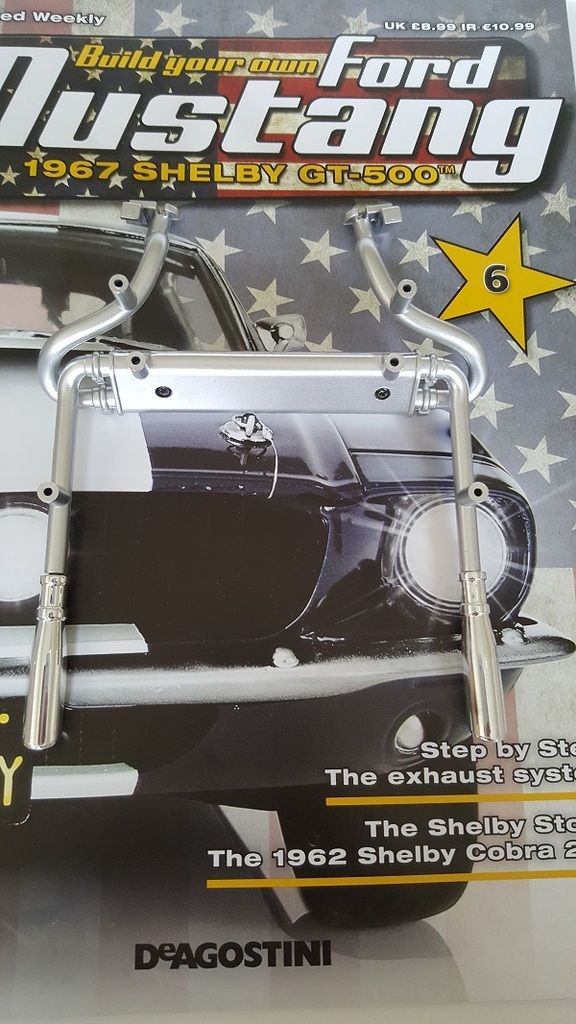 HINTS AND TIPS: Double check you have the parts located correctly before you tighten everything up.
Issue 7
As in issue 2 we have now the 2nd front wheel and tyre. Parts list: • Front wheel • Front tyre 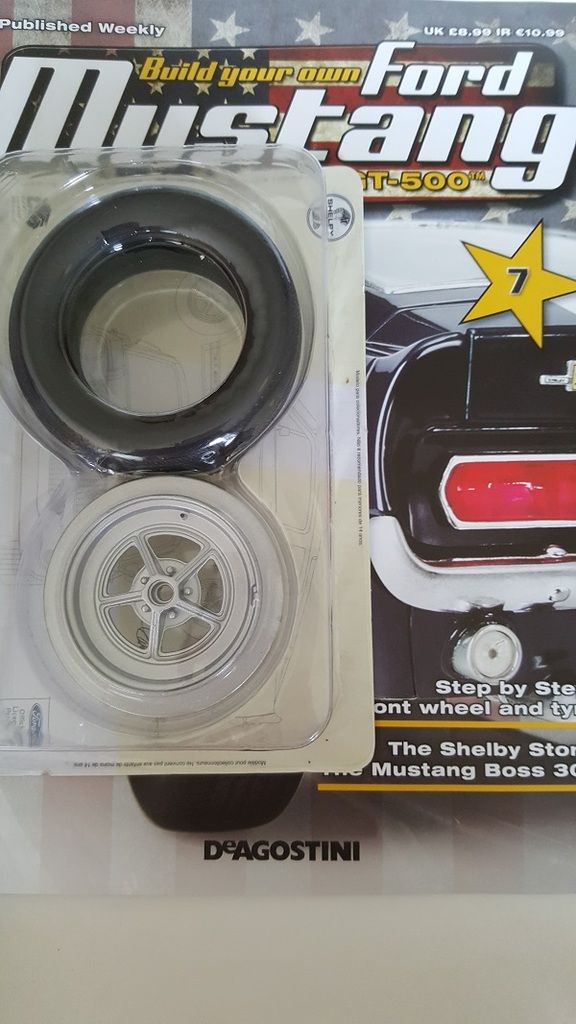 The build: Following the same method as issue 2 I soaked the tyre in hot water softening it to make it easier to fit the wheel. 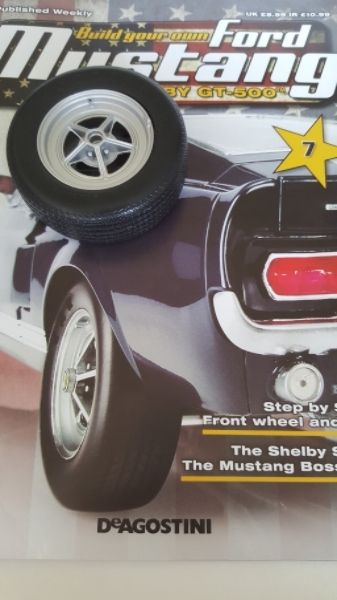 Hint: Place tyre in hot water to soften it, but be careful not to burn your fingers like I did!!! Suggested modifications: Highlight the lettering on the tyre in white. Wheel – fully black or maybe white rim with blue spokes. Issue 8 Onto issue 8, where we have the right front brake assembly. Again a fairly simple step, you are just mirroring the other half of issue 2. Parts list: • Steering knuckle • Brake disc shield brake disc and calliper • Shelby logo wheel cover • Relevant screws 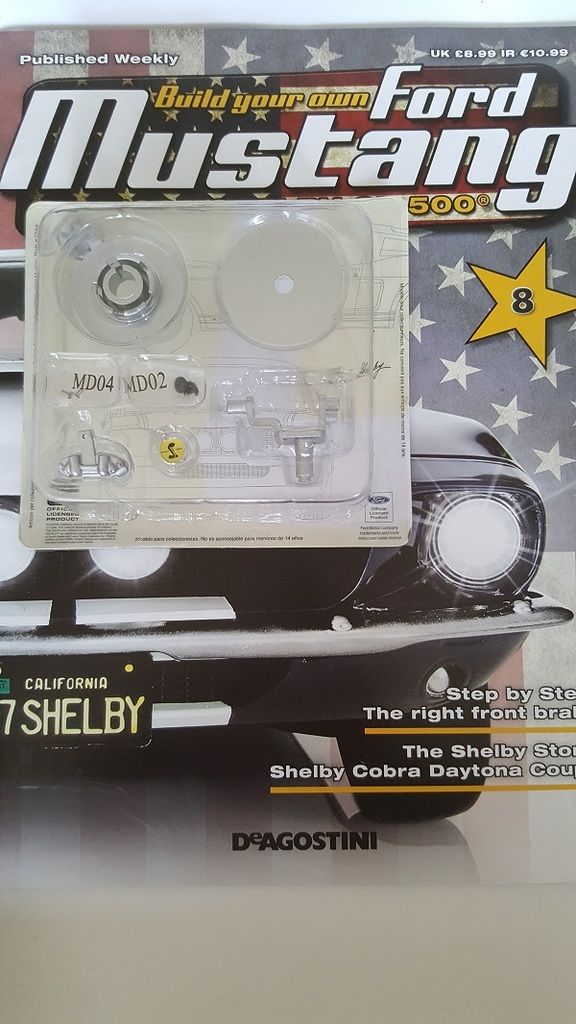 THE BUILD: Again nothing too difficult or technical here, assembling the brake and attaching to the wheel is all straight forward and completes another section of the Shelby. 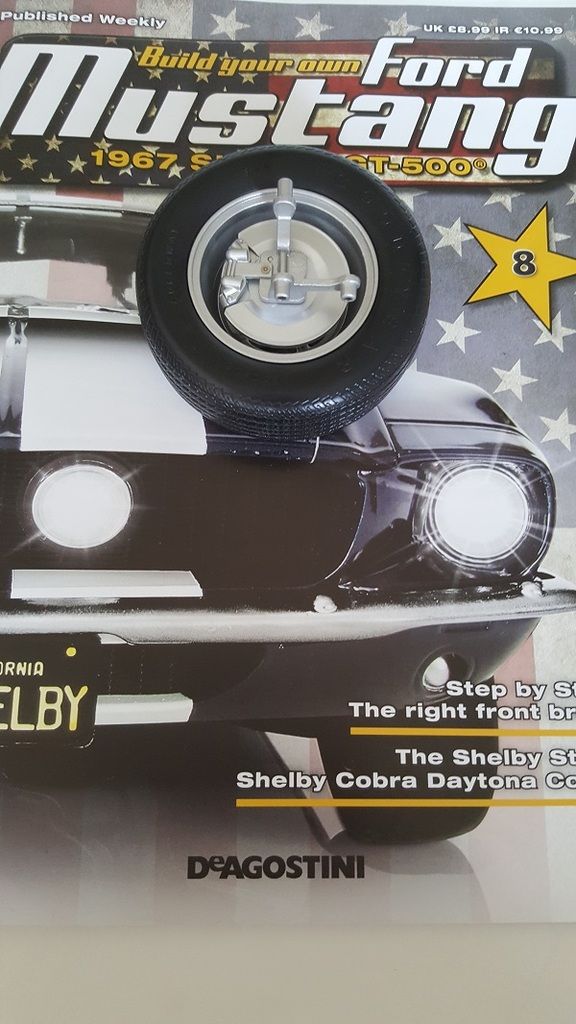 SUGGESTED MODIFICATIONS: Paint the brake callipers blue to match the car Ok that concludes this month’s build, don’t worry the next section is already in progress and will be uploaded by tomorrow. Until next time……………… PART 3 Ok hope your all enjoying the build as much as I am so far. A little let down with this delivery which is no free gift again I’m assured it’s on the way so let’s build on. Issue 9 Onto issue 9 where we have received left door and side mirror. Again impressed with the quality of the parts supplied. Parts List: • Left door mirror • Left door • Left door handle • Relevant screws 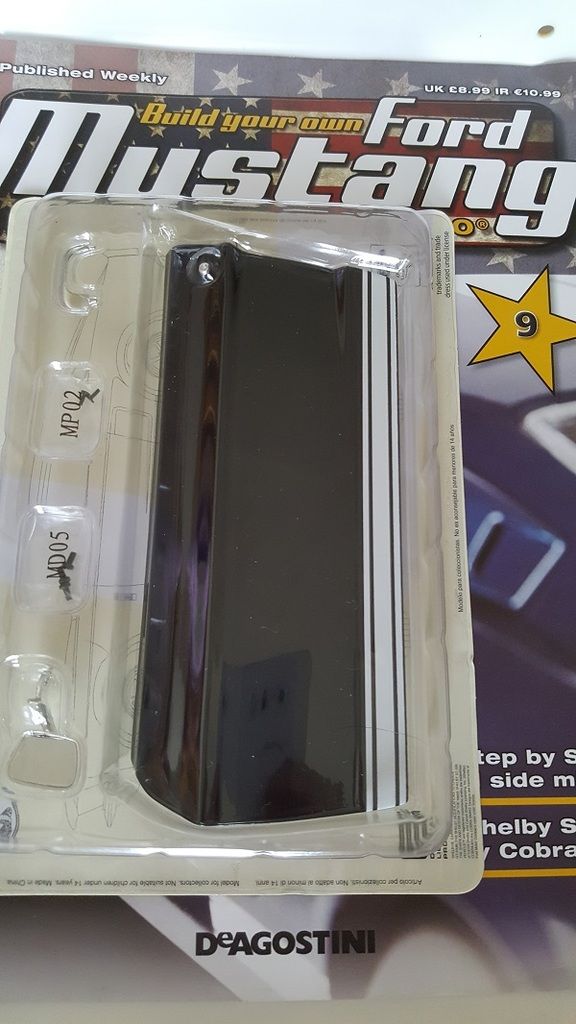 THE BUILD: A bit fiddly but nice easy steps to follow, nothing more to add really but satisfying receiving another big chunk of the soon to be Shelby. 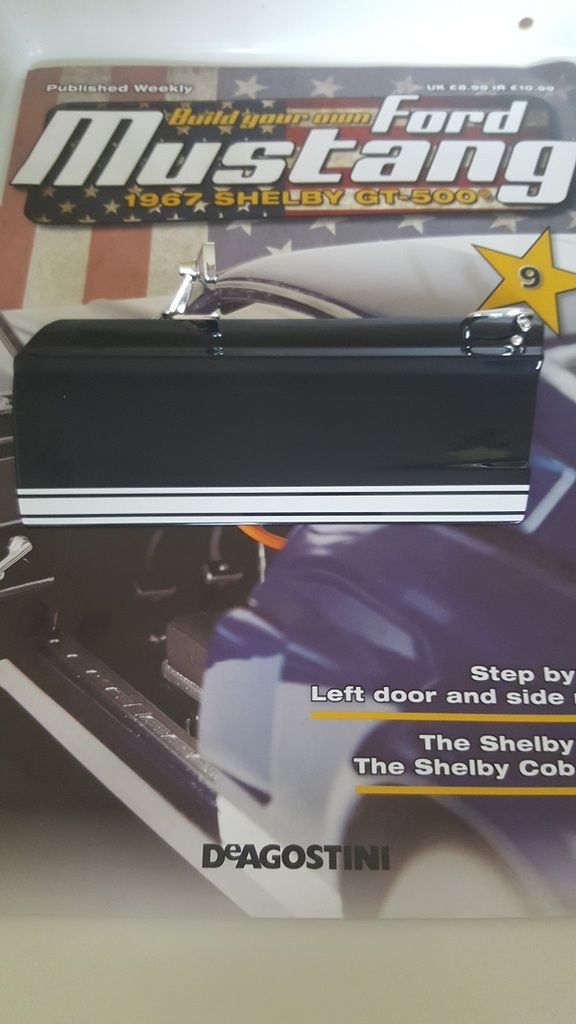 ISSUE 10: The second part of this section you will need to have the door from issue 9 to hand. Just to add I’m a little unimpressed as I was under the impression the final build would allow you to wind the windows up and down, however they are clearly fixed, anyway on with the build. PARTS LIST: • Left window • Door hinge • Hinge plate • Relevant screws 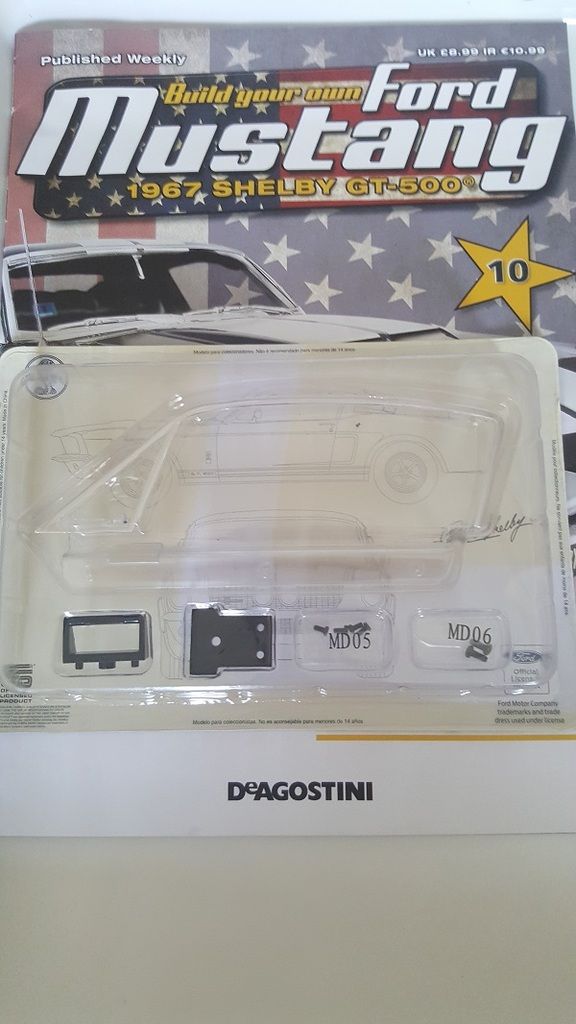 THE BUILD: Nothing challenging here, a satisfying addition to the collection of parts. 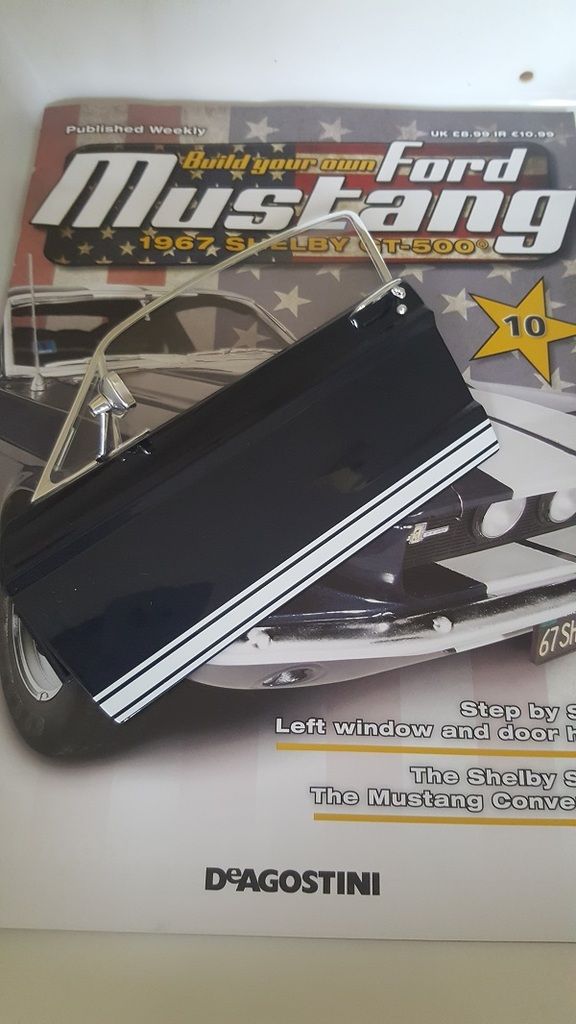 ISSUE 11 Moving onto issue 11, we received the parts to complete the left door. Again nice detailed quality products. PARTS LIST: • Left door card • Lower trim panel • Door handle and mount • Window crank • Upper door trim • Relevant screws 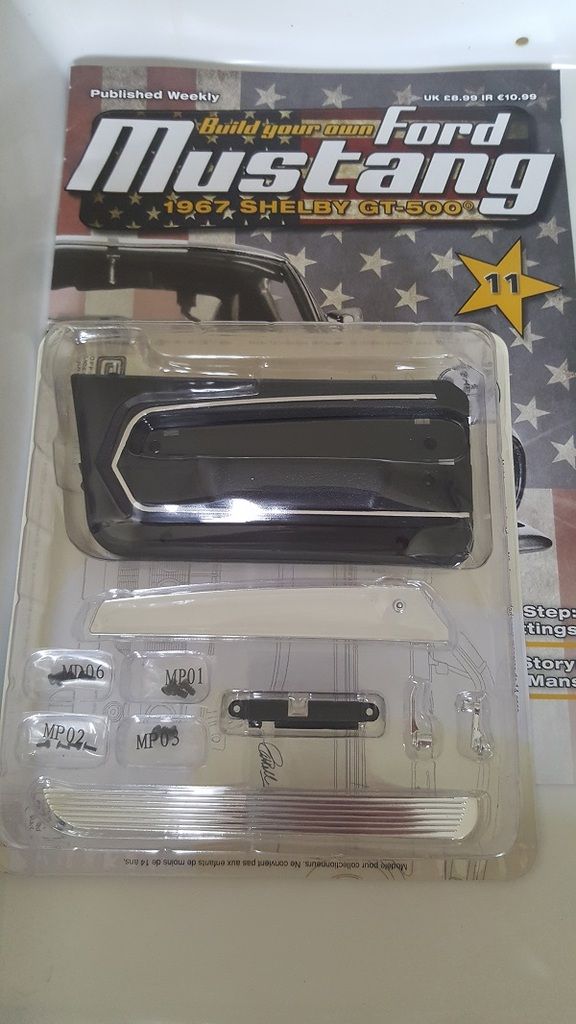 THE BUILD: A bit of a fiddle with a couple of ill-fitting trims, a quick file sorted out this though. We have now completed the left door. 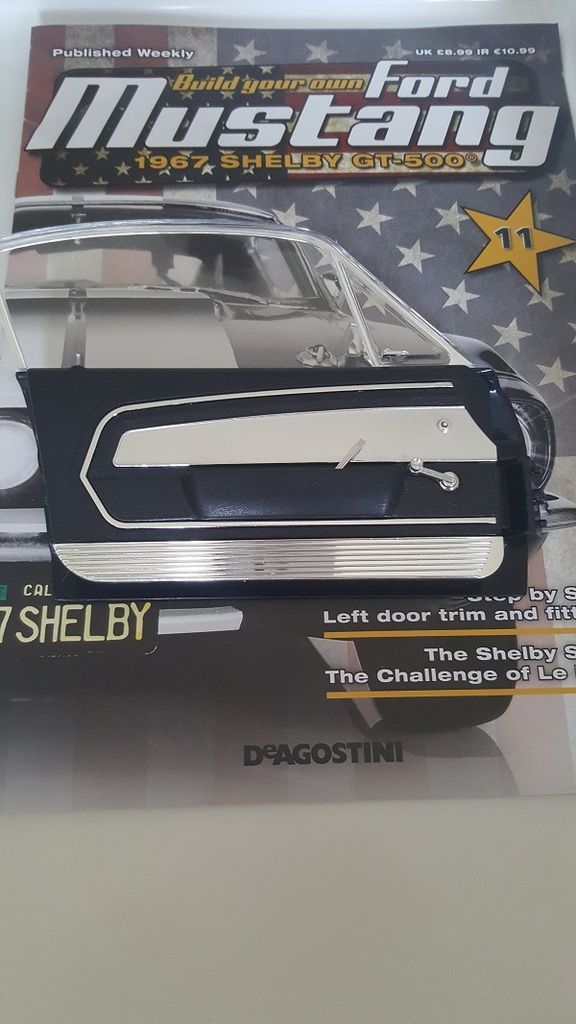 HINT: The only hint here would be (as always) test fit the parts before you tighten everything up. ISSUE 12 Onto the final issue of part 3 which gives us the left seat base. Again another simple but satisfying part that gives us a complete left seat when completed. PARTS LIST: • Left seat • Left Seat base • Relevant screws 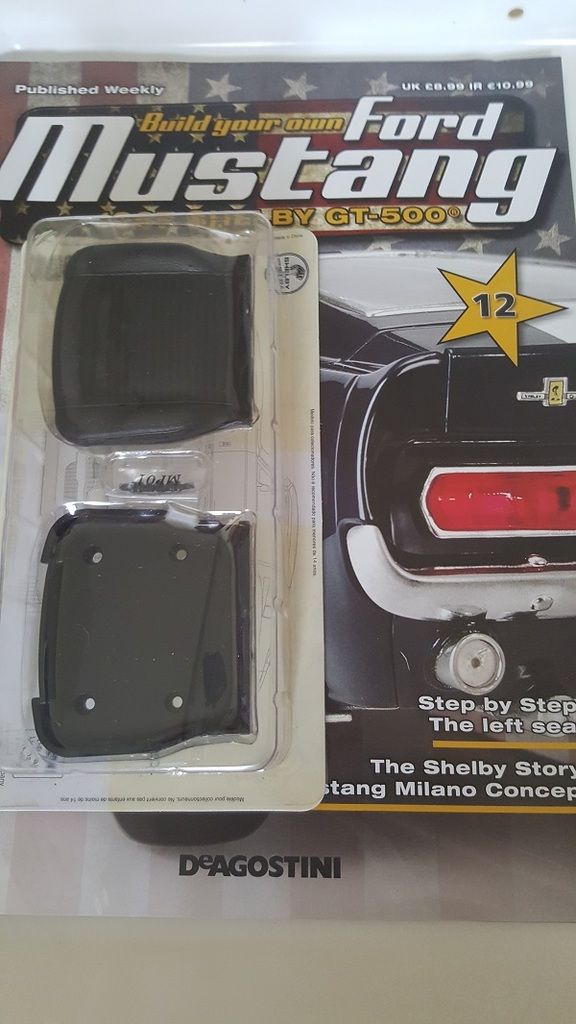 THE BUILD: Retrieving the seat back from issue 5 and 4screws to tighten, this section couldn’t be easier. The overall detail really stands out when these parts click together. 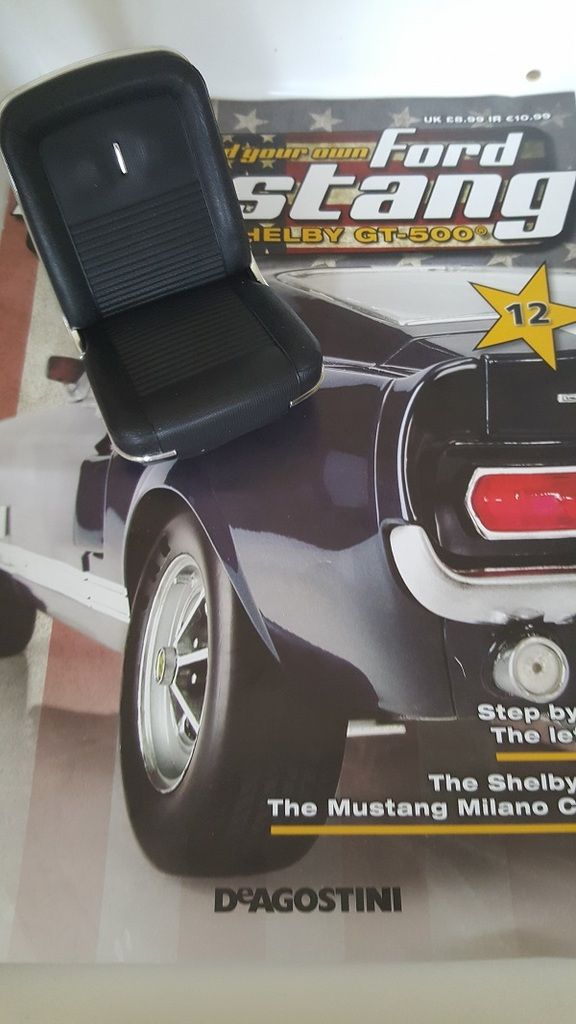 That concludes part 3 of the build diary. I’m still impressed with the detail and quality of the parts and looking forward to part 4. Below is a picture of the overall build/collection so far 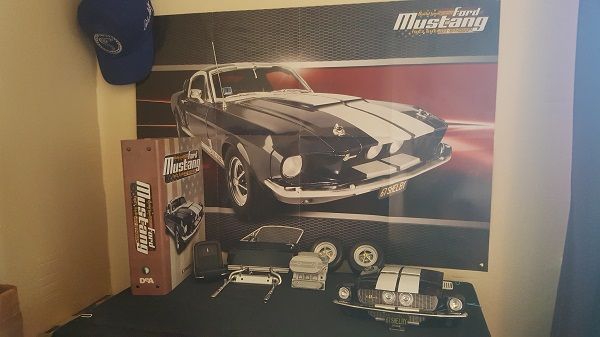 That almost puts me back on track and the next 4 issues are with me and will follow shortly Built- Shelby Mustang, Lamborghini Huracan
Building-Spitfire, Redbull racing RB7, 3d printer, Honda CB750, Stage coach and Revell 1/400 Titanic
|
|
|
Rank: Super-Elite Groups: Registered
Joined: 27/01/2014 Posts: 5,060 Points: 14,980
|
Glad to see you're caught and enjoying the build Steve, looking good
|
|
|
Rank: Pro Groups: Registered
Joined: 22/03/2016 Posts: 175 Points: 552 Location: Merseyside
|
Cheers dave, it's a great build and truly recommend it to anyone considering it. I've also been following your diary wich had kept me eager to catch up on mine so cheers for that. Built- Shelby Mustang, Lamborghini Huracan
Building-Spitfire, Redbull racing RB7, 3d printer, Honda CB750, Stage coach and Revell 1/400 Titanic
|
|
|
|
|
Excellent build diary, and a fantastic build.
|
|
|
Rank: Super-Elite  Groups: Registered
Joined: 16/08/2010 Posts: 2,771 Points: 8,344 Location: Brighton
|
Fantastic looking build. Regards Ian Current builds.Hachettes build the bismark,HMS Victory, HMS Hood.
Finished Builds Corel HMS Victory cross section.
|
|
|
Rank: Pro Groups: Registered
Joined: 22/03/2016 Posts: 175 Points: 552 Location: Merseyside
|
Cheers fellas just glad you lot didn't give up on following the diary with me leaving it so long. I really am happy with this build so far and would definitely recommend it to anyone considering it. I'm also following the other great diarys on here. Just browsing around this site has give me some good tips and I've seen amazing builds. Built- Shelby Mustang, Lamborghini Huracan
Building-Spitfire, Redbull racing RB7, 3d printer, Honda CB750, Stage coach and Revell 1/400 Titanic
|
|
|
Rank: Pro Groups: Registered
Joined: 22/03/2016 Posts: 175 Points: 552 Location: Merseyside
|
ISSUE 13 Back on with the build, I have a few issues backed up now so I had best get on with it…
PARTS LIST • Right side mirror
• Right side Door
• Left door handle
• Relevant screws THE BUILD This was a pretty straight forward step, All I had to do was mirror issue 9 which was the left door. ISSUE 14 This is the next step towards completing the right door. PARTS LIST • Right window
• Door Hinge
• Hinge plate
• Relevant screws THE BUILD Again not much to say on this issue as it is just a mirror of issue 10. Not happy with the cheap flimsy handle by the wing mirror on the window panel, which has fallen off when I was taking it out of the packaging, hopefully a spot of glue will fix it. ISSUE 15 Here we have the rest of the right door. For this step you will need the door from issues 14 and 13. I am starting to get a good collection of parts now, looking forward to putting them all together. On we go….
PARTS LIST • Lower and upper right door panels
• Right door inner
• Door handle and mount
• Window crank
• Relevant screws THE BUILD As with the last few steps, not a lot can be said here, pretty simple, just mirroring issue 11. ISSUE 16 In this issue we have the right seat back rest, should be pretty simple and straight forward.
PARTS LIST • Right seat back (rear)
• Right seat back (front)
• Right seat back (frame)
• Relevant screws
THE BUILD Simple straight forward step again as it was with the other seat in issue 12. ISSUE 17 This issue is the chassis, in this issue all you can do is test fit the exhaust assembly, hopefully it all goes as simply as it sounds. PARTS LIST • Rear chassis THE BUILD Simple step as all you have to do is test fit the exhaust assembly and it fitted nice and snug. ISSUE 18 As with the last step this step is just a test fit step of the fuel tank PARTS LIST • Fuel tank THE BUILD Yet again not much to say on this step as it is another test fit, mine fitted nicely. ISSUE 19 Finally, I can get my screw driver back out… You will need the fuel tank and chassis from issue 17 and 18 to complete this step. PARTS LIST • Fuel tank filler pipe
• Fuel tank lid
• Relevant screws THE BUILD Pretty simple to fit, just make sure that you have the chassis the right way around as it is easy to get confused. ISSUE 20 In this issue we have the rest of the right seat so you will need to get the back of the seat from issue 16 to complete this step
PARTS LIST • Right seat base
• Right seat
• Relevant screws THE BUILD Referring back to issue 12, this step is exactly the same. I am very happy with how the build is going so far and I am still very happy with the quality of the parts (with the exception of the hand on the window) still waiting for my free lighter and t-shirt but have been assured they will be here as soon as deagostini have them in stock.
Just as a side note, I am interested in buying a mustang binder if anyone is selling one please let me know. Built- Shelby Mustang, Lamborghini Huracan
Building-Spitfire, Redbull racing RB7, 3d printer, Honda CB750, Stage coach and Revell 1/400 Titanic
|
|
|
 Rank: Beginner Level 3 Groups: Registered
Joined: 09/06/2016 Posts: 28 Points: 87 Location: Beaverton, OR
|
Looks great can't wait to see this kit in the US Current builds: MAZ-537 w trailer and T-62 for trailer; tamiya 1/35 Stegosaurus, and on its way the Mellinum Falcon
|
|
|
Rank: Pro  Groups: Registered
Joined: 24/05/2014 Posts: 236 Points: 627 Location: North Wales
|
Good build diary this. Built and building
All things Airfix & Revell.
|
|
|
Rank: Super-Elite Groups: Registered
Joined: 27/01/2014 Posts: 5,060 Points: 14,980
|
Looking good Steve!
Are you going to be carrying on with your suggested modifications or doing any mods yourself or are you going to be building it as it comes?
|
|
|
|
Guest
|
 US
US

