|
|
 Rank: Elite      Groups: Registered
Joined: 13/02/2011 Posts: 2,227 Points: 6,801 Location: UK
|
Bad luck on the Trex 450 looks like a new rotor hub, tail boom, and may be a swash plate,and plenty of new screws. Shaun, thanks for the update on the Spit, its coming on well and it looks like it will be a strong model when finished. Regards Trev. Work in progress: Tombstone (Scratch) - San Francisco 2. -The Mayflower ( scratch by plan).
|
|
|
 Rank: Super-Elite  Groups: Registered
Joined: 27/01/2014 Posts: 5,060 Points: 14,980
|
That's painful with your Trex 450, I can imagine there was a choice few swear words that were expressed  Your Spitfire is coming along quite nicely though 
|
|
|
 Rank: Pro  Groups: Registered
Joined: 08/02/2015 Posts: 274 Points: 812 Location: Malmesbury
|
Hi guys thank you all for looking in and your kind comments  I am planning on rebuilding the heli in the new year I am planning on upgrading some of the damaged parts and it going to cost between 150 and 200 to get her flying again I am now up to issue 20 on my build and I will update you all whe no get more time at the weekend I did run into a little problem when my Yorkshire terrier decided to jump on the fuselage putting a hole in the balsa  I have now repaired the damaged and will show the repair when I get to that stage with the update  I will leave you all with a photo of the little culprit Regards Shaun Building-RC spitfire
Build- titanic,Skyrider drone, solar system, T72 tank
|
|
|
Rank: Pro Groups: Joined: 24/08/2009 Posts: 48,051 Points: -13,308
|
Can you guys keep this topic on topic and discuss helicopter matters elsewhere such as in aviation discussion
|
|
|
Rank: Pro Groups: Registered
Joined: 08/02/2015 Posts: 274 Points: 812 Location: Malmesbury
|
Thank you to everyone that just looked in or commented. Its time for update 17. With issue 17 parts supplied are Spar 1 and 2 of the wing assemble jig, sheet of 2x100x300mm balsa and engine mounting bolts, nuts and washers. 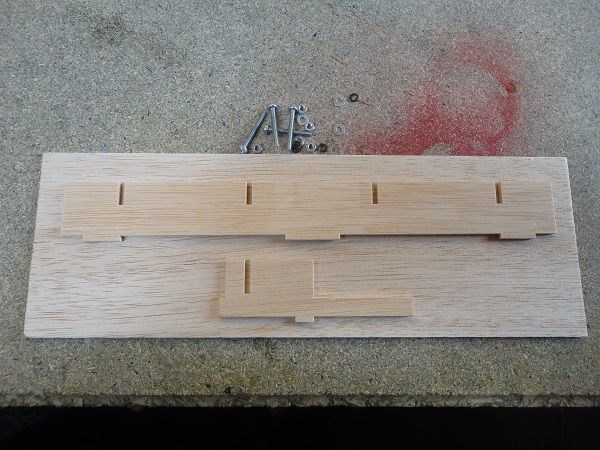 The first step with is issue is to glue the short spar 2 too the wing assemble jig and clamp in place until the glue sets. 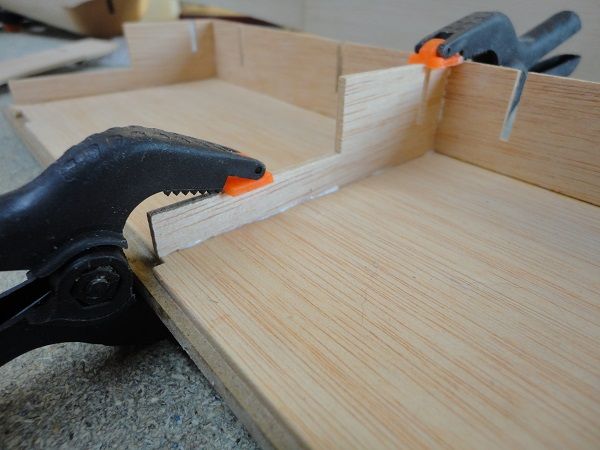 While the glue sets I noticed that at the rear end of the fuselage there is about a 2mm gap. In the instructions it just says to glue the tail fin over this gap but I do not real this was going to give must surface area for the glue. I decide to cut a piece of the 2mm balsa sheet and glue into this gap. 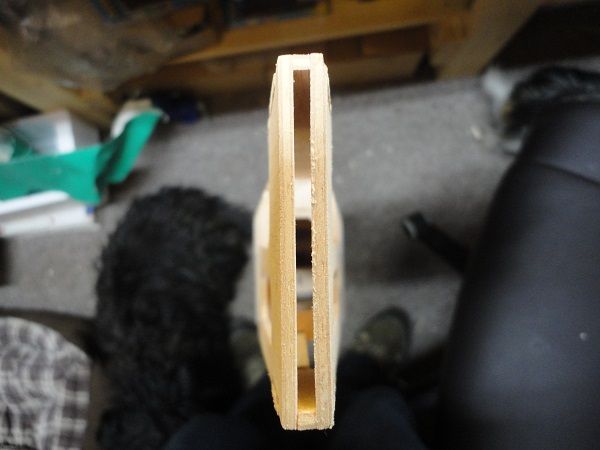 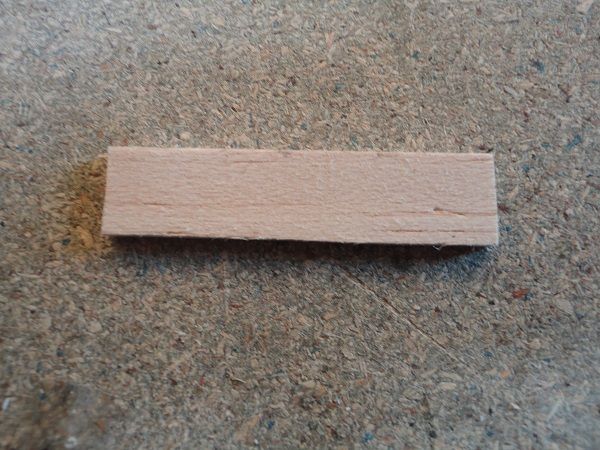 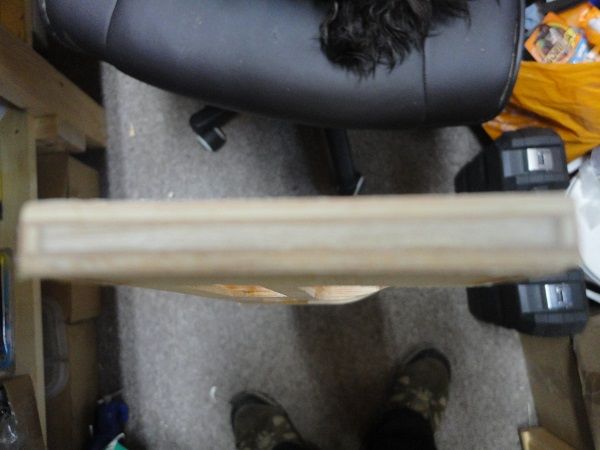 After the glue had set on the wing jig it is time to glue spar one into place finishing the wing jig. 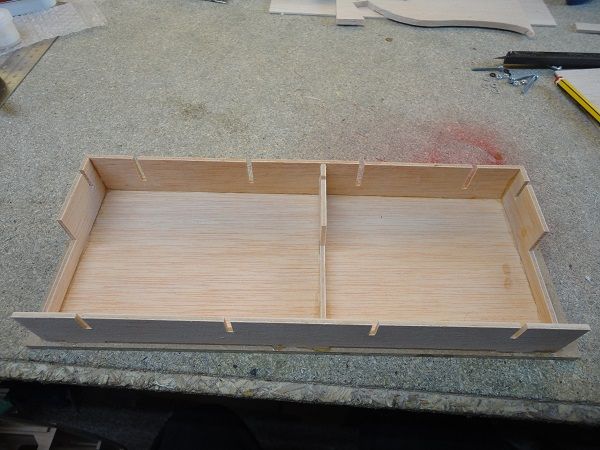 Next it is time to glue and clamp the tail fin in place. Two 6mm blocks are used to keep the correct gap above the fuselage and it must be completely vertical to the fuselage. 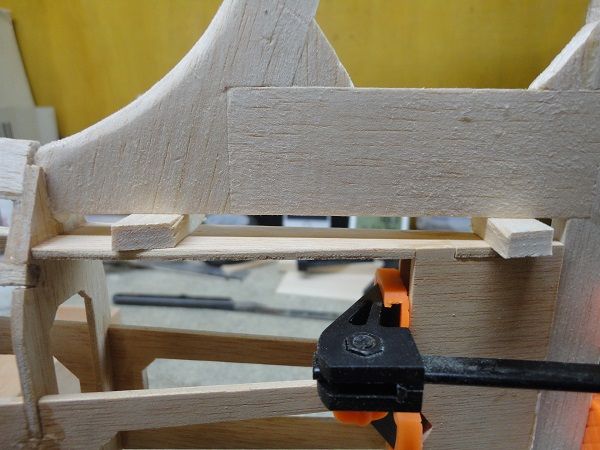 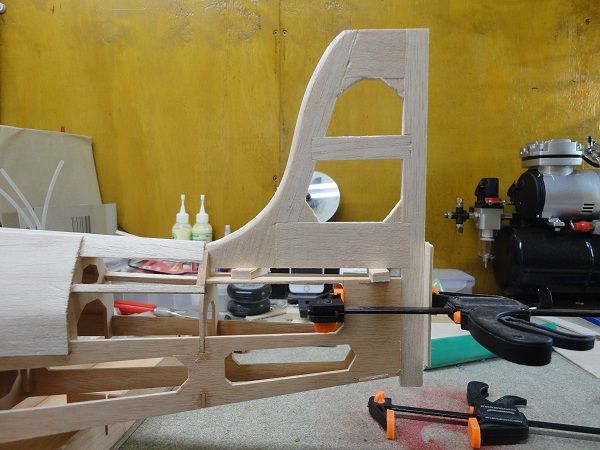 After the glue has completely set the clamps are removed and the piece are the tail fin below the fuselage cut off.  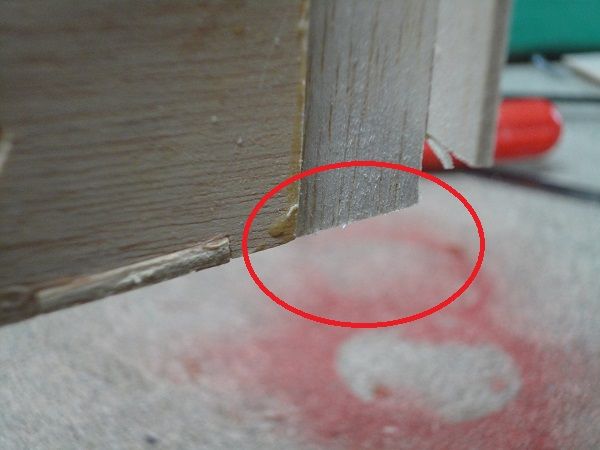 Next the area to the rear of the fuselage is sanded and the sheet of balsa glued in place. I had a gap in the fuselage skin where I had glued the previous sheets on to far forward. 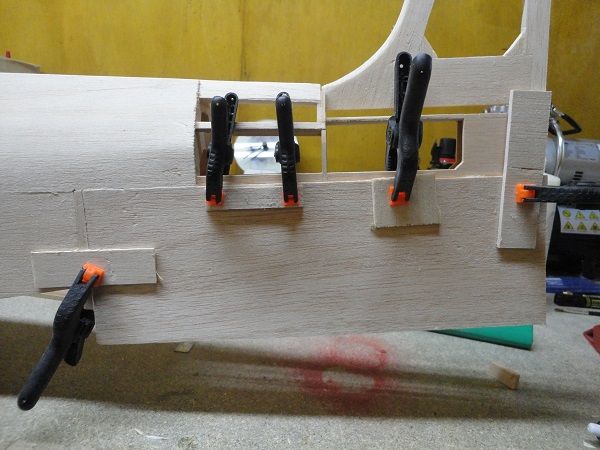 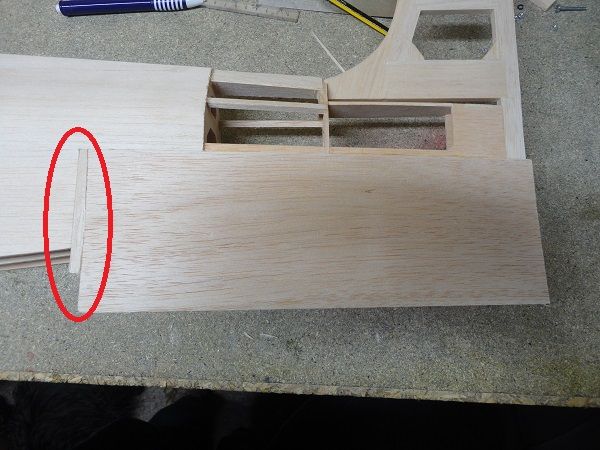 This sheet is then cut back lever with the bottom of the fuselage and then repeated on the other side of the fuselage. 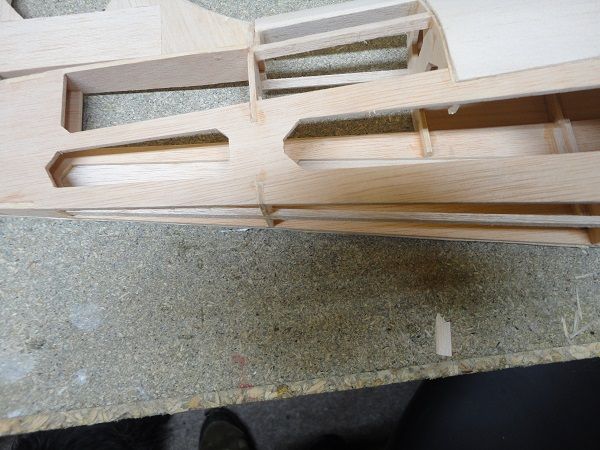 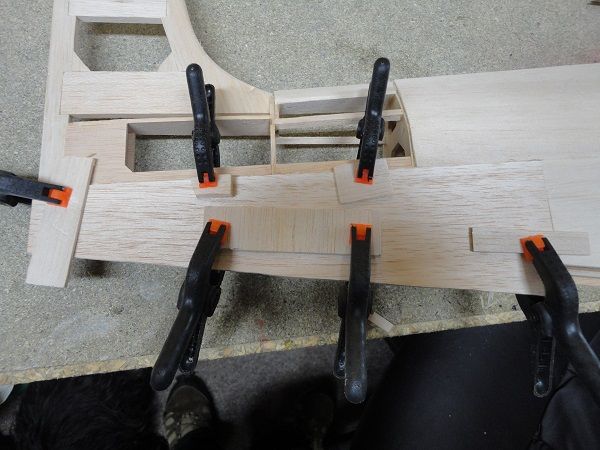 That's all for this issue and update 18 coming soon. Regards Shaun Building-RC spitfire
Build- titanic,Skyrider drone, solar system, T72 tank
|
|
|
Rank: Pro Groups: Joined: 24/08/2009 Posts: 48,051 Points: -13,308
|
Looking good, your build has fond memories of my heading up this project and the test flights out in Barcelona
|
|
|
Rank: Super-Elite  Groups: Registered
Joined: 31/05/2010 Posts: 5,679 Points: 17,011 Location: Wiltshire
|
Very neat and tidy build you are doing. Hope it all continues to go well for you. Happy Modelling
BUILDING: Hachette Spitfire Mk 1A, Constructo Mayflower
SUBSCRIPTION COMPLETE (Awaiting building): USS Constitution, Sovereign of the Seas, 1:200 Bismarck (Hachette)
COMPLETED: Porsche 911, E-Type Jaguar, Lam Countach
|
|
|
Rank: Pro Groups: Registered
Joined: 08/02/2015 Posts: 274 Points: 812 Location: Malmesbury
|
Thank you to everyone for looking in as always. Thank you Mr T I am having lots off fun building this one and can only imagine what it must have be like to work of the project and the first ever flight tests. Thank you Tony there has been a few problems along the way and their will be an update shortly showing the damage caused to the fuselage by my Yorkshire terrier and the repair work. This will come between updates 19 and 20 of the build. This is a photo showing the fuselage so far. 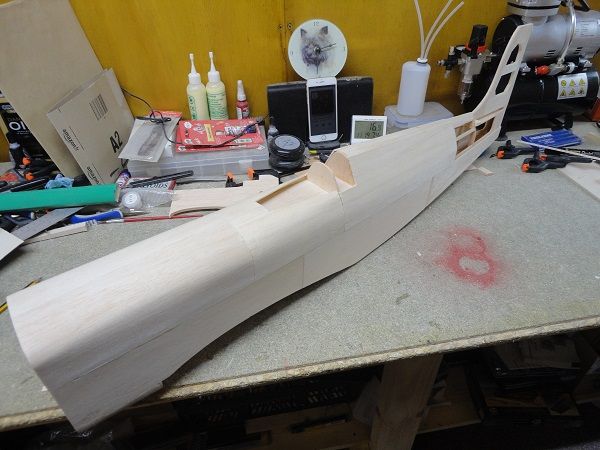 Sorry for the mess on the bench Now time for update 18. Parts supplied with this issue are, Two sheets of 2x100x300mm balsa, Tail and elevator horns and bases and self tapping screws. 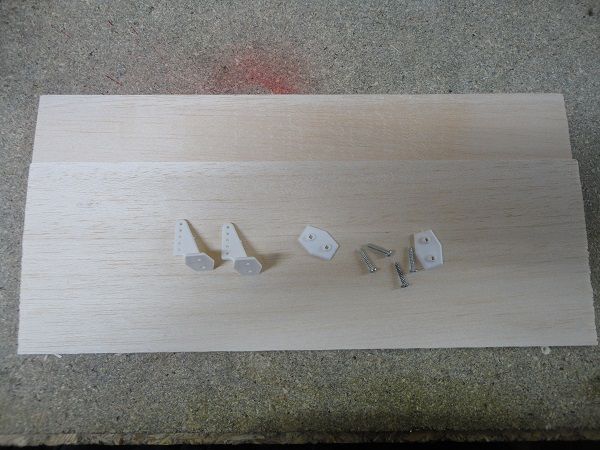 The first stage in this issue is to cut a 14mm wide 30mm long piece from the left over 6mm balsa sheet the tail fin was made from. 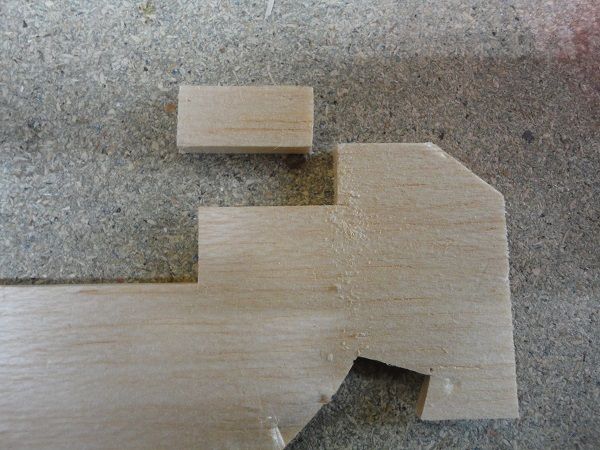 This is then glued to the last bulkhead under the tail fin. 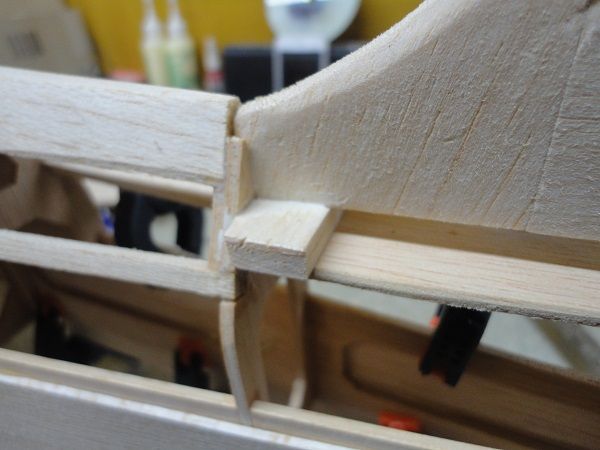 When this is dry it is sanded back. Next offcuts of 5x5mm baton are cut, shaped and glued to bulkhead. 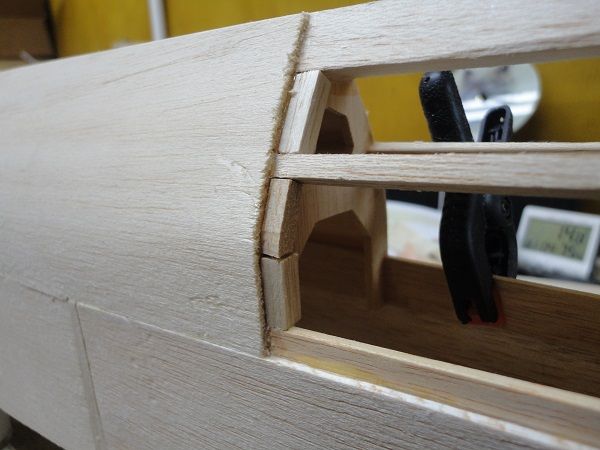 Next the gap is measured and a piece from one of the 2x100x300mm sheets is cut and glued to the gap between the last two bulkheads. 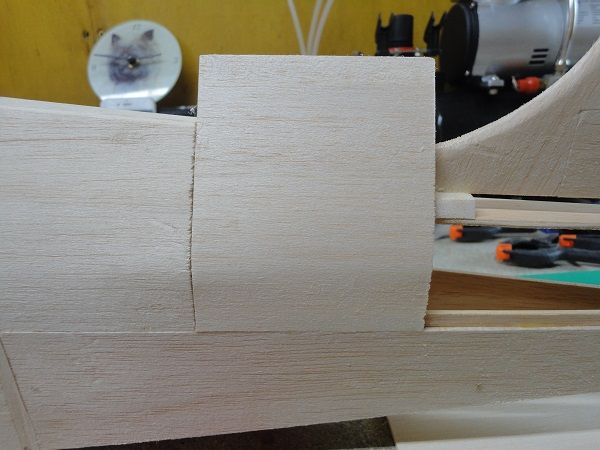 Next two more offcuts of 5x5mm baton are cut and glued to the last bulkhead and under the support plate. 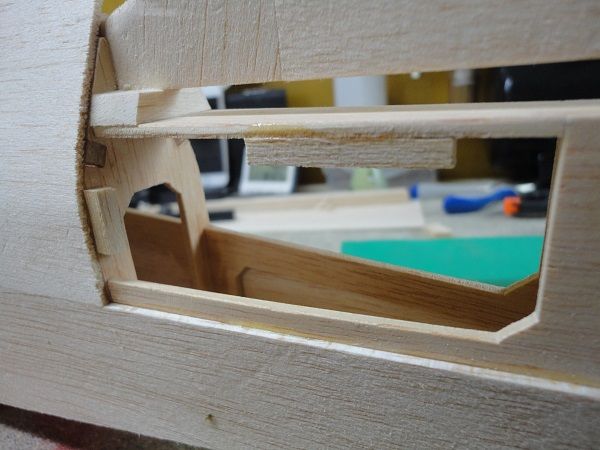 The final step in this issue is to measure the final balsa skin panel for the left hand side cut and glue into place. The hole area is then trimmed and sanded. 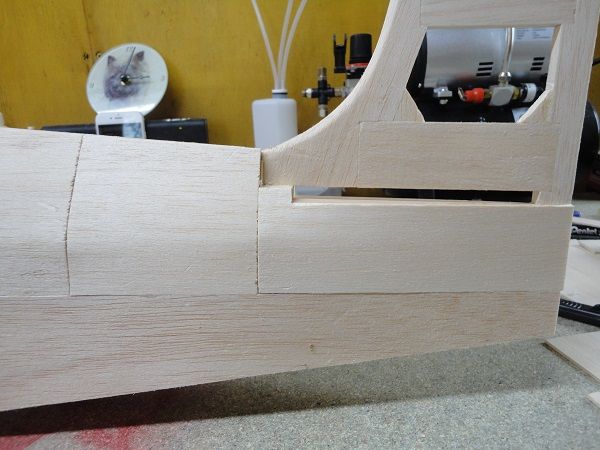 That's all for this update Update 19 tomorrow. Regards Shaun Building-RC spitfire
Build- titanic,Skyrider drone, solar system, T72 tank
|
|
|
Rank: Pro Groups: Joined: 24/08/2009 Posts: 48,051 Points: -13,308
|
She fly's fast and hard as is, but reduce the risk of aileron flutter by dumping the single aileron servo and its control rods, and swop for a hatch mounted servo into each wing and also use bowden cables for the long control run along the fus.
Build is looking good
|
|
|
Rank: Pro Groups: Registered
Joined: 08/02/2015 Posts: 274 Points: 812 Location: Malmesbury
|
Thank you Mr T for the advise I have spoken to a few people who have the model and they have all said the same about moving the servos into the wings. Some have said also about using Bowden cables and others have said to use two push/pull rods. I will be upgrading all the radio gear to futaba servos, receiver and 10j transmitter. Regards Shaun Building-RC spitfire
Build- titanic,Skyrider drone, solar system, T72 tank
|
|
|
Rank: Super-Elite Groups: Registered
Joined: 27/01/2014 Posts: 5,060 Points: 14,980
|
Really neat work Shaun  You will have to post a video when you get her up flying
|
|
|
|
|
Am truly enjoying your build Shaun and look forward to the day you get her into the air.... hope you will share the experience with us of her taking her maiden flight.... .. Look forward to your next update... Regards Alan
|
|
|
Rank: Pro Groups: Registered
Joined: 08/02/2015 Posts: 274 Points: 812 Location: Malmesbury
|
Thank you everyone for looking in and your comments Alan and davetwin I will hopefully post a video of her in flight but as for her maiden flight I'm not sure. I wouldn't want to crash her into the ground on camera  I will however be purchasing a cheap low wing trainer to get some practice in first as I have only ever flown high wing planes and helicopters before. Anyway now as promised its time for update 19 Parts supplied in this issue are, Sheet of 2x100x300mm balsa, engine cowl and engine cowl fixing screws. 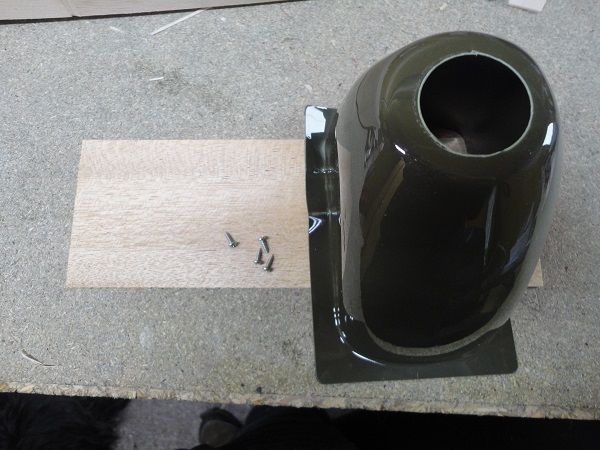 The first step in this issue is to retrieve the two parts left other from issue 12 and glue them to the front edge of bulkhead 1 insuring them are in line with the bulkhead edges and not the edge of the balsa skin. 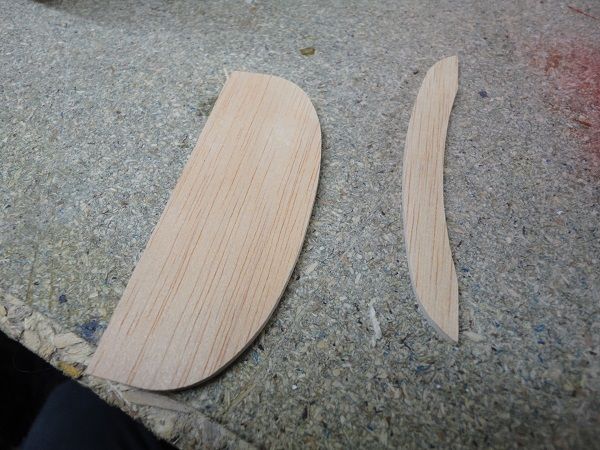 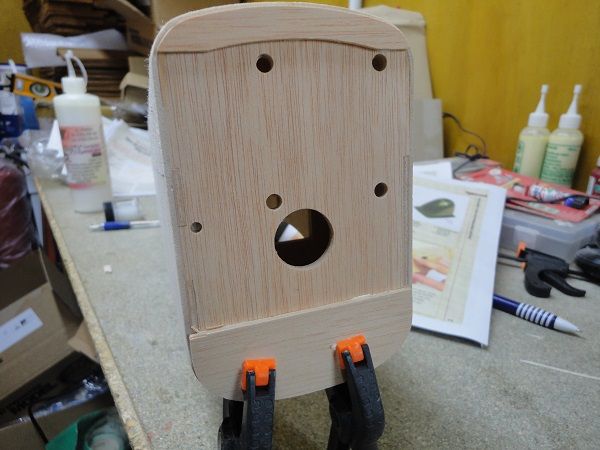 Next is to cut four 20mm long pieces from the 10x10mm baton from issue 9 and glue these to bulkhead one. The top ones are glued 15mm down from the bottom edge of the former just fitted and the bottom ones 10mm up from the top edge of the lower former just fitted. 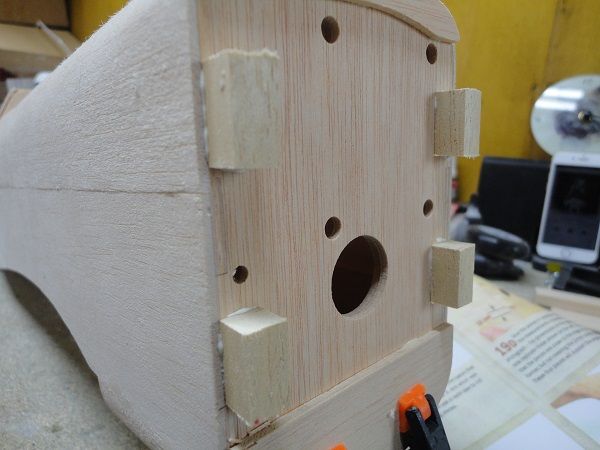 The next stage would be to cut the cowling down to size but I want to reinforce it with fibreglass so this will come later in a mod update. The final stages in this issue is to finish the balsa skin on the rear right of the fuselage the same as in issue 18. 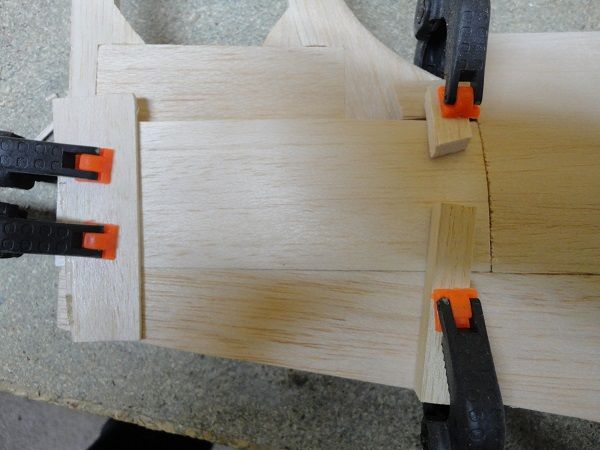 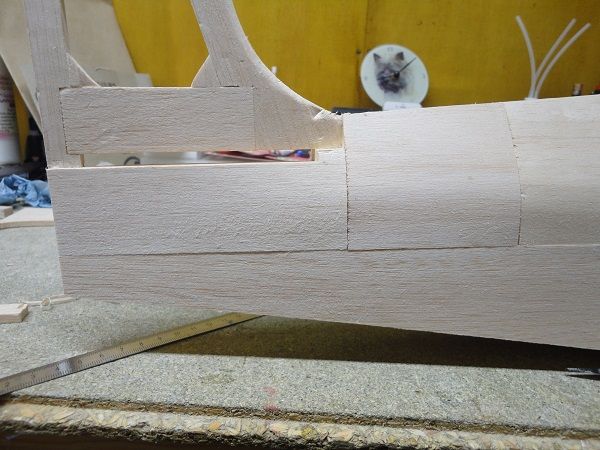 In the next update you will get to see the damage caused to the fuselage by my Yorkshire terrier and the repair work I carried out. That's all for this update more tomorrow. Regards Shaun Building-RC spitfire
Build- titanic,Skyrider drone, solar system, T72 tank
|
|
|
Rank: Pro Groups: Registered
Joined: 08/02/2015 Posts: 274 Points: 812 Location: Malmesbury
|
Firstly sorry for not posting the following update on Tuesday I have been feeling very ill the past few days Any here is the update on the damage my little Yorkshire terrier (Thea) caused to the fuselage 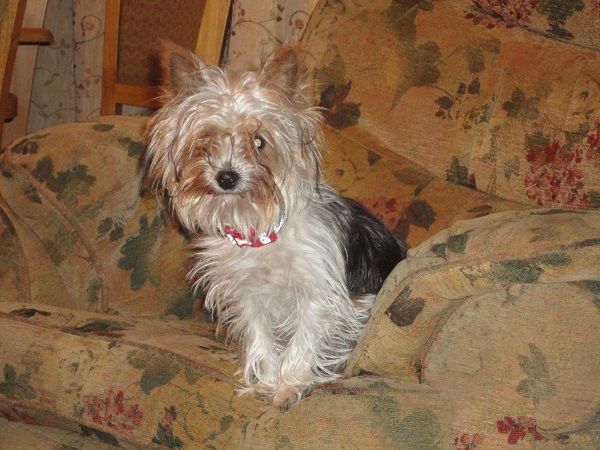 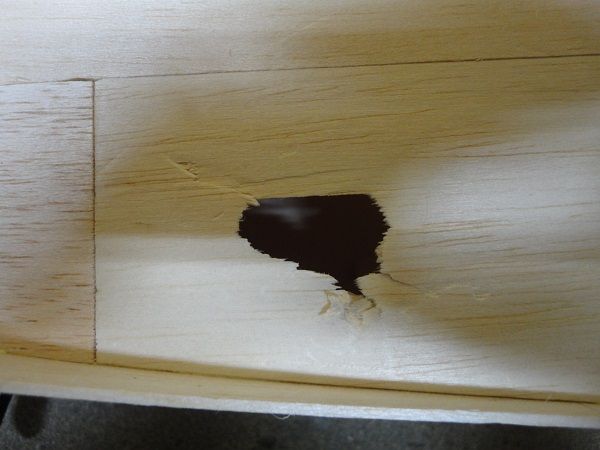 Firstly after telling the little monkey off I cut away all the damaged balsa to get I nice square hole to work with. 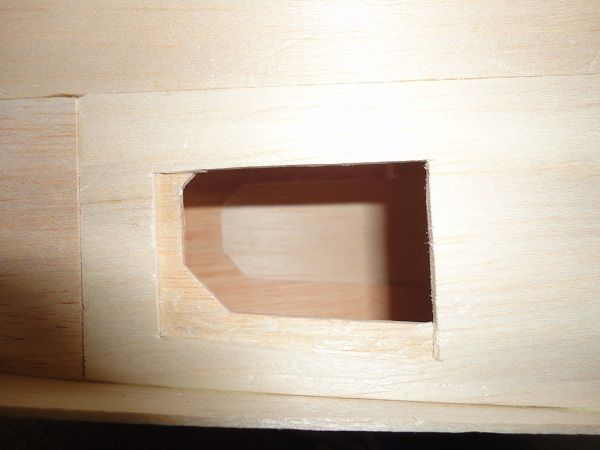 This did expose some of the fuselage frame that made the repair easier. I then cut and glued two pieces of balsa to the inside of the skin so the repair patch has something to glue to. 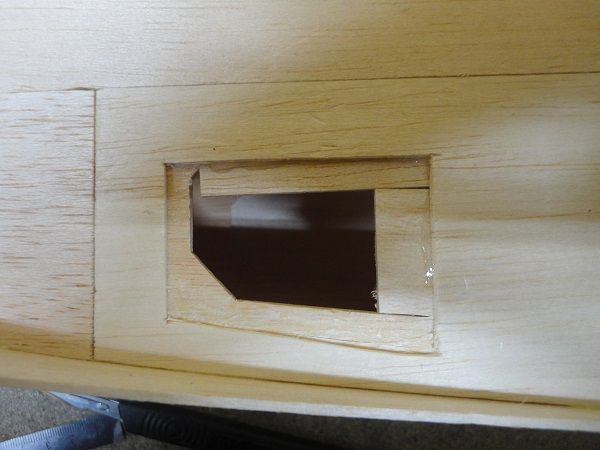 And finally I measured the hole in the fuselage and cut out a repair patch from the left over balsa wood skin and glued this in place with CA glue. 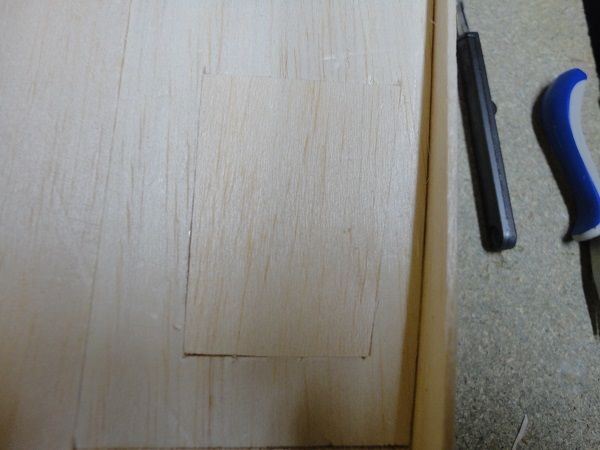 And this completes the repair on the damage. Thank you all for looking in as always and Merry Christmas to you all. Regards Shaun Building-RC spitfire
Build- titanic,Skyrider drone, solar system, T72 tank
|
|
|
Rank: Administration  Groups: Registered, Forum Support Team, Administrators, Global Forum Support Team, Moderator, Official Builds Joined: 09/11/2012 Posts: 7,942 Points: 23,012 Location: East midlands
|
That`s a nice repair job well done. Is the doggy out of the dog house yet? Regards delboy271155 (Derek) COME BACK GUY FAWKES "YOUR COUNTRY NEEDS YOU"
|
|
|
Rank: Super-Elite Groups: Registered
Joined: 31/05/2010 Posts: 5,679 Points: 17,011 Location: Wiltshire
|
Pets and Models are a fatal combination. My cat thinks I am playing with him when I have the planks soaking in a 1 litre pop bottle/ The number of times that has been up ended. Your aircraft build is looking fantastic. Sounds very complex though with the details of the servos and how they should be placed. The supplied parts certainly look good though I must say and that engine cowl really does look fantastic. Happy Modelling
BUILDING: Hachette Spitfire Mk 1A, Constructo Mayflower
SUBSCRIPTION COMPLETE (Awaiting building): USS Constitution, Sovereign of the Seas, 1:200 Bismarck (Hachette)
COMPLETED: Porsche 911, E-Type Jaguar, Lam Countach
|
|
|
|
|
Top job on the repair, all looking fab again.... Regards Alan
|
|
|
Rank: Pro Groups: Joined: 24/08/2009 Posts: 48,051 Points: -13,308
|
A good idea to fill around the cut-out with a microbead filler, otherwise when you come to apply the solarfilm the rectangle will be highlighted.
Overal coming along nicely
|
|
|
Rank: Super-Elite  Groups: Registered
Joined: 28/07/2014 Posts: 4,269 Points: 12,713 Location: Scotland
|
Great result with the repair Shaun coming along very well regards Phil COMING SOON =1/72 Italeri diorama`s Battle for the Reichstag and Stalingrad battle at the tractor factory 1/16 Trumpeter King Tiger with loads of extras ON THE GO= refurbishment of 1/25 Tamiya tiger 1 , amt Star trek kits and space 1999 models
So Much to Build,But What a Hobby!
|
|
|
Rank: Pro Groups: Joined: 24/08/2009 Posts: 48,051 Points: -13,308
|
Nice repair Shaun, it looks like your Spitfire has been in a dogfight already (pun intended) but nicely sorted.
Hope you are feeling better now after your illness?
Kev 
|
|
|
|
Guest
|
 US
US

