|
|
 Rank: Beginner Level 3  Groups: Registered
Joined: 22/03/2016 Posts: 22 Points: 69 Location: Luxemburg
|
Hi from the small country of Luxembourg, and another Falcon being built. I receive my magazines from Germany, so I'm at #10 right now, not much has happened yet, I'm checking the net for pics videos for all kinds of ideas, but here the first pics from what I did so far. 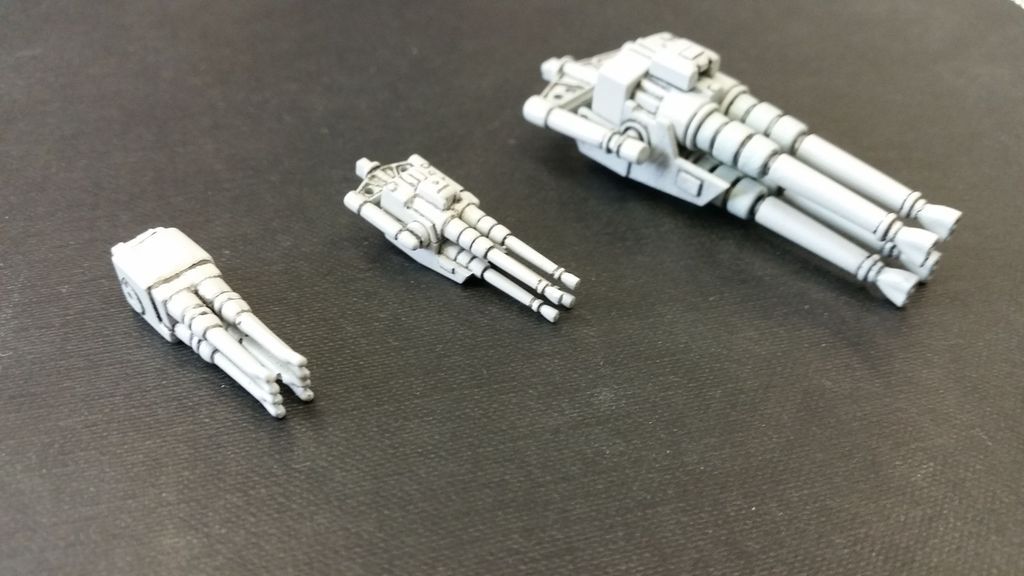 Three kinds of quad-cannons, from left to right, an old Revell model I had lying around for at least 20 years, the middle one is the Fine Molds 1:72 and the right one is ofc the DeAgo. 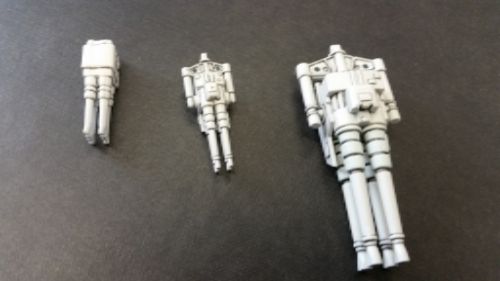 I did drill muzzle holes into the barrels, primes the cannons with Citadel Black Primer (yes, I have tons of GW miniatures), then sprayed the cannons with Tamiya AS-20 Insignia White (the color Steve Dymszo recommends for the hull), washed the recesses with Citadel Badab Black wash. No other effects like oil or rust yet, as I'm not sure to be happy with the result so far. On one side I like the wash, on the other side it seems to give me a much darker result than on the pics from the original model's quad-cannons. Gonna think about it in the next days, comments welcome.
|
|
|
Rank: Beginner Level 3 Groups: Registered
Joined: 22/03/2016 Posts: 22 Points: 69 Location: Luxemburg
|
I also got the different photoetch sets from Paragrafix, so I started to drill, cut and file the necessary holes into the back panel and the console to lighten them up later. 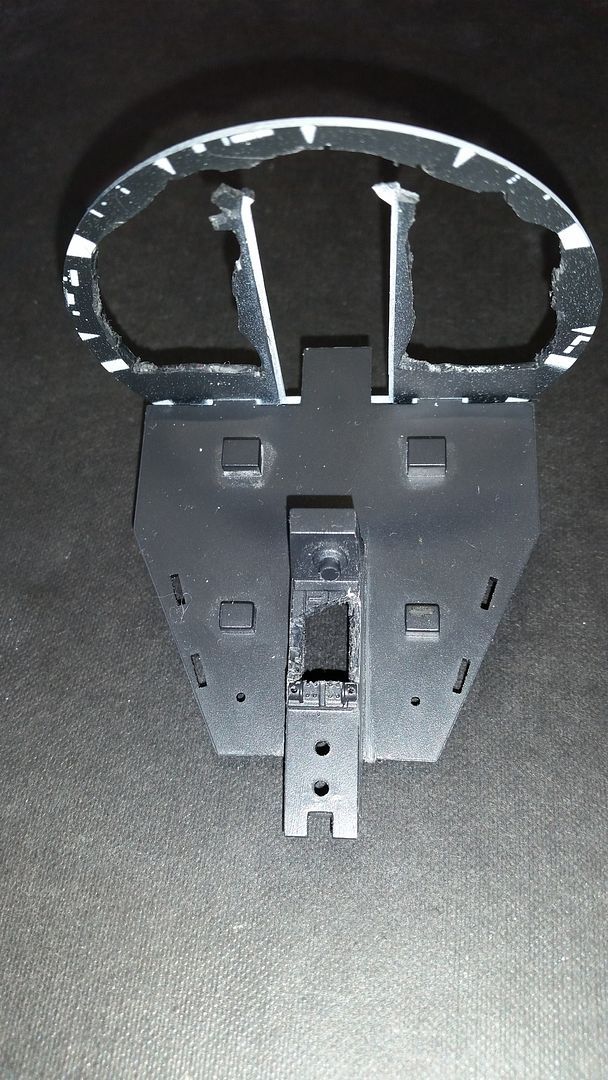 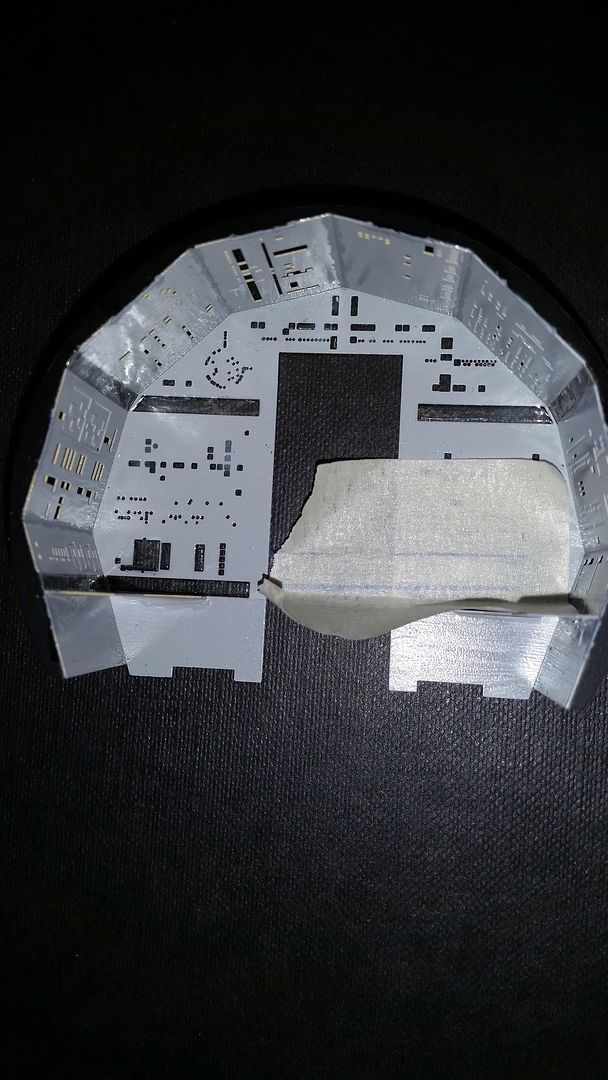 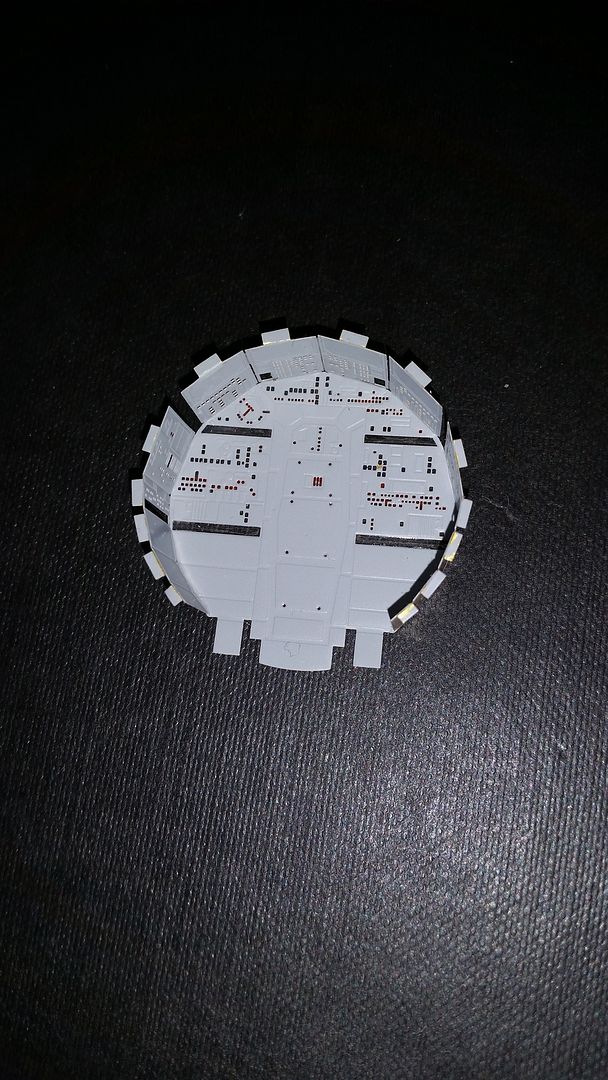 The bigger cockpit is for the DeAgo model, both were primed with Tamiya Grey Primer. I tried to apply the decals from Paragrafix to the bare metal, and to black undercoat, both results are a catastrophe, so I decided to go with grey primer. Generally I must say that I never worked with worse decals then those that come with the Paragrafix sets. I did a complete Fine Molds cockpit, some decals needed to lie just 10 seconds in water, 20 made the color come off, other pieces still wouldn't come off the paper after 40 seconds in water. (If I understand decals correctly that comes from an uneven coat of glue, which probably means they are handmade ...) The holes were filled with Microscale Krystal Klear. For the bigger holes I used a piece of masking tape with a 3, resp, 5 mm strip cut from a plastic bag glued on top, glued from the inside onto the cockpit wall to give a Krystal Klear something to hold on, after drying I could just tear off the masking tape. Don't use a masking tape strip alone, cause the glue on it will make Krystal Klear get an uneven surface that will stay white even after drying. Imagine frosted glass ... 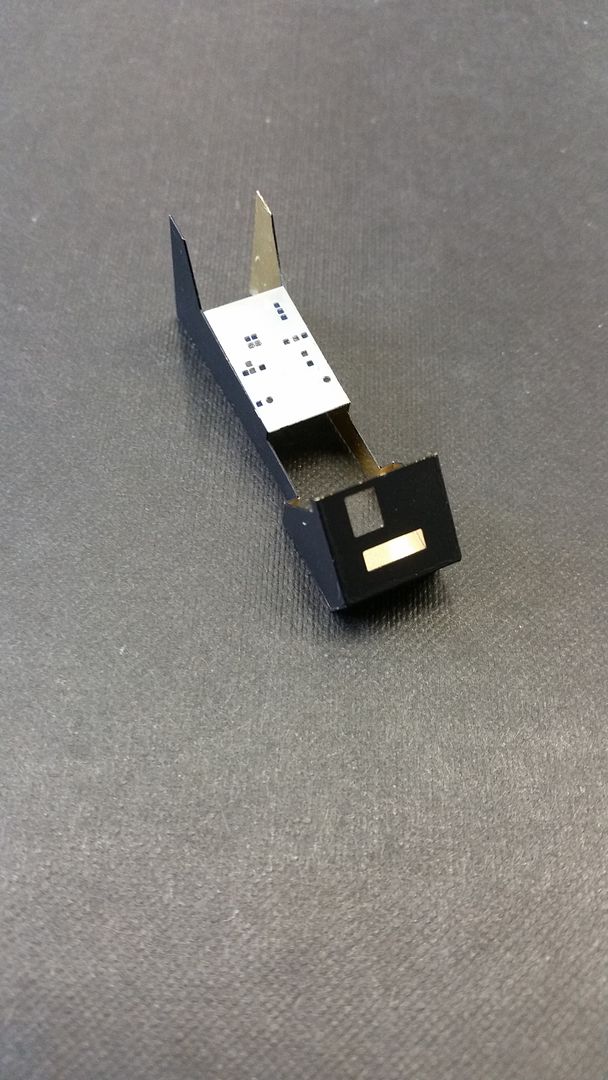 The center console was primed with Citadel Black Primer, then the area where the decal would come was masked off and given a coat of Tamiya Grey Primer. Finished with a Microscale Krystal Klear to close the holes. 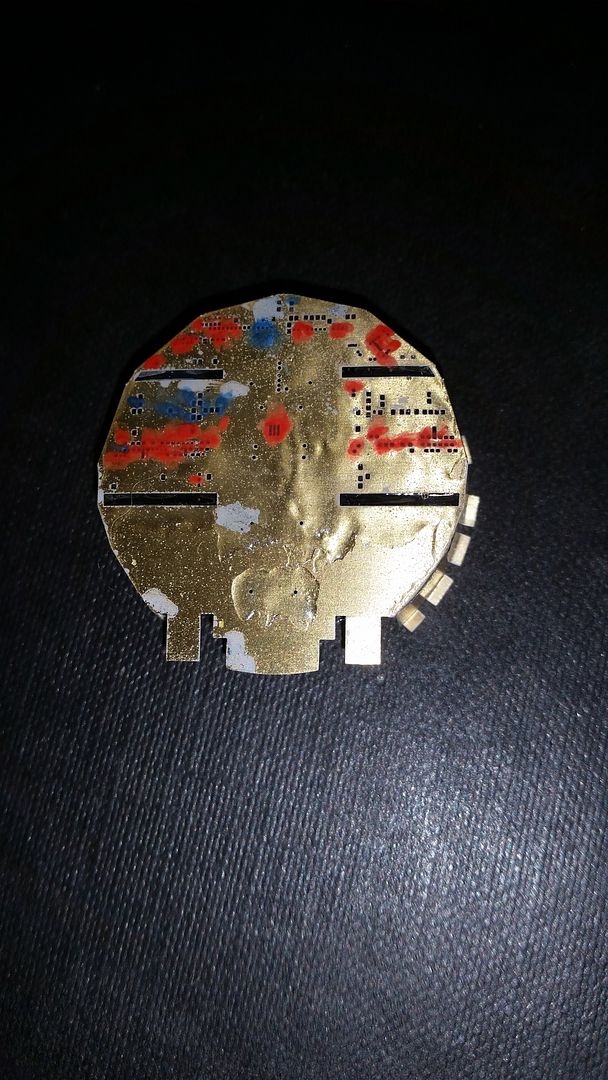 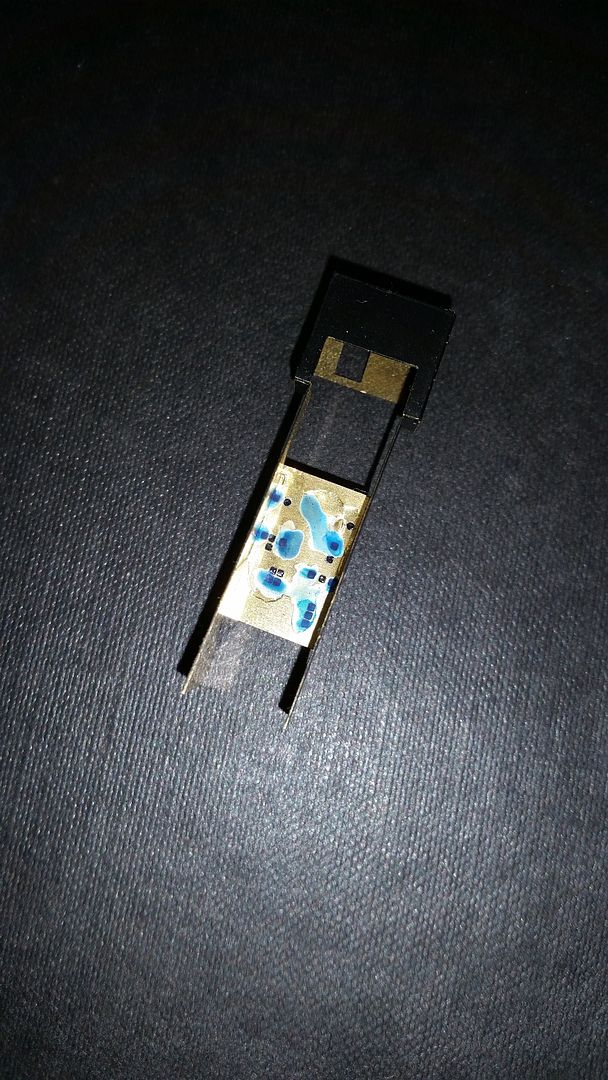 All pieces are then given a coat of Citadel Glazes (Bloodletter and Guilliman Blue), cause imo the decals are too thin to make the red and blue lights have anything else then a very light red or blue color. The next days I will finish the clear styrene disk that you need to complete the Paragrafix cockpit for the Fine Molds model. Again, I'm very disappointed about buying the set for 40$ and then a crucial part you need to finish it isn't even included!!! I would accept to pay the set 2 or 3$ more, but have everything inside, instead of running to the next shop again and find a 1mm clear styrene sheet that I need to cut and file until it finally fits correctly. (I didn't even find a 1mm sheet, I did it now with a 2mm one and hope I won't have problems with it later, didn't want to wait another 2-3 weeks and order it from the net)
|
|
|
Rank: Beginner Level 3 Groups: Registered
Joined: 22/03/2016 Posts: 22 Points: 69 Location: Luxemburg
|
At the same time I did prepare the hold floor, cut two holes into it and test-fitted the Paragrafix set. Ready to be primed and painted in the next days. 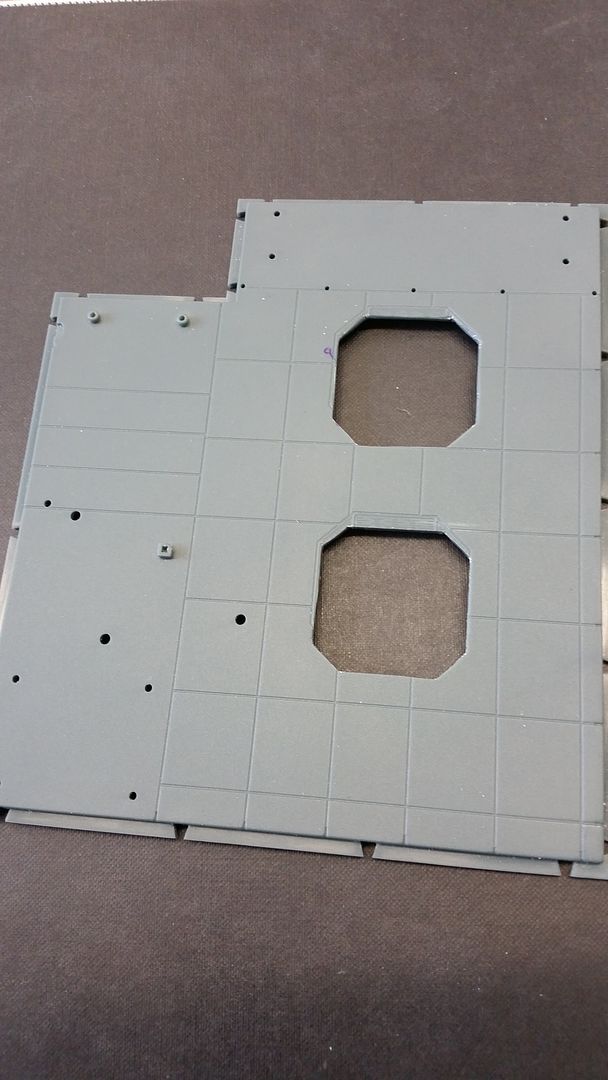 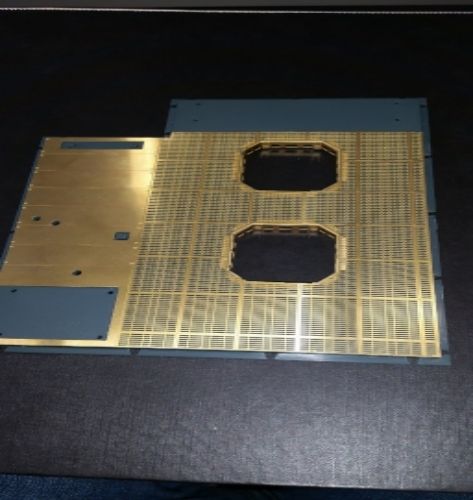
|
|
|
 Rank: Newbie Groups: Registered
Joined: 07/04/2016 Posts: 1 Points: 3 Location: Gijon
|
Hi from Spain.I like your build, I'm just in #7, so I'll wait to start mine, I may get some ideas from yours ;) Are you gonna light your pe floor too?
|
|
|
Rank: Beginner Level 3 Groups: Registered
Joined: 22/03/2016 Posts: 22 Points: 69 Location: Luxemburg
|
Yes, I plan to put LEDs and SMD-LEDs everywhere, just won´t built anything for the hold holes yet. I´ve seen many pics, Colson here in this forum is a genius, but as long as I don´t have more parts from the lower hull, thus not knowing how much place I have under the hold floor, I´ll wait.
|
|
|
 Rank: Super-Elite      Groups: Registered
Joined: 27/01/2014 Posts: 5,060 Points: 14,980
|
Welcome to the forum  You're off to a great start there, look forward to seeing some more
|
|
|
|
|
 Looking good Current builds:-C57,Zero, Lamborghini Countach, Caldercraft HMS Agamemnon,Robi,R2-D2, MFH Cobra .
|
|
|
Rank: Administration   Groups: Registered, Forum Support Team, Administrators, Global Forum Support Team, Moderator, Official Builds Joined: 09/11/2012 Posts: 7,967 Points: 23,090 Location: East midlands
|
Hi, Welcome to the forum. A good start to your Falcon and congrats on your "Blue" medal for starting a diary. Regards delboy271155 (Derek) COME BACK GUY FAWKES "YOUR COUNTRY NEEDS YOU"
|
|
|
Rank: Beginner Level 3 Groups: Registered
Joined: 22/03/2016 Posts: 22 Points: 69 Location: Luxemburg
|
Thanks for your comments and messages. I just have some small updates this week, as I'm waiting for more pieces, notably some Evergreen 274 strips, which you need to complete the Paragrafix set (if you want show the open holes in the hold floor. 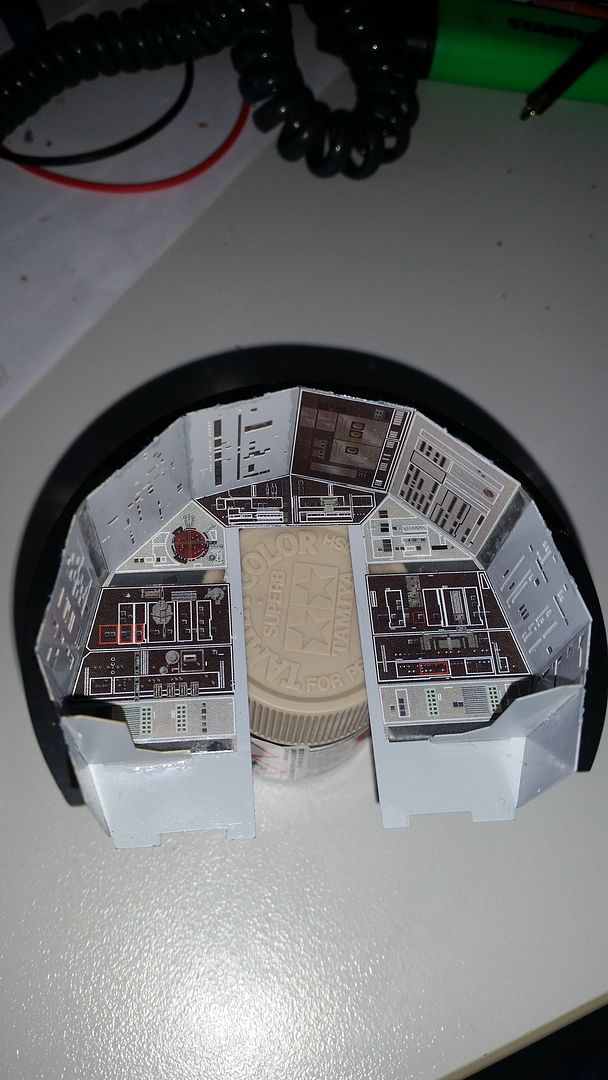 I'm just now applying the decals to the Paragrafix cockpit. I must say that these decals are much better than those from the PE set for the Fine Molds kit. Still managed to rip the upper decal for the back wall in two (just noticed that you can see the crack on the photo, it's barely visible in real, and I can add some small dip of black to hide it completely). 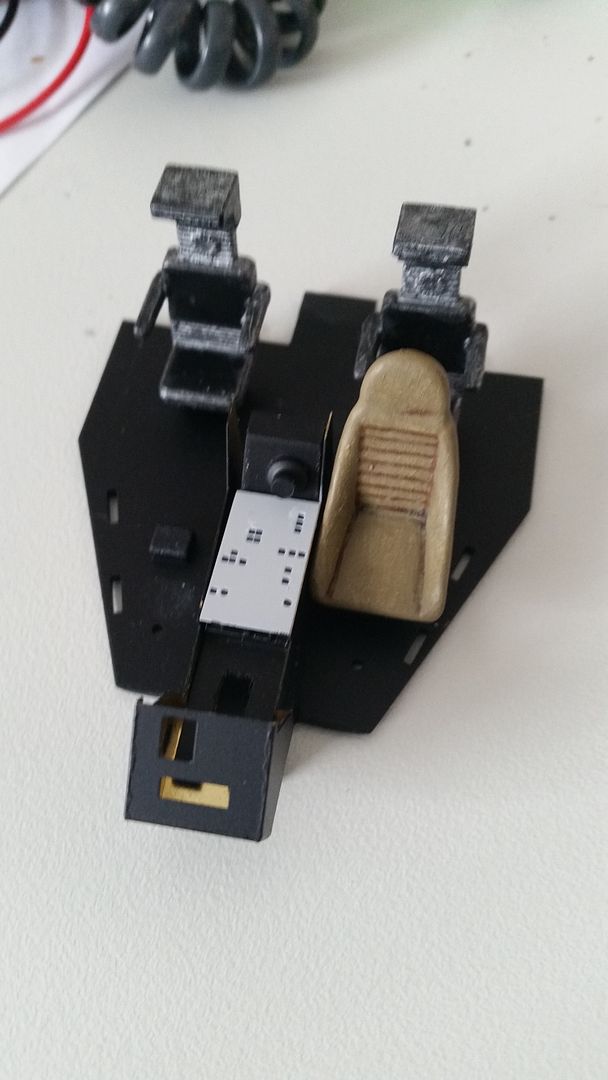 Also working on the cockpit seats. I think the front seat is all right (Tamiya XF-49 Khaki over a black undercoat, then a Citadel Seraphim Sepia wash followed by some more XF-49 and then a light Tamiya XF-57 Buff drybrush). The back seats are too metalic, I tried the Hairspray method on those to do the chipping, but it failed, and instead I used Carson Paint Killer to rework the final black coat. Well, it worked too good. Think I will try to apply some black wash and see how it works out. 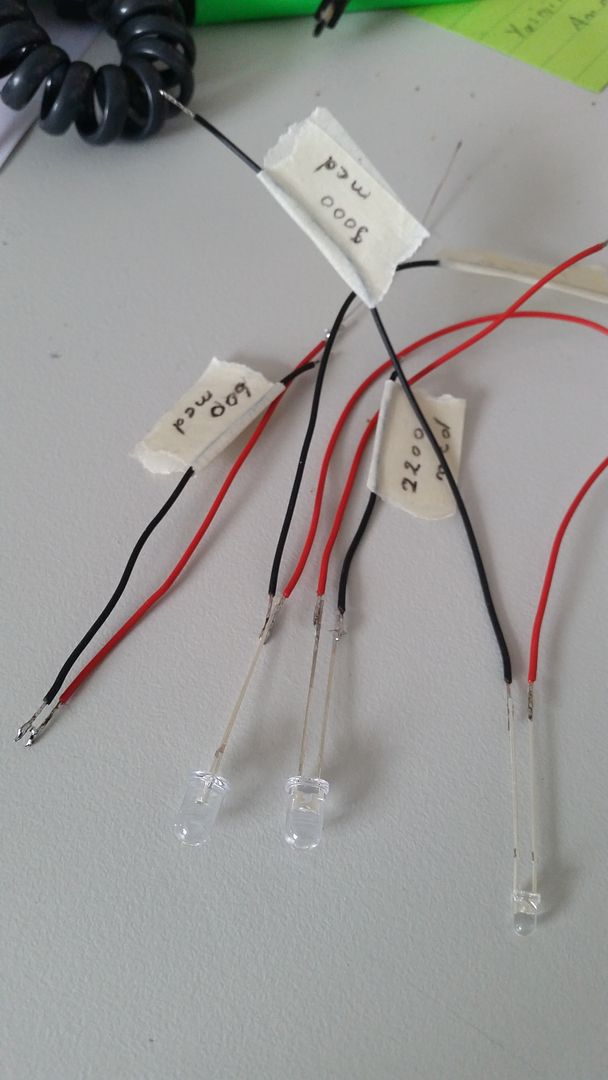 I did prepare some LED's, from a small SMD-LED to a 5mm one (600mcd up to 25000mcd). Once I have the cockpit door ready I will try the LED set delivered by De Agostini and see if it's good enough, but I will also need LEDs for the rest of the cockpit, the hold and the corridors. Having prepare those LEDs I can connect them to my 9V battery and check out which one best to use and where to fix them .... 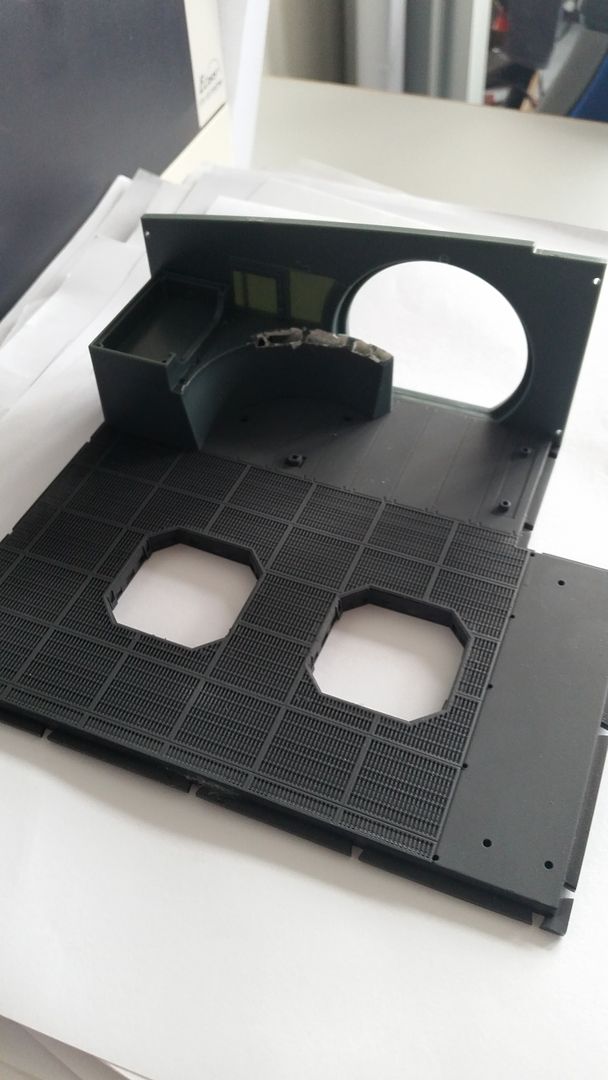 And last a pic from the current hold. The floor has been sprayed black and then a first layer of Tamiya XF-63 German Gray. The wall had just been sticked in place (I needed to file off a piece of the PE floor to make it fit). The bunk/bench piece has been prepared for its PE piece ... and yes, I need to get a better camera then my smartphone one ...
|
|
|
|
|
Looking good. Looks like you are well into it now. Keep up the good work; I look forward to seeing more soon. 
|
|
|
 Rank: Pro  Groups: Registered
Joined: 16/03/2016 Posts: 122 Points: 381 Location: Layton, Utah
|
Very nice looking! I think I like the way the Paragrafix hold floor looks even better than the Shapeways floor. That being said, since my build is going to be displayed "in flight", I'll rarely ever open her up to see the hold, so I can't justify the cost to put a lot of expensive add-ins. But seeing how good these look does make me a bit jealous.  If at first you don't succeed,
maybe you should skip the chainsaw juggling...
|
|
|
Rank: Pro Groups: Registered
Joined: 04/07/2015 Posts: 99 Points: 309 Location: north wales
|
Great to see another build taking shape... And more paragrfix fans taking the plunge..
Theres a bitter sweet feeling looking through everyones new builds now.. Half of me wishes i was still back opening pack 1 ... The other half says wish they would stop being so stingy with the parts !!!!
Can't wait to see her lit up .. All the best
Ade
|
|
|
 Rank: Vice-Master Groups: Registered
Joined: 05/03/2015 Posts: 561 Points: 1,713 Location: South Carolina
|
|
|
|
 Rank: Semi-Pro Level 2 Groups: Registered
Joined: 04/09/2015 Posts: 92 Points: 256 Location: Atlantis
|
Your floor looks so much better than mine. Really nice work.
|
|
|
Rank: Beginner Level 3 Groups: Registered
Joined: 22/03/2016 Posts: 22 Points: 69 Location: Luxemburg
|
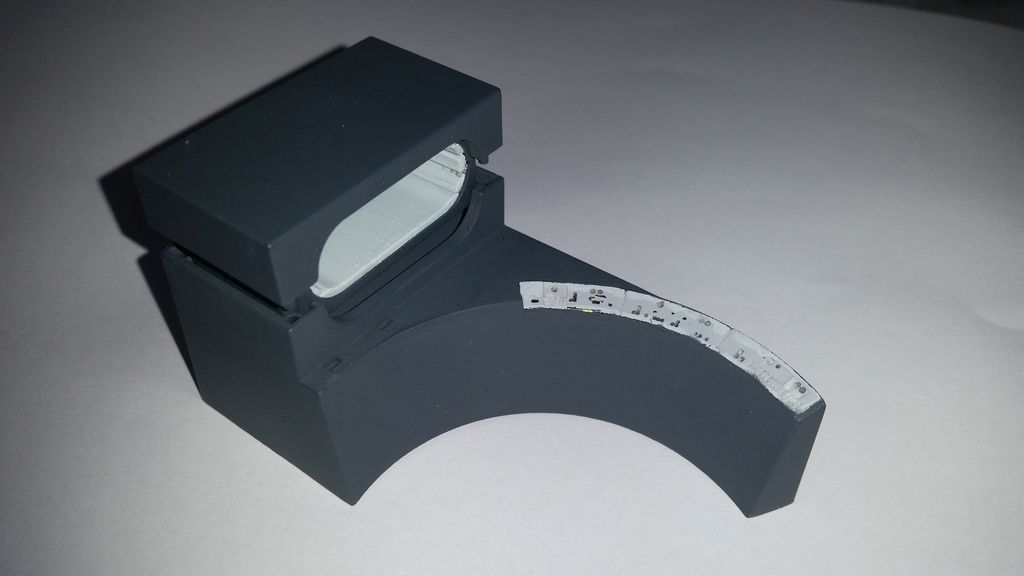
Thanks again for all you nice words of encouragement. I did some more work the past days: 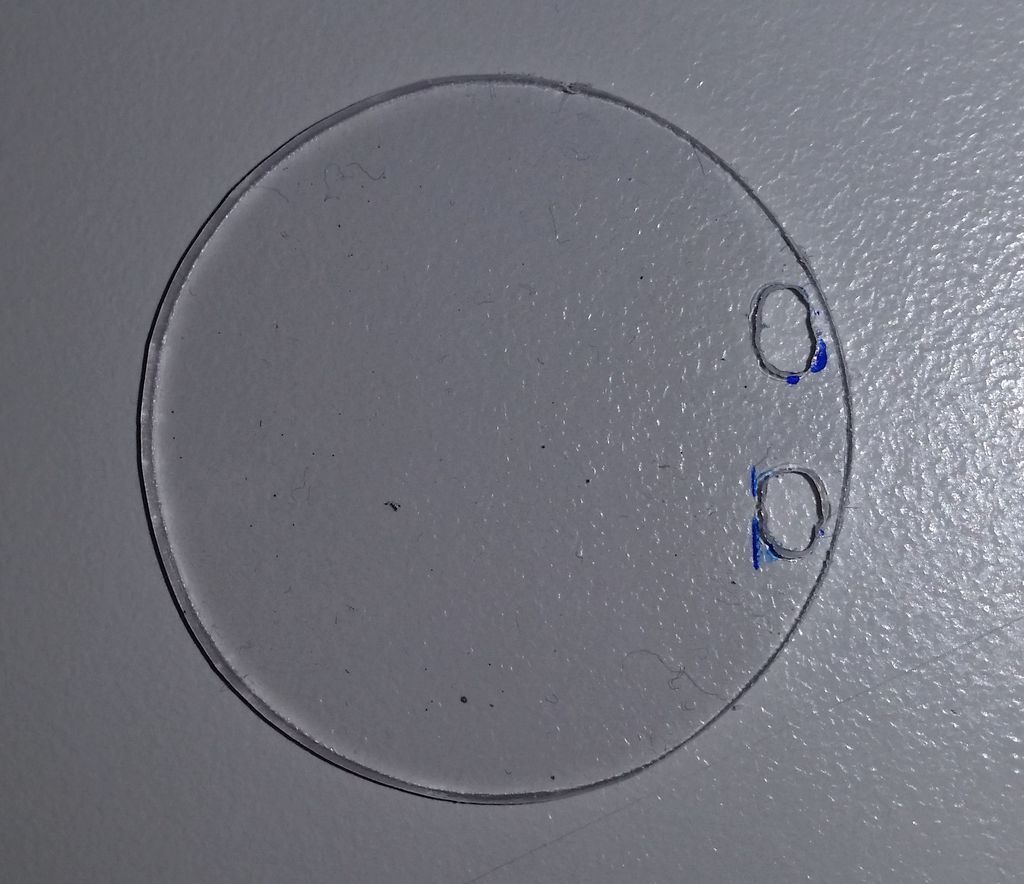 The round transparent panel you need for the Paragrafix Fine Molds model. Took me days to find a sheet (and it's 2mm, not 1mm like Paragrafix proposes, so I hope I won't have problems with it later, probably will have). Took me a long time to get it to the correct form and size. Again, if I buy a 50$ kit, I would gladly add some more dollars, but then have at least a "complete" set, instead of having to waste time to find the necessary materiel to even built my kit. Would it really be so hard for Paragrafix to add these small bits to their kits? And then the decals from the Fine Molds 1/72 kit. A catastrophe. Won't even add a picture of that cockpit, as I feel ashamed by the thought that somebody could believe that's the best I can make it look. I will spent a lot of time to repaint the decals to make them look decent, and to repair the places where the color simply went off the decals. Luckily they seem to have learned a bit about decals and those for the new kits (as those for the DeAgostini Falcon) are a lot better. 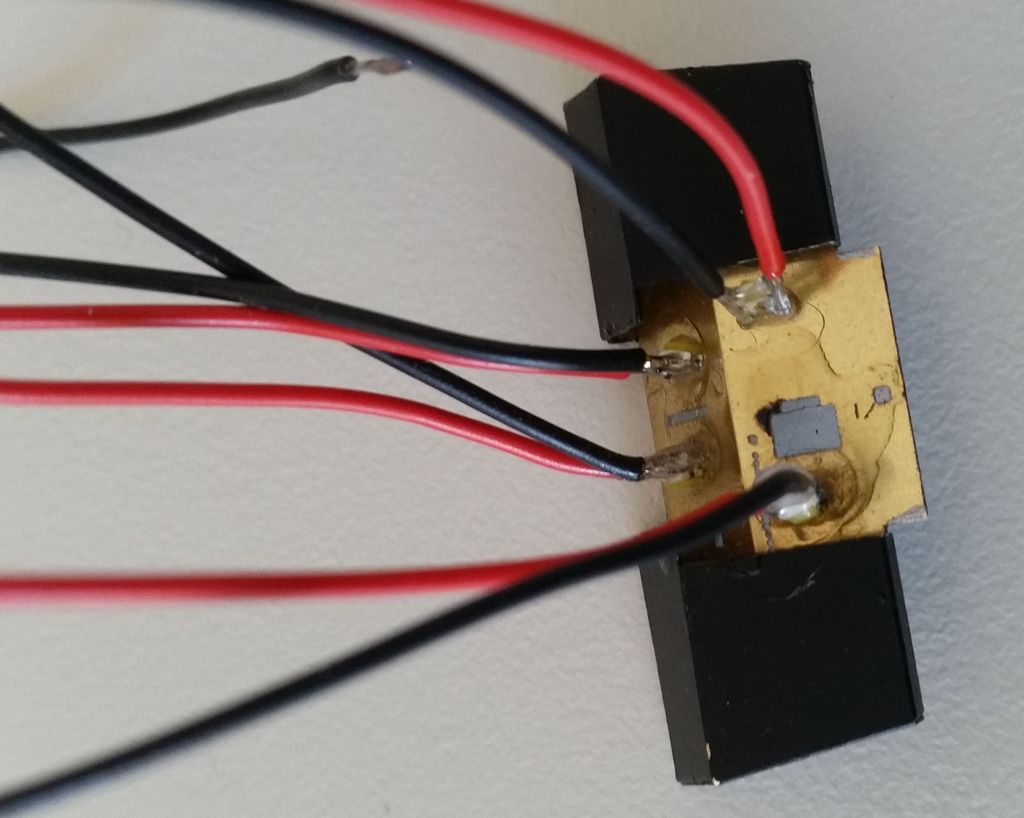 Back to the DeAgostini cockpit. I did solder some SMD-LEDs to their cables, then put a small dip of Microscale Krystal Klear around them. Just did try it, and seems like my idea proved to be a good one, now the smoldering is stronger (sorry but they are so small that moving the cables tends to make them break off the LED often, didn't smolder a lot in the last 20 years ....). I did connect it 3 hours to a battery, just to make sure nothing bad happens to the LEDs and/or Krystal Klear once you lighten them up, and all was good. So I glued them inside the flight console. 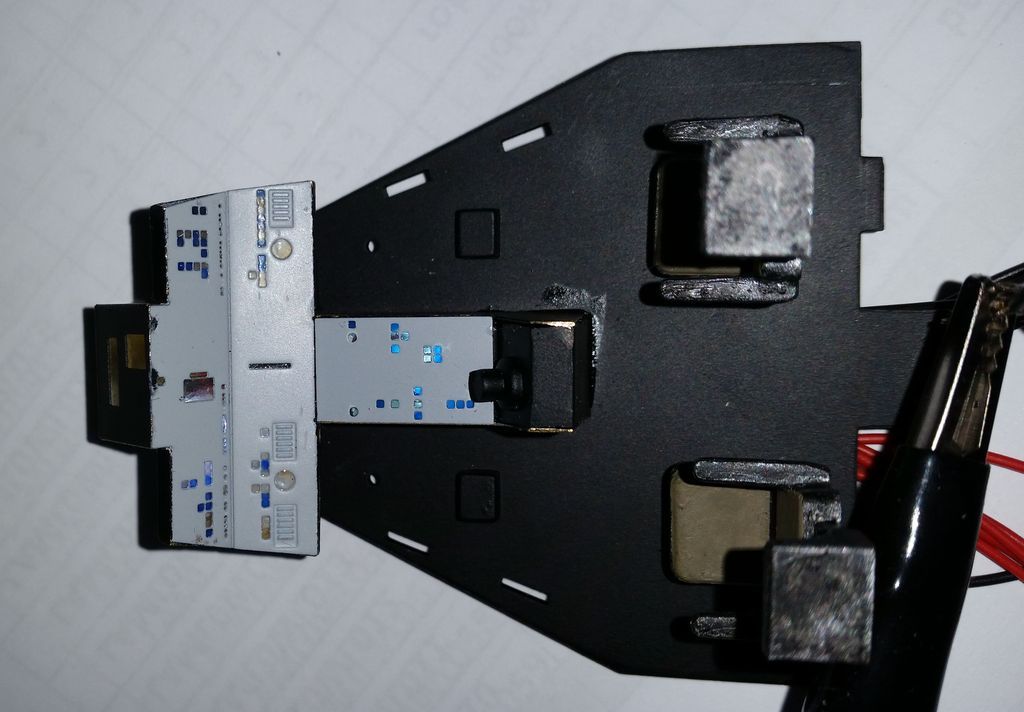 Then I glued that part to the center console (which contains an additional 3mm 2200mcd LED) 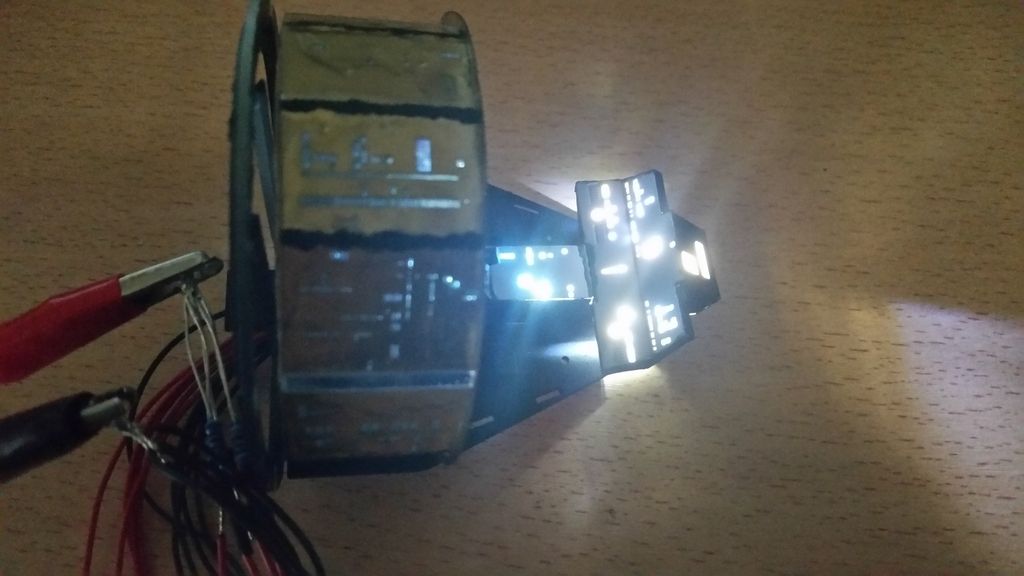 Lightened up. P.S. On the pics they seem to shine brighter then they do in reality. I'm an IT guy and modeller, not photographer. 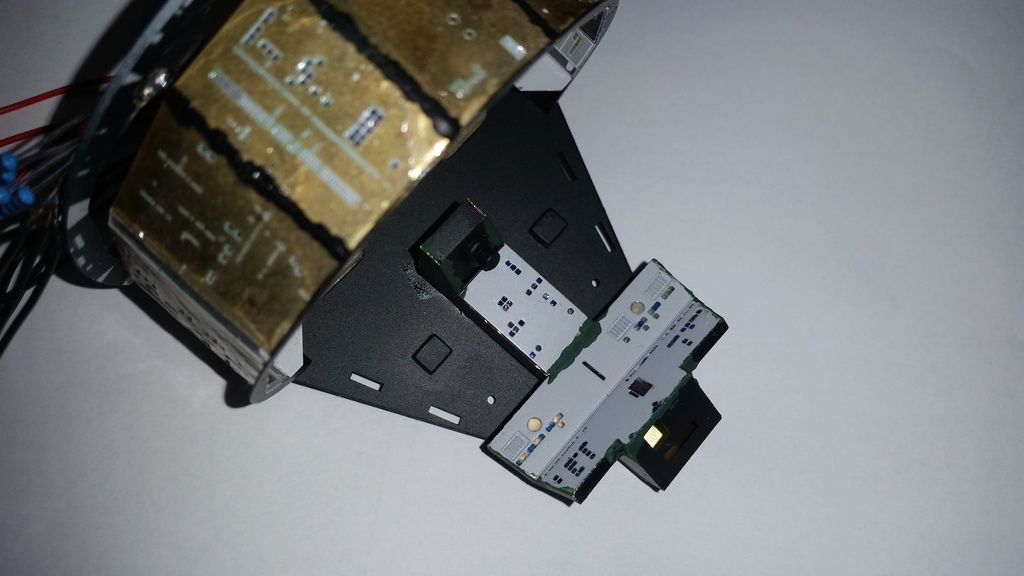 As there are a lot pf small gaps where the flight console is glued to the central console, I needed to fill the holes with some Citadel Liquid Green Stuff. In the previous image you can still see light under the console. That not just from the hole in the floor, so more Green Stuff needed to fill them. Now on to work on the cockpit door to try out the DeAgostini lightning and wher I need glue more SMD-LEDs to lighten the side walls.
|
|
|
Rank: Beginner Level 3 Groups: Registered
Joined: 22/03/2016 Posts: 22 Points: 69 Location: Luxemburg
|
 Worked also on some parts of the hold. Tried a lot of colors to paint the inside of the bunk, in the end i decided to go with Citadel Ulthuan Grey. Will try to add some washes, as you can see dirt spots on there in the reference pics. But as Steve Dymszo says in his vids: It's hard to find out what colors were used in the original Falcon. (https://www.youtube.com/watch?v=t-Yaj2wlHS4) So Ulthuan Grey is fine for me. 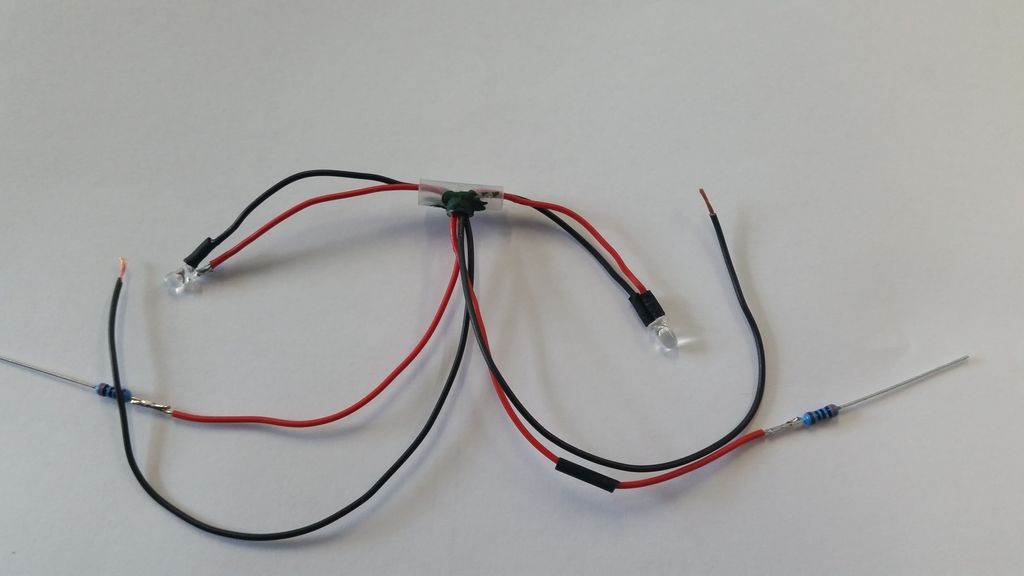 This will become the lights between the bunk and the seats. The tube was cut from the protective tube from my paint brushes. 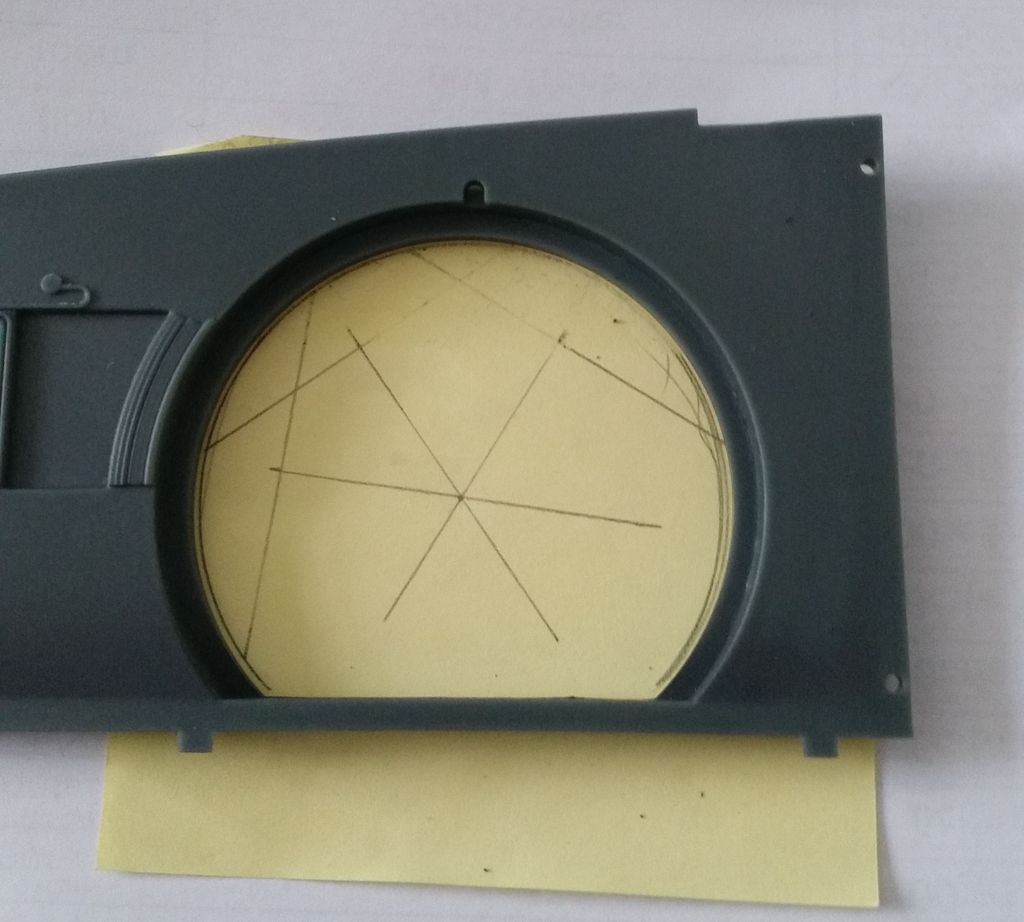 On to the first side wall. Glued a Post-It under it to find the center of the doorway, then I did used it to draw the lines for the holes that are missing. 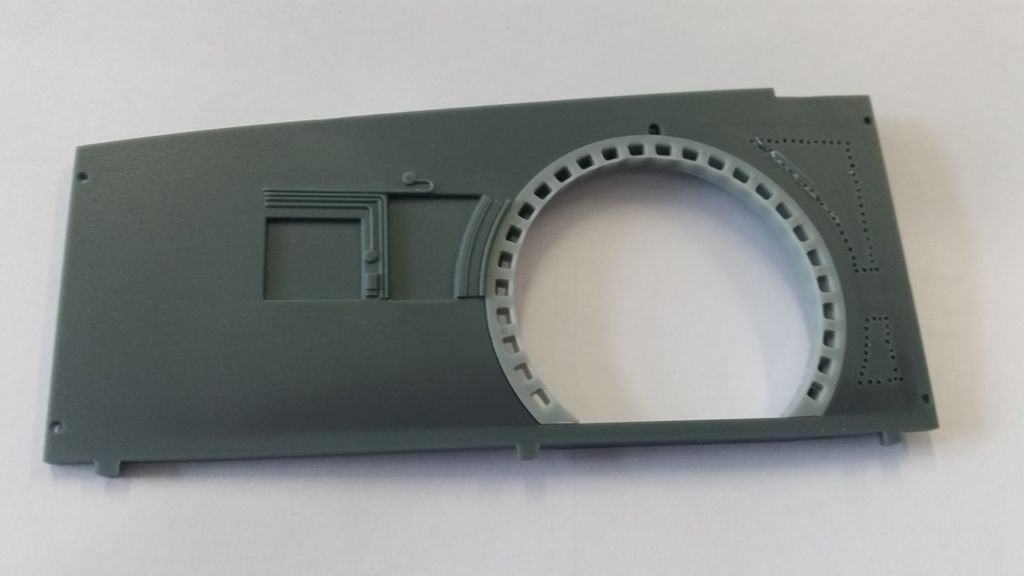 Drilled some holes close to those lines, now I need to cut out those parts.(My knife starts to become blunt  )
|
|
|
Rank: Beginner Level 3 Groups: Registered
Joined: 22/03/2016 Posts: 22 Points: 69 Location: Luxemburg
|
GoofyFoot wrote:Very nice looking! I think I like the way the Paragrafix hold floor looks even better than the Shapeways floor. That being said, since my build is going to be displayed "in flight", I'll rarely ever open her up to see the hold, so I can't justify the cost to put a lot of expensive add-ins. But seeing how good these look does make me a bit jealous. I took a look at the Shapeways parts, and honestly, I think most people are out of their mind when it comes to how much they ask for their parts. I saw a bunk (alone) for more then 50$. Sorry, but that's clearly too much for me. Some parts that I would like to have are even more than 200$. Not with me. I will scratch-build some pieces and that's it. Some people have more money, some less, some accept to spent it, some not. In the end, we have to be satisfied with our models. Yes, it may be true that we'll always see some bits and say:" I could have done that better." But even with a 200$ piece, I would still find other pieces that could look better.
|
|
|
|
|
Looks like you've definitely got your teeth into it now. Looks great, a lot of time is gone into that. I did mine a year ago, and now, so far I have a complex wiring loom that looks like I built something for mass production. It’s looking good, keep the pictures coming. Mark
|
|
|
Rank: Beginner Level 3 Groups: Registered
Joined: 22/03/2016 Posts: 22 Points: 69 Location: Luxemburg
|
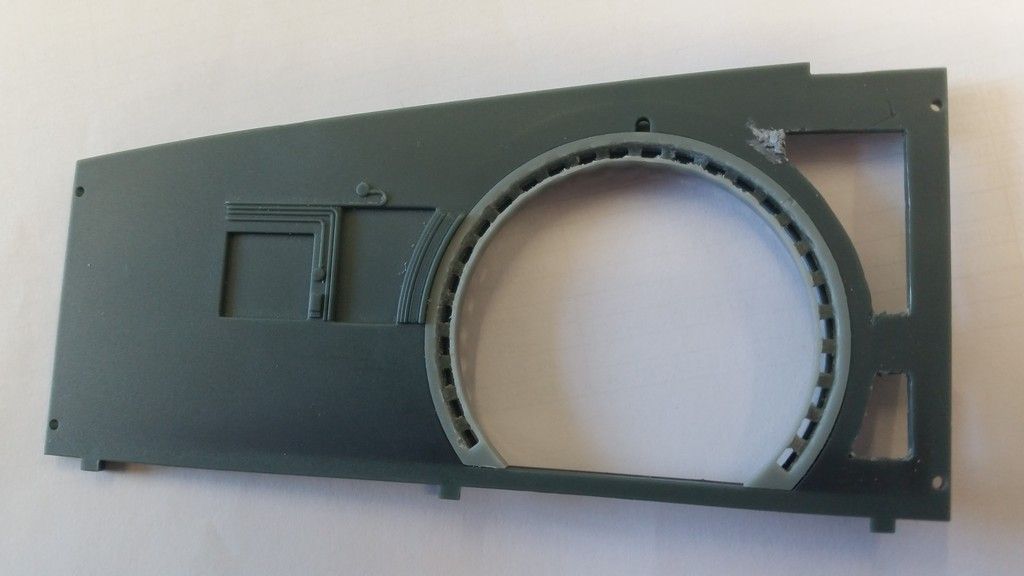 Holes cut out and the door rings prepared. Took me 1 hour for this ring alone ... . Did cut a bit too much in that upper left corner, so filled it up again with Tamiya putty. 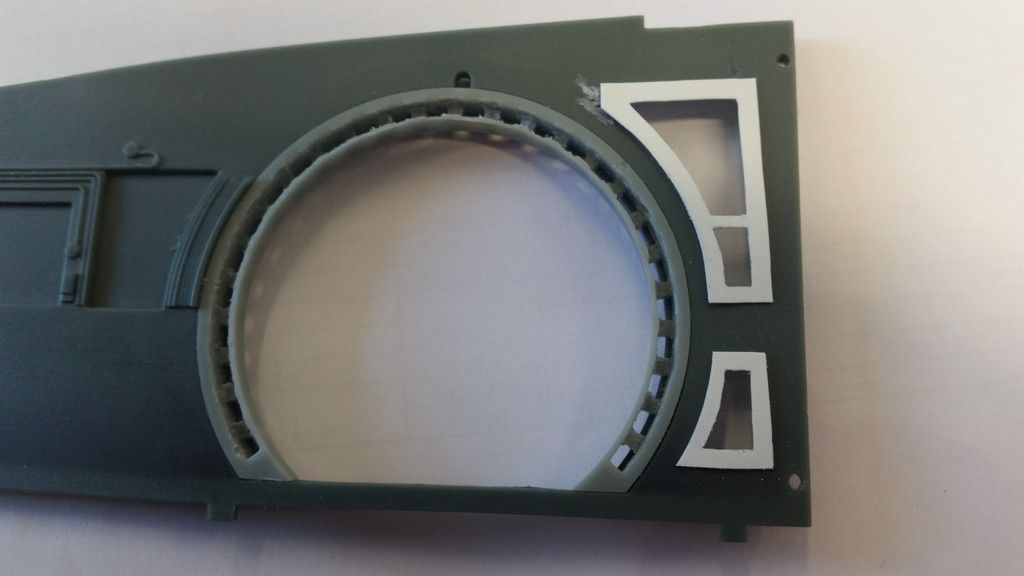 Then I cut a frame out of a 0.4mm styrene sheet. For those who think this comes easily ... I have redone this frame 5 times. Either I did cut too far and destroyed it, or the parts weren't aligned correctly (like in this picture). It's just a matter of how much time and effort you want to invest until you're satisfied (and of course money for those who buy third-party pieces). So, I'm also still learning with this model, I may built and paint for more then 30 years, but imho I'm still learning new things from every new model. 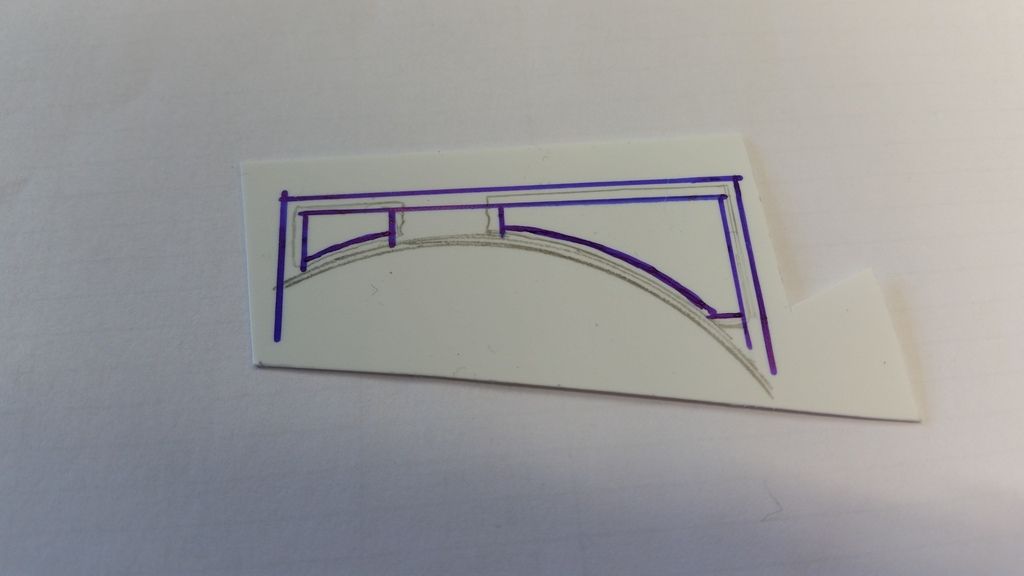 As the frame wasn't aligned in the last picture, I did start a new one, this time drawing both together instead of two single frames .... 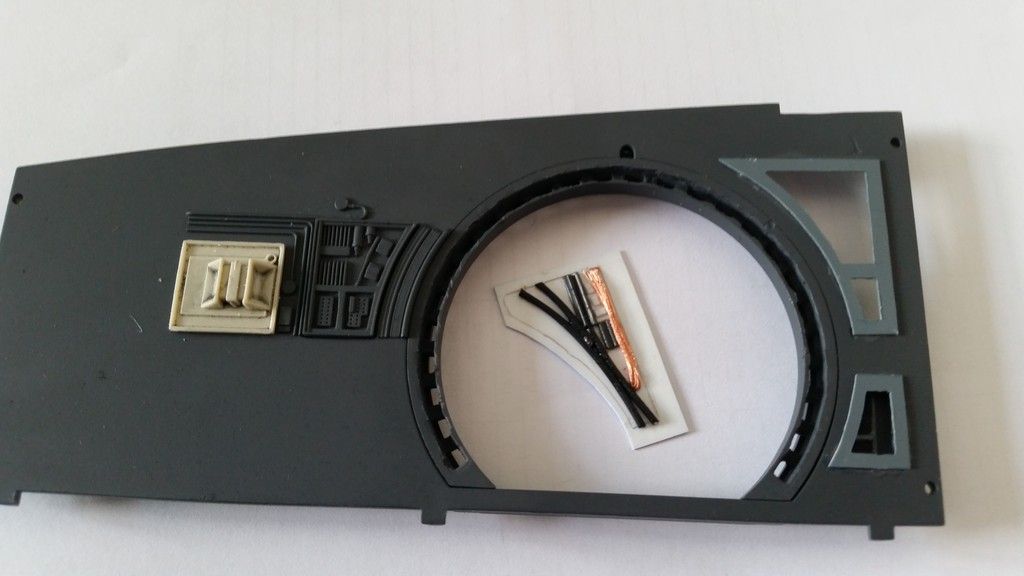 As a result it now looks better. Started to paint the whole wall (wall is Tamiya German Grey and the frames Tamiya Ocean Grey, dunno yet what to do with the white part) and did some scratch building. I'm still looking for some 1 or 1.5mm round disks for the upper piece. Don't want to take the isolation from a 1mm wire, these thing tend to embrittle (is that the correct word) and then break apart. And a home I just have 0.5 and 2mm platic rods .... sigh. It's hard to figure out what's exactly in those places, I just have 2 or 3 pics that show them fairly well, and the things look different when you compare the New Hope Falcon to the Empire Falcon. Guess if the guys from LucasArt didn't know exactly how these things look then what I built is all fine for me. 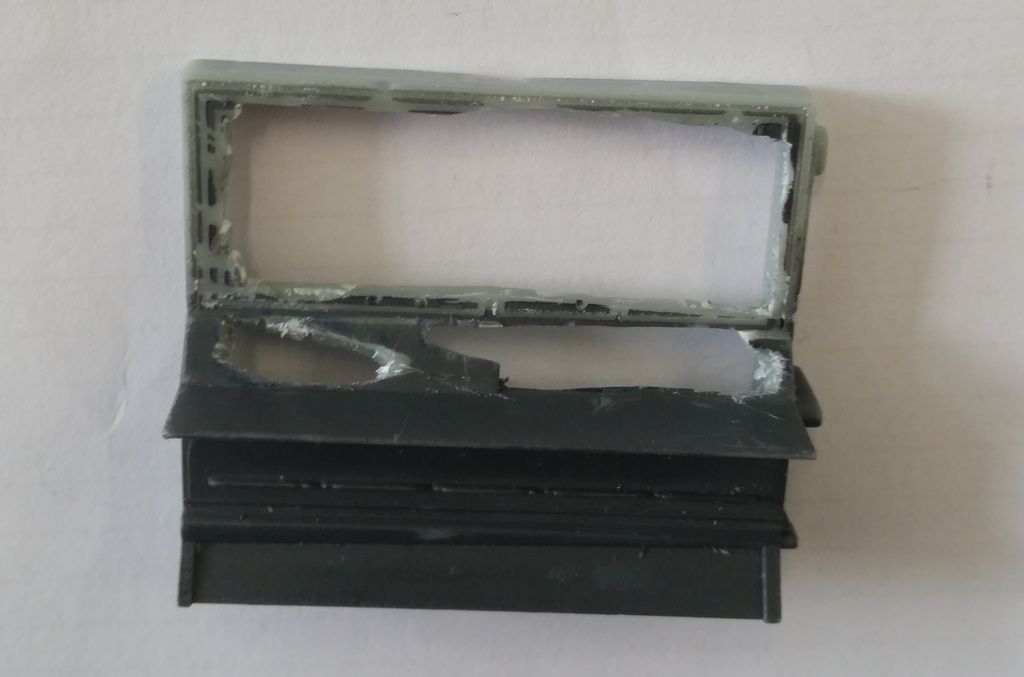 Preparing the navigation computer for the paragrafix pieces.  All the cables from the bunk assemble up to now. Guess there'll be some more from the bench... and need take a look at the Dejarik table. Do you need to buy the Shapeway one if you want to add fibres? Hmmmm 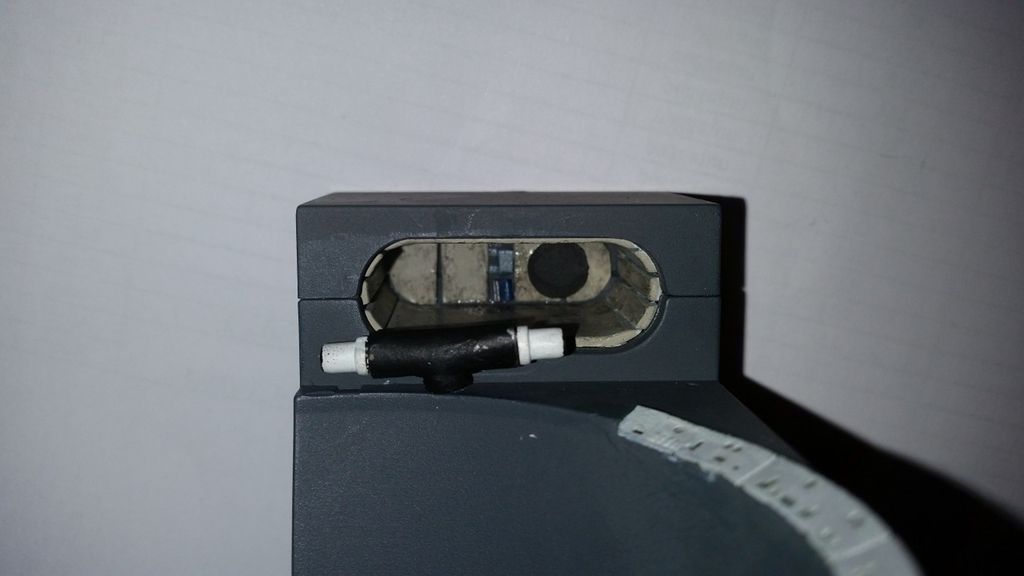 Did also some scratch building for the bunk interior. The light in front of it is just sticked in place for this pic, it's not yet glued in place :-) And again, I think I repainted this thing 4 times. Didn't like Tamiya Deck Tan or Buff, then tried Citadel Ulthuan Grey, until I saw pics from a guy named Necronaut, so I went back to Deck Tan .... it really looks better once you apply that black wash (Citadel Nuln Oil applied with a cotton bud), which I hadn't when I painted it the first time.
|
|
|
|
|
Nice bit of scratch building going on there. Looking good.
|
|
|
|
Guest
|
 US
US

