|
|
|
|
|
|
|
 Rank: Vice-Master      Groups: Registered
Joined: 05/04/2016 Posts: 706 Points: 2,121 Location: Ferrara
|
Thanks to much Mark  I started the finishing work on underface of undertray. I spray 5 times of clear matt and final coat from far to give a rough look (especially in the flat zone). - I extra add joint and hose to the brakes and clutch tank. Just add for photo because i'll fit the nose cone that will hide it. - I polished the fire exstinguisher and the ducts from intercooler to inlet manifold. - I added the bolts (with punch & die) to gearknob bracket and a final paint touch. - I add some detail to showa sunspension control unit: i add the protection pad, the sticker R,F,E (rear, front, ecu), i added the fixing system to monocoque and i silver paint the plug to ECU. I also add the protection aluminium profile ad the base of tunnel legs.  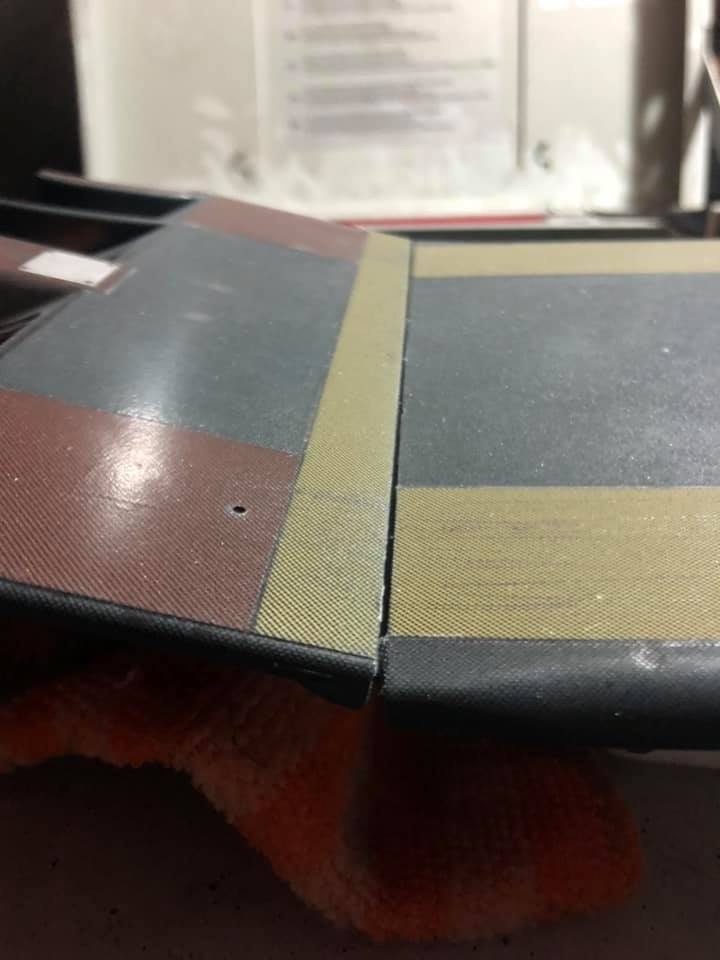 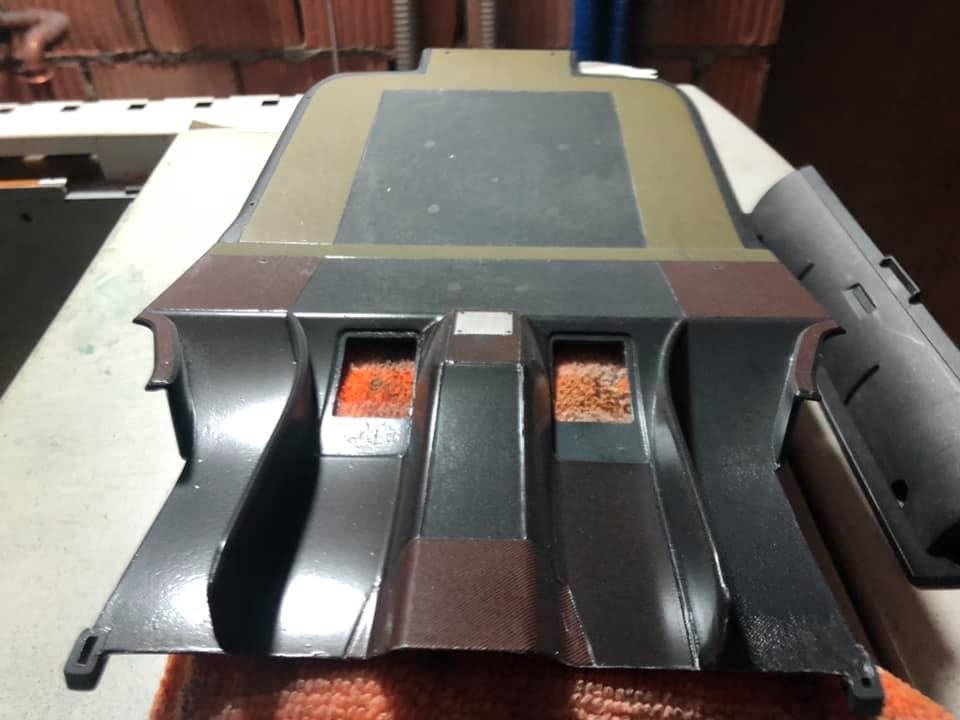 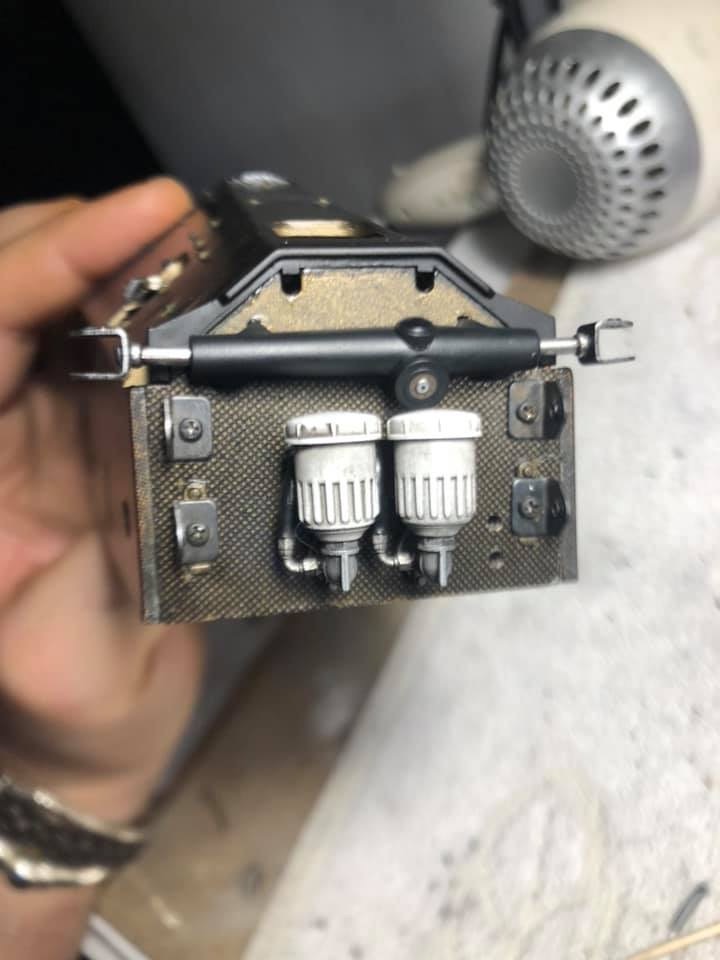 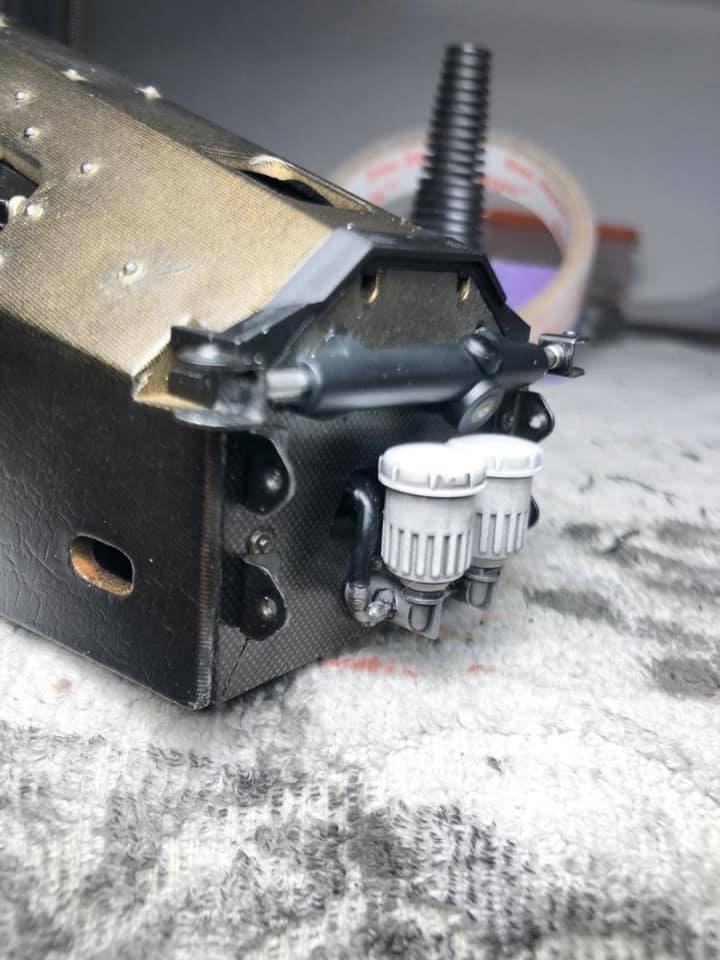 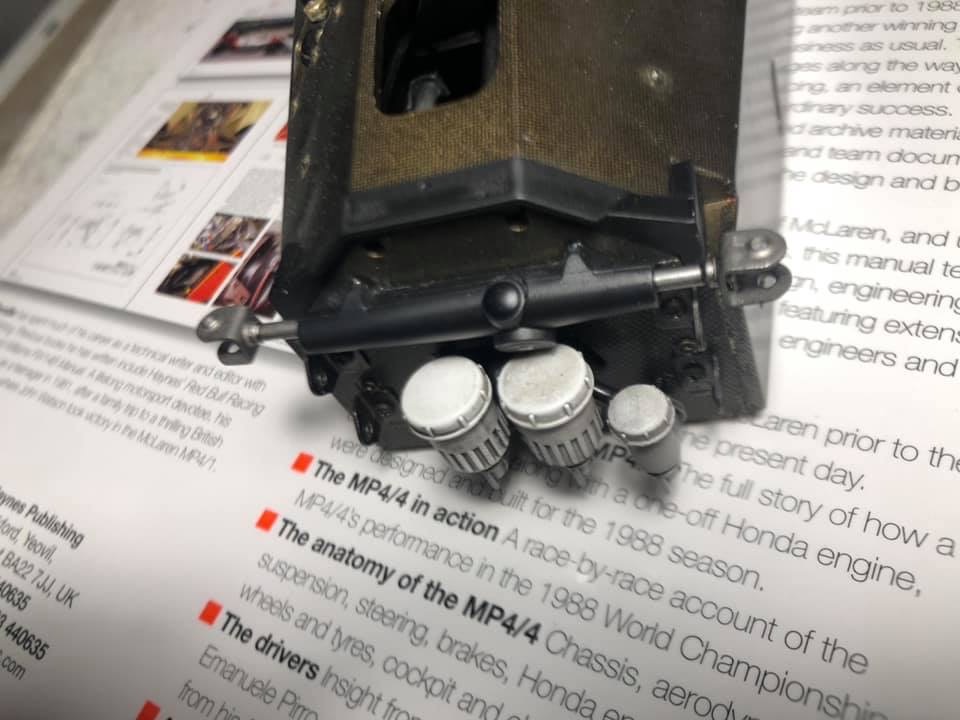  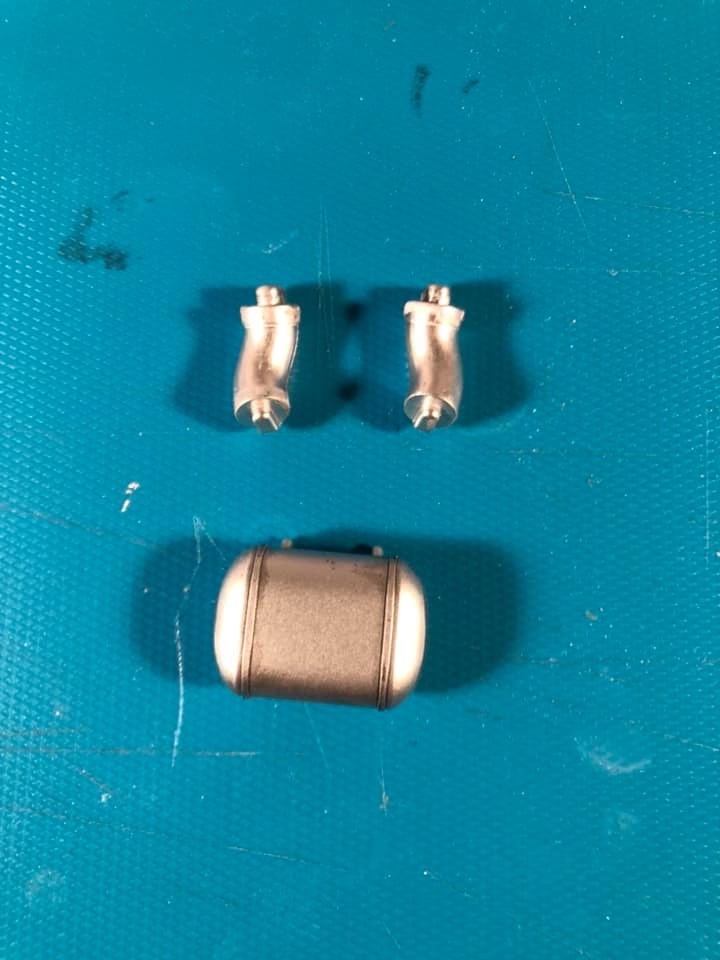  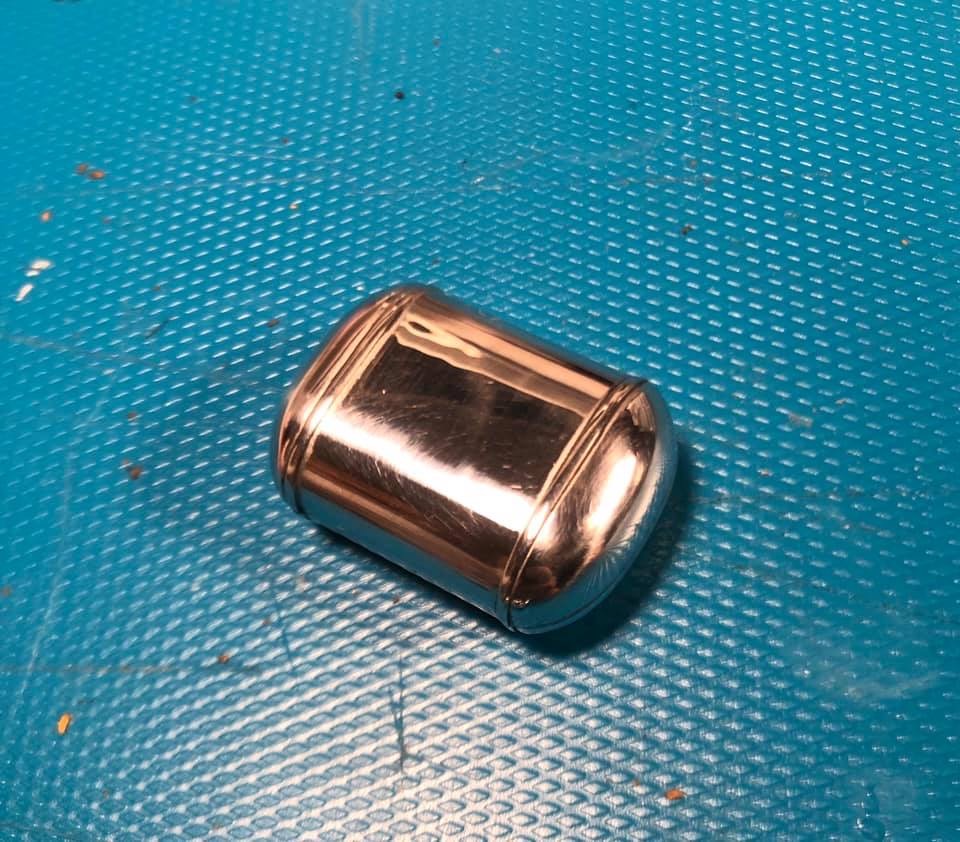   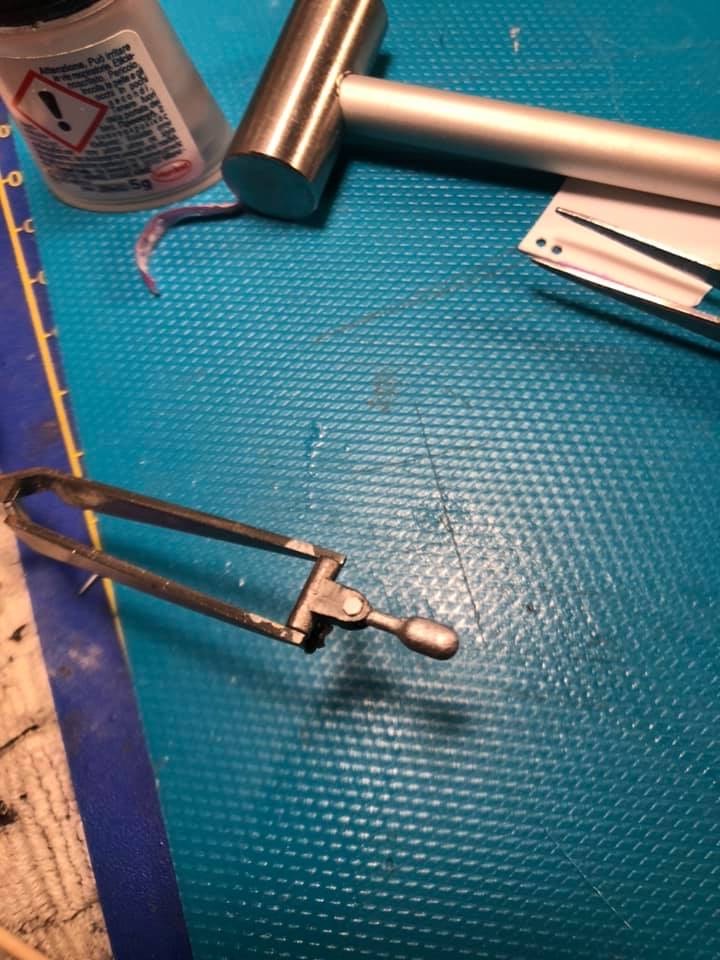      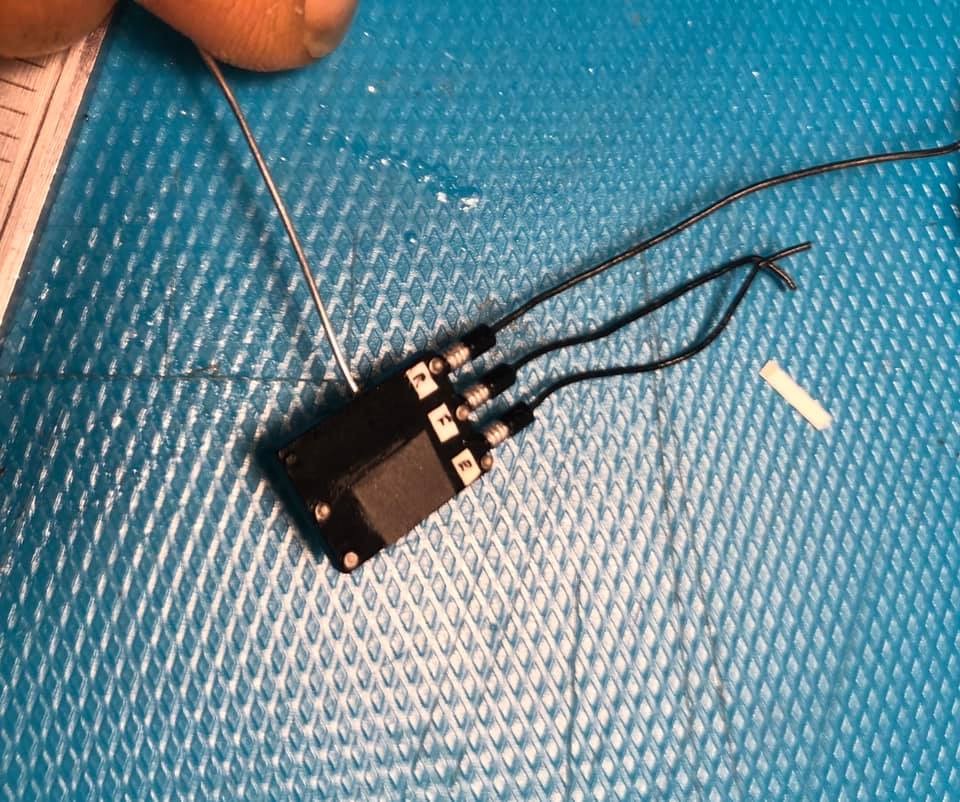 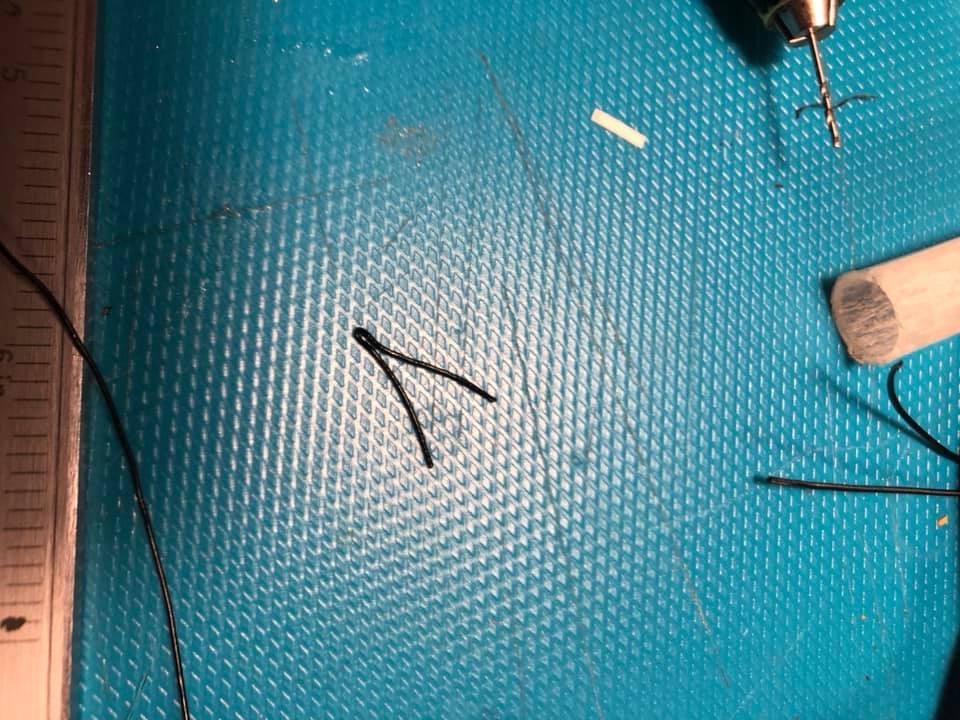 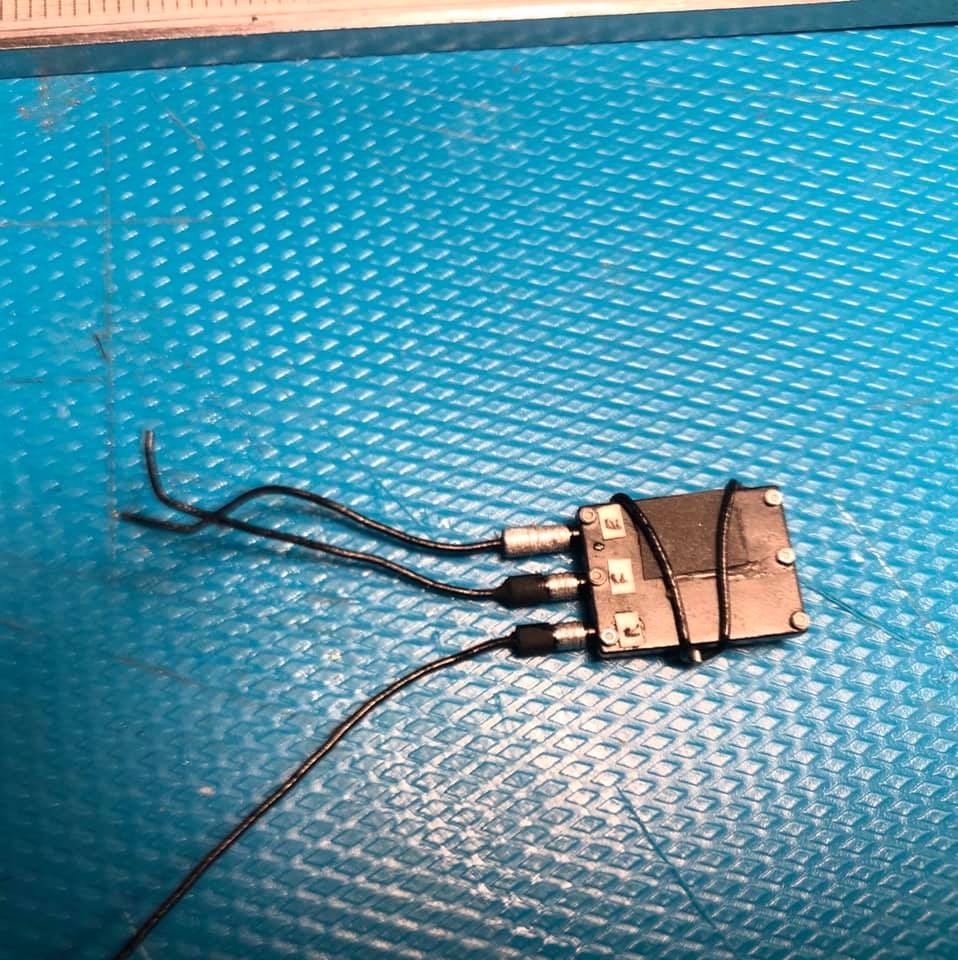 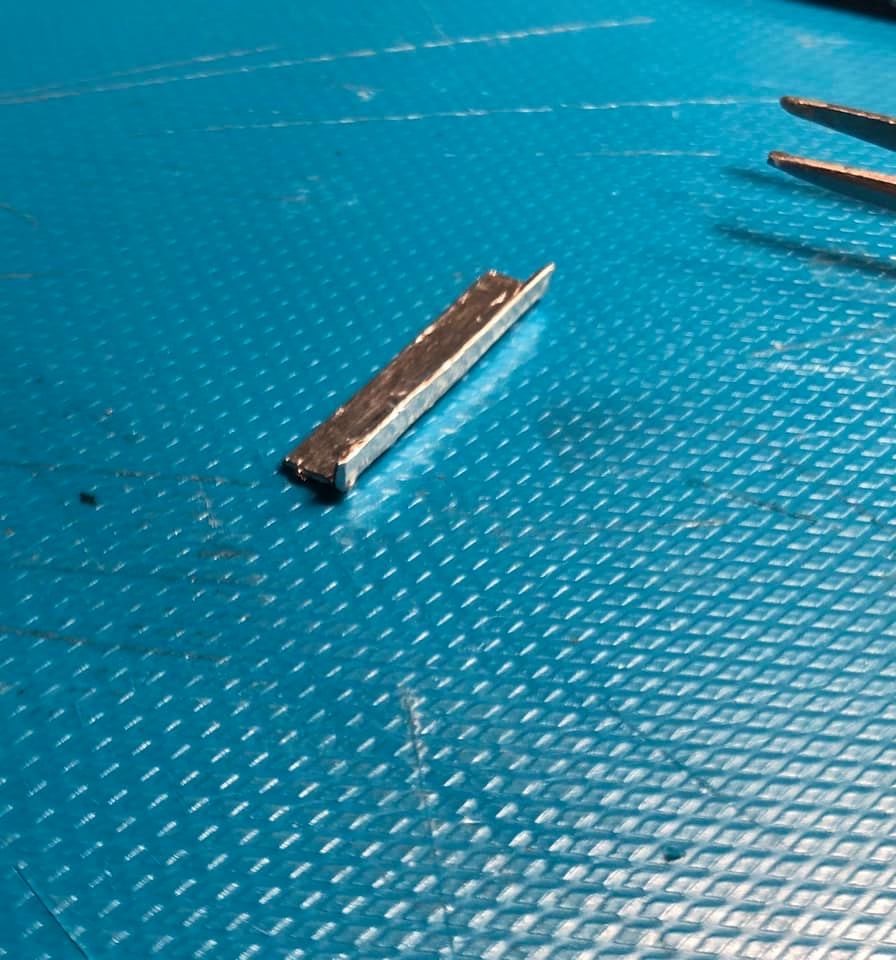 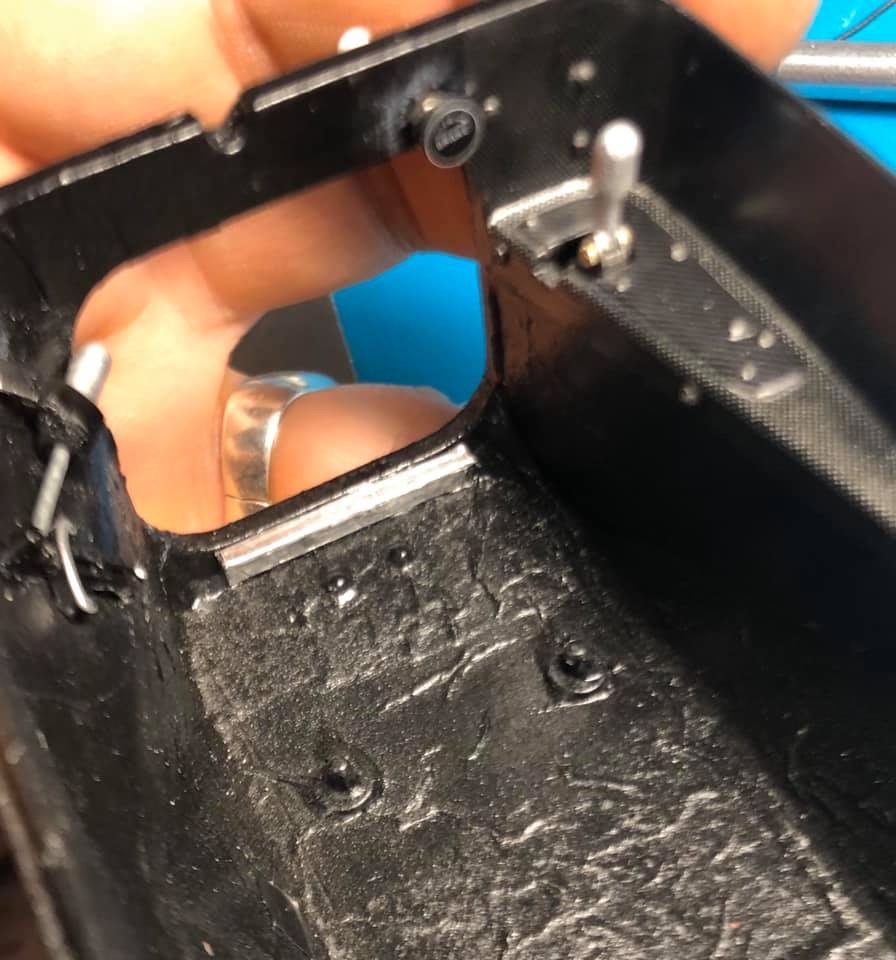   Collection active: Lotus 97T, Audi Quattro A2, Vw Maggiolino '60
Work in progress: Porsche 911 RS Turbo
Completed model: Delta WRC Martini, Mclaren MP4/4, Golf GTI 1/8 Tuned
|
|
|
Rank: Vice-Master Groups: Registered
Joined: 05/04/2016 Posts: 706 Points: 2,121 Location: Ferrara
|
|
|
|
 Rank: Super-Elite    Groups: Registered
Joined: 31/05/2010 Posts: 5,679 Points: 17,011 Location: Wiltshire
|
So impressed by the level of detail you are adding to this and also your knowledge of what you are building. Tony Happy Modelling
BUILDING: Hachette Spitfire Mk 1A, Constructo Mayflower
SUBSCRIPTION COMPLETE (Awaiting building): USS Constitution, Sovereign of the Seas, 1:200 Bismarck (Hachette)
COMPLETED: Porsche 911, E-Type Jaguar, Lam Countach
|
|
|
Rank: Vice-Master Groups: Registered
Joined: 05/04/2016 Posts: 706 Points: 2,121 Location: Ferrara
|
|
|
|
|
|
Some beautiful detailing.  Mark
|
|
|
Rank: Vice-Master Groups: Registered
Joined: 05/04/2016 Posts: 706 Points: 2,121 Location: Ferrara
|
|
|
|
Rank: Vice-Master Groups: Registered
Joined: 05/04/2016 Posts: 706 Points: 2,121 Location: Ferrara
|
|
|
|
Rank: Vice-Master Groups: Registered
Joined: 05/04/2016 Posts: 706 Points: 2,121 Location: Ferrara
|
I started to study the fitting and system of some hoses and cables After watching somes pics I think to undertand the connection for fuel sistem. On the top of monocoque (between ecu unit and fuel filler) are two joints: the inlet and oulet fuel lines. These hose running and connect to fuel pressure valve that is on the rear of engine at the bottom of inlet manifold I also study the connection of some cooling hose I think to understand that the pink hose that start from each radiators, runs from radiators and goes to water tank that is under the manifold. On the right side of this tank there is the filler cap. From this cap start a hose that run near the manifold, run under the oil filler tank and finish on the rear of gerbox. This is the cooling bleeder hose I made a basical pics with the kit parts Another study is the oil gearbox cooler. On motegi chassis, the cooler is withot the thermometer. On race car there's 2 thermometer on the top of oil cooler. 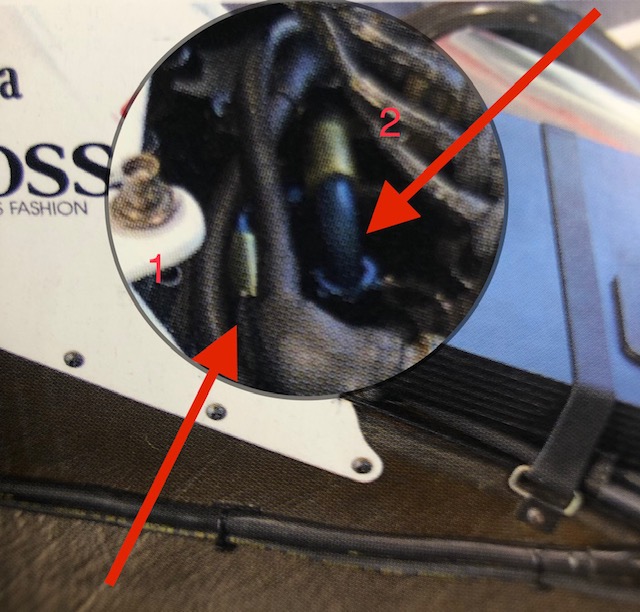 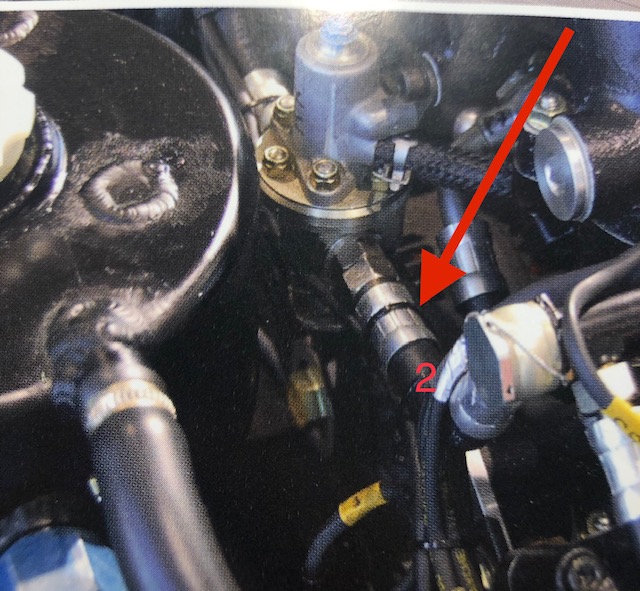  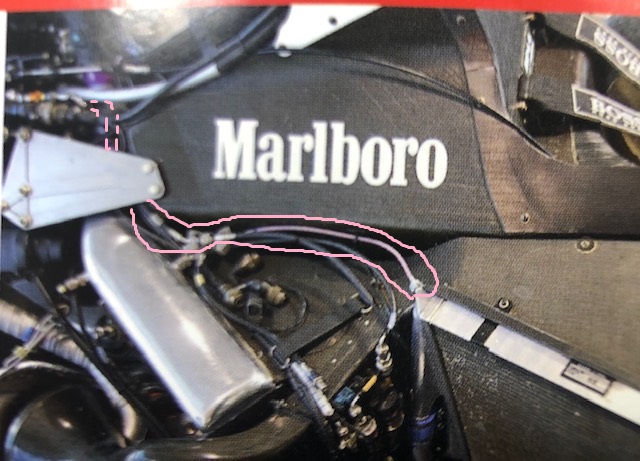   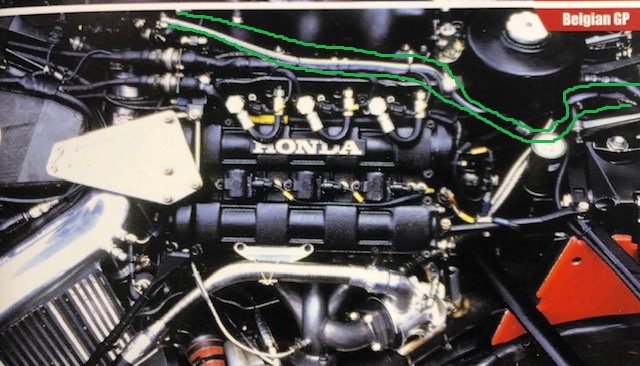 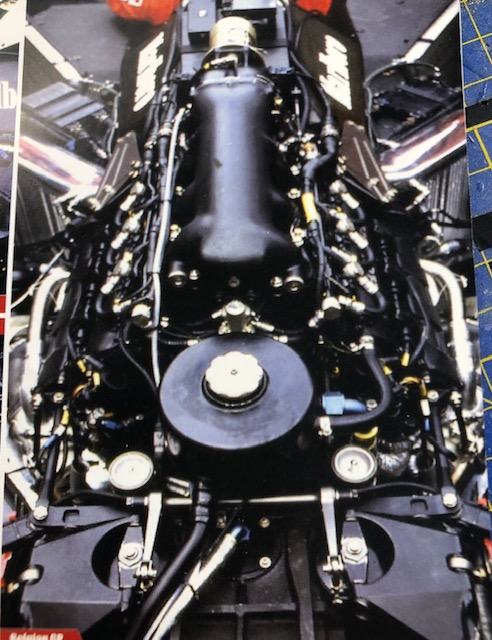   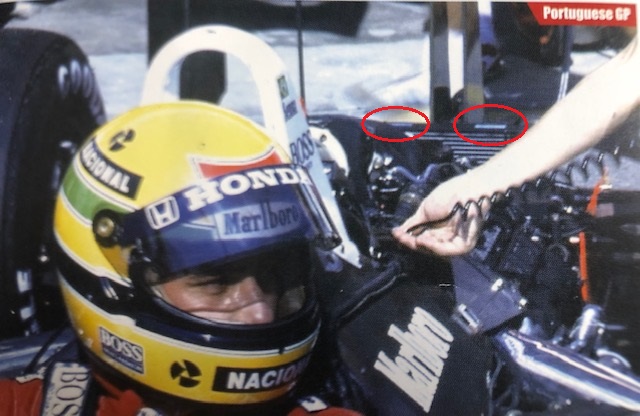 Collection active: Lotus 97T, Audi Quattro A2, Vw Maggiolino '60
Work in progress: Porsche 911 RS Turbo
Completed model: Delta WRC Martini, Mclaren MP4/4, Golf GTI 1/8 Tuned
|
|
|
|
|
Loving the attention to detail you are giving this.  Mark
|
|
|
|
|
Remarkable amount of study and work going on here. Amazing stuff. !!
Malc.
|
|
|
Rank: Vice-Master Groups: Registered
Joined: 05/04/2016 Posts: 706 Points: 2,121 Location: Ferrara
|
|
|
|
Rank: Vice-Master Groups: Registered
Joined: 05/04/2016 Posts: 706 Points: 2,121 Location: Ferrara
|
|
|
|
Rank: Vice-Master Groups: Registered
Joined: 05/04/2016 Posts: 706 Points: 2,121 Location: Ferrara
|
Exhaust turbo pipes - from previous work I had left out the 2 lambdas with relative protection. For the base I used a 2,5 m washer. aluminum-coated styrene tube and finally the lambda wiring Intake manifold - I installed the mounting system by opening the slot in order to insert the flange now welded to the ducts with the throttles that will join the intercoolers - Another difference is that the main body of the collector is a semi-opaque, the ducts of the butterflies are a little bit shiny black. - Another missing detail on the intake manifold is the missing of two bolts (perhaps for inspection or for other). Before being able to position them, I filed the poisition so as to make it oblique to give the right angle for the future bolts. Once this was done, I painted everything with the color combo described above and I made the bolts with the usual punch & die Wastegate - another peculiarity of this car is the different application of a wastegate pressure hose on the top of wastegate unit. This hose was not ever present in each GP. Fortunately, Hiro's book has a clear photo from above for Suzuka's GP, the tube was absent and there was the blind bolt. Throttle body control. - totally absent and quite visible in their absence. I tried to reproduce them in my best personal way. I used a U-folded aluminum tape and drilled with a 1.4 drill. I remade the spring with a 0.5 thread, everything was fixed with a screw. This will be followed by painting of the silver titanium brackets and future bolts - I started to work on the main throttle control bar controlled by the tie rod of gas cable to the pedal. Injector rail and fuel pressure valve: - the petrol pressure valve is drilled to add the inlet and outlet fuel hoses. These hoses will run from pressure valve to the top of monocoque between Ecu unit and fuel filler 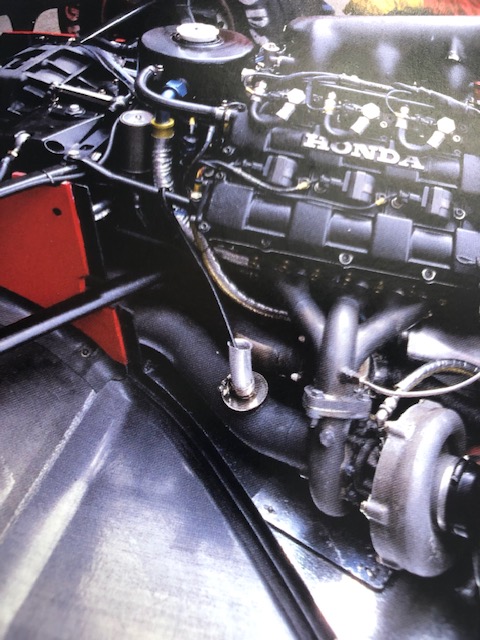 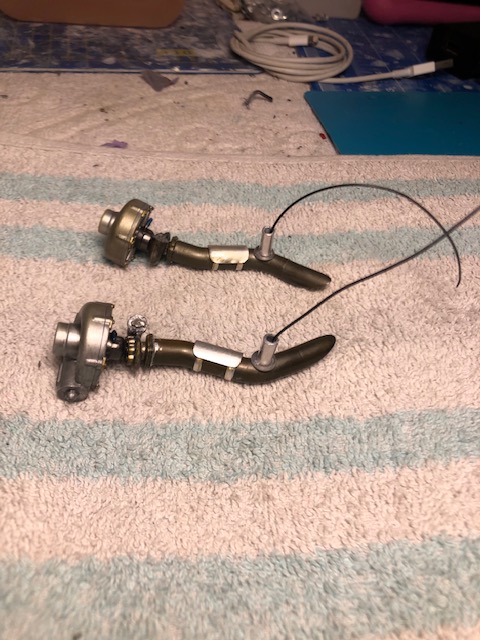 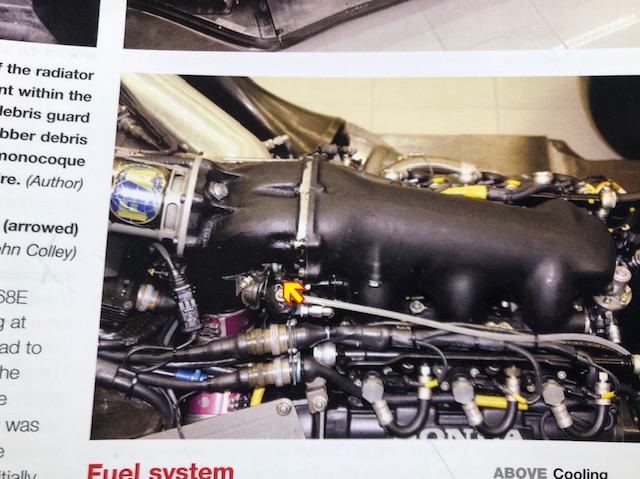 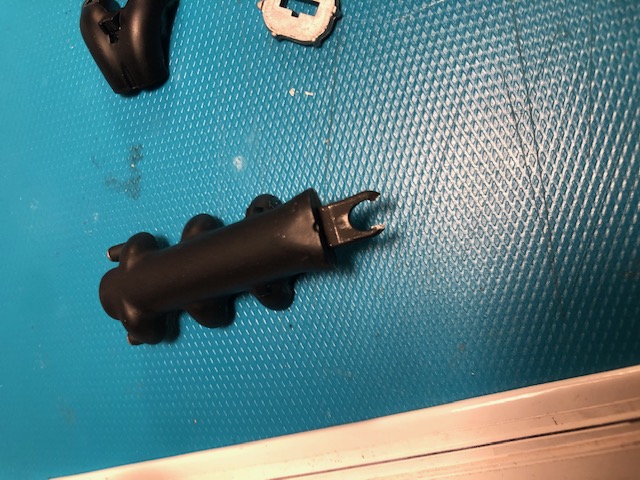  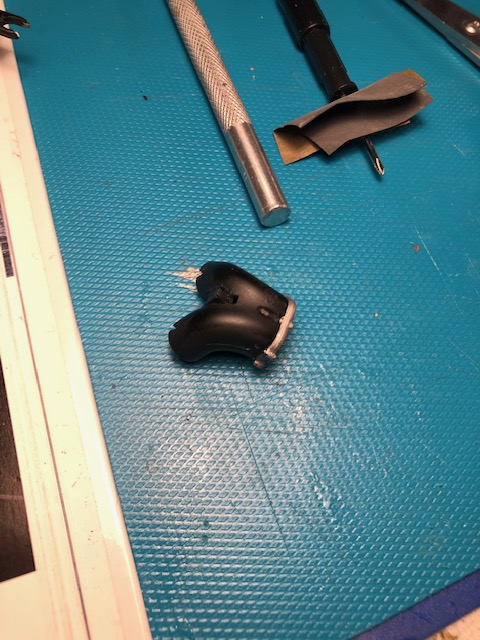 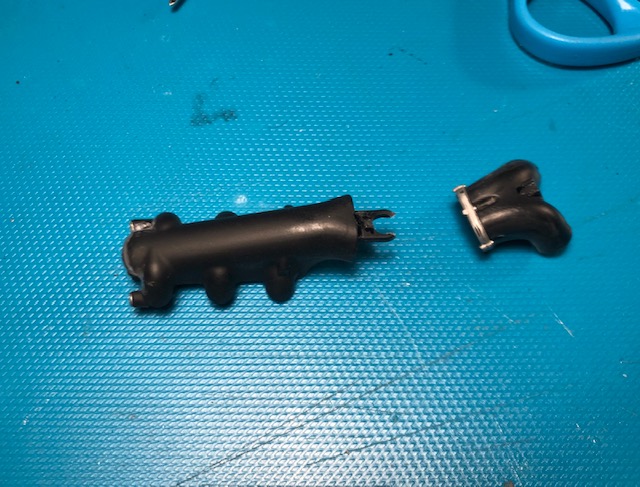 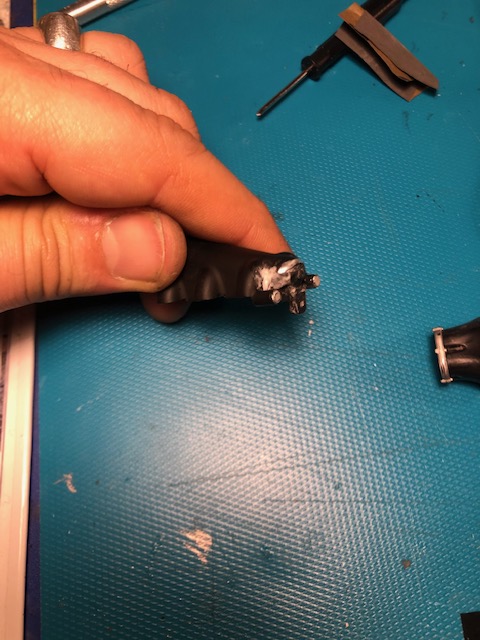 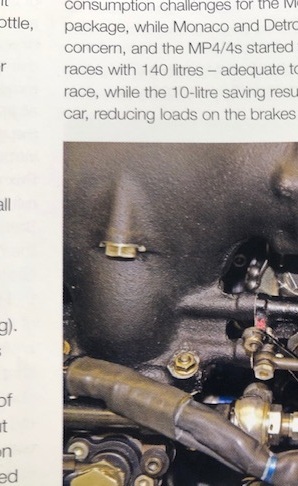    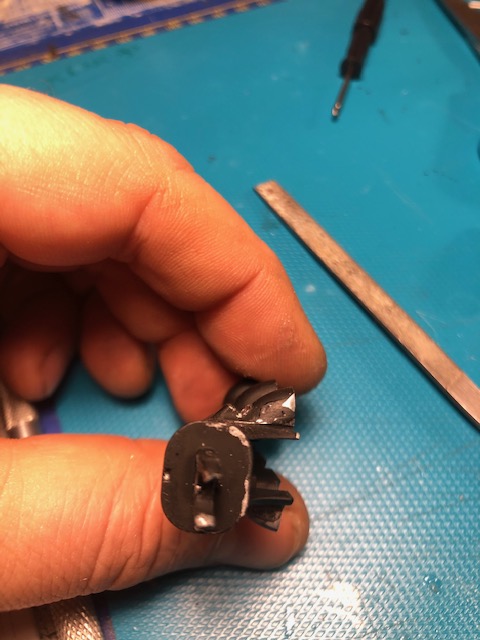 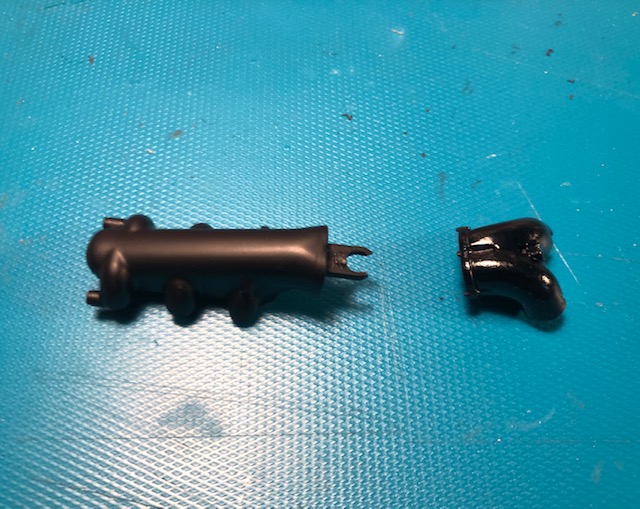 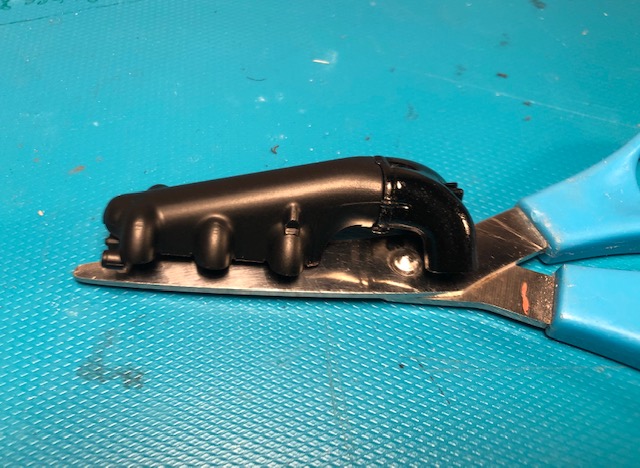 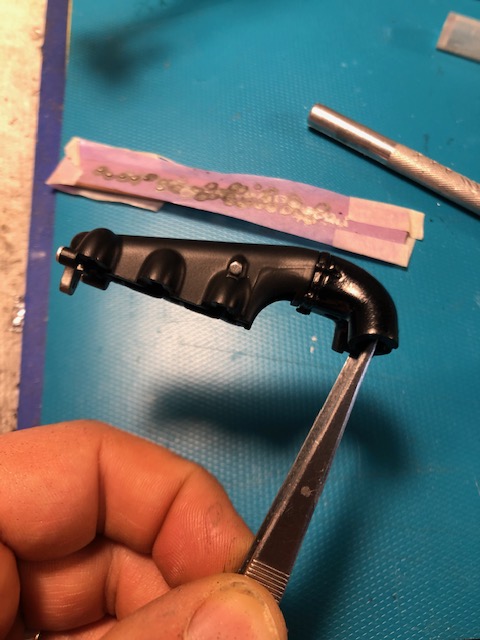 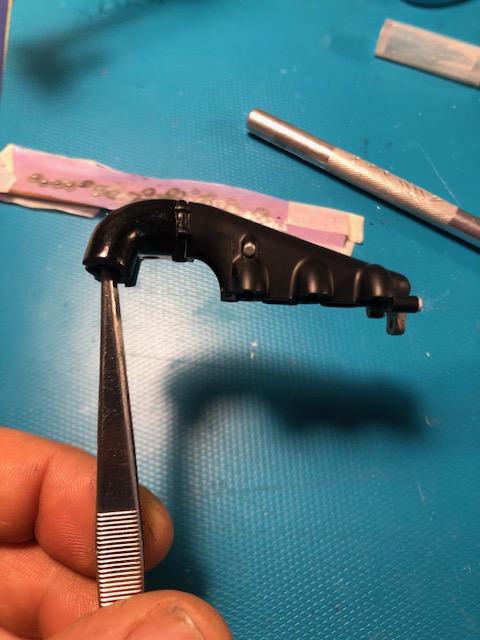 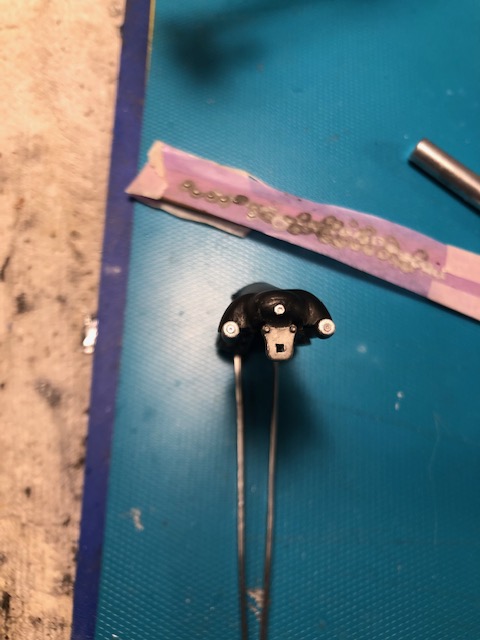 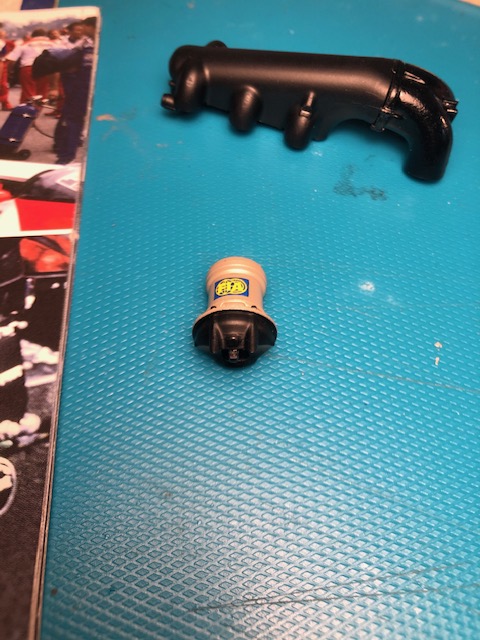 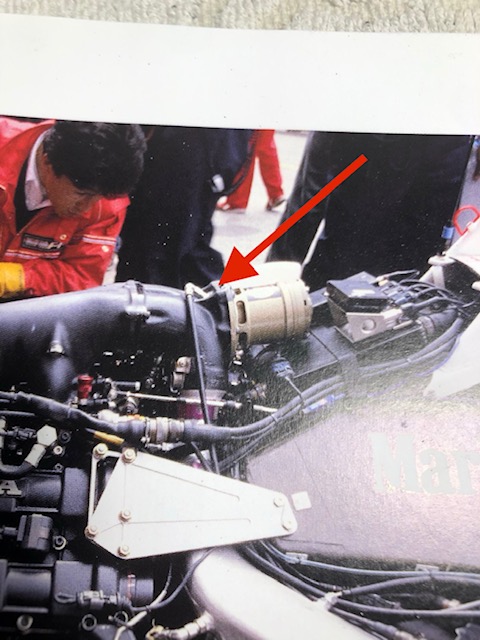 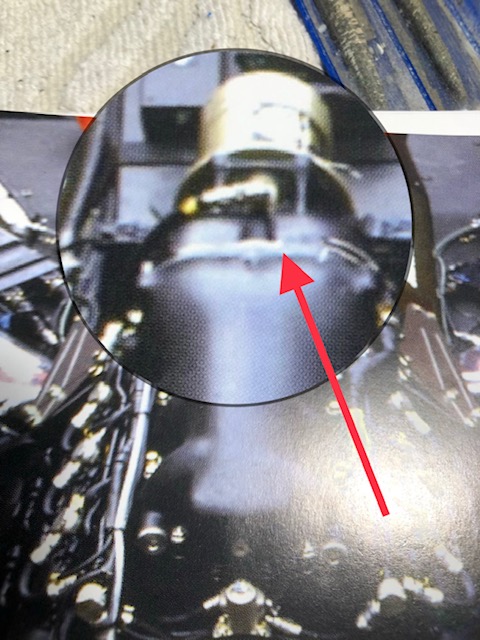 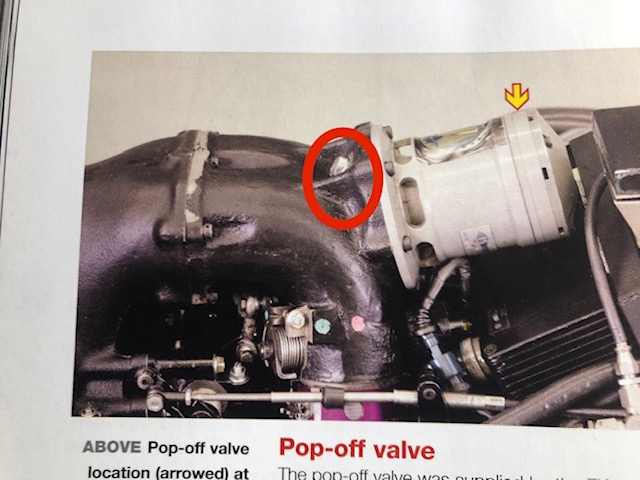 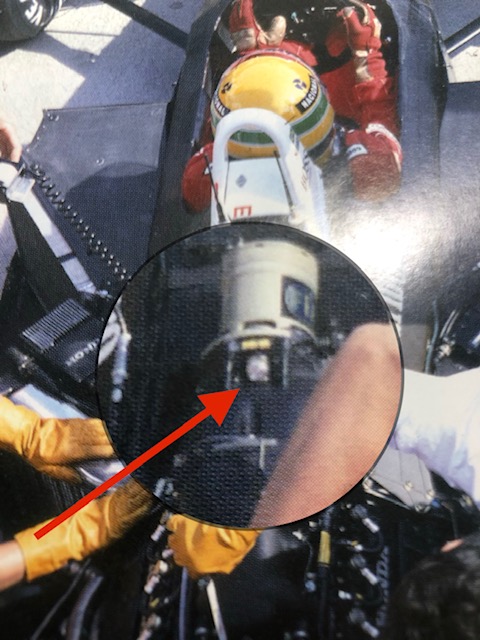 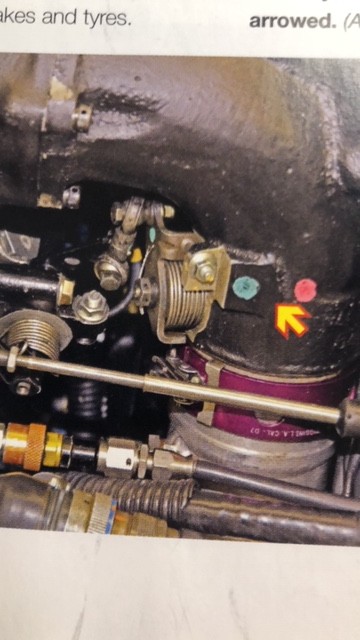 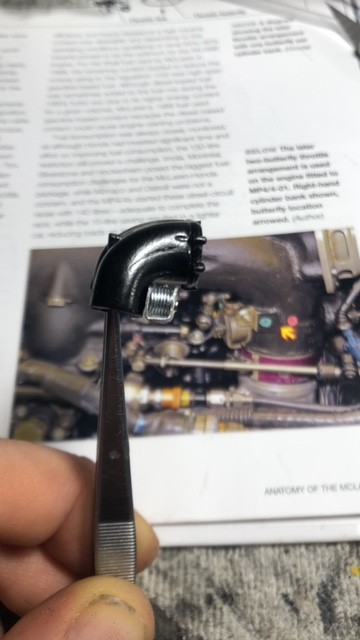 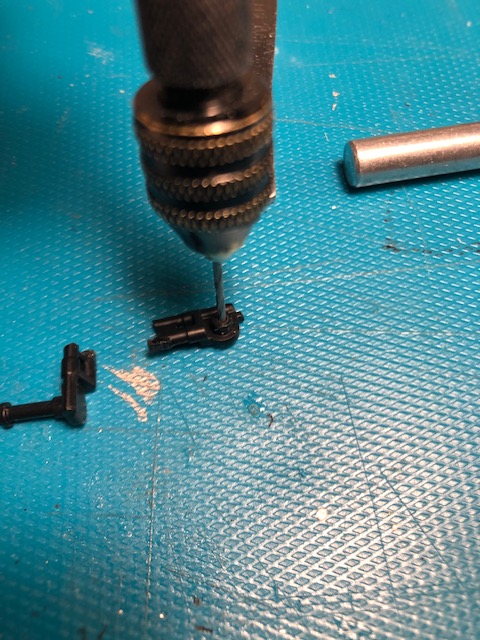 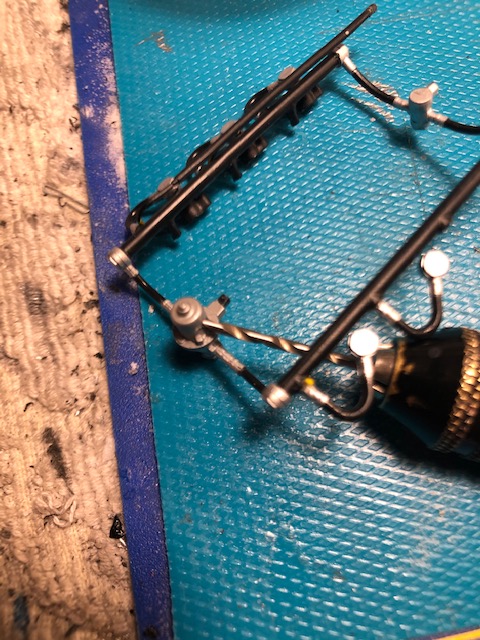 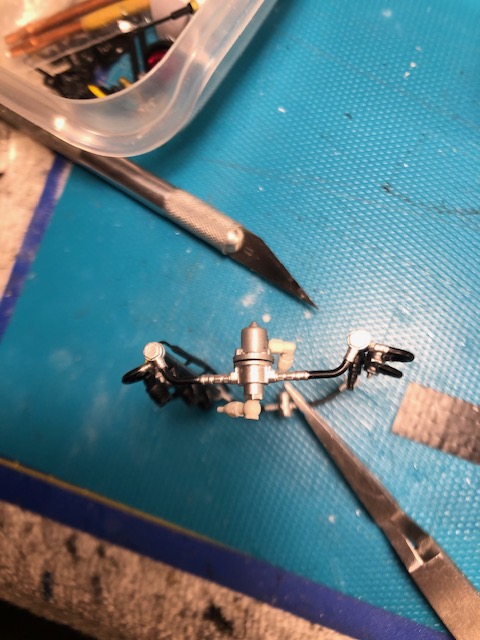 Collection active: Lotus 97T, Audi Quattro A2, Vw Maggiolino '60
Work in progress: Porsche 911 RS Turbo
Completed model: Delta WRC Martini, Mclaren MP4/4, Golf GTI 1/8 Tuned
|
|
|
Rank: Vice-Master Groups: Registered
Joined: 05/04/2016 Posts: 706 Points: 2,121 Location: Ferrara
|
|
|
|
Rank: Vice-Master Groups: Registered
Joined: 05/04/2016 Posts: 706 Points: 2,121 Location: Ferrara
|
|
|
|
Rank: Vice-Master Groups: Registered
Joined: 05/04/2016 Posts: 706 Points: 2,121 Location: Ferrara
|
|
|
|
Rank: Vice-Master Groups: Registered
Joined: 05/04/2016 Posts: 706 Points: 2,121 Location: Ferrara
|
|
|
|
Rank: Vice-Master Groups: Registered
Joined: 05/04/2016 Posts: 706 Points: 2,121 Location: Ferrara
|
|
|
|
Rank: Vice-Master Groups: Registered
Joined: 05/04/2016 Posts: 706 Points: 2,121 Location: Ferrara
|
|
|
|
|
Guest
|
 US
US

