|
|
 Rank: Vice-Master      Groups: Registered
Joined: 05/04/2016 Posts: 702 Points: 2,109 Location: Ferrara
|
I started to work on top of monocoque. The kit is well done but lacking in other elements. I painted the filler neck in semi-glossy black; looking also at Hiro's instructions there are indications to paint the external crown of filler in light gun metal .... it is not painted, but the crown is depainted due to the use of the fuel filler. To simulate this, I drybrushed the crown. Also in this area there are various missing elements which are: - electrical wiring with connector (I think for inside tank fuel pump) - Air vent pipe for vacuum when the car was was refueling (in a photo I see a mechanic with the 10 lt gravity tank on it with this vent connected while refueling) - Fuel inlet e fuel outlet joints - A joint that start from fuel filler to connect at another connection on right fuel rail on engine. Before proceeding I had to check if there was enough area to add the missing details. There was some problems with space between fuel filler and ECU ... I repositioned the main ECU I removed the pegs from the ECU to move it lower by 3-4 mm, Now I have enough space to make 4 holes for: - Fuel inlet - Fuel outlet - plug for fuel pump - Vacuum fuel hose For the fuel pump plug I worked in the following way: a die-cut nut, I drilled and added a plug and then wired. For venting the vapors: die-cut nut, 1mm wire and white tube. Gas delivery and return are already in progress.   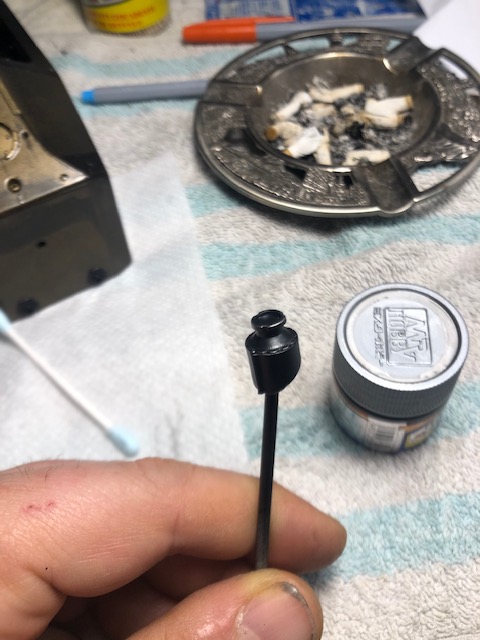 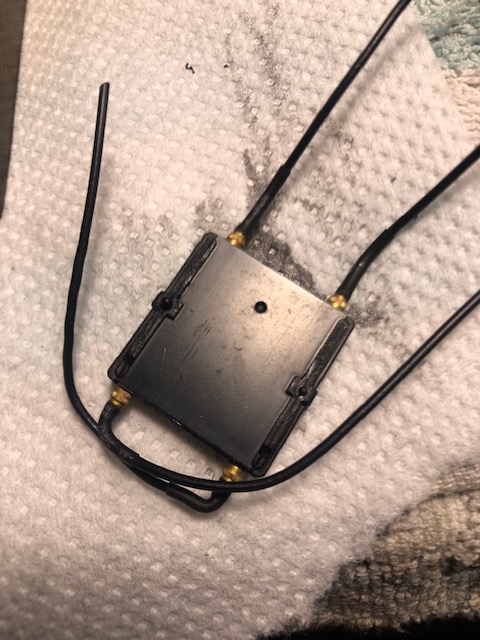  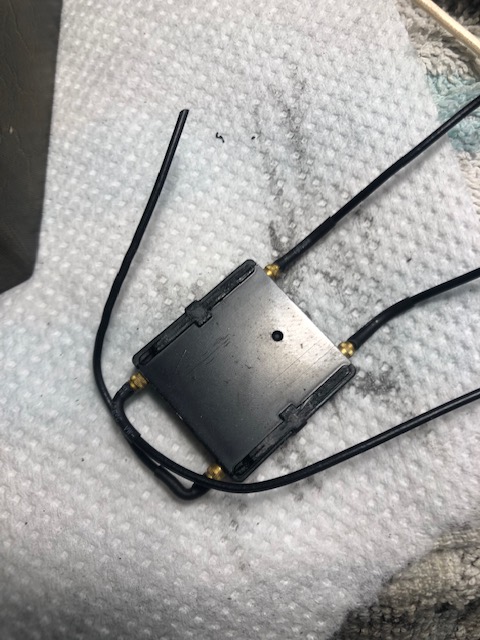 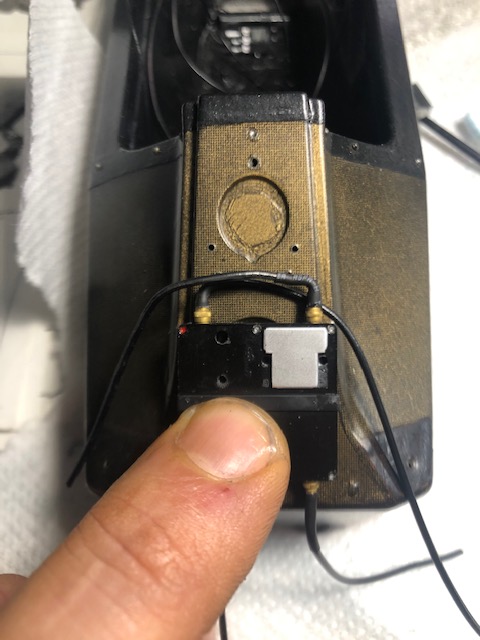 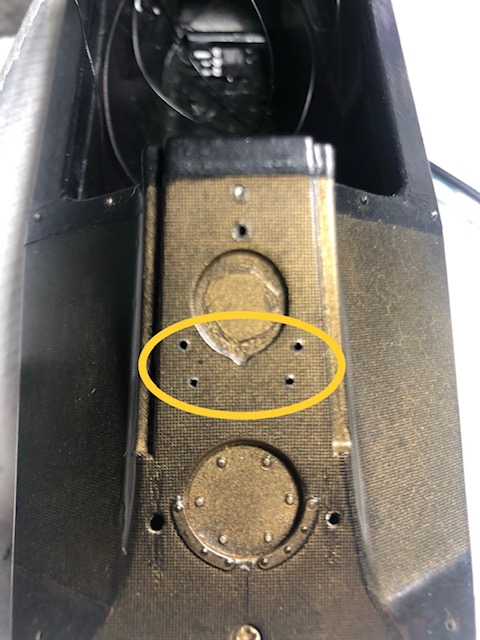 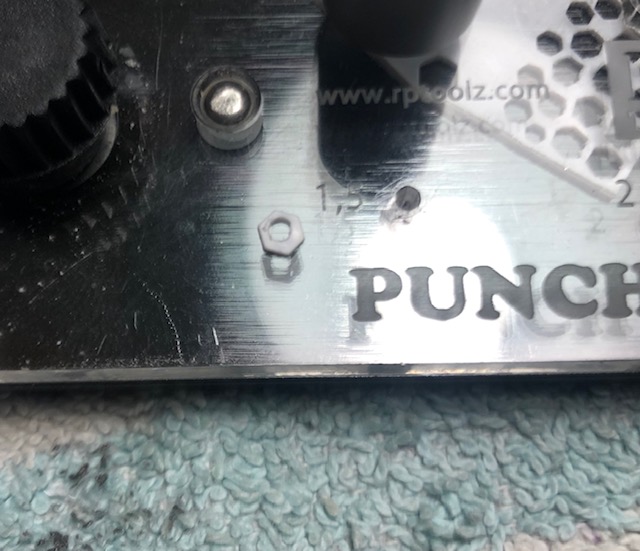    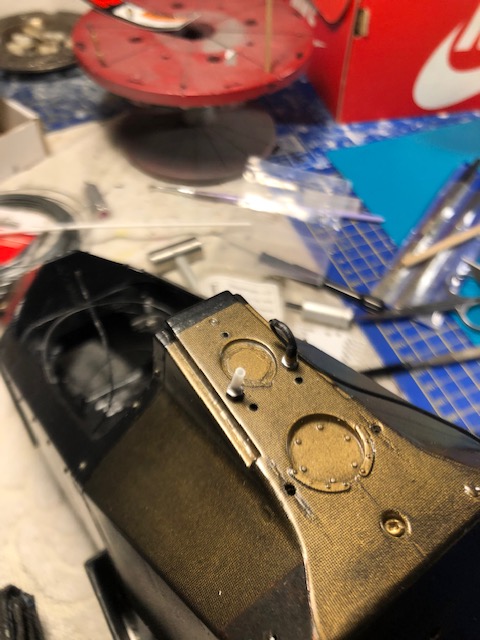 Collection active: Lotus 97T, Audi Quattro A2, Vw Maggiolino '60
Work in progress: Porsche 911 RS Turbo
Completed model: Delta WRC Martini, Mclaren MP4/4, Golf GTI 1/8 Tuned
|
|
|
Rank: Vice-Master Groups: Registered
Joined: 05/04/2016 Posts: 702 Points: 2,109 Location: Ferrara
|
After several days that I think to solve all fuel system A visible element is a joint (with an orange ergal section) which has mounted on the right injector rail. From this joint start a hose... after several searches and different pics, I understand that the hose ends up on a joint fixed to the side of the fuel filler neck. I try to made with my best own this joint using a nut M 1.4, plasticard, wire and Hex nut Topstudio. I follow the paint scheme following the references and I painted it. I think it is an additional fuel return or vacuum hose. To insert this joint I drilled 1mm the rail. I Positioned it and is not bad, but I will have to redo the wiring harness bracket because on the real the joint is internal and the electric plug is external. I dry fitted the the joint for inlet and outlet fuel, fuel filler and ECU to see if space is enough and good working…..it seems good. Last (happy) discovery: I noticed a hole on the post left bottom of the monocoque. It is the passage hole of the rear brake circuit ..... MFH instruction, Top Studio details set give an incomplete instructions and I could not understand where the passage was. All instruction of MP4/4 kit fit the brake hoses from the calipers to the T-joint on the upper part of the gearbox. From this T-joint start and die the main line under the gearbox..... but I want to know the connection to the master cylinder In the end, a technical drawings on Haynes' book show a way between tank and monocoque. And this way start from this: I finally came to discover the complete passage of the rear brake circuit that I can now connect on my MP4/4  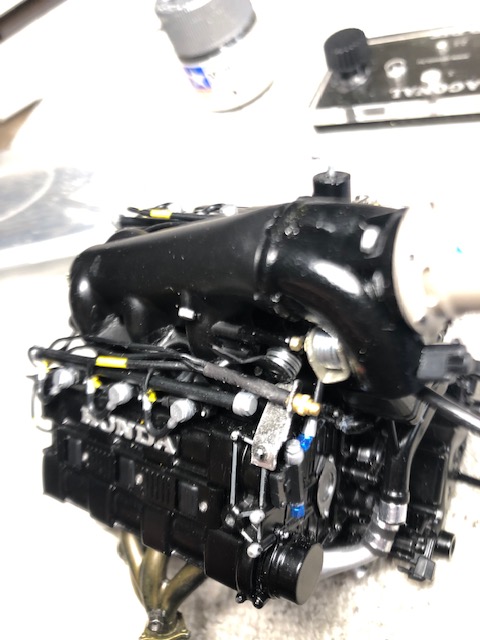  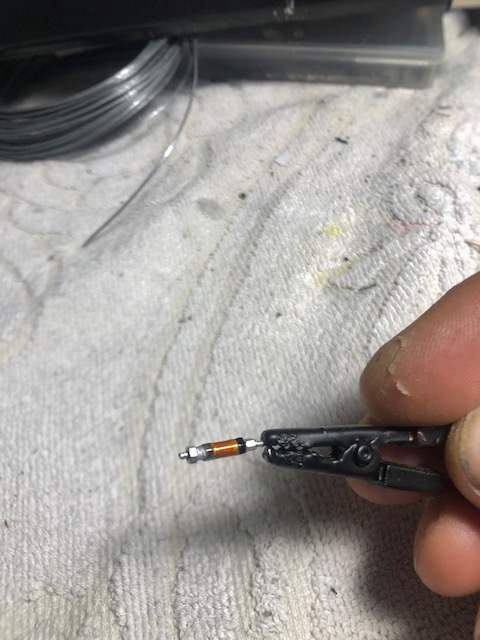 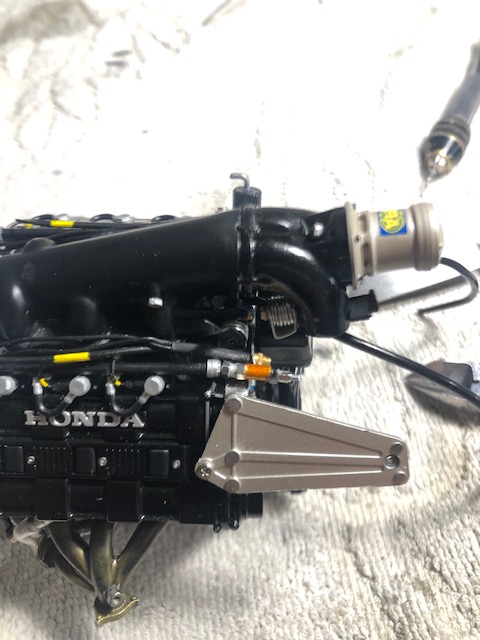 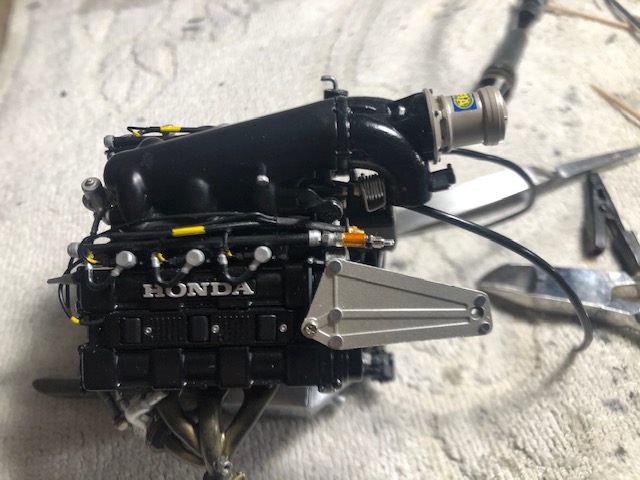  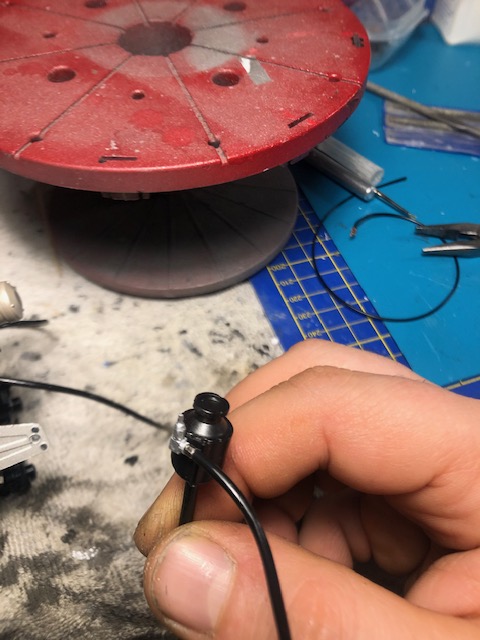 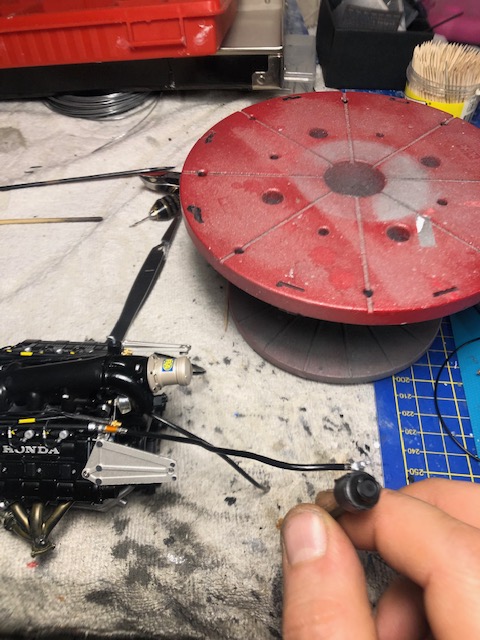 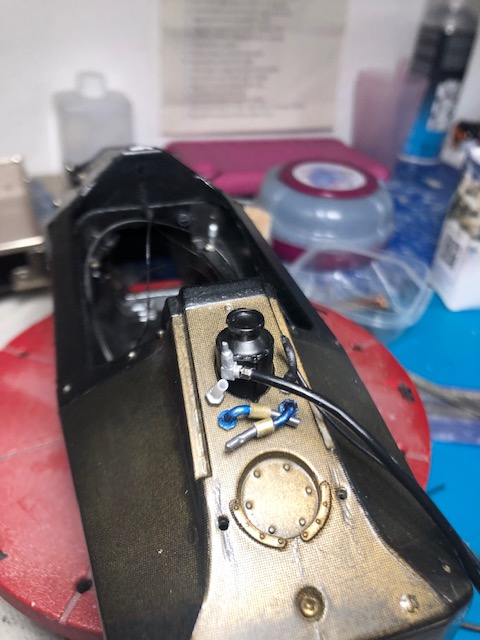 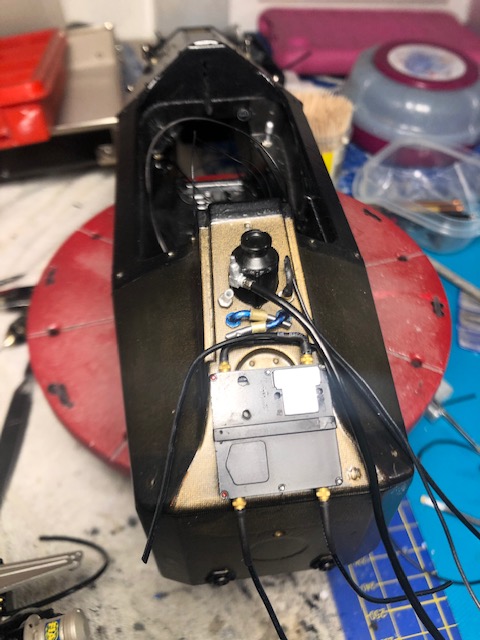 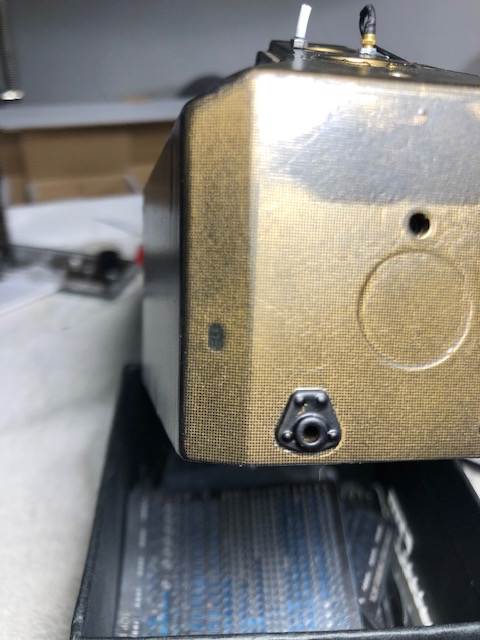 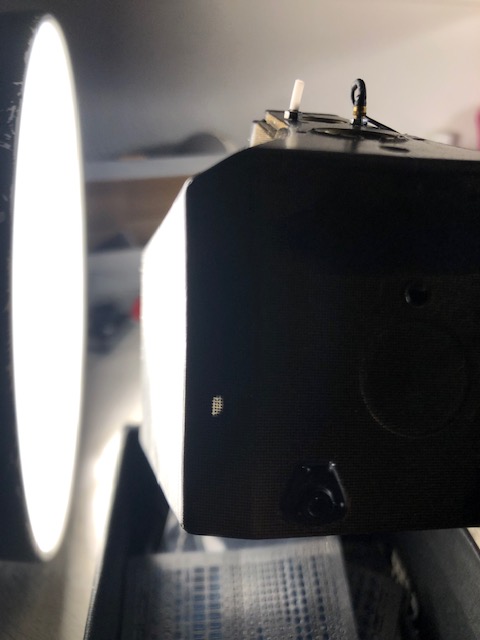 Collection active: Lotus 97T, Audi Quattro A2, Vw Maggiolino '60
Work in progress: Porsche 911 RS Turbo
Completed model: Delta WRC Martini, Mclaren MP4/4, Golf GTI 1/8 Tuned
|
|
|
Rank: Vice-Master Groups: Registered
Joined: 05/04/2016 Posts: 702 Points: 2,109 Location: Ferrara
|
I Continue with the engine and missing details. I'm focused on the position throttle sensors. These Sensors are good but missing electrical plugs. I reproduced them in a basic way to go ahead with the work (Top Studio are out of stock due to CoronaVirus) ..... as the Top Studio will be available, I will order and I will replace them. The position sensors have two colors (blue and black) to recognize their side. With 0.7 wire, styrene, heat shrink and color, I tried to give my best work I also added the missing PE Allen keys on the sensors. Another change that awaited me: the fuel joint on the right injector rail (the orange ergal ) that runs behind the wiring bracket. I reshaped the bracket to recreate the correct fitting. Another big missing: the reinforcement rods placed on the rocker covers and that are fixed on the front of the wishbones structure. I started with the easy part: I reproduced the U-bracket positioned on the camshafts with a square profile of styrene ..... I will have to study how to reproduce the connecting rod ... but first I have to wait to assemble the whole group of rear suspension. I finished the work on the main ECU by connecting the 3 colored plugs (black, gray and blue), and the other aluminum and titanium gold connectors. A peculiarity about an additional ECU for the Japanese GP there is the presence of a letter "A". I used a Martini and I got the letter I (re) worked the brackets that hold the hose that connects the turbo conveyors to the wastegate: I re-profiled, drilled and added 0.35 wire. I worked on a critical point of this construction. This model is good and strong assebly .... but there’s a weak point on exhaust system has: the turbo and external exhaust assembly are supported by a single point of contact. At first attempt I used cyano glue .... then I used bicomponent. I Dry mounted monocoque, radiator pods and intercooler conveyors and everything seems to fit good. I worked on the exhausts: the first time was good but they were too rusty look I started mixing powders between titanium, light gun, gun metal .... and looking at the references and now arw quite similar to 1:1 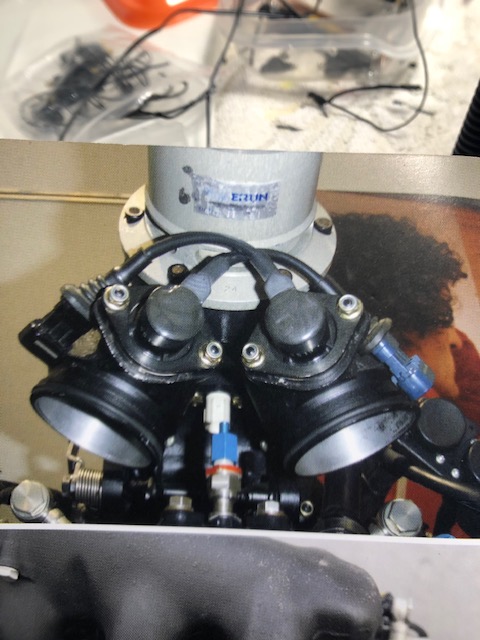  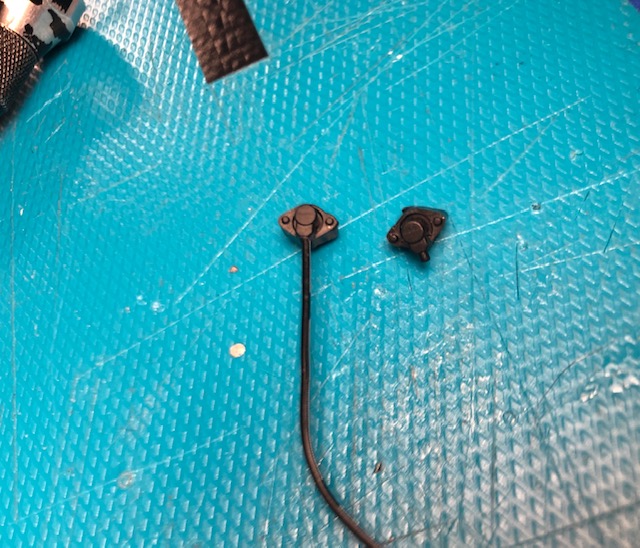 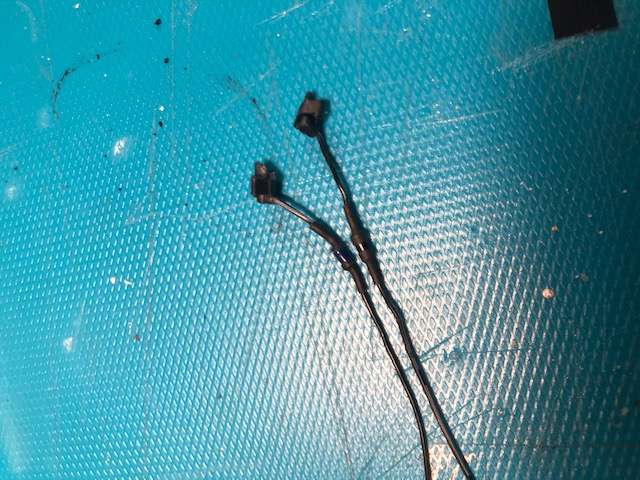  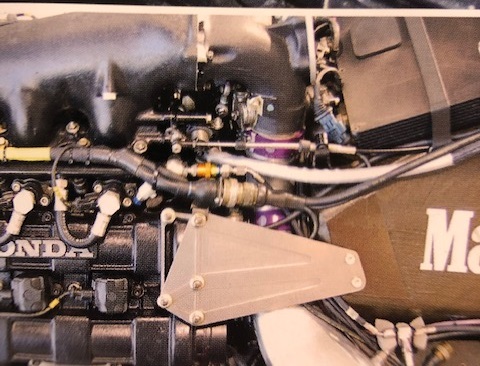   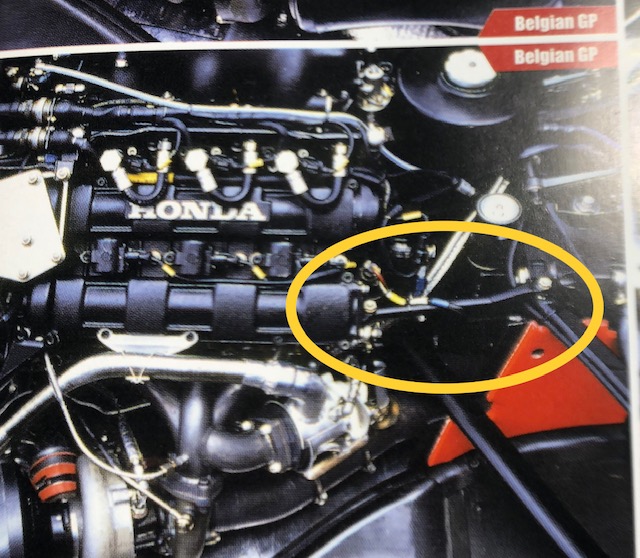      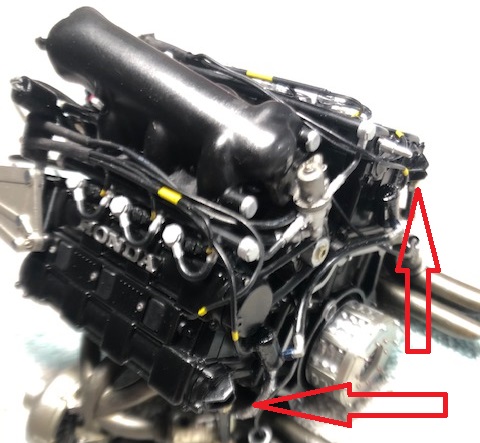            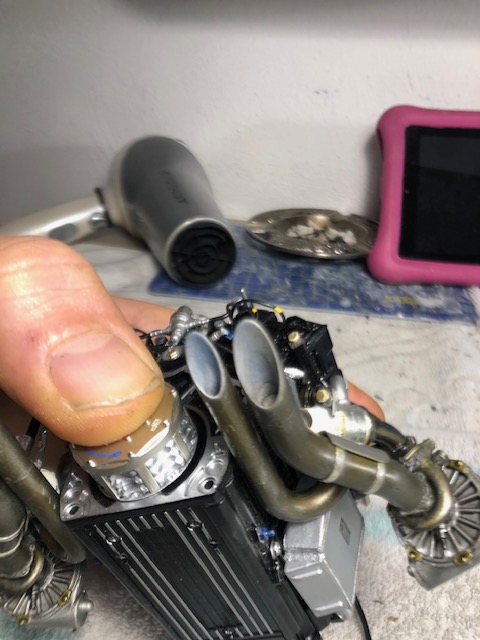 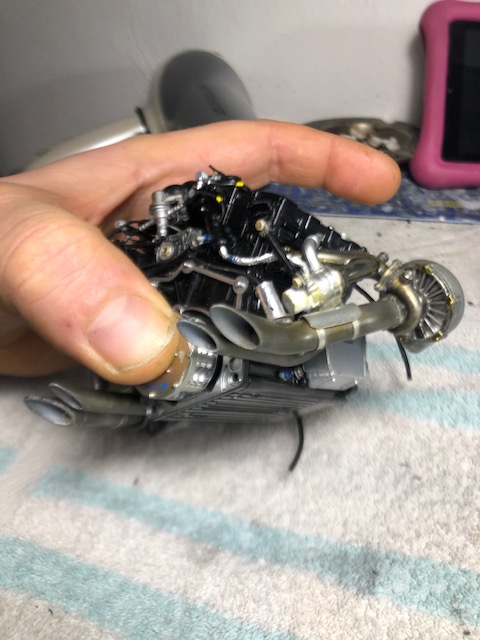 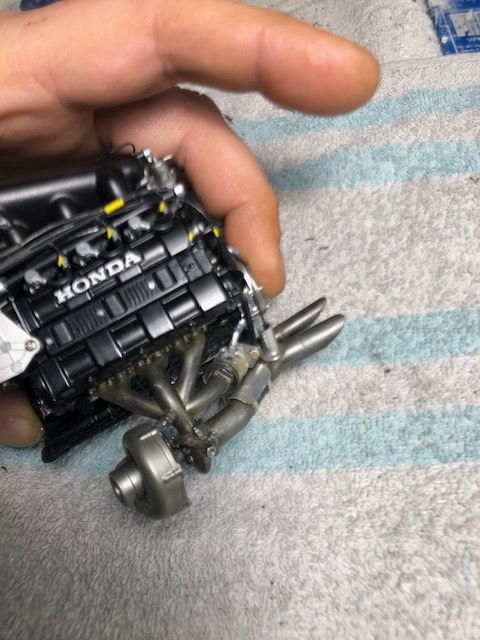 Collection active: Lotus 97T, Audi Quattro A2, Vw Maggiolino '60
Work in progress: Porsche 911 RS Turbo
Completed model: Delta WRC Martini, Mclaren MP4/4, Golf GTI 1/8 Tuned
|
|
|
|
|
 Funnily enough I have been looking at those same wires today and have just sourced some extra wire from Hiroboy . Yours is looking sweet and top work as usual from you   Current builds:-C57,Zero, Lamborghini Countach, Caldercraft HMS Agamemnon,Robi,R2-D2, MFH Cobra .
|
|
|
|
|
Excellent work throughout and a pleasure to see..... very well done indeed.... Regards Alan
|
|
|
Rank: Vice-Master Groups: Registered
Joined: 05/04/2016 Posts: 702 Points: 2,109 Location: Ferrara
|
Gandale wrote:Excellent work throughout and a pleasure to see..... very well done indeed.... Regards Alan Thanks too much mate...i hope for everyones and everythings this virus will be eradicated. I continue with the study of this Mclaren. I Return to the radiator bleeding pipes .... I wanted to check if they are connected to the expansion tank, but this is not the right fitting system ... when they bleed for the pressure they did it directly to the rear. They both start from the radiators .... and they passed behind the engine brackets, the passage was no longer clear. I deduced that it connects to the expansion tank ... and it’s an error. The pipes pass between the head and over the cranckcase (a clear pic of the engine pulled by a Japan mechanic revealed these hoses) And another photo shows them clear visible, they’re just under the bigger hose of the oil breather ... and they all end up one side of the end of the gearbox .... then they vent directly on the track. Another detail: the mp4 / 4 at Motegi shows these radiator pipes with the pink coolant.... At the time of 1988 in Honda they used distilled water as liquid because it had a best performing heat exchange compared to normal glycol-based liquids. To prevent corrosive effects of distilled water on internal components, Honda was usual to add some addicitive The correct color of these tubes (when they bleed) was transparent green ..... but in most cases they were natural white ... Replying Suzuka I will mount the white transparent tubes in place of the pink ones that are on Motegi's car.  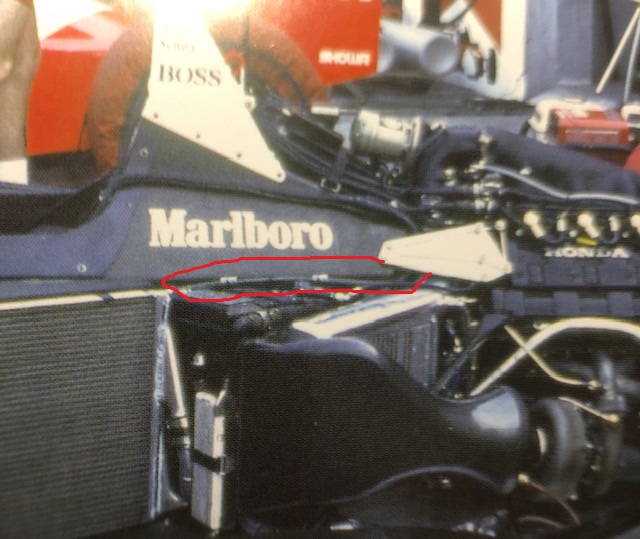  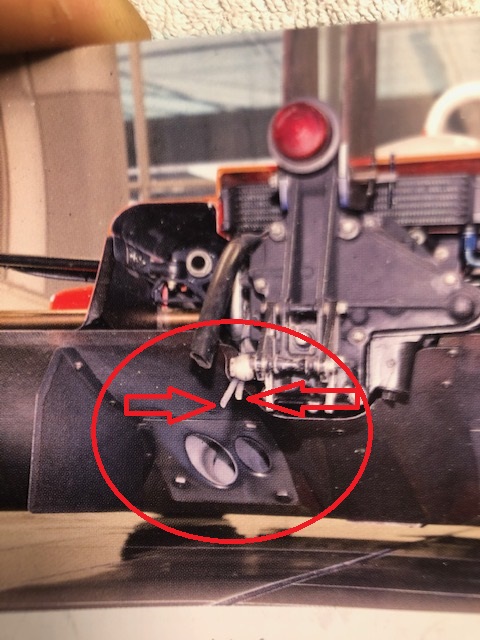 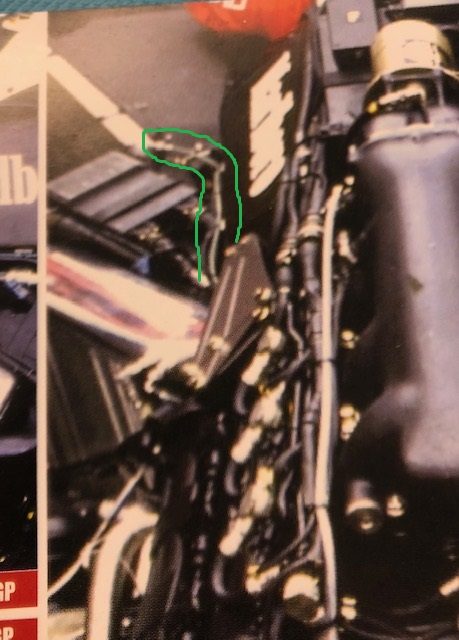  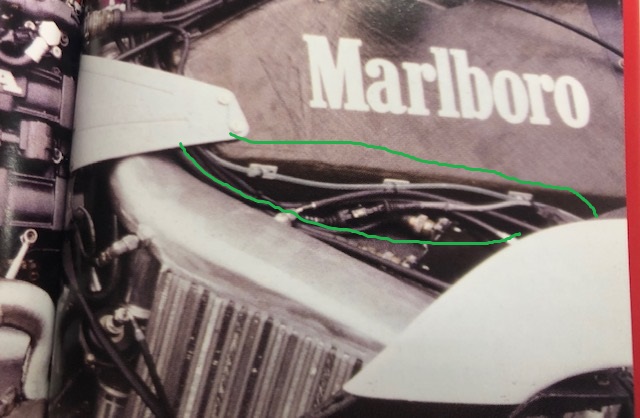 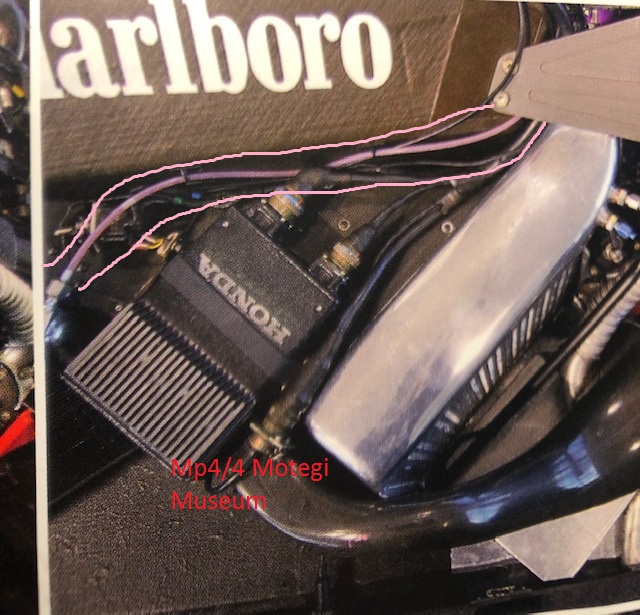 Collection active: Lotus 97T, Audi Quattro A2, Vw Maggiolino '60
Work in progress: Porsche 911 RS Turbo
Completed model: Delta WRC Martini, Mclaren MP4/4, Golf GTI 1/8 Tuned
|
|
|
Rank: Vice-Master Groups: Registered
Joined: 05/04/2016 Posts: 702 Points: 2,109 Location: Ferrara
|
|
|
|
|
|
Excellent work, lovely detailing.  Mark
|
|
|
 Rank: Super-Elite   Groups: Official Builds, Administrators, Moderator, Global Forum Support, Registered Joined: 04/06/2011 Posts: 4,206 Points: 12,763 Location: ipswich
|
Yet more lovely work. You really are pulling out all the stops with this.
|
|
|
Rank: Vice-Master Groups: Registered
Joined: 05/04/2016 Posts: 702 Points: 2,109 Location: Ferrara
|
Markwarren wrote:Excellent work, lovely detailing. Mark roymattblack wrote:Yet more lovely work. You really are pulling out all the stops with this. Tnaks too much Mark and Roy  Collection active: Lotus 97T, Audi Quattro A2, Vw Maggiolino '60
Work in progress: Porsche 911 RS Turbo
Completed model: Delta WRC Martini, Mclaren MP4/4, Golf GTI 1/8 Tuned
|
|
|
Rank: Vice-Master Groups: Registered
Joined: 05/04/2016 Posts: 702 Points: 2,109 Location: Ferrara
|
|
|
|
Rank: Vice-Master Groups: Registered
Joined: 05/04/2016 Posts: 702 Points: 2,109 Location: Ferrara
|
|
|
|
Rank: Vice-Master Groups: Registered
Joined: 05/04/2016 Posts: 702 Points: 2,109 Location: Ferrara
|
|
|
|
Rank: Super-Elite Groups: Official Builds, Administrators, Moderator, Global Forum Support, Registered Joined: 04/06/2011 Posts: 4,206 Points: 12,763 Location: ipswich
|
Amazing work. I'm really enjoying seeing what you are doing.
|
|
|
Rank: Vice-Master Groups: Registered
Joined: 05/04/2016 Posts: 702 Points: 2,109 Location: Ferrara
|
roymattblack wrote:Amazing work. I'm really enjoying seeing what you are doing. Thanks too much Roy Collection active: Lotus 97T, Audi Quattro A2, Vw Maggiolino '60
Work in progress: Porsche 911 RS Turbo
Completed model: Delta WRC Martini, Mclaren MP4/4, Golf GTI 1/8 Tuned
|
|
|
Rank: Vice-Master Groups: Registered
Joined: 05/04/2016 Posts: 702 Points: 2,109 Location: Ferrara
|
Intercooler, ducts and bypass valve. This mp4/4 is equipped with a complex pressure control system which is regulated by a series of electrovalves located on right radiator pod. From these solenoid valves a series of pressure pipes occurs The duct is present in the kit but the bypass valve is totally missed. My friend has rebuilt and machined for me of the new ducts and by-pass valves. The kit instructions said to put a tape to imitate a the rubber joint .... in reality the system is different. This duct is separated into 3 part: lower, central with valve throttle system and upper. In a single photo where it is taken very closely it is possible to saewthe presence of a rubber joint that fixes the lower duct to the bypass valve duct. The bypass valve duct is dark steel and not aluminum. I drilled the duct for the activation of the bypass valve. I masked the ducts, I gave primer, and a final coat of gun metal. I madethe rubber joint of the three elements, aluminum clamp; finally with a 1mm piece of wire, I connected and put the bypass valve and its connection banjo in its place. The valve in Woking is titanium colored, in race "the mushroom" was black, and therefore it will be painted in black. It was then the turn of the calipers. The brake calipers show some peculiarities: The pumping elements are connected by a braided hose passing through lower side of calper. The pumping elements are equipped with extenders which push the pads against the disc. These extenders are steel-colored and have violet reflections due to the very high temperature reached during braking. The calipers are then equipped with 4 heat shields (without Haynes' book I would never have discovered such details) which go to repair the surrounding part of the piston. Other peculiarities, bleeder valves are located on the top of the external side of calipers. Riccardo (with his great hand and patience) also reworked my calipers: Kyosho supplies the brake with printed bleeder, no hole for the braid to pass through. (printed bleeder and through hole were made by my friend) The caliper in the shapes is correct and well made, but missing a series of details. In backlight you can see the passage hole in which a 0,6 braided cable from the top studio will slide. The cable will be on one side fixed to a Hex bolt always from the Top studio. Banjio and bleeder: I ordered one maounth ago banjo and bleeder from RbMotion ...... I think they are dispersed in the Atlantic. Unable to wait, I started to change the banjo. I used 2 mm resin studio top joint; cut the pin for the braided cable and drilled with a 0.8 In this way, the braided cable will fit into the banjo. I then started the detail of the pump extenders: burnt iron coat and a wash with very very diluted violet Gun metal for the heat shields and for the 2 bolts that fix the calipers to the hubs, for the banjo instead silver chrome ... to highlight the details the comparison with an out of box caliper.  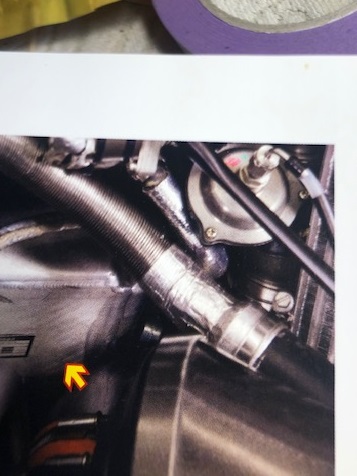 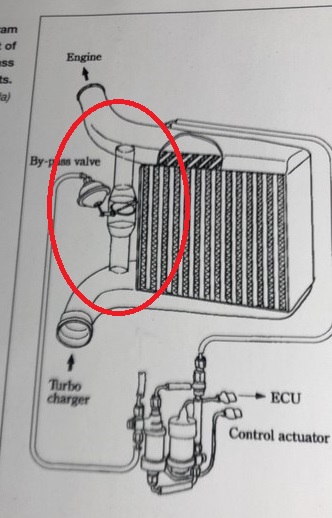 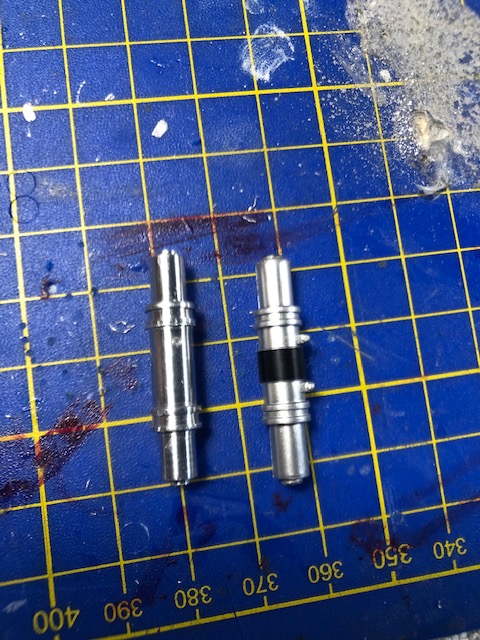 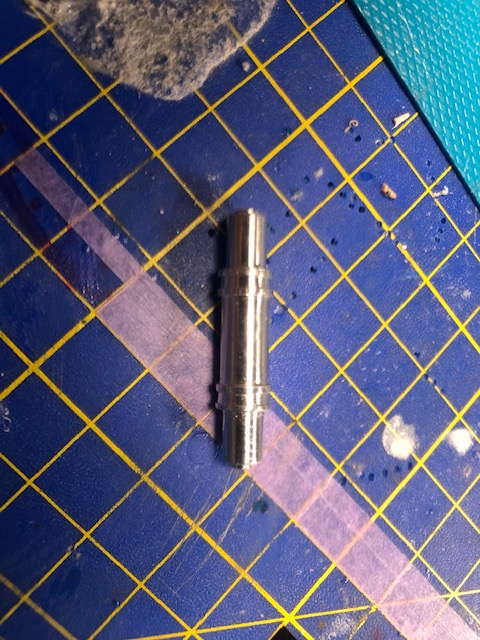 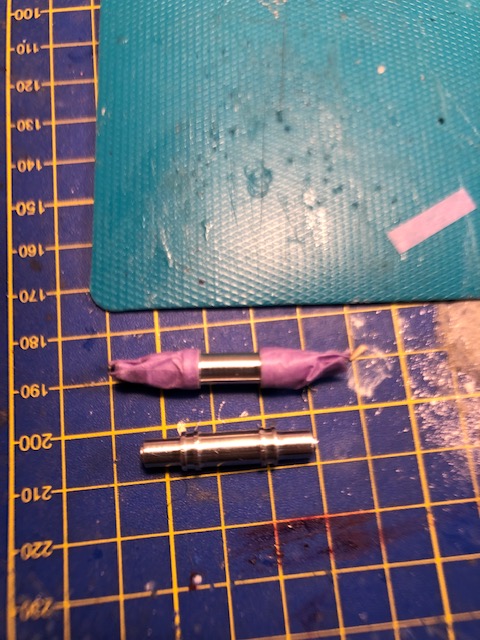 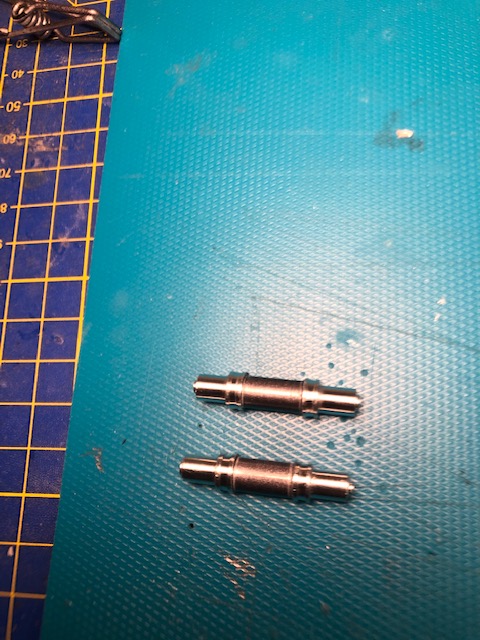  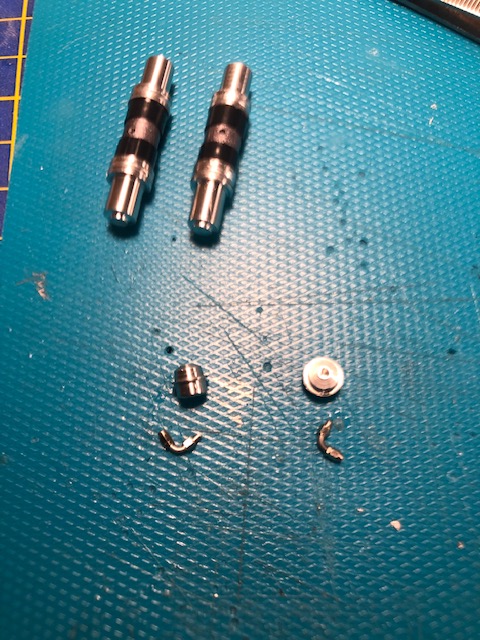 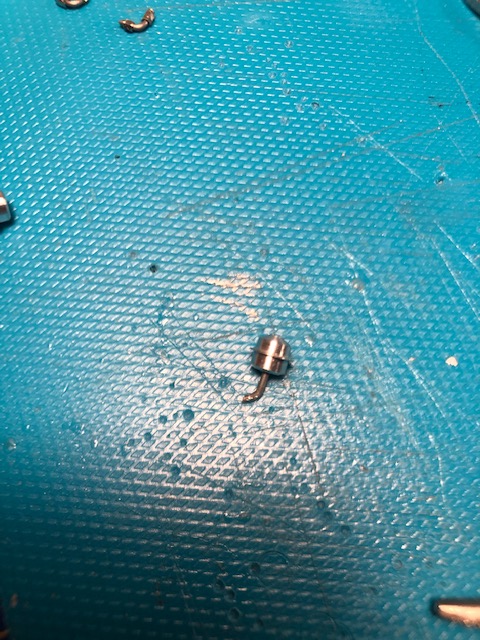 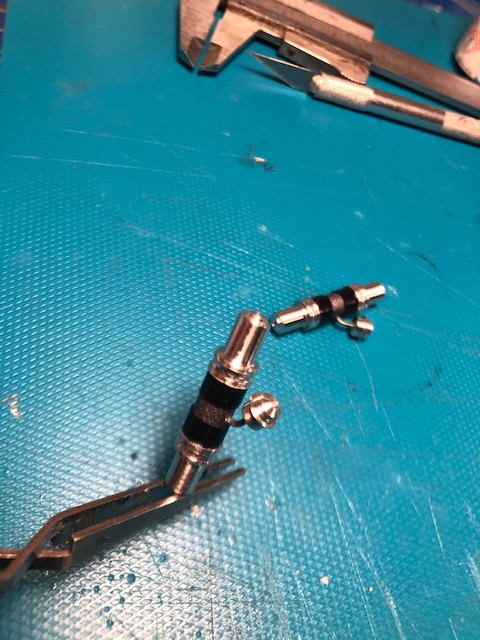 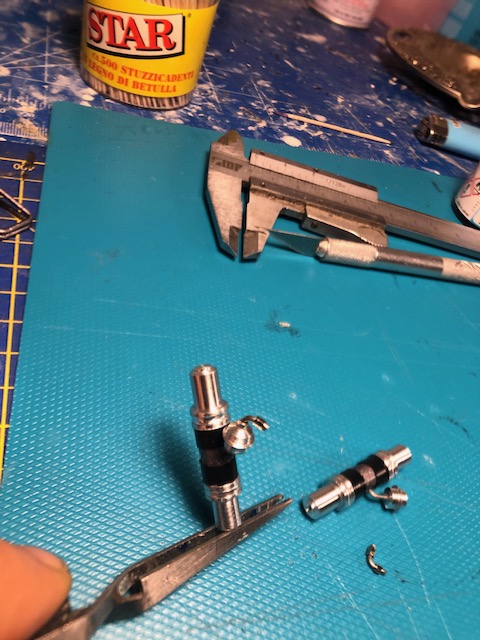 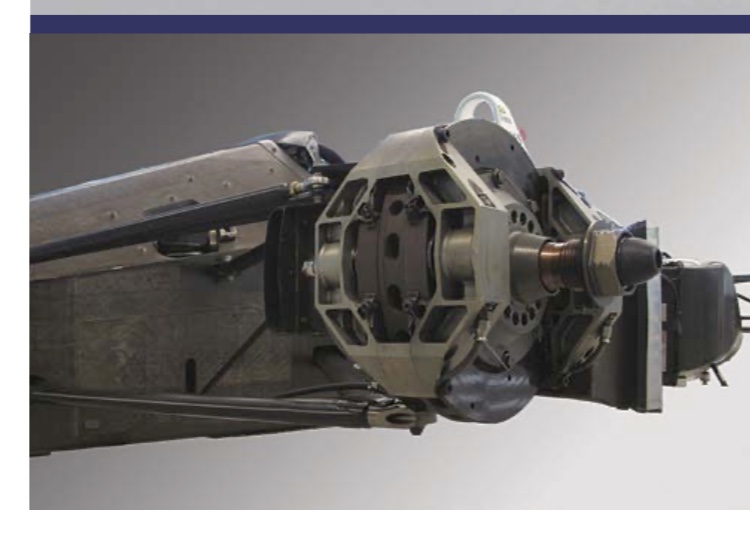 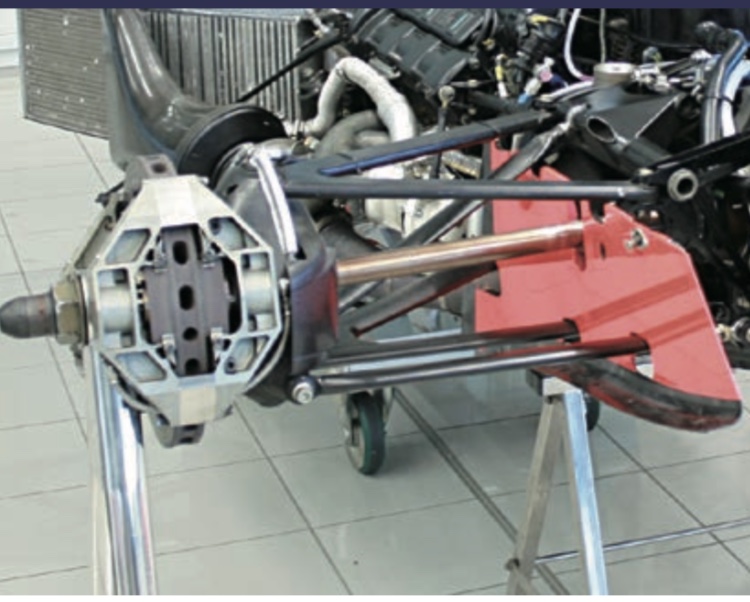  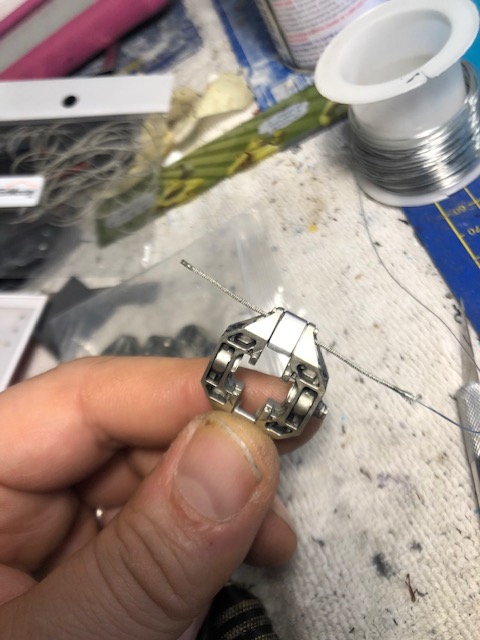  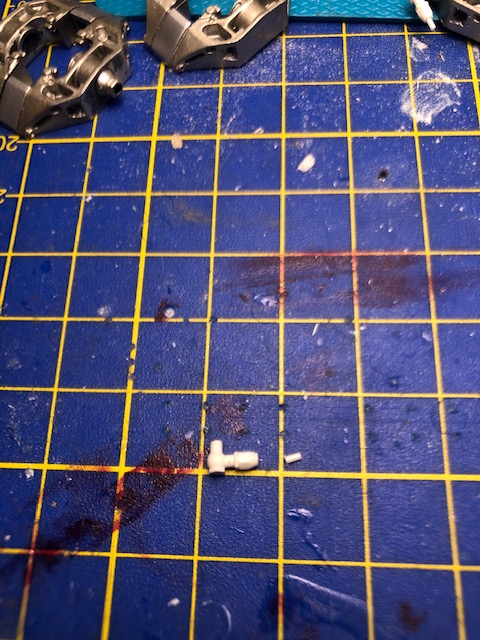 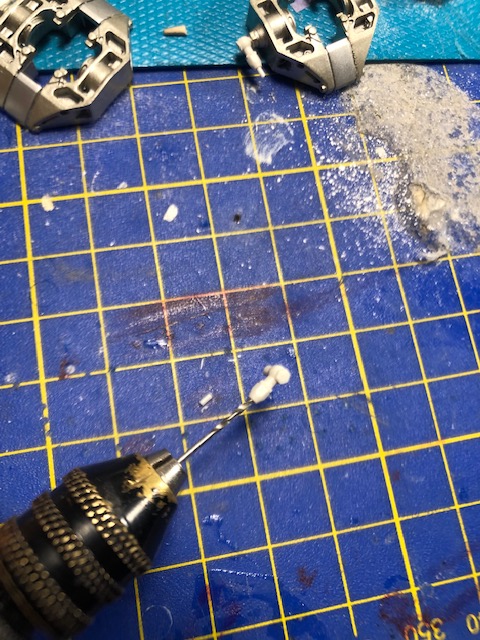 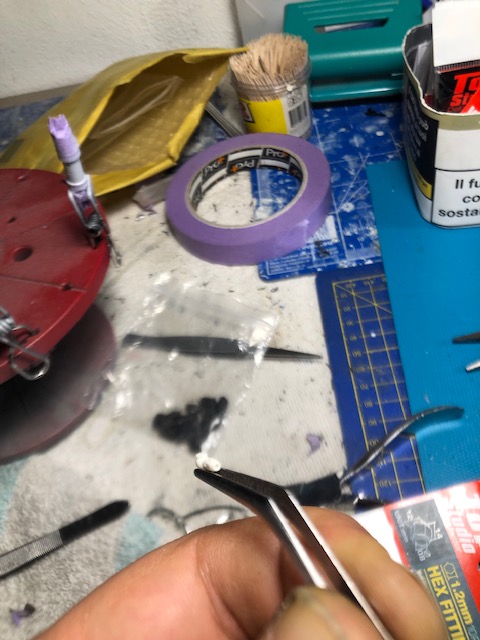  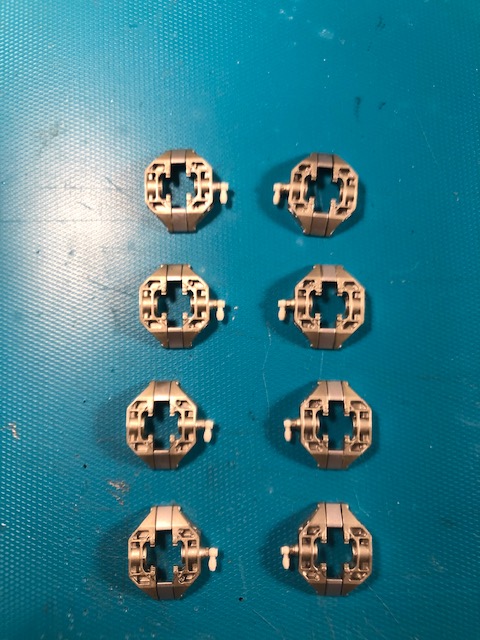 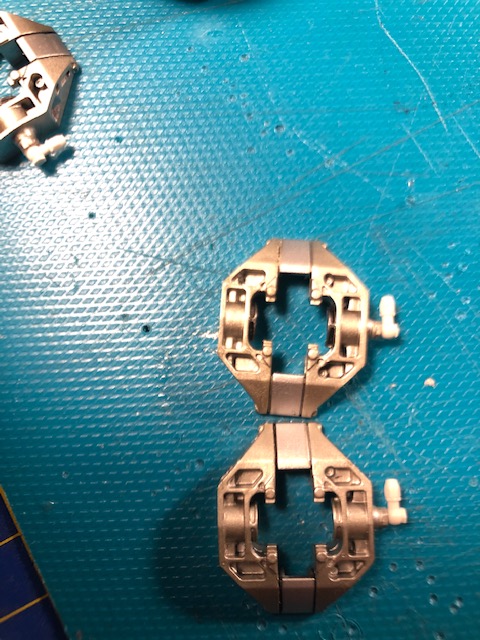   Collection active: Lotus 97T, Audi Quattro A2, Vw Maggiolino '60
Work in progress: Porsche 911 RS Turbo
Completed model: Delta WRC Martini, Mclaren MP4/4, Golf GTI 1/8 Tuned
|
|
|
Rank: Vice-Master Groups: Registered
Joined: 05/04/2016 Posts: 702 Points: 2,109 Location: Ferrara
|
|
|
|
 Rank: Master   Groups: Registered
Joined: 25/11/2018 Posts: 1,256 Points: 3,791 Location: Southeast UK
|
|
|
|
Rank: Vice-Master Groups: Registered
Joined: 05/04/2016 Posts: 702 Points: 2,109 Location: Ferrara
|
Kev the Modeller wrote:Fantastic detailing as always Francesco, great to see such dedication to authenticity!
Very well done. 
Kev  Thank too much Kev In the week I started and finished (just some final details to add) to assemble the front suspension group. A detail visible on the braking system are 3 colored mark on the discs and pads. I think that these marks (made with some particular paint) varied the color second of the temperatures reached. I also wanted to reproduce them. Before going up with the complete hubs I worked to the 3-way braking joint. This joint presents some differences between the race car in and the one at the museum: in the race the braid is covered with a black sheath, a Motegi the sheath is in heat shield aluminum . The first time I made it in aluminum, this time I made it black like on “race mode”. To improve a vision of this joint: I drilled the joint, I inserted a 1mm pin,I added M 1.4 bolts and finally put the new black hoses. Before fixing everything to the lower wishbone, I tried to understand the position of the tube that connects to the master cylinder from the joint. It’s fixed with clamps and is positioned in the rear area of the arm profile (I imagine for a better aerodynamic efficiency) To fix the joint on the arm I created an invisible support on the arm: I made a bolt with punch and die, I glued and painted black and then I fixed the joint on wishbone. Before to assembling everything, I focused on the cross screws of the various steering arms and tie rods. The head screw is not a pretty look… so I could have masked the heads with punch & die dice. The screws are 1.4 m, I also have 1,4 bolts .....so I turned 180 degrees all the bracket on the monocoque, I inverted the bracket of the steering tie rods on the hubs, I screwed all the screws "from below" and finally I saw the bolts from above ...... now it has a better look. I then mounted the carbon brake vents and some pics. 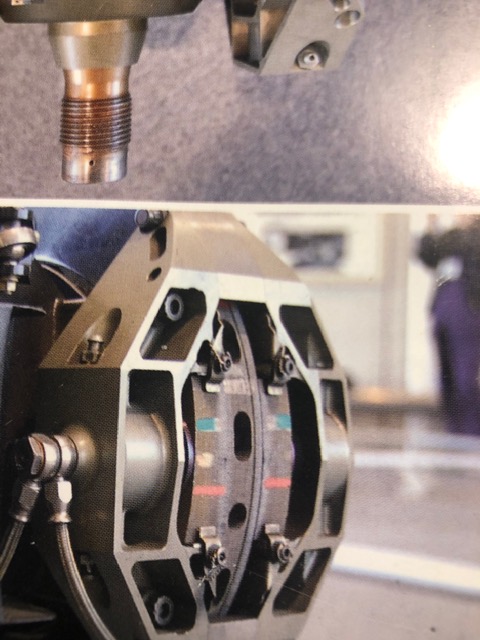 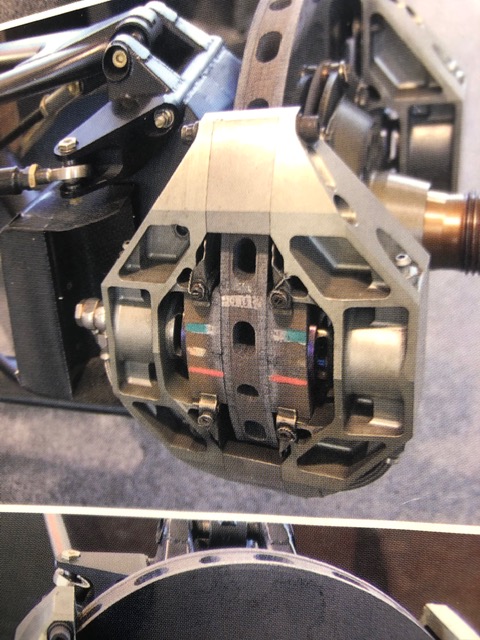 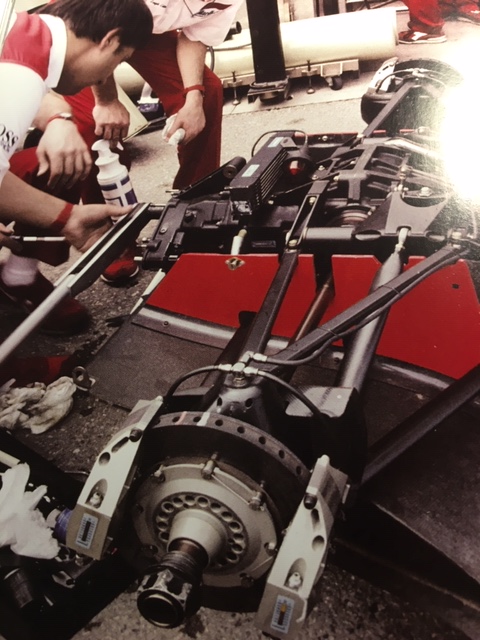   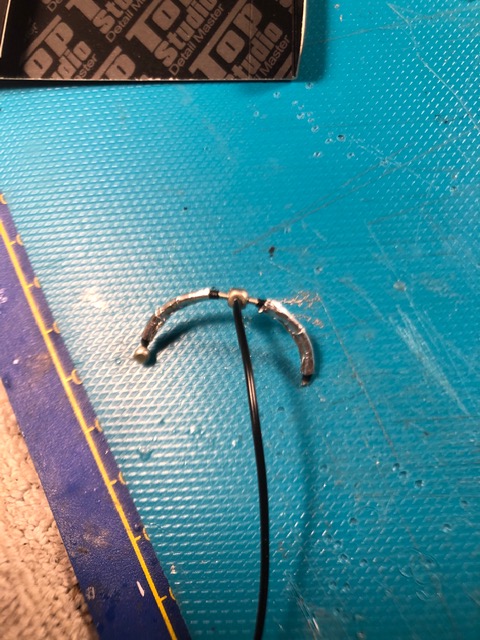 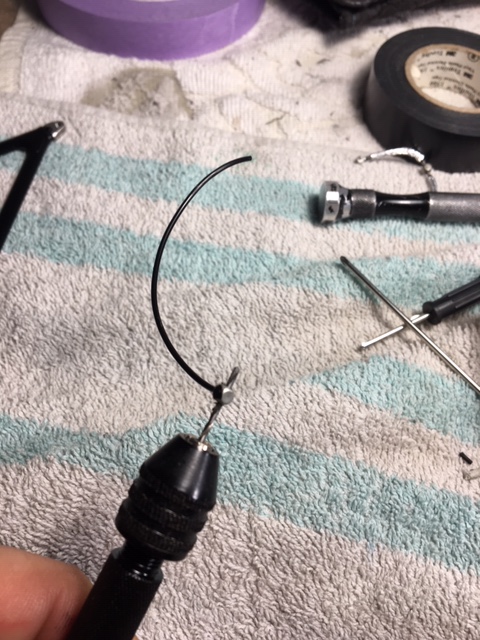 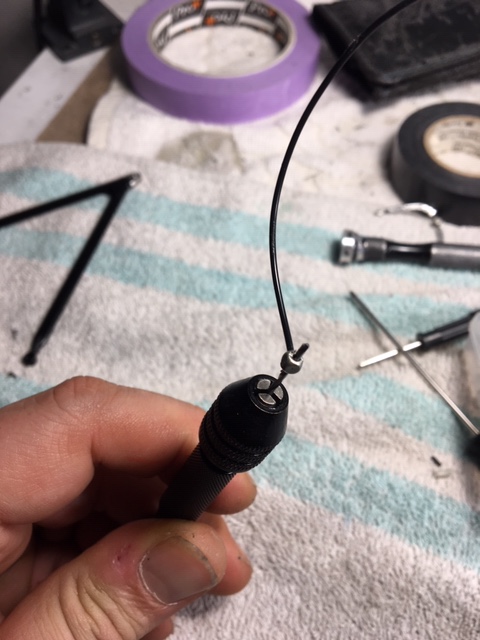 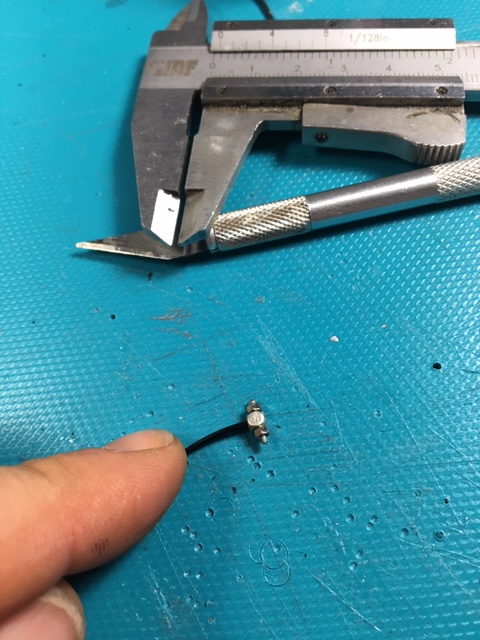  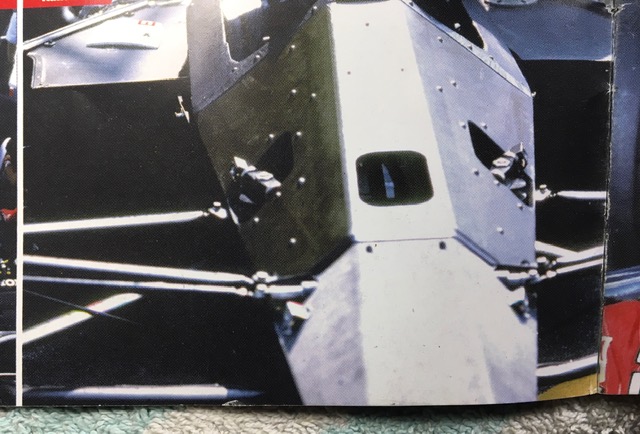 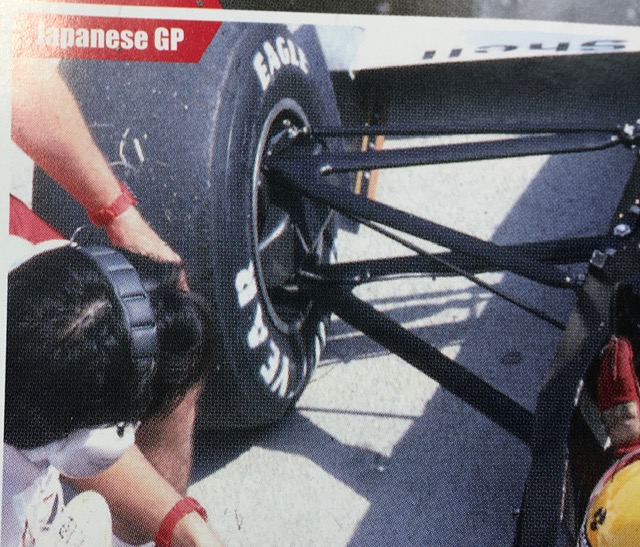   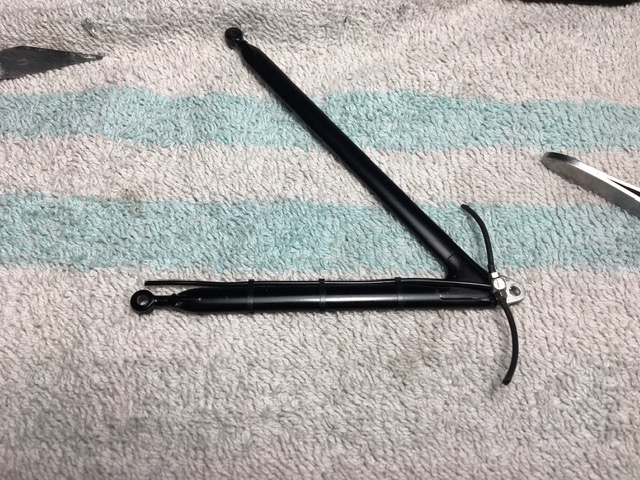  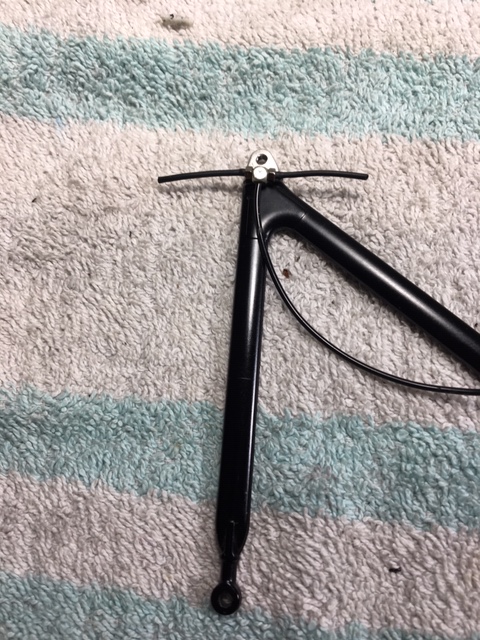  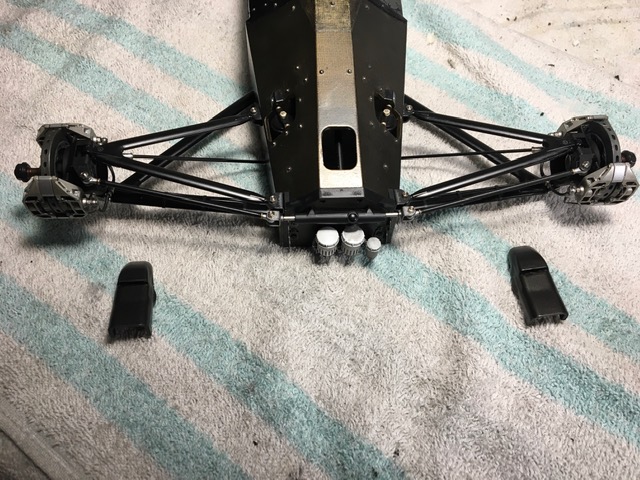  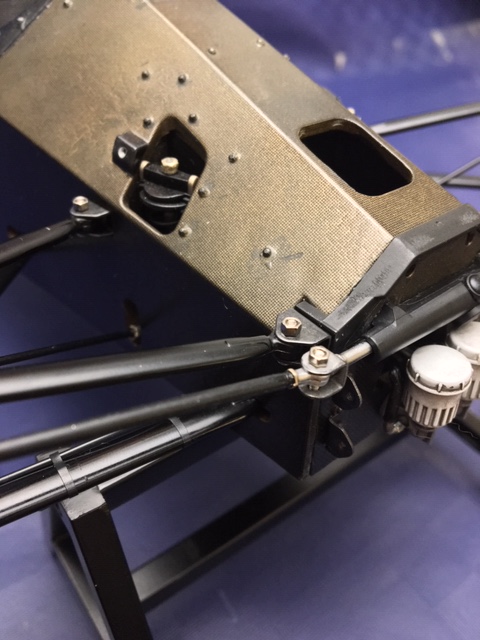  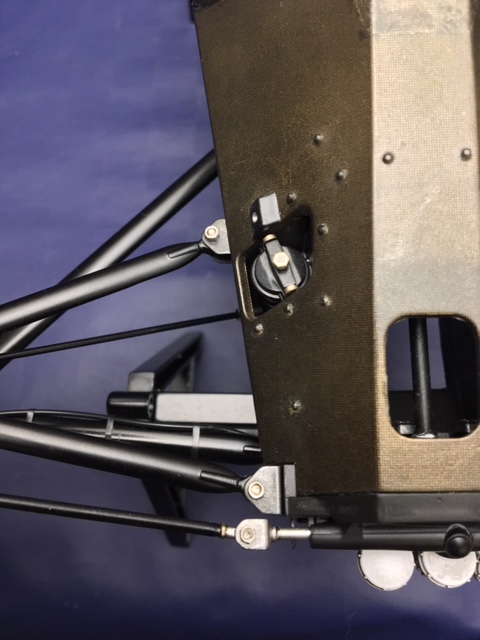   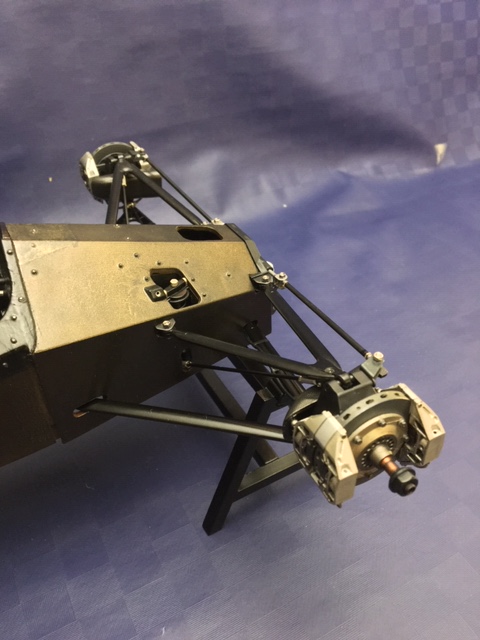   Collection active: Lotus 97T, Audi Quattro A2, Vw Maggiolino '60
Work in progress: Porsche 911 RS Turbo
Completed model: Delta WRC Martini, Mclaren MP4/4, Golf GTI 1/8 Tuned
|
|
|
|
|
Some great work going on there.
Malc.
|
|
|
|
Guest
|
 US
US

