|
|
 Rank: Vice-Master      Groups: Registered
Joined: 05/04/2016 Posts: 705 Points: 2,118 Location: Ferrara
|
Yesterday I “married” the monocoque with radiator pods. To put everything in right position I fitted the undertray. To fix the radiator pods I used the 2k glue instead of classic cyano. I also made a dry fitting with the engine to check one critical point: the turbos with intercooler Another detail mounted is the secondary Ecu on the undertray .... I have slightly set it back so as to leave space for the future tie rod that run from rocker covers to the floor of undertray between the Ecu and intercooler While everything is fixed, I work on side bulkheads that are in front of the radiators inlet. These bulkheads until mid-season were white. There is an anecdote about this particular. At the beginning of the championship they were white color, but then they were painted in black (if I well remember) from Hungarian GP) as Steve Nichols could not like to see these only 2 white pieces when the bodyshell was off. Even these pieces presented small missing details: The Dsuz fastener and the Allen screws. The fastener (which serves to keep the body or bodyshell in place) is correct in shape but missing a detail. The bayonet screw is flat with fastener when the body is mounted, when removed the screw is external. I drilled with a 0.5, I added a rivet ... I think now a little bit better. Another addition: the Allen screws that secure this panel; I used the usual PE kit from the Top studio and a final coat with panel line to dark them. The next macro-group to be completed will be the gearbox. To go ahead with it I have to mount the side bulkheads embedded between the arms. These bulkheads also need some extras: I added the Dsuz fastener and the 3 bolts that fix the bulkhead to the flat bottom. I then worked on the rear axle group and brake ducts. The real photo shows that on the brake ducts there is a dust cover fixed with 2 steel plates and rivets. To reach a better final view a iadd some insulating tape and rubber o-ring to simulate the dust cover. 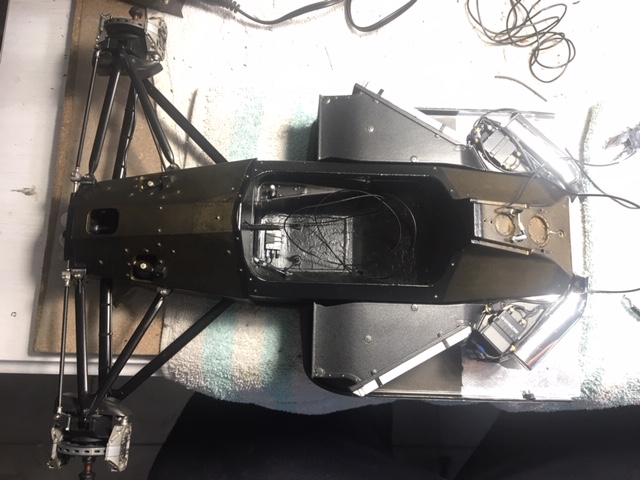 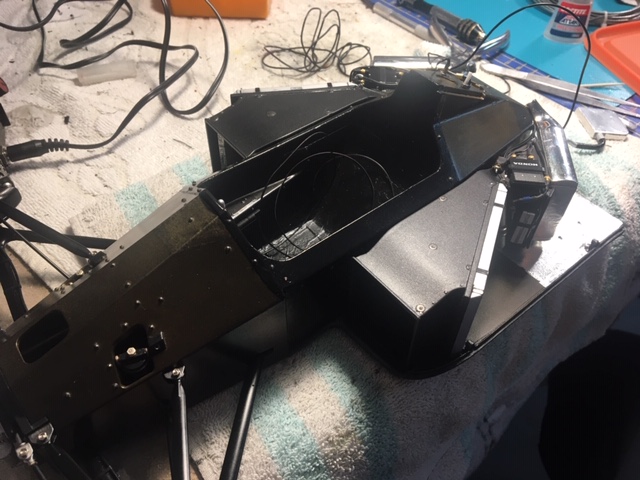  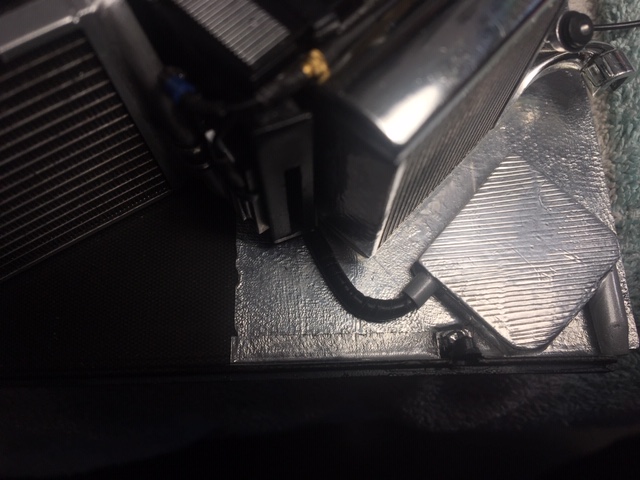 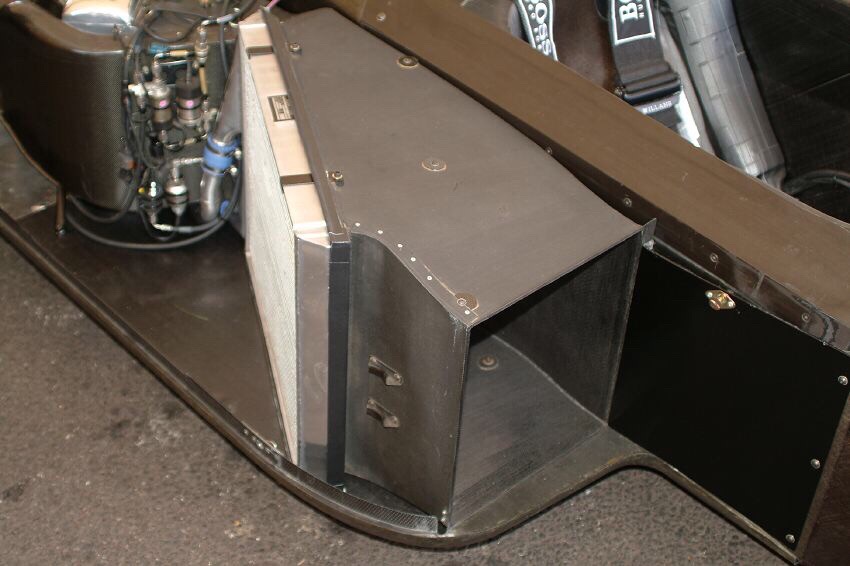  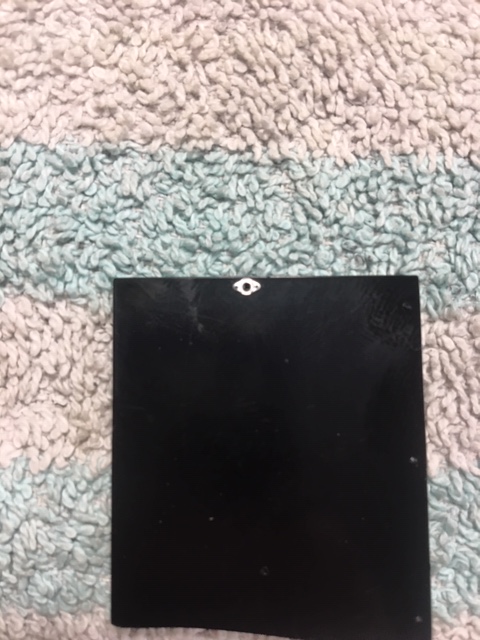  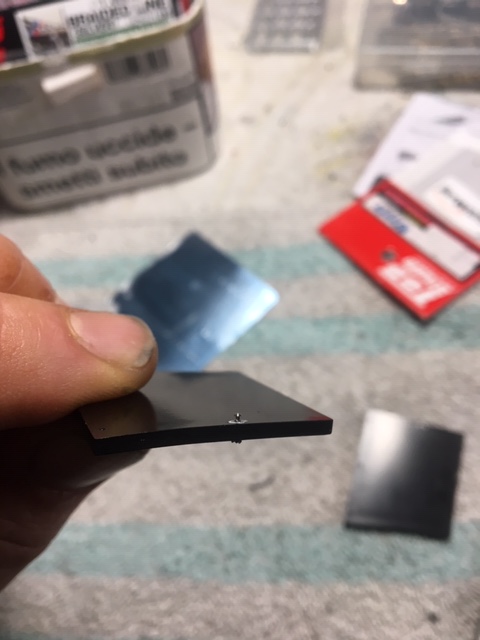 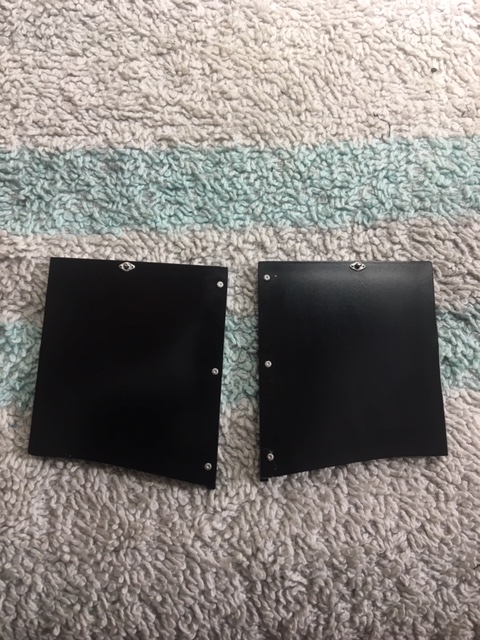 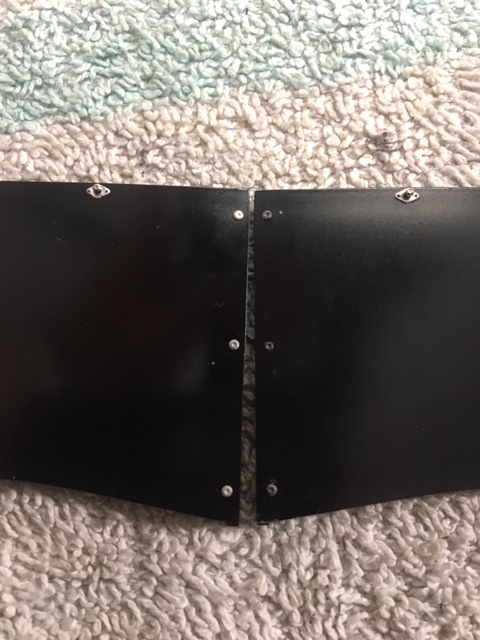 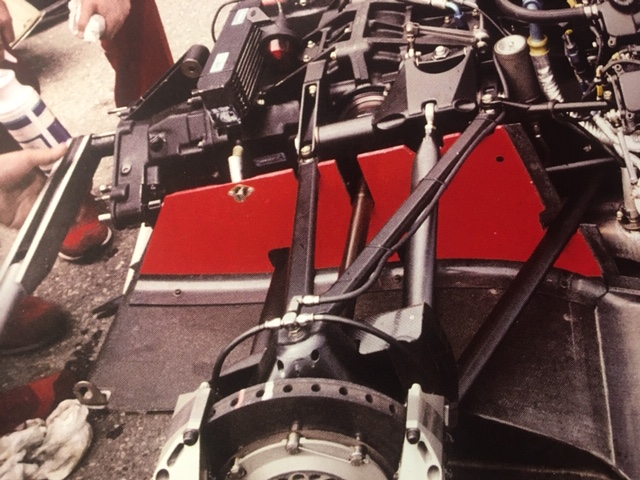 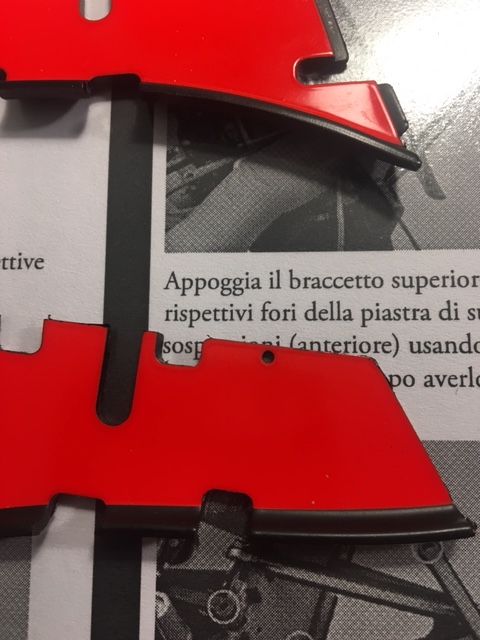 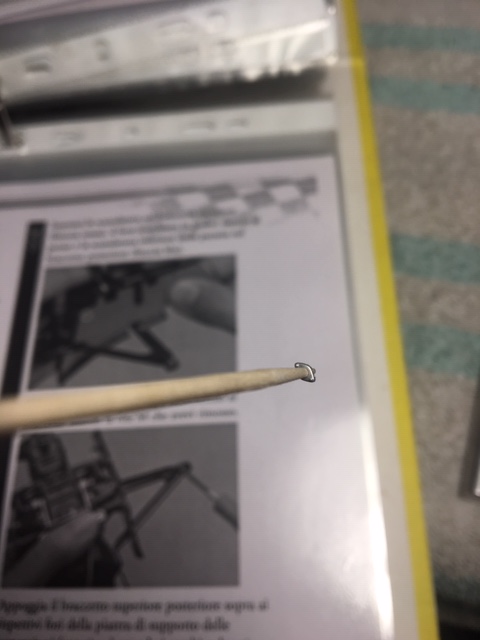 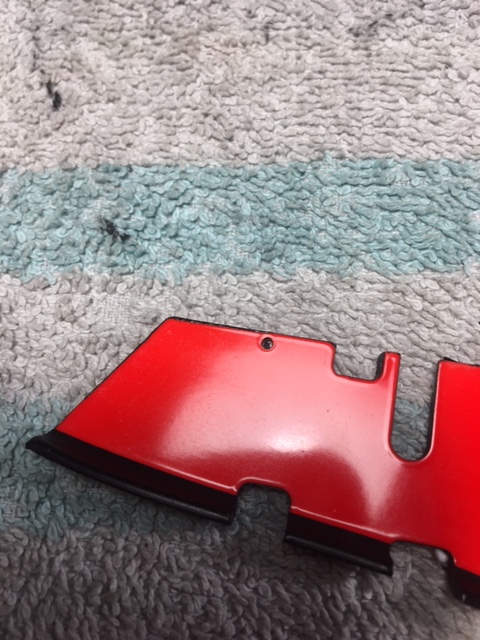 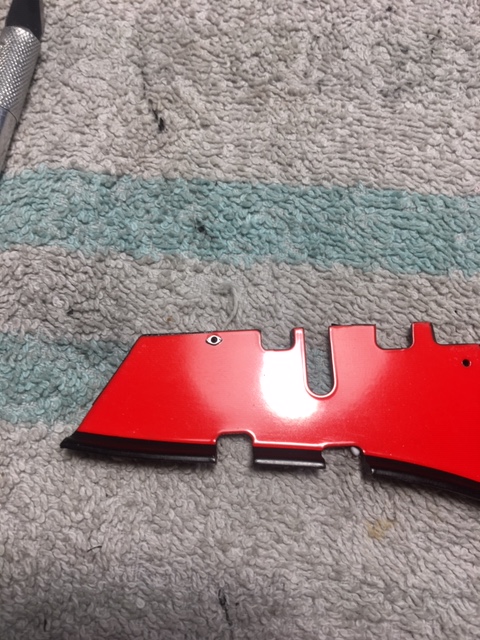  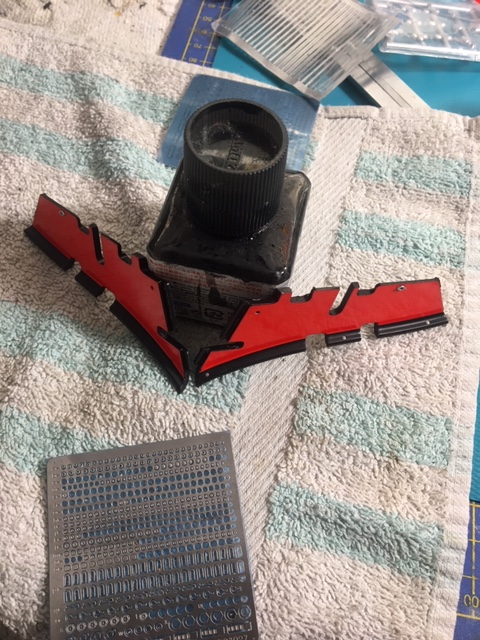 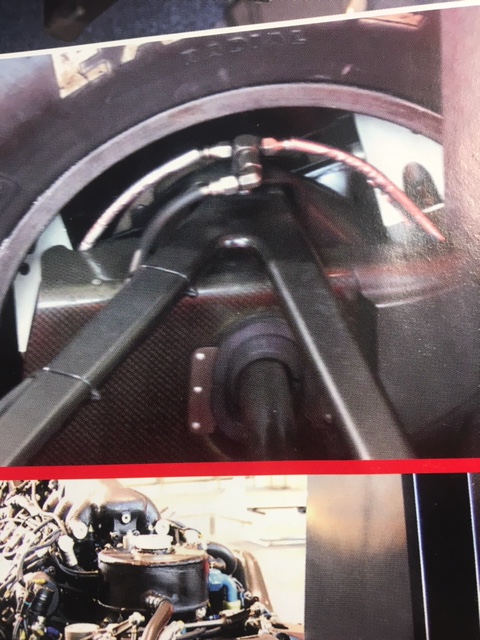  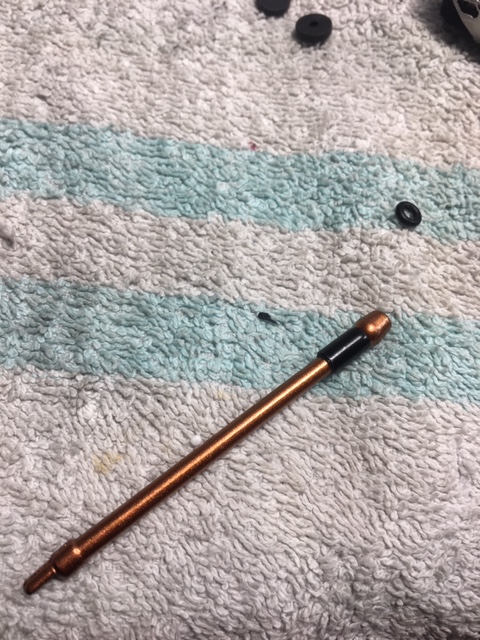  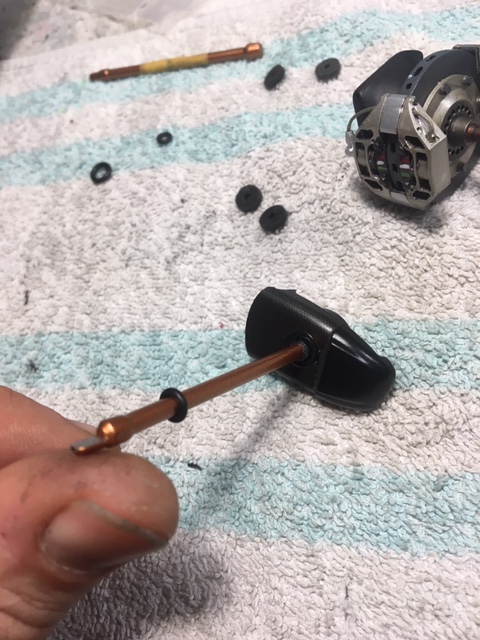  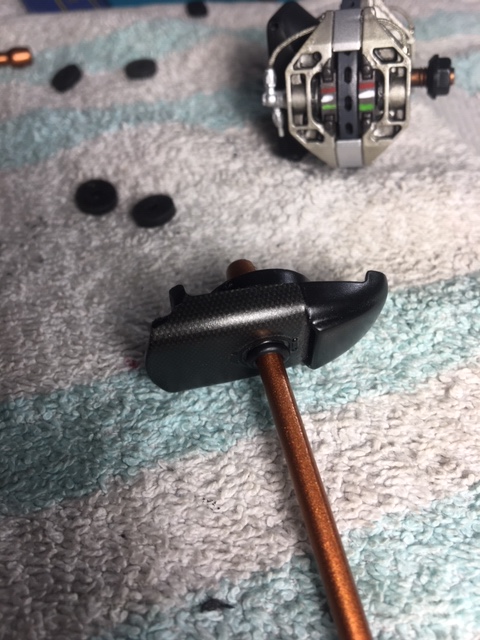 Collection active: Lotus 97T, Audi Quattro A2, Vw Maggiolino '60
Work in progress: Porsche 911 RS Turbo
Completed model: Delta WRC Martini, Mclaren MP4/4, Golf GTI 1/8 Tuned
|
|
|
Rank: Vice-Master Groups: Registered
Joined: 05/04/2016 Posts: 705 Points: 2,118 Location: Ferrara
|
The macro groups are almost finished. I placed the fire extinguisher and closed the front of the monocoque. The fire extinguisher is blocked by two metal bands that have an antivinbrating sheath. To reproduce this sheath I applied four 1mm strips of insulating tape. I added the PE rivets to the rear air intakes which actually hold the rear axle dust guard in place. I mounted the gearbox by adding the nuts to the 1.4 m screws and turning the bracket at 180 degrees to make the added nut visible and no longer the screw head. Where it was not possible to replace the screws, to hide the head, I applied hexagonal heads with the punch & die. I covered the upper screws of the suspension castle (painted in titanium gold) and the screws that fix all the various wishbones and tie rods to the rear hubs (painted in gun metal) While everything is fixed and dries I noticed in a single photo, the presence of a control unit (probably the FIA transponder) in the front of the nose cone .... and precisely where there is the jaw where is fixxed the lower part of front wing. The transponder is orange (I believe with a black case): Lego help me.... perfect in size and color. Drilled, added a hex nut for the white cable and an aluminum connector for the gray, and I finally placed. Next steps: - the assembly of the belts and seat, cockpit and steering wheel and harnesses along the upper part of the monocoque to finish (maybe) the entire monocoque - the positioning of the three-way hydraulic joint of the rear brakes (and with this I should also have finished the rear axle) 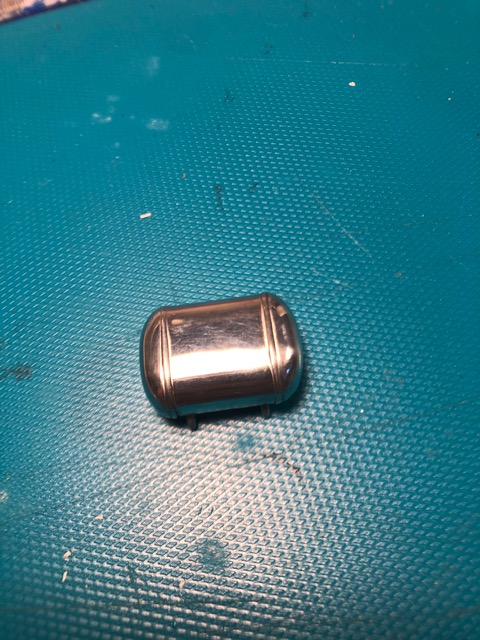 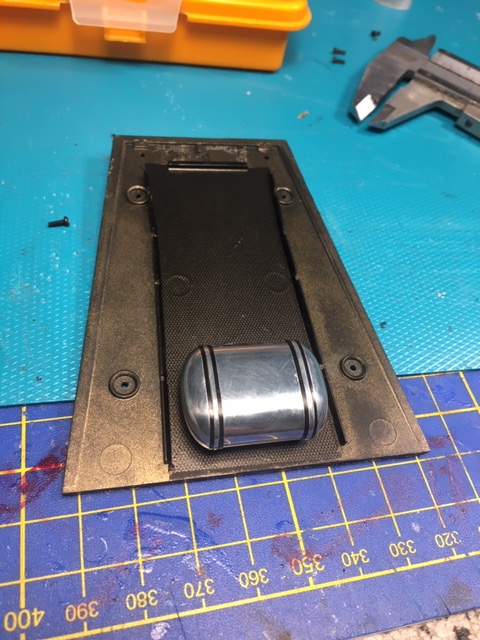 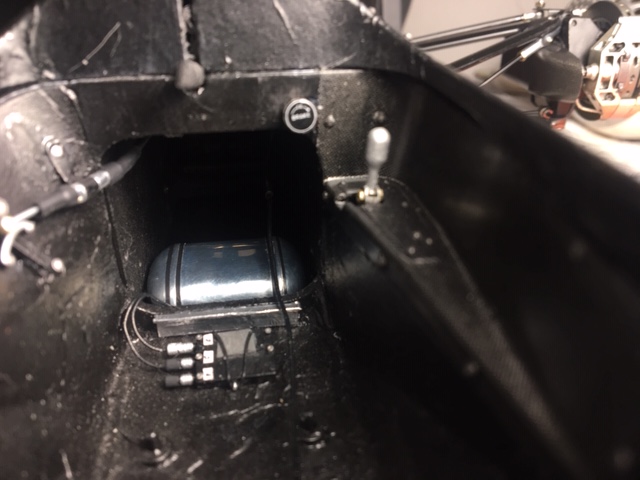 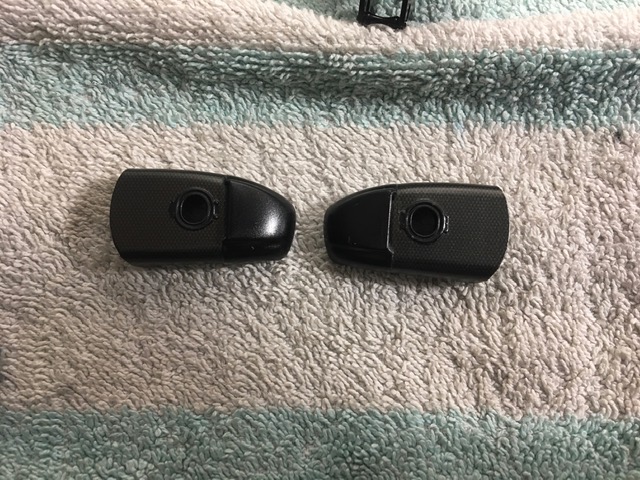 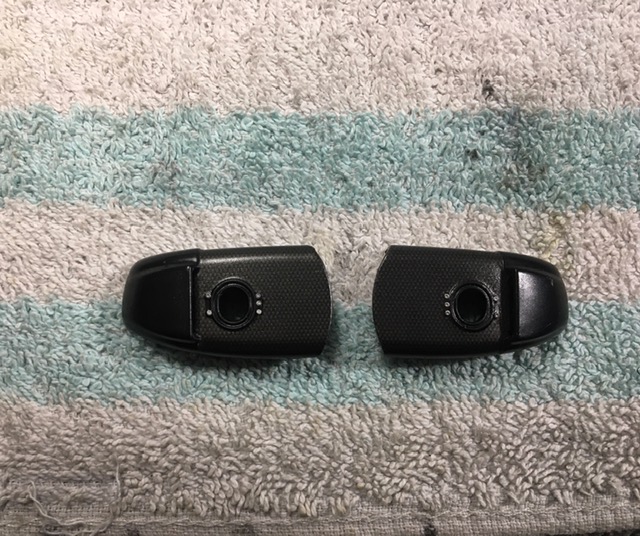 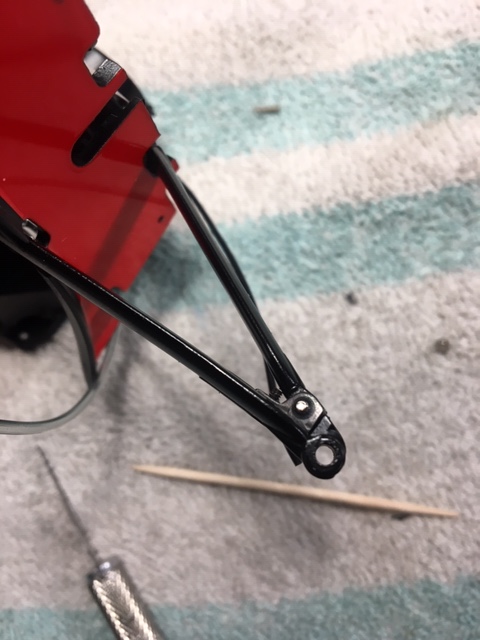 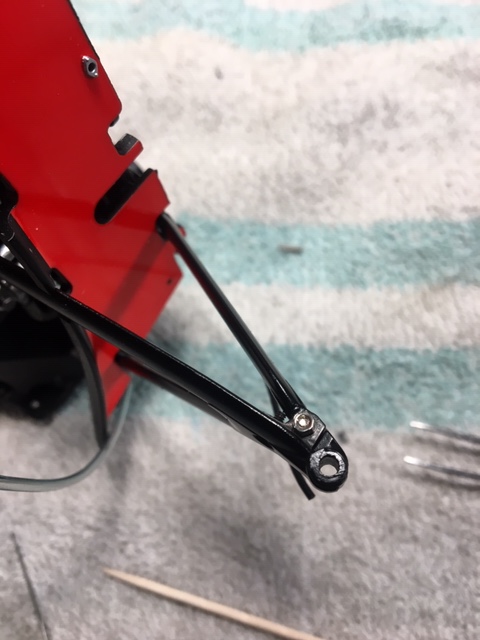 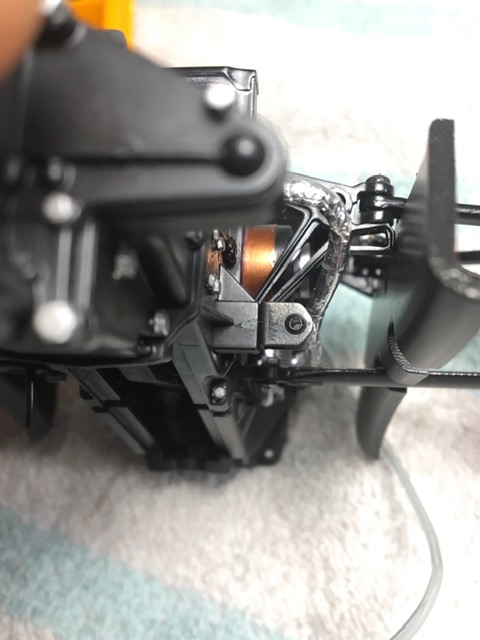 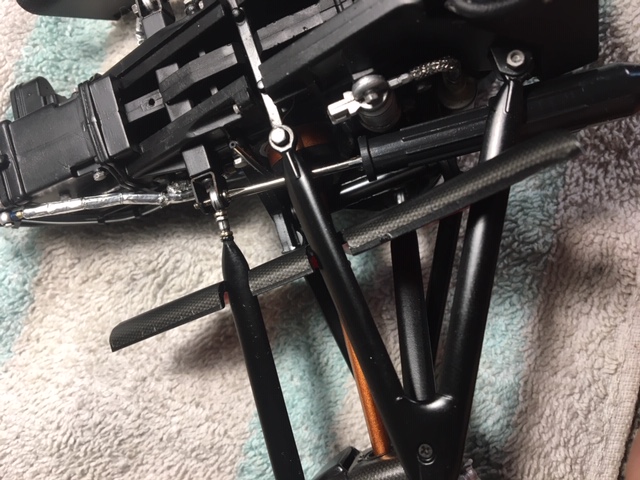 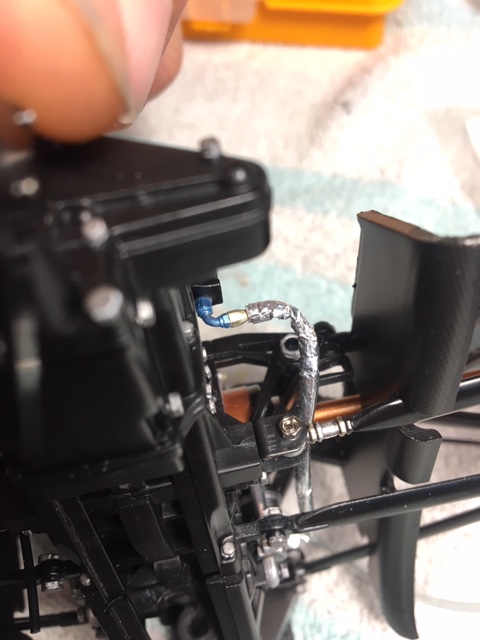 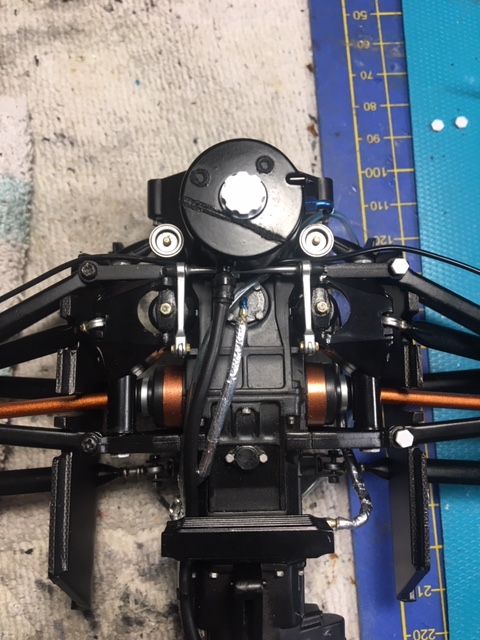 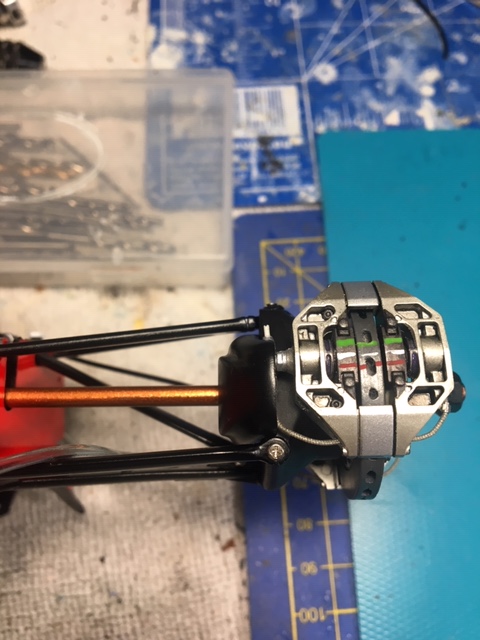 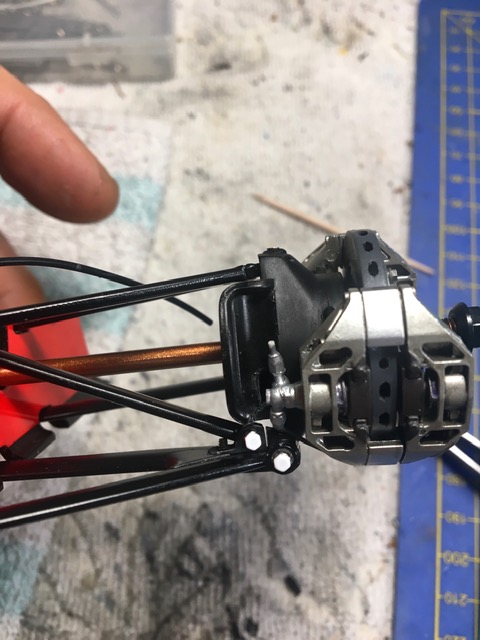 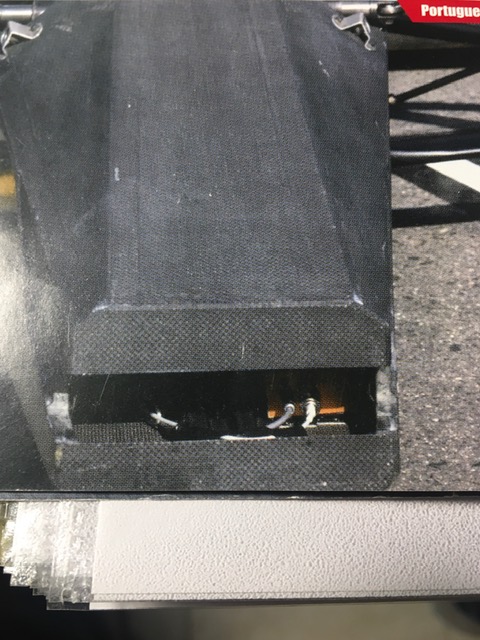 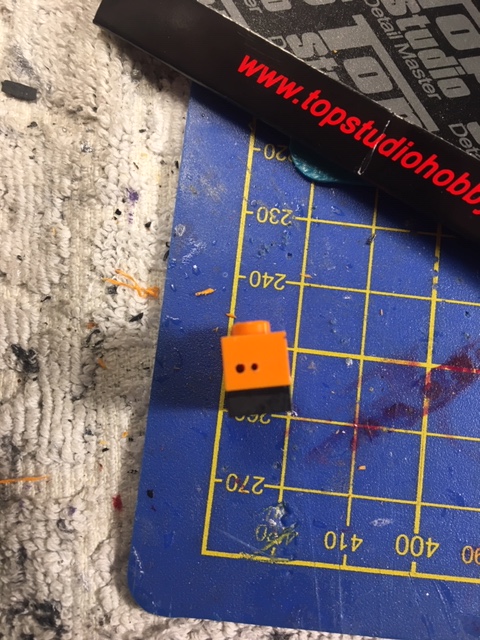 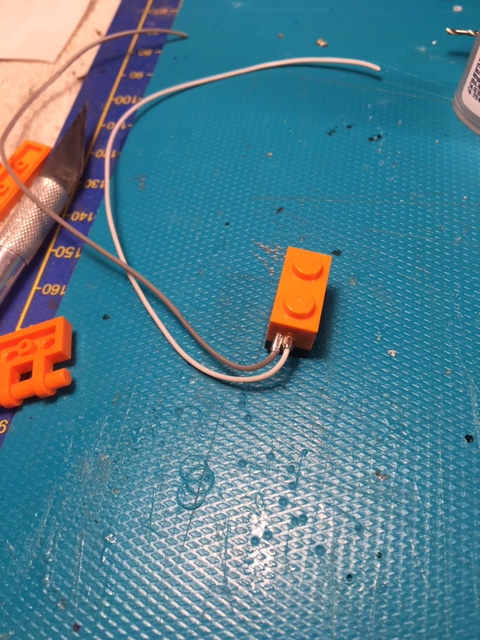   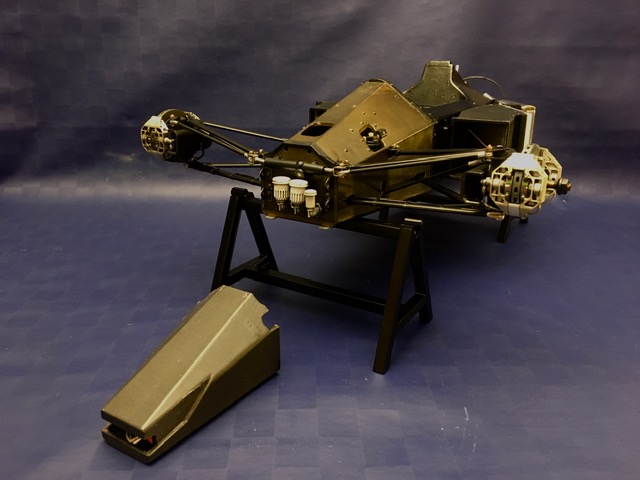 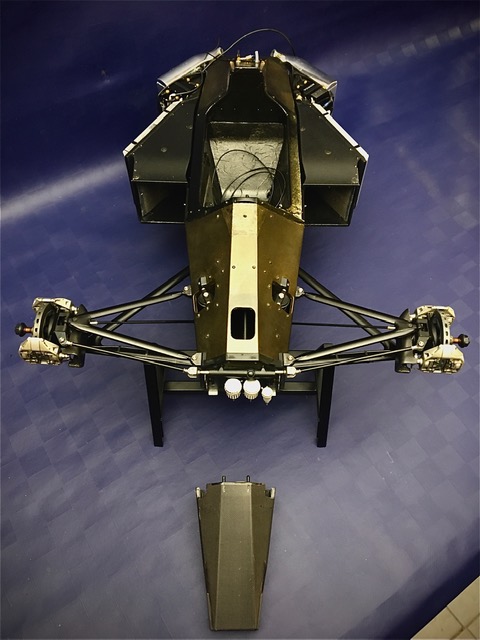  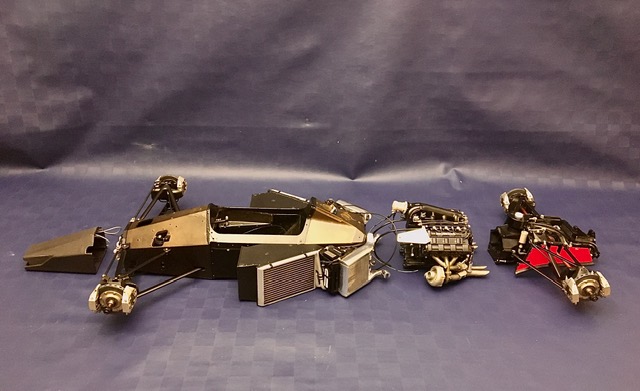 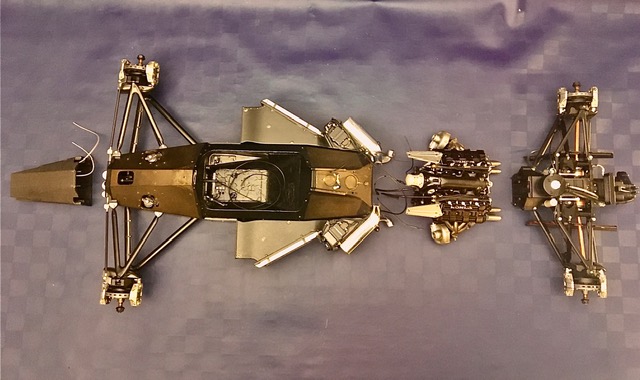 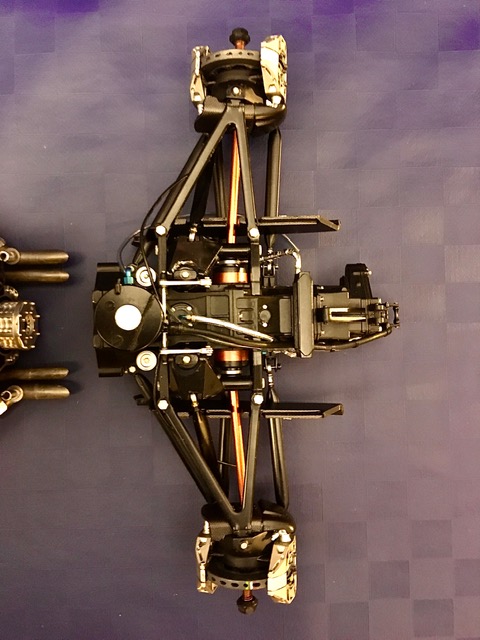 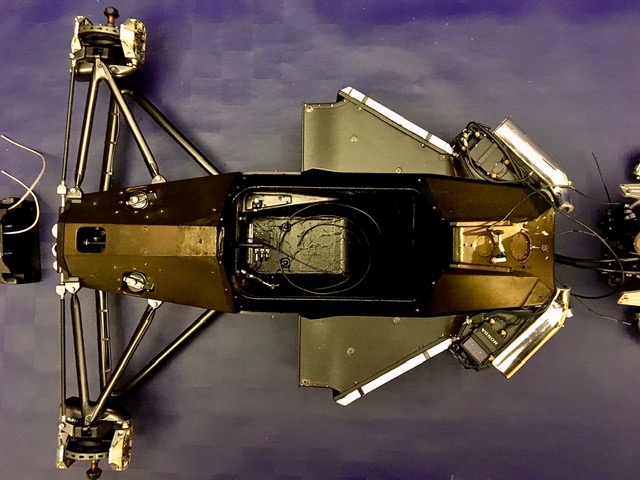 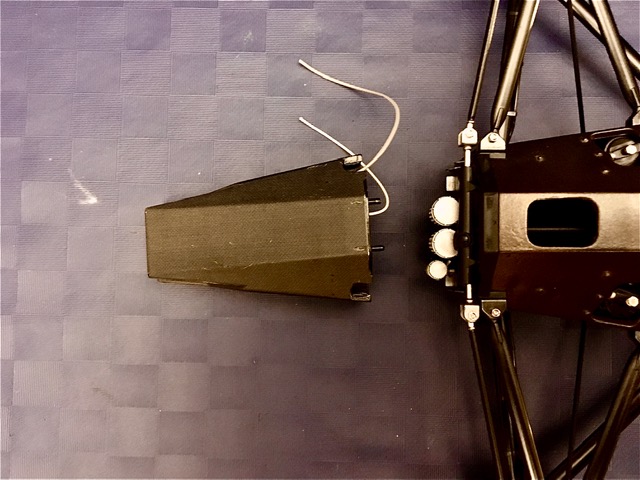  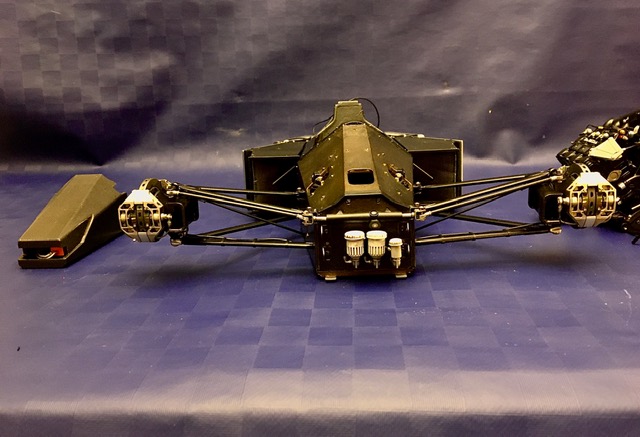  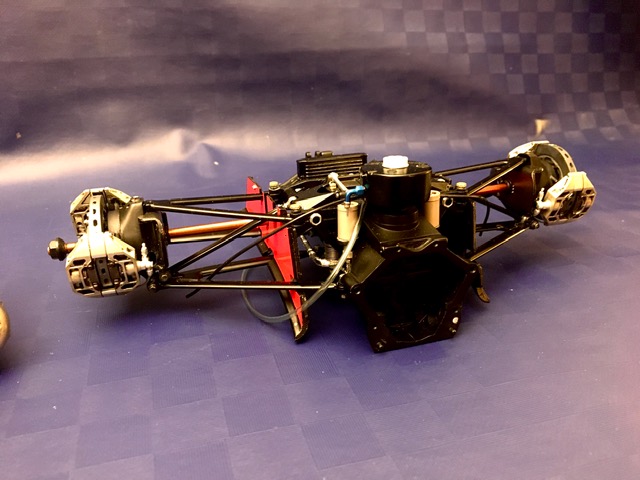 Collection active: Lotus 97T, Audi Quattro A2, Vw Maggiolino '60
Work in progress: Porsche 911 RS Turbo
Completed model: Delta WRC Martini, Mclaren MP4/4, Golf GTI 1/8 Tuned
|
|
|
Rank: Vice-Master Groups: Registered
Joined: 05/04/2016 Posts: 705 Points: 2,118 Location: Ferrara
|
My good friend Riccardo noticed to me an inaccuracy: the gray cable of the transponder was of too large section compared to the white one. I opened 4 LAN cables (between normal and cross) and I found the gray cable of the right size (in addition to many others in different and useful colors). I rewired everything and added the Top Studio heat shrink and plug. The plug connects to a wiring that comes from the "window" in the front section of the monocoque where are located the master cylinders and relative hydraulic pipes. I have also added wiring and plug here. I then reproduced the brackets that fix the front wing to the nose cone with aluminum 0.5. To shape them I used the same bracket as a template. I then worked on steering wheel. This element is not always the same: it changes from race to race, chassis, driver etc. The steering wheel that Ayrton used in the Suzuka race is: black with no seam lines on the crown and without the “Personal” logo. The one with “Personal” logo and seam line is of other frames. There is also a wheel with a straight upper part (it was mostly used by Prost) I wanted to increase the sense of suede a little: masked, matt clear transparent and sprayed from far to recreate the rough surface Other characteristic elements: the quick release to release it; I bored the hub and inserted an M5 washer painted in steel. Other elements that are missing and that I will add: the plug for the "boost" and "radio" buttons which will then connect in plug located at the bottom of the dashboard. I then started the definitive positioning of the internal and side wiring to the cockpit. Here too there are differences between the various frames. The "early frames" provided by the aluminum cable clamps .... on the opposite the "late frames" present in plastic or black metal (I presume plastic) ... the 05 chassis at Motegi has them black, but it is to understand if they are really 30 years ago placed or remodeled in more recent times. I recreated the aluminum strips and sliced and heated the heat shrink tubing. Following the photos, I laid the wiring for the dashboard controls and for the Showa ECU on the left side of the cockpit. The throttle cable has been laid on the right side. Another extra pipe is the hydraulic pipe of the rear brake system: between photos and technical diagrams on Haynes book (especially those relating to the bathtube and the tank) and my own deductions,I have come to unravel the mystery of the passage of this hydraulic pipe. The tube starts from the master cylinders, runs right down the leg tunnel, passes under the seat ...... exits the seat, passes between the monocoque and the fuel tank and comes out of a passage hole in the rear area of the monocoque (symmetrically opposite to the linkage gearbox) I then reassembled the seat (previously redone) with the belts that did not require particular modifications ..... only note: The "BOSS" logos in Motegi are black. In Suzuka and in the championship they were white. Another note, the 2 different fixing positions of the belts. Ayrton had them high ... Prost being lower height placed them at the bottom. 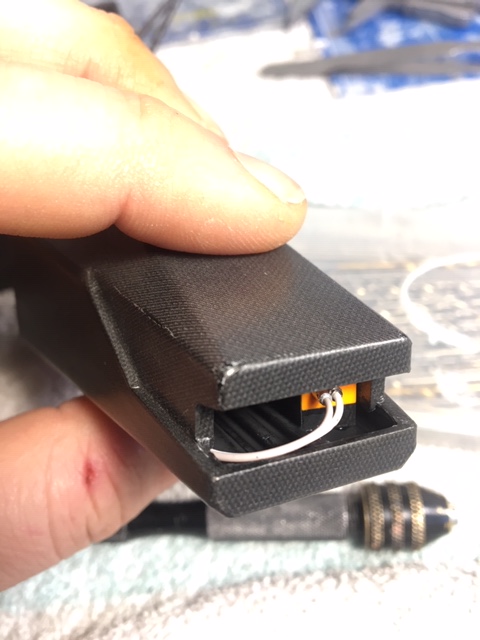  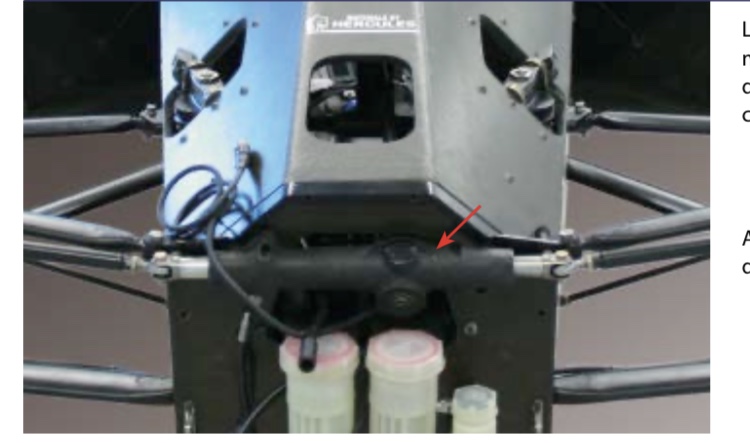 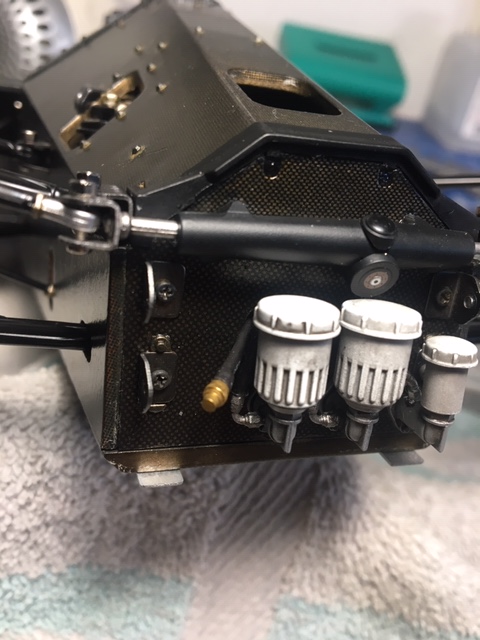  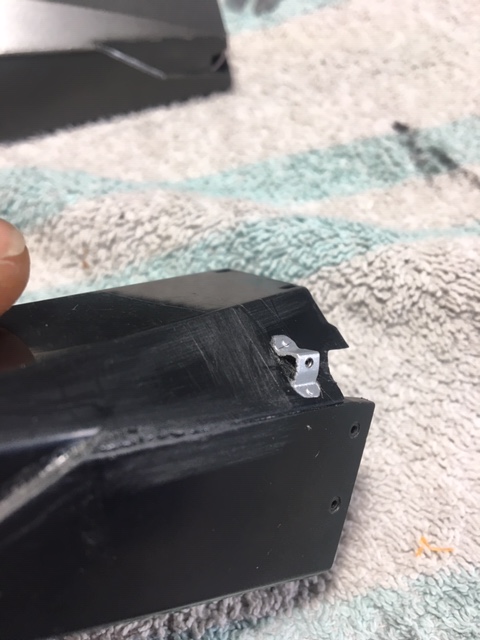 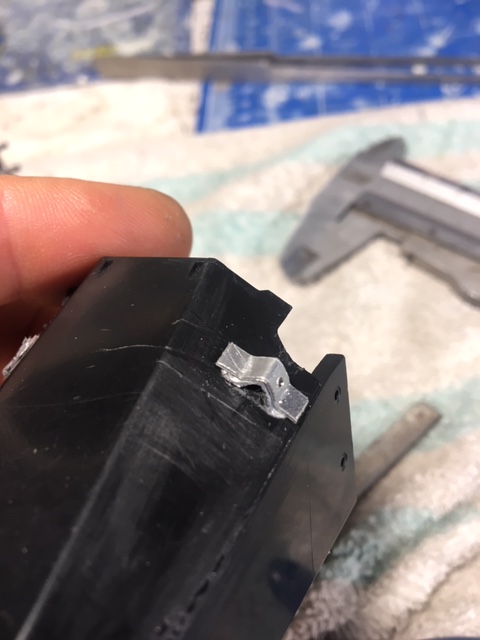 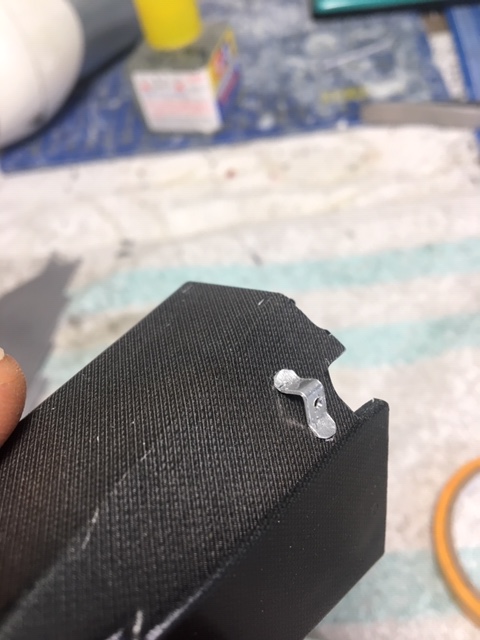 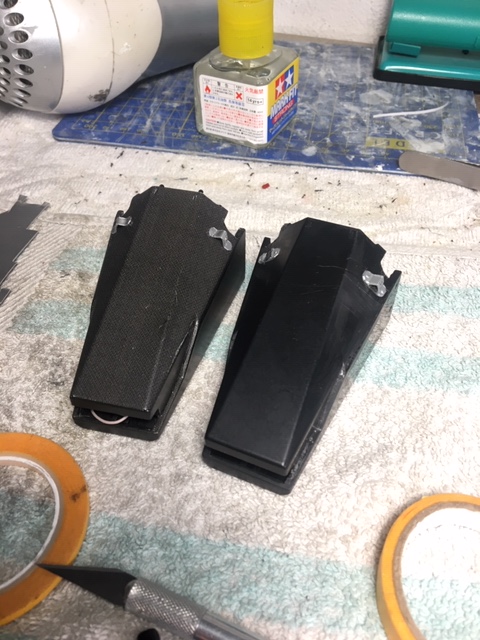 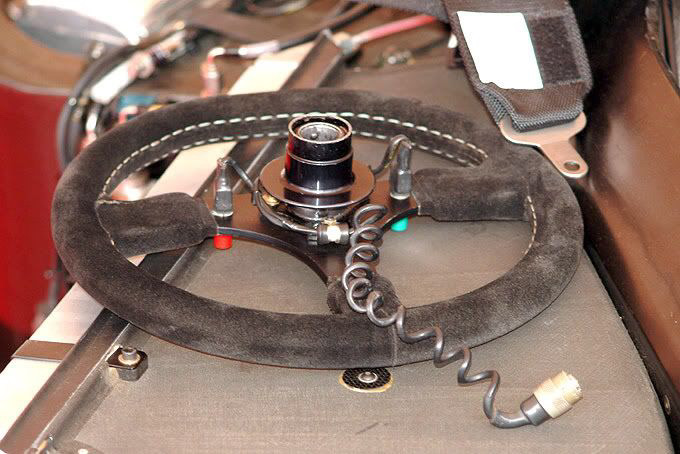 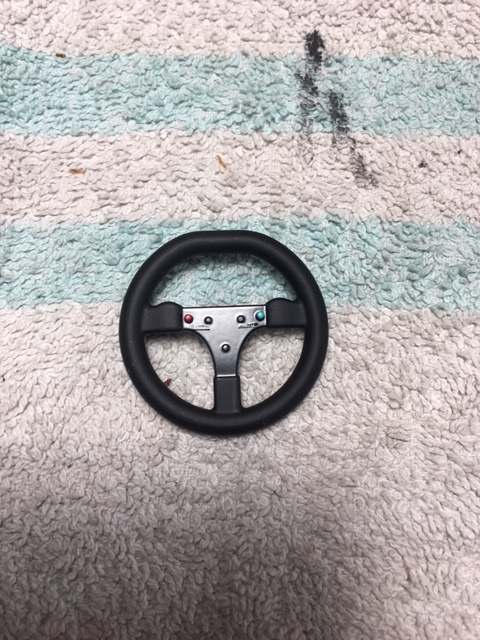 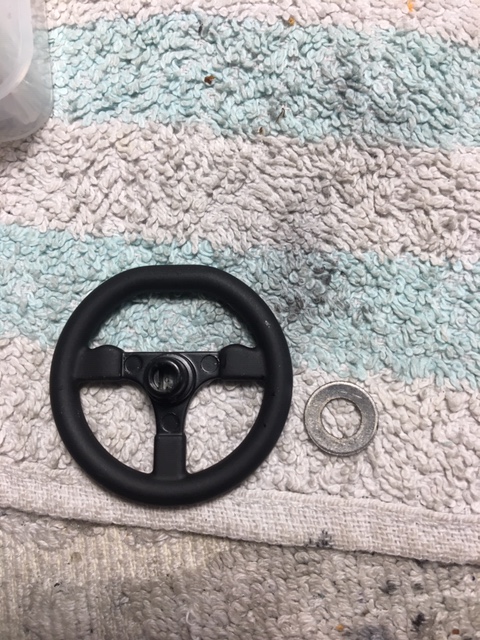 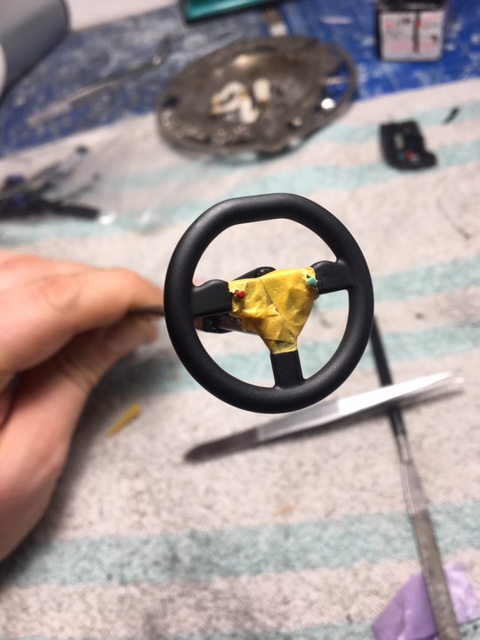 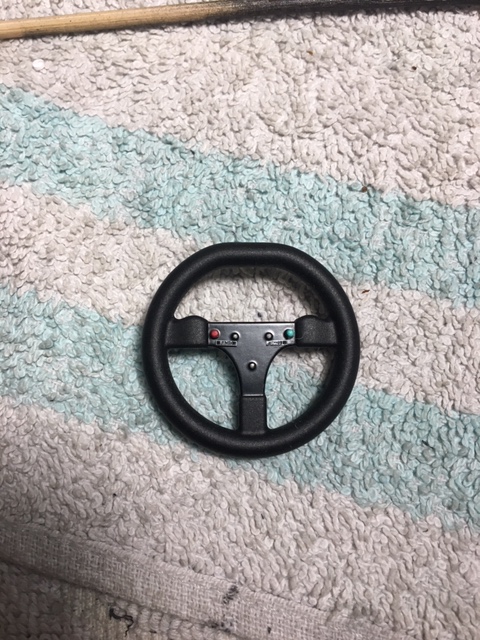  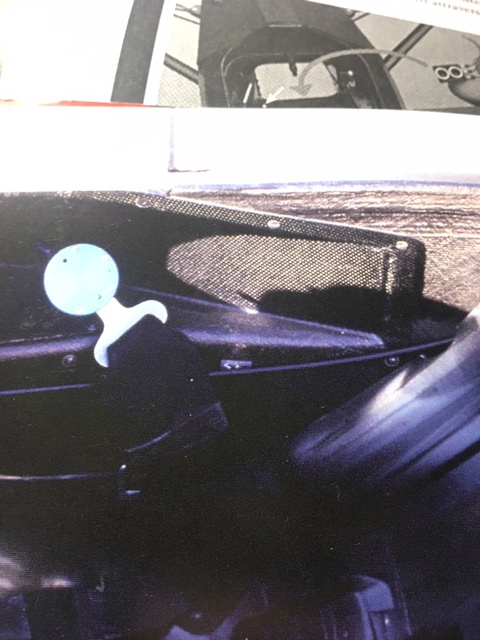 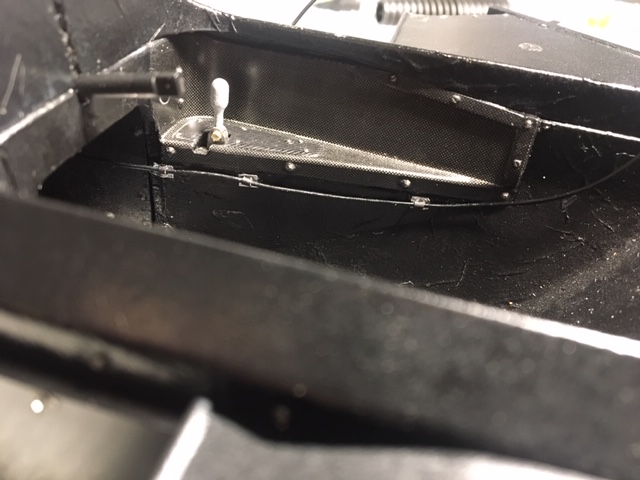 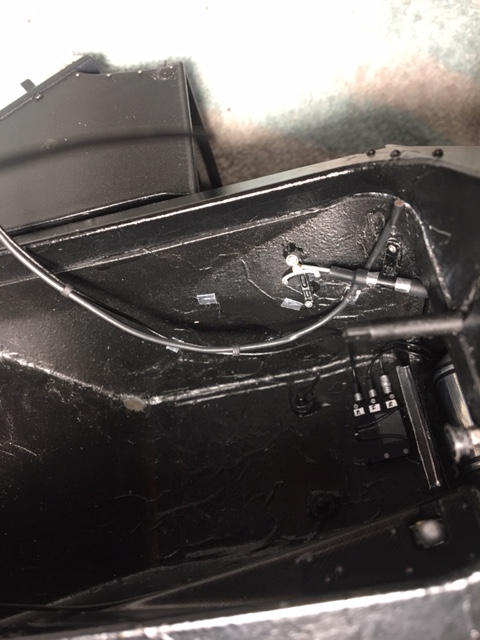 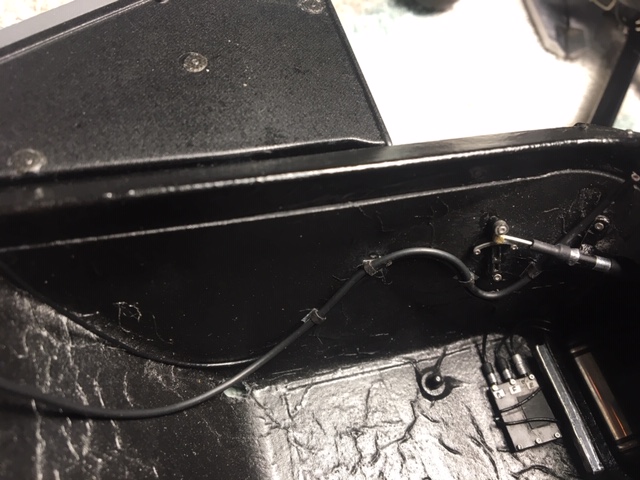 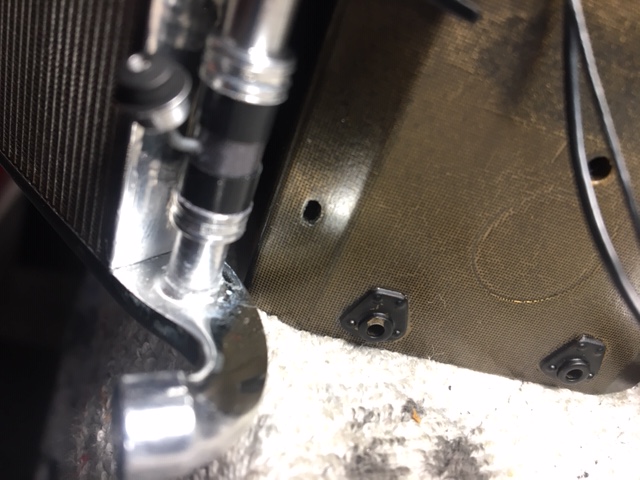 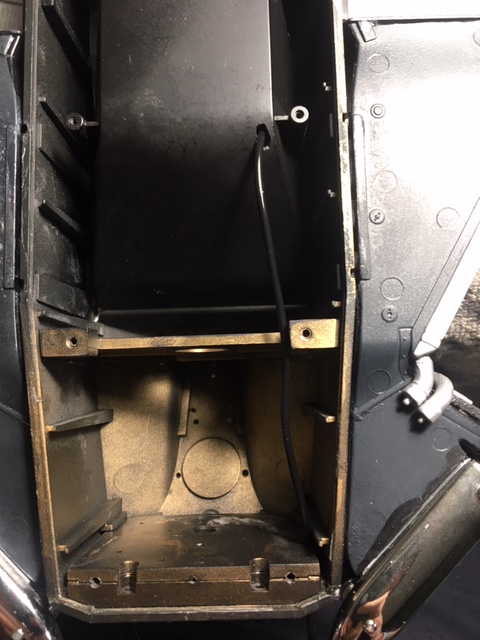 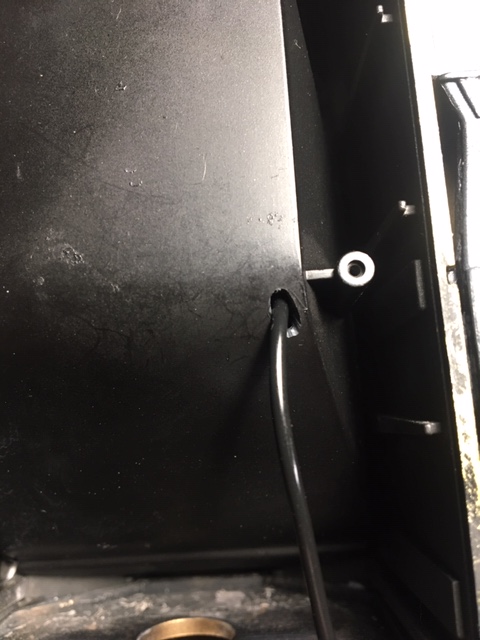 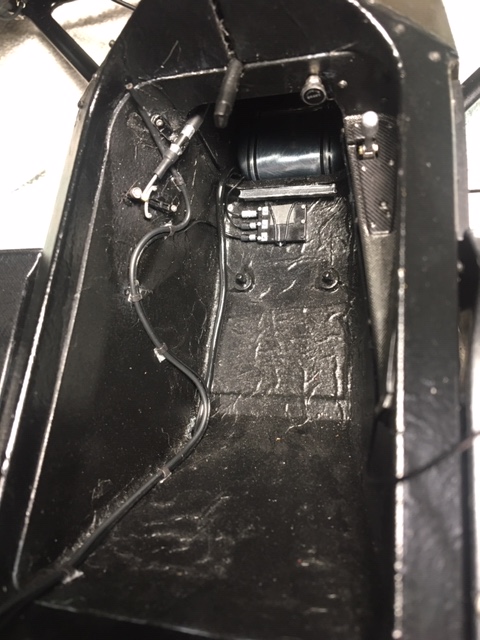 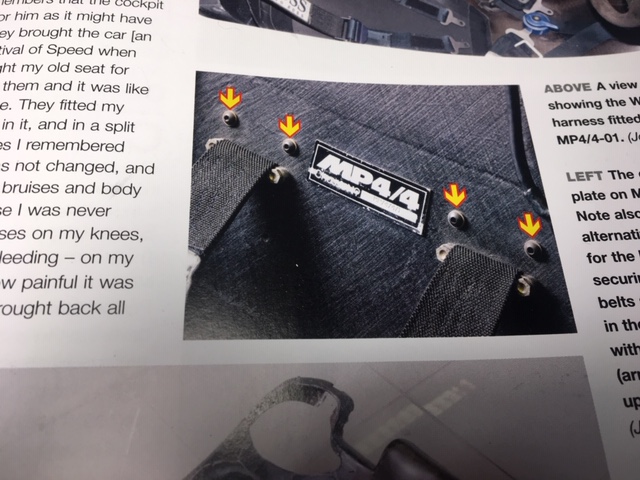 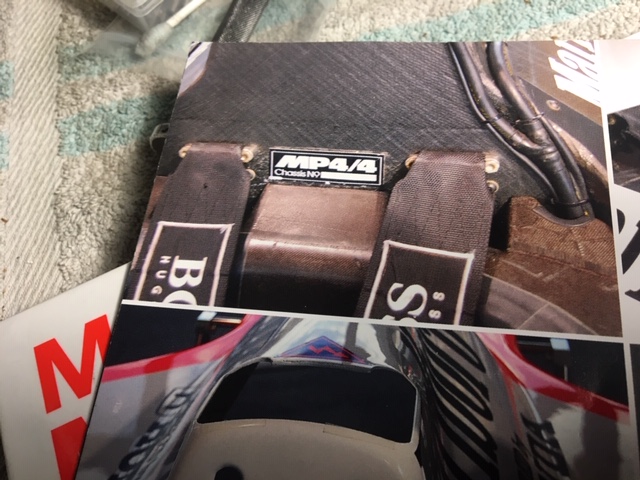 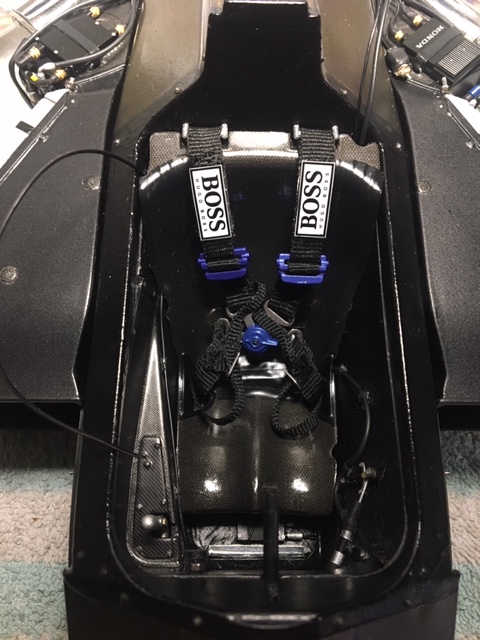 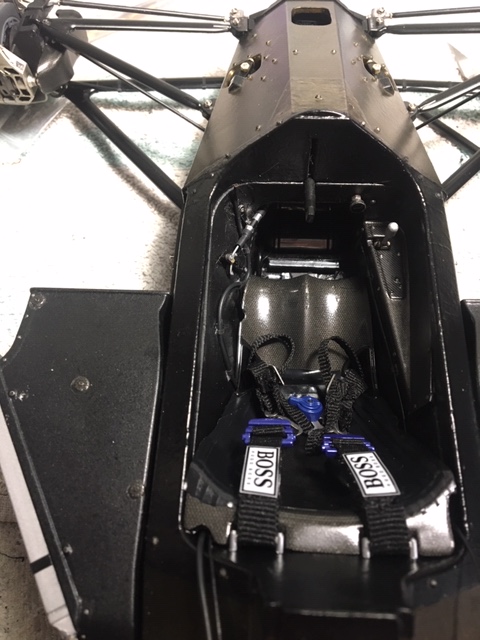 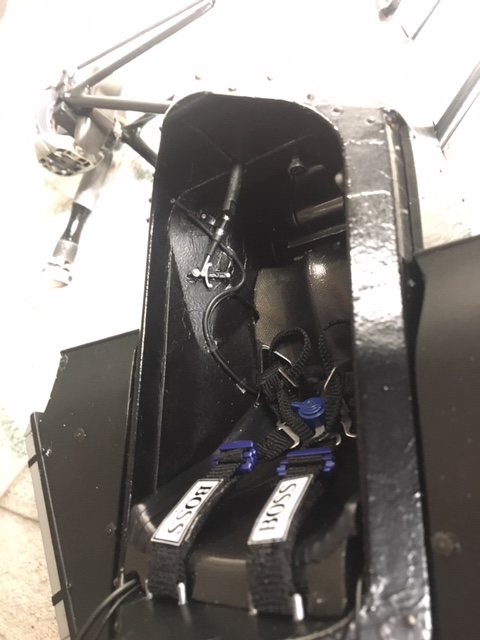  Collection active: Lotus 97T, Audi Quattro A2, Vw Maggiolino '60
Work in progress: Porsche 911 RS Turbo
Completed model: Delta WRC Martini, Mclaren MP4/4, Golf GTI 1/8 Tuned
|
|
|
Rank: Vice-Master Groups: Registered
Joined: 05/04/2016 Posts: 705 Points: 2,118 Location: Ferrara
|
I finished the dashboard: this element also has various differences and extras not present in Suzuka race. Chassis 01 (owned by Mclaren) has become extra: the oil pressure warning light (on the right) and an extra wiring and plug (on the right). In addition, there ‘is the "Personal" logo on steering wheel spokes. All these extras in Suzuka were not there; the element that i went to reproduce is the plug under the dash that connects the cables of the boost and radio buttons on the steering wheel. For the button cables I used: 1mm cable, top studio hexagon bolt painted in flat black and then connected with heat shrink to the coiled cable which then connects to the dashboard. Finally I mounted and positioned everything ..... the steering wheel is not FIXXED but only inserted with the possibility of removing it from the steering column. Following the usual references, I applied the strips for the clamps that maintain in position: - on the right side: the bleeder pipe of the radiator with an intercooler bypass pipe - on the left the radiator: the bleeder pipe and the main switch cut off . I then worked to another critical part (and anticipated) of this restoration: the final assembly of the RA168E. Having to connect the extra fuel inlet and outlet, the and fuel vacuum from fuel filler and having to fix the ECU, I was forced to mount the engine to be able to connect everything (yellow, red and green arrow). In addition, between the narrow space and the “forest” of electrical wiring did not favor me in the assembly to fit before the ECU and then suddenly connect the rest of the fuel pipes. I have already assembled everything to also check the clearance and measures for the fitting of the future ducts between the intercooler and the intake manifold (another really huge and difficult passage) Another small (but visible) addition is the derivation of the electrical wiring that branches off from the upper part of the seat, runs on the "headrest" and connects to the series of secondary ECUs positioned on the main control unit. I dry mounted the roll bar to check if spaces and clearance was good with these extra add Last step of the last workin’ night: I passed the hydraulic cable of the rear brakes through the cranckcase in order to find it ready for the future connection on the gearbox. 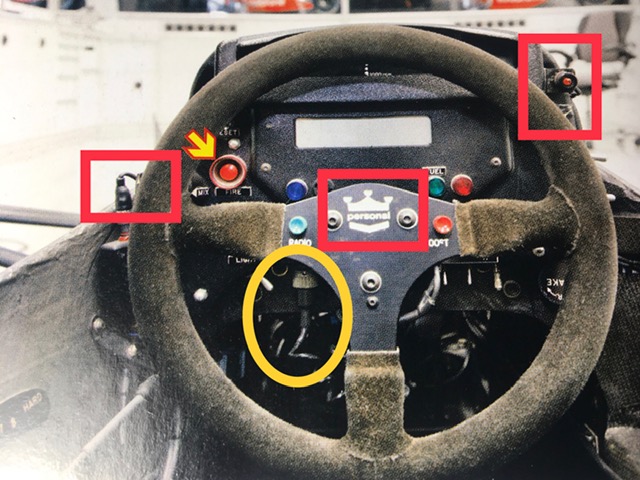 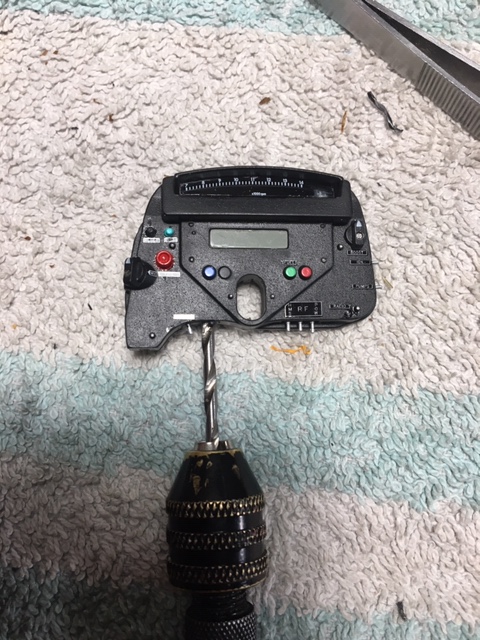   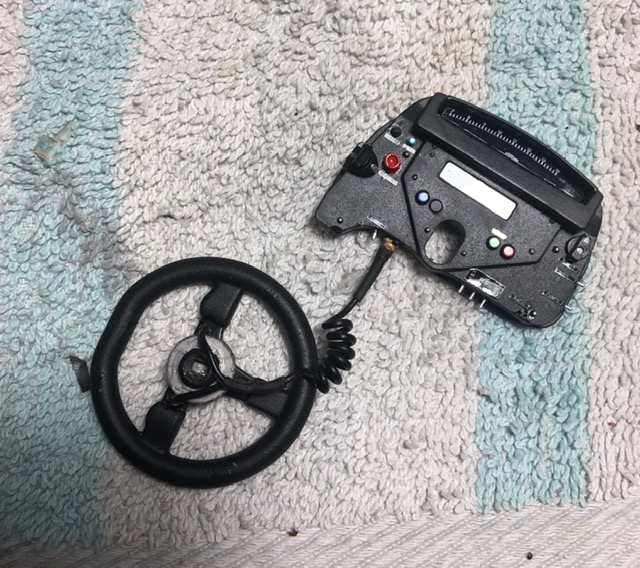 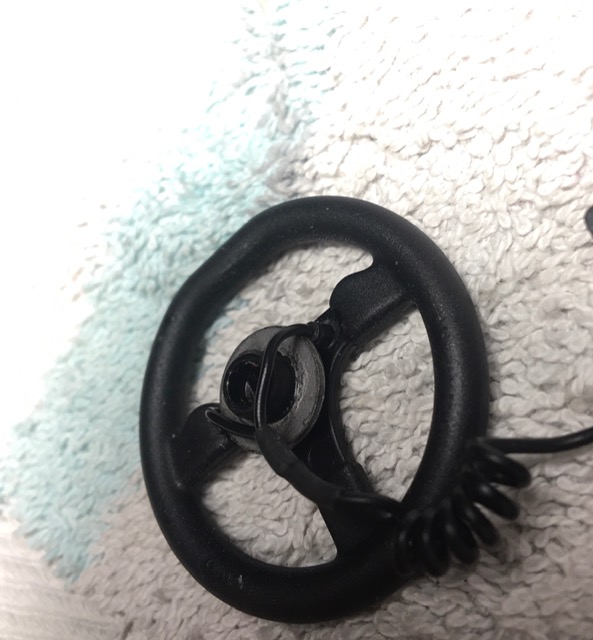 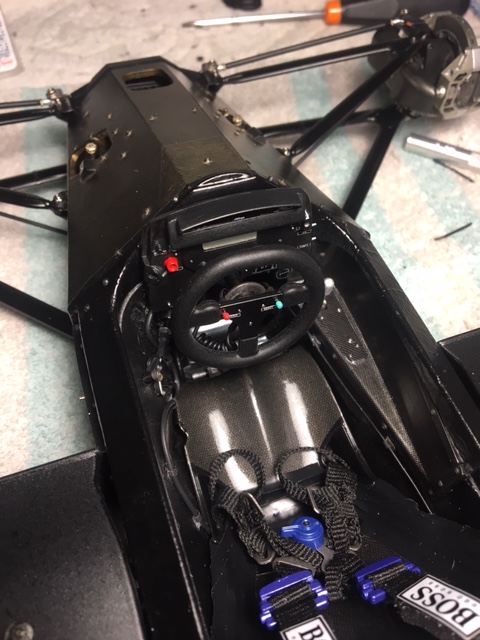 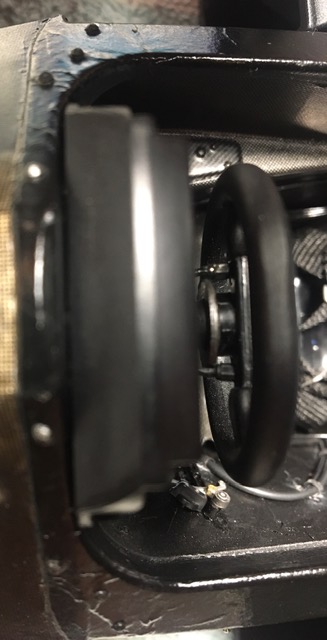 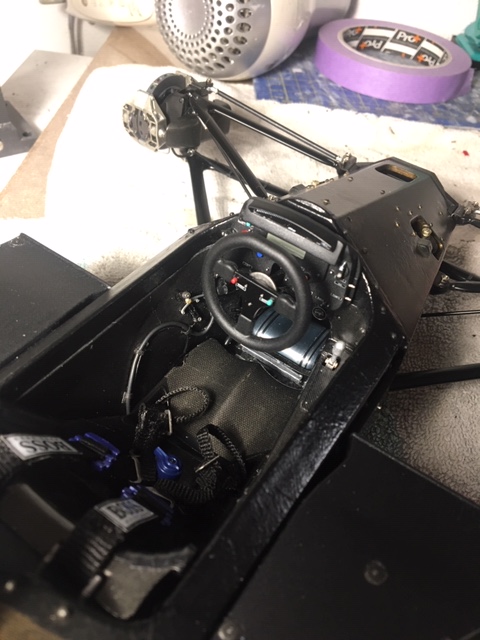 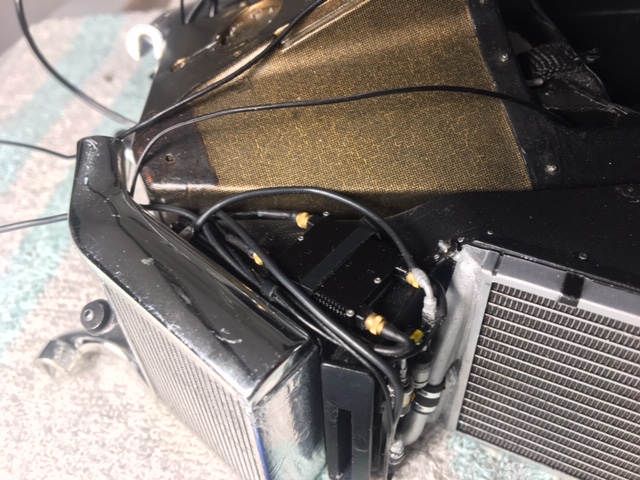 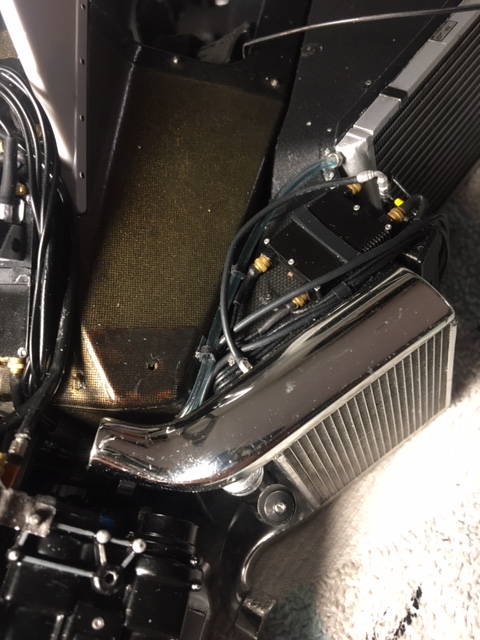 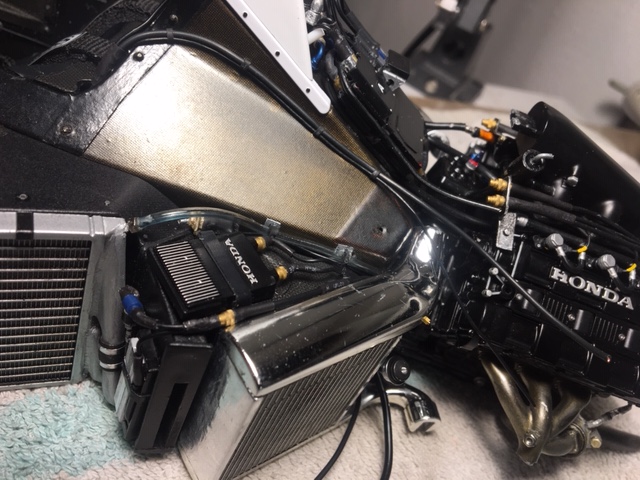 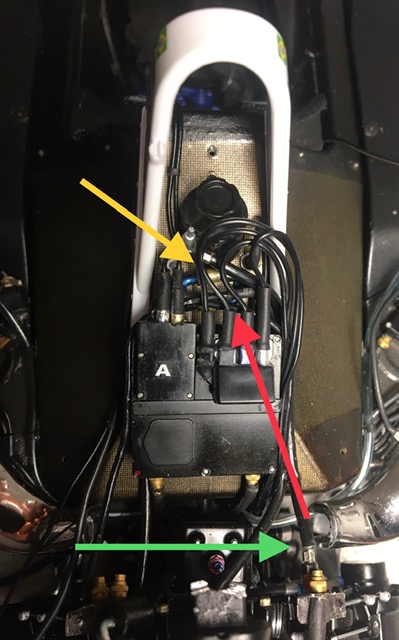 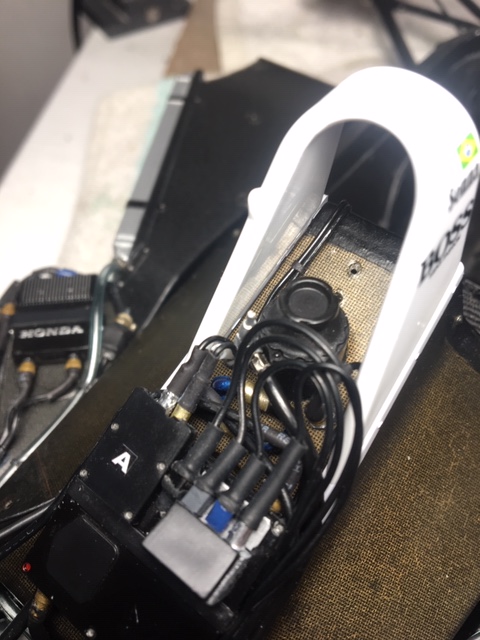 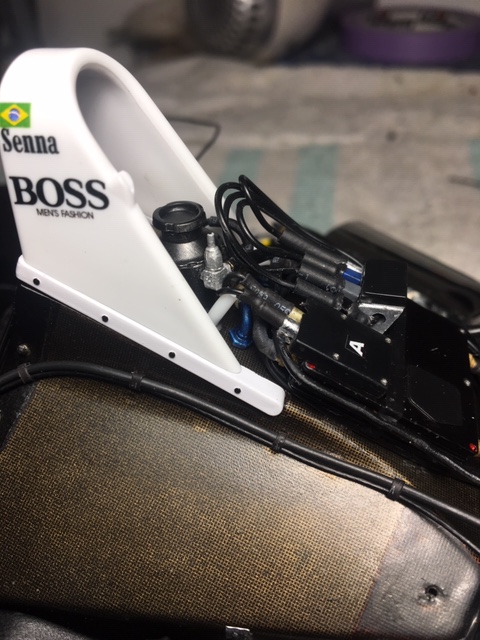 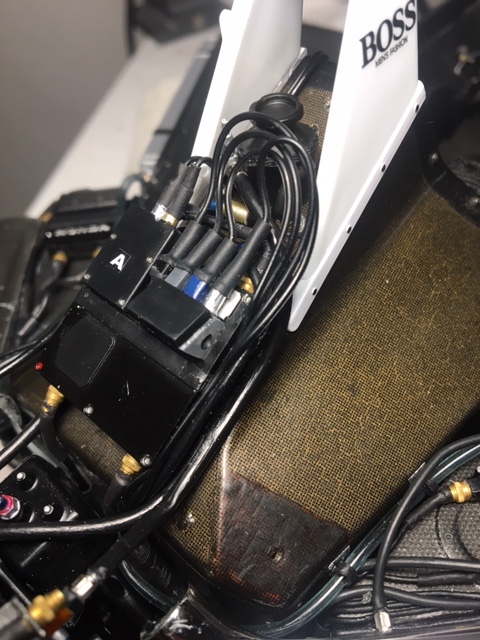 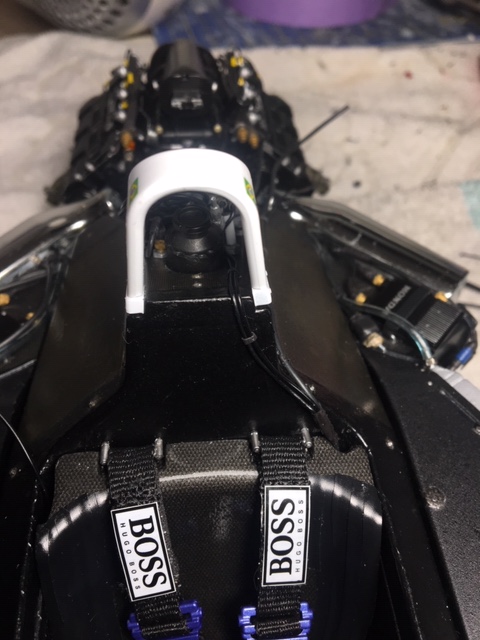 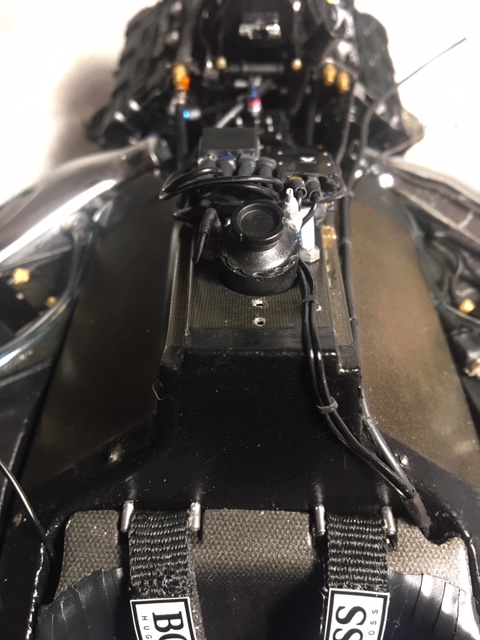 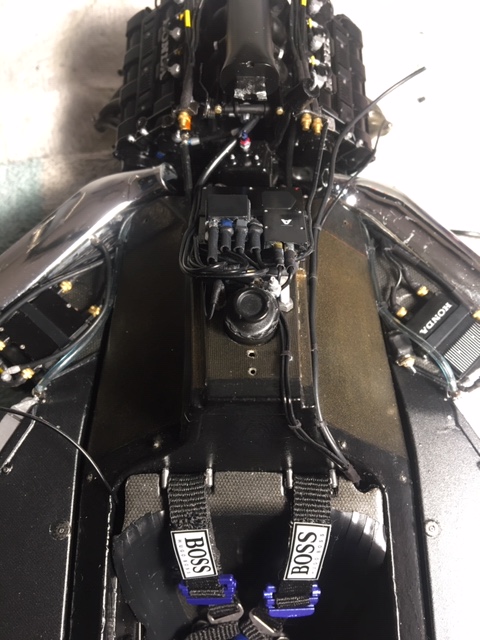 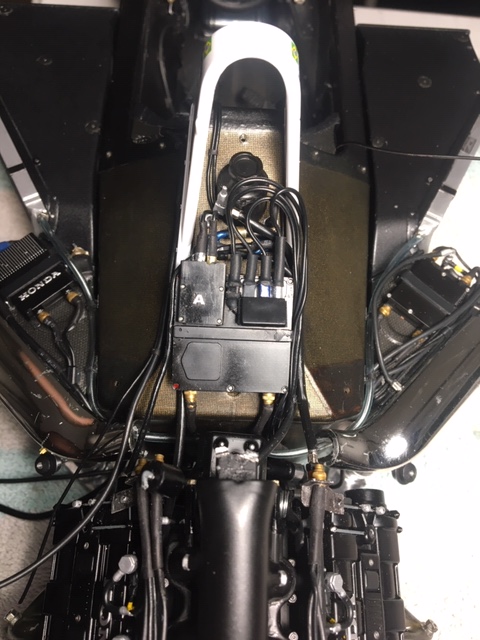 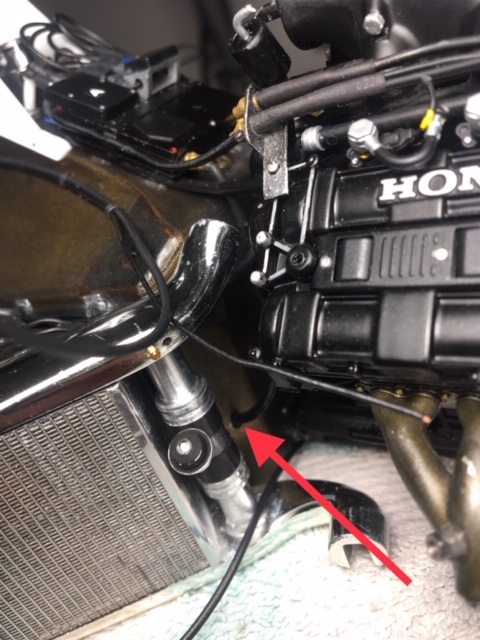 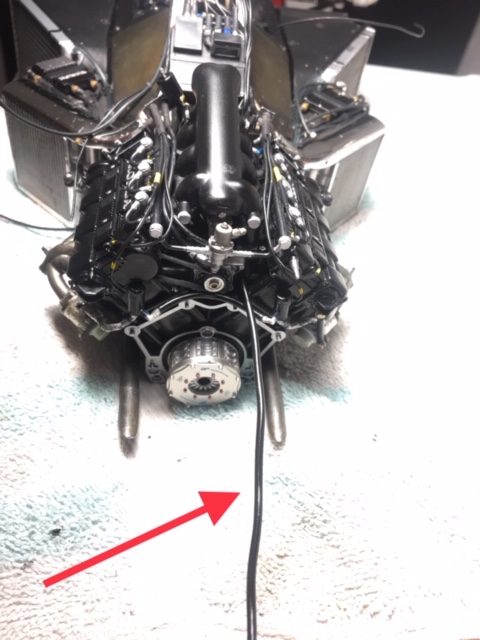  Collection active: Lotus 97T, Audi Quattro A2, Vw Maggiolino '60
Work in progress: Porsche 911 RS Turbo
Completed model: Delta WRC Martini, Mclaren MP4/4, Golf GTI 1/8 Tuned
|
|
|
|
|
The work being done on this is simply stunning.... all credit to your skills....   Regards Alan
|
|
|
Rank: Vice-Master Groups: Registered
Joined: 05/04/2016 Posts: 705 Points: 2,118 Location: Ferrara
|
Gandale wrote:The work being done on this is simply stunning.... all credit to your skills.... Regards Alan Thanks Alan In the meantime that I write the MP4 / 4 is completed. The coronavirus has brought damage and worries .... quarentene, school shutdown, general phobia and also the displacement of the ModelExpo of Verona (for which I worked like a mule between 6 and 7 hours a day behind my Mclaren) Kindergartens and schools closed: I take holidays from work and dad 24h at home .... luckily my little girl is good and calm and wants to be together in the same room while doing her own things ..... in 6 days I finished the restoration. A rather difficult work both in terms of reproduction and assembly (perhaps the toughest of all this work): the ergal clamps in purple metallic color. For the color I try to find it in 10 nail art stores, until a china shop (ironically) had for 1 euro an indelible marker of the color I was looking for. I produced the cable ties by superimposing three layers of adhesive aluminum; for the round holes I punched with a 1.3 inverted drill bit in the 1.5 hexagonal die. Colored the clamps, mounted and then this work took me almost an hour for fitting these duct between intercooler and the intake manifold…but finally I did it. I have completed the work of the upper fittings of the intercoolers ..... fittings produced by my good friend Riccardo. In addition to the application of the 1 mm braided, I have reproduced the thermal sheath with the external part in aluminum and the internal part with a single veil of a paper towel (this sheath is in the aluminum relativity clothed internally with white or similar fabric) Wrapped the pipe and finally mounted. Another visible detail, the flanged nuts with bolt (or stud) mounted on the engine plates. I saw 10 rivets and used the head for the 5 rear nuts; on the front of engine’s plates, there are 2 hexagonal bolts ..... which have become 3 for occulting the assembly screw. I painted them in titanium gold and gun metal for the thread of the bolt I then connected the first hose on the bypass valve produced by Riccardo. I made the fitting out of a 1mm piece of wire to which I inserted a 1.2 hex nut from Top studio. On the top of the bypass valve I then marked with red and green metallic to signal the tightening and / or pressure and / or operation check. Temporary coupling between RA168E and gearbox for mounting and aligning the exhausts with the undertray .... finally I connected the various lubrication ducts of the IHI turbos. The gearbox and ritual photo are remounted. 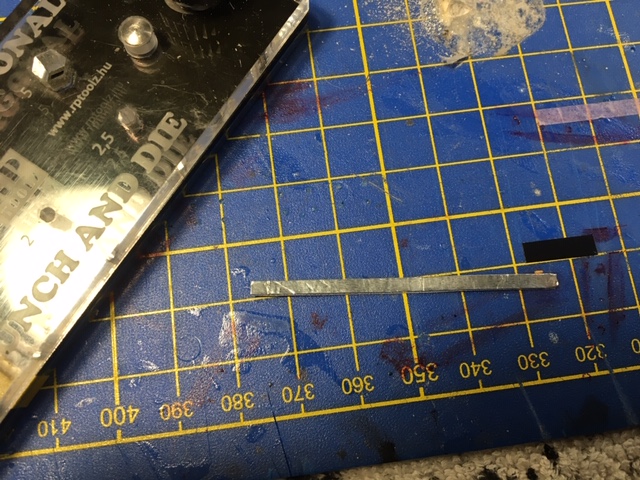 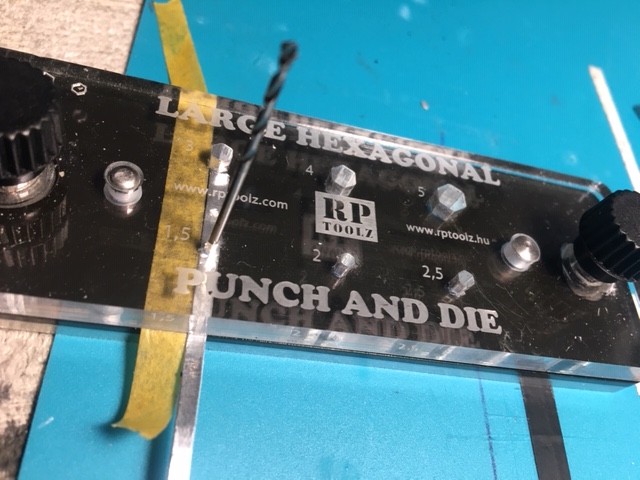 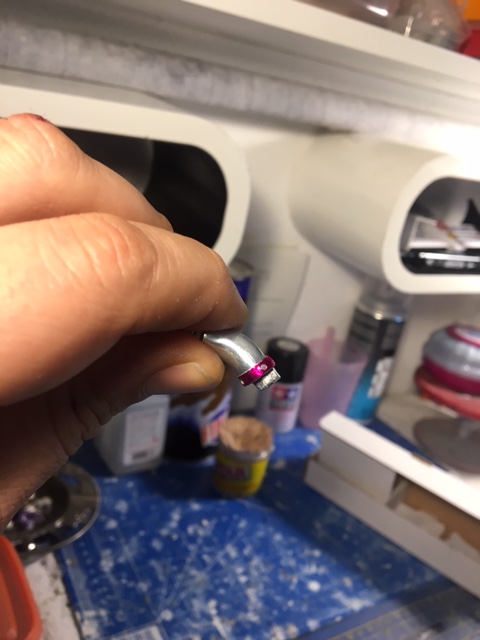 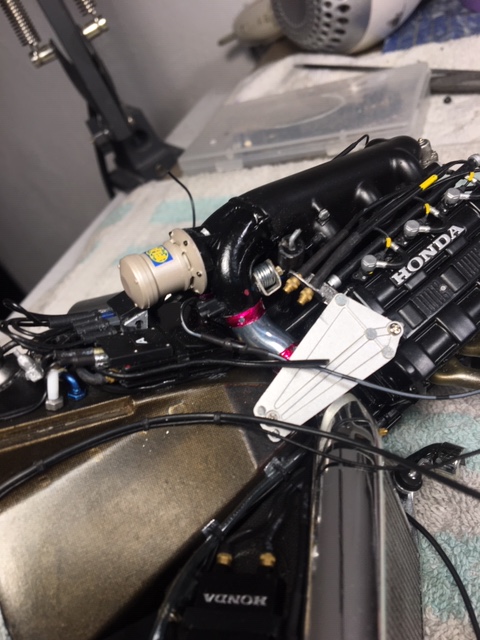 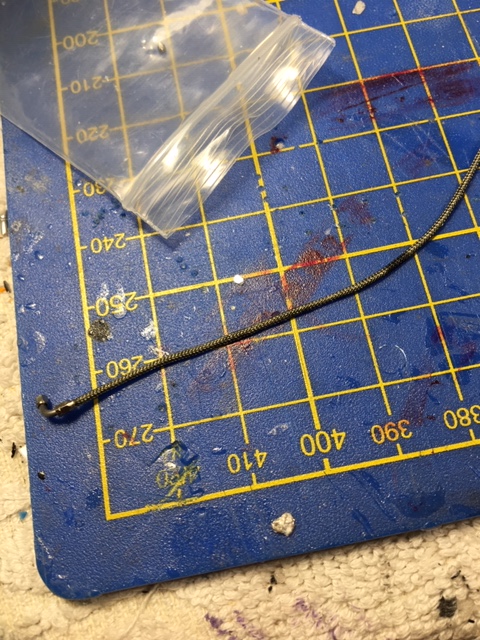  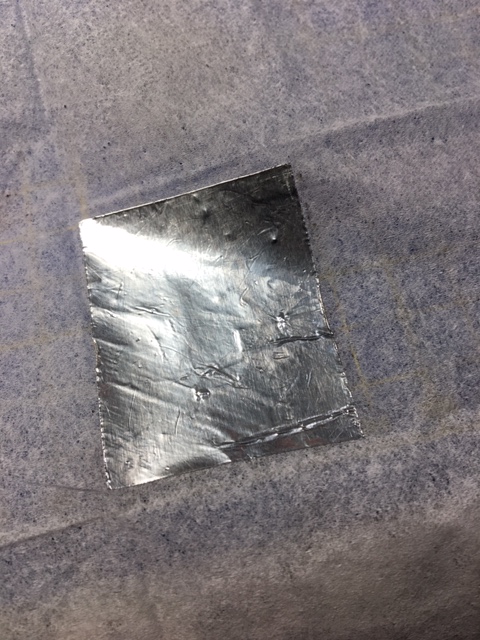 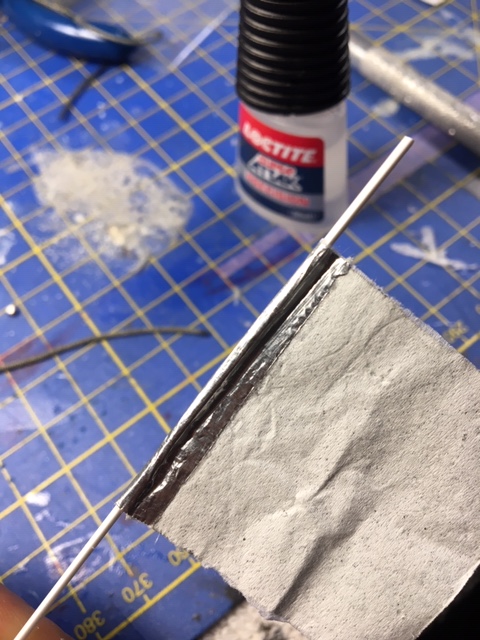 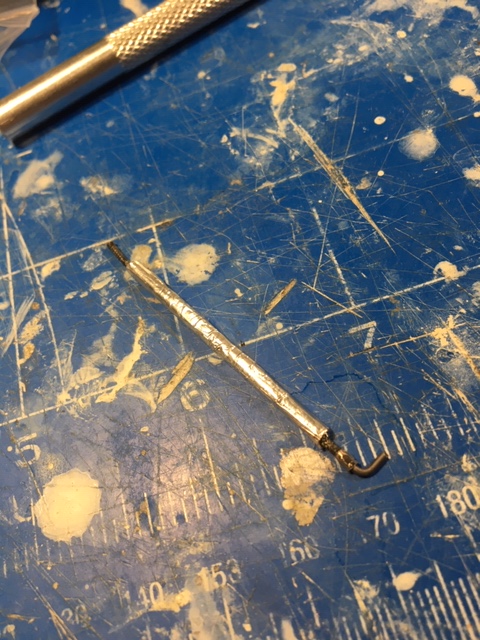 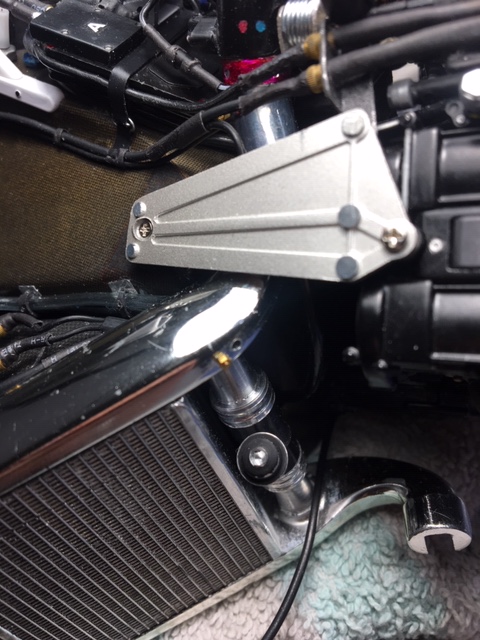 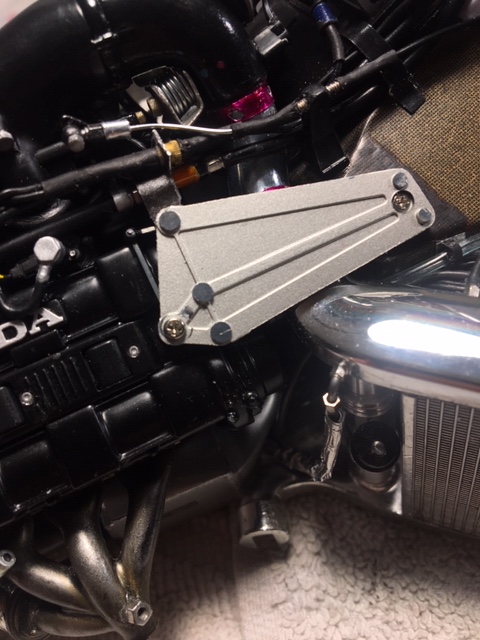  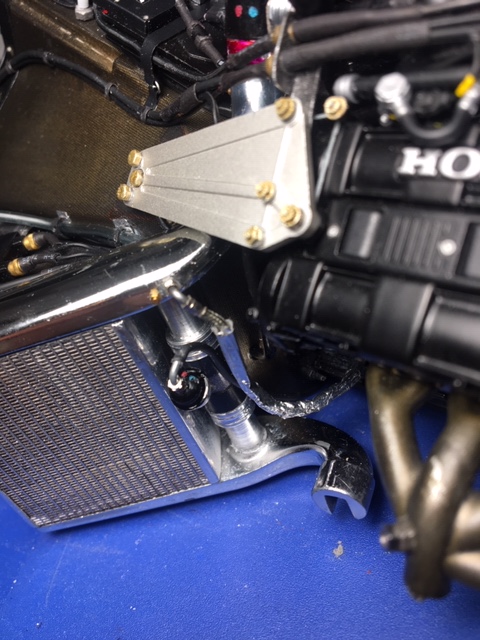 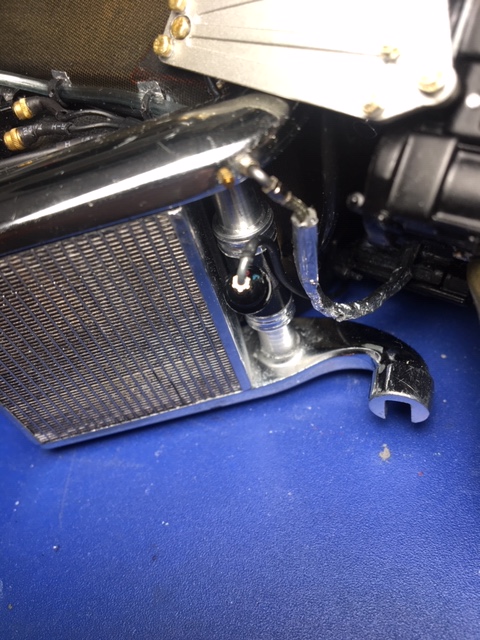 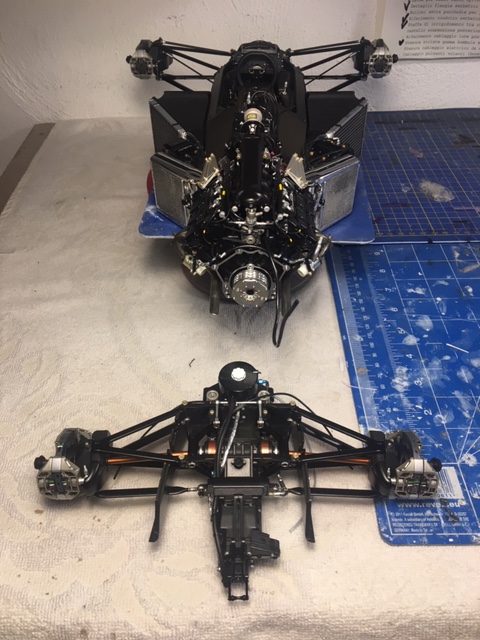 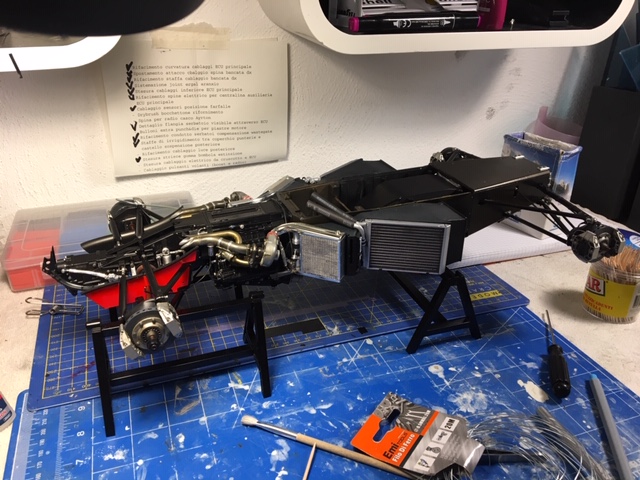 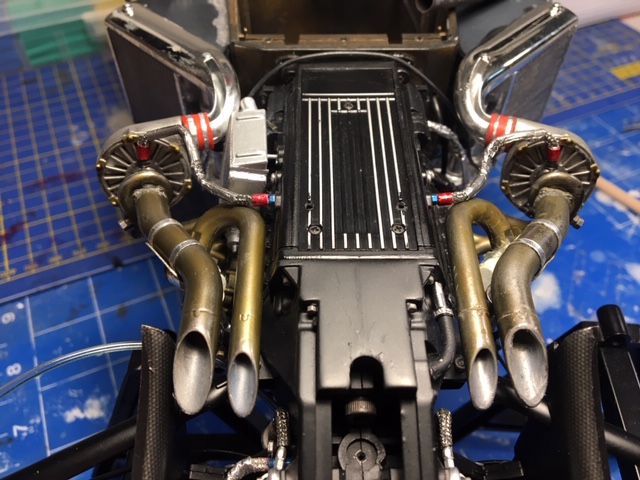 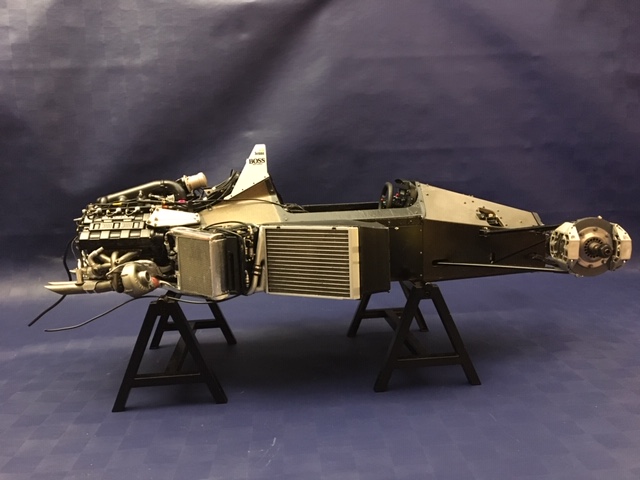 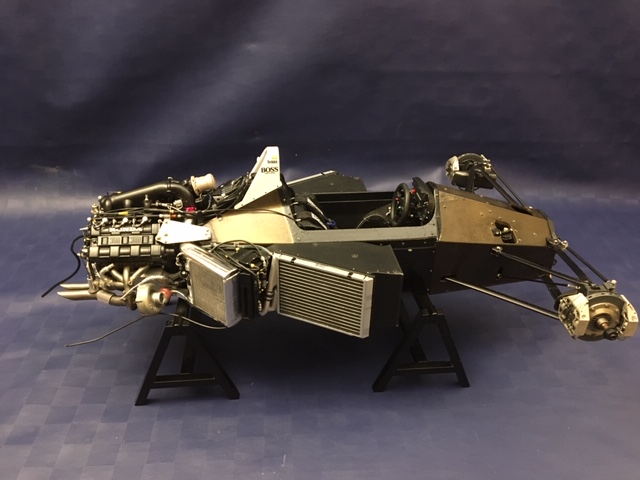 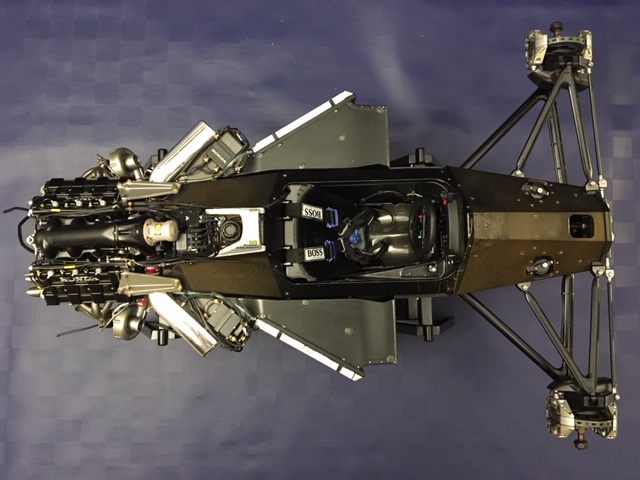 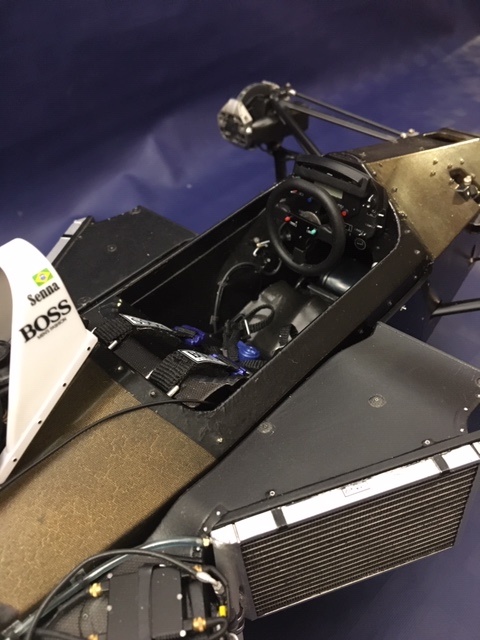 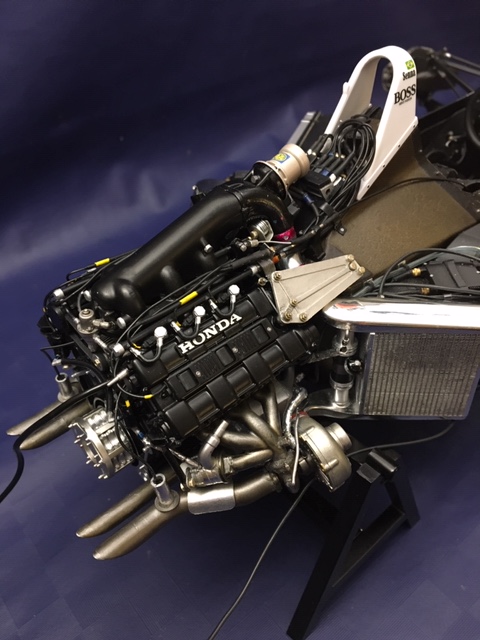 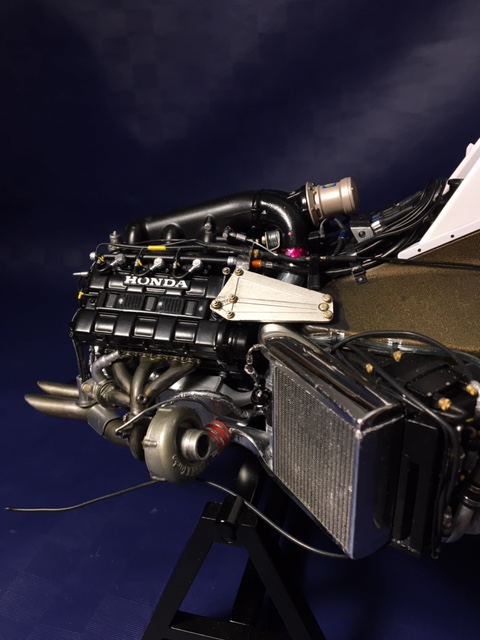 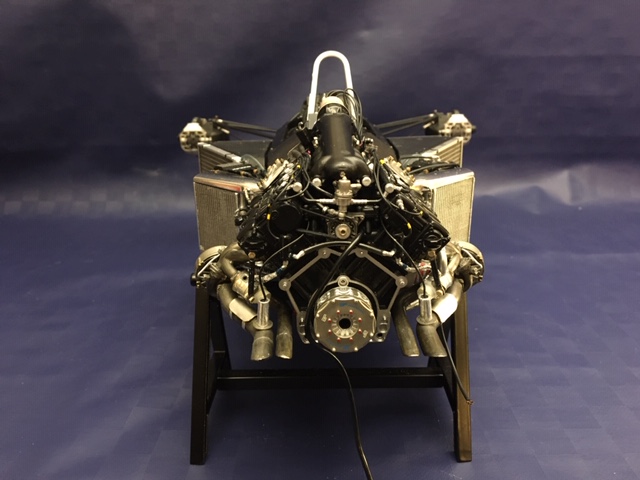 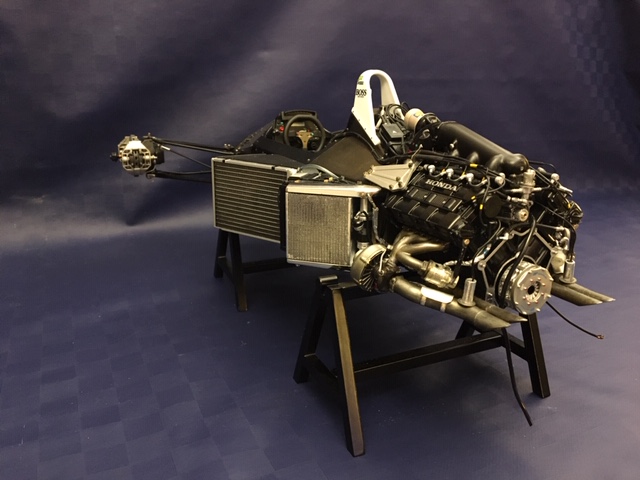 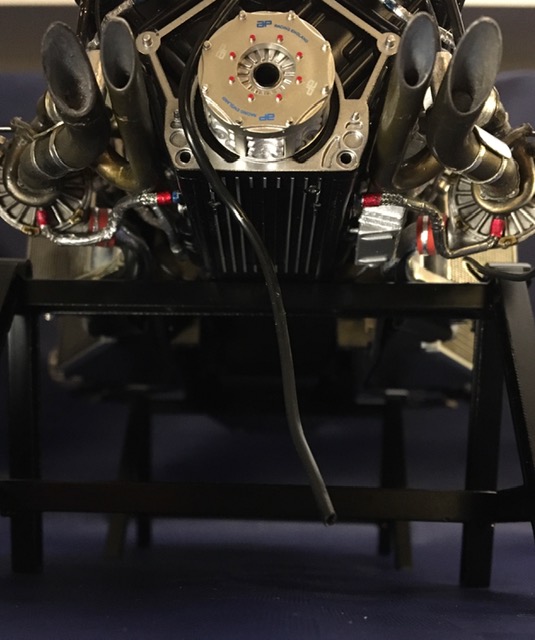 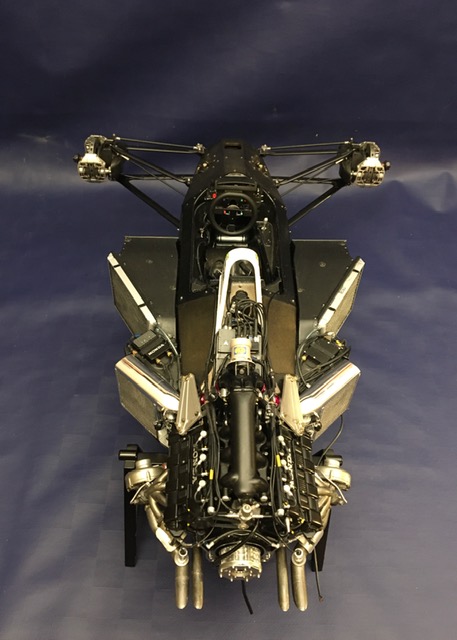 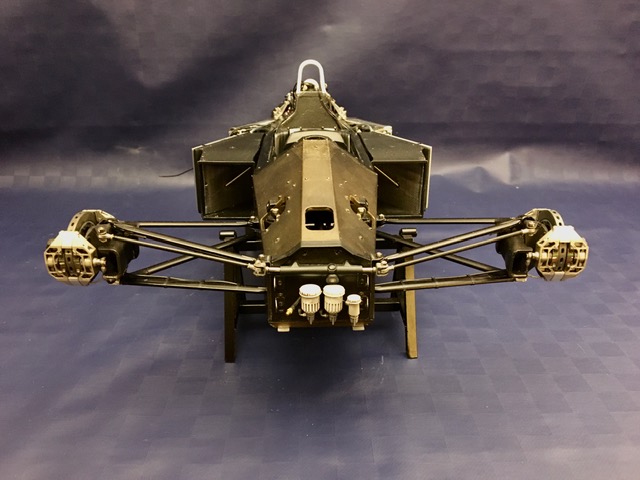 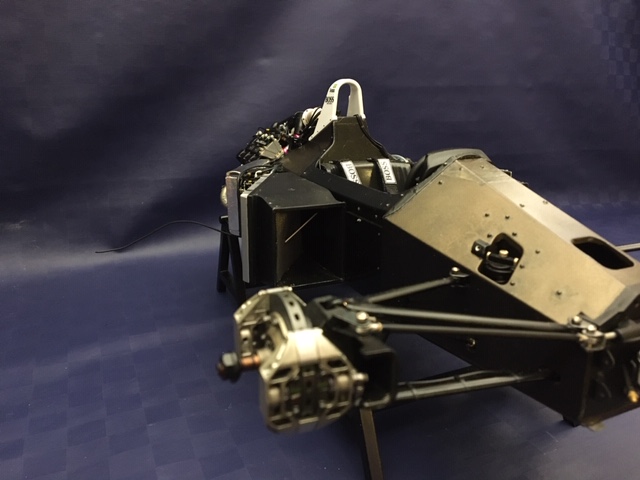 Collection active: Lotus 97T, Audi Quattro A2, Vw Maggiolino '60
Work in progress: Porsche 911 RS Turbo
Completed model: Delta WRC Martini, Mclaren MP4/4, Golf GTI 1/8 Tuned
|
|
|
Rank: Vice-Master Groups: Registered
Joined: 05/04/2016 Posts: 705 Points: 2,118 Location: Ferrara
|
|
|
|
 Rank: Super-Elite   Groups: Official Builds, Administrators, Moderator, Global Forum Support, Registered Joined: 04/06/2011 Posts: 4,215 Points: 12,790 Location: ipswich
|
An amazing piece of work here. Absolute show-stopper. Very well done.
|
|
|
|
|
|
|
|
Rank: Vice-Master Groups: Registered
Joined: 05/04/2016 Posts: 705 Points: 2,118 Location: Ferrara
|
roymattblack wrote:An amazing piece of work here. Absolute show-stopper. Very well done. Thanks Roy and Mark…..very happy to give you a good viewing After I finished the macro group, I moved on some missing details on the body and antennas The antenna of “version A” were a little simple: I sawed off the base, added a nut of M 1.4. After screwing the 1.4 m screw, I finally screw the antenna which are different in shape and which have two distinctly colored bands (yellow and blue). The body was missing the 6 Dzus fastener ...... Kyosho supplied them but for inserting the screw to fix the bodyshell .... I understand that I will never “dress” the body…so I worked on fasteners as open when bodyshell is off. I inserted the rivet leaving it protrude, painted in aluminum and then the final coat of black panel I removed the wrong nose decal and finally I put the new decal (decal that was born whole…I divided it between the nose and the shell) 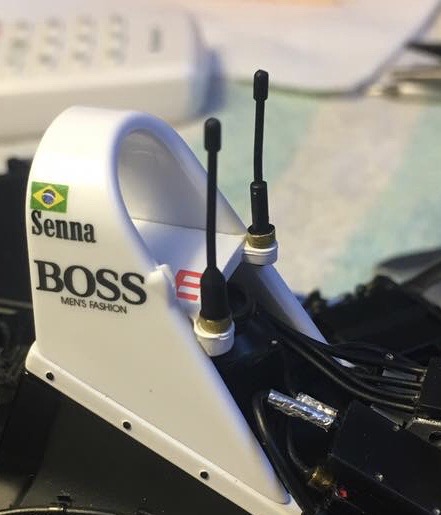 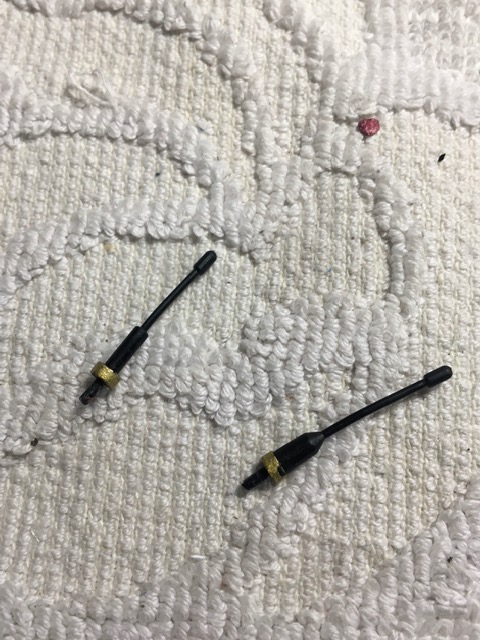 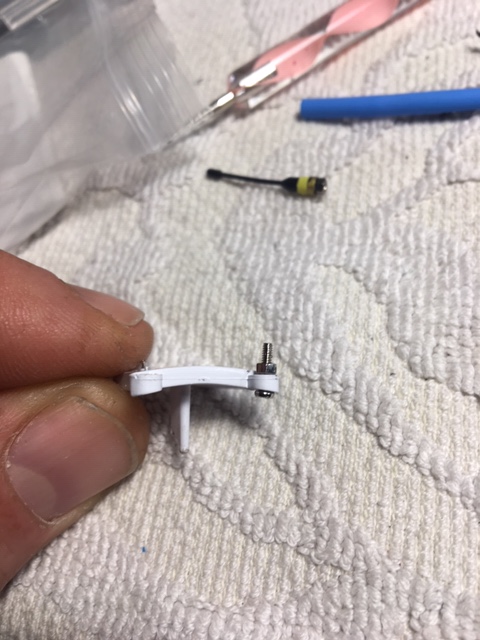 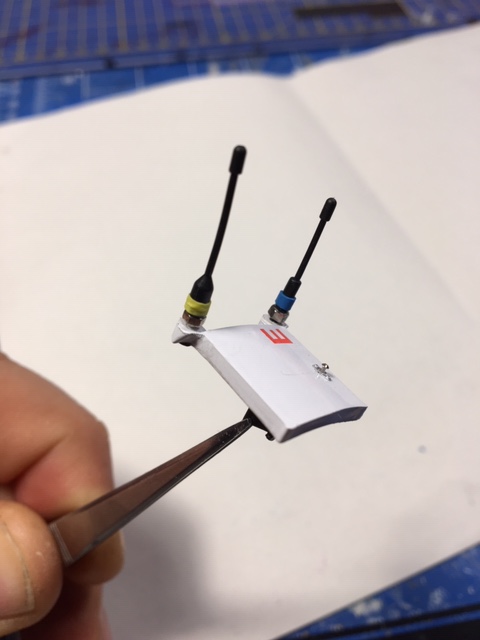 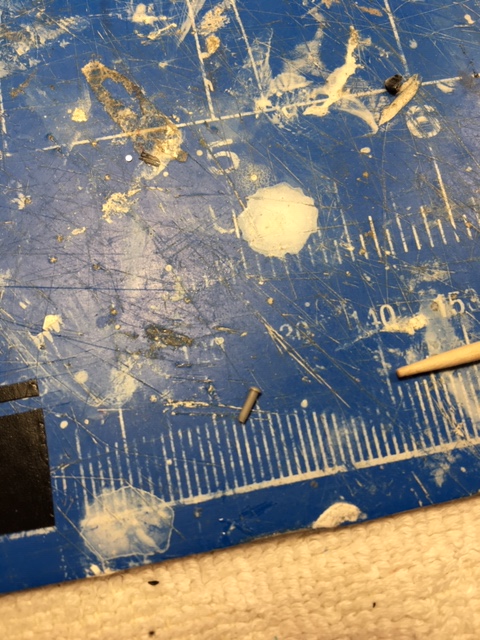 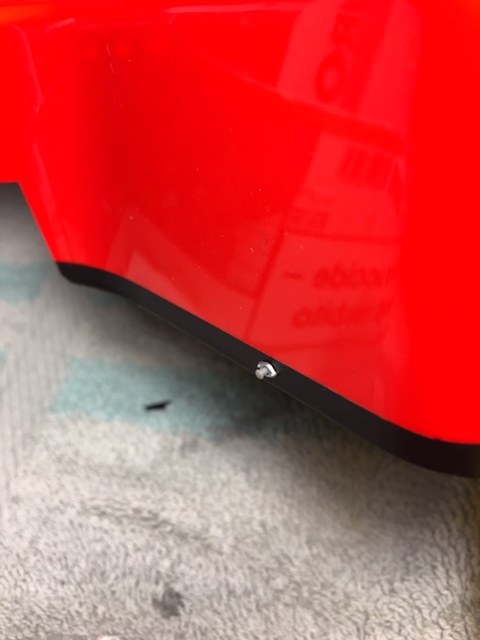 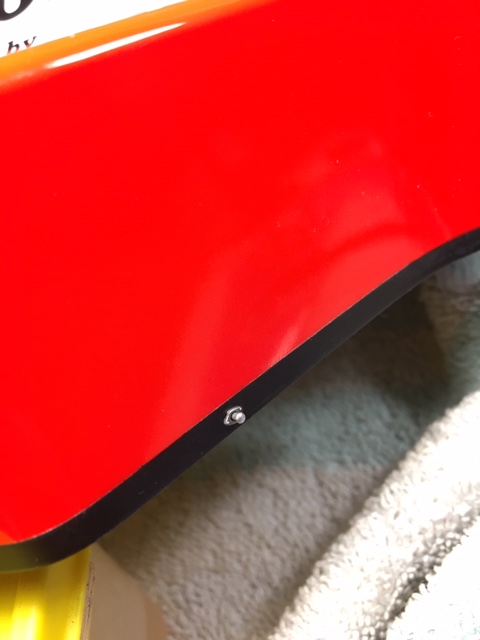 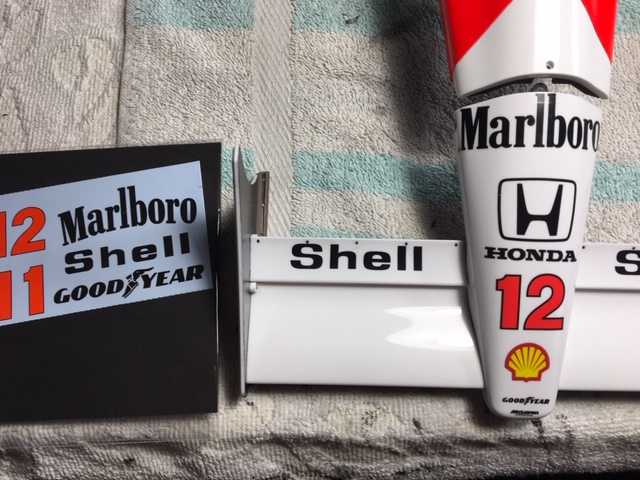 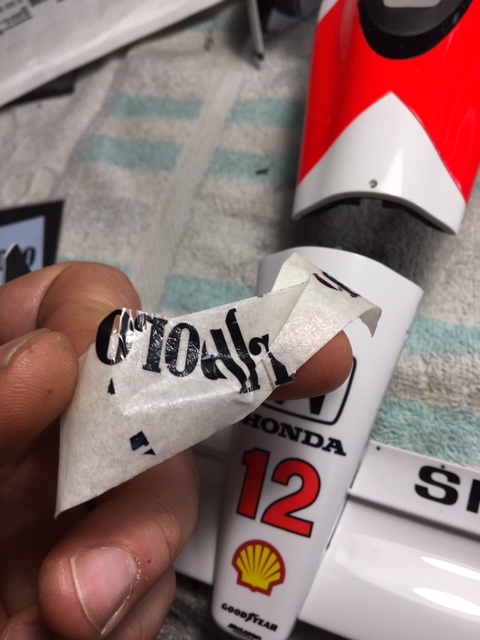 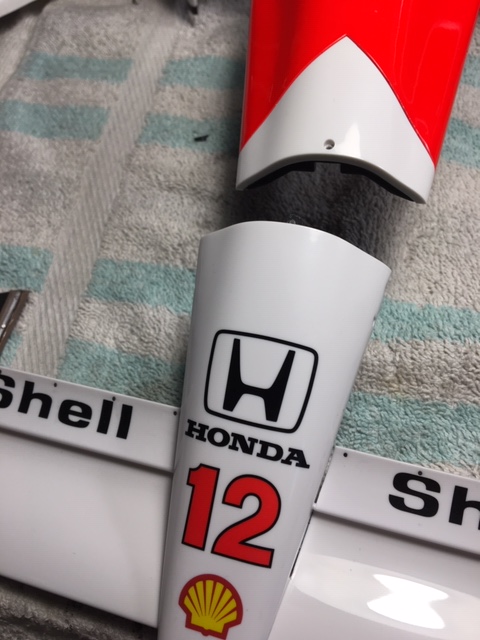 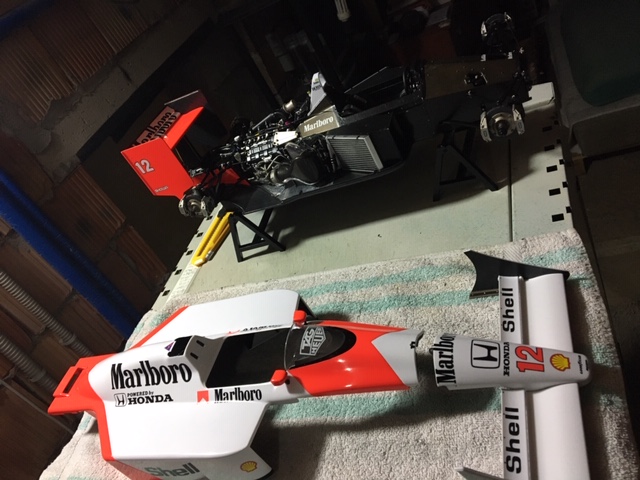 Collection active: Lotus 97T, Audi Quattro A2, Vw Maggiolino '60
Work in progress: Porsche 911 RS Turbo
Completed model: Delta WRC Martini, Mclaren MP4/4, Golf GTI 1/8 Tuned
|
|
|
|
|
Outstanding details on this build. Fantastic work.
Malc.
|
|
|
Rank: Vice-Master Groups: Registered
Joined: 05/04/2016 Posts: 705 Points: 2,118 Location: Ferrara
|
RM1 wrote:Outstanding details on this build. Fantastic work.
Malc. thanks Malc  I Finished (in reality I miss the bleeder on the calipers and a decal that will reach me) I PlaceD the last detail left last: The label with chassis # 2 (the label 26) I was forgetting a important detail..... the weights of the balance. With Plasticard and aluminum tape and a perfect photo of Suzuka, I reproduced them 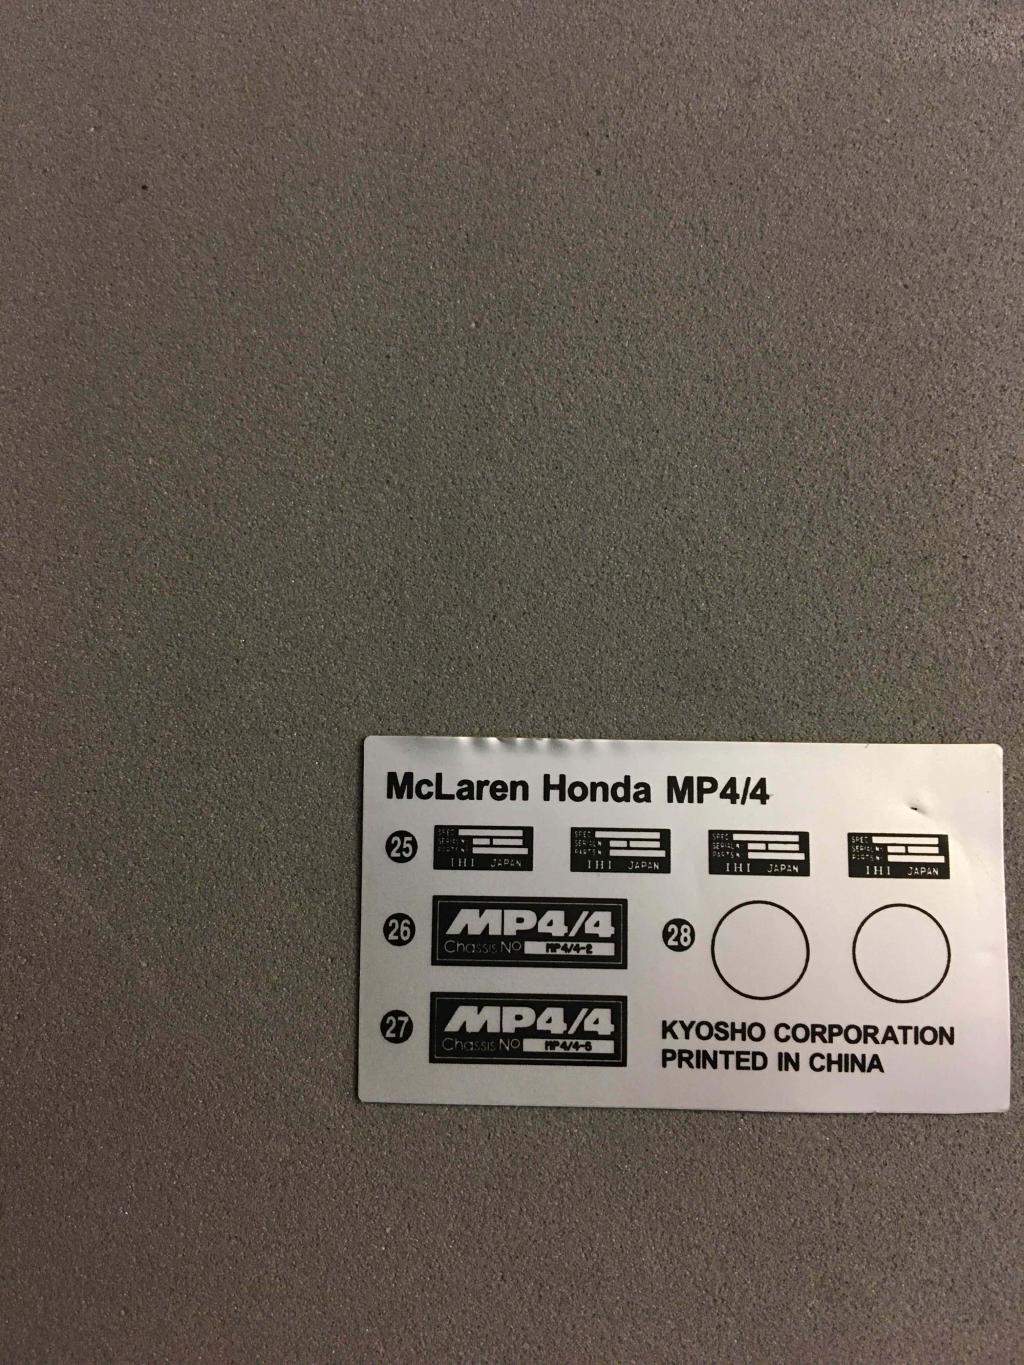    Collection active: Lotus 97T, Audi Quattro A2, Vw Maggiolino '60
Work in progress: Porsche 911 RS Turbo
Completed model: Delta WRC Martini, Mclaren MP4/4, Golf GTI 1/8 Tuned
|
|
|
Rank: Vice-Master Groups: Registered
Joined: 05/04/2016 Posts: 705 Points: 2,118 Location: Ferrara
|
|
|
|
Rank: Vice-Master Groups: Registered
Joined: 05/04/2016 Posts: 705 Points: 2,118 Location: Ferrara
|
|
|
|
Rank: Vice-Master Groups: Registered
Joined: 05/04/2016 Posts: 705 Points: 2,118 Location: Ferrara
|
|
|
|
Rank: Vice-Master Groups: Registered
Joined: 05/04/2016 Posts: 705 Points: 2,118 Location: Ferrara
|
4/4 I modified the display mode of my MP4/4 Under i positioned the bosdyshell with a mirror to see the internal carbon and heatshield. The car is also positioned on lego brick to not deform the tyres 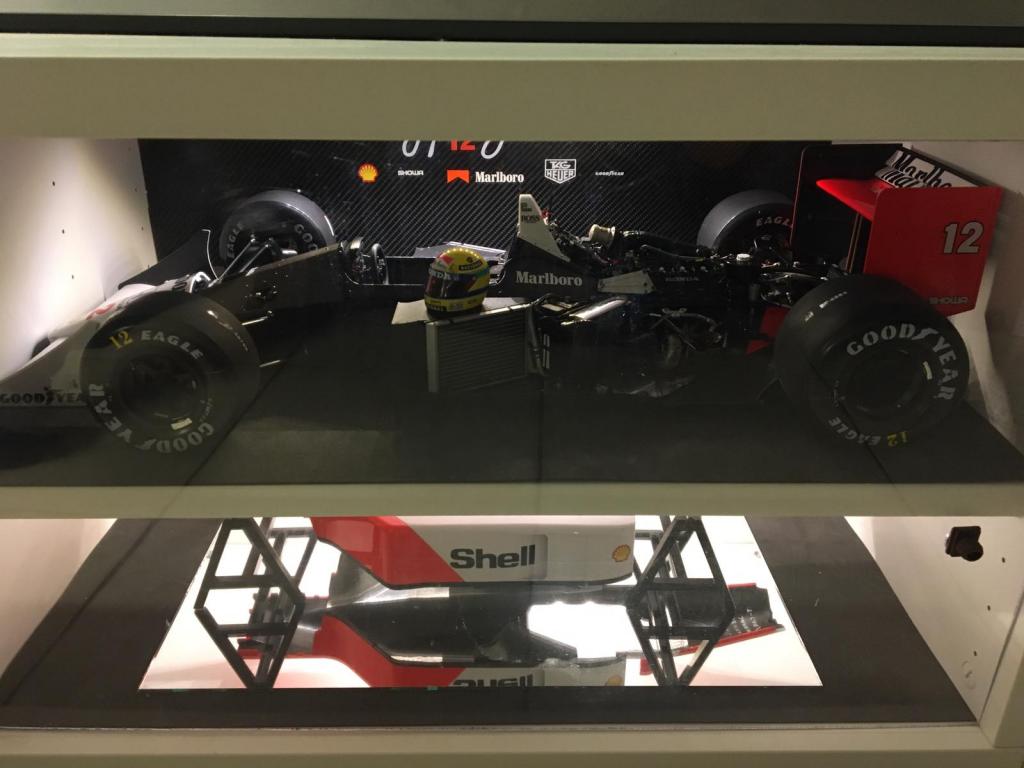 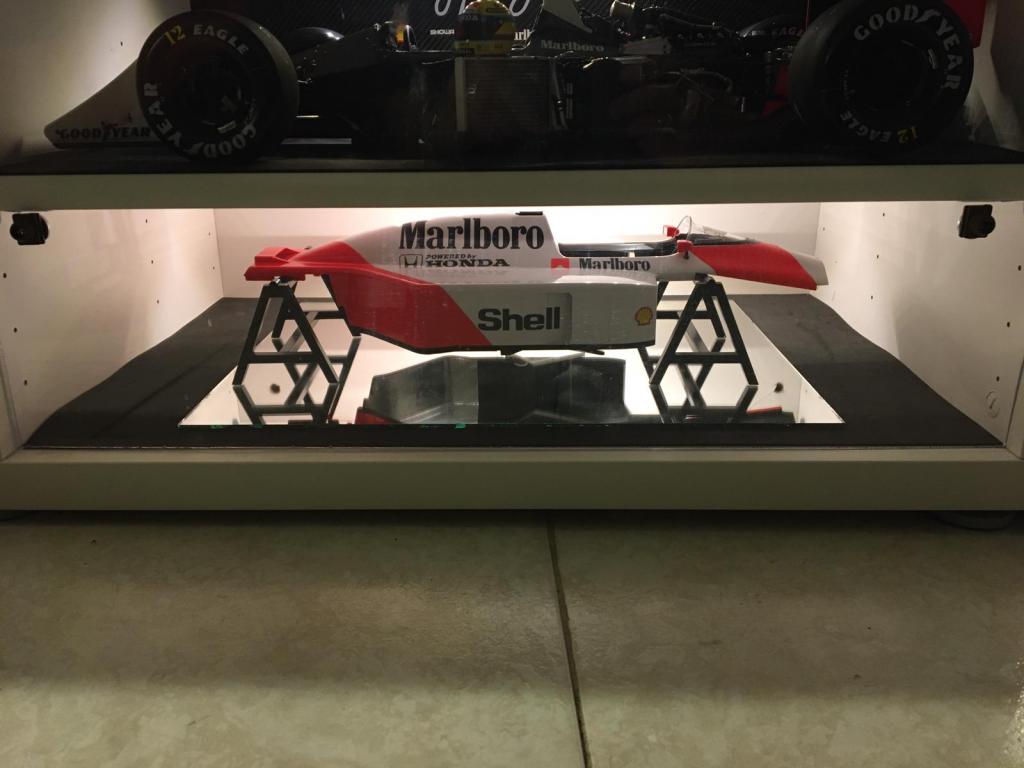 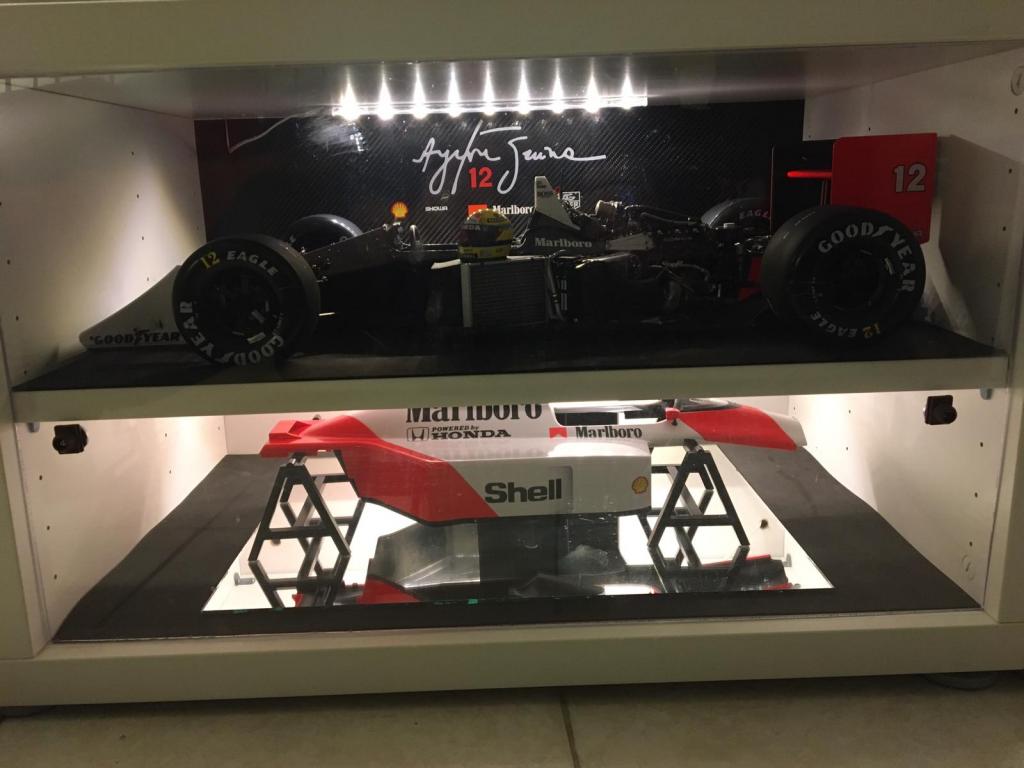 I also add another led strips and finally i positioned the last thing: Ayrton's helmet 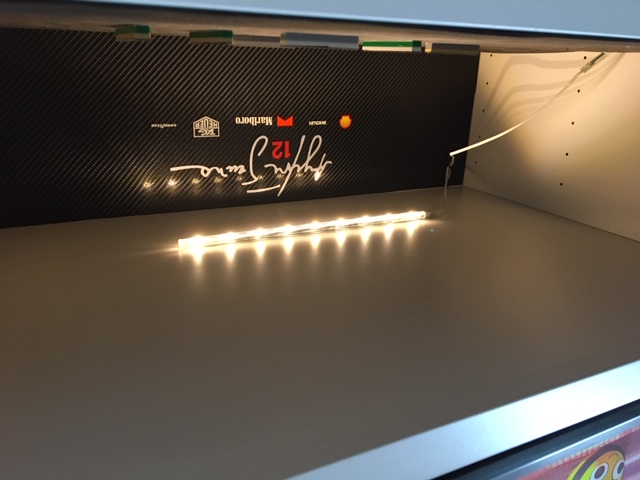 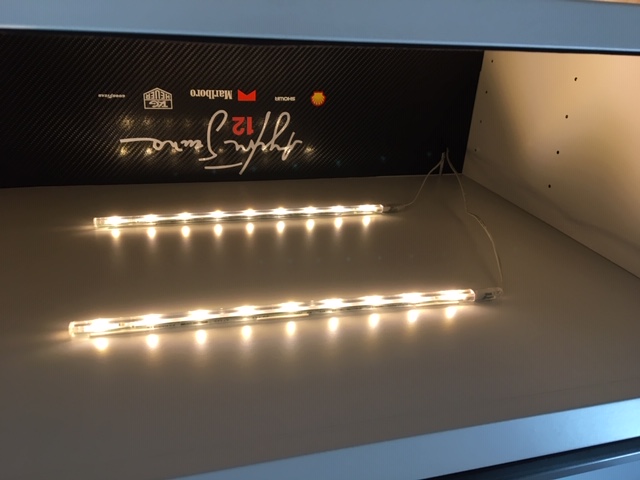  Collection active: Lotus 97T, Audi Quattro A2, Vw Maggiolino '60
Work in progress: Porsche 911 RS Turbo
Completed model: Delta WRC Martini, Mclaren MP4/4, Golf GTI 1/8 Tuned
|
|
|
|
|
Great result and very nicely displayed. Well done !!
Malc.
|
|
|
Rank: Administration   Groups: Registered, Forum Support Team, Administrators, Global Forum Support Team, Moderator, Official Builds Joined: 09/11/2012 Posts: 7,951 Points: 23,039 Location: East midlands
|
Excellent build and a great choice for the April featured build of the month.  Regards delboy271155 (Derek) COME BACK GUY FAWKES "YOUR COUNTRY NEEDS YOU"
|
|
|
Rank: Vice-Master Groups: Registered
Joined: 05/04/2016 Posts: 705 Points: 2,118 Location: Ferrara
|
delboy271155 wrote:Excellent build and a great choice for the April featured build of the month. Regards delboy271155 (Derek) This is a big honor for me. Thank yoy very much Collection active: Lotus 97T, Audi Quattro A2, Vw Maggiolino '60
Work in progress: Porsche 911 RS Turbo
Completed model: Delta WRC Martini, Mclaren MP4/4, Golf GTI 1/8 Tuned
|
|
|
 Rank: Master Groups: Registered
Joined: 21/04/2011 Posts: 1,039 Points: 3,140 Location: Buckinghamshire
|
Excellent build. Congratulations on the award.
Chris.
|
|
|
|
Guest
|
 US
US

