|
|
 Rank: Super-Elite        Groups: Registered
Joined: 11/11/2009 Posts: 3,432 Points: 10,280 Location: Bâe Colwyn, Wales
|
Lovely job Oldsid, Very nice work. Chris On the bench 1/350 Revell Tirpitz Platinum Edition (Pontos PE and Wooden deck) plus extra Eduard PE set and extra MK1 door sets.
|
|
|
 Rank: Pro Groups: Registered
Joined: 03/06/2016 Posts: 101 Points: 279 Location: New Hope, MN
|
arpurchase wrote:Hi Sid
Looking good and by the way did you remember to offset the bolt on the boiler ring next to the firebox by about half an inch otherwise it will destroy the silicon tube motor joint the first time you start her up.
Andy Don't recall any instructions about offsetting a bolt on the boiler ring. I vaguely remember a post in the conversation forum about a bolt but don't remember what it said. Can you enlighten me?
|
|
|
|
|
Hi Sid If you go too pack 25 instructions page 216 [ it has the heading 'The figures and coal'] stage 99 the 1st pic shows the boiler with a red reference line, just read the instructions below this 1st picture. Andy Current builds:-C57,Zero, Lamborghini Countach, Caldercraft HMS Agamemnon,Robi,R2-D2, MFH Cobra .
|
|
|
Rank: Super-Elite Groups: Registered, Moderator, Tech Support, Technical Support, Forum Support Team, Forum Support USA, Global Forum Support, Global Forum Support Team Joined: 17/12/2013 Posts: 3,983 Points: 11,974 Location: NY, USA
|
oldsid wrote:arpurchase wrote:Hi Sid
Looking good and by the way did you remember to offset the bolt on the boiler ring next to the firebox by about half an inch otherwise it will destroy the silicon tube motor joint the first time you start her up.
Andy Don't recall any instructions about offsetting a bolt on the boiler ring. I vaguely remember a post in the conversation forum about a bolt but don't remember what it said. Can you enlighten me? Yes it is not discussed until almost the end of the build.I missed it in the instructions and had problems with my motor.The motor attaches to the drive gear with a piece of silastic tubing. The nut and bolt for the rearmost boiler ring is in the way so when you attach the body to the chassis and run the motor the tubing gets torn up by the boiler ring nut and bolt.As Andy said you have to shift the nut and bolt over as bit so it is out of the way of the tubing. You train looks great so far!!!
|
|
|
Rank: Pro Groups: Registered
Joined: 03/06/2016 Posts: 101 Points: 279 Location: New Hope, MN
|
arpurchase wrote:Hi Sid
If you go too pack 25 instructions page 216 [ it has the heading 'The figures and coal'] stage 99 the 1st pic shows the boiler with a red reference line, just read the instructions below this 1st picture.
Andy Kind of late in the game. Looks like it should be included with the installation of the bands, especially if the bands are painted and stuck to the boiler, as mine were.
|
|
|
Rank: Pro Groups: Registered
Joined: 03/06/2016 Posts: 101 Points: 279 Location: New Hope, MN
|
Assembled the Back Head and installed it to the Boiler Assembly. Thanks Andy, for reminding me about the rear band nut and bolt offset. I certainly would have missed it. Just found out the offset instruction is in Pack 25. I guess better late than never.
|
|
|
Rank: Administration  Groups: Registered, Forum Support Team, Administrators, Global Forum Support Team, Moderator, Official Builds Joined: 09/11/2012 Posts: 7,946 Points: 23,024 Location: East midlands
|
Looking good Sid. Regards delboy271155 (derek) COME BACK GUY FAWKES "YOUR COUNTRY NEEDS YOU"
|
|
|
|
|
Very tidy build, well done.
|
|
|
|
|
Hi Sid A few of us were nearly caught out by the strap but at least your sorted on it now. Looking good and nice work on the back head. Andy Current builds:-C57,Zero, Lamborghini Countach, Caldercraft HMS Agamemnon,Robi,R2-D2, MFH Cobra .
|
|
|
Rank: Super-Elite  Groups: Registered
Joined: 31/05/2010 Posts: 5,679 Points: 17,011 Location: Wiltshire
|
Sid Looking very good indeed. Hope the rest of the build goes well. Happy Modelling
BUILDING: Hachette Spitfire Mk 1A, Constructo Mayflower
SUBSCRIPTION COMPLETE (Awaiting building): USS Constitution, Sovereign of the Seas, 1:200 Bismarck (Hachette)
COMPLETED: Porsche 911, E-Type Jaguar, Lam Countach
|
|
|
Rank: Pro Groups: Registered
Joined: 03/06/2016 Posts: 101 Points: 279 Location: New Hope, MN
|
Installed Running Boards both sides. Installed the Compressor and the Left Air Reservoir and Cooling tube. Attached the Front Deck.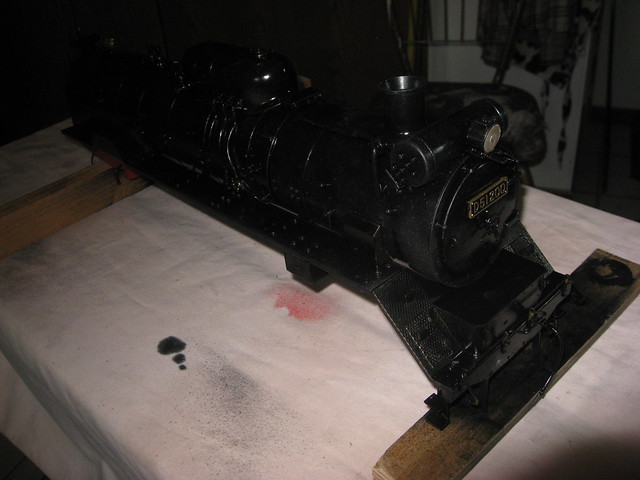 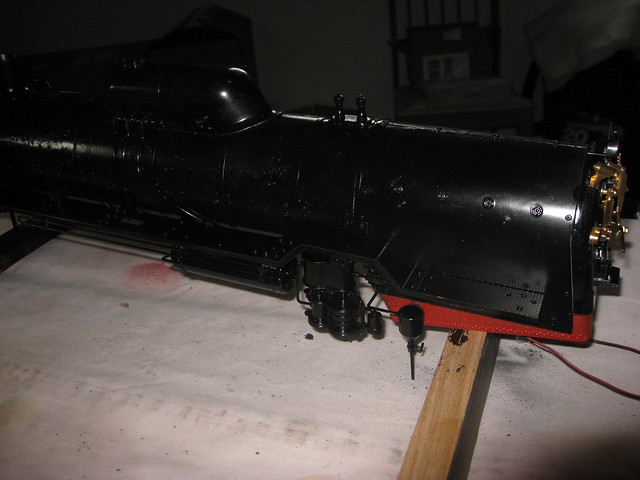
|
|
|
Rank: Super-Elite Groups: Registered, Moderator, Tech Support, Technical Support, Forum Support Team, Forum Support USA, Global Forum Support, Global Forum Support Team Joined: 17/12/2013 Posts: 3,983 Points: 11,974 Location: NY, USA
|
Coming along nicely now Oldsid
Carl
|
|
|
Rank: Super-Elite  Groups: Registered
Joined: 19/06/2013 Posts: 4,588 Points: 13,553 Location: West Yorkshire
|
Great work Sid, I bet its getting a bit heavier now.
Al
|
|
|
|
|
Looks good from here Current builds:-C57,Zero, Lamborghini Countach, Caldercraft HMS Agamemnon,Robi,R2-D2, MFH Cobra .
|
|
|
Rank: Pro Groups: Registered
Joined: 03/06/2016 Posts: 101 Points: 279 Location: New Hope, MN
|
Installed the Water Pump and the Right Air Reservoir and Cooling Tube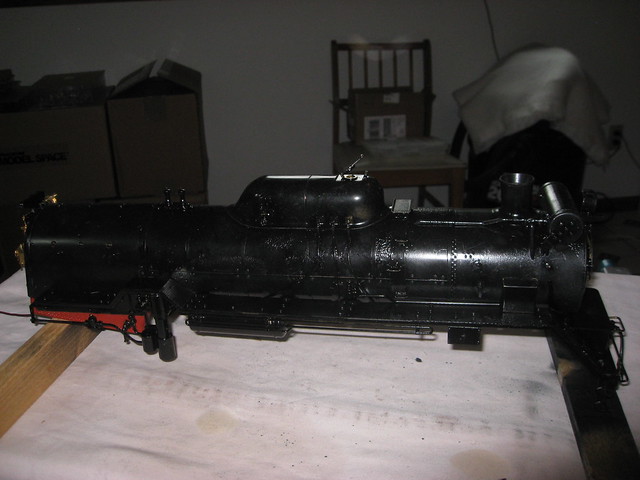
|
|
|
Rank: Pro Groups: Registered
Joined: 03/06/2016 Posts: 101 Points: 279 Location: New Hope, MN
|
After a lot of aggravation and a few #$%words and screaming for my wife to help with another pair of hands, I finally got both front deflector plates installed and the cab and cab floor attached to the Boiler. Still have a couple pieces to install yet namely the firebox board and another part I haven’t figured out yet where it goes. It’s called a water distribution valve. It’s probably in the instructions somewhere.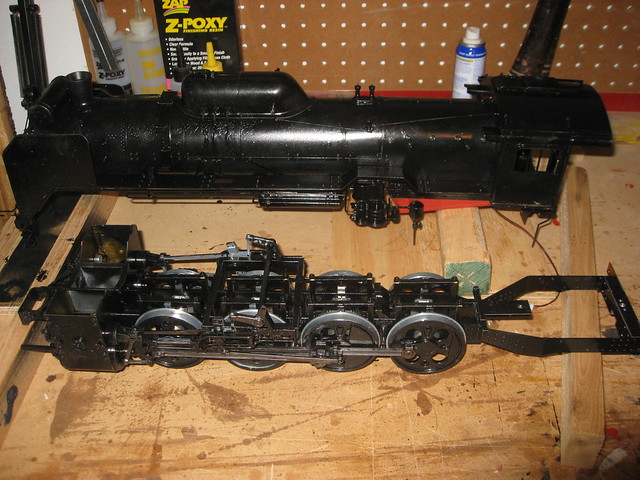
|
|
|
|
|
Great job so far and looking great the part your wondering about I think will be fitted right at the end of the build or at least in that final assembly Current builds:-C57,Zero, Lamborghini Countach, Caldercraft HMS Agamemnon,Robi,R2-D2, MFH Cobra .
|
|
|
Rank: Super-Elite Groups: Registered
Joined: 19/06/2013 Posts: 4,588 Points: 13,553 Location: West Yorkshire
|
Good work Sid, looks great.
Al
|
|
|
Rank: Pro Groups: Registered
Joined: 03/06/2016 Posts: 101 Points: 279 Location: New Hope, MN
|
arpurchase wrote:Great job so far and looking great the part your wondering about I think will be fitted right at the end of the build or at least in that final assembly Thanks, I'll add it to the box I have along with all the spare screws and such that I have accumulated so far. The only other part that I haven't installed yet is the Diode Board for the firebox. Than it looks like I'll be ready to start working on the under carriage again.
|
|
|
Rank: Pro Groups: Registered
Joined: 03/06/2016 Posts: 101 Points: 279 Location: New Hope, MN
|
Spal wrote:Good work Sid, looks great.
Al Thanks for looking in. Has been fun so far even at times aggravating. Hardest part lately was installing the deflector plates on both side of the front of the boiler. Instant adhesive didn't cut it... overtime I tried to turn it over to do something else the slightest squeeze in the wrong place broke one or the other of the glue joints. I finally used 5 minute epoxy for all the joints and finally got them both installed for keeps.
|
|
|
|
Guest
|
 US
US

