|
|
 Rank: Master      Groups: Registered
Joined: 07/07/2015 Posts: 1,292 Points: 3,928 Location: Allentown PA
|
Ok so I wasn't planning on posting this until the display was started. However it won't be until sometime in August that it will start and I couldn't wait any longer to post about it. The short version is that I will be displaying this build in a local automotive museum. It's a small museum and they are know for having rotating and changing displays all year long. So I decided it would be cool to set this up as a evolving display. Each month I will display the current months magazines and parts that I have received. When I receive the next month I will assemble all previous issues and put the new issues and parts on display along with all assembled bits. For the most part I plan to build as is but there will be a part from time to time that I will paint or detail.
DeAgostini kit builds:
Millennium Falcon: 18% Complete
Shelby GT-500: 28% Complete
Thunderbird 2: 13.75% Complete
|
|
|
 Rank: Super-Elite  Groups: Registered
Joined: 17/12/2013 Posts: 3,982 Points: 11,974 Location: NY, USA
|
|
|
|
Rank: Master Groups: Registered
Joined: 07/07/2015 Posts: 1,292 Points: 3,928 Location: Allentown PA
|
So not much too see yet in way of photos. I have been buying a few things for display purposes once I get to put this into a case in the museum. One thing I have been contemplating is decorations. The magazines and model parts itself are more then enough for a display. However the case I will be getting will end up with a lot of unused space. I have been trying to think of ways to decorate the case to go along with the model. The fold out poster that come with the first month is getting framed, and that will be on display on top of the case. I plan to put the hat and Zippo inside the case as well. Trying to come up with some other ideas as well. I was thinking maybe some metal signs from Hobby Lobby. Maybe a wooden crate with the ford logo an some tools. these are just random ideas floating through my head. Not sure if they are good ideas or just a waste of money. Maybe some of you have ideas or input on this subject? I would appreciate it.
DeAgostini kit builds:
Millennium Falcon: 18% Complete
Shelby GT-500: 28% Complete
Thunderbird 2: 13.75% Complete
|
|
|
|
|
Interesting idea and I look forward to seeing pics of the various displays as it progresses.....Good luck with it..
Regards
Alan
|
|
|
Rank: Master Groups: Registered
Joined: 07/07/2015 Posts: 1,292 Points: 3,928 Location: Allentown PA
|
Ok finally update time. Tomorrow I officially get to put my model on display in the museum. I will have plenty of photos to post of the set up. For now I will leave you with a few photos of the parts I painted. I painted the air filter white with a light coat so the primer could show through in spots. I wanted it to have that dusty, slightly used look. I also painted both calipers red. They are still attached to my part holders because they need another light coat tomorrow. I wanted to paint my rotors but I ran out of primer after the calipers. Will just have to do that later. I have something special in mind I am going to try on the calipers. Here are the photos, more tomorrow after I get all set up. 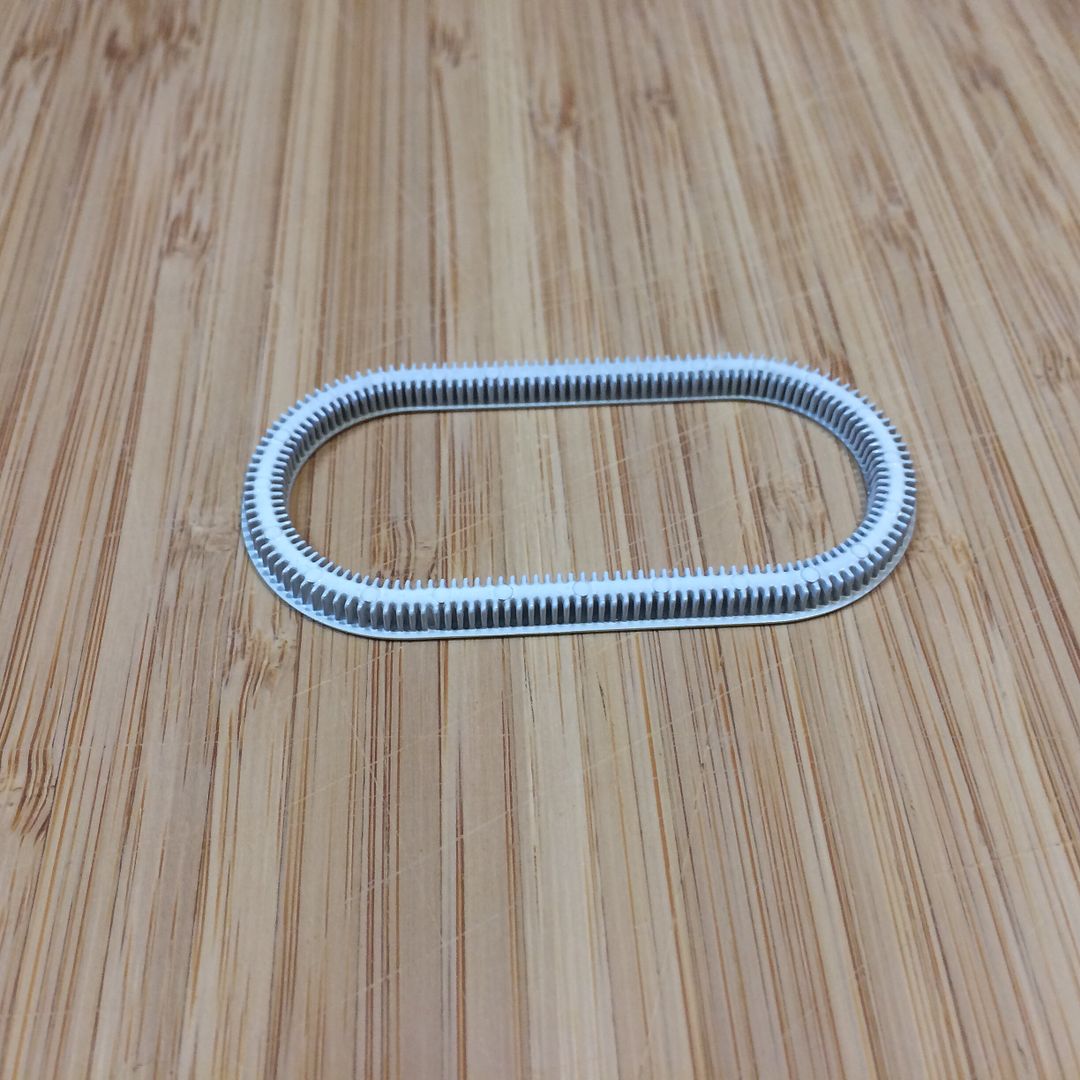 
DeAgostini kit builds:
Millennium Falcon: 18% Complete
Shelby GT-500: 28% Complete
Thunderbird 2: 13.75% Complete
|
|
|
Rank: Super-Elite  Groups: Registered
Joined: 27/01/2014 Posts: 5,060 Points: 14,980
|
Nicely done  I'm intrigued to see photos of the museum setup when you've got them
|
|
|
Rank: Master Groups: Registered
Joined: 07/07/2015 Posts: 1,292 Points: 3,928 Location: Allentown PA
|
Heading out now to set up. Here is a quick teaser. I love how the poster looks framed except for the fold lines. I contacted customer care to see if its possible to get a rolled, unfolded version because it will looks much better. 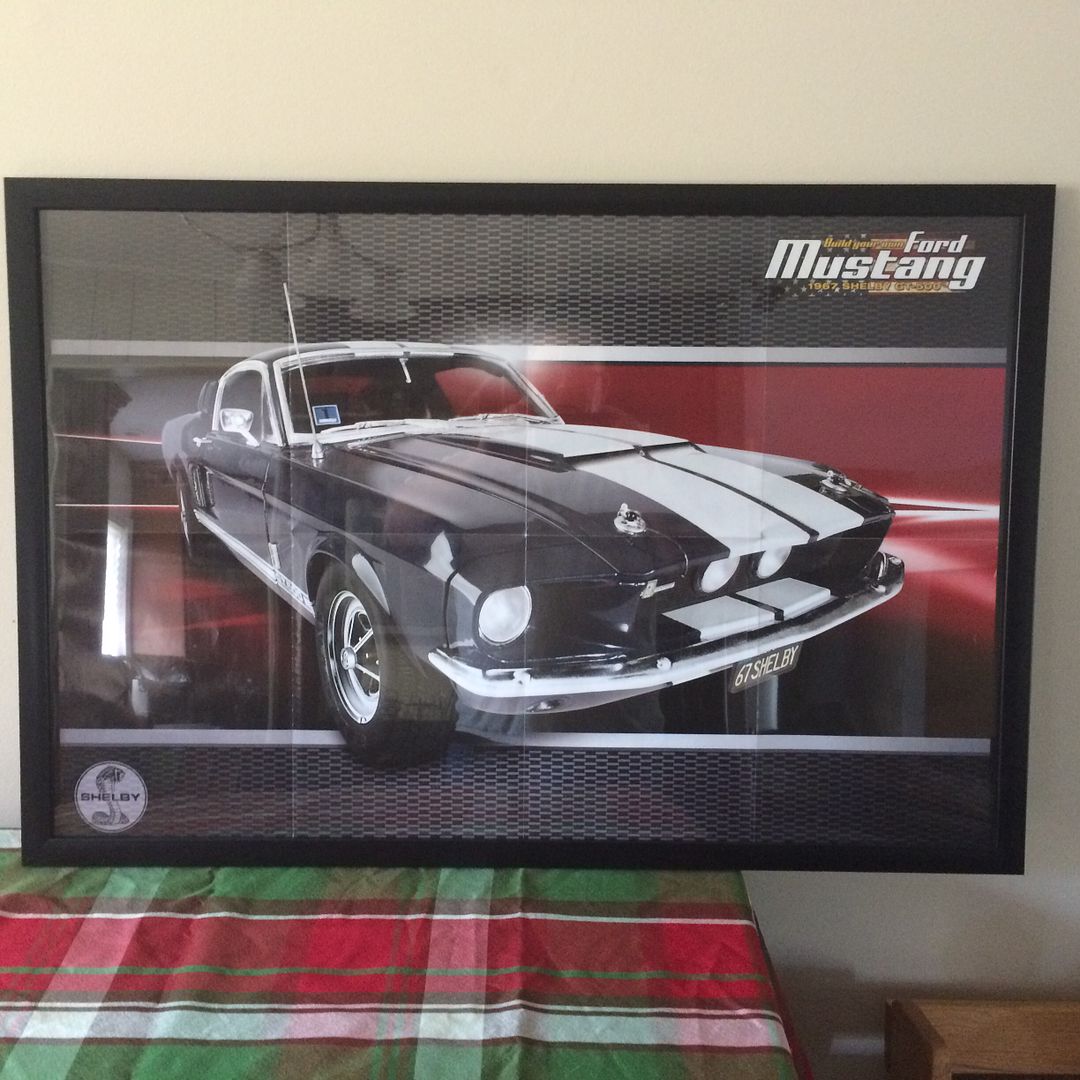
DeAgostini kit builds:
Millennium Falcon: 18% Complete
Shelby GT-500: 28% Complete
Thunderbird 2: 13.75% Complete
|
|
|
|
|
Iron it on the back using a damp cloth, gets rid of the fold lines!
|
|
|
Rank: Master Groups: Registered
Joined: 07/07/2015 Posts: 1,292 Points: 3,928 Location: Allentown PA
|
Nemesis wrote:Iron it on the back using a damp cloth, gets rid of the fold lines! The problem isn't just the creases, but the lack of color on the crease lines. Even if I got it ironed perfectly flat there would still be white lines where it was folded.
DeAgostini kit builds:
Millennium Falcon: 18% Complete
Shelby GT-500: 28% Complete
Thunderbird 2: 13.75% Complete
|
|
|
|
|
Metal Mech wrote:Nemesis wrote:Iron it on the back using a damp cloth, gets rid of the fold lines! The problem isn't just the creases, but the lack of color on the crease lines. Even if I got it ironed perfectly flat there would still be white lines where it was folded. Ah that is a shame.
|
|
|
Rank: Master Groups: Registered
Joined: 07/07/2015 Posts: 1,292 Points: 3,928 Location: Allentown PA
|
Ok so display is all set up and done for now. The director seems be very please with the display so far and plans I have for it. I hadn't had the chance to completely show her the display and explain my plains till today. So first up is the photo of the display case empty, well at least the top shelf. The bottom shelf has railroad stuff on it. Unfortunatly for now I have to share a case, but I just wanted to get it in the museum and set up. I may be able to move to my own case later. 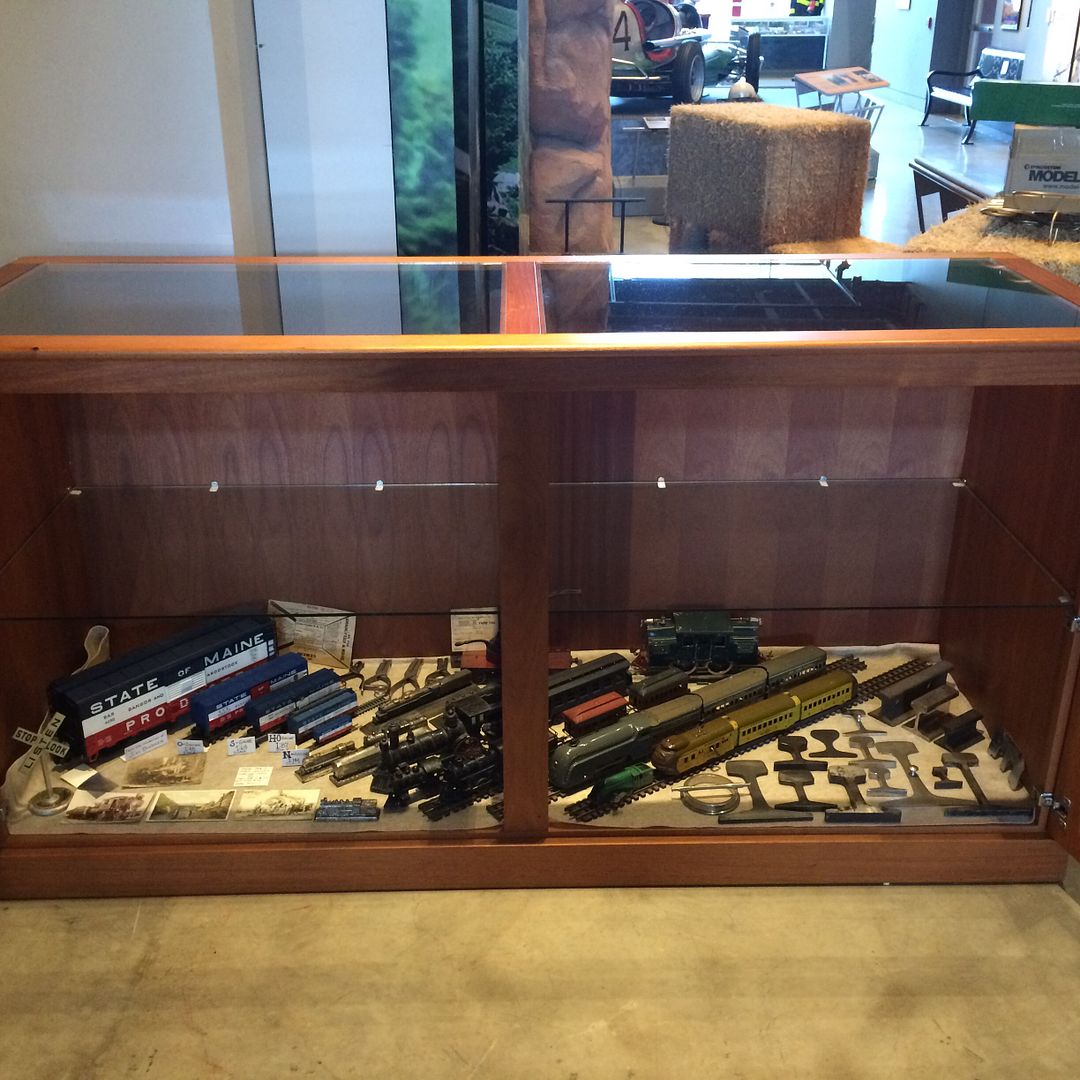 Next up you can see the framed poster and the small printout I made that describes the model kit. Its a mix of text from the website and my own wording. I avoided putting anything that came off as advertising to be safe, but I was actually asked by the director if I could provide information on how to purchase this model if people were interested. So I may print out the advert info straight from the home page and leave them on the display for people to take. Will look into that more later. 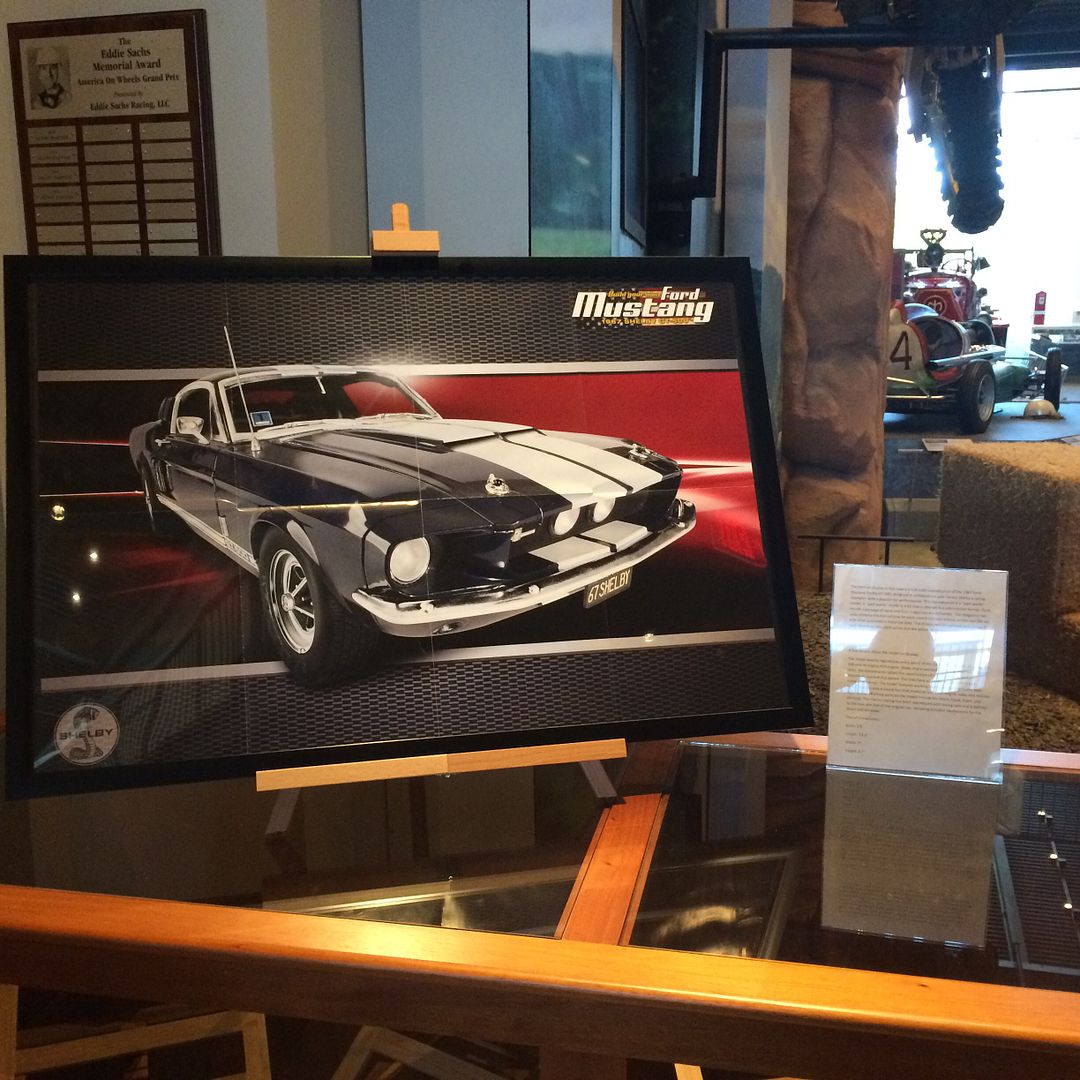 Next up is a photo of the cook book stands I used to display the magazines. 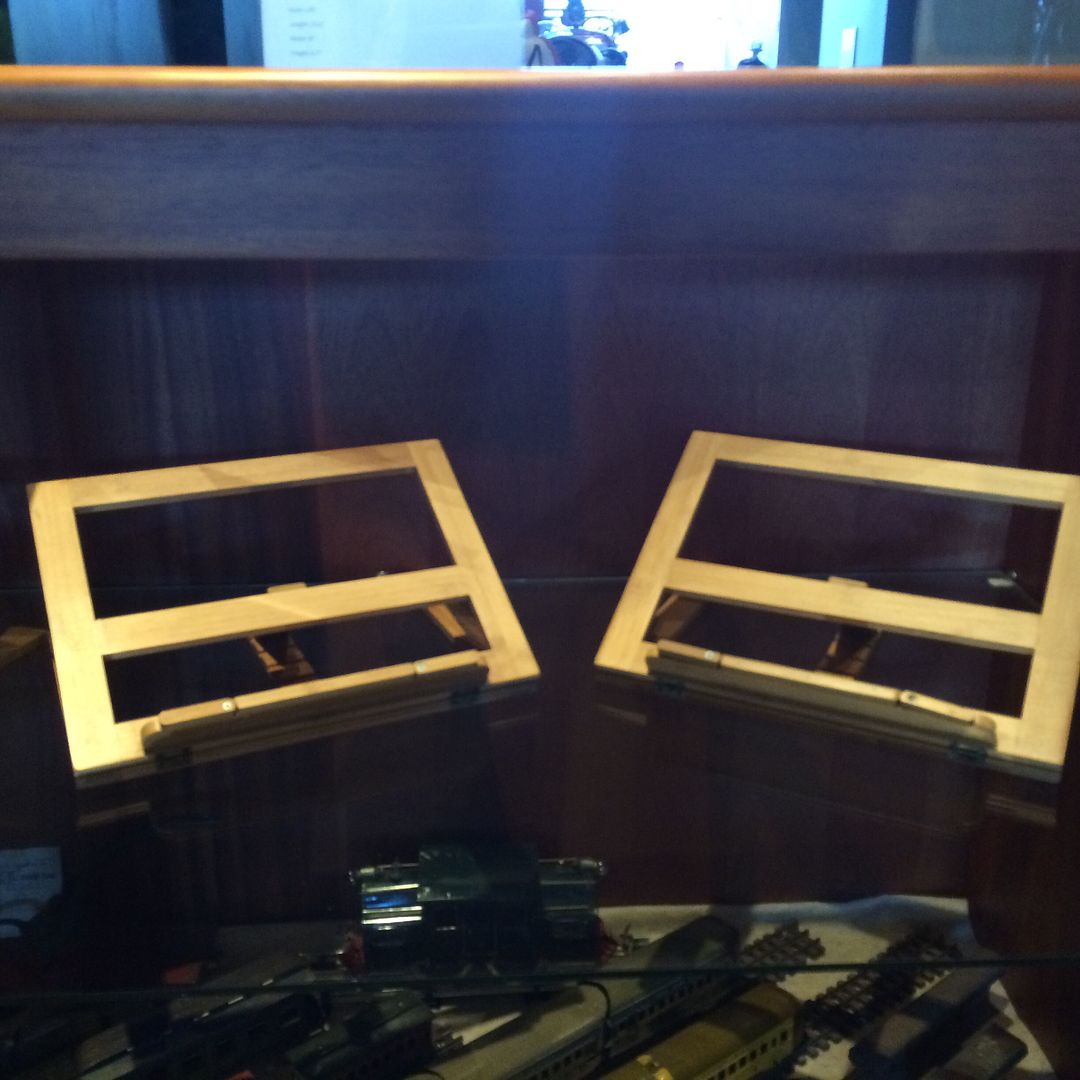 Here are photos of each of the first 4 issues with parts that go with them. Only thing I wish were different was the GT-500 related articles. They all seem to be the first article in the magazine and as such are printed front and back instead of side to side. This makes it impossible to display the entire article without having two copies of each magazine. I doubt I can talk DeAgostini into sending me two copies of every magazine with each month. There is so much good automotive history arcticles in the magazines that I am thinking I will donate them to the museums library after I am done with them. 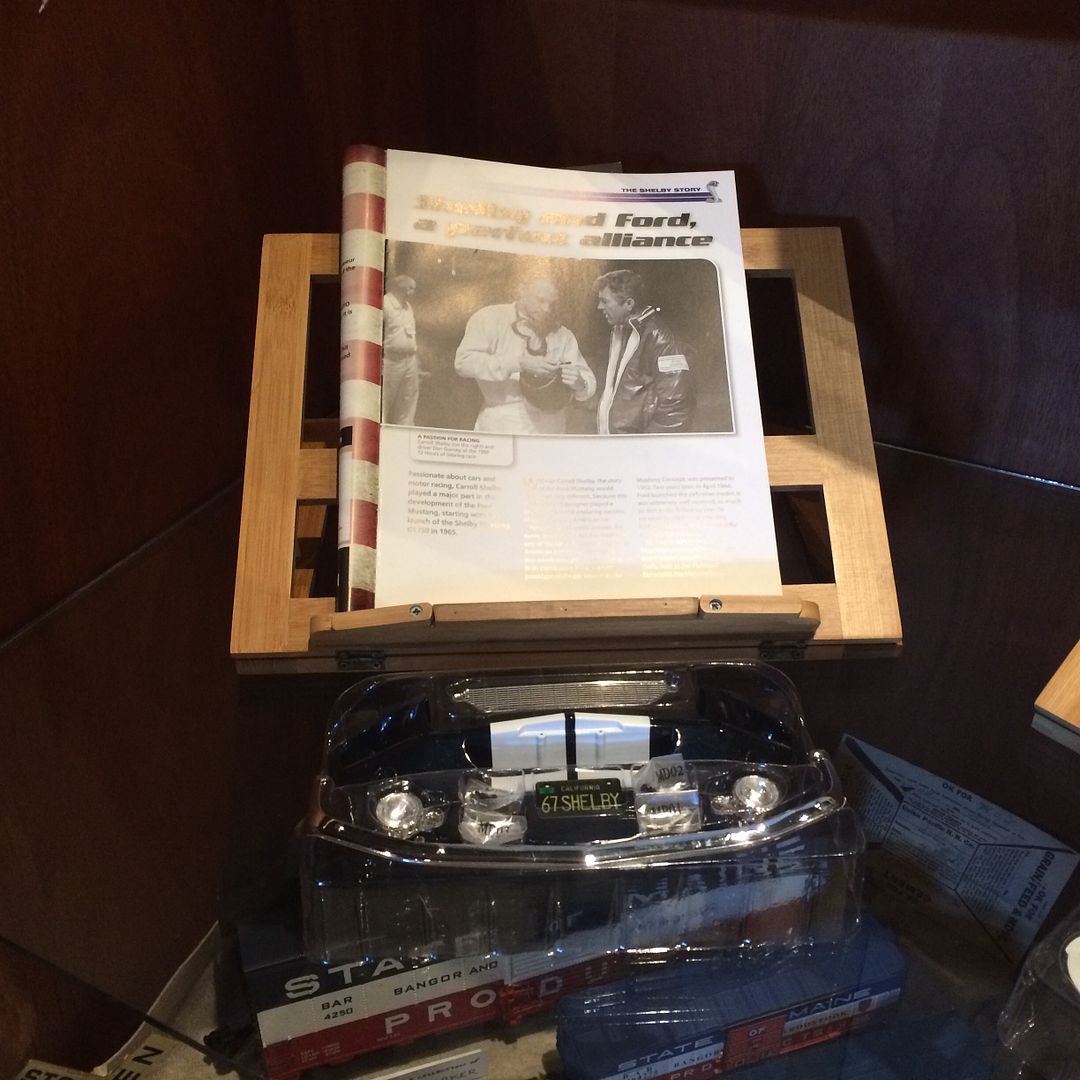 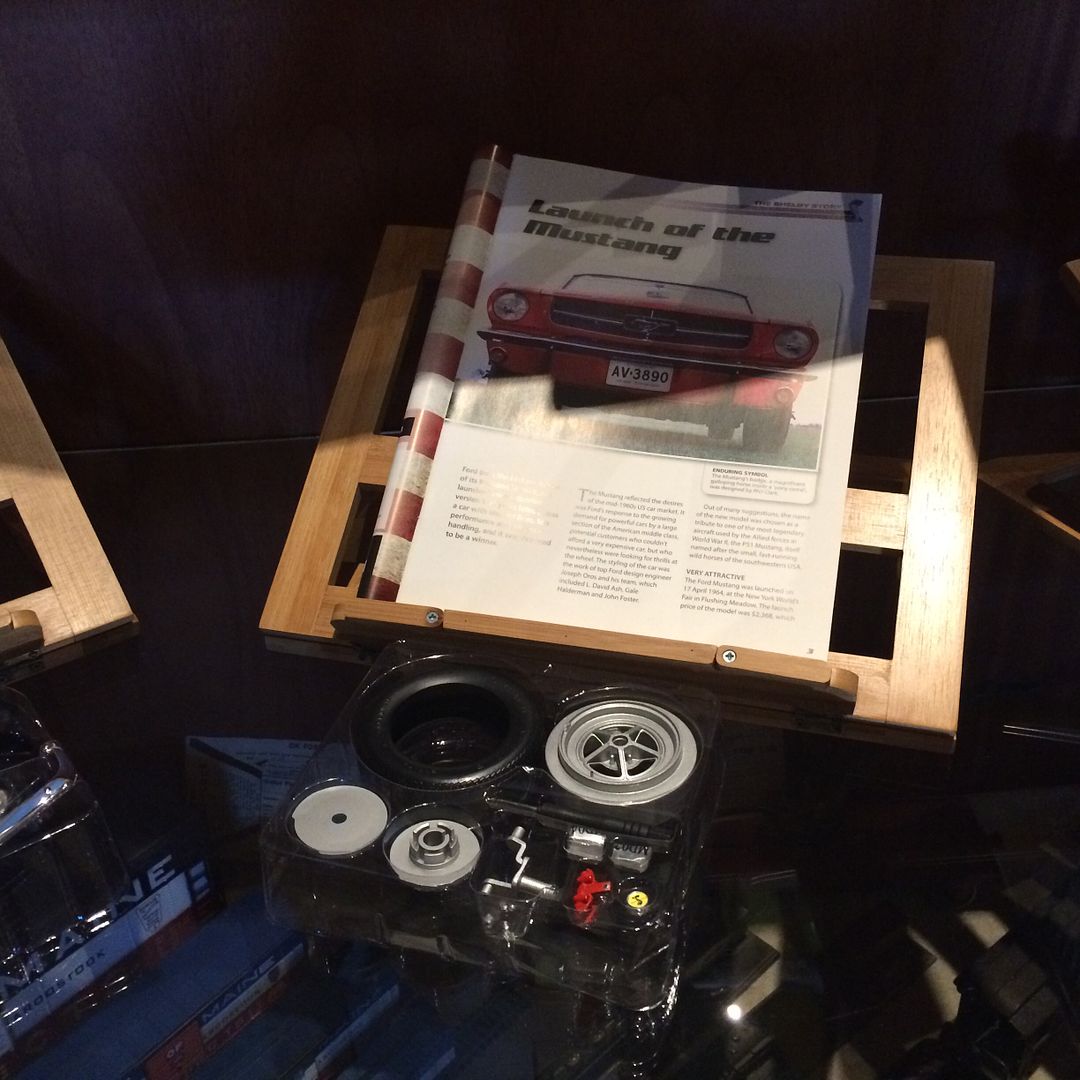 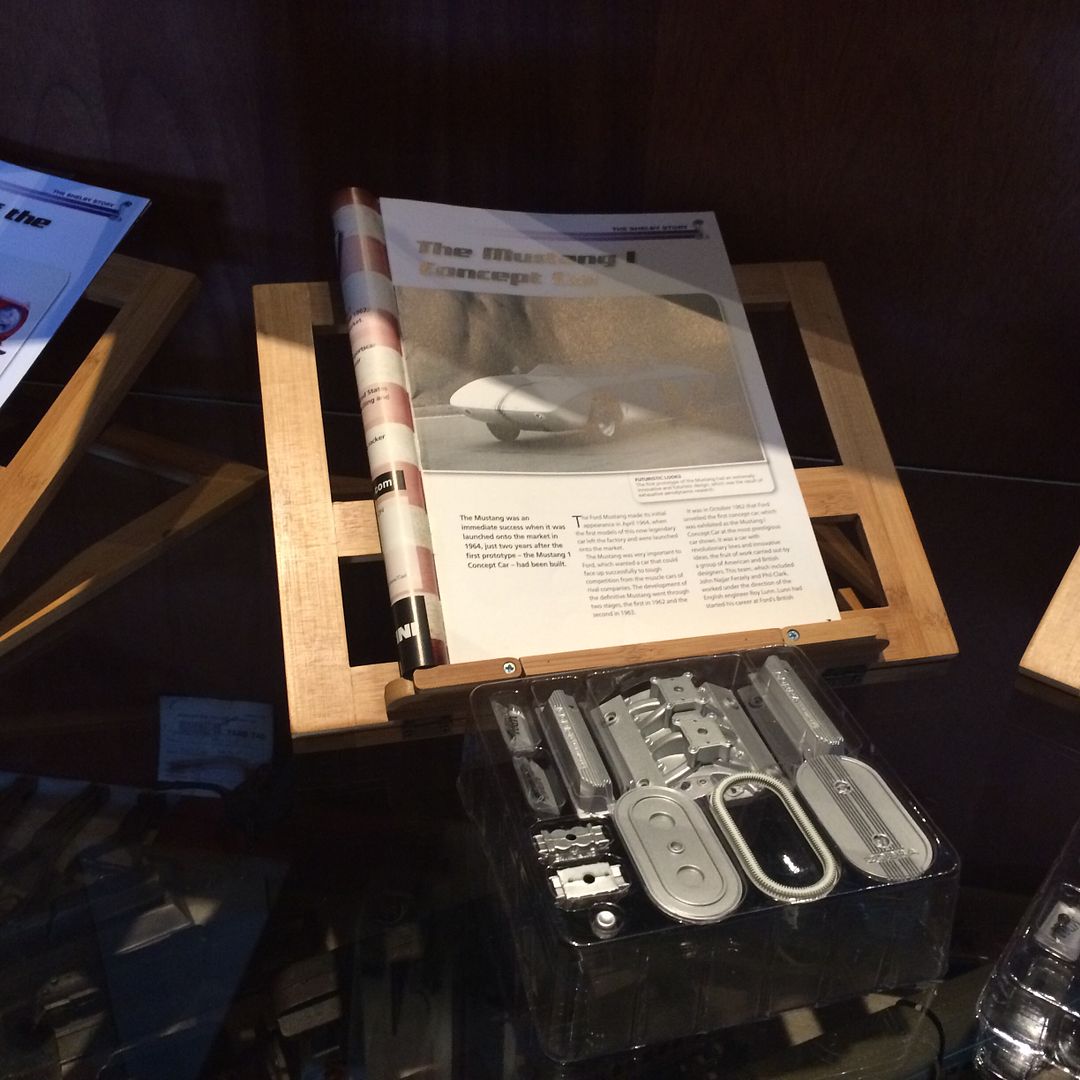 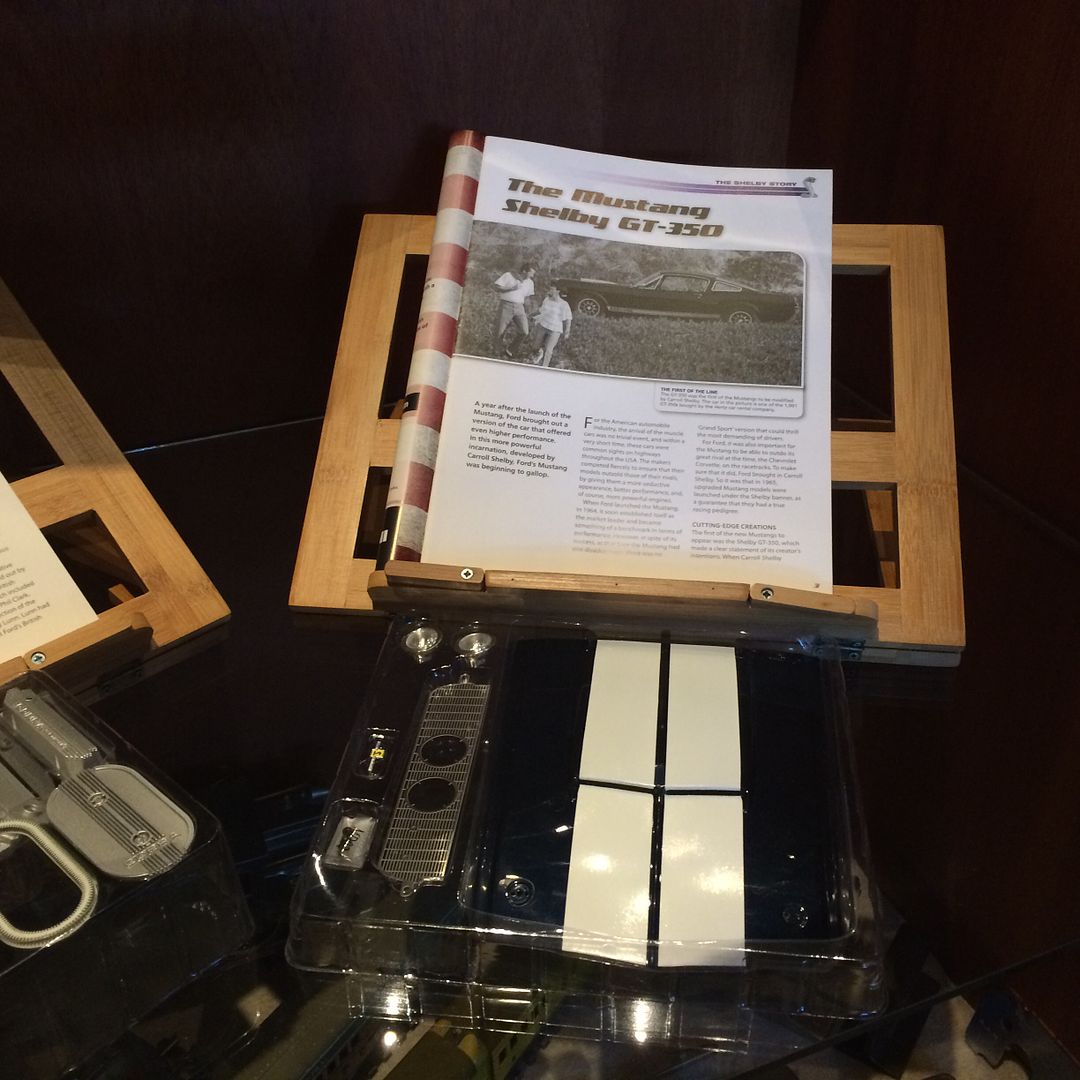 Finally a photo of the whole display over all before I closed up the case. For now its just the magazines and parts. Once I put in the next months issues and parts I will assemble the previous months parts and display the assembled parts as well. 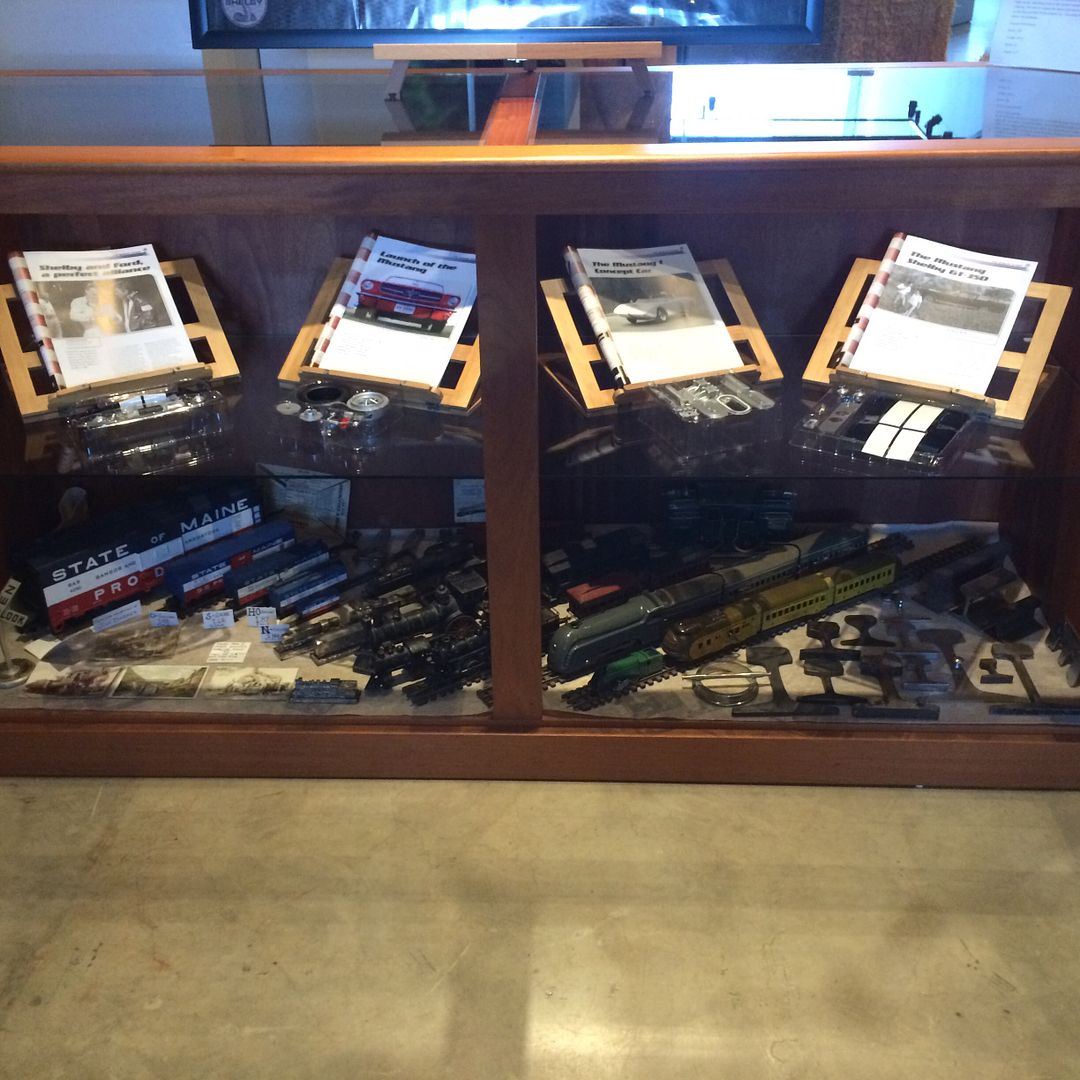
DeAgostini kit builds:
Millennium Falcon: 18% Complete
Shelby GT-500: 28% Complete
Thunderbird 2: 13.75% Complete
|
|
|
Rank: Super-Elite Groups: Registered
Joined: 17/12/2013 Posts: 3,982 Points: 11,974 Location: NY, USA
|
|
|
|
 Rank: Semi-Pro Level 1  Groups: Registered
Joined: 22/08/2016 Posts: 56 Points: 164 Location: Tyler, Texas
|
Nice display, look forward to seeing how it progresses and changes each month. Current DeAgostini Model Space Builds:
Millennium Falcon; Sovereign of the Seas, Ford Mustang Shelby
Current "Other" Model Builds:
Bandai 1/12 C-3PO (Japan Import); Revell 1/48 X-Wing "Master Series"
On The Shelf Waiting to Be Started:
Revell 1/72 Millennium Falcon "Master Series"; Bandai 1/12 Boba Fett; Bandai 1/72 Y-Wing Star Fighter; Bandai 1/72 A-Wing Starfighter
|
|
|
Rank: Master Groups: Registered
Joined: 07/07/2015 Posts: 1,292 Points: 3,928 Location: Allentown PA
|
I realise DeAg has reasons why they do things but man I hate these tires. Tried both methods unsuccessfully last night. Gonna give it another try tonight.
DeAgostini kit builds:
Millennium Falcon: 18% Complete
Shelby GT-500: 28% Complete
Thunderbird 2: 13.75% Complete
|
|
|
 Rank: Pro Groups: Registered
Joined: 22/03/2016 Posts: 175 Points: 552 Location: Merseyside
|
Boil the kettle pour water into a bowl and drop the tyre straight in. Leave there for 4/5 mins. You will feel the tyre is alot softer. Place half the wheel in then push in the other side. Hope this helps Looking forward to seeing your progress Steve Built- Shelby Mustang, Lamborghini Huracan
Building-Spitfire, Redbull racing RB7, 3d printer, Honda CB750, Stage coach and Revell 1/400 Titanic
|
|
|
Rank: Super-Elite Groups: Registered
Joined: 27/01/2014 Posts: 5,060 Points: 14,980
|
Metal Mech wrote:I realise DeAg has reasons why they do things but man I hate these tires. Tried both methods unsuccessfully last night. Gonna give it another try tonight. Boiling the kettle and soaking the tyres really work, it's how I did all of mine. Just make sure the tyre is seated correctly all the way around so that it doesn't dry deformed
|
|
|
Rank: Master Groups: Registered
Joined: 07/07/2015 Posts: 1,292 Points: 3,928 Location: Allentown PA
|
Thanks guys I will try boiling water tonight. On the build threads I read it said to use hot water not boiling so I filled a owl with the hottest water my tap could do which is enough to burn you. I will try this way today when I get home.
DeAgostini kit builds:
Millennium Falcon: 18% Complete
Shelby GT-500: 28% Complete
Thunderbird 2: 13.75% Complete
|
|
|
 Rank: Vice-Master   Groups: Registered
Joined: 07/01/2015 Posts: 856 Points: 2,479 Location: Sevenoaks, UK
|
Yep, boiling water does the trick! With the training gained on first three wheels, I popped the last one on in 5 seconds. Really easy this way. If you want you can lubricate the rim with a bit of washing up liquid, but that's not really necessary. Any images I post on my personal builds are free to be used and shared under Creative Commons Attribution license, which means you can do what you want with them, on the condition you mention I'm the author.
Happy building :-) http://www.model-space.com/gb/
|
|
|
Rank: Master Groups: Registered
Joined: 07/07/2015 Posts: 1,292 Points: 3,928 Location: Allentown PA
|
Ok guys thanks again. The boiling water trick worked. Still was a bit of a PIA but I got it done and it looks good. A little backstory, as I have said in the past I plan to build the previous months parts when I add the newest months parts. I plan to do this at the Museum instead of bringing the parts home and then having to take them back. The wheel and tires being the exception because of the method required. I realized the other day that this month and last month had the same exact tire and wheel parts. So I decided to go ahead and assemble them. Then when its time to put next months parts in the case I will just put the wheel and tire that is in the case now into the wheel/tire tray from next month and then just display the one I assemble today as if its last months. Will make it easier for building and set up when for the next month. Anyways here is a photo of the wheel and tire. I know you have seen this plenty of times in other build threads so I decided to show you it on the display stand I bought so you can see how I will have it in the case next month. 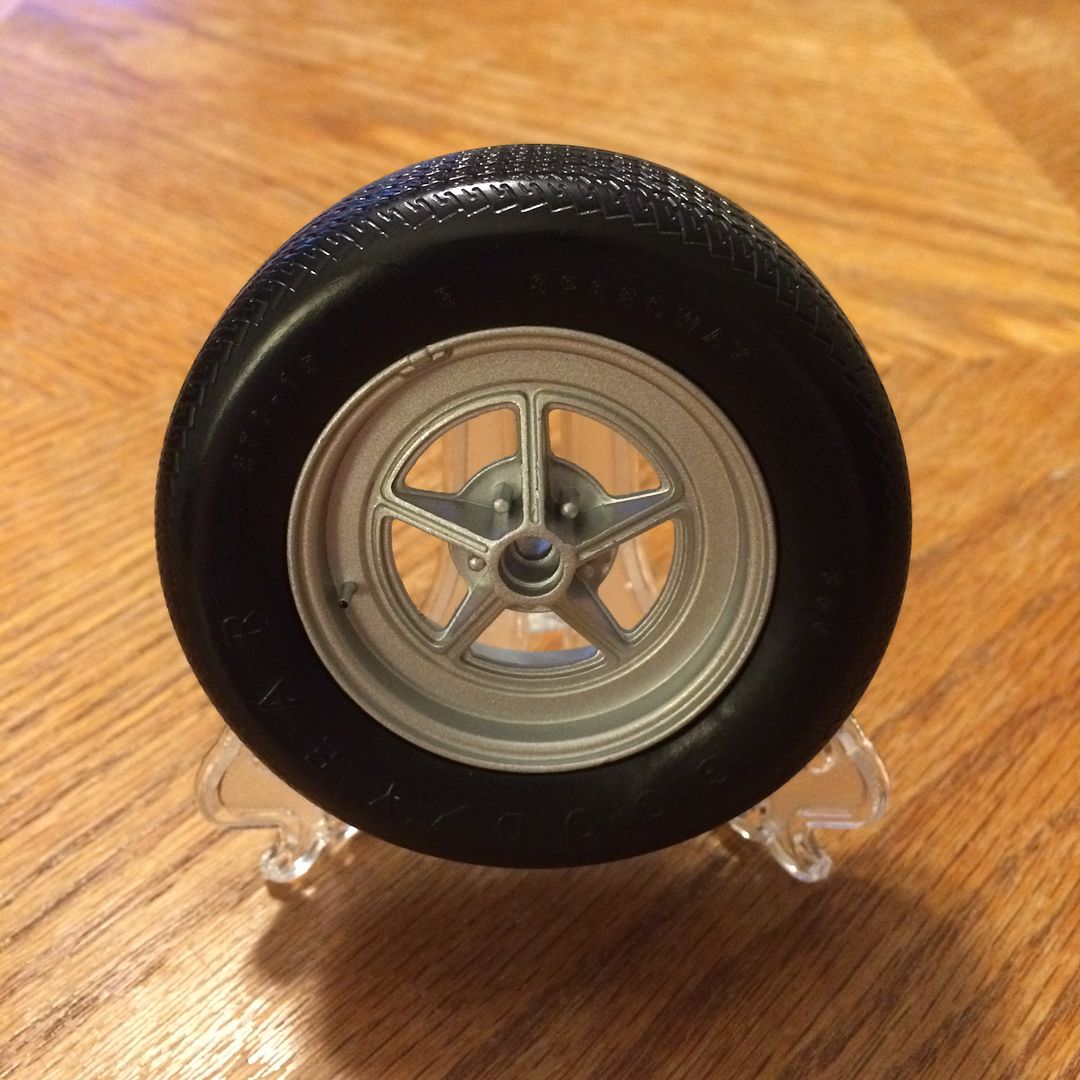 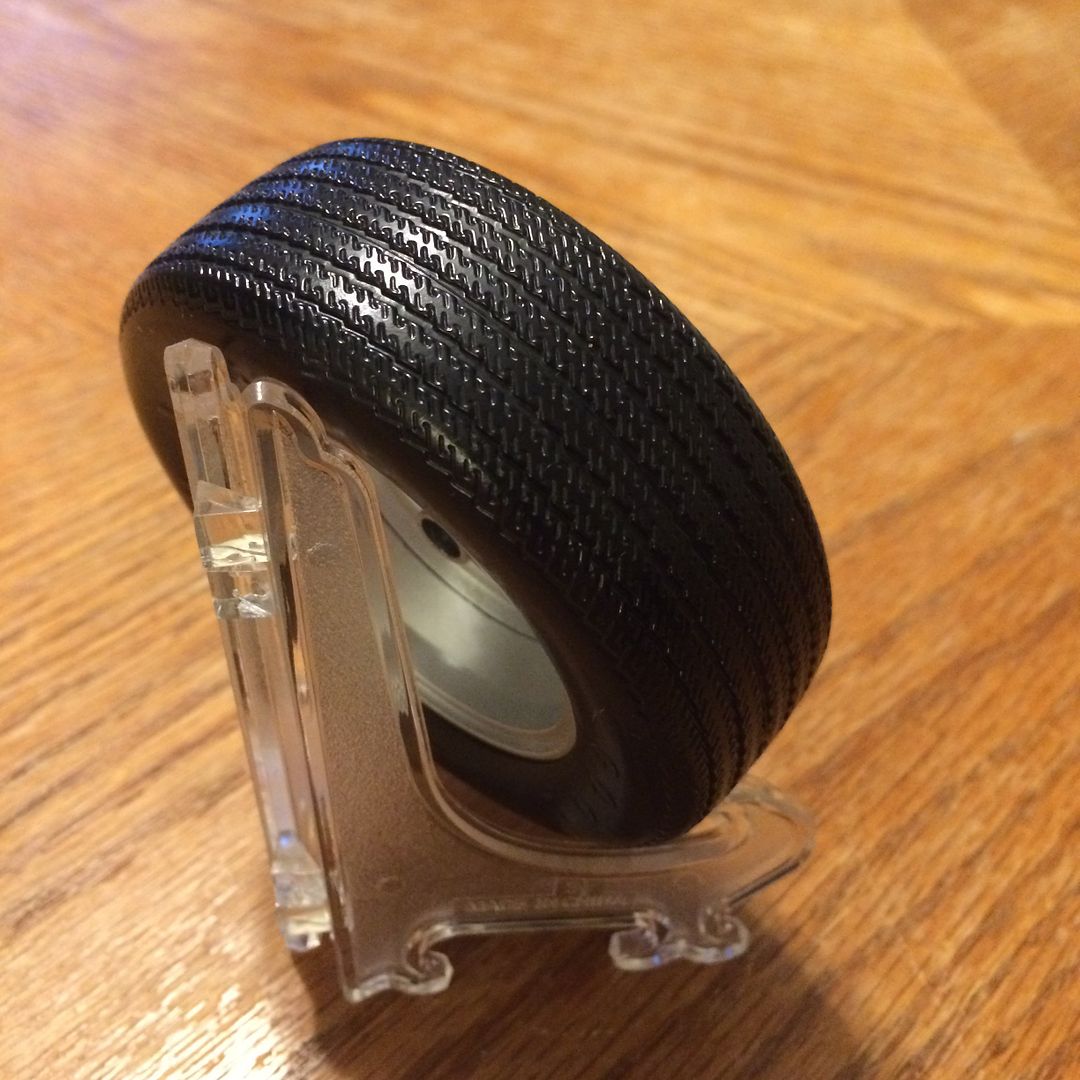
DeAgostini kit builds:
Millennium Falcon: 18% Complete
Shelby GT-500: 28% Complete
Thunderbird 2: 13.75% Complete
|
|
|
Rank: Pro Groups: Registered
Joined: 22/03/2016 Posts: 175 Points: 552 Location: Merseyside
|
Glad you got it sorted. Looking good on the display stand too Built- Shelby Mustang, Lamborghini Huracan
Building-Spitfire, Redbull racing RB7, 3d printer, Honda CB750, Stage coach and Revell 1/400 Titanic
|
|
|
|
Guest
|
 US
US

