|
|
 Rank: Super-Elite       Groups: Registered
Joined: 27/01/2014 Posts: 5,060 Points: 14,980
|
The tyres are tough to get on but they shouldnt be coming off in a hurry, good luck with the display 
|
|
|
 Rank: Master  Groups: Registered
Joined: 07/07/2015 Posts: 1,292 Points: 3,928 Location: Allentown PA
|
Did some painting today. I painted the steering knuckle and dust shield, too much silver for me. I like the silver on certain parts but not everything. Wanted some color separation. I feel the silver makes a good aluminum color but not good for all "metal" colored parts. I was going to paint the rotor, but after running out of primer while trying to paint it last time I need to strip the primer off to get a smooth finish. Kept putting it off this weekend so it wasn't ready for paint. I still put off doing it tonight, really need to work on that. Anyways I painted the knuckle Tamiya TS-42, light gunmetal. I sit the part on top of the wheel so you could get a idea of the color difference. This will be the color I use for all metal colored parts I don't want in the silver color. I painted the dust cover in Tamiya TS-6 Matt Black. Again, mainly for color separation, and because I like it. My current car has black dust covers so I figured might as well. Here are the photos. 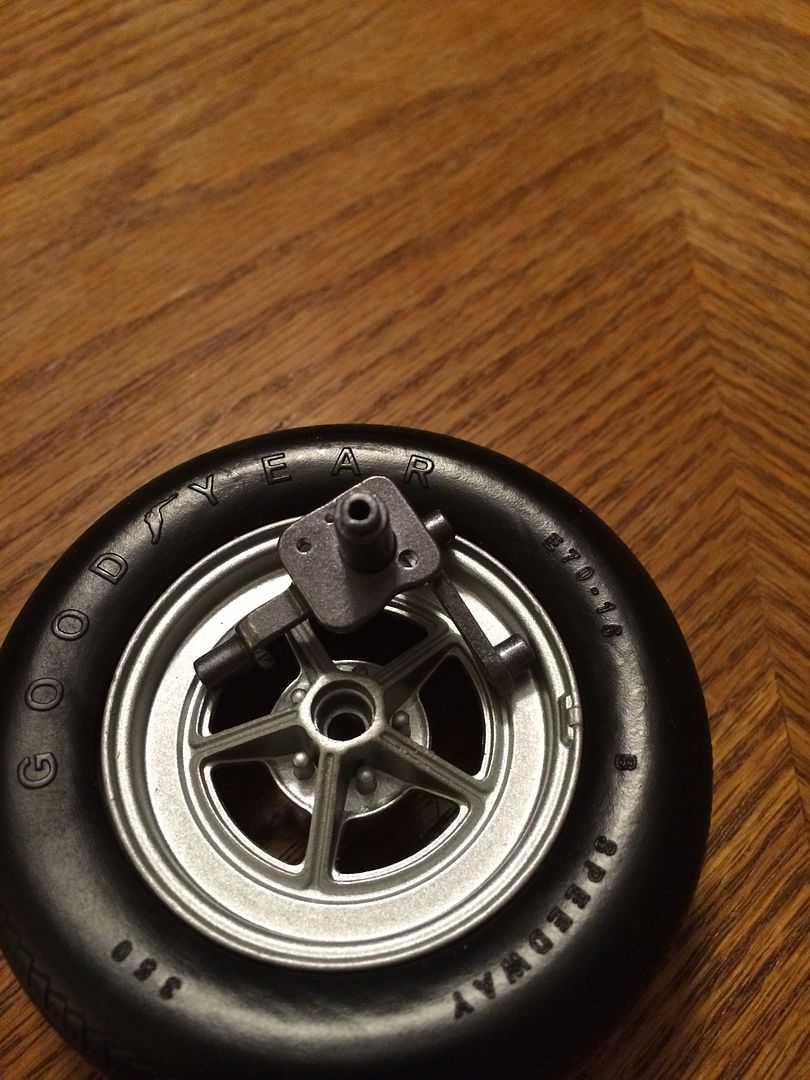 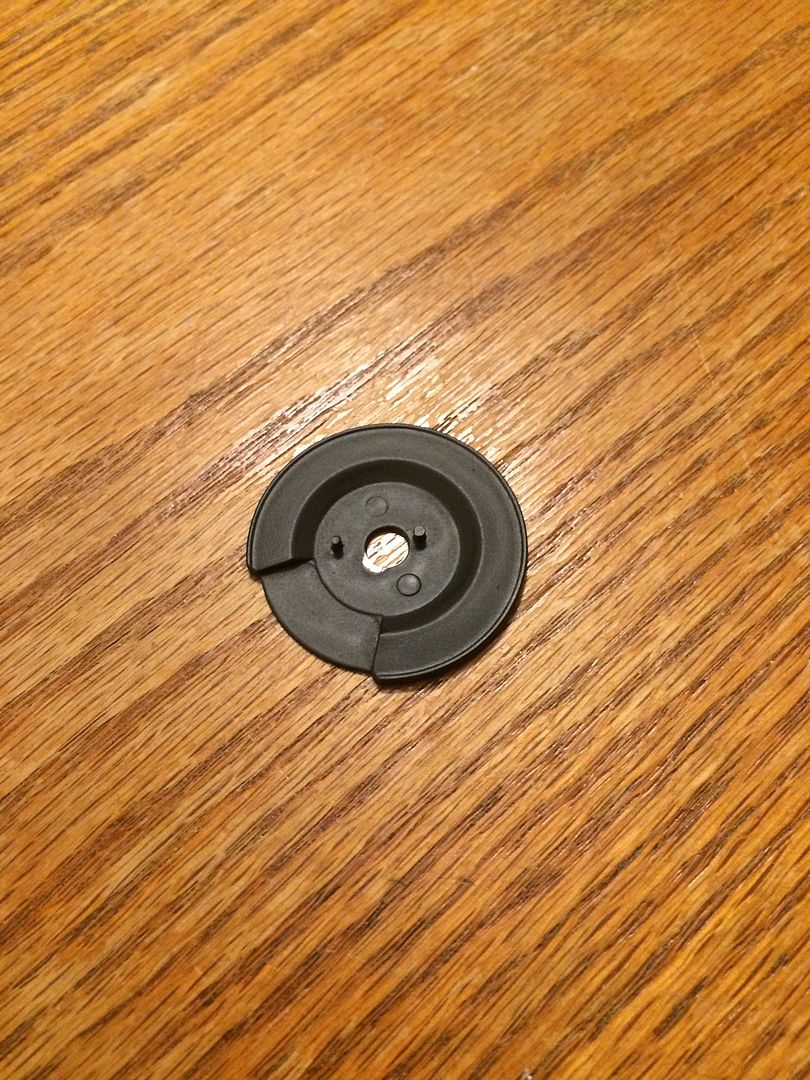
DeAgostini kit builds:
Millennium Falcon: 18% Complete
Shelby GT-500: 28% Complete
Thunderbird 2: 13.75% Complete
|
|
|
 Rank: Pro Groups: Joined: 24/08/2009 Posts: 48,051 Points: -13,308
|
Nice work on colour separation Metal Mech, that should look good when everything is assembled on the finished car. On the dust cover, I would have left the small quadrant that represents a portion of the brake disc in it's original silver colour as the disc is usually of a polished steel colour? You could always just go over that bit again in silver, though it may not show very much once the brake caliper is in place?
Well done, looking good. 
Kev 
|
|
|
Rank: Master Groups: Registered
Joined: 07/07/2015 Posts: 1,292 Points: 3,928 Location: Allentown PA
|
Thanks for the input MM. That's something I didn't think about. When I get home I will test fit the parts and see how much of that is visible. If it's quite a bit I will paint, if not I will just leave it as is.
DeAgostini kit builds:
Millennium Falcon: 18% Complete
Shelby GT-500: 28% Complete
Thunderbird 2: 13.75% Complete
|
|
|
Rank: Master Groups: Registered
Joined: 07/07/2015 Posts: 1,292 Points: 3,928 Location: Allentown PA
|
Hey guys, just realized something. My plan is that ever time I post up a part that I have painted to include the brand name, paint code, and color name in the same post as the photo. I forgot to do that with the calipers and the air filter. The air filter is Tamyia TS-26 Pure White The calipers are Tamyia TS-49 Bright Red Also, now that I have painted the dust shield and control arm from month 2 I am going to paint the ones from month 1 as well. Which means I need to pull them from the display. I will do this on Friday, since I can pull them early, prime, paint, and potentially return them that day, if not I can do it on Saturday. I am also going to paint the carburetors. After seeing some of the other builds I have decided I want to paint them for a bit of color separation on the engine. So there will be an update come Friday.
DeAgostini kit builds:
Millennium Falcon: 18% Complete
Shelby GT-500: 28% Complete
Thunderbird 2: 13.75% Complete
|
|
|
Rank: Master Groups: Registered
Joined: 07/07/2015 Posts: 1,292 Points: 3,928 Location: Allentown PA
|
Quick update. Painted the other dust shield and control arm as well as the carburetors. I will post up the paint details for the gold I used on the carbs at a later time. I have some parts coming in Friday that I think you guys will find interesting. You will have to wait until then to find out what I am talking about. Quick photo. 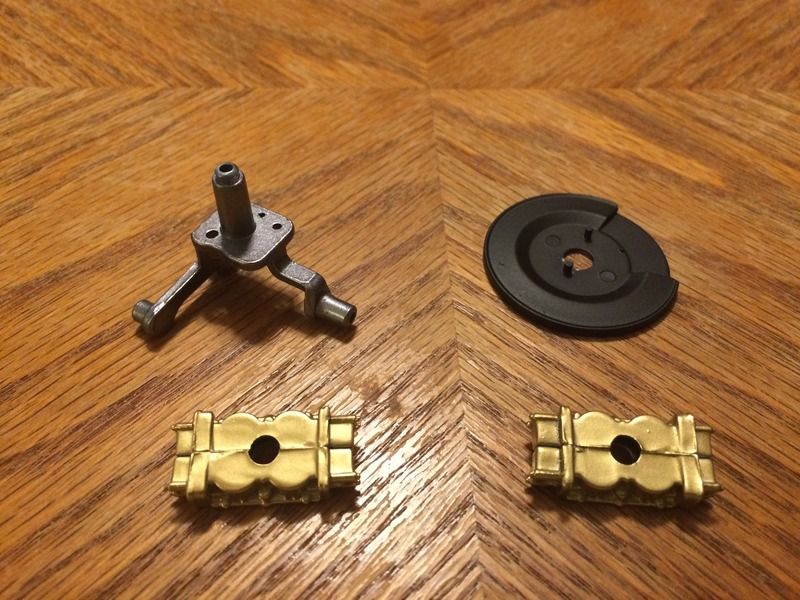
DeAgostini kit builds:
Millennium Falcon: 18% Complete
Shelby GT-500: 28% Complete
Thunderbird 2: 13.75% Complete
|
|
|
Rank: Pro Groups: Registered
Joined: 22/03/2016 Posts: 175 Points: 552 Location: Merseyside
|
Nice progress.You got me interested in fridays update  Built- Shelby Mustang, Lamborghini Huracan
Building-Spitfire, Redbull racing RB7, 3d printer, Honda CB750, Stage coach and Revell 1/400 Titanic
|
|
|
Rank: Master Groups: Registered
Joined: 07/07/2015 Posts: 1,292 Points: 3,928 Location: Allentown PA
|
Ok so quick update. I stopped by the museum to replace the parts I took out to paint. Man they look even better sitting the blister packs all painted up. Took pictures because I thought they looks so nice. I gotta say, I am really enjoying all these parts being in the blister. With the Falcon being my first DeAg build I figured all kits started with blisters but then went to bags. I am glad for the blisters because they make wonder full display organizers. Sadly I will not be able to reveal the promised surprise I had planned. Short version of the story, the parts didn't get ordered, so order is now placed with my name and phone number. I am supposed to get phone call when its in. I would give the long story but it Putes me off and I don't want to think about it anymore. On the positive side I got my notice today that I was billed for month 3. Which means it will ship Monday and I will have it by Thursday. So I will go in on Friday and put month 2 parts on display and build month 1 parts. The really cool part is that on Saturday the museum is hosting a model builders contest. So there will be lots of people that are into building models that will get to see this on display. Hopefully DeAg will sell a few more GT-500 kits because of it. Makes me wish I was putting month 3 in the case because it has a seat and a door which make great display pieces. Ok photos.  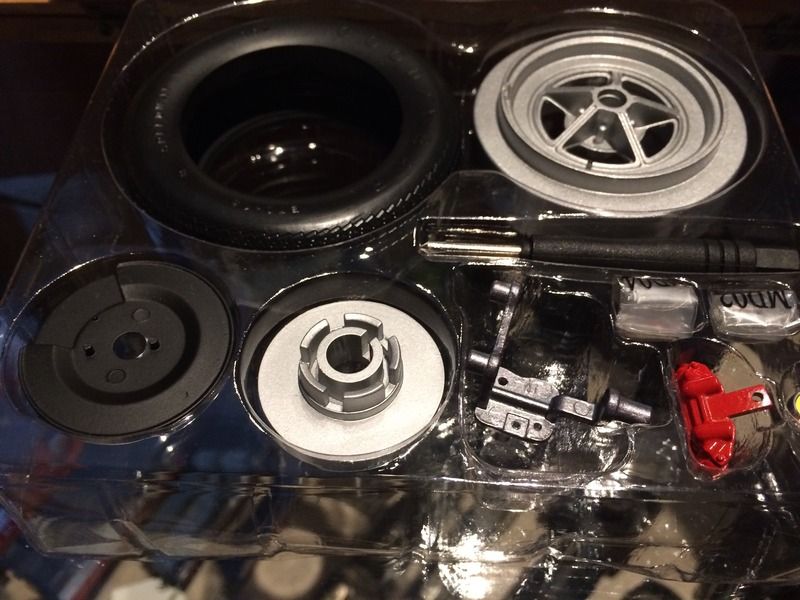 Ok here are some bonus photos for you. I figured for fun you guys might like to see my GT-500's neighbors. These are all on display in the same hallway my display is in. 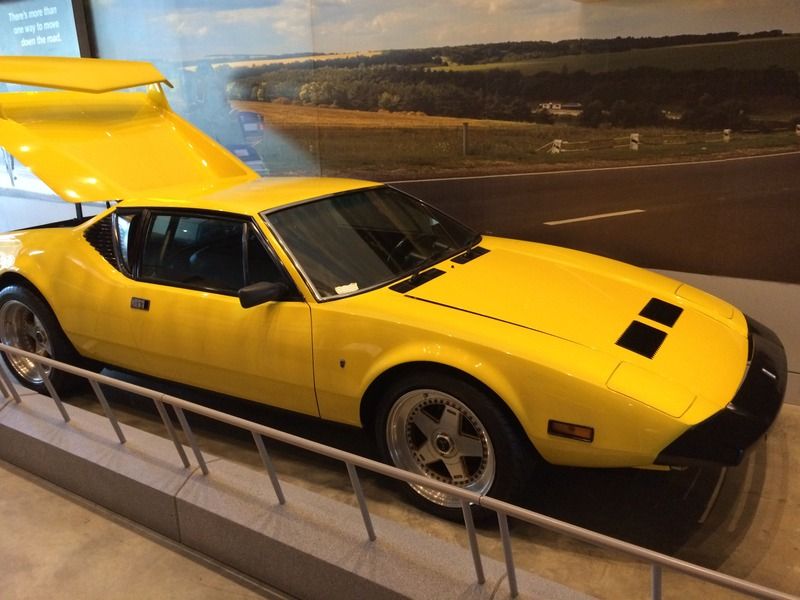  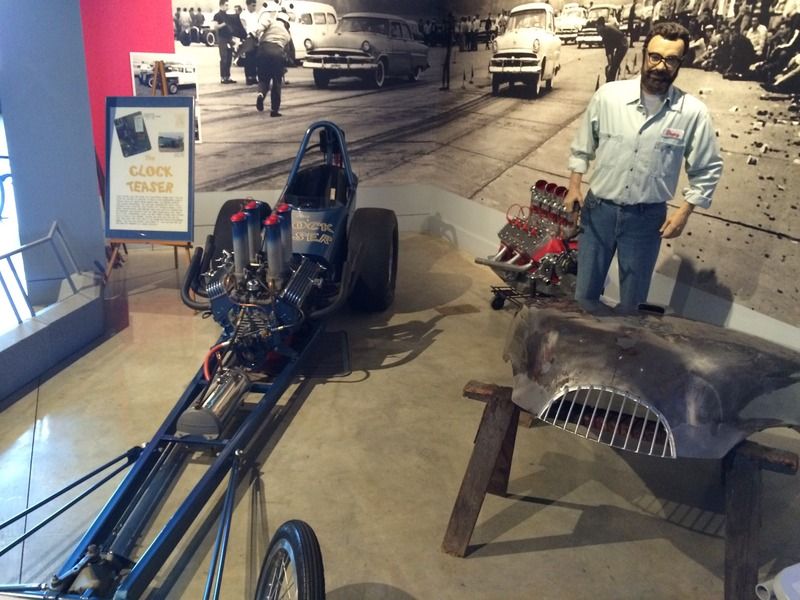 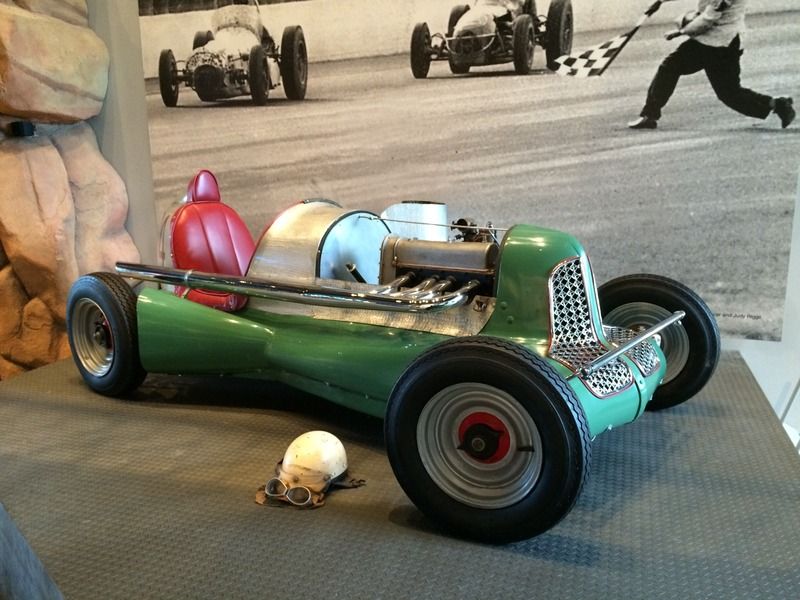 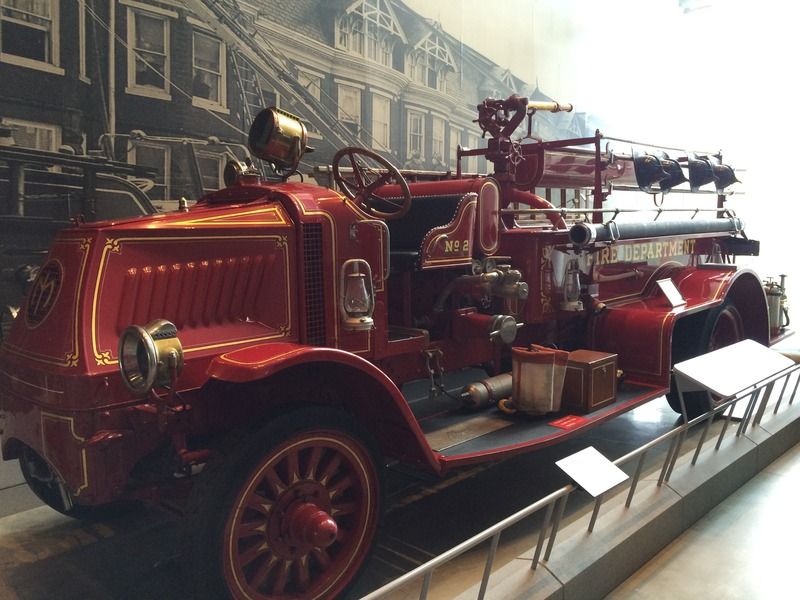
DeAgostini kit builds:
Millennium Falcon: 18% Complete
Shelby GT-500: 28% Complete
Thunderbird 2: 13.75% Complete
|
|
|
Rank: Pro Groups: Registered
Joined: 22/03/2016 Posts: 175 Points: 552 Location: Merseyside
|
Nice pictures and i agree they really do pop in the blister packaging. great work so far Built- Shelby Mustang, Lamborghini Huracan
Building-Spitfire, Redbull racing RB7, 3d printer, Honda CB750, Stage coach and Revell 1/400 Titanic
|
|
|
Rank: Pro Groups: Joined: 24/08/2009 Posts: 48,051 Points: -13,308
|
Looking good Metal Mech and nice photos of the co-exhibits, that last one of the fire engine looks fabulous and that would make a very nice subject for a DeAgostini partwork? I seem to remember that there was a partwork being tested somewhere a while back of a more modern U.S. Fire Engine.
Thanks for sharing.
Kev
|
|
|
Rank: Master Groups: Registered
Joined: 07/07/2015 Posts: 1,292 Points: 3,928 Location: Allentown PA
|
Yeah that is a Mack Truck fire engine. PA was the home for all Mack truck manufacturing. It moved to NC a few years ago but the head office is still here. My wife's grandfather actually worked for them. So the museum has a lot of antique Mack trucks. Sometimes when it's slow if the museum director sees a kid looking at it she will let them sit in the drivers seat. As a side note my wife's grand father also worked on Mario Andretties pit crew and her mom went to school with Michael Andretti.
DeAgostini kit builds:
Millennium Falcon: 18% Complete
Shelby GT-500: 28% Complete
Thunderbird 2: 13.75% Complete
|
|
|
Rank: Master Groups: Registered
Joined: 07/07/2015 Posts: 1,292 Points: 3,928 Location: Allentown PA
|
Well I got an interesting surprise today. A package arrived from DeAg. Yesterday I got my shipping notice for month 3 of the mustang and thought it was a bit fast getting here. Opened up the box to find Pack 23 of the Harley Davidson. On a plus not my "special" parts came in. Will update later with photos.
DeAgostini kit builds:
Millennium Falcon: 18% Complete
Shelby GT-500: 28% Complete
Thunderbird 2: 13.75% Complete
|
|
|
Rank: Master Groups: Registered
Joined: 07/07/2015 Posts: 1,292 Points: 3,928 Location: Allentown PA
|
Alright took a bit longer then I planned. Here are photos of what I am tinkering with. I bought a set of cross drilled rotors and caliper, and a set of wheels that are all from RC cars. The rotors are going to work just fine, but the wheels are another story. I can probably make them work but not sure its worth it. Figured I would show off ideas I had. the rotors are nice. There are many different ways I can go about mounting them. I am gonna go the simple route that way if I don't like them I can reverse it back to the original ones. Both the original and new calipers will fit, but for the new ones you will need to make a bracket to mount them. I think the originals look better anyway. 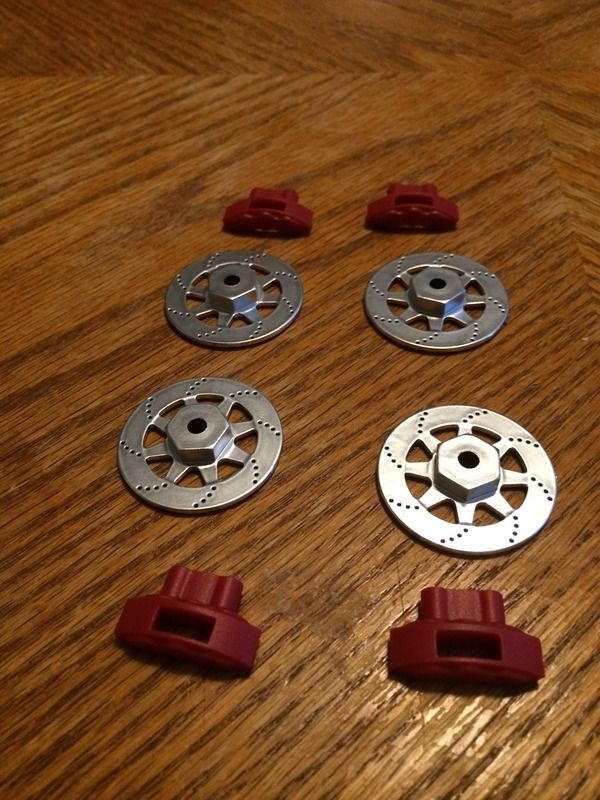 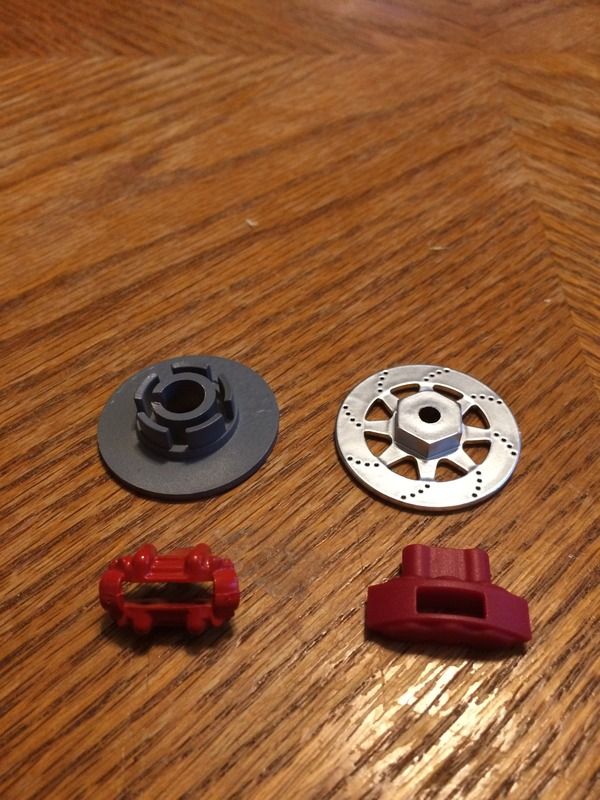 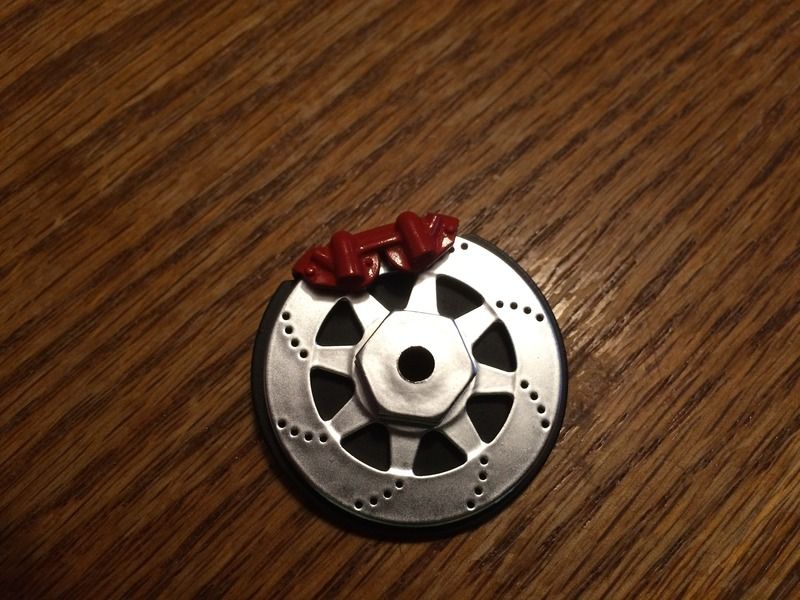 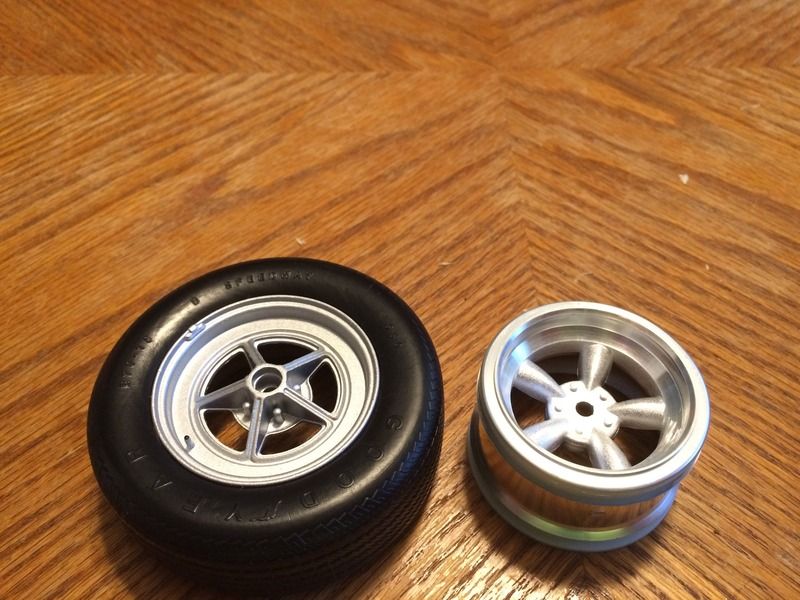
DeAgostini kit builds:
Millennium Falcon: 18% Complete
Shelby GT-500: 28% Complete
Thunderbird 2: 13.75% Complete
|
|
|
Rank: Master Groups: Registered
Joined: 07/07/2015 Posts: 1,292 Points: 3,928 Location: Allentown PA
|
Another quick update. I did get the build updated for the museum. I have now finally built some parts of the model. I took photos but haven't had the time to get them uploaded and posted. Will try and do that soon. I would like to say thank god for this forum. I was having a hell of a time assembling the front section because I coy dot get the screws all the way down. After reading a few posts I discovered the dish soap trick and man does it work great. I have also decided that I am going to pre install screws before I display the parts as to make it easier when I am building at the museum. I assemble them at home due to a time shortage and was glad I did because of the trouble I ran into. I know better now. So pictures soon, till then guys.
DeAgostini kit builds:
Millennium Falcon: 18% Complete
Shelby GT-500: 28% Complete
Thunderbird 2: 13.75% Complete
|
|
|
Rank: Master Groups: Registered
Joined: 07/07/2015 Posts: 1,292 Points: 3,928 Location: Allentown PA
|
|
|
|
Rank: Master Groups: Registered
Joined: 07/07/2015 Posts: 1,292 Points: 3,928 Location: Allentown PA
|
Updated my display Friday but didn't take pictures cause I wasn't feeling well after some dental work. Wouldn't matter as my computer is having trouble connecting to Internet at the moment. I will take photos next weekend. Also my display got a new neighbor I think you guys will like to see.
DeAgostini kit builds:
Millennium Falcon: 18% Complete
Shelby GT-500: 28% Complete
Thunderbird 2: 13.75% Complete
|
|
|
Rank: Master Groups: Registered
Joined: 07/07/2015 Posts: 1,292 Points: 3,928 Location: Allentown PA
|
My apologies for not updating this blog sooner and more often. Life and holidays got in the way. I will be going tomorrow to update the physical display and will take photos to post up later. For now here are two photos of what I have done lately. I bought a new stand to display the hood on. The one I originally bought was too small and just didn't work for the large and heavy hood. I installed felt where the painted part of the hood will rest. I even did a test with the Jaguar hood to make sure it would work. 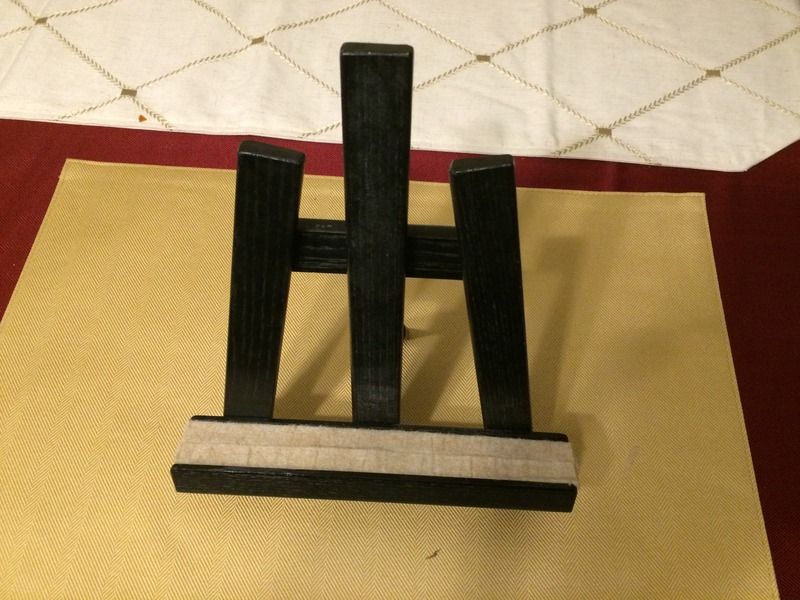 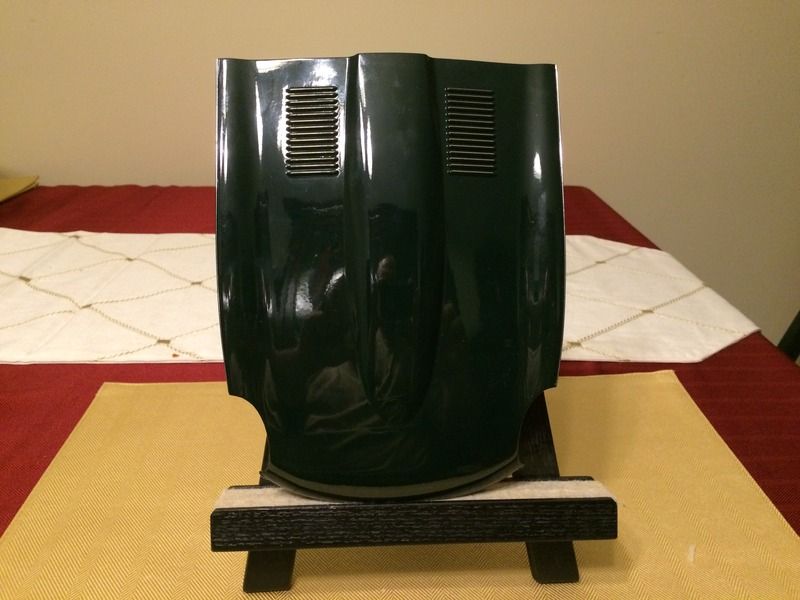 In this final picture you can see what was the newest neighbor for my display when I took the picture. Its been there a while now and the Pantera was replaced with a 60's era corvette along with this car. 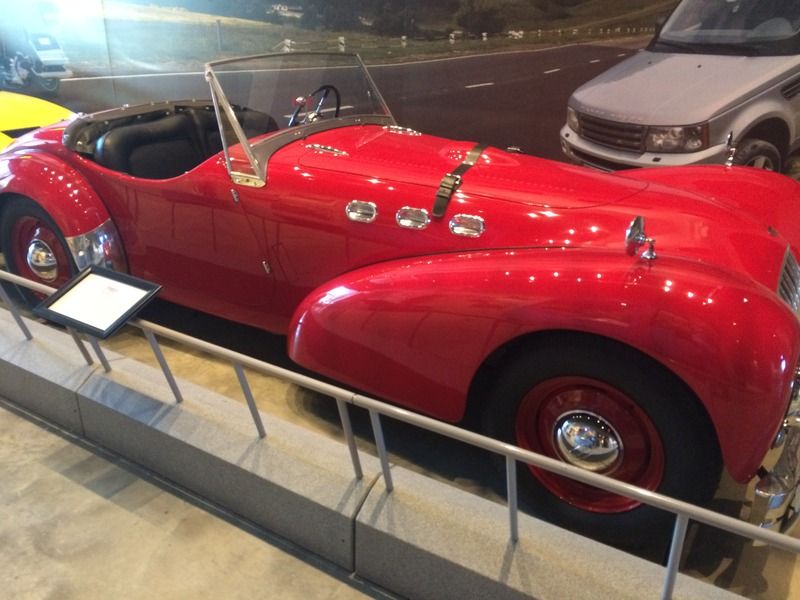
DeAgostini kit builds:
Millennium Falcon: 18% Complete
Shelby GT-500: 28% Complete
Thunderbird 2: 13.75% Complete
|
|
|
Rank: Pro Groups: Registered
Joined: 22/03/2016 Posts: 175 Points: 552 Location: Merseyside
|
Nice to see you back and thanks for sharing the pictures. Looking forward to more updates  Built- Shelby Mustang, Lamborghini Huracan
Building-Spitfire, Redbull racing RB7, 3d printer, Honda CB750, Stage coach and Revell 1/400 Titanic
|
|
|
Rank: Master Groups: Registered
Joined: 07/07/2015 Posts: 1,292 Points: 3,928 Location: Allentown PA
|
Ok got month seven in the mail the other day. It has parts that I wanted to paint and it being a nice decided to do just that. I painted the leaf spring flat black and the drum gun metal. I also painted the shock asorber red. It didn't turn out right. It came out too dark. Which is odd because it's the same color I used in the calipers. I don't remember what color primer I used on the calipers but I am thinking maybe it was a lighter color. Gonna give it another few coats and see what happens. If it doesn't brighten up I am gonna strip and use a lighter primer. 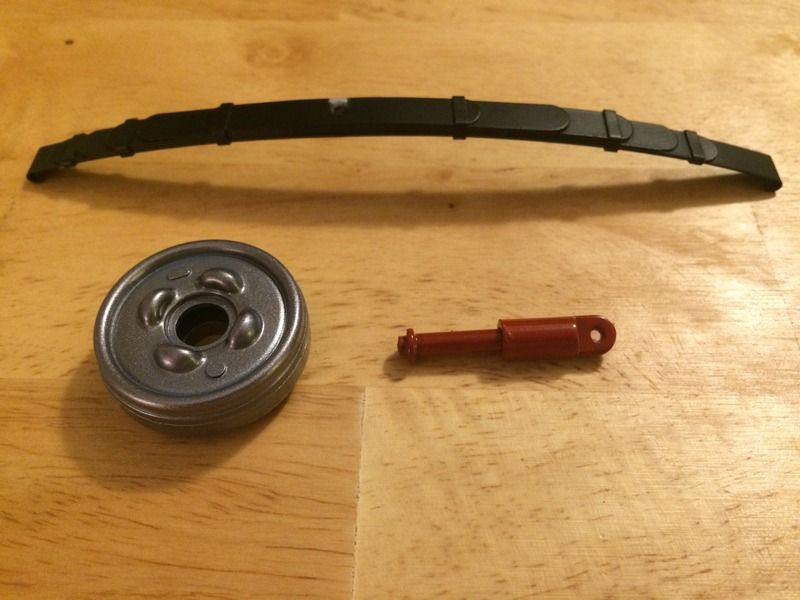
DeAgostini kit builds:
Millennium Falcon: 18% Complete
Shelby GT-500: 28% Complete
Thunderbird 2: 13.75% Complete
|
|
|
Rank: Super-Elite Groups: Registered
Joined: 17/12/2013 Posts: 3,982 Points: 11,974 Location: NY, USA
|
Looks good.A white primer would make the red brighter
Carl
|
|
|
|
Guest
|
 US
US

