|
|
 Rank: Pro   Groups: Registered
Joined: 27/06/2014 Posts: 393 Points: 1,104 Location: st austell
|
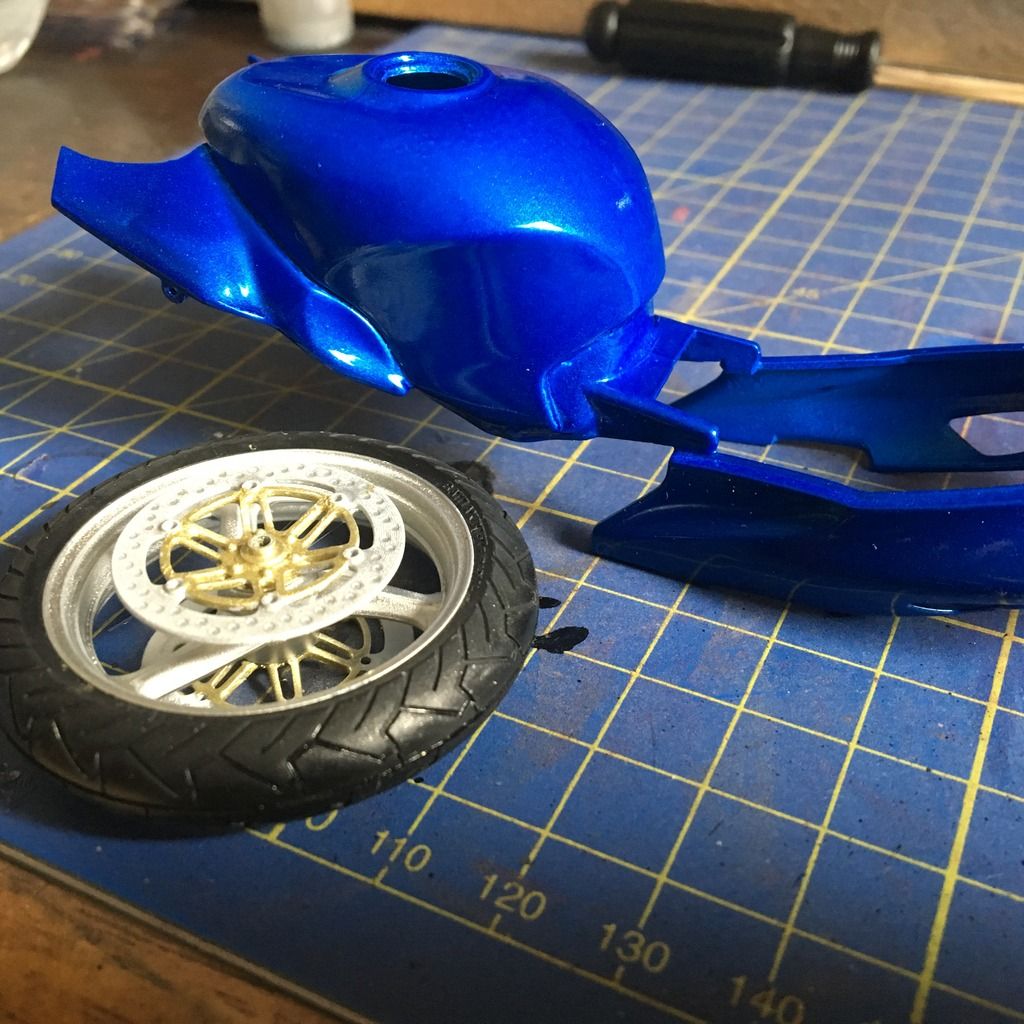
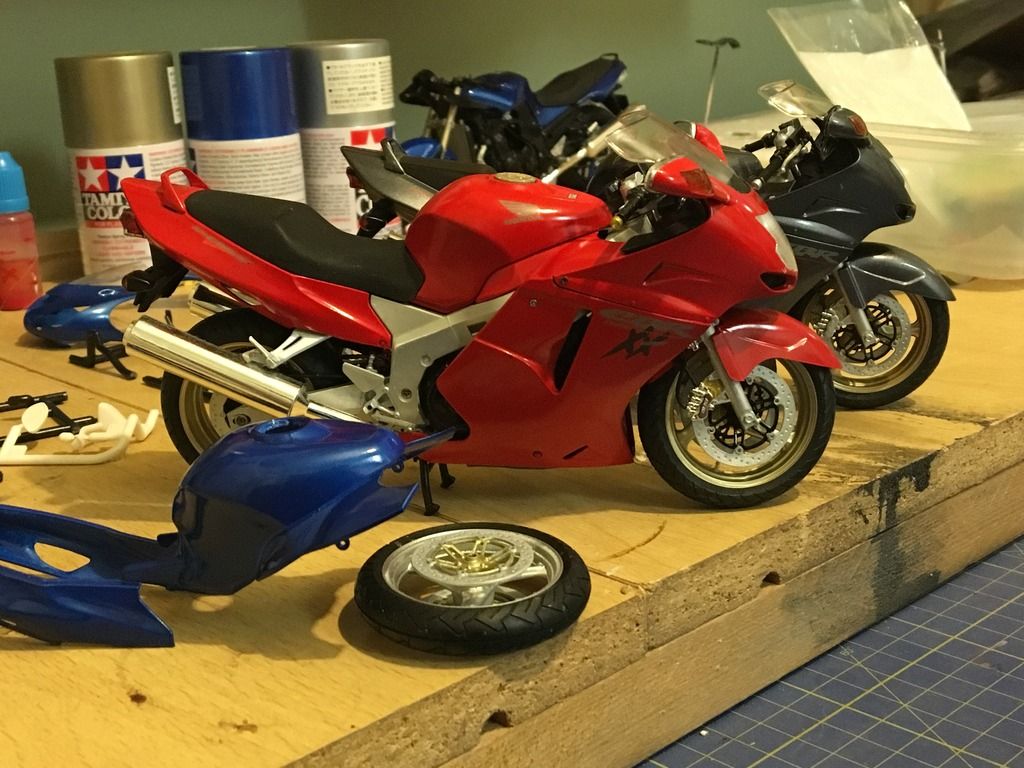
O no not again I here u say we'll just finished a red one and is in finished build please feel free to have look ok right on to this build its simple going for trio set this is going to be blue and have started it and my what a nice blue it is so ...... Facebook-model maker
|
|
|
 Rank: Pro   Groups: Registered
Joined: 27/06/2014 Posts: 393 Points: 1,104 Location: st austell
|
 Facebook-model maker
|
|
|
 Rank: Pro   Groups: Registered
Joined: 27/06/2014 Posts: 393 Points: 1,104 Location: st austell
|
 Facebook-model maker
|
|
|
 Rank: Super-Elite        Groups: Registered
Joined: 08/03/2014 Posts: 2,977 Points: 8,523 Location: united kingdom
|
Oh my God I love that colour,your off to a great start. Ken's the name modeling's the game.
|
|
|
 Rank: Pro   Groups: Registered
Joined: 27/06/2014 Posts: 393 Points: 1,104 Location: st austell
|
I know kp very nice colour stunning 😊 Facebook-model maker
|
|
|
|
|
Beautiful colour, you can count me in on your list of followers....
Regards
Alan
|
|
|
 Rank: Super-Elite       Groups: Registered
Joined: 27/01/2014 Posts: 5,060 Points: 14,980
|
Blimey Ian, you didn't hang around did you?
That's a really nice blue too
|
|
|
 Rank: Pro   Groups: Registered
Joined: 27/06/2014 Posts: 393 Points: 1,104 Location: st austell
|
Hi Dave lol i made few mistakes one was body it was black and red it did not work for me so got another kit for spares finished It about week ago. I was looking at the red and black thinking what I can do so clean it up and thought what colour so had some blue lefted over then thought about the wheels so again something different lol do think they work well together. At moment working on engine it should be black but going for gold or sliver think It would look nice which colour choose I don't know will go with flow tonight not that fast lol Ian Facebook-model maker
|
|
|
 Rank: Super-Elite       Groups: Registered
Joined: 19/06/2013 Posts: 4,588 Points: 13,553 Location: West Yorkshire
|
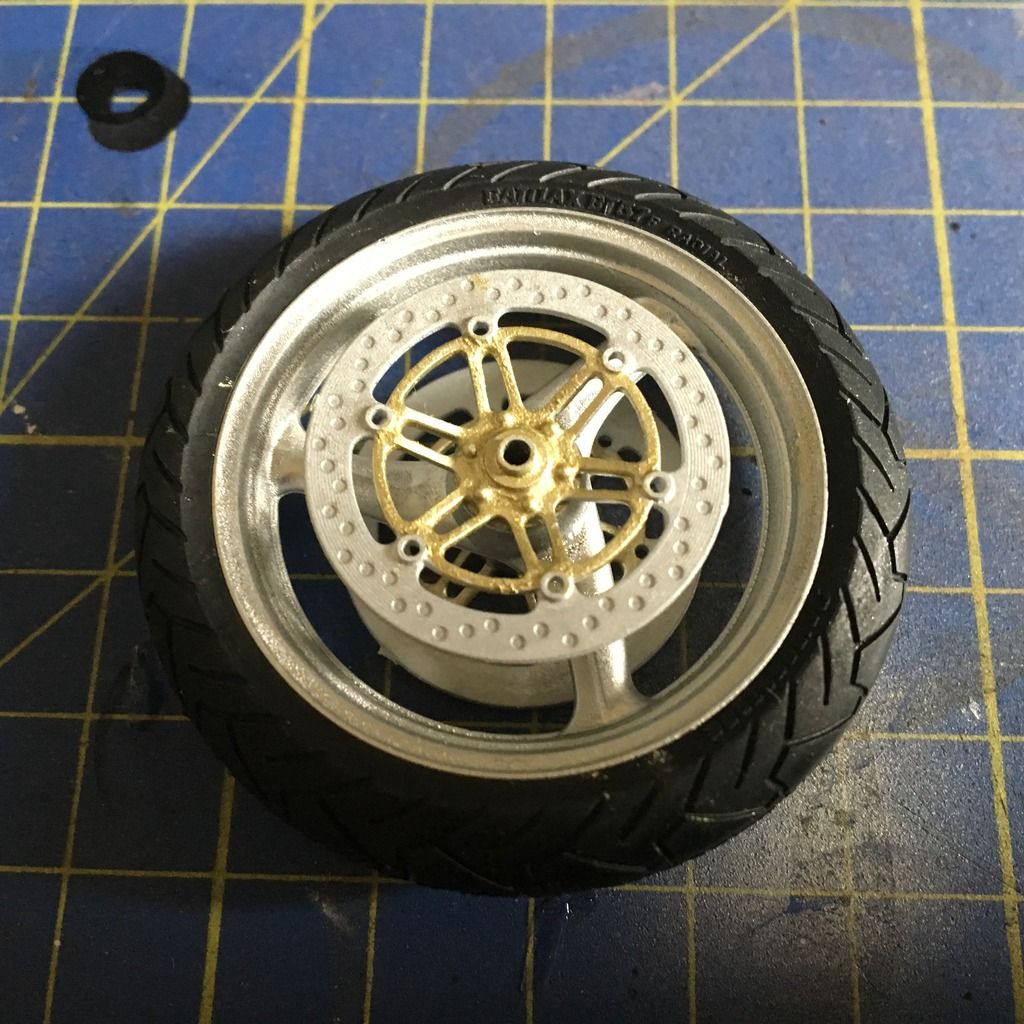
Nice blue Ian, and the wheels look good. Are you going to drill the holes in the brake disc?
Al
|
|
|
 Rank: Pro Groups: Joined: 24/08/2009 Posts: 48,827 Points: -13,348
|
Nice start Ian, love the blue you have chosen. Have you thought about either drilling the holes in the brake discs as already suggested or maybe dropping in a dark oil paint wash instead to make them stand out? I think it would really benefit the overall look, and if this turns out as nice as your red version it'll be very cool - well done.
Kev
|
|
|
|
|
Love the blue, looking forward to seeing this one built!
|
|
|
 Rank: Pro   Groups: Registered
Joined: 27/06/2014 Posts: 393 Points: 1,104 Location: st austell
|
Thanks guys never thought to drill holes but got drill no bits lol went to order new ones wrong size lol have got dark grey wash ideas lol and thank you neme not too close lol Facebook-model maker
|
|
|
 Rank: Pro   Groups: Registered
Joined: 27/06/2014 Posts: 393 Points: 1,104 Location: st austell
|
Question guys with wash do use bush or dip hole thing in wash never done before lol Facebook-model maker
|
|
|
 Rank: Pro Groups: Joined: 24/08/2009 Posts: 48,827 Points: -13,348
|
ian2014 wrote:Question guys with wash do use bush or dip hole thing in wash never done before lol
Hello Ian,
There are two types of wash, an 'overall' wash, where you cover a large area in wash using a brush and allow the colour to bleed into crevices, panel lines and details which when dried leaves a collection of the dark pigment in the crevices/details without overly affecting the tone of the surrounding areas, though it will darken them slightly depending on how well thinned the wash is - or not? I find it best to cover the whole area in a light layer of clean thinners first before brushing the wash over the top while the clean layer of thinners is still drying, the primer coat of thinners helps the wash to move towards the crevices and details and gives a better end result?
The other type is a 'pin' wash, where a small, fine tipped brush is used to just drop small amounts of wash into and very close to the detail/panel lines and crevices, without putting it onto unwanted areas? If you just want to make the holes in your brake discs appear darker then a 'pin' wash would be the one for you to use in this instance?
You need to thin your paint to a watery consistency, hence the name 'wash' and don't just use a straight black, it looks unnatural. Better to use a black/brown mix in a 50/50 or 60/40 ratio (black/brown).
The media you use for making the wash depends on what underlying paint you have used, but a mix of oil or enamel paints with a turpentine or white spirit type thinners is usually best I find? If the silver you have used on the discs is oil or enamel based, then you will need to seal it first with an acrylic varnish, to stop the oil/enamel/thinners in the wash from affecting the silver paint beneath? Acrylics don't mix with oil/enamel based paints and vice-versa, so you could then safely use your oil/enamel/thinners wash over the top of the acrylic varnish? If your silver paint is acrylic, you can just apply the oil/enamel/thinners wash over the top without needing to use a varnish first though it's always good practice to seal the underpaint anyway in case you want to remove the wash?
Here are a few useful sites that might help you:
http://modelairplanebuilding.com/washes.html
http://www.scalemodelgui...eathering/paint-washes/
http://hlj.com/guides/wash.html
There are many more guides on the net which will all say the same sort of thing?
It's always a good idea to practice the method on an old/damaged model first before trying it on your cherished build, only moving onto something like your bike when you are comfortable with what you are doing/
Hope that helps?
Kev
|
|
|
 Rank: Pro   Groups: Registered
Joined: 27/06/2014 Posts: 393 Points: 1,104 Location: st austell
|
Thanks Kev big help always used Tamyia acrylic disc are airbrushed thanks Ian Facebook-model maker
|
|
|
 Rank: Pro   Groups: Registered
Joined: 27/06/2014 Posts: 393 Points: 1,104 Location: st austell
|
 Facebook-model maker
|
|
|
 Rank: Pro Groups: Joined: 24/08/2009 Posts: 48,827 Points: -13,348
|
ian2014 wrote:Thanks Kev big help always used Tamiya acrylic discs are airbrushed thanks Ian
Hello Ian,
In that case, having used Tamiya Acrylics as your main coat, all you need to do is apply your thinned oil or enamel wash over the top, as it won't affect the acrylic paint underneath. Always best though to just cover your underlying paint layer in an acrylic varnish (gloss) first which will help if you aren't happy with your wash effect and want to remove it to try again? Once the wash has dried you can then either leave as is if you want a gloss finish or apply another layer of varnish according to whether you want a matt or satin finish instead then job done?
Personally, if you just want to accentuate the holes in the discs, you'd be better off buying yourself a set of micro drill bits and a pin vice and just drill them out, which is how they would be in reality anyway and much less hassle to do?
Hope that helps?
The three bikes together look cool in their various colours - well done!!
Kev
|
|
|
 Rank: Pro   Groups: Registered
Joined: 27/06/2014 Posts: 393 Points: 1,104 Location: st austell
|
Thanks for just leave as it is still cool but never know what is round corner this build was last min idea lol Facebook-model maker
|
|
|
 Rank: Pro   Groups: Registered
Joined: 27/06/2014 Posts: 393 Points: 1,104 Location: st austell
|
Mind you yellow be cool lol Facebook-model maker
|
|
|
 Rank: Pro   Groups: Registered
Joined: 27/06/2014 Posts: 393 Points: 1,104 Location: st austell
|
 Facebook-model maker
|
|
|
|
Guest (2)
|