|
|
 Rank: Amateur Level 1 Groups: registriert, Registered Joined: 24/03/2010 Posts: 30 Points: 83 Location: Burnley
|
Hi all, this is my first attempt at a build of any sorts, the tv ad got me hook line and sinker! Got issue 1 and can't wait for the others to start coming, and I also decided to build my ship in the classic trafalgar colours. Here is my cannon, all seems well, after reading the various forum posts i decided to turn the base plate around so the taper matches that of the cannon, and after viewing many pictures of the gun deck aboard victory, i have painted my wheels brown as they were made of wood and still are today(Maybe a little pedantic, but that's just me) 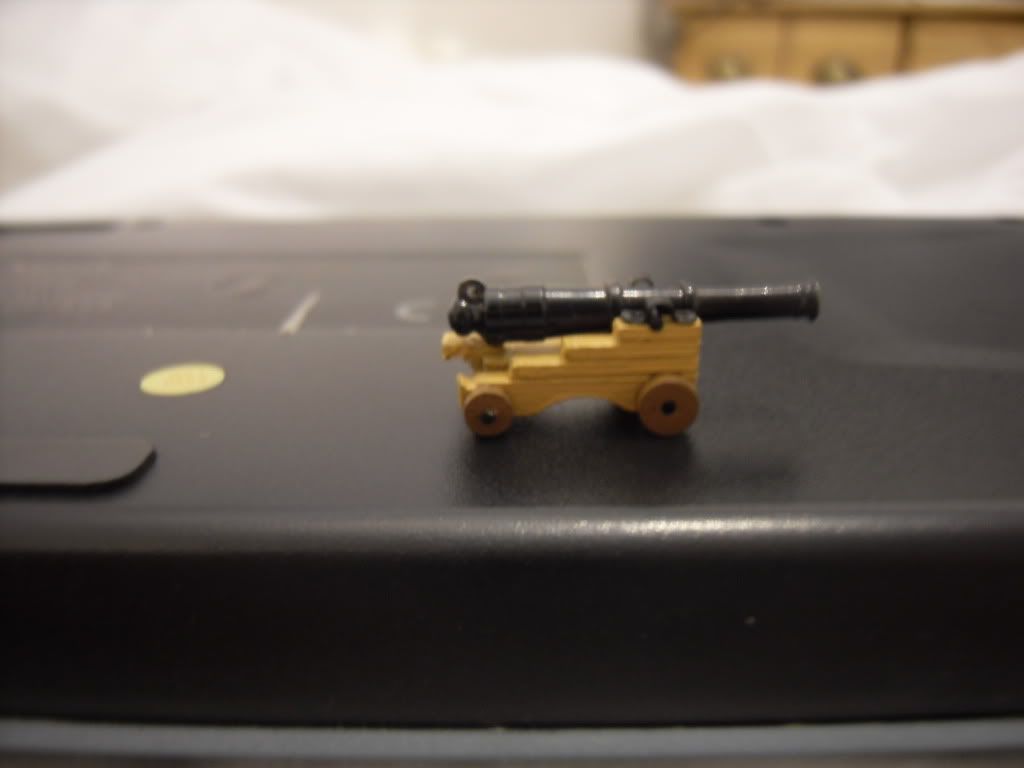 Sat waiting impatiently for the next 2 issues to come...............should be here any day now!
|
|
|
 Rank: Pro   Groups: Registered
Joined: 20/03/2010 Posts: 219 Points: 585 Location: Faversham
|
Looking good mate, gunna start mine when I have got a few more issues. _____________________________________
Currently building:-
Deagostini HMS Victory
Amati Black Pearl
Mamoli HMS Victory 1:90 Scale
Caldercraft HMS Victory 1:72
|
|
|
Rank: Pro Groups: Joined: 24/08/2009 Posts: 48,827 Points: -13,348
|
Good stuff thescrameth 
|
|
|
|
|
spot on for a first attempt well done mate “Whenever you find yourself on the side of the majority, it is time to pause and reflect.”
-Mark Twain
|
|
|
Rank: Pro  Groups: Registered
Joined: 22/03/2010 Posts: 236 Points: 709 Location: Falkirk
|
|
|
|
Rank: Amateur Level 1 Groups: registriert, Registered Joined: 24/03/2010 Posts: 30 Points: 83 Location: Burnley
|
Got tired of waiting for the next issues to come in post  so i bought the second issue, a good chance to practise the puddening and seizing Here is my 1st attempt, which i don't think is too bad.  I decided to try adding extra white banding on top rather than paint the division, and i feel on my next attempt (The real one in the post LOL!) i should achieve pretty decent results. 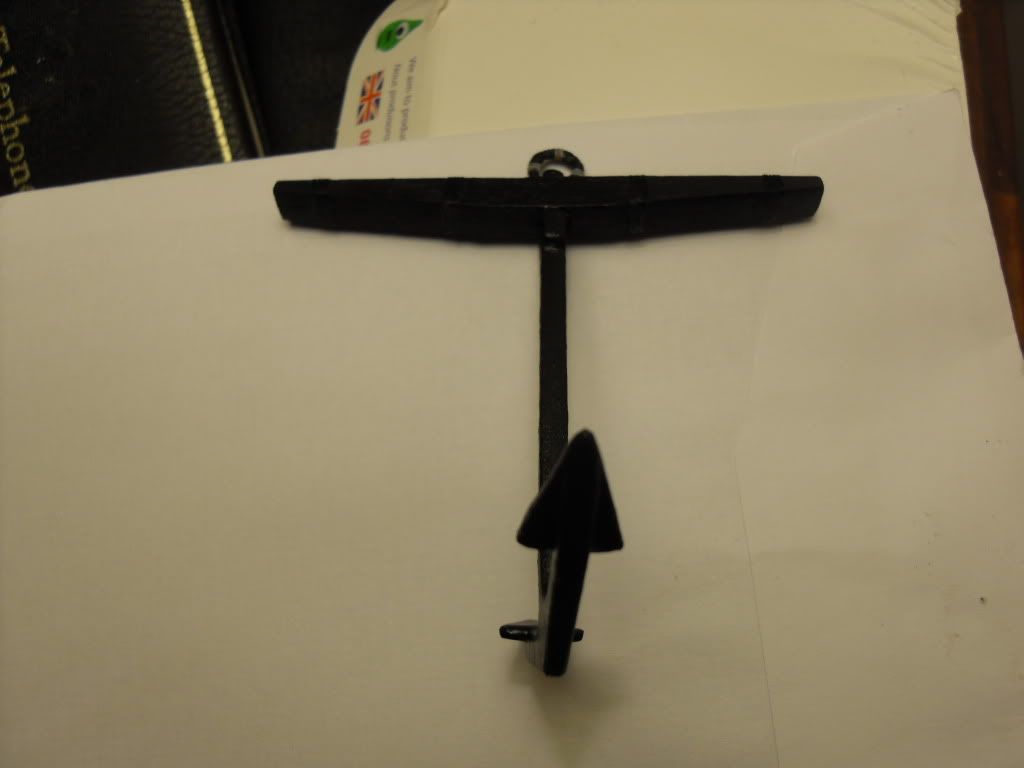 Painted thread black initially, to give the tarred effect. Just a little loose on the banding when up ultra close (but at normal distance allows you to see the individual thread) Also, i'm thinking of painting the white thread just to clean it up a little. 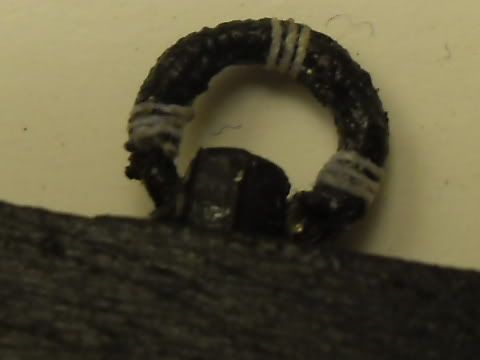
|
|
|
Rank: Pro   Groups: Registered
Joined: 25/01/2010 Posts: 459 Points: 1,367 Location: Bridlington
|
Like it puddening looks good, thescrameth Regards
Rob
Bridlington.
Built Flying Scotsman (Train). Collecting HMS VICTORY
|
|
|
Rank: Pro   Groups: Registered
Joined: 02/04/2010 Posts: 491 Points: 1,460 Location: Poole
|
A most promising start! Don't forget to prep the wood before painting, (and, if you want a perfect finish, between coats too). Schnellboots on back burner
Tools.
|
|
|
Rank: Pro Groups: Registered
Joined: 20/03/2010 Posts: 219 Points: 585 Location: Faversham
|
thescrameth wrote:Got tired of waiting for the next issues to come in post so i bought the second issue, a good chance to practise the puddening and seizing Here is my 1st attempt, which i don't think is too bad. I decided to try adding extra white banding on top rather than paint the division, and i feel on my next attempt (The real one in the post LOL!) i should achieve pretty decent results. Painted thread black initially, to give the tarred effect. Just a little loose on the banding when up ultra close (but at normal distance allows you to see the individual thread) Also, i'm thinking of painting the white thread just to clean it up a little. Must admit, I did the same thing!!! _____________________________________
Currently building:-
Deagostini HMS Victory
Amati Black Pearl
Mamoli HMS Victory 1:90 Scale
Caldercraft HMS Victory 1:72
|
|
|
Rank: Amateur Level 1 Groups: registriert, Registered Joined: 24/03/2010 Posts: 30 Points: 83 Location: Burnley
|
12 Pounder Cannon Re-Done! Decided after viewing the great work done by captain stedders to pimp my cannon. Luckily enough i bought issue 3 whilst waiting for my delivery and as such, used a few of the parts to add the iron detailing to my cannon. I also notched out the underside of the base plate so the wire is no longer visible 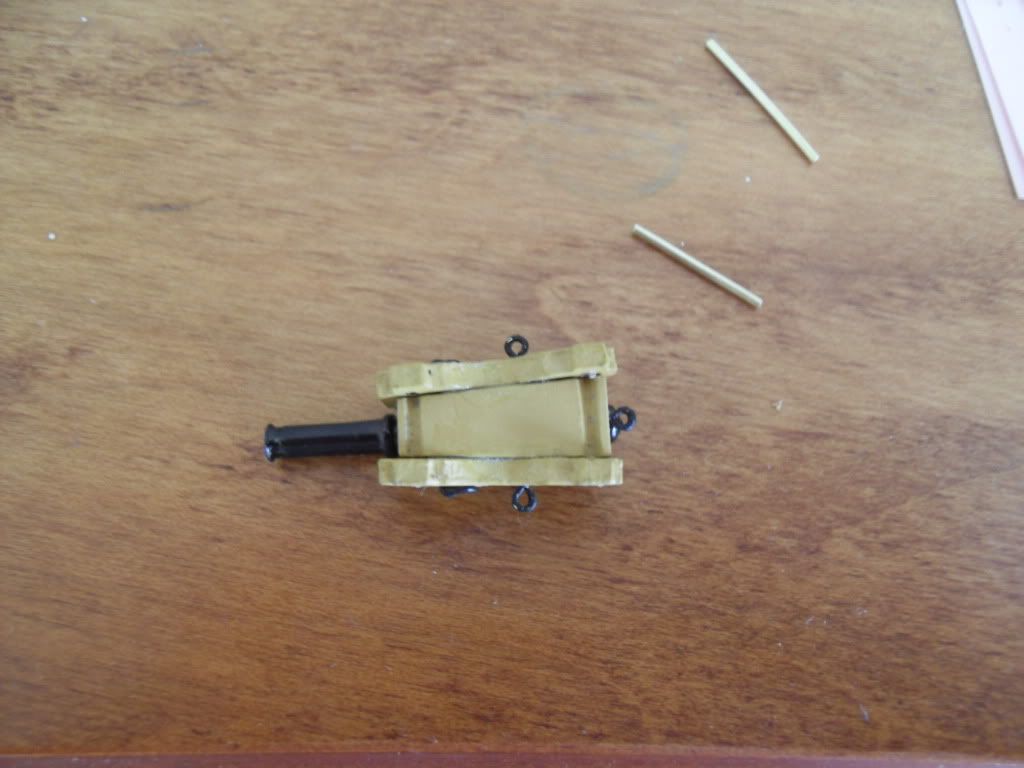 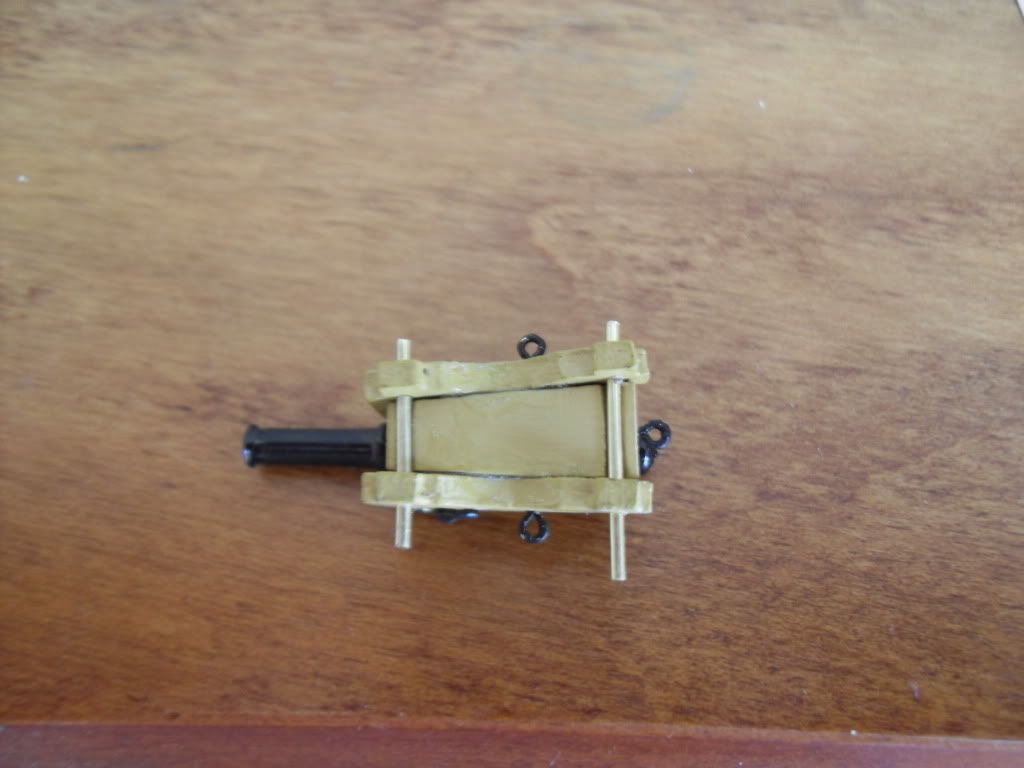 Also, i feel it gives a bigger depth to the gun carriage 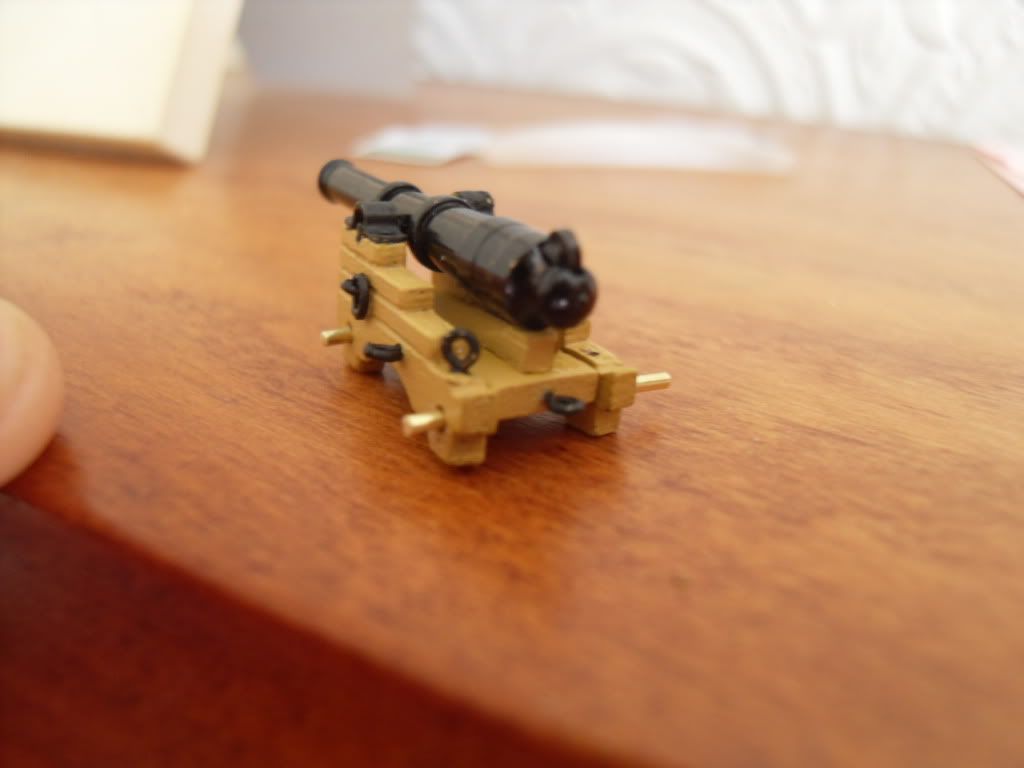 Then for the wheels used the green stuff and a few fiddly hours later ................... 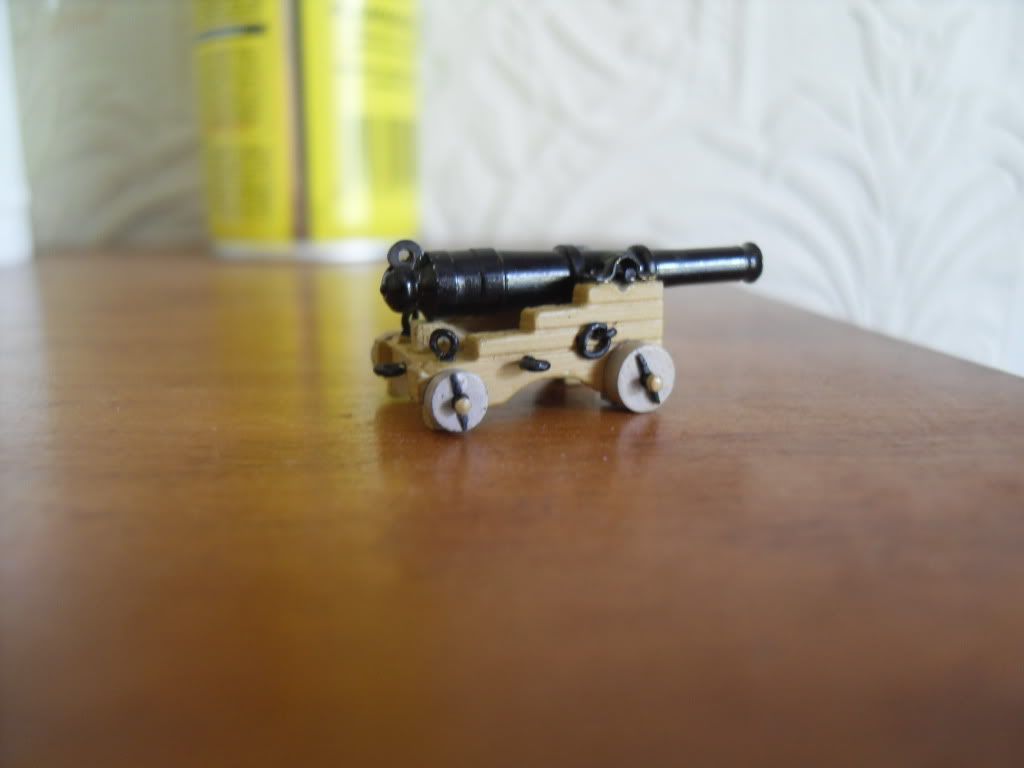 I still need to touch up the paintwork in places but other than that, 12 Pounder Cannon...............DONE No chance of matching the cannon crest that stedders mastifully did, but i prefer it to the old vesion  On to Re-doing the puddening on my anchor now. because it does look a little messy in macro.
|
|
|
Rank: Pro Groups: Registered
Joined: 22/03/2010 Posts: 236 Points: 709 Location: Falkirk
|
Looking good I know what you mean about macro, my anchor doesn't bear too close an inspection with macro either, so I'll probably wait till I've done my second anchor before I dare post any pictures  Regards,
David
|
|
|
Rank: Pro Groups: Registered
Joined: 02/04/2010 Posts: 491 Points: 1,460 Location: Poole
|
Consider your cannon well pimped sir! Very nice, clean work. I'm VERY interested to know how you added that second securing ring to the sides. (I have after spending an inordinate amount of time faffing about with brass wire, pliers and even string, developed a rather fiendish way of making 'rings' that don't shred paint and am therefore intrigued as to how you approached the problem). Schnellboots on back burner
Tools.
|
|
|
 Rank: Elite     Groups: Registered
Joined: 22/03/2010 Posts: 2,065 Points: 6,295 Location: Gorleston-on-sea
|
You did a very nice job on that cannon...11 out of 10 mate..  John Current Builds: Deagostini HMS Victory: Deagostini HMS Sovereign of the seas. Completed Builds: Del Prado: HMAS Bounty: Hachette: RMS Titanic: Del Prado: Cutty Sark...
|
|
|
Rank: Pro  Groups: Registered
Joined: 25/03/2010 Posts: 472 Points: 1,357 Location: Hyde
|
Nice job mate Great upgrade
|
|
|
Rank: Pro Groups: Registered
Joined: 25/03/2010 Posts: 472 Points: 1,357 Location: Hyde
|
Capt Stedders wrote:Consider your cannon well pimped sir! Very nice, clean work. I'm VERY interested to know how you added that second securing ring to the sides. (I have after spending an inordinate amount of time faffing about with brass wire, pliers and even string, developed a rather fiendish way of making 'rings' that don't shred paint and am therefore intrigued as to how you approached the problem). Hi I tried to add this ring myself and I need to tell you that it does look really good. I've used copper wire (stripped CAT5). It isn't as thick as brass used for rings in carronade but it does the job. I'll post some pics when I'll start my build. I need to get some drill bits and other stuff first. Tom
|
|
|
|
|
Like the idea of hiding the truck wire under the carrage good call “Whenever you find yourself on the side of the majority, it is time to pause and reflect.”
-Mark Twain
|
|
|
Rank: Amateur Level 1 Groups: registriert, Registered Joined: 24/03/2010 Posts: 30 Points: 83 Location: Burnley
|
Capt Stedders wrote:Consider your cannon well pimped sir! Very nice, clean work. I'm VERY interested to know how you added that second securing ring to the sides. (I have after spending an inordinate amount of time faffing about with brass wire, pliers and even string, developed a rather fiendish way of making 'rings' that don't shred paint and am therefore intrigued as to how you approached the problem). Thanx Stedders, a great compliment coming from you. I should have taken more photos in the build, but i had a "spare" Cannon that went wrong on my first try, so iv'e used it to show you, it's easier this way. Firstly, I drilled two holes next to each other, then using 0.5 mm wire threaded in a u-shape through both holes catching hold of an o ring i got from a cheap belchor chain. 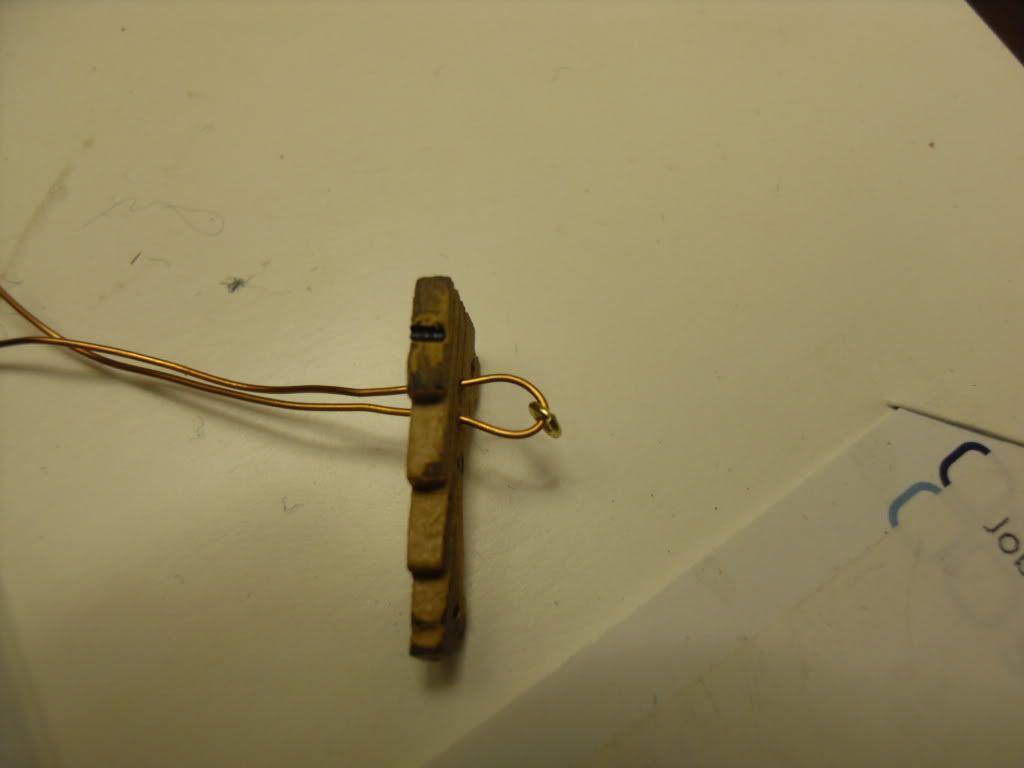 then pull tight 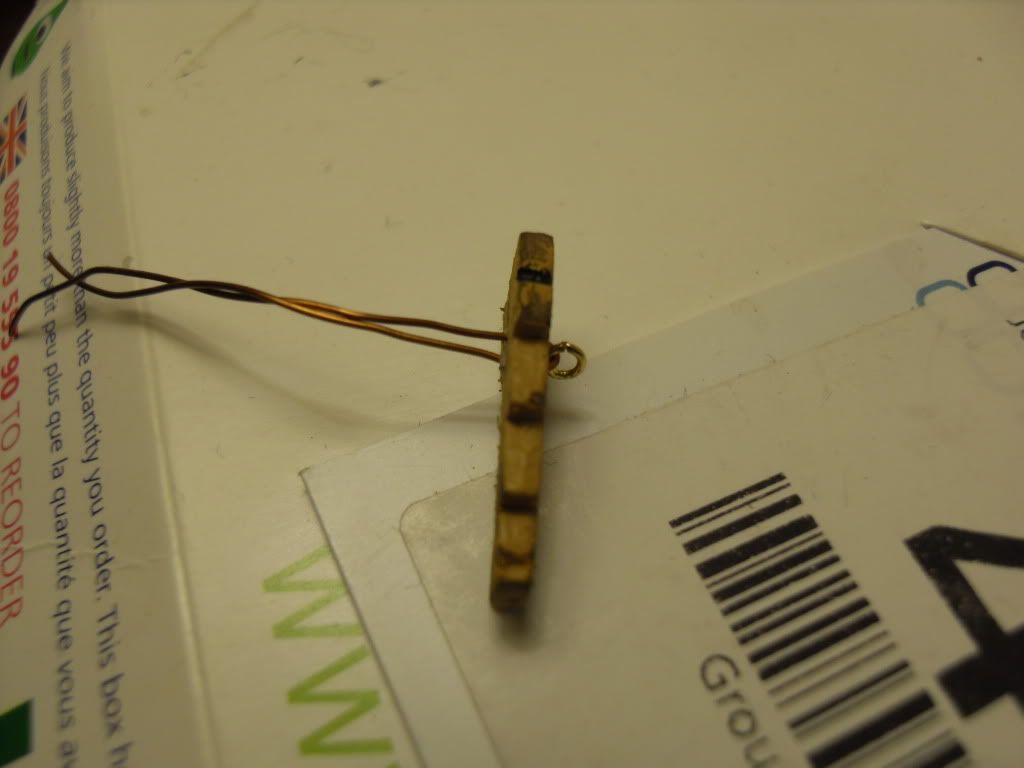 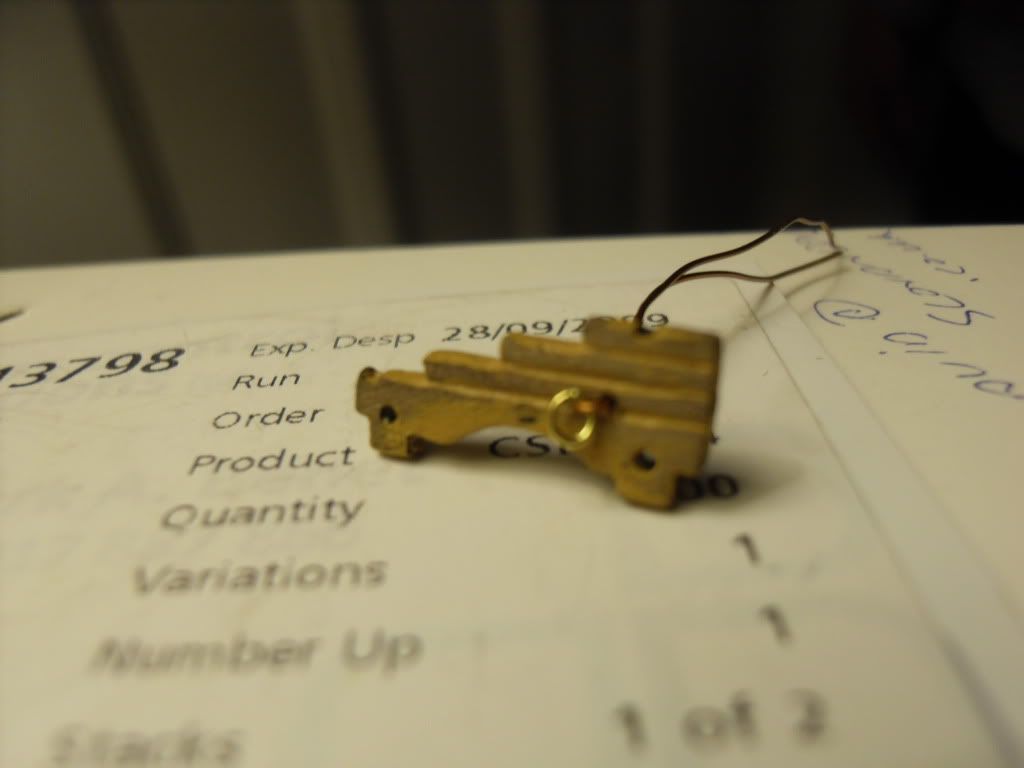 i push it back out a little to paint it black, then pull it back in. Finally, snip the insides to clean up. 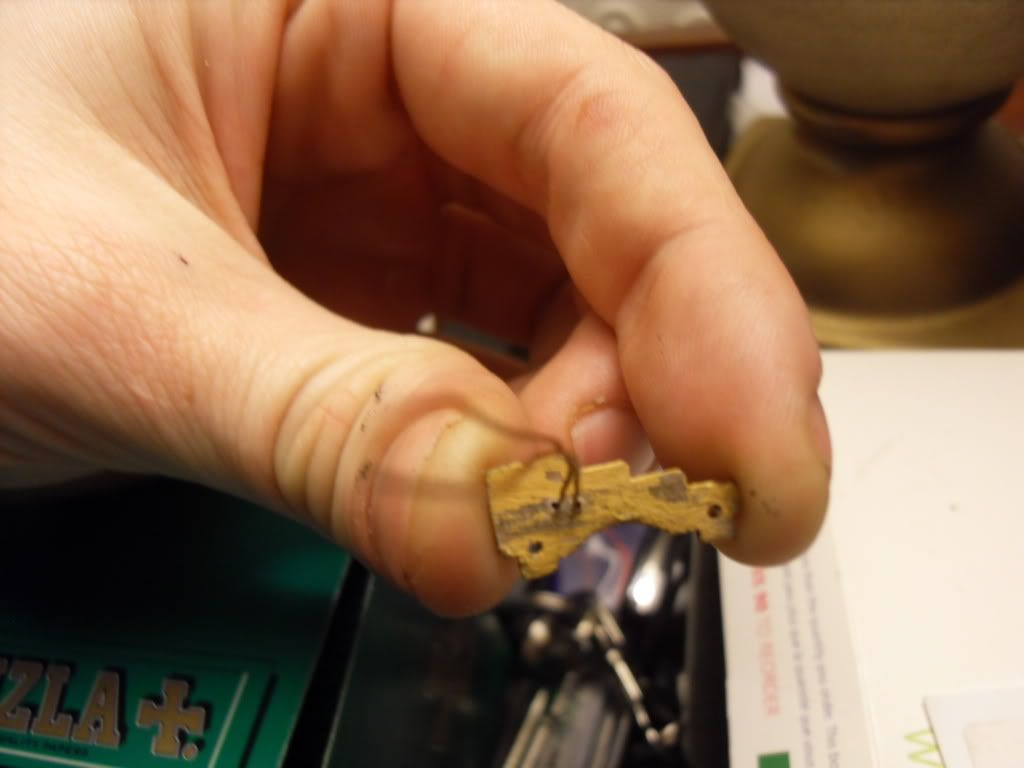 Hope this helps Guys.
|
|
|
Rank: Pro Groups: Registered
Joined: 02/04/2010 Posts: 491 Points: 1,460 Location: Poole
|
Fiendishly clever! I was wondering how you managed to loop a second ring around one already in situ - whereas you have managed to avoid this horrifically fiddly process altogether by securing the second ring via a u-shaped bit of wire early in the build process - good thinking! The best bit being that it doesn't look obvious. One of the best aspects of this forum is that we have many different brains working on the same conundrums which invariably results in some pretty nifty solutions and methods that can be employed. Schnellboots on back burner
Tools.
|
|
|
Rank: Pro Groups: Registered
Joined: 25/03/2010 Posts: 472 Points: 1,357 Location: Hyde
|
Capt Stedders wrote:Fiendishly clever!
I was wondering how you managed to loop a second ring around one already in situ - whereas you have managed to avoid this horrifically fiddly process altogether by securing the second ring via a u-shaped bit of wire early in the build process - good thinking! The best bit being that it doesn't look obvious.
One of the best aspects of this forum is that we have many different brains working on the same conundrums which invariably results in some pretty nifty solutions and methods that can be employed.
Hi mate This is my try with copper wire (stripped CAT5 cable). You can compare it to original part supplied with Carronade 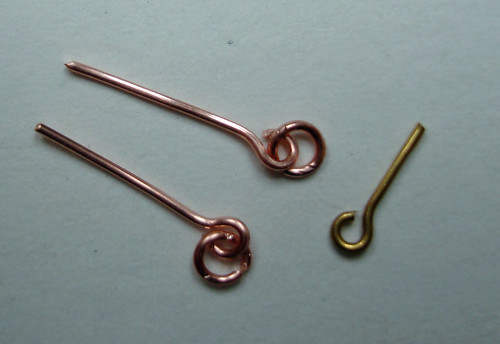
|
|
|
Rank: Pro Groups: Registered
Joined: 02/04/2010 Posts: 491 Points: 1,460 Location: Poole
|
Definitely going to add some copper wire to my bits box now! Great tip guys, cheers! Schnellboots on back burner
Tools.
|
|
|
|
Guest
|
 US
US

