|
|
 Rank: Amateur level 2   Groups: Registered
Joined: 20/02/2016 Posts: 45 Points: 135 Location: SoCal
|
Hello everyone. MY name is Jeff and this is my 3'rd Model Space build. I started with the McLaren F1 and am almost complete with the Lambo Countach. I was seriously eyeballing the Hayabusa as my next project but somehow ended up ordering the full kit for the SOTS. I've read all the builds and have mined some very helpful information from all that have come before me. My professional background is a machinist ( 30 yrs ) with a emphasis on CNC'S, programming, design, and prototyping. So I may come at this project a little differently. For some reason pics not downloading from phone so stay tuned for updates soon.
|
|
|
 Rank: Pro Groups: Joined: 24/08/2009 Posts: 48,827 Points: -13,348
|
Welcome to ModelSpace, hope you enjoy your time with us and your build 
|
|
|
Rank: Amateur level 2 Groups: Registered
Joined: 20/02/2016 Posts: 45 Points: 135 Location: SoCal
|
OK, here goes. first week was basically building the keel jig and assembling the rib sections. Starting with the base of the jig, milled out the slots for the angle brackets. 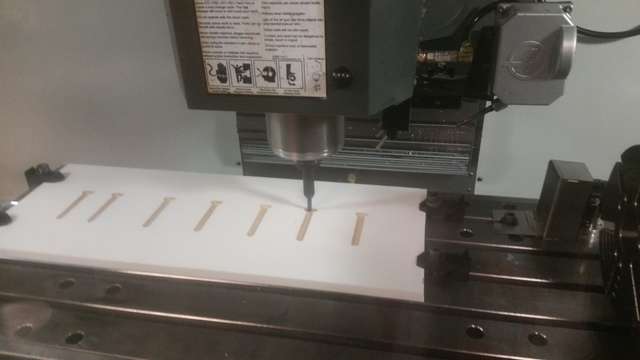 Then milled 14 ea. 1/2" wide angle brackets from 1 1/2" aluminum angle stock. The far side brackets are fixed and dialed in within .001" of each other. The near side brackets are slotted and can slide 1/8" of an inch to clamp up against the keel when installed in the jig. Adjustability will be useful if in the future I may make another ship with maybe different thickness keel.  While that was going on I was assembling the rib sections. I would glue the sides in, wrap them in wax paper top and bottom and then press them in between a granite surface plate and a 6" x 12" x 1"thick piece of aluminum tooling plate. Then set a 20 lb weight on the whole thing and let set for about 3 hrs. I could get about three a day. 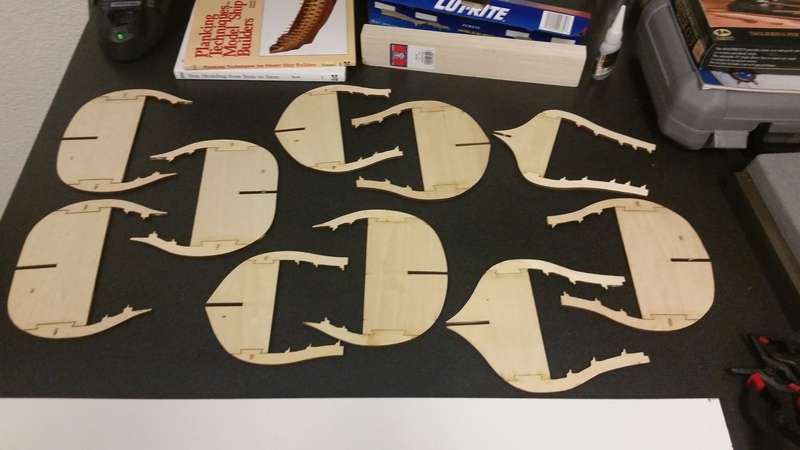 It would be good to note that I'm doing this build (like the 2 car builds before) at work in my office. I'm a machine shop manager, I work for Edelbrock. Yeah, the "make cars go fast" company. It's a good way to pass lunch time and breaks, and I have an entire machine shop at my disposal when needed. I also glued together the keel using the same technic as the rib sections and installed in the jig. 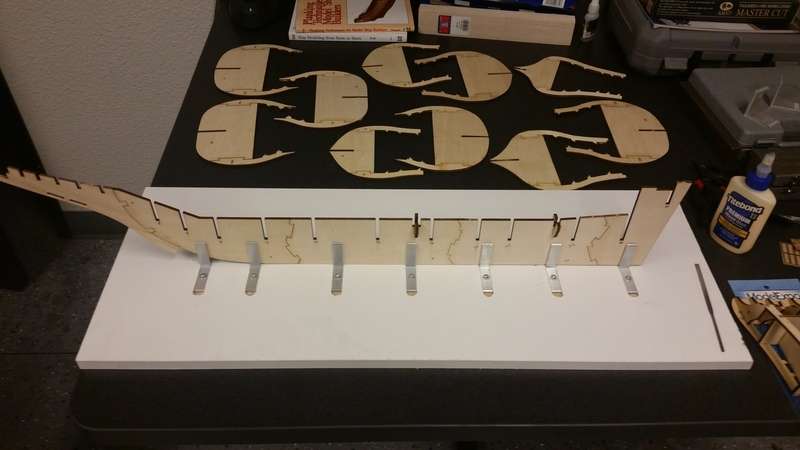 I dry fitted the rib sections to the keel just to see how things look. Pretty good so far. 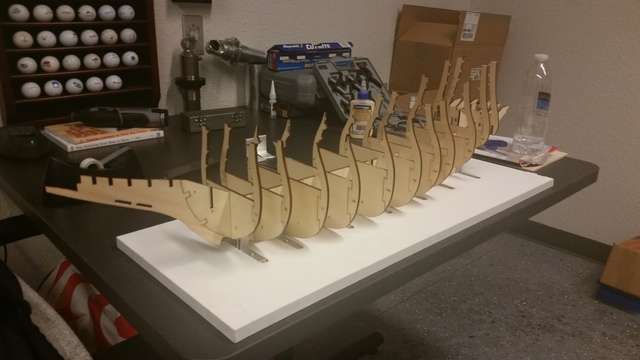 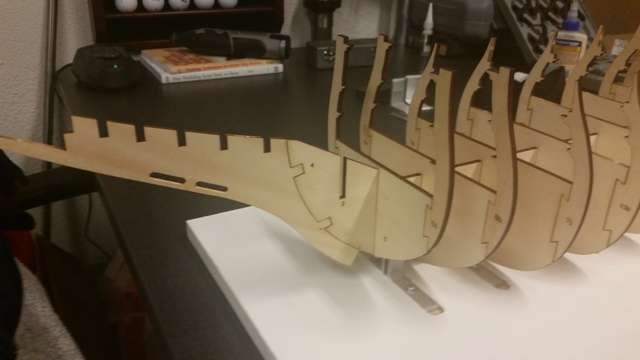 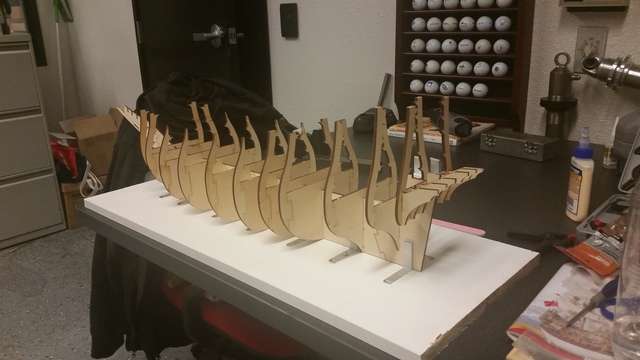 Stay tuned Jeff
|
|
|
 Rank: Super-Elite       Groups: Registered, Forum Support Team, Administrators, Global Forum Support Team, Moderator, Official Builds Joined: 09/11/2012 Posts: 8,520 Points: 24,651 Location: East midlands
|
Hi, Welcome to the forum.  Looks as if you`re off to a fine start, well done so far. Congrats on your "Blue" medal for starting your diary. Regards delboy271155 (Derek) COME BACK GUY FAWKES "YOUR COUNTRY NEEDS YOU"
|
|
|
|
|
Welcome aboard Jeff and what a great start you look to have made... She's a beautiful ship and I think you'll have a lot of fun putting her together.... I'll be following your progress all the way through so good luck with her.... Regards Alan
|
|
|
Rank: Super-Elite  Groups: Registered
Joined: 28/07/2014 Posts: 4,269 Points: 12,713 Location: Scotland
|
Welcome to the forum Jeff looks an impressive start to your build regards Phil COMING SOON =1/72 Italeri diorama`s Battle for the Reichstag and Stalingrad battle at the tractor factory 1/16 Trumpeter King Tiger with loads of extras ON THE GO= refurbishment of 1/25 Tamiya tiger 1 , amt Star trek kits and space 1999 models
So Much to Build,But What a Hobby!
|
|
|
Rank: Administration   Groups: Registered, Administrators, Global Forum Support, Moderator, Forum Support Team, Official Builds Joined: 04/01/2016 Posts: 7,143 Points: 21,736 Location: Northamptonshire, England
|
Welcome to the forum Jeff, looks like you are off to a flying start. Mark Regards
Markwarren
(Mark) Admin
|
|
|
|
|
Welcome to the forum Jeff made a great start on your build. Look forward to more updates. Chris On the bench 1/350 Revell Tirpitz Platinum Edition (Pontos PE and Wooden deck) plus extra Eduard PE set and extra MK1 door sets.
|
|
|
Rank: Amateur level 2 Groups: Registered
Joined: 20/02/2016 Posts: 45 Points: 135 Location: SoCal
|
Thanks everyone for the good words. Week 2 seemed a bit slower. A couple of issues came up. The first rib section that forms the nose of the ship was warped pretty good top to bottom. So Sunday I steamed it and pressed it on the surface plate and left it for 2 days. Still warped :( So pressed it out flat again on the surface plate and glued two ribs to the backside and after dried it stayed pretty flat. Problem solved. Then on the stern section the lower horizontal piece ended up not quite square on one side. In hindsight I would have assembled it in a different order than the guide. After looking forward in the build, none of this will be visible and the outside surfaces were all still square, just had to notch one of the slots in the curved vertical support on one side a bit and all was good again. So, getting the front section glued on all straight and square. 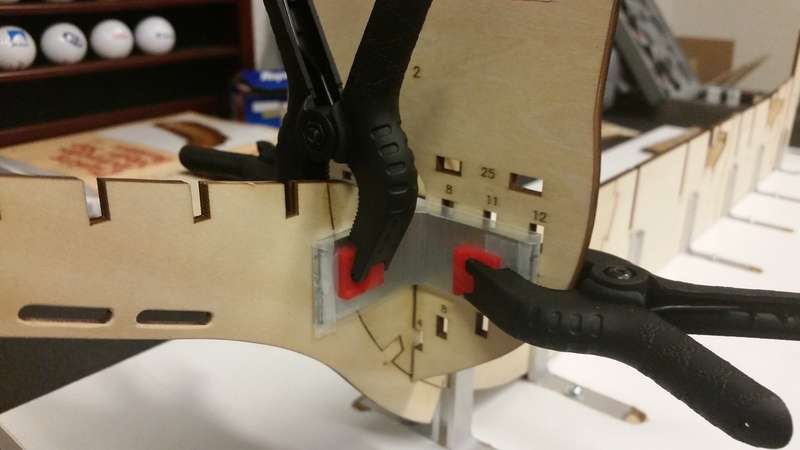 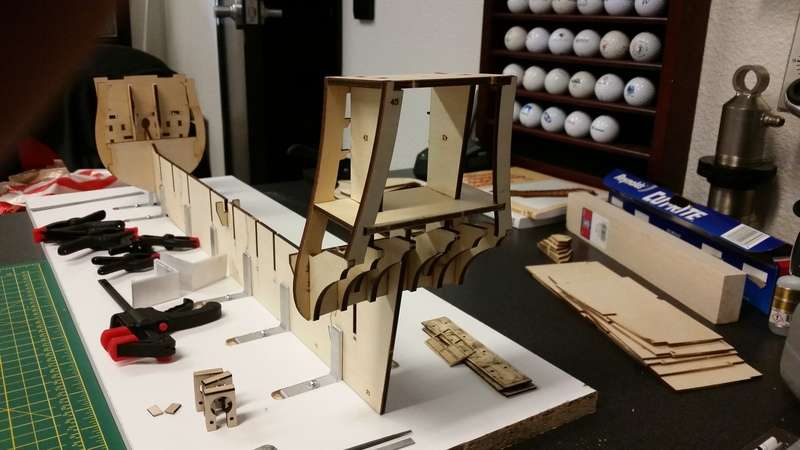 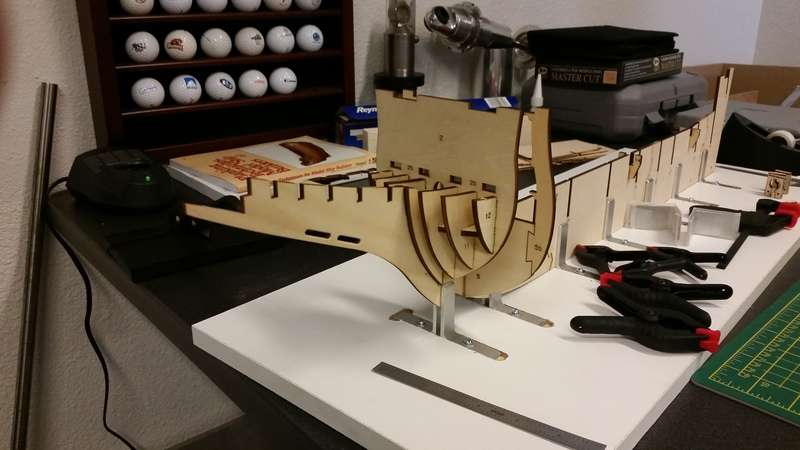 While I was making up the supports for the keel jig I made a couple of 1" wide angle pieces to use for squaring up things for assembly. I always cover them with wax paper so I don't glue them to the model :) 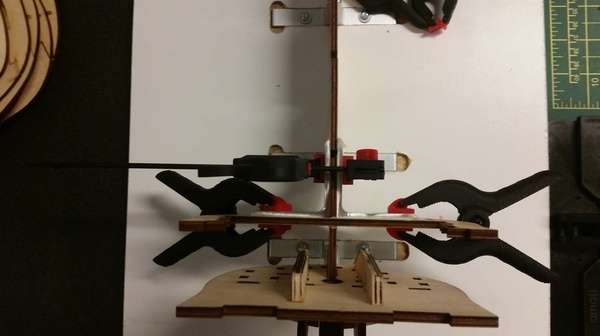 Some might have noticed, I radiused the slots and the the leading edge of the bowsprit as these will be visible on the finish product. It's the small details that make the build  This weekend I'll try and get some more ribs on, Need to box them as I go for strength and keeping things nice and straight. I've been ignoring the launch and cannons for now, I'll get to those after I get the hull framed out complete. I'll use the launch as practice for planking before I start the big guy...
|
|
|
|
|
Great work Jeff, great idea on the angle supports to stop them sticking. Glad you solved the dreaded warped ply problem.
It’s a pain as you get them out of the bag flat then the humid air just bananas them. One of the traits of ply unfortunately.
You may actually find planking the Big guy to be easier than the launch. 
Chris On the bench 1/350 Revell Tirpitz Platinum Edition (Pontos PE and Wooden deck) plus extra Eduard PE set and extra MK1 door sets.
|
|
|
Rank: Administration Groups: Registered, Administrators, Global Forum Support, Moderator, Forum Support Team, Official Builds Joined: 04/01/2016 Posts: 7,143 Points: 21,736 Location: Northamptonshire, England
|
Nice start, sounds like you've got things under control now. Mark Regards
Markwarren
(Mark) Admin
|
|
|
 Rank: Elite  Groups: Registered
Joined: 22/03/2010 Posts: 2,065 Points: 6,295 Location: Gorleston-on-sea
|
She is looking really good!! Great to see another SOTS on the go...Look forward to seeing more of your work...  John JohnCurrent Builds: Deagostini HMS Victory: Deagostini HMS Sovereign of the seas. Completed Builds: Del Prado: HMAS Bounty: Hachette: RMS Titanic: Del Prado: Cutty Sark...
|
|
|
Rank: Pro Groups: Registered
Joined: 05/09/2012 Posts: 184 Points: 525 Location: ireland
|
Looking real good. This will be a professional job. No doubt.
|
|
|
Rank: Amateur level 2 Groups: Registered
Joined: 20/02/2016 Posts: 45 Points: 135 Location: SoCal
|
Some progress today. Set time for glue is always the limiting factor on how much you can get done. Got a couple more rib sections glued and boxed the gaps. 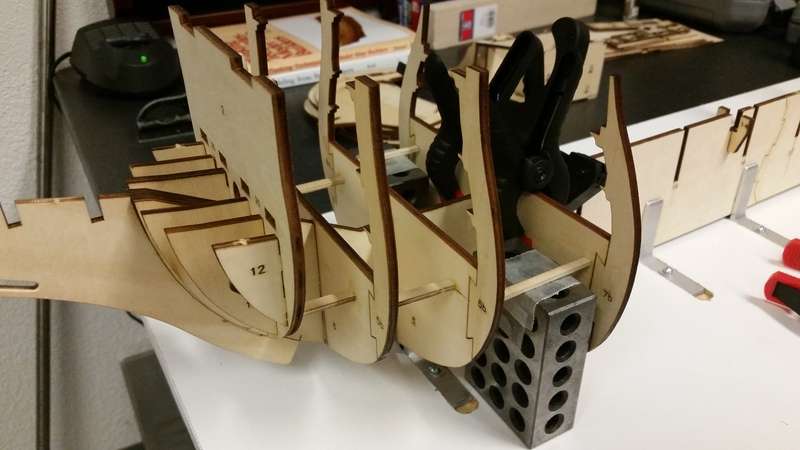 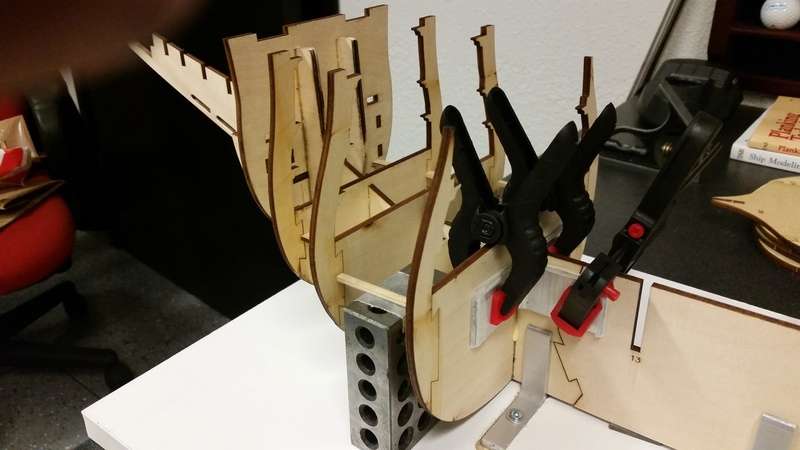
|
|
|
|
|
Very nice update Jeff and that's a good way of ensuring the ribs stay square and in line with each other, they won't be pulled out of position when it comes to the planking stage..... .. Look forward to your next update... Regards Alan
|
|
|
Rank: Amateur level 2 Groups: Registered
Joined: 20/02/2016 Posts: 45 Points: 135 Location: SoCal
|
Hello everyone. Not as much progress this week as I would have liked. Employees out on vacation so I had to actually work at work this week ( what's up with that?!?) Finished up setting and boxing all the rib sections. Looks a little ghetto as I just used cuttings from the frets but very effective. The entire framework is now very stiff. 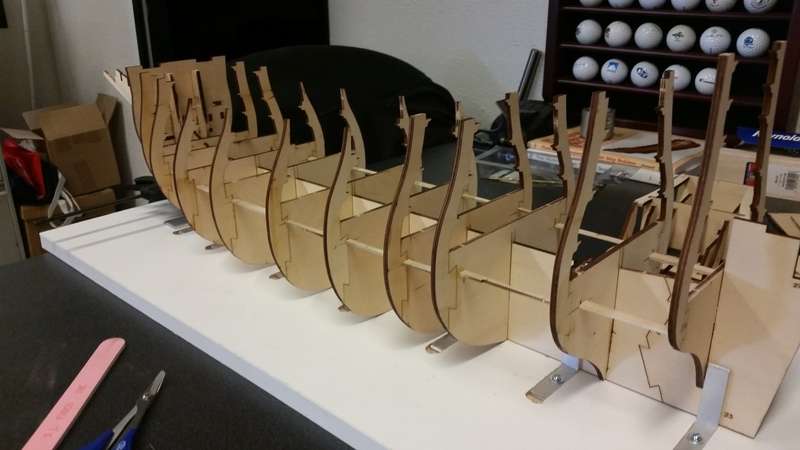 Went in this morning and got all but 1 of the first deck sections glued down. The last 2 on the stern were a bit warped so I had to weigh the first one down a bit and decided to leave it until tomorrow to let is set nice and proper. Left my phone at home so no pic's on that until tomorrow. I'll go back in and glue the last one and try and get as much done on the false walls for the guns. I do have a question, Since the deck sections are glued down quite securely, what exactly is the reason for nailing them down as well? More of a "experiencing the build" kinda thing? I've noticed that on the 2 car builds I've done with DeAgostini they're not shy on spending time on things that only the builder will ever know about or see. And from what I've seen and read about this build there's a boatload (Ha!)of that kinda stuff on this one as well. Not that I'm against that sort of thing. But back to the point... Nail or no nail?
|
|
|
|
|
Looks like you're making really nice progress and I look forward to seeing more.... .. As for the nailing of the decks, its belts and braces. The last thing you would want to see when well into the build is any of the deck sections starting to lift, it also helps to ensure the ribs are firmly fixed into position. You'll find on some builds the instructions will say to nail and glue whilst on others it will say glue only. I didn't take any chances and decided to follow the instructions by nailing and gluing the decks in place.... Regards Alan
|
|
|
Rank: Super-Elite Groups: Registered, Forum Support Team, Administrators, Global Forum Support Team, Moderator, Official Builds Joined: 09/11/2012 Posts: 8,520 Points: 24,651 Location: East midlands
|
Looking good. Keep up the good work. Regards delboy271155 (Derek) COME BACK GUY FAWKES "YOUR COUNTRY NEEDS YOU"
|
|
|
Rank: Amateur level 2 Groups: Registered
Joined: 20/02/2016 Posts: 45 Points: 135 Location: SoCal
|
So deck one is done. I did go ahead and nail it down. 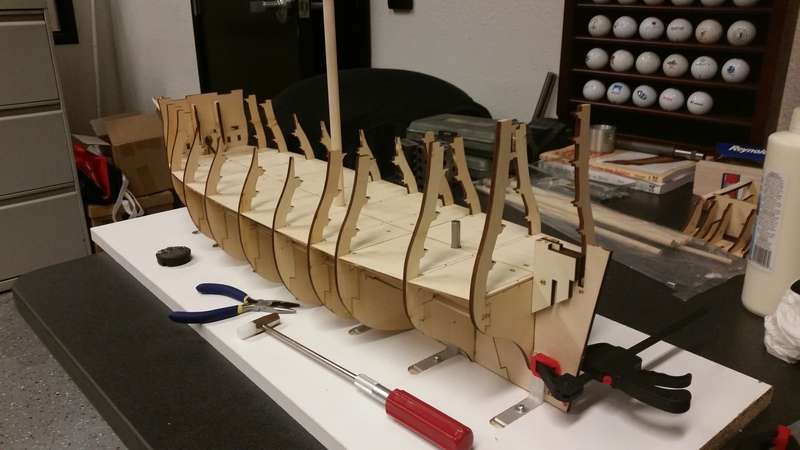 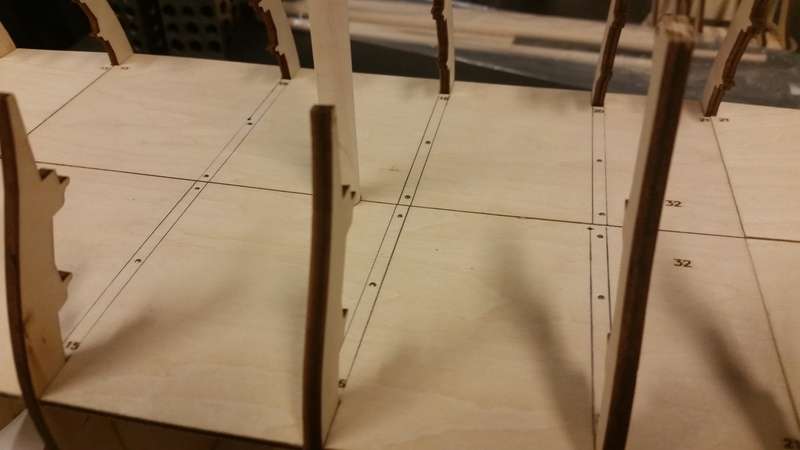 I have to admit beating on the girl with a hammer did not sit so well with me  It was a bit fiddly to start but after a couple nails got a system going. I repurposed a small hammer from my watch repair toolkit, it ended up fitting perfectly in the handle for my razor saw. Holding the nail with the needle nose pliers that came in the toolkit to get it about hallway in and then finish it off nice and easy. Proud to say I didn't bend or boink one off into Neverland never to be found again. Started to fit the first strip and ran into immediate problems. The strip was just to wide to fit in the rib sections. First I beveled the top and bottom to match the angle that it sits at against the ribs. There were still a couple of ribs that were still too tight so I took an emery board to the ribs and relieved the problem childs, enough for an easy fit. Glued her up and clamped it down and I'll let it sit till tomorrow. That's it for today, Wish all a Happy Labor Day! 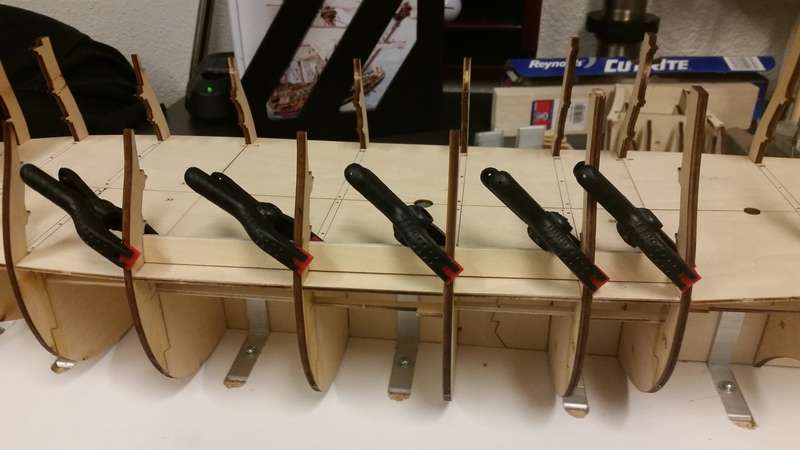 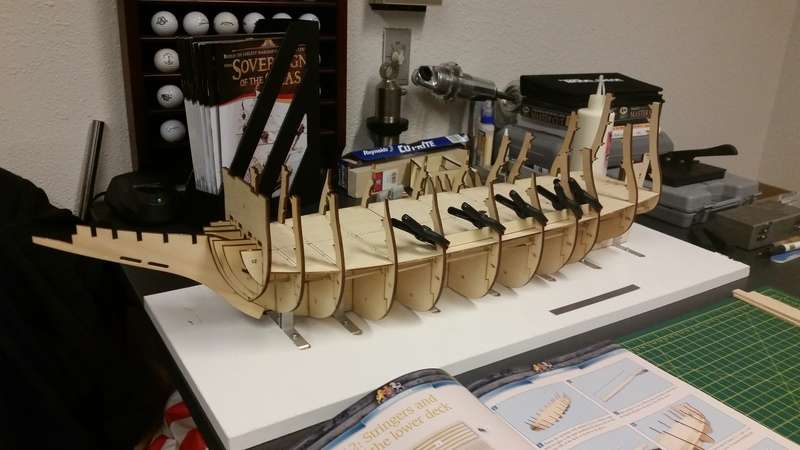
|
|
|
Rank: Super-Elite  Groups: Registered
Joined: 31/05/2010 Posts: 5,679 Points: 17,011 Location: Wiltshire
|
Looking very nice indeed. Really good tip using that small hammer in an exact handle as it gives you a bit more reach and control. Hope it all continues well. Happy Modelling
BUILDING: Hachette Spitfire Mk 1A, Constructo Mayflower
SUBSCRIPTION COMPLETE (Awaiting building): USS Constitution, Sovereign of the Seas, 1:200 Bismarck (Hachette)
COMPLETED: Porsche 911, E-Type Jaguar, Lam Countach
|
|
|
|
Guest
|
 US
US

