|
|
 Rank: Elite        Groups: Registered
Joined: 20/04/2012 Posts: 1,787 Points: 5,292 Location: Thurso
|
Great job, she's looking good and some nice tips along the way.
Graeme
|
|
|
|
|
Making really nice progress and its good to see you have a very methodical approach... well done....  Regards Alan
|
|
|
 Rank: Amateur level 2  Groups: Registered
Joined: 20/02/2016 Posts: 45 Points: 135 Location: SoCal
|
birdaj2 wrote:Looking very nice indeed.
Really good tip using that small hammer in an exacto handle as it gives you a bit more reach and control.
Hope it all continues well. that ended up being a bit of good luck. After a few nails I was looking for some kind of handle and that ended up being just right.
|
|
|
Rank: Amateur level 2 Groups: Registered
Joined: 20/02/2016 Posts: 45 Points: 135 Location: SoCal
|
Yay!! Page 2  First deck finished up. Didn't have any fitting issues with the other 4 strips, plenty of room. Just sanded an angle on the bottom to match up with the deck.  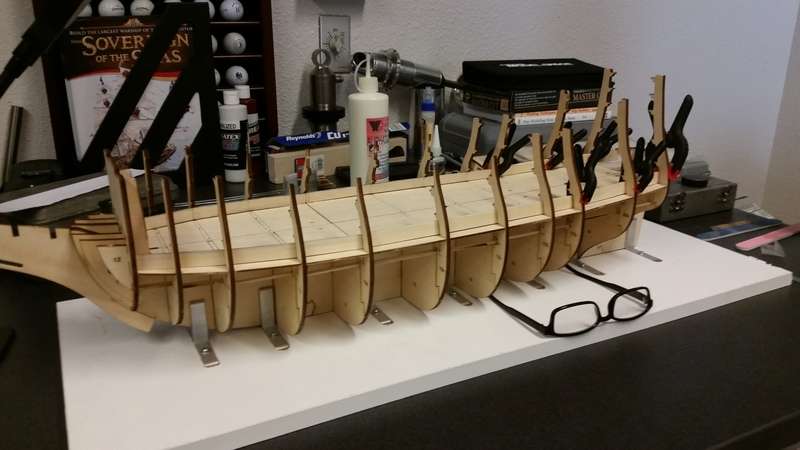 Just a teaser on plans for the visible decks.  So a question, it seems most people are using Tanganika strips for decking.. what size and where did you source them? Thanks in advance. That's if for today. Jeff
|
|
|
 Rank: Super-Elite Groups: Registered
Joined: 17/12/2013 Posts: 3,982 Points: 11,974 Location: NY, USA
|
Hi Jeff,
superb work so far.You can get tanganika from model expo online in various widths and thickness.
I have this kit too and will be following your build with interest.
I am one of the USA forum support members so let me know if I can help in any way-not that you need any help building!!!!
Carl
|
|
|
Rank: Amateur level 2 Groups: Registered
Joined: 20/02/2016 Posts: 45 Points: 135 Location: SoCal
|
darbyvet wrote:Hi Jeff,
superb work so far.You can get tanganika from model expo online in various widths and thickness.
I have this kit too and will be following your build with interest.
I am one of the USA forum support members so let me know if I can help in any way-not that you need any help building!!!!
Carl
Thanks Carl. The official build has to mention somewhere the spacing of the lines they scribe on the decks. I started going thru all the issues but didn't get to that point today. I've also looked at silver ash but the pic's are generic for the sites I've looked at so far. They say silver ash is more white where tanganika is a light fawn color. I kinda favor the white myself..
|
|
|
Rank: Amateur level 2 Groups: Registered
Joined: 20/02/2016 Posts: 45 Points: 135 Location: SoCal
|
So I actually READ the instructions today. Browsing thru pack #4 to get more info on deck planking, I had stuck in my brain that none of the decks were planked, only simulated with pencil lines on the deck sections. I did find the offending picture that gave me this idea, of simulating the caulking by using a pencil in the seams in between the planks. I would like to say that this cleared up so many things, but my head was so far up my butt that I was just.... "you're an idiot". Literally slapped my forehead  So just to clarify, for the people that planked the 2'nd deck, (just for practice), did you buy the Tanganika planking for just that or did you replace all the Basswood deck planking thru the whole thing? On to actual building, I did get all the support strips for the 2'nd deck installed and most of the support strips for the support strips  I was on the fence if I would need the secondary supports but after cutting out the 2'nd deck pieces, they have a pretty good warp to them so I will need to put some weight on them to get them glued down flat. I do intend to do some planking on the 2'nd deck, but just enough to cover what will be visible thru the holes in the 3'rd deck. I considered doing the fake lines with a pencil (like I thought they were) but I'm planning to make those 2 grates removeable so it should be a little more authentic. More to come.. stay tuned :) Jeff
|
|
|
Rank: Amateur level 2 Groups: Registered
Joined: 20/02/2016 Posts: 45 Points: 135 Location: SoCal
|
Hello again. Laying the second deck took a bit of weighting for it to lay flat.  After the deck was down went to work framing and fairing the gun ports. 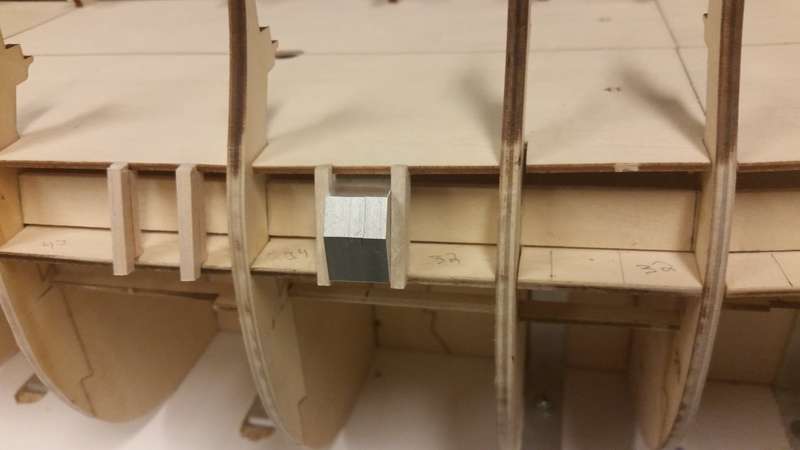 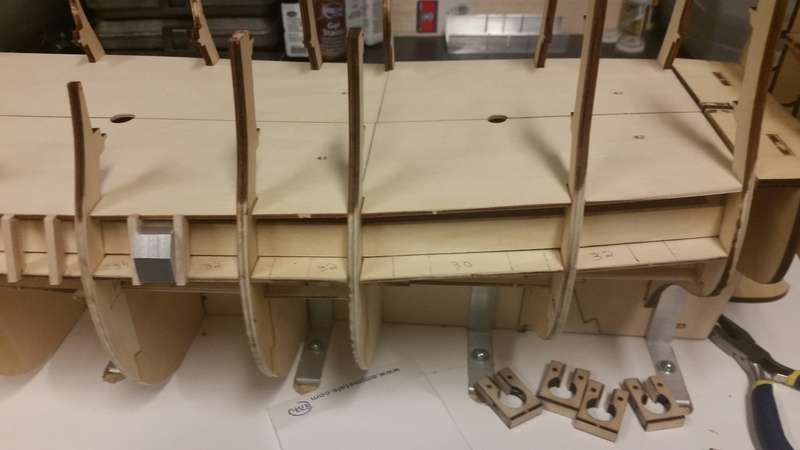    I'm going to prefab all the port liners and install them before planking. I think they will look much sharper, more square and even.  built a jig for gluing them up nice and square and will also be used for installing them, and setting the proper inset after planking.  Stay tuned..
|
|
|
|
|
Lovely work, like the way you're progressing with this.....well done.... .. As for your deck planking question, I purchased additional planking strips and planked the whole deck simply as a practice session and to see how it would look prior to carrying out the process on the decks that could be seen. If I didn't like the look of it then no harm was done as it would all be hidden..... Regards Alan
|
|
|
Rank: Super-Elite  Groups: Registered
Joined: 11/11/2009 Posts: 3,432 Points: 10,280 Location: Bâe Colwyn, Wales
|
Great Work Jeff, great idea with the linings .  Look forward to your progress. Chris On the bench 1/350 Revell Tirpitz Platinum Edition (Pontos PE and Wooden deck) plus extra Eduard PE set and extra MK1 door sets.
|
|
|
Rank: Elite  Groups: Registered
Joined: 22/03/2010 Posts: 2,065 Points: 6,295 Location: Gorleston-on-sea
|
She is looking good!! Watch out for the tops of some of the frames as they are pretty fragile...Current Builds: Deagostini HMS Victory: Deagostini HMS Sovereign of the seas. Completed Builds: Del Prado: HMAS Bounty: Hachette: RMS Titanic: Del Prado: Cutty Sark...
|
|
|
|
|
Love the idea with the gunports. Looking forward to the next update Martyn Building ?
Completed. Soliei Royal . Sovereign of the Seas . Virginia . Scotland . San Felipe . Corel vasa , Santisima Trinadad X section , Vasa
Next Build ?
When sailors have good wine, They think themselves in heaven for the time. John Baltharpe
|
|
|
Rank: Super-Elite  Groups: Registered
Joined: 31/05/2010 Posts: 5,679 Points: 17,011 Location: Wiltshire
|
Jeff That is a really smart looking build you have yourself there. You certainly know what its all about and that gunport lining idea is very neat. I shall follow on with great interest to see some more of this coming together. Happy Modelling
BUILDING: Hachette Spitfire Mk 1A, Constructo Mayflower
SUBSCRIPTION COMPLETE (Awaiting building): USS Constitution, Sovereign of the Seas, 1:200 Bismarck (Hachette)
COMPLETED: Porsche 911, E-Type Jaguar, Lam Countach
|
|
|
Rank: Amateur level 2 Groups: Registered
Joined: 20/02/2016 Posts: 45 Points: 135 Location: SoCal
|
jonny7england wrote:She is looking good!! Watch out for the tops of some of the frames as they are pretty fragile... Thanks For that reason my plan is to finish all the decks before flipping her over. I want to leave it in the keel jig as long as possible.
|
|
|
Rank: Amateur level 2 Groups: Registered
Joined: 20/02/2016 Posts: 45 Points: 135 Location: SoCal
|
Going into production mode. I need to precision cut 48 pieces for the gun port frames, and that's just for the first deck. I have the Mastercut plank cutter which does a nice job but none of my traditional machinist work stops will adapt. My solution was to use double stick tape to affix a depth micrometer to the side and press a round Delrin support onto the thimble to keep it from sagging.   I can now cut the strips with an acceptable variance. The cuts aren't completely square so I cut them a hair long and made a fixture that I can square the ends and sand to finish length.  So now I'm in business Got my little assembly line set up  I was able to get strips enough for 12 ports during lunch today, one side of the first row of ports. Now it's just gluing them together. 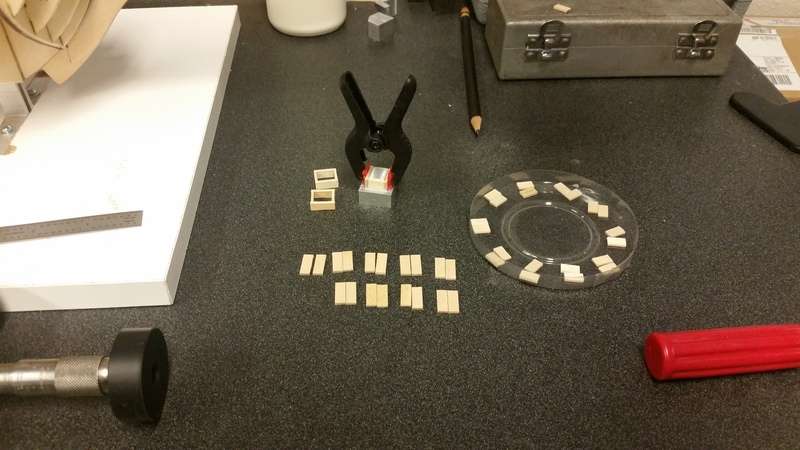 This will probably take the rest of the week and this weekend I will try and get the starboard side framed. Stay tuned..
|
|
|
 Rank: Pro  Groups: Registered
Joined: 06/08/2015 Posts: 276 Points: 817 Location: Monrovia, Ca
|
Looks really nice so far, Jeff. Your machinist background will definitely help with this build. I am also working on this one, although, I put mine aside for the last 8 month in order to finish my Falcon build. Should be back on it soon though. I look forward to seeing how you approach the planking. I will be watching with interest. Regards, Stephen Current Builds: HMS Sovereign of the Seas /// Lamborghini Countach /// Eaglemoss BTTF DeLorean
Finished Builds: Millennium Falcon
|
|
|
|
|
Love the precision work, looking superb..... Regards Alan
|
|
|
Rank: Amateur level 2 Groups: Registered
Joined: 20/02/2016 Posts: 45 Points: 135 Location: SoCal
|
scraperjawa wrote: I look forward to seeing how you approach the planking.
Regards,
Stephen Yeah, I'm curious myself..  Not sure what I'm going to do.
|
|
|
Rank: Amateur level 2 Groups: Registered
Joined: 20/02/2016 Posts: 45 Points: 135 Location: SoCal
|
Back again folks. Not a lot of progress since last update. Work keeps getting in the way. As usual I have 3 things going at the same time. Still working on gun ports, have the port side 1'st deck finished framing, and scribing out the 2'nd deck frames Also planking 2'nd deck under the 3'rd deck grate openings. More on that Sunday when I finish it up. Third project I want to plank the bottom section of the gallery before I glue it to the keel. I just think it will be easier. Which leads to project #4, finishing my planking clamps. You've probably seen them lurking about in other pictures in various stages of incompletion. 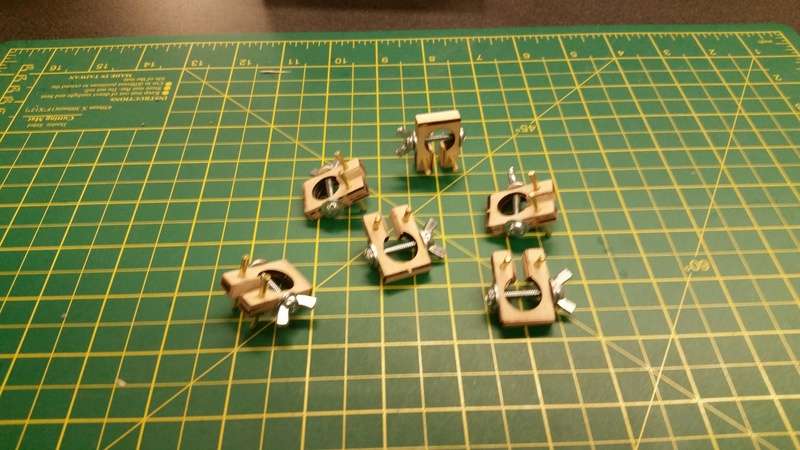 These are used to hold planks against the rib instead of nailing them to the ribs. BTW, I ran into an issue there. When I did try to use the pin pusher that comes in the DeAgnosti tool kit its too small, the nail heads are bigger than the pusher tube. Has anyone else had this problem? Are the nails too big or the tool too small? Anyway the clamps are a little bulky for planking the gallery so they're sitting this one out. There are 2 distinct compound curve sections on the gallery and I wanted to get the transition as crisp as I could. So I'm laying the first 2 planks there.   The top plank is set on all ribs, the bottom one is just glued to the 2 center ribs. Those lines at each rib are actually razor saw cuts to allow them to bend. My plan is to finish the deck planking and the gallery planking this weekend, update to follow, stay tuned :)
|
|
|
|
|
Looking good, I like your attention to detail.... Regards Alan
|
|
|
|
Guest
|
 US
US

