|
|
|
|
 All looking god and nice work  Current builds:-C57,Zero, Lamborghini Countach, Caldercraft HMS Agamemnon,Robi,R2-D2, MFH Cobra .
|
|
|
|
|
Very nice work.  Mark
|
|
|
 Rank: Master        Groups: Registered
Joined: 20/09/2011 Posts: 1,312 Points: 4,126 Location: Austria
|
Impressive build!Greetings,
Walter
Present builds:
Revell B-24D Liberator 1:48
On the shelf:
Italeri "Fiat Mefistofele", Italeri "Moto Guzzi California", Fokker "Red Baron", Revell Bismarck, Revell Tirpitz, Arab Dow, Stage Coach, .....
Completed builds:
McLaren MP4/4, D-51 Steam Locomotive, HMS Victory, GWH F-15D Eagle, St. Stephen`s Cathedral (cardboard), Solar-powered paddle Steamer (little project with my son), HMS Victory X-section, "Geli" Phantom II (cardboard)
|
|
|
 Rank: Amateur level 2  Groups: Registered
Joined: 20/02/2016 Posts: 45 Points: 135 Location: SoCal
|
Happy New years to all So last time I was working on getting the planking and square gun ports complete up to the main deck. I've got that done and both sides sanded down smooth. Due to a upcoming change of position at work I need to finish shaping all the decks that I plan on using a cnc milling machine. They are moving my machine shop to another facility and downsizing so I am being laterally moved from Production Manager to Process Engineer, working with the corporate machine shop. So lets get to it! Layout the deck, build the framing for the hatches and infill, build the hatch frames and grating and glue it all down 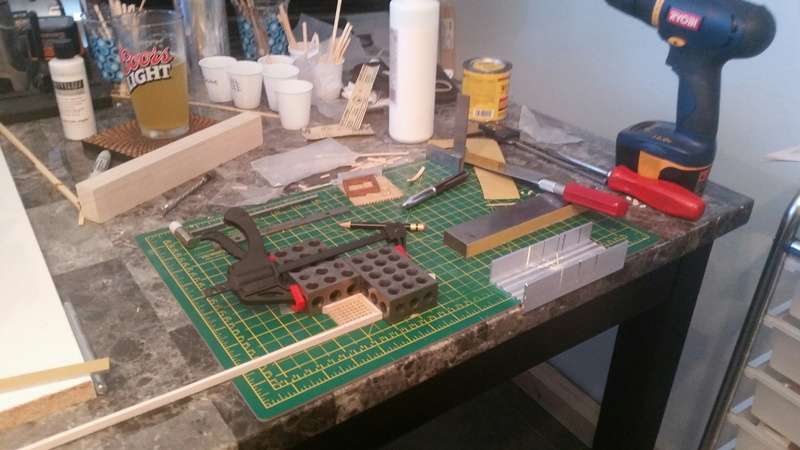 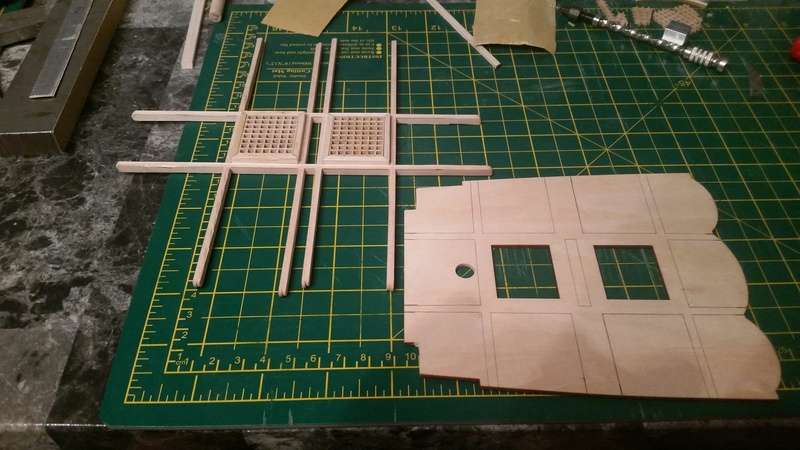 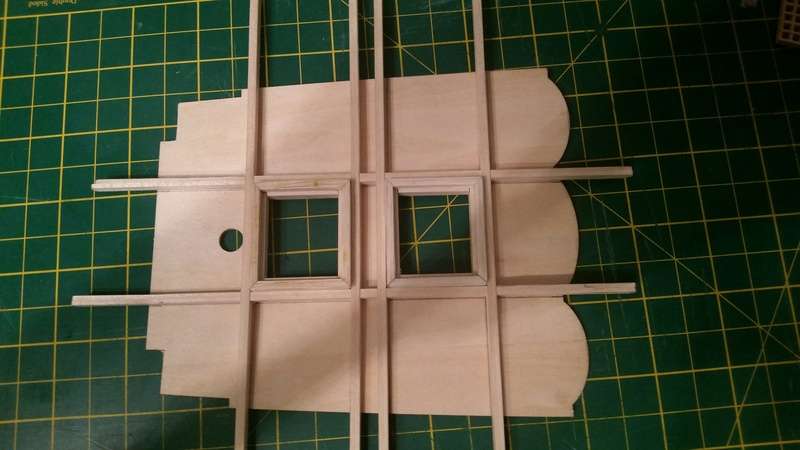 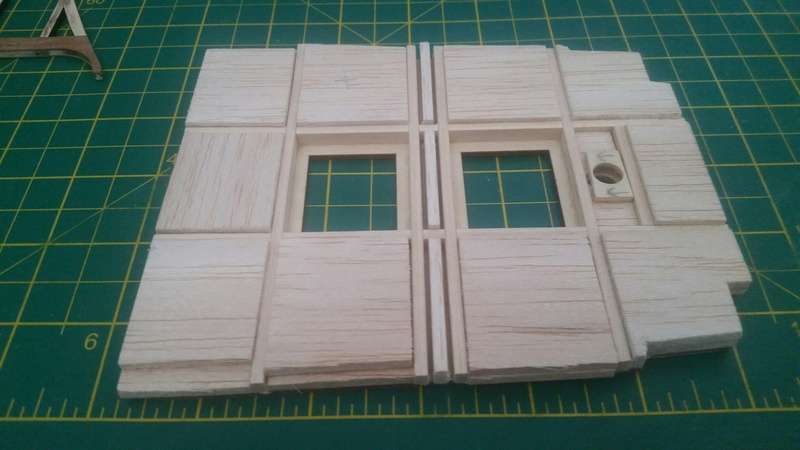 After that it's back to the laser to align the quarterdeck 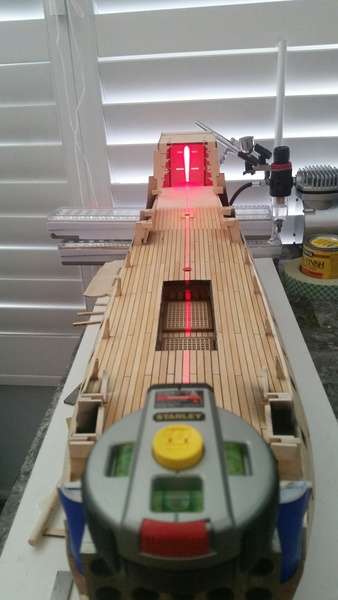 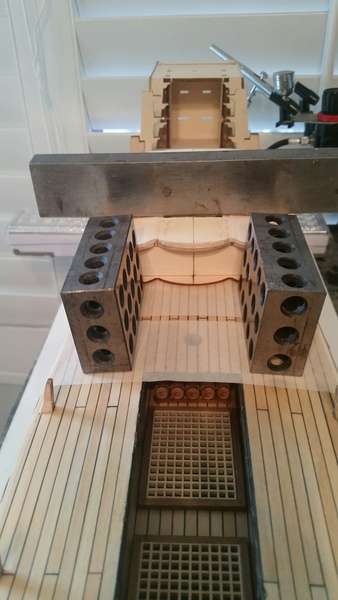 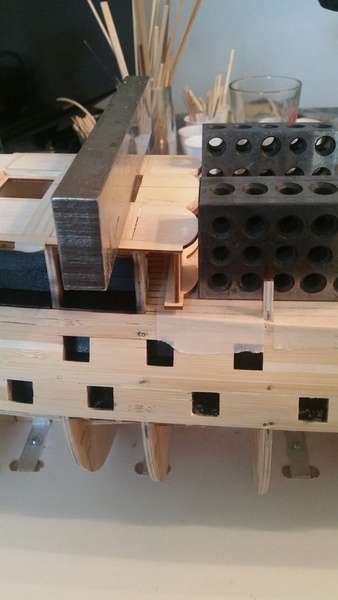 I also cut the upper quarterdeck and made a few 8mm mast washers. 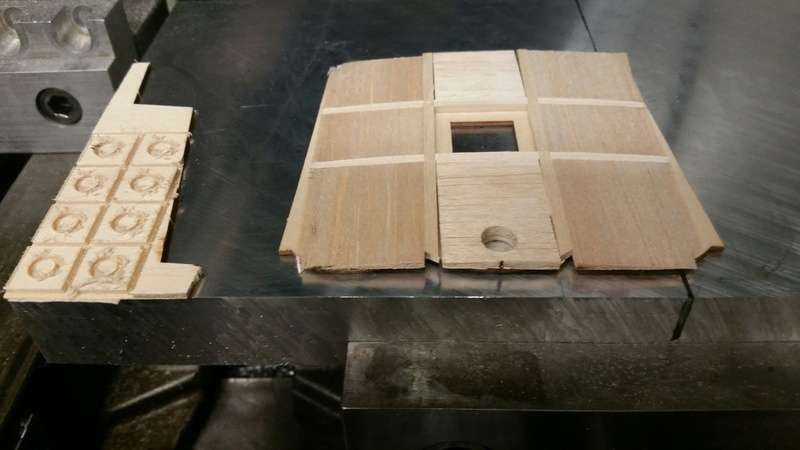 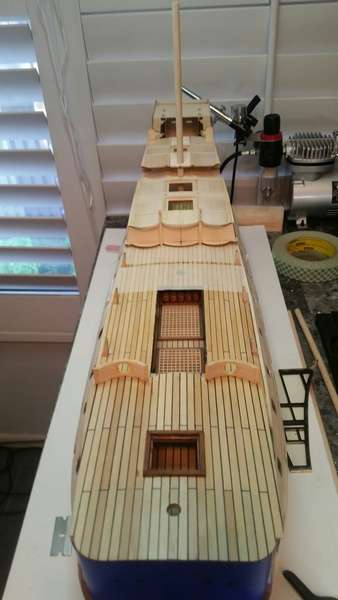 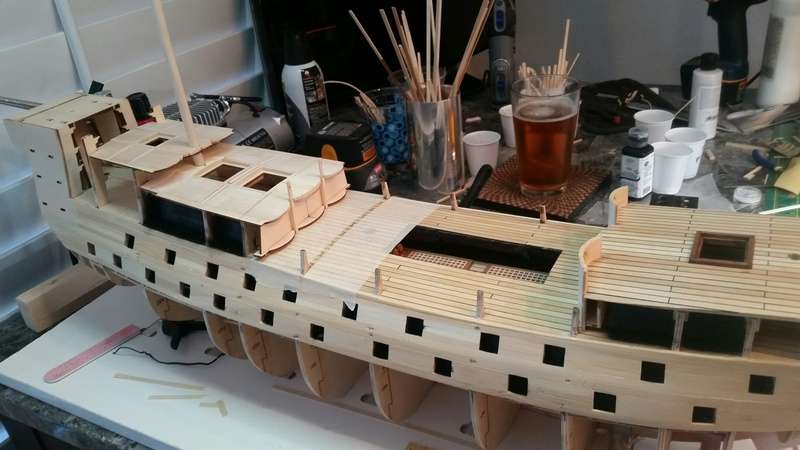 OK, now that I got that out of the way...    I'm also been working on the round cannon ports on the forecastle deck. Plan A was to mark the center of the port with a 0.5mm drilled hole, stand it up in a mill vise and using a 1/4" bit plunge out the center of the hole. I know it's going to splinter on the backside, even with the planking on the inside of the bulkhead. The reason I started with a bit just over half the finish size is now I can use the sides of the bit to work outwards, cutting away the splintering and cut a square hole that just fits inside the finish size. Then I can use the center line to mill straight up and down, left and right to mill it out even closer to round. This worked flawlessly on the first hole..... The second hole suffered a blowout  Something I've seen everyone experience. I considered re-planking that side of the bulkhead but ended up just patching it up. I glued bamboo across the top to reconstruct the gaping hole and used bits of wood scrap, sanding dust and wood filler all mixed together to fill in the rest of the voids. 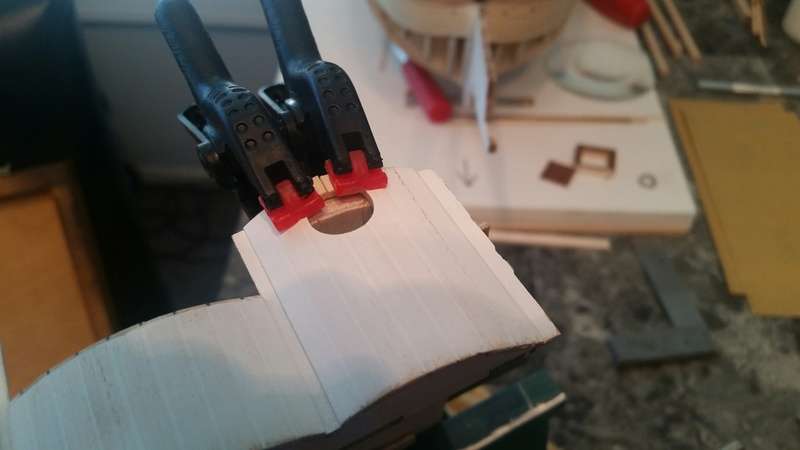 For rounding the holes and working out to finish size I have a secret weapon. Not all machinists have a personal set of gage pins but I'm one of them. These are hardened and ground 2" long precision steel pins that come in .001 inch increments. I have 3 sets covering .011" thru .500" diameters. Basically I can wrap sandpaper around the biggest pin that will fit in the existing hole and give it a few strokes, a minute of sanding usually opens it up enough to move up 3-5 pins sizes. 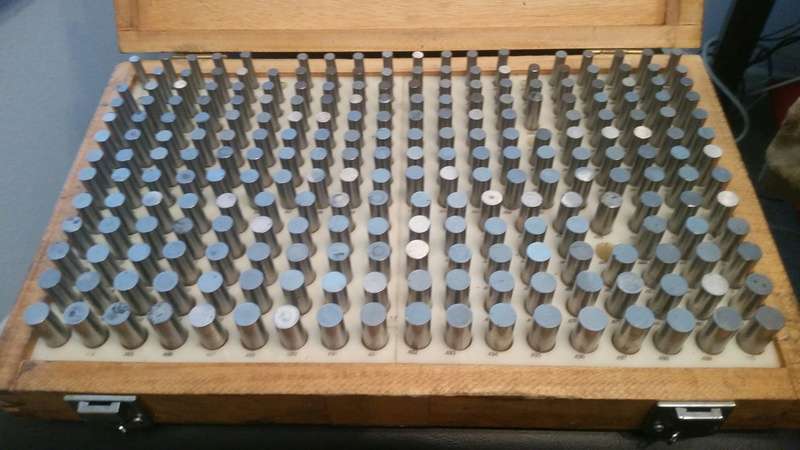 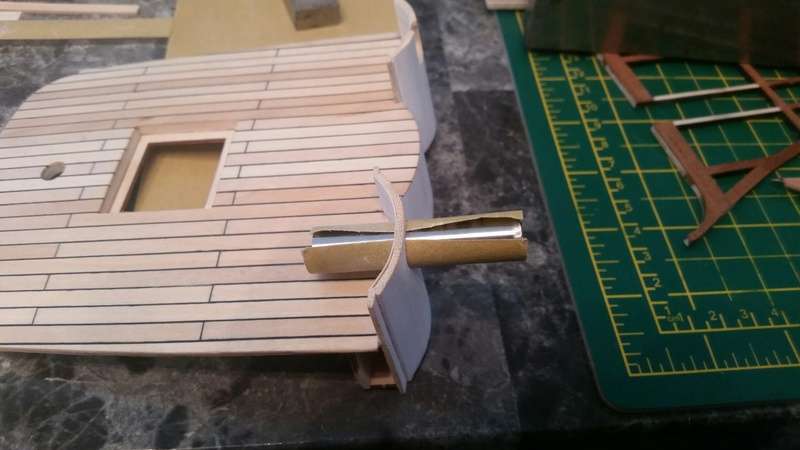 What I'm getting is freakishly round holes 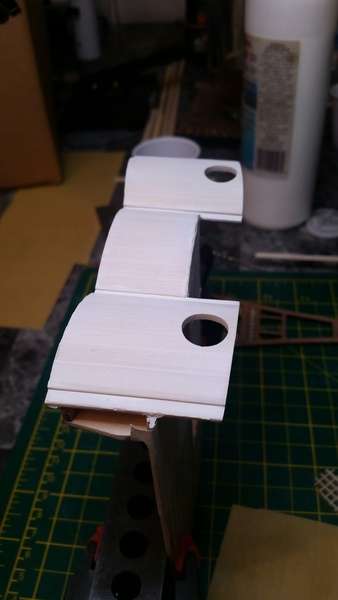 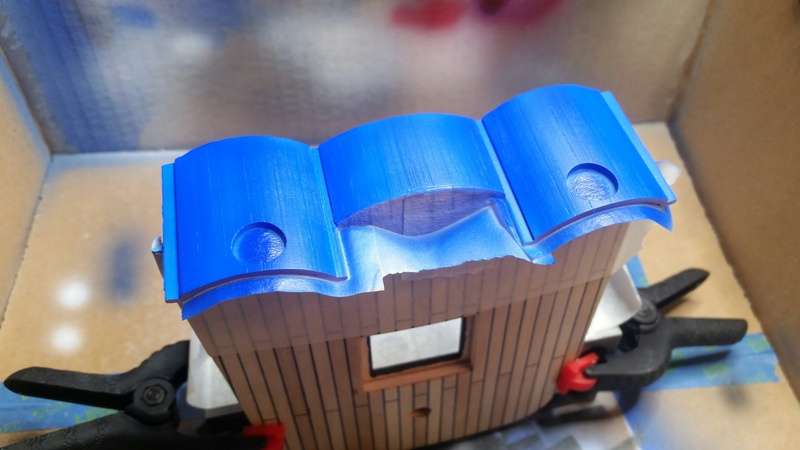 A little color never hurts either That color appears a lot lighter in this picture than it really is. This one is closer. The color is Royal Purple. -Edit, Royal Blue  The only issue I ran into after working the holes out to 13mm is the metal inserts that go in the holes are tapered.  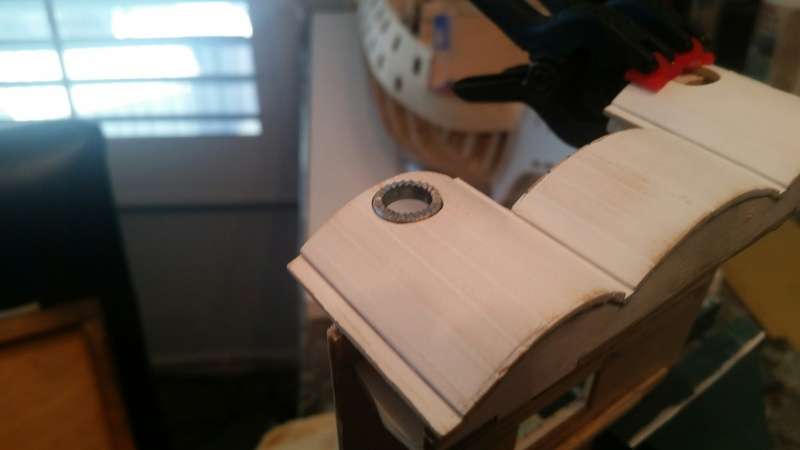 Hmmmmm… Hold my beer, I got this. 1 hr later I'm back from work with a 1/2" aluminum rod turned with a 3 1/2 degree taper. I took the steel insert with me and determined the draft angle on a optical comparator. It was showing a 7 degree included angle so I turned the taper on the high side so the nose of the insert that sticks out the front of the bulkhead will fit tighter than the butt end which you wont see. 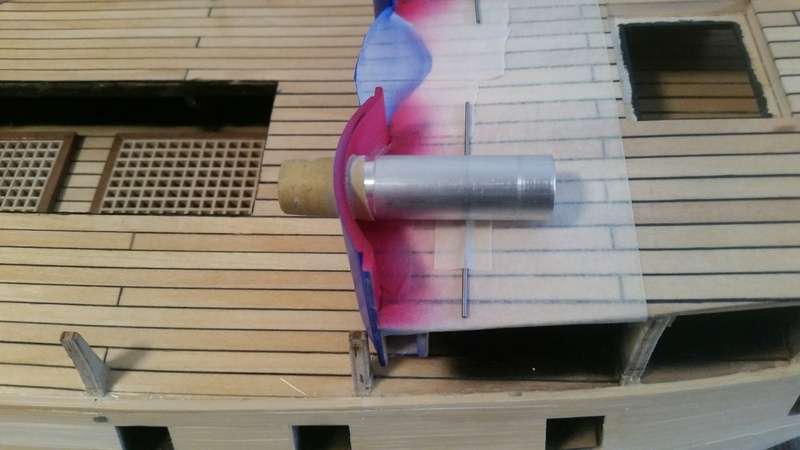 You will also notice that I taped down some gage pins to the deck before sanding the taper into the ports. #1 they protect the deck from scratches and #2 I calculated out the size pin to use to keep the tapered reamer parallel to the deck. 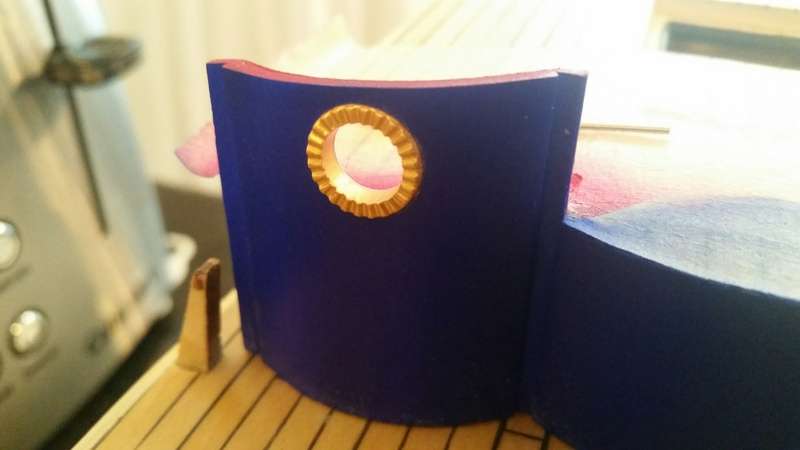 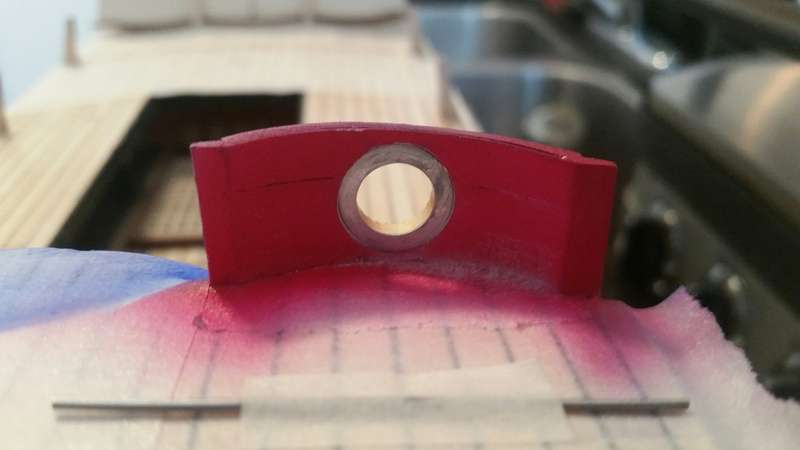 I've been doing some painting too. Like everything else it's on the job training. I'm getting better with the airbrush, which was a pretty low bar For instance my primer paint comes out pretty rough, it needs a bit of sanding before I can put color down over it as I learned the hard way. Not a big deal on the woodwork but on the metal parts they're so small it's difficult to smooth after. It could be it's just too thick to spray so I'm experimenting with thinning. Also on the metal parts, which are almost exclusively going to be gold I was going to do grey primer, then a red base coat to give the gold a darker tint then gold top coat. So far I've only painted the 2 ports and the 6 stands for the naked ladies  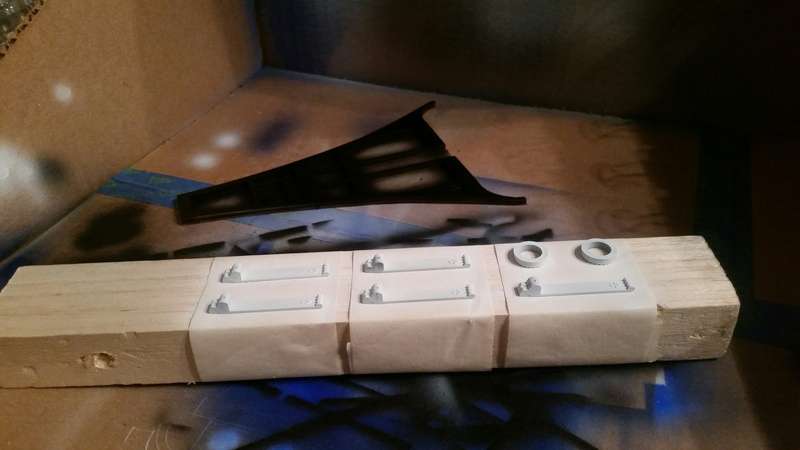  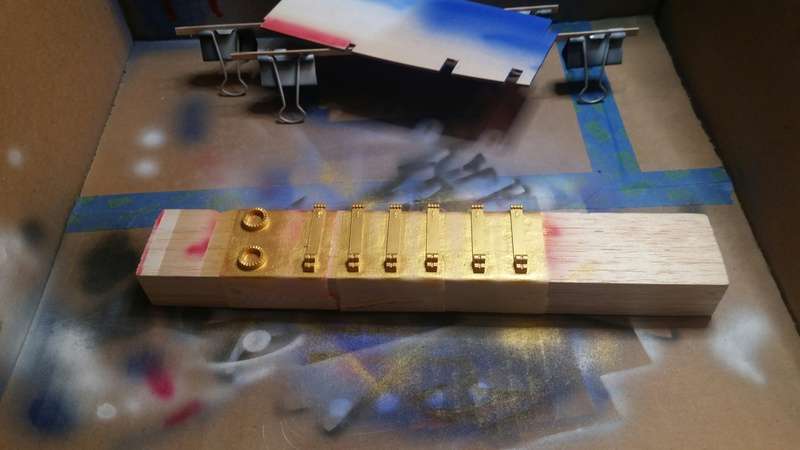 I found the gold to lay down pretty thick but it was probably just my technic. I'll go ahead and throw in some random pictures to finish with. Happy holidays and may all your builds be merry My little corner workshop 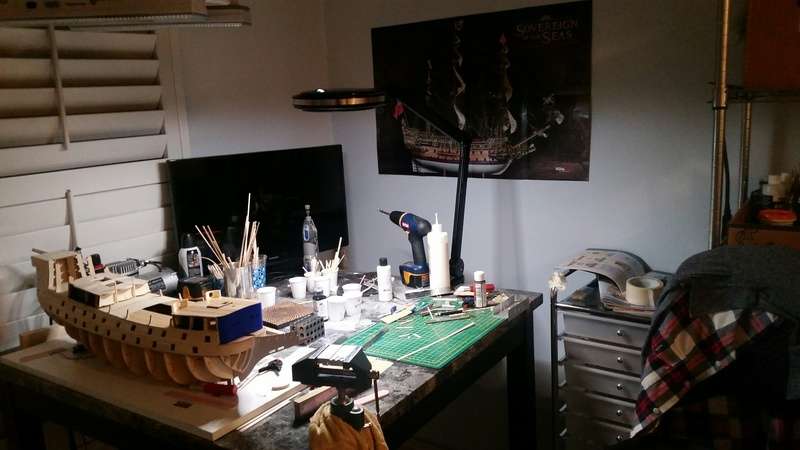 My little paint booth 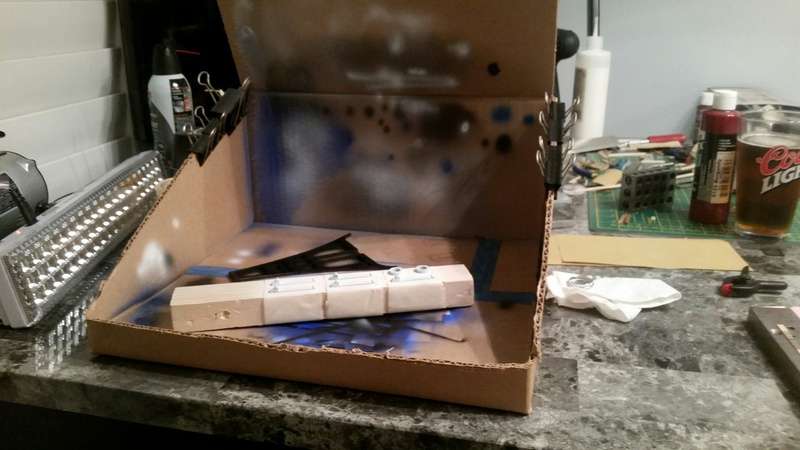 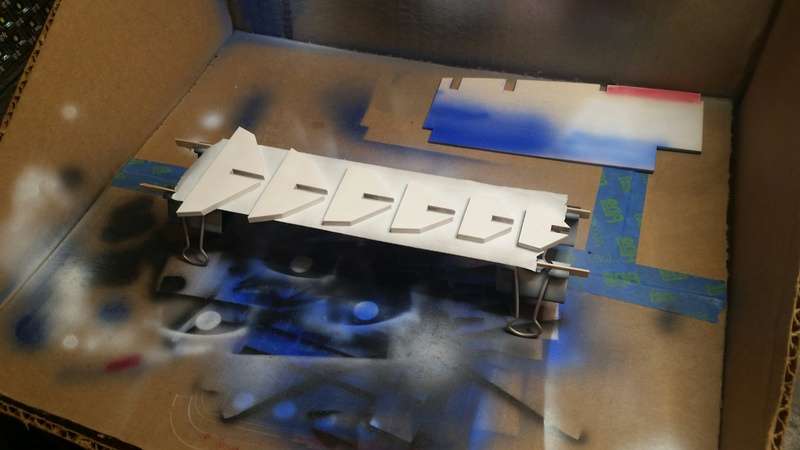 P.S. The red on the inside of the bulkhead is not finished, it will need a few more coats to get the deep Burgundy color. P.S.S. No matter what the glass reads, that is NOT Coors light. 
|
|
|
|
|
Looking very impressive, this has the makings of being a stunning build....  Regards Alan
|
|
|
Rank: Amateur level 2 Groups: Registered
Joined: 20/02/2016 Posts: 45 Points: 135 Location: SoCal
|
Hello again. I was having issues with the painting, the burgundy in particular so I've decided to work on the hull a bit. First thing first, I want a good way to hold the ship upside down. I bought a bag of 8mm dowels to replace the warped masts awhile back so I have plenty to spare. I cut 2 dowels about the same height as the highest point of the ship, then cut a piece of 3" wide x 1/8" thick balsa to glue in between them. what that does is allow me to keep using the keel jig. 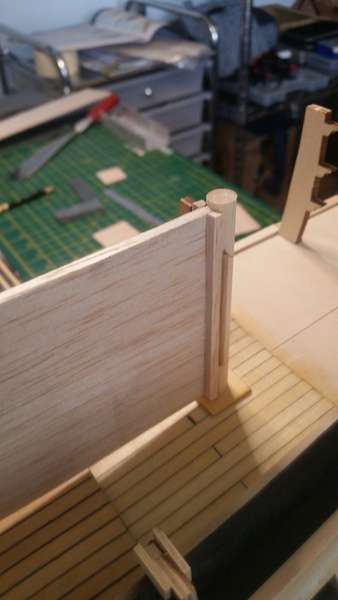 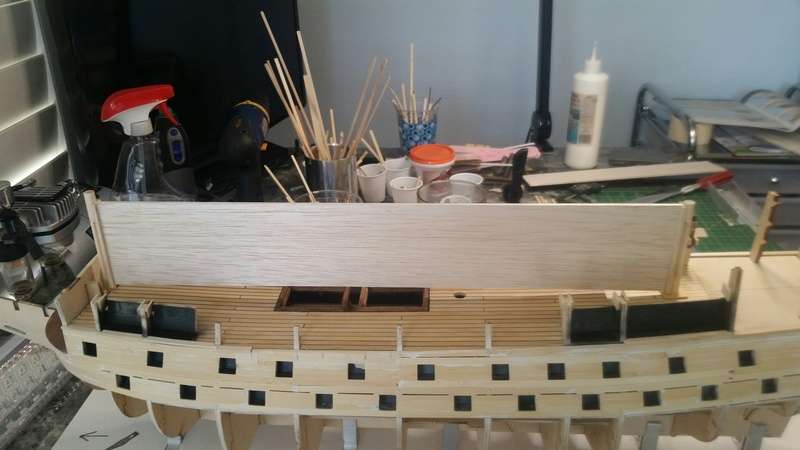  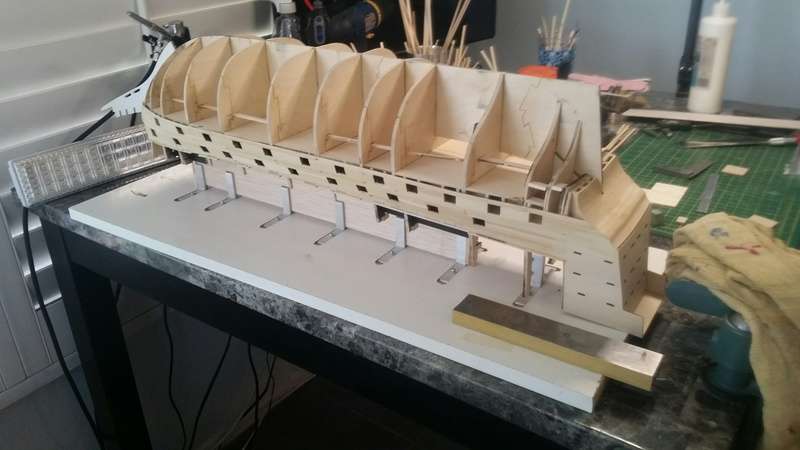 I had already sanded most of the fairing but I had a hard time visualizing the last few ribs so I decided to infill them. 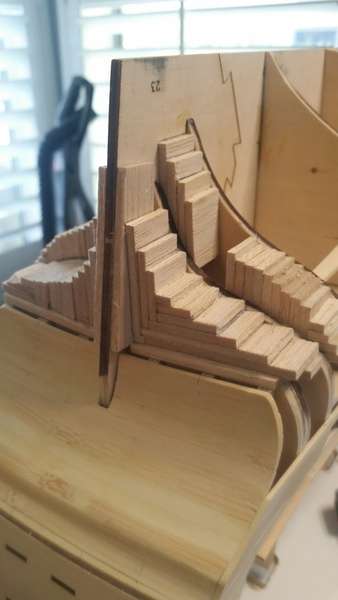   In hindsight I would go back and infill the front too. I also thinned the keel where it meets the rudder to match the thickness of the rudder when complete. And so, on to planking. Not going to get too anal on this layer, just try to let things lay as naturally as possible. Right off the bat I was not happy with the bow planking already down. I was concentrating on the gun ports at the time. A bit of deconstruction and I was able to even things out side to side. I found that my habit of doing one side and then the other was not helping things so I'm moving forward doing both sides at the same time as much as I can. 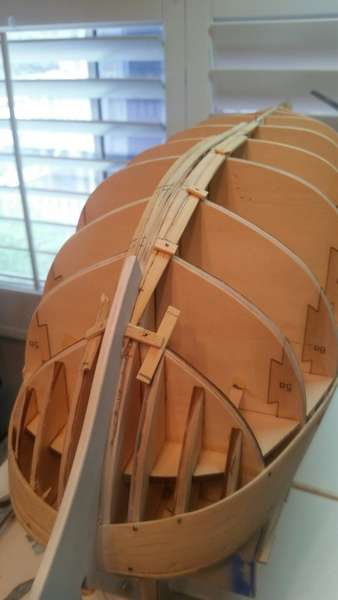 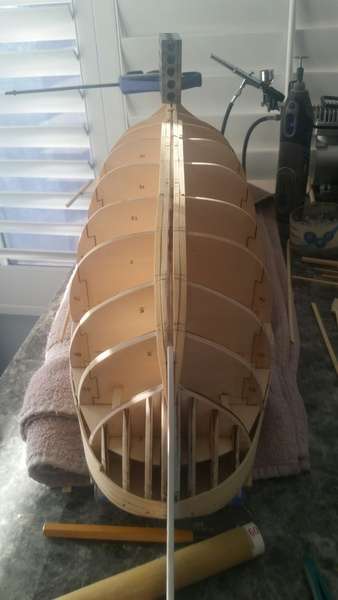 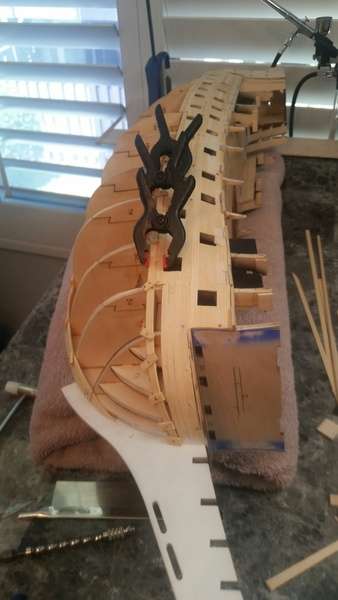 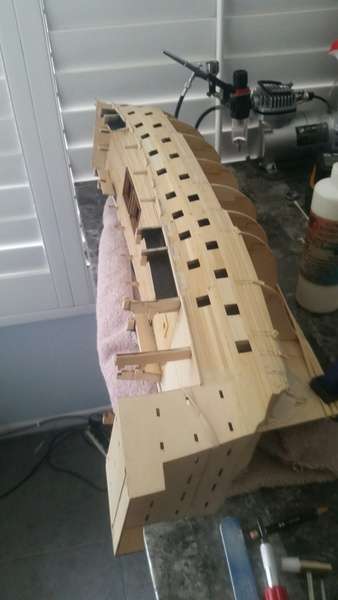 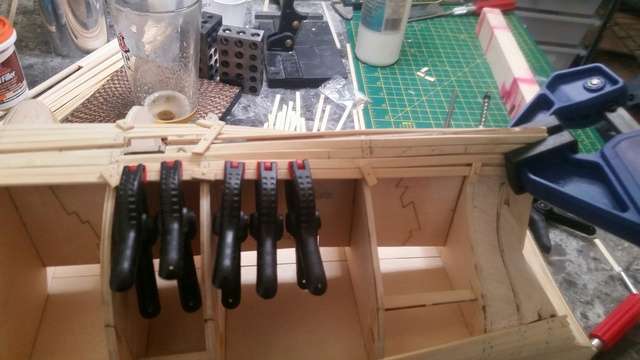  I cut a series of slots along the keel so I can put it back on the keel jig when I'm ready to go back to the top half. I plan to use these for the final display base mount instead of the cradle type stand. 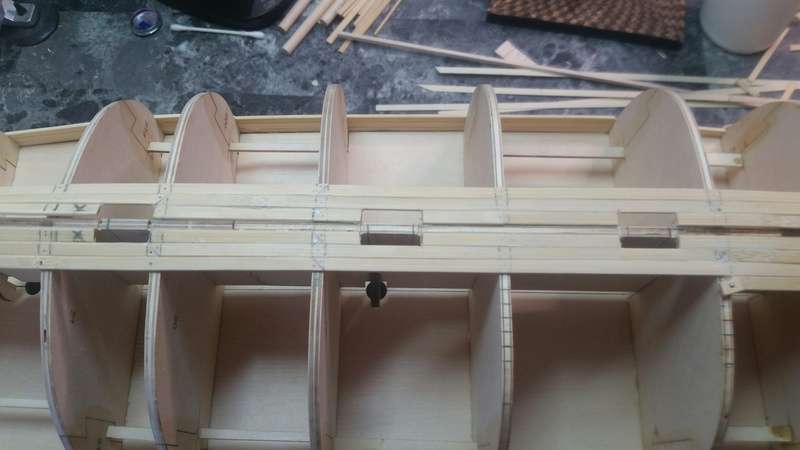 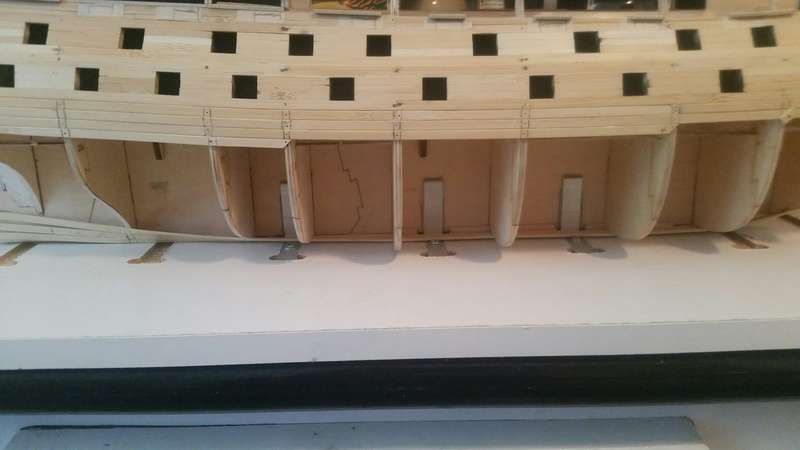  The last shot is my plank prep setup. The plank bender and shaping die to get the right bend and the disc sander for tapering. I picked up the sander the other day, it's one of those 6 in 1 micro machines. For only $120 I'm happy with it so far. The wood lathe configuration will come in handy for sure too. A couple of thoughts on planking. I was not a fan of the butt joint where 2 planks meet on a rib. It was prone to splitting when nailed even when pre drilled. And it didn't give a lot of room for the nails. I've gone to a 45 degree joint, it seems to solve both issues. As far as the actual nails, I'm using small bits of plank on the nail as almost a washer to let me drive the plank flush down to the rib and then be able to pull the nail back out when it's set for a day or so. I'm not leaving in nails at all anymore either, I was leaving them in the end of the planks but the aforementioned changes have made that unnecessary I believe. Thant's it for now, there's planks to be laid 
|
|
|
|
|
A masterpiece in the making, stunning work....  Regards Alan
|
|
|
Rank: Amateur level 2 Groups: Registered
Joined: 20/02/2016 Posts: 45 Points: 135 Location: SoCal
|
|
|
|
Rank: Amateur level 2 Groups: Registered
Joined: 20/02/2016 Posts: 45 Points: 135 Location: SoCal
|
|
|
|
|
|
|
|
|
|
|
Coming together very nicely. Great work. Mark
|
|
|
Rank: Administration   Groups: Registered, Forum Support Team, Administrators, Global Forum Support Team, Moderator, Official Builds Joined: 09/11/2012 Posts: 7,938 Points: 23,000 Location: East midlands
|
Very tidy WTG Regards delboy271155 (Derek) COME BACK GUY FAWKES "YOUR COUNTRY NEEDS YOU"
|
|
|
 Rank: Super-Elite  Groups: Registered
Joined: 31/05/2010 Posts: 5,679 Points: 17,011 Location: Wiltshire
|
Fantastic job on your hull planking. Looks really good. Tony Happy Modelling
BUILDING: Hachette Spitfire Mk 1A, Constructo Mayflower
SUBSCRIPTION COMPLETE (Awaiting building): USS Constitution, Sovereign of the Seas, 1:200 Bismarck (Hachette)
COMPLETED: Porsche 911, E-Type Jaguar, Lam Countach
|
|
|
|
|
I have a feeling this is going to end up being a stunning build when done, excellent work to date..... Regards Alan
|
|
|
Rank: Amateur level 2 Groups: Registered
Joined: 20/02/2016 Posts: 45 Points: 135 Location: SoCal
|
Thanks for the kind words and encouragement. I really enjoyed this part of the build. Cutting, bending, shaping, fitting is right up my alley Jeff
|
|
|
Rank: Superelite  Groups: Registered
Joined: 10/05/2010 Posts: 2,608 Points: 7,519 Location: Lincolnshire
|
Great job on the planking well worth the time taken Cheers Gray
|
|
|
Rank: Amateur level 2 Groups: Registered
Joined: 20/02/2016 Posts: 45 Points: 135 Location: SoCal
|
|
|
|
Rank: Administration Groups: Registered, Forum Support Team, Administrators, Global Forum Support Team, Moderator, Official Builds Joined: 09/11/2012 Posts: 7,938 Points: 23,000 Location: East midlands
|
Hi Jeff, May have been a while since your last post, but you`re still going and its looking good to me. Regards delboy271155 (Derek) COME BACK GUY FAWKES "YOUR COUNTRY NEEDS YOU"
|
|
|
Rank: Amateur level 2 Groups: Registered
Joined: 20/02/2016 Posts: 45 Points: 135 Location: SoCal
|
|
|
|
Rank: Super-Elite Groups: Registered
Joined: 31/05/2010 Posts: 5,679 Points: 17,011 Location: Wiltshire
|
Jeff Good to see you back onto the build. Time does so quickly that is for sure. Everything is still looking nice and sharp and pristine. Tony Happy Modelling
BUILDING: Hachette Spitfire Mk 1A, Constructo Mayflower
SUBSCRIPTION COMPLETE (Awaiting building): USS Constitution, Sovereign of the Seas, 1:200 Bismarck (Hachette)
COMPLETED: Porsche 911, E-Type Jaguar, Lam Countach
|
|
|
|
Guest
|
 US
US

