|
|
 Rank: Beginner Level 3 Groups: Registered
Joined: 08/09/2015 Posts: 27 Points: 74 Location: Mudgee, NSW, Australia
|
Hi All.
This will not be a step by step build as others have already so well covered this in their build diaries.
I will some some pictures and highlight the mods I have done. Nearly all modifications have been copies of what other members on the forum have done to their cars.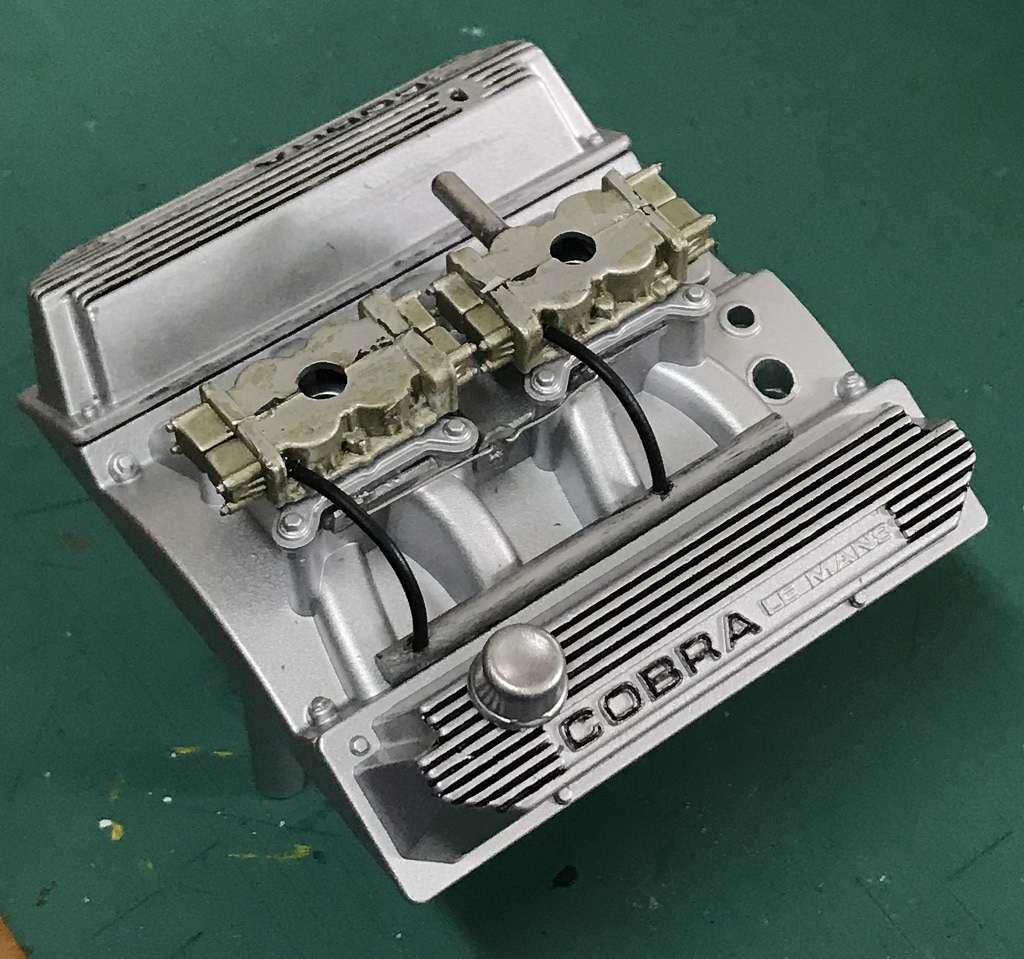 Here I have coloured in the cooling fins on the cam shaft covers as well as painted the Carburetors the Gold colour and added in the breather lines as well as the throttle linkages. Here I have coloured in the cooling fins on the cam shaft covers as well as painted the Carburetors the Gold colour and added in the breather lines as well as the throttle linkages.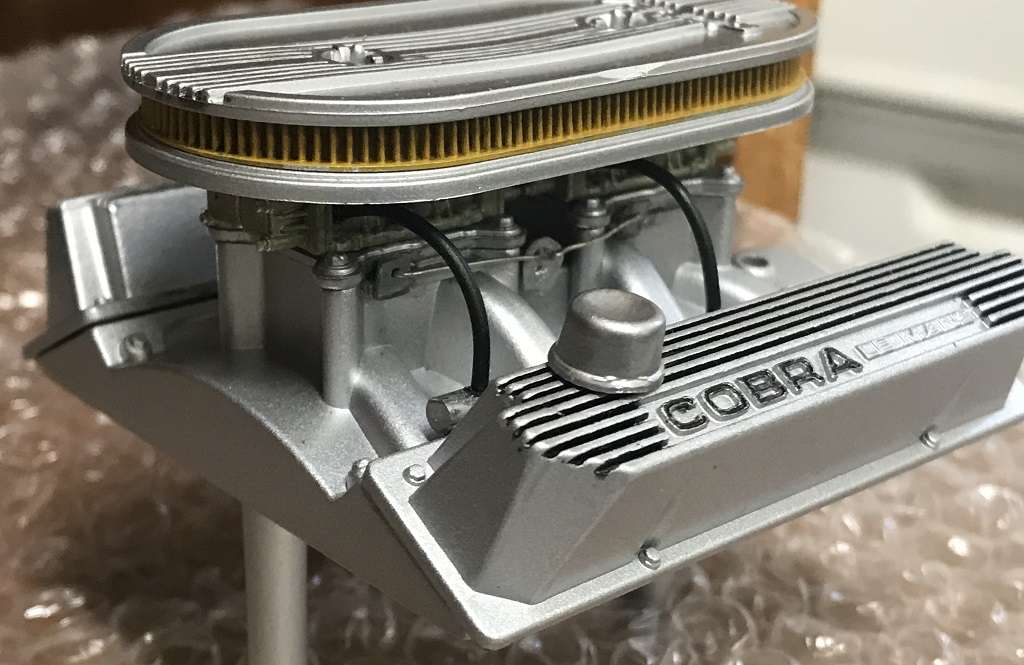 With airfilter on. With airfilter on.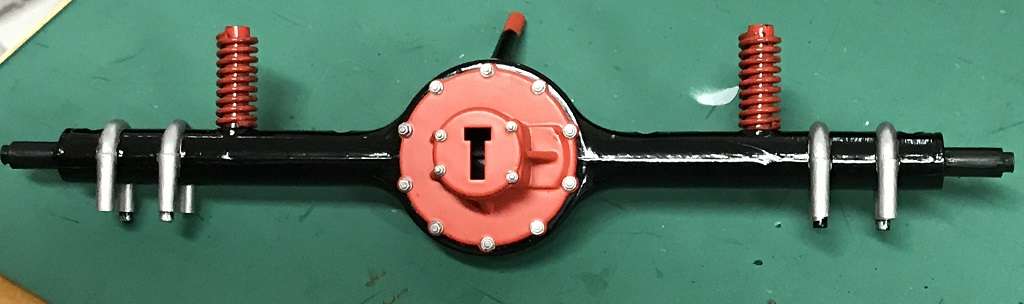 Rear axle with replacement bolt heads, and the springs and their support painted with Model Master "Italian Red" to try to hide these parts. Rear axle with replacement bolt heads, and the springs and their support painted with Model Master "Italian Red" to try to hide these parts.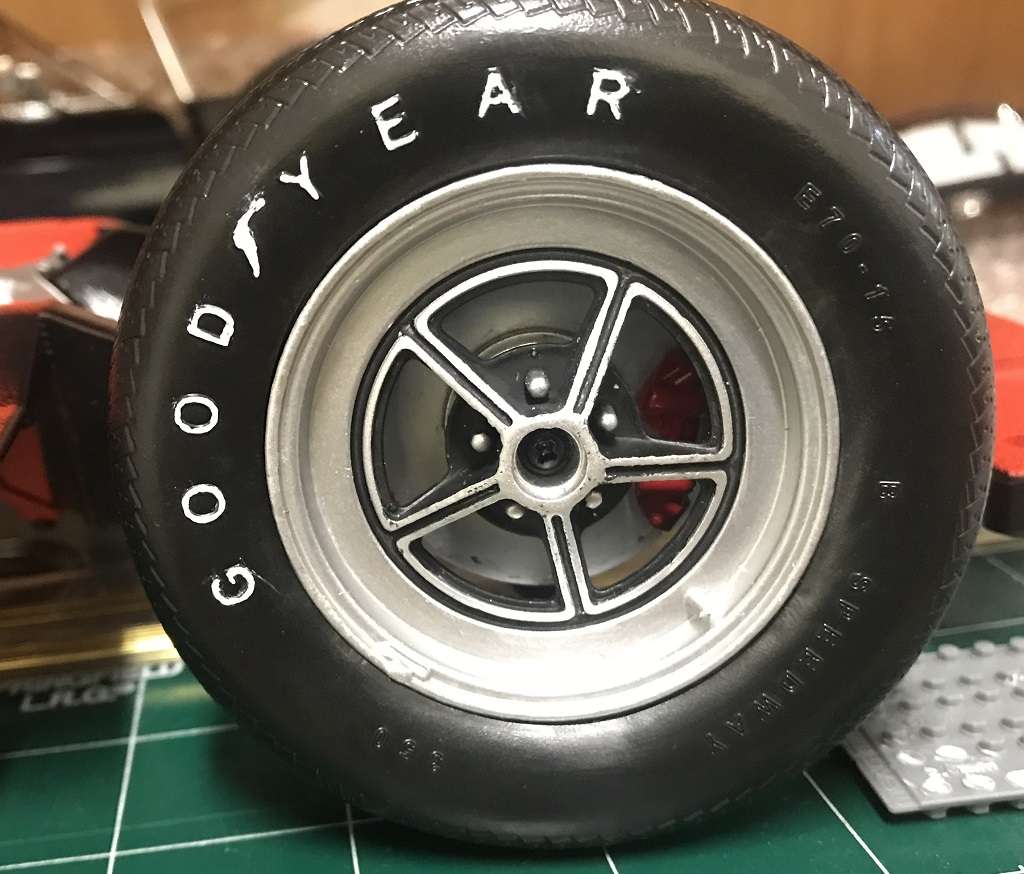 Painting of the Good Year insignia and the Black trim on the wheel using the Uni Posca pens. Also painted the Brake calipers Red. Painting of the Good Year insignia and the Black trim on the wheel using the Uni Posca pens. Also painted the Brake calipers Red. 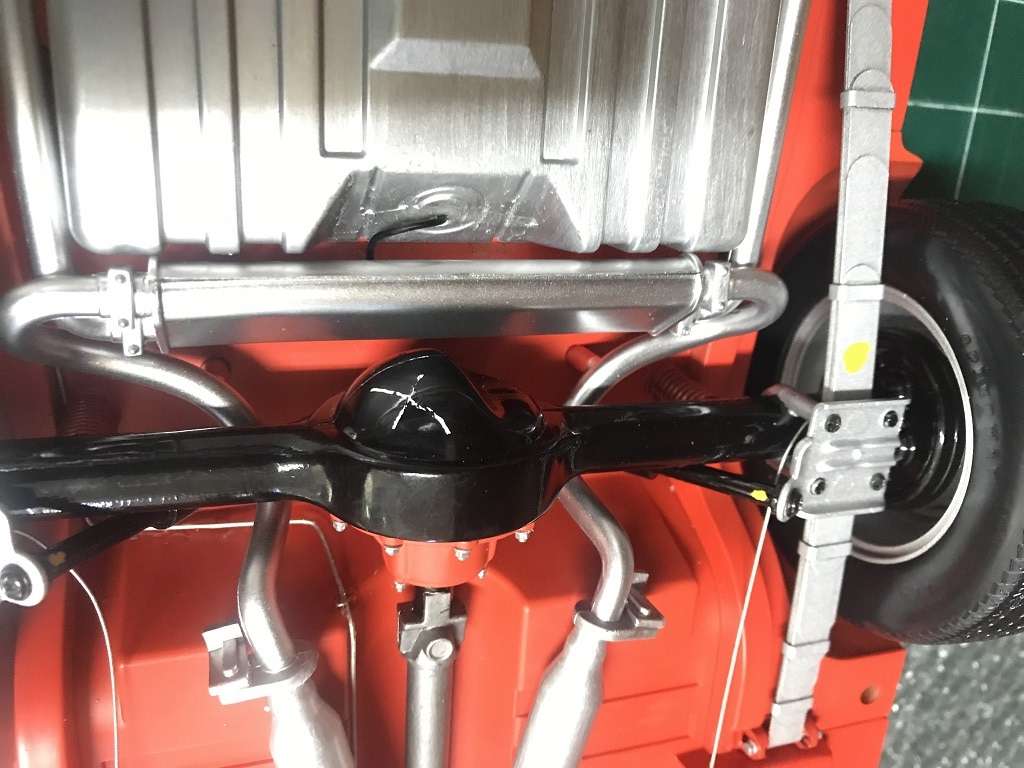 Rear of car showing additions of brake lines and their attachment points (made from styrene sheet). Repainted the axle and shocks in glossy Black as that is what the real car had. Also, sanded off the molded on fuel filler line and replaced with 1mm diameter rubber hose. You can see the fuel line winding it's way up the transmission tunnel. Some builders markers added as well. Rear of car showing additions of brake lines and their attachment points (made from styrene sheet). Repainted the axle and shocks in glossy Black as that is what the real car had. Also, sanded off the molded on fuel filler line and replaced with 1mm diameter rubber hose. You can see the fuel line winding it's way up the transmission tunnel. Some builders markers added as well.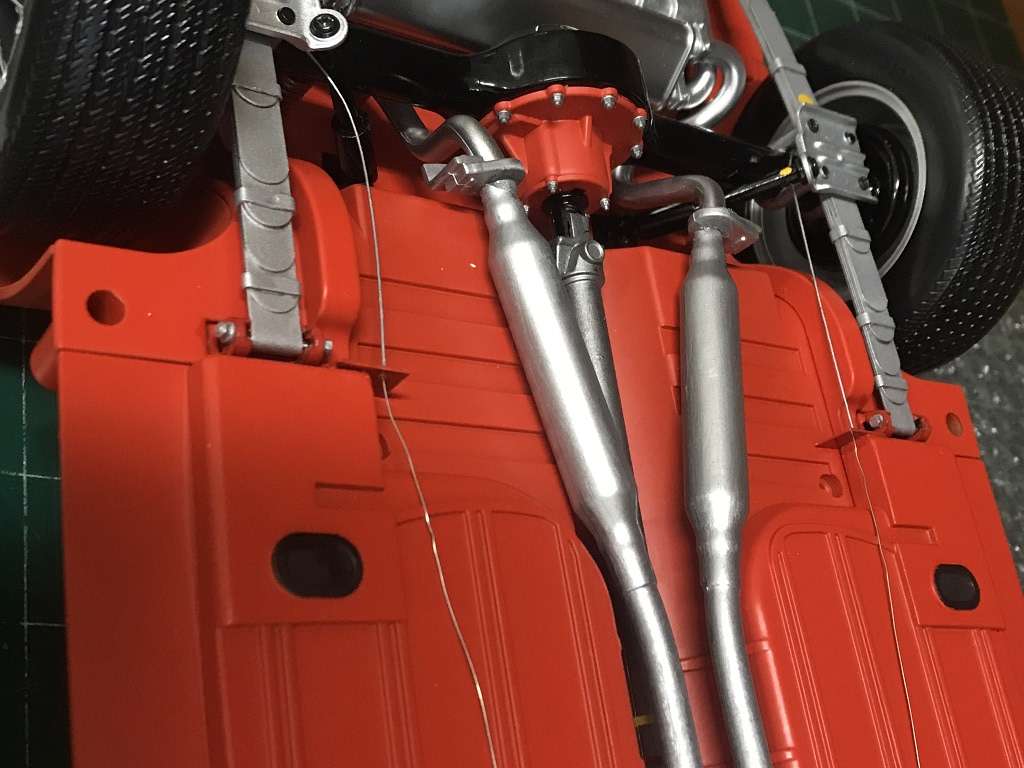 A better shot of the brake cables and rear attachment points as well as some bolt heads added to the leaf spring attachment points. A better shot of the brake cables and rear attachment points as well as some bolt heads added to the leaf spring attachment points.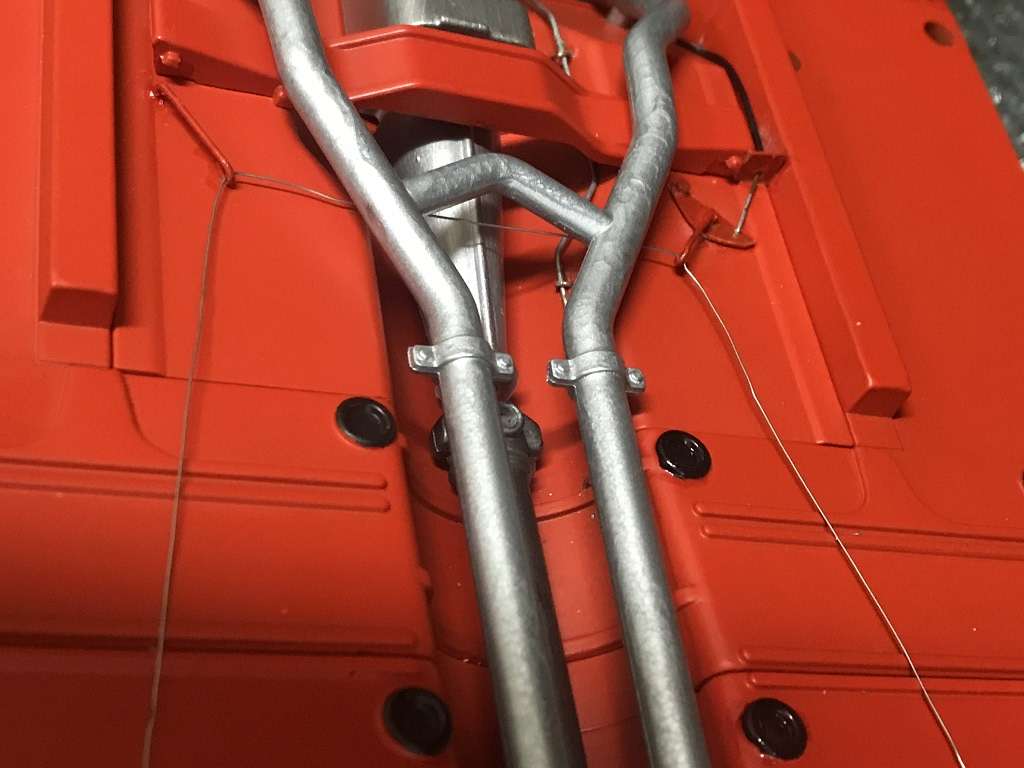 Further forward this picture shows the brake cable forward attachment points (using Brass and styrene) the rubber grommets painted and the front part of the fuel line. Further forward this picture shows the brake cable forward attachment points (using Brass and styrene) the rubber grommets painted and the front part of the fuel line. 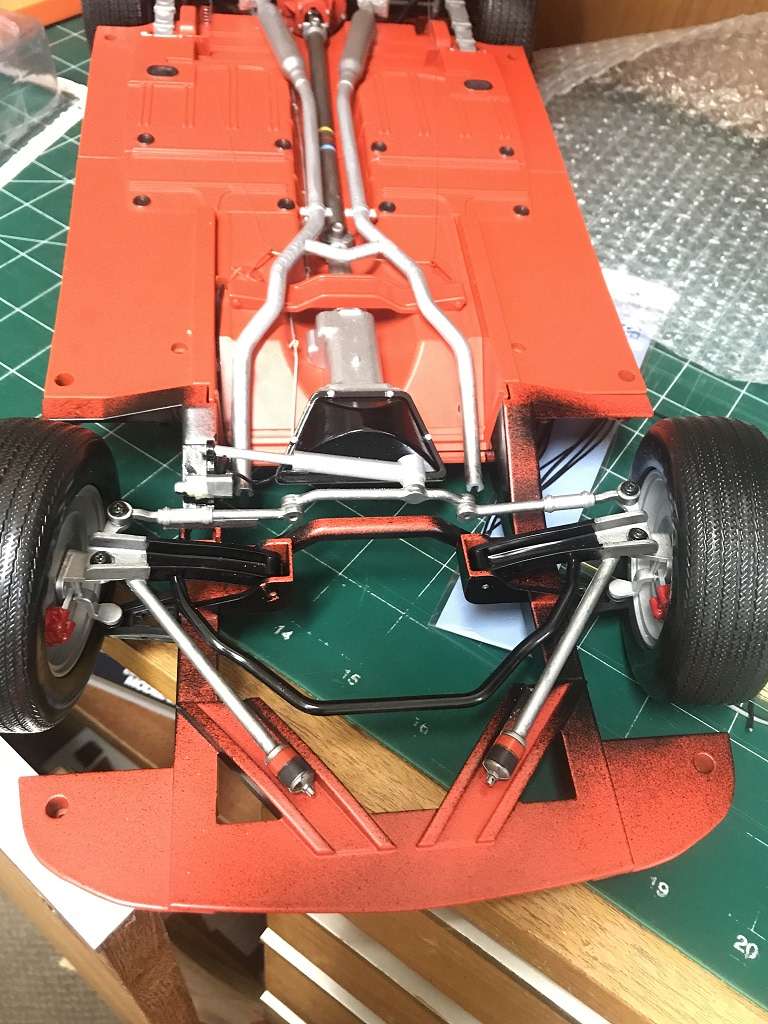 Underside of engine bay showing some of the over-spray from painting the engine bay in Blackout (all Mustangs had this). Underside of engine bay showing some of the over-spray from painting the engine bay in Blackout (all Mustangs had this).
Can also see repainting of the front suspension and transmission. You can just make out the painted steel driveshaft and the colour coding for a 4speed manual transmission on it. top of the engine bay showing the Blackout of all areas (done to avoid any primer or body colour showing when looking through the wheel arches. top of the engine bay showing the Blackout of all areas (done to avoid any primer or body colour showing when looking through the wheel arches.
|
|
|
 Rank: Amateur level 2  Groups: Registered
Joined: 28/01/2016 Posts: 46 Points: 131 Location: Pennsylvania, U.S.
|
Very Nice! I'm building this one too, but veeeerry sloooowly!
My main focus is 1/24-25 scale. I was wondering what size/number drill but were you using to drill into the chassis? Being that it's diecast, was it difficult to drill?
I hate breaking bits and have to go out and get new ones!
Keep up the great work!
|
|
|
 Rank: Pro Groups: Joined: 24/08/2009 Posts: 48,051 Points: -13,308
|
Lovely work and thanks for sharing 
|
|
|
 Rank: Super-Elite       Groups: Registered
Joined: 19/06/2013 Posts: 4,588 Points: 13,553 Location: West Yorkshire
|
Some nice additional detail going in to this build looks great. Al
|
|
|
Rank: Beginner Level 3 Groups: Registered
Joined: 08/09/2015 Posts: 27 Points: 74 Location: Mudgee, NSW, Australia
|
Hi,
Thanks for the kind comments.
Mr.Obsessive I used a number 74 (0.0225) drill bit in a 'twist drill' (one that is hand powered) in order to pass .51mm (0.020) brass rod bent in the shape of a 'U' to hold the fuel line. Most of the parts that form the actual drive shaft tunnel are made of plastic so there was no problem there. The only holes I drilled in the metal were near the fuel tank to hold the start of the fuel line and with a new bit and a small battery powered drill made by Dremel. The metal is relatively soft and the hardest part was starting the hole then it was easy.
|
|
|
Rank: Amateur level 2 Groups: Registered
Joined: 28/01/2016 Posts: 46 Points: 131 Location: Pennsylvania, U.S.
|
Oh OK! I have a drill press Dremel so I'll definitely keep that in mind! Thanks also for the size you used------I have those handy.
Keep up the great work!
|
|
|
Rank: Beginner Level 3 Groups: Registered
Joined: 08/09/2015 Posts: 27 Points: 74 Location: Mudgee, NSW, Australia
|
|
|
|
Rank: Superelite  Groups: Registered
Joined: 10/05/2010 Posts: 2,608 Points: 7,519 Location: Lincolnshire
|
 Impressive Build Peter, your mods look great. keep it up  regards Gray
|
|
|
Rank: Beginner Level 3 Groups: Registered
Joined: 08/09/2015 Posts: 27 Points: 74 Location: Mudgee, NSW, Australia
|
And here is the engine in all it's glory.
I used the kit supplied ignition leads but cut the ones that were not correct off flush with the top of the distributor cap and super glued them back on going to the appropriate cylinder.
added the low tension wires to the coil and some to the alternator that will connect to a relay on the left sidewall. Also added a line (missing) from the Brass pressure fitting at the front of the engine that goes down the right side of the engine into the firewall.
Added a top to the oil filter as well as a dipstick.
Painted the headers to make them look a little heat coloured.
Applied some of Roy's fabulous decals (Very easy to use).
And thought about adding a AC unit but didn't want to add in extra belts and pulleys!!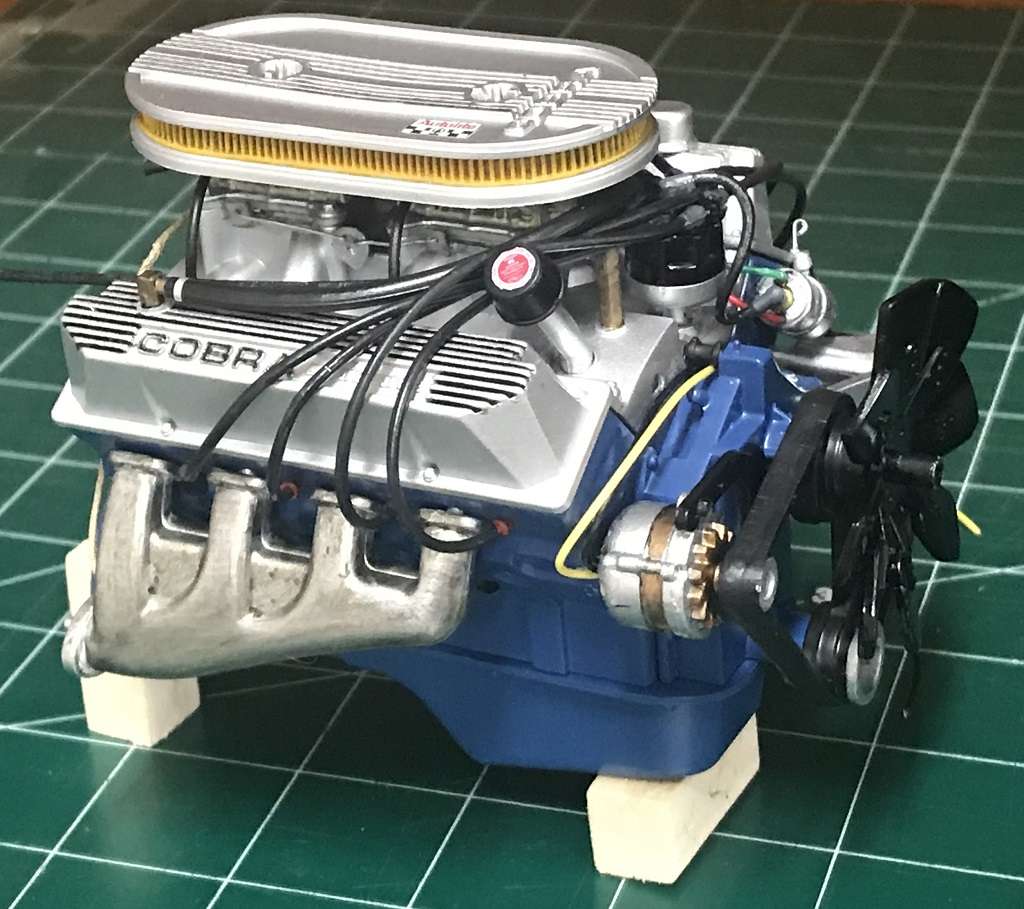  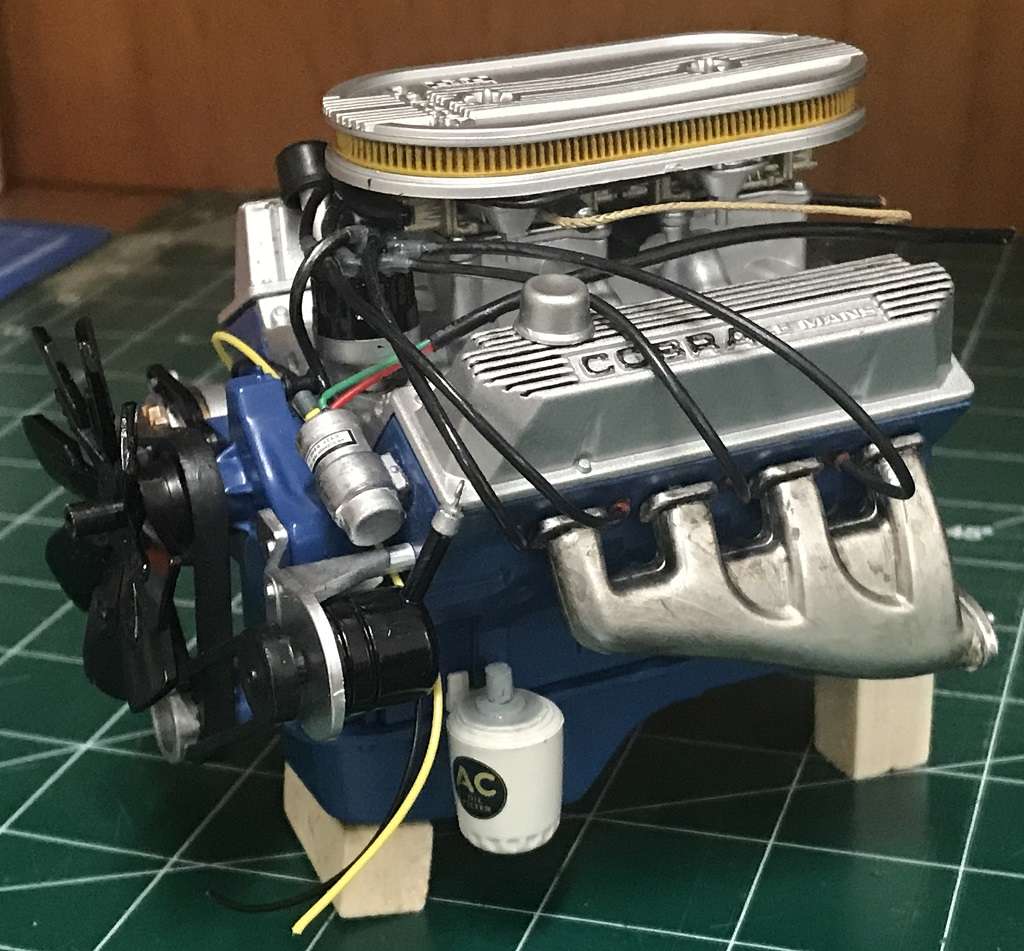
|
|
|
|
|
Looks fab, superb work on the engine...  Regards Alan
|
|
|
|
|
Lovely work, looks excellent  Mark
|
|
|
Rank: Super-Elite   Groups: Official Builds, Administrators, Moderator, Global Forum Support, Registered Joined: 04/06/2011 Posts: 4,199 Points: 12,739 Location: ipswich
|
Looking really great. Nice to see another one being built with added gubbins.
Roy.
|
|
|
Rank: Super-Elite Groups: Registered
Joined: 19/06/2013 Posts: 4,588 Points: 13,553 Location: West Yorkshire
|
That's looking really well the additional touches really make it stand out. Al
|
|
|
Rank: Beginner Level 3 Groups: Registered
Joined: 08/09/2015 Posts: 27 Points: 74 Location: Mudgee, NSW, Australia
|
I concluded that the exposed areas in the boot/trunk would have been painted in the body colour at the factory, so I masked off certain areas that wouldn't need to be painted prior to spraying with body colour. Here is the back of the rear seat (IE the rear wall of the boot/trunk). Here is the back of the rear seat (IE the rear wall of the boot/trunk).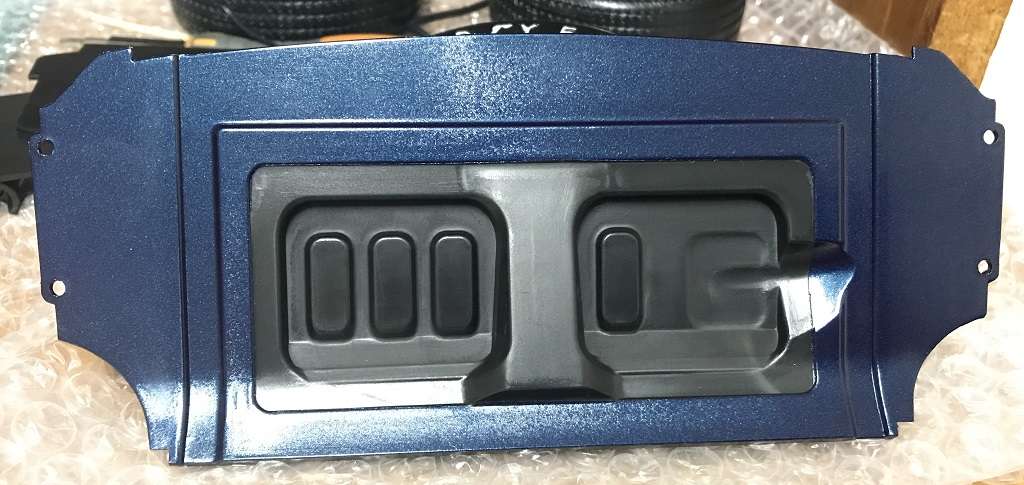 And what it will look like assembled (although a lot of pictures do NOT show the Trunk side panels being in place and I wonder if this was a option cost?): And what it will look like assembled (although a lot of pictures do NOT show the Trunk side panels being in place and I wonder if this was a option cost?):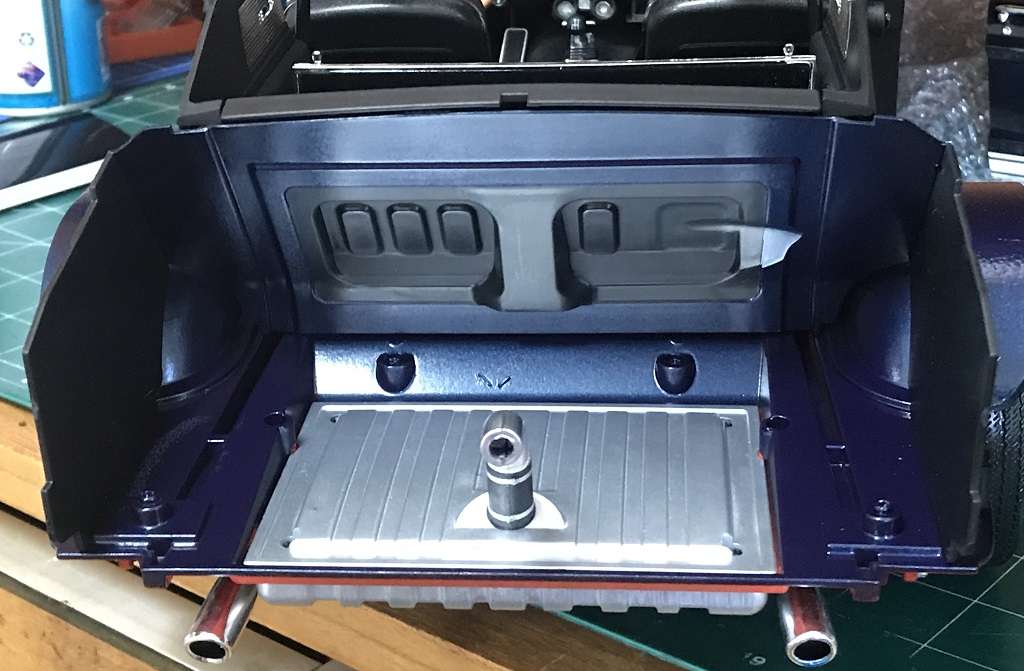
|
|
|
Rank: Beginner Level 3 Groups: Registered
Joined: 08/09/2015 Posts: 27 Points: 74 Location: Mudgee, NSW, Australia
|
Engine is now in with additional pipes going through the firewall. Alternator wires connected to terminal on left side of engine bay above washer bottle. Also washer pump and white hose from the bottle to the windows through the firewall. Added the Brass brake lines to the master brake cylinder (just viable on the Left of the cylinder). 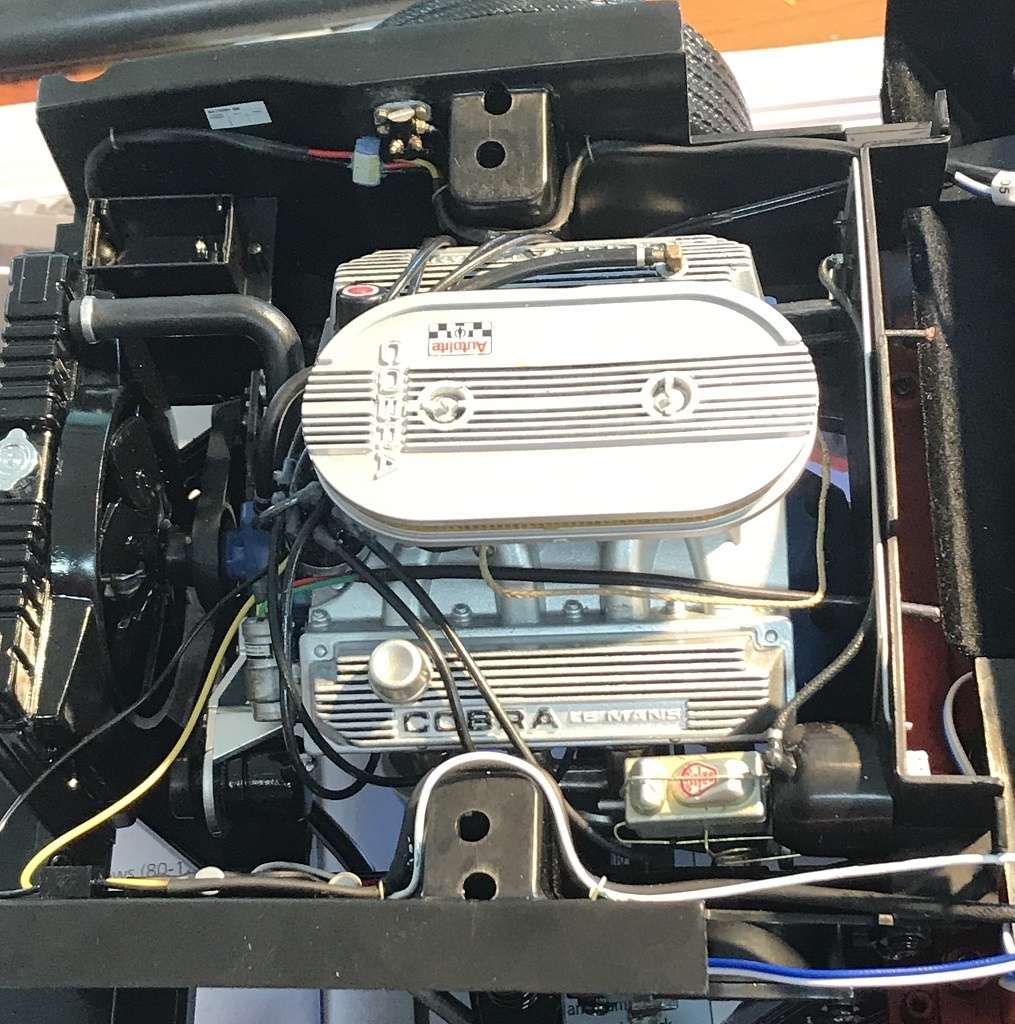 
|
|
|
Rank: Super-Elite Groups: Registered
Joined: 19/06/2013 Posts: 4,588 Points: 13,553 Location: West Yorkshire
|
Looking very real with all the extra wiring great job. Al
|
|
|
Rank: Beginner Level 3 Groups: Registered
Joined: 08/09/2015 Posts: 27 Points: 74 Location: Mudgee, NSW, Australia
|
Well I bit the bullet and wrapped the underside ready for spraying the rear wheel arches. I believe that they would have been done at the factory as part of the body spraying (or at least have a reasonable coat of over spray in them).
I did not want it to look like this (as I think that both spoils the look and is incorrect):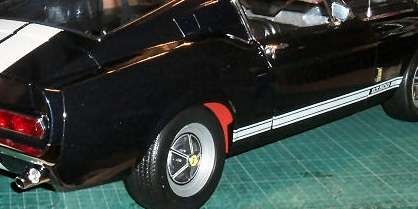 So here it is part way through spraying: So here it is part way through spraying:
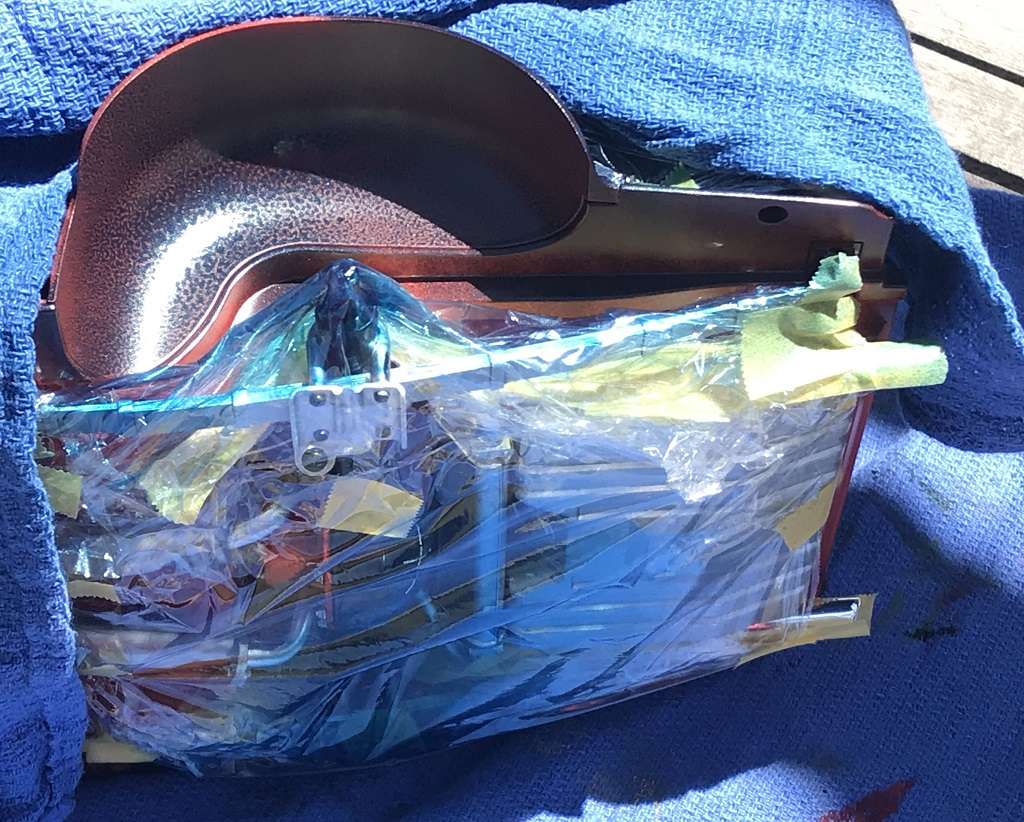 And finished (with some light over spray on the undersides: And finished (with some light over spray on the undersides:
|
|
|
|
|
Looking excellent. Mark
|
|
|
Rank: Beginner Level 3 Groups: Registered
Joined: 08/09/2015 Posts: 27 Points: 74 Location: Mudgee, NSW, Australia
|
In hindsight it would’ve been better to have done this once the chassis was completed but before any additional parts were put on.
|
|
|
Rank: Amateur level 2 Groups: Registered
Joined: 28/01/2016 Posts: 46 Points: 131 Location: Pennsylvania, U.S.
|
Lookin' Good!
|
|
|
|
Guest
|
 US
US

