|
|
 Rank: Amateur Level 1 Groups: Registered
Joined: 01/12/2011 Posts: 34 Points: 102 Location: London
|
Hello forum readers, my name is Jack and I am new to both model building and forums.
Admittedly, I have been visiting this site for some time to try and get some "insider tips". Everyone seems to chip in really well with some excellent information, so I thought it may be time to jump in the deep end, come out of cover and try to contribute.
As a newbie, I have been building my project each week, closely following instructions and studying the pictures to see what tricks I can pick up. I've taken some recent photo's which I will upload once I get used to using this.
I am really excited by this build and look forward to each weeks parts, which I get from a local newsagent who has been absolutely spot on each week. The hardest thing I find doing is getting it home, test fitting it and then putting it back down for a day or so until I feel I am ready (and steady enough) to take it on. I don't want to rush it because I realise that that's a rookie error.
So far, I'm really happy with my effort. I have made a few mistakes, some which I will have to live with, and one which was replacable. After hours of really testing myself building the rear wing, I accidentally dropped it a few days later. Yep, it shattered. But I just bought a new kit and built a new one. No probs.
Look forward to talking with you all soon and sharing some pics.
|
|
|
 Rank: Pro Groups: Joined: 24/08/2009 Posts: 48,051 Points: -13,308
|
 Hello Jack and a warm welcome to the forum. If you have any problems with your build you are in the right place to ask and someone will usually come up with the answer on here, so don't be afraid to pop a question or two if you feel the need. Better to ask and get it right first time than make mistakes and do it twice !!! Look forward to seeing your progress.  Kev
|
|
|
Rank: Amateur level 2  Groups: Registered
Joined: 23/04/2011 Posts: 45 Points: 138 Location: Portsmouth
|
Welcome Jack, I am building this modle after having quite a few years away from this sort of thing and I find this forum very usefull, cant wait to see your photos and I have the same problem with not being able to put them down after they have been deliverd, which does not go down too well with the wife 
|
|
|
 Rank: Super-Elite      Groups: Registered
Joined: 24/04/2010 Posts: 5,787 Points: 17,662 Location: Stafford, United Kingdom
|
A big warm welcome to the Forum, I hope you enjoy your build  MWG BUILD DIARIES: HMS VICTORY, SOVEREIGN OF THE SEAS, SAN FRANCISCO II, HMS HOOD, HMS ENDEAVOUR LONGBOAT, HMS VICTORY X-SECTION, 007 DB5, NISSAN GTR, CUTTY SARK, RB7, AKAGI, BARK HMS ENDEAVOUR, HUMMER H1, MITSUBISHI ZERO.
|
|
|
Rank: Pro Groups: Joined: 24/08/2009 Posts: 48,051 Points: -13,308
|
Welcome to the forum Jack
|
|
|
Rank: Amateur Level 1 Groups: Registered
Joined: 01/12/2011 Posts: 34 Points: 102 Location: London
|
Thanks for the warm welcome everyone.
I think I have uploaded some photos correctly. I didn't take earlier photos simply because I didn't know that the forum existed.
I think this week has been a really exciting week. The first undertray section is very impressive and, as Kev has done, I couldn't help but sit some sections together to see how it's going. I should have stuck the rear wheel on now that I think of it.
I hope you enjoy my photo's. Any comments are welcome (good or bad - I won't be affended) as I think the learning curve is pretty much straight up at the moment.
|
|
|
Rank: Super-Elite    Groups: Registered
Joined: 04/04/2010 Posts: 3,955 Points: 11,809 Location: uk
|
hi jack,you need to copy and paste the img code,the bottom one on the list next to your pics. Current builds: SotS, USS Consitution, San Felipe, D51 loco, HMS Surprise, RB7, Arab Dhow, Jotika HMS Victory Completed builds: HMS Pickel, Thermopylae, Mississipi river boat, Mary Rose, Cutty Sark, San Francisco II, HMS Victory x5, Titanic Lifeboat, Panart HMS Victory Launch, Hachette Titanic, Virginia Schooner, Endeavour Longboat. http://www.model-space.com/gb/
|
|
|
Rank: Amateur Level 1 Groups: Registered
Joined: 01/12/2011 Posts: 34 Points: 102 Location: London
|
Thanks Karl. Second attempt. [ 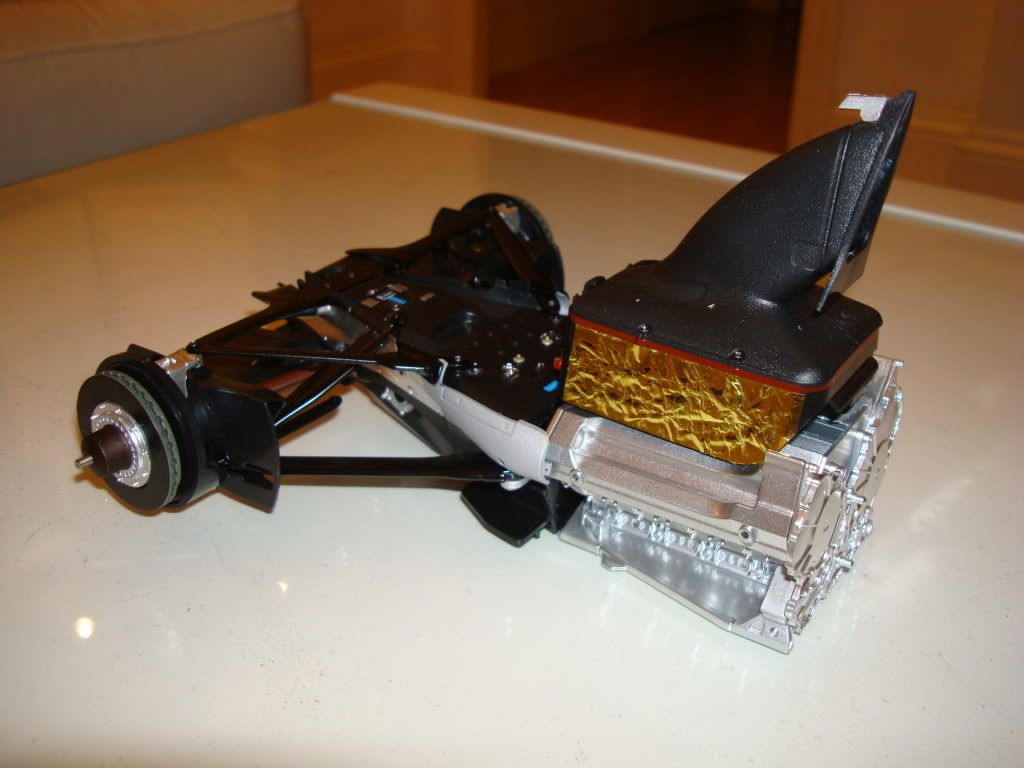 ] [ 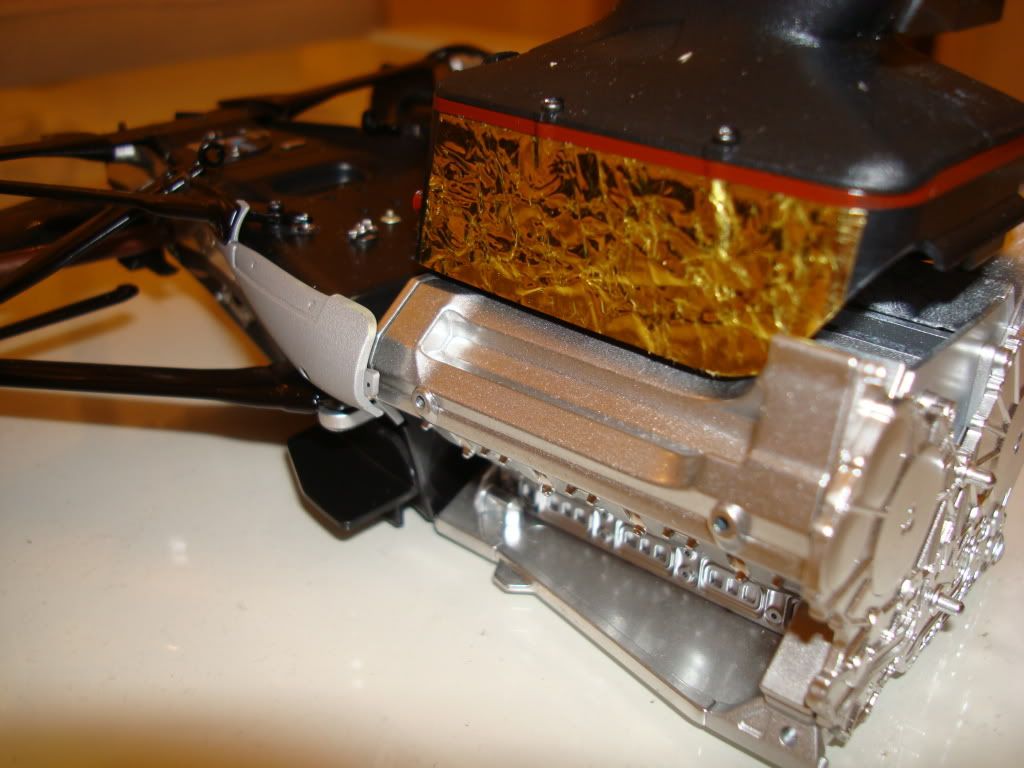 ] [ 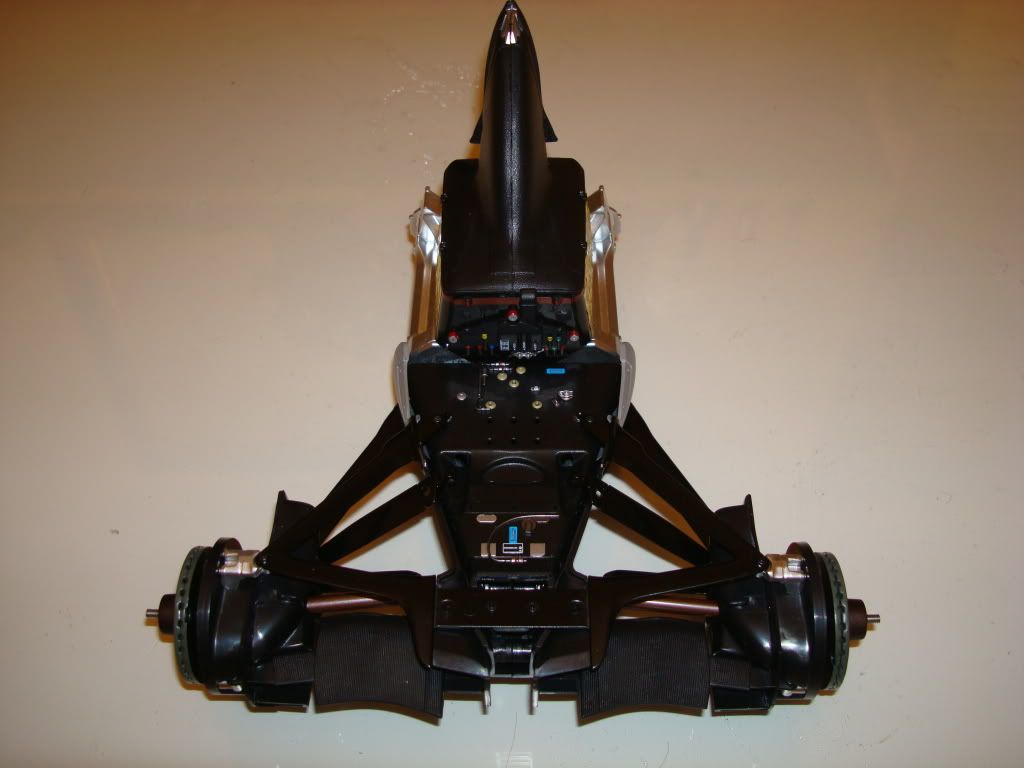 ] [  ] [ 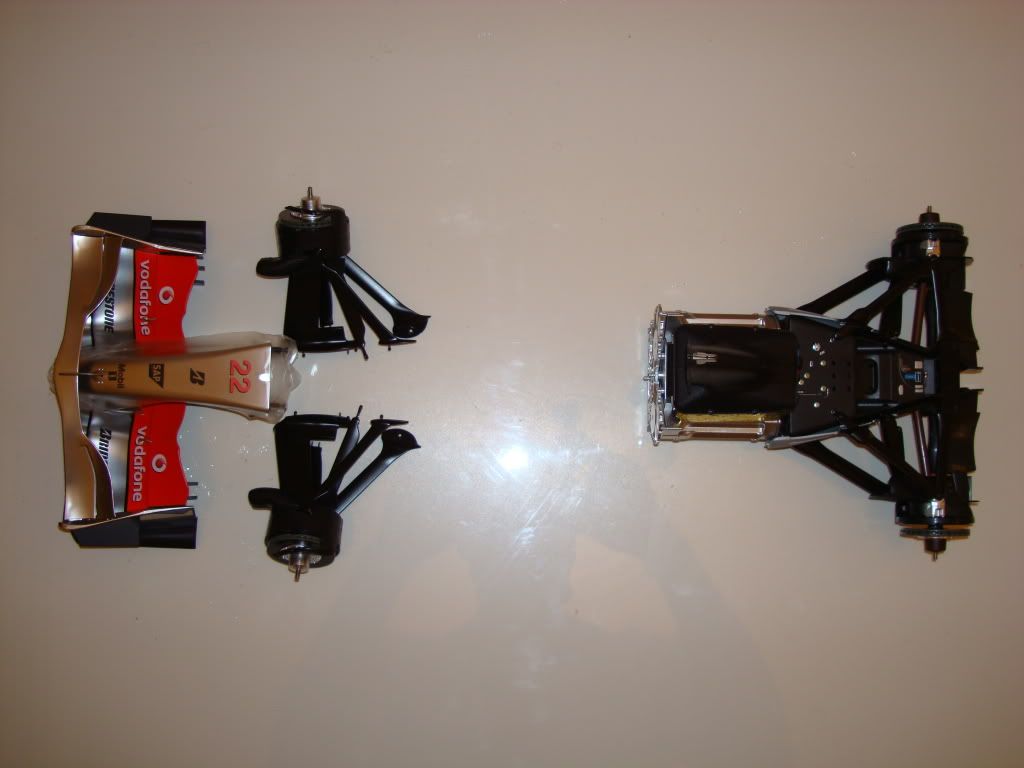 ] [ 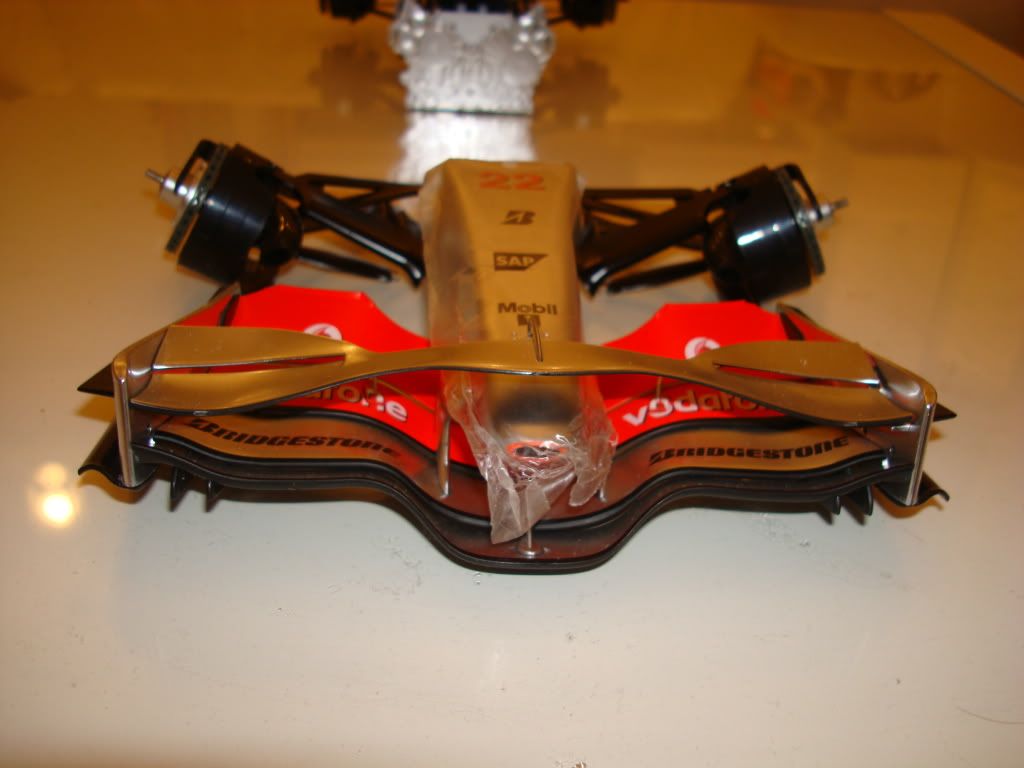 ] [  ] [  ] [ 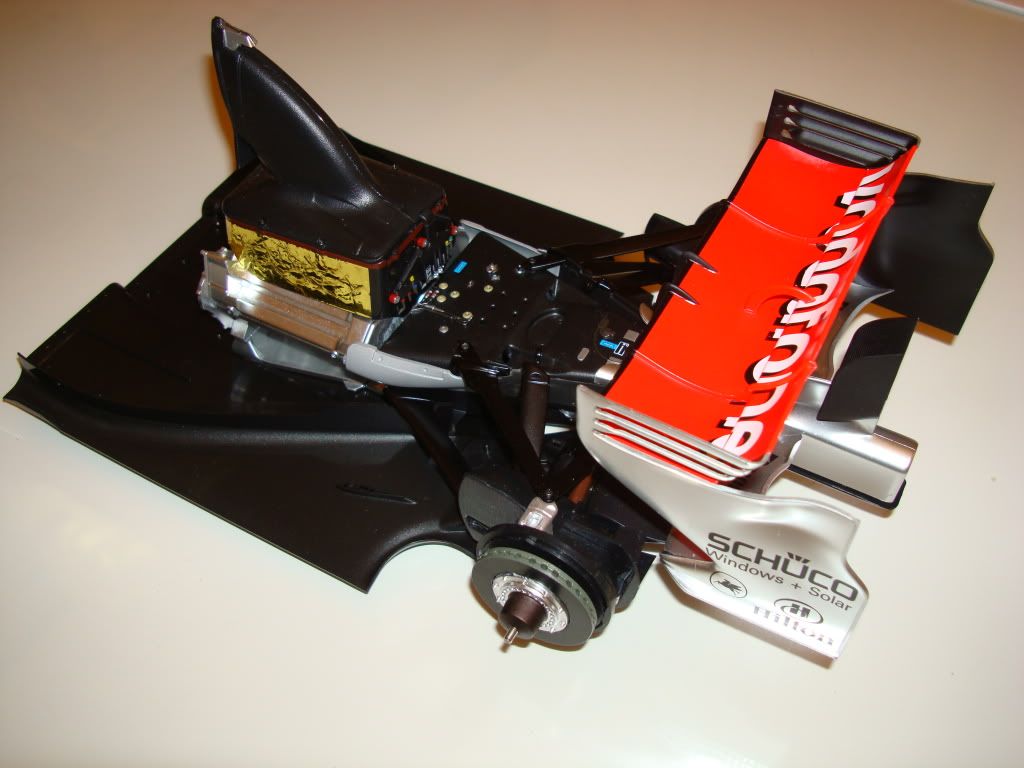 ] [ 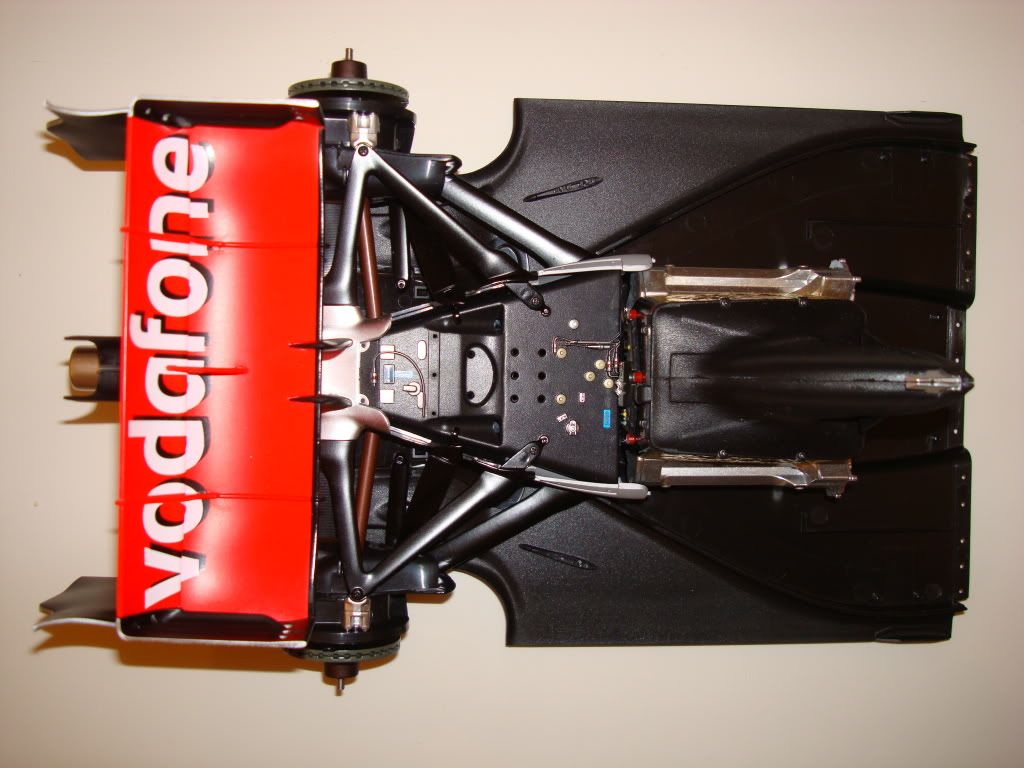 ] [ 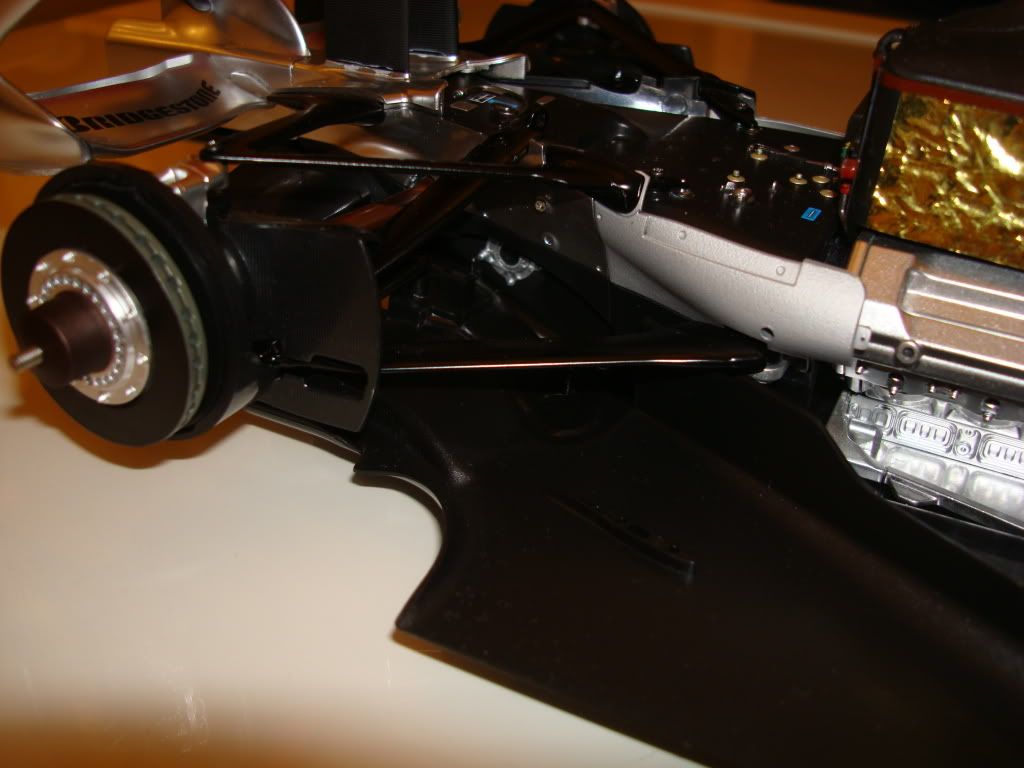 ]
|
|
|
Rank: Pro Groups: Joined: 24/08/2009 Posts: 48,051 Points: -13,308
|
Looking good Jack
|
|
|
Rank: Pro Groups: Joined: 24/08/2009 Posts: 48,051 Points: -13,308
|
|
|
|
Rank: Amateur Level 1 Groups: Registered
Joined: 01/12/2011 Posts: 34 Points: 102 Location: London
|
Thanks again guys for your positive words.
Reading some of the other posts, I was wondering if anyone is still going to add anymore detail to their cars.
I have seen the photo's of the carbon fibre detailing that has been done, but more noticably in those photo's was some small detail such as painting the steering and suspension arm connection joints silver, rather than just leaving them black.
Kev's build posted that more research was required into the "crushed gold reflector foil" applied to the sides of the injector box.
This is all interesting stuff and having a motor sport background I totally understand what your trying to achieve. As Kev's posts indicated though, F1 keep there cars under close wrap and it's probably going to be hard to find what it actually looks like.
So, I've tried to google all kinds of things, thinking that perhaps an older car such as this 2009 model, may have been opened up to photographers a bit more....nope, nothing.
The closest I got was on the suggested F1technical site where I found a similar type reflector foil on the Mercedes engine. Their reflector was more like a patch, but at least you could understand its appearance. Nevertheless, as you can see on my photo's, I have just put it on as per instructions. Interestingly, if you look closely at the original fold out brochure from issue 1 where the car is dismantled, you can see that the foil sits off the injector box???
On the F1technical website Mclaren photos you can clearly see that the steering and suspension joints are actually a silver, or aluminium colour. Knowing F1 its probably titanium, but it suggests that the ends should be painted.
What do you think?
While I'm at this, I think that some of you may have picked up my inexperience that manifests itself from over application of glue. This seems like a common beginners error. As hard as I've tried, I haven't been able to find out what removes the white stains on the black plastic. Any tips?
|
|
|
Rank: Super-Elite Groups: Registered
Joined: 24/04/2010 Posts: 5,787 Points: 17,662 Location: Stafford, United Kingdom
|
Nice build Jack MWG BUILD DIARIES: HMS VICTORY, SOVEREIGN OF THE SEAS, SAN FRANCISCO II, HMS HOOD, HMS ENDEAVOUR LONGBOAT, HMS VICTORY X-SECTION, 007 DB5, NISSAN GTR, CUTTY SARK, RB7, AKAGI, BARK HMS ENDEAVOUR, HUMMER H1, MITSUBISHI ZERO.
|
|
|
Rank: Pro Groups: Joined: 24/08/2009 Posts: 48,051 Points: -13,308
|
Jacksmclaren wrote:Thanks again guys for your positive words.
Reading some of the other posts, I was wondering if anyone is still going to add anymore detail to their cars.
I have seen the photo's of the carbon fibre detailing that has been done, but more noticably in those photo's was some small detail such as painting the steering and suspension arm connection joints silver, rather than just leaving them black.
Kev's build posted that more research was required into the "crushed gold reflector foil" applied to the sides of the injector box.
This is all interesting stuff and having a motor sport background I totally understand what your trying to achieve. As Kev's posts indicated though, F1 keep there cars under close wrap and it's probably going to be hard to find what it actually looks like.
So, I've tried to google all kinds of things, thinking that perhaps an older car such as this 2009 model, may have been opened up to photographers a bit more....nope, nothing.
The closest I got was on the suggested F1technical site where I found a similar type reflector foil on the Mercedes engine. Their reflector was more like a patch, but at least you could understand its appearance. Nevertheless, as you can see on my photo's, I have just put it on as per instructions. Interestingly, if you look closely at the original fold out brochure from issue 1 where the car is dismantled, you can see that the foil sits off the injector box???
On the F1technical website Mclaren photos you can clearly see that the steering and suspension joints are actually a silver, or aluminium colour. Knowing F1 its probably titanium, but it suggests that the ends should be painted.
What do you think?
While I'm at this, I think that some of you may have picked up my inexperience that manifests itself from over application of glue. This seems like a common beginners error. As hard as I've tried, I haven't been able to find out what removes the white stains on the black plastic. Any tips? Hi Jack, Excellent post, and re the Gold Heat Reflector foil, I am still trying to find a photo that was posted on here some time ago which showed it very well and I am sure that it did go further round than the standard DeAg build and I am also sure that it was around the back of the main tub, behind the driver's seat!! If I find it I will post it up. Re the Titanium bits on the suspension arms, you are correct and I probably will put some Titanium paint through my airbrush and paint those on before I fit them to the rest of the car later in the build. I intend to keep my build as standard as possible but just add subtle touches here and there where they are easy enough to do without tearing the bits apart and completely remaking them !! Little things that are obvious but will enhance the model just a little - standard with a few little tweaks if you like !! The only major thing I am thinking about doing, is repainting the exhaust when we get to them to try and replicate the purple/gold heat staining that they get after being so hot but will wait and see what the kit parts look like first. I will probably order double issues when the exhaust parts are due and then compare standard with heat stained ?? Re the white stains on the black plastic, it looks like it is a result of you using superglue where you should be using ABS glue on those parts. The vapours from superglue are VERY aggressive and will attack the surface of any bare plastic around a joint which then leaves the white residue. You could either try using the correct glue (ABS) which would prevent the staining, or you can stop it to an extent by putting masking tape on the surfaces next to a joint so that the vapours can't physically get at the bare plastic. The only problem with that method, is if you aren't VERY precise with the superglue you could find that when you come to remove the tape, the edge of it is stuck fast to the superglue in the joint, so it can be risky. Better just to use the correct glue !! Hope that all helps mate and thanks again for your interesting post, we need more of that kind of posting and if you come across a decent photo of the Gold foil on the real car let me know, it would be much appreciated !! Kev
|
|
|
 Rank: Beginner Level 2  Groups: Registered
Joined: 28/09/2011 Posts: 13 Points: 39 Location: Edinburgh
|
Welcome jack, I am also a rookie and made some silly mistake on the first edition build, since then work has taken up all my time. I find the forum friendly and very helpful, its a nice community thats building. Hopefully I can catch up with my build and find some time...... Builds in progress:
1:8 McLaren MP4/23 (DeAgostini) x 2
Waiting to Build:
|
|
|
Rank: Amateur Level 1 Groups: Registered
Joined: 01/12/2011 Posts: 34 Points: 102 Location: London
|
Jimthedj65, as newbies I think the best we can do is take our time and pay close attention to the really helpful posts from the likes of Kev and Warthog. Although I think warthog's fully modified build is one of those that we should just watch, and not try to emulate. I have a simple approach and that is to know my limits. Kev, as always some really good tips and discussion. With modifications the one thing I am particularly concerned about it getting the details mixed up with the actual real car model. Even if you research the 2009 model mclarens, you end up with 2010 pics. This is most noticable with the front suspension design. My other problem is that the more experienced builders like yourself talk about airsprays and special techniques. Although I am really happy with the standard kit finish, I would like to add a few little extras, but I don't have those special tools and I think the wife would go a bit tropo if I starting buying them. For such small parts, do you think you can achieve the detail finish with a brush? But, I did manage to find some photo's attached to some forum discussions in 2009 on the F1technical website. They are the first ones I have found that are "under the hood" so to speak. Best of all, it actually has the heat reflectors in the shot. On the f1technical site look at the topic for: Mc Laren MP4/24 aero-mech development in 2009. The pics of the engine are on page 2. I would attach the photos but I am a bit hesitant for copyright reasons. These pictures also give you a look at the exhaust system. The exhaust looks to be a gunmetal colour rather than the silver that is on the De Agostini "Mclaren detail" photo's. As for the front suspension arms, there is very little difference between the kit colours and the actual real situation. Only one arm has aluminium coloured sections at the body end. I found photo's at: www.f1fanatic.co.uk/2009...s-side-by-side-pictures/Again, I'm much happier with this photo because it is actually the 2009 car. Thanks for your tip on the glue Kev. I went to a model shop with the list of tools and they seemed to set me up with what was needed. I will check it again to see what I have. I think the problem is that in some cases I simply used too much glue and it spilled out. Since reading a few posts I have reduced my "glueing" technique to a toothpick dipped in the glue. Pitty about the initial mistakes but atleast they were small.
|
|
|
Rank: Pro  Groups: Registered
Joined: 07/04/2011 Posts: 251 Points: 741 Location: Leeds
|
Hi mate.. Welcome! I agree with Copyright issues... me and Tom have had convo's about it and you should put links rather than the actual photos. But I have a good idea for you... Warthog is to thank for this but I thought I'd share it with you - Check this vid - its the 08 car and you can see extensively the inner workings of the car - pause it for better details - http://www.youtube.com/watch?v=4zf40OzfwOo - best viewed in 720p of course. I do have an extensive collection of MP4-23 pics I've got on photos, shame I can share them! I'm a newbie... but as far as adding details go, Ive got a year to practice! I wont start building until next year, just about to embark on my first build, G. Paffett DTM car from 09. Will post a diary! Building the McLaren MP4-23
|
|
|
Rank: Pro Groups: Joined: 24/08/2009 Posts: 48,051 Points: -13,308
|
Hi Jack, Re not using an airbrush, yes you could paint smaller parts with a brush, but I would thin the paint so that it doesn't hold a brush mark quite so easily as thicker paint and then apply it in several very thin layers and use a brush with very fine and soft hairs. Time consuming, I know but you should get a smoother finish to the paintwork that way and if you varnish or use a spray can of clearcoat over the top then I think you will get a quite satisfactory finish, though it will never compete with the finish from an airbrush. I wouldn't brush paint on larger areas if you could help it, as it is more likely to show unless you use a large soft brush, thin paint and precise strokes without too much overlapping !! You are right about the exhaust being more 'Gunmetal' than silver and that is what I intend to do with my exhaust, by respraying it and also the two bands around the top of the suspension push rods and their upper connecting joint should also be gunmetal as in reality they are made of Titanium. I think as I said in one of my earlier posts, there is no need to do heavy modifications to get a nicer looking model, just a few selective and subtle changes in the right place can have a very nice effect on the finished model. In any case, unless you have the necessary skills, which only come with experience, then I think to follow others with their extensive modifications, would be ill advised and would probably open up a whole can of worms for you, that you wouldn't be able to cope with without those skills ?? Thanks for the heads up on the engine photos by the way Jack, much appreciated. Kev
|
|
|
Rank: Pro Groups: Joined: 24/08/2009 Posts: 48,051 Points: -13,308
|
Hi Senna94, Good post and thankyou for putting up the link to the 'Youtube' video, just what I was after !! You are right not to put up the photos as they are someone else's 'intellectual property' which would normally have a copyright involved and if you breach that you could land yourself in some very serious court action, so best steer clear !! If in doubt, then don't post and as you correctly say, a link to the original site is probably the safest way to share photos/information that doesn't belong to you ?? Kev
|
|
|
Rank: Amateur Level 1 Groups: Registered
Joined: 01/12/2011 Posts: 34 Points: 102 Location: London
|
Senna94 & Kev, Thanks for the valuable advice. Its hard not to get wrapped up in all the possibilities. But, your both spot on by suggesting to stick with both what I can actually do and with what finish would be best achieved. You guys both have such fantastic looking pieces, it's a real pleasure to see and watch. There a real inspiriation. I had a look at the video clip and probably saw more than my limited talent could possibly deal with. I'll be really interested to see how you guys incorporate that information into your builds. I think I will just take a step back and build the best "standard" car that I can. My aim now - ease up on the glue and stop drinking fizzy pop before handling small pieces I love it though and even though this weeks parts look fairly small in comparison to last weeks, I will probably sit there and just turn it through 360 degrees a few times before finally being told "put that thing away now" from the wife. They don't understand! Cheers guys. Look forward to seeing this weeks posts.
|
|
|
Rank: Pro Groups: Joined: 24/08/2009 Posts: 48,051 Points: -13,308
|
Hi Jack, Thanks for the nice comments about my build though I think yours looks equally nice and if that is your first attempt at modelling then you should do more as you seem to have what it takes. A nice clean build so far from what I can see and nothing wrong with that at all ?? Re the video, I understand what you mean about the overwhelming amount of detail, and yes, you are right to stick to what you can cope with as you will get more satisfaction from a standard build that looks nice, than a badly attempted modified one !! Even I won't be doing much extra to my model, though I am capable of doing it, as I think the standard model looks perfectly good enough and it represents the real car very well. I'll just be doing a handful of subtle changes that I feel are needed but other than that, it will be standard. I probably won't even fit the DeAg carbon decals to the suspension if they are supplied towards the end of the build (I think they are definitely going to be issued) as I think the plain black parts look fine and unless you get right up close to the suspension on the REAL car even they look just plain black from a distance, so not really necessary methinks ?? Keep posting up your pics Jack and excellent posts so far, well done !! Kev
|
|
|
|
Guest
|
 US
US

