|
|
 Rank: Vice-Master     Groups: Registered
Joined: 31/08/2011 Posts: 629 Points: 1,963 Location: Plymouth
|
 Great build mate!
|
|
|
 Rank: Amateur Level 1 Groups: Registered
Joined: 01/12/2011 Posts: 34 Points: 102 Location: London
|
Cheers mate, thanks for the encouragement. I really rely quite heavily on Kev, Warthog and Senna94. Those guys are doing some great work and there pictures, commentary, tips and advice is invaluable. It's fantastic to have those guys giving as much as they do on the forum. I think I will wait a few weeks to post some progress photos because quite obviously, Kev does an immaculate job and also some of the parts from the past week or so are waiting to be fixed so there is very little to see. In saying that though I still can't help but put on whatever I can, then just sit there and marvel at my work. Even though we just fixed a small part to the underside, it was still worth it. I also spend a bit of time hunting down pictures of the areas that we are currently building, just so I can understand how it actually looks while ambitiously considering adding some of my own detail. But that's quickly being sidelined purely by ability rather than ambition. I'd rather do a good standard car than a sh**#y modified one. I don't know how some people can be just buying the kits each week and then leaving it aside. I'm so excited recieving my issue and the most I can stand doing is putting it down for a day or two while I wait for Kev or others hints and tips to be posted (not that I want to rush them ). Sometimes they see things I wouldn't, so as a newbie I really need to slow down and be patient. But it is simply really exciting week after week. Don't know what's going to happen over the Christmas period if like me you get your issues from the news agent. Perhaps someone could let me know from experience. Cheers for now.
|
|
|
 Rank: Pro  Groups: Registered
Joined: 07/04/2011 Posts: 251 Points: 741 Location: Leeds
|
Jacksmclaren wrote:Cheers mate, thanks for the encouragement. I really rely quite heavily on Kev, Warthog and Senna94. Those guys are doing some great work and there pictures, commentary, tips and advice is invaluable. It's fantastic to have those guys giving as much as they do on the forum. I think I will wait a few weeks to post some progress photos because quite obviously, Kev does an immaculate job and also some of the parts from the past week or so are waiting to be fixed so there is very little to see. In saying that though I still can't help but put on whatever I can, then just sit there and marvel at my work. Even though we just fixed a small part to the underside, it was still worth it. I also spend a bit of time hunting down pictures of the areas that we are currently building, just so I can understand how it actually looks while ambitiously considering adding some of my own detail. But that's quickly being sidelined purely by ability rather than ambition. I'd rather do a good standard car than a sh**#y modified one. I don't know how some people can be just buying the kits each week and then leaving it aside. I'm so excited recieving my issue and the most I can stand doing is putting it down for a day or two while I wait for Kev or others hints and tips to be posted (not that I want to rush them ). Sometimes they see things I wouldn't, so as a newbie I really need to slow down and be patient. But it is simply really exciting week after week. Don't know what's going to happen over the Christmas period if like me you get your issues from the news agent. Perhaps someone could let me know from experience. Cheers for now. Cheers for the mention mate! you are doing a great job with your build! I'm a newbie to this... so loading myself with as much info as possible is probably me talking like I know what to do rather than doing it!  I think when it comes to stuff like this I'm a perfectionist, and don't stop until I'm happy! Just about to post an update on the DTM car thread, been at it all day! Oh and yes, its very difficult getting parts and putting them in a box in the cupboard! but I've got loads of builds to crack on with Keep up the good work mate, I'll help as much as I can! Building the McLaren MP4-23
|
|
|
Rank: Pro Groups: Joined: 24/08/2009 Posts: 48,051 Points: -13,308
|
Hello Jack, Thanks for the frequent compliments in your post, much appreciated. As Danny has said in the post above, I too am a perfectionist, which is why my build looks neat and tidy I suppose, I'm just not happy unless everything is perfect !! A good way to be though, as the search for perfection and taking as long as it takes to get it right, are two qualities that will always bring good results ?? Your build looks equally neat and tidy Jack, so well done to you mate !!  Kev
|
|
|
Rank: Amateur Level 1 Groups: Registered
Joined: 01/12/2011 Posts: 34 Points: 102 Location: London
|
Hi everyone, These are photo's of my dry test fit of the assembly in issue 38. Typically I would test fit all the parts before committing to glue as in these photos. From this test fit, I'm confident enough to say that the assembly doesn't seem too technically difficult, however, my biggest fear again is glue over run. Some of the faces, particularly around the rear skirt are highly visible on both sides. The other problem I see is that the two pin fixing of the rear skirt doesn't really support the parts in place, therefore they tend to move about quite a bit. [ 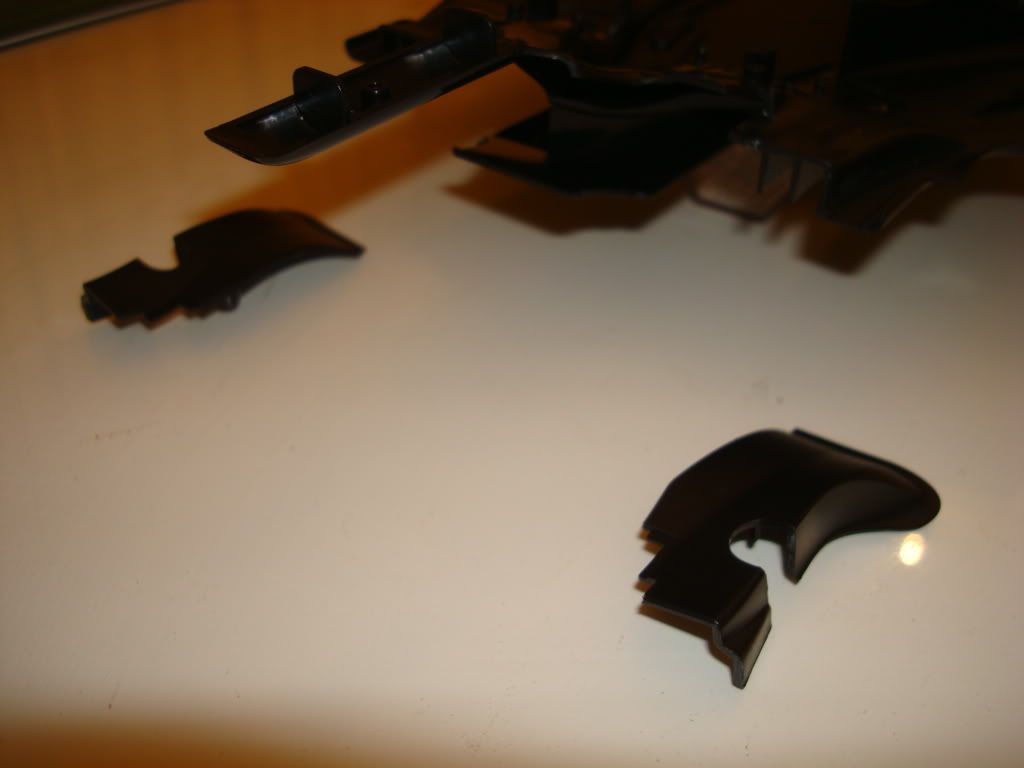 ] This is the components of issue 38 laid out at the rear of the floor tray. [ 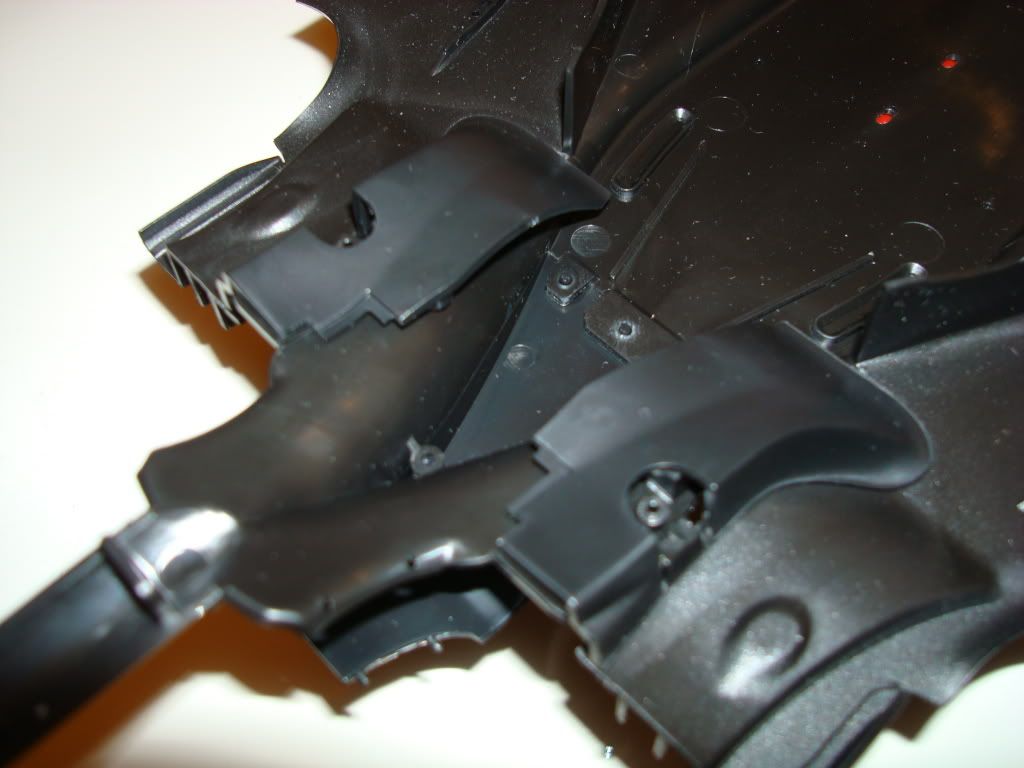 ] My test fit of the components in place. Yes, that is dust on my build!!!! Sorry, I don't know why, it was tightly packed away. [ 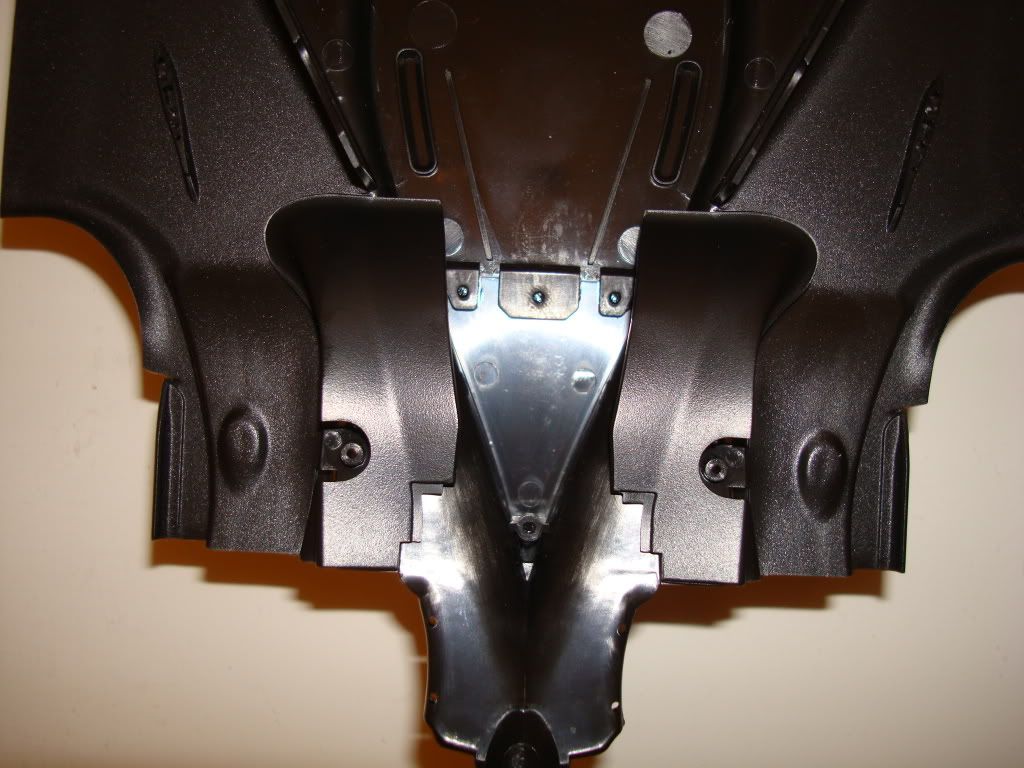 ] Fitted and in place it looks OK and striaght. They fit quite well but I did notice that they rock a bit. I think the trick with these two parts is to get the visible joint with the floor tray perfect. Glueing shouldn't be too difficult but the parts aren't exactly easy to locate so I think I will try it a few times before applying glue. [ 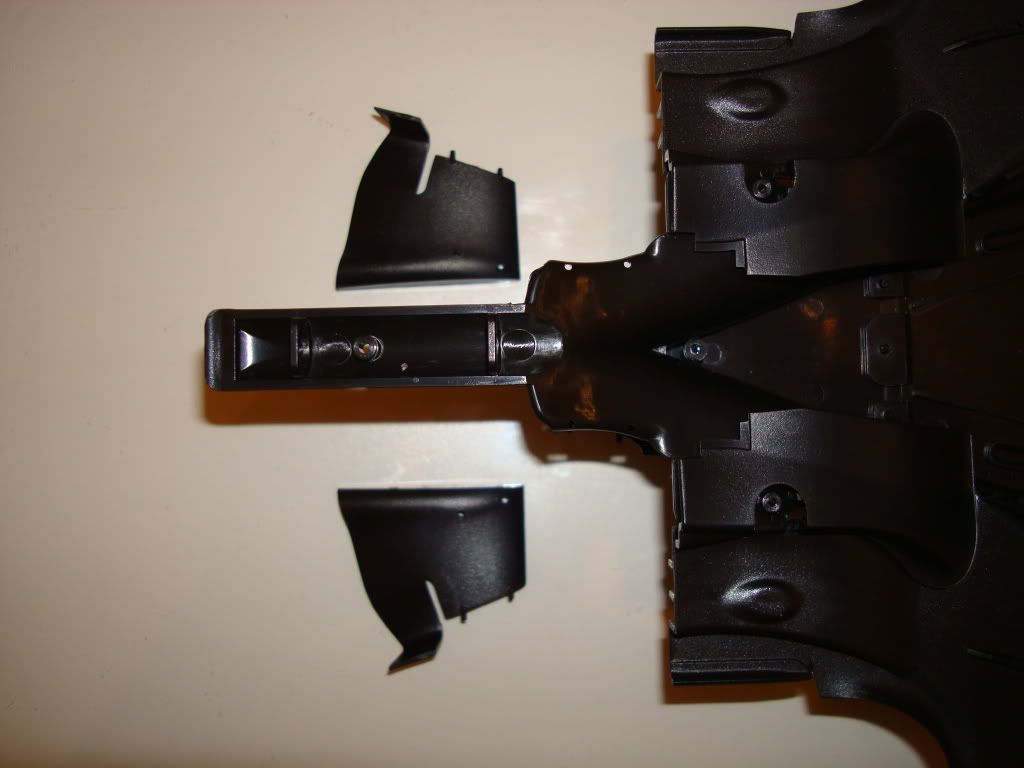 ] Components from Issue 37 laid out on each side of the base plate. [ 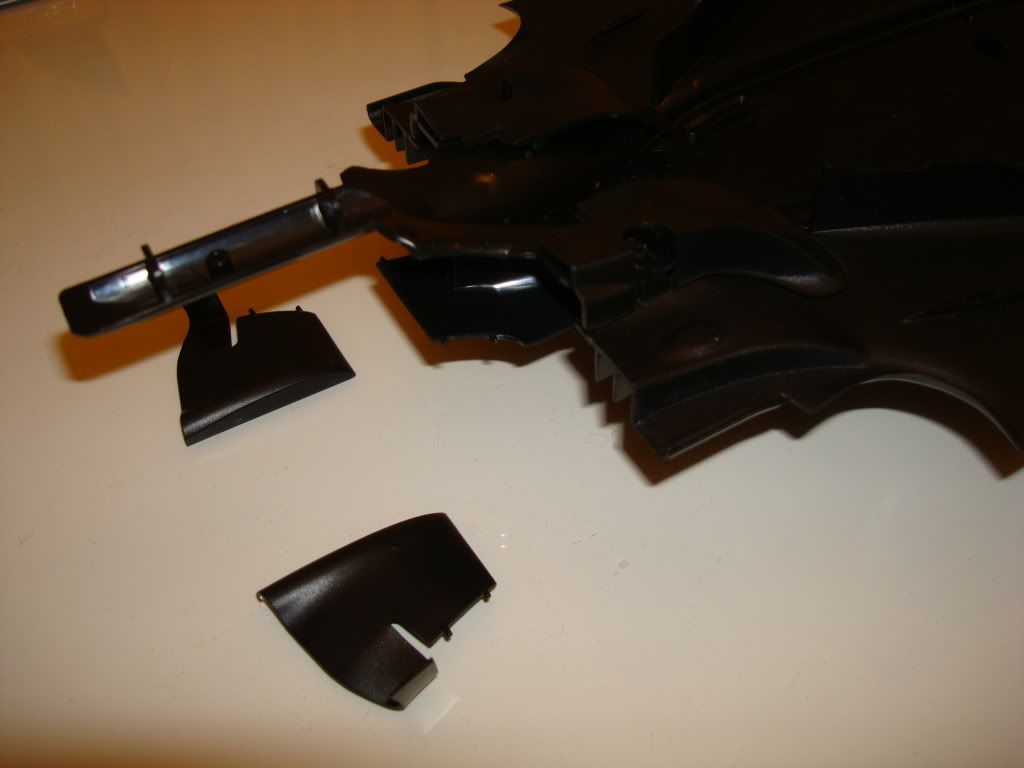 ] [ 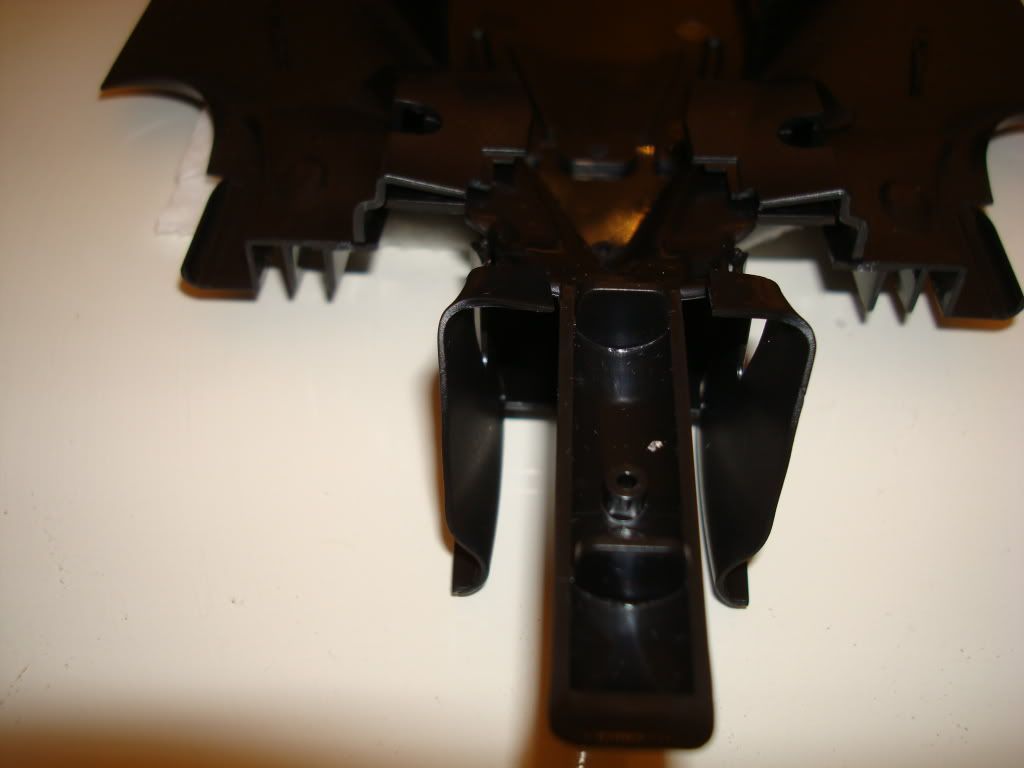 ] I think attaching these side skirts is going to be tricky. The two pin fixing has a lot of slack in them and they are going to be highly visible from the rear so getting them straight is going to be critical. You can see in the test fit that they're not evenly spaced. Time and patience I think is the trick but if anyone has any tips on how to make sure you get the alignment right I would be ahppy to hear about it.
|
|
|
 Rank: Super-Elite   Groups: Registered
Joined: 24/04/2010 Posts: 5,787 Points: 17,662 Location: Stafford, United Kingdom
|
Good stuff Jack, great build  MWG BUILD DIARIES: HMS VICTORY, SOVEREIGN OF THE SEAS, SAN FRANCISCO II, HMS HOOD, HMS ENDEAVOUR LONGBOAT, HMS VICTORY X-SECTION, 007 DB5, NISSAN GTR, CUTTY SARK, RB7, AKAGI, BARK HMS ENDEAVOUR, HUMMER H1, MITSUBISHI ZERO.
|
|
|
Rank: Amateur Level 1 Groups: Registered
Joined: 01/12/2011 Posts: 34 Points: 102 Location: London
|
Thanks MWG. After yesterday's dry run I've made the moves and finished week 38. I noticed yesterday that there were some burrs between the two top pins of the rear skirts. After carefully taking them off I gave it another test fit and found the top junction was a lot neater. These are my photo's after week 38. Oh yeah, I cleaned off the dust. I think its the storage packing so I think there might be some changes there. [ 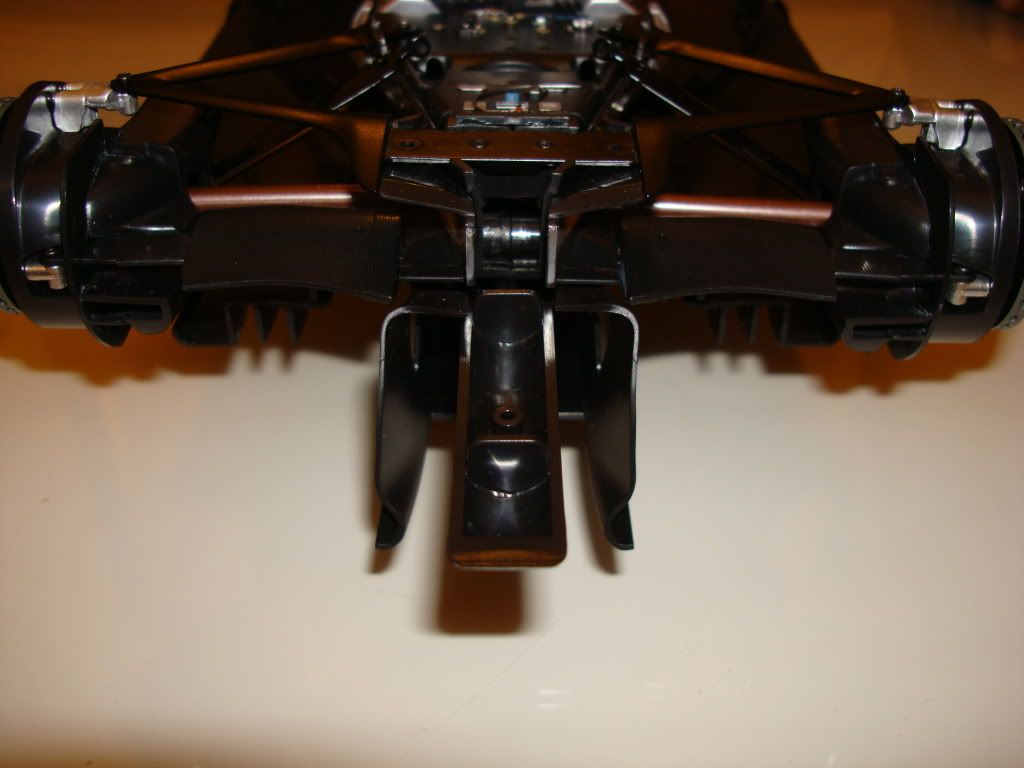 ] Notice that the right hand side skirt sits slightly higher than the left. I put the two pieces back to back and found that the right side had a slightly different shape. I was a bit worried about applying too much pressure trying to re-shape it so I decided I can live with it.
[  ] That's not a bad looking rear end! Pretty square and neat. I'm happy with that. PS Kev, notice the toothpicks under the car
|
|
|
Rank: Pro Groups: Joined: 24/08/2009 Posts: 48,051 Points: -13,308
|
Hello Jack, Nice to see your progress and looking very neat and tidy, well done, thanks for posting the photos and yes, I had noticed the toothpicks !! Re your point about the two pin fixing being quite slack, I haven't had a chance to look at it properly yet, but I presume you are talking about the pins being smaller than their receiving holes, which thus gives the sloppy fit ?? If that is the case you could always try snipping off the plastic pins then using a short length of steel pin (such as a cut down sowing needle or dress pin) and a Micro Drill bit in a pin vice, just drill a hole the same size as the steel pin about 2-3mm to the side of where the snipped off plastic pin was, then a corresponding hole in the opposite place where the part fits to the underbody. Make sure the holes line up properly then superglue the steel pin into both parts as you mate them together and not forgetting to add a bit of glue on therest of the mating surfaces and that should give a nicer, tighter fit, but you will need to be accurate with the drilling. You could instead try filling the original hole, waiting for it to harden properly and then drilling it out again to the same size as the plastic pin, but why bother with filler and the original plastic pin, when it is easier to drill new holes and use a stronger metal pin ?? Hope I haven't made that too difficult to understand what I am getting at ?? Hadn't noticed the slight size difference in the two skirt parts but I do remember mentally noting that the top of the left skirt did sit slightly higher and more towards the rain light housing than the opposite side. Will definitely be checking the sizes when I get round to building it, so thanks for pointing that one out, it is much appreciated. Cheers Jack. Kev
|
|
|
Rank: Amateur Level 1 Groups: Registered
Joined: 01/12/2011 Posts: 34 Points: 102 Location: London
|
Kev, great comments about the pins, but unfortunately I think that sort of building is way, way out of my grasp.
The pins just about clip in, and they hold the pieces in place quite well, but they rock from front to rear. The problems with this is most noticable when you turn the base over and look at the lines of the undertray. If you rock the skirts back and forward while turned up side down you will see that the lines of the undertray end up with a dog leg in it if not positioned correctly.
So then you have three problems. Getting the top pins in, then the bottom ones while positioning the skirts so that the lines are nice and neat. I did several dry runs putting the parts in place and finding where to place the pressure before committing to glue. Probably not all that tricky for the pro's, but for me, I found it quite a difficult assembly. Think thats why I was so happy with the look of the rear assembly.
Don't know if anyone else has noticed that there are some really fantastic and complex lines starting to come together around the rear assembly. The detail is so impressive and there is always something to look at.
Oh yeah, has anyone noticed the parts for the next issue? Can't wait for that!!!
Only problem is, I think this baby is about the outgrow its current accommodation.
|
|
|
Rank: Amateur Level 1 Groups: Registered
Joined: 01/12/2011 Posts: 34 Points: 102 Location: London
|
Here is my week 39 progress. In this weeks assembly I used some very valuable advice from Kev and I think the results are brilliant. Although the assembly is quite simply putting two halves together, it could be an absolute disaster to get glue on the highly polished surfaces. [ 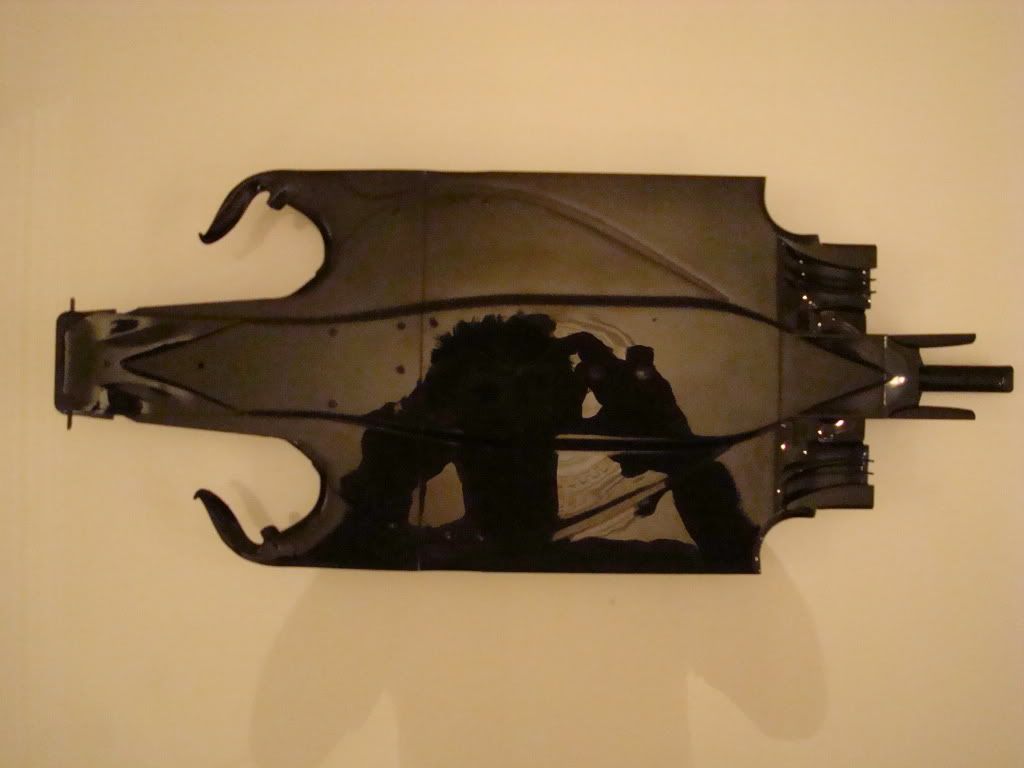 ] This is the finished product from week 39. Sorry for my reflection but I don't have the photography skills of others. [  ] Fixing the panel covers was not a difficult task. A small amount of glue on a toothpick (thank you Kev) to each fixing point was all I allowed. I started placing it from the thinnest end to front because in the dry test it fell into place nicely this way. [ 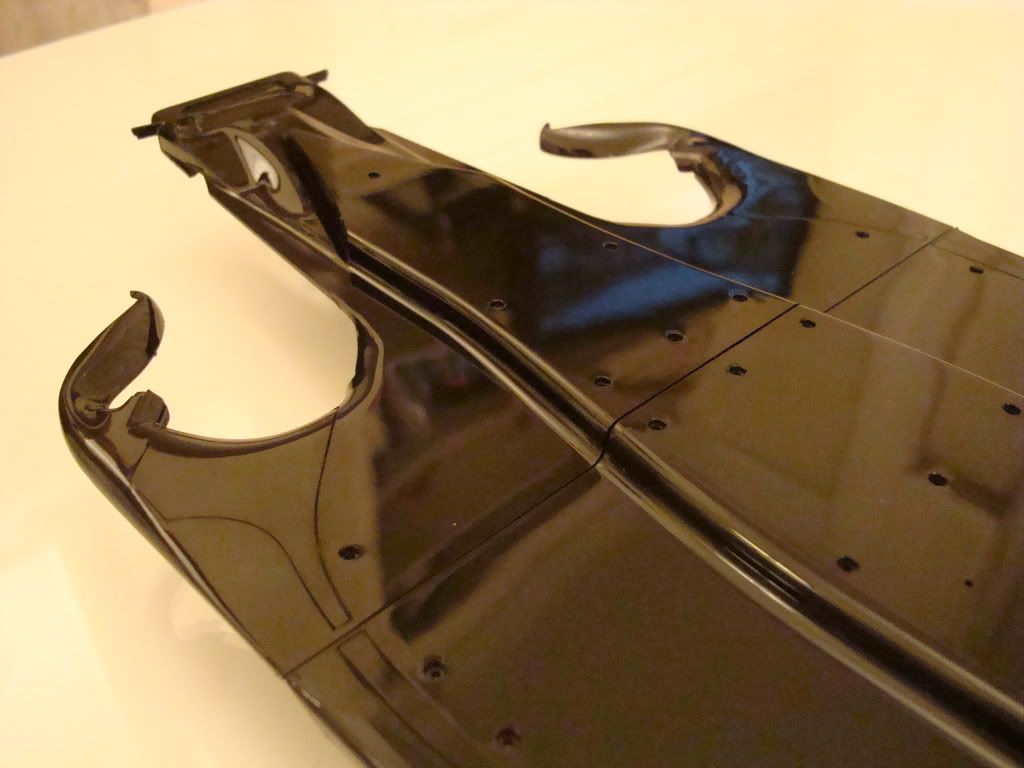 ] Once the covers were set I looked at the floor tray assembly. What I found was that as I applied pressure to one side, the other would pop out of alignment. So, my decision was to fit the sections together dry and then glue fix it in three stages - middle, right and then left. I also decided to glue it from the rear and allow the glue to cover the pins by capilary action. By doing it in sections I was able to place adequate pressure on that section while the glue set. I allowed each section to fully dry before glueing the next area so that it didn't pop apart and cause problems. Patience and time are the true test with this build. [ 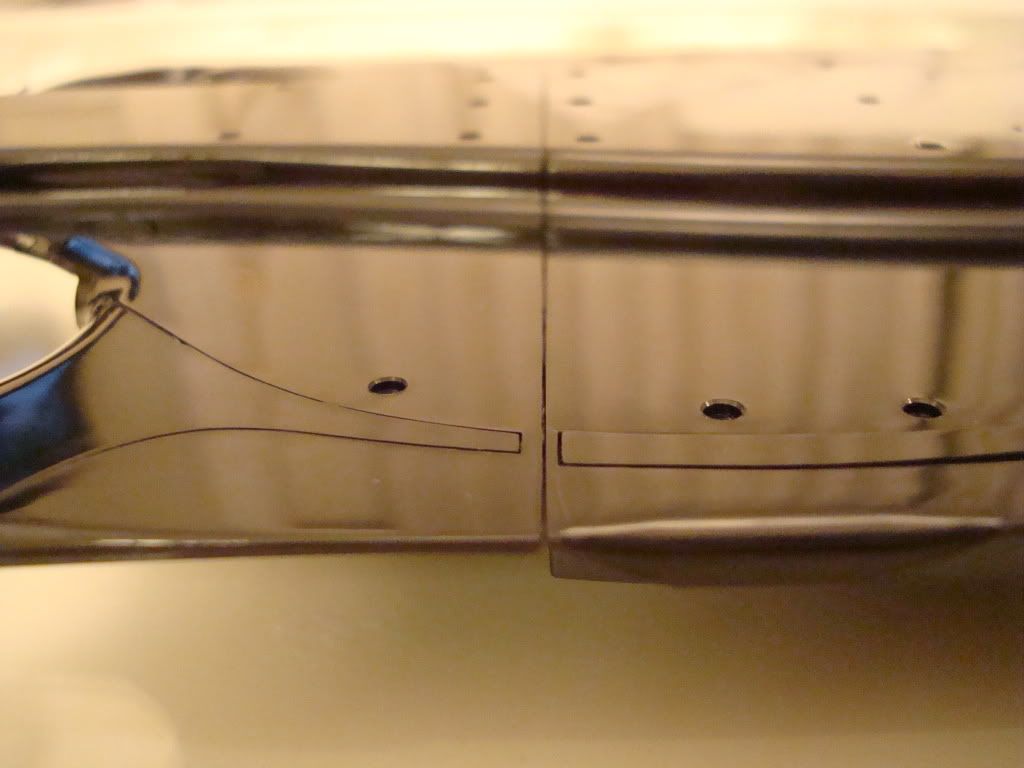 ] I'm really pleased with the outcome because I have achieve neat, aligned edges and consistant, flat and clean undertray. I'll be happy if we get a break from shiny parts for a while....they're quite unnerving. Hope you like my photos this week. Merry Christmas and a very happy new year to all forum friends and readers!
|
|
|
Rank: Pro Groups: Joined: 24/08/2009 Posts: 48,051 Points: -13,308
|
Hello Jack, Some excellent work there and apart from the one with your reflection there is nothing wrong with your photography skills and they are cetainly no worse than mine I have to say. See how nice it feels when you achive a very neat joint with no ugly glue spills and you are absolutely right in the way you approached the task, a bit at a time then let it dry before doing a bit more, who says that you have to do a joint in one go anyway. If you achieve a better result by a careful thought out approach then that has to be the correct way methinks. Modelling is easy if you think things through properly and only make a move when you know exactly how you are going to do it. Patience and forethought are the main ingredients in achieving a nice result from your work. Sorry, sound like the master talking to his pupil on the old Kung Fu TV series !! Good stuff Jack and thanks once again for the compliments. I will try to get some more of mine up soon though very busy and it seems I will have to catch you up now !! Merry Christmas and a Happy and Prosperous New Year to you !! Kev
|
|
|
Rank: Super-Elite Groups: Registered
Joined: 24/04/2010 Posts: 5,787 Points: 17,662 Location: Stafford, United Kingdom
|
Great Build Jack MWG BUILD DIARIES: HMS VICTORY, SOVEREIGN OF THE SEAS, SAN FRANCISCO II, HMS HOOD, HMS ENDEAVOUR LONGBOAT, HMS VICTORY X-SECTION, 007 DB5, NISSAN GTR, CUTTY SARK, RB7, AKAGI, BARK HMS ENDEAVOUR, HUMMER H1, MITSUBISHI ZERO.
|
|
|
Rank: Pro Groups: Joined: 24/08/2009 Posts: 48,051 Points: -13,308
|
Jack, there's some intricate work on building the damper unit coming up shortly which might calm your nerves
|
|
|
Rank: Amateur Level 1 Groups: Registered
Joined: 01/12/2011 Posts: 34 Points: 102 Location: London
|
Hi everyone, Happy to be back guys. I hope you all had a great christmas. I've been on a kind of forced break from my build due to problems with delivery of issue 40, which I now know has absolutely nothing to do with issues 41, 42 & 43 - of which the photo's below will show. As Mr T wrote in my last post, the rear damper unit has certainly had some intricate work away from previously nerve racking shiny black - good call Mr. T ! But that said, the rear damper has some really small and thin parts that could quickly ruin your day with just a small slip of the knife or clippers. But, as the photos show, I have made it through with some pretty pleasing results if I do say so myself. [ 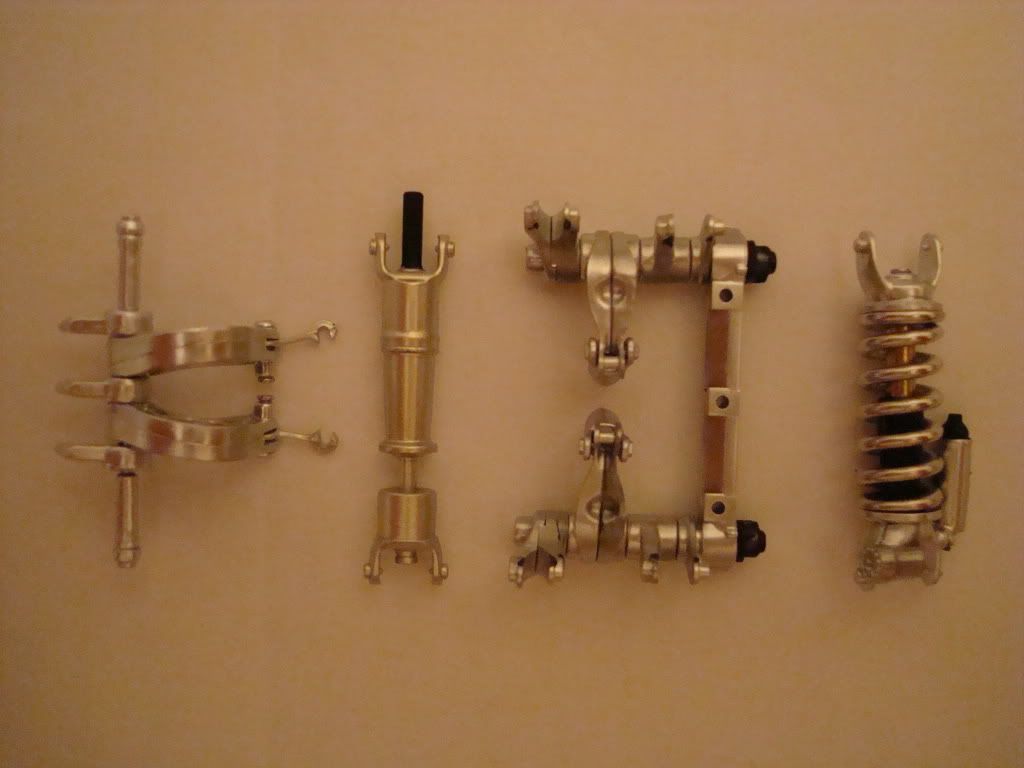 ] Most of this went together quite well. I took a lot of time assembling the torsion bar set (left hand end of the photo). Getting the two halves of the torsion bar fixed together without over splilling glue onto other parts without it being visible at all I found to be quite tricky. I used tape as they suggested in the instructions and after a number (probably 10 or so) of dry runs had everything fixed in place enough to easily slide the torsion bar into place with a really small line of glue applied straight down the middle of the torsion bar half using the tip of a tooth pick. [ 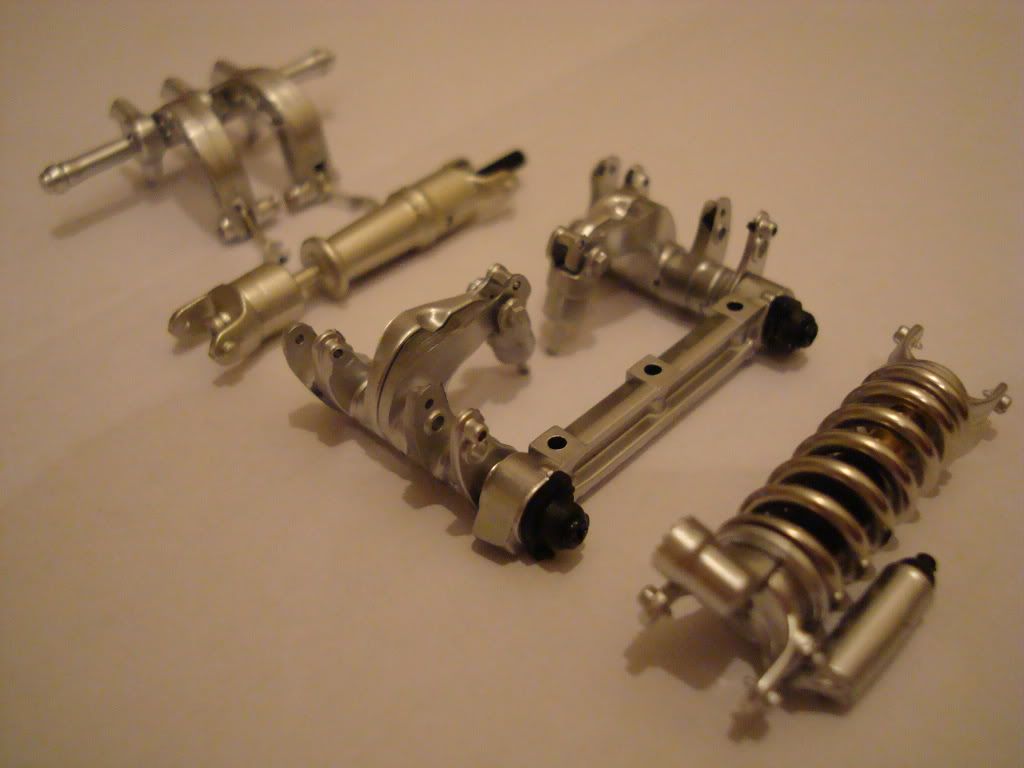 ] One little detail I found that needed some extra attention was fitting the rotational damper (part number 6). Its the blurry bit right at the end of the spring on the right hand side. A quick fit on the dry run showed that the part didn't sit as flush with its corresponding edges as it probably could. It just didn't seem to sit far enough back. So I slowly sanded off some of fixing area until it was flush on both edges. I think it ended up better and as a part that seems to have quite a bit of detail and tends to catch your eye even in the promo photos, I think it was worth the extra attention. Some people may not agree with this approach, but I haven't glued together any of the parts on the crank linkages (main piece in the centre of the photo). Screws fix everything together from each end and you can construct the whole thing without glue and it holds together as good as with. I decided that because its an independant piece, I can always take it out later and glue it if need be. Issues 41, 42 & 43 has been really good fun while being quite trying and fiddly. I hope to have issue 40 and 44 by Wednesday so I'll be looking forward to that. Hope you like my progress photos. Cheers.
|
|
|
Rank: Super-Elite Groups: Registered
Joined: 24/04/2010 Posts: 5,787 Points: 17,662 Location: Stafford, United Kingdom
|
Hi Jack, It really is a pleasure to see your work Well done, Regards Mike MWG BUILD DIARIES: HMS VICTORY, SOVEREIGN OF THE SEAS, SAN FRANCISCO II, HMS HOOD, HMS ENDEAVOUR LONGBOAT, HMS VICTORY X-SECTION, 007 DB5, NISSAN GTR, CUTTY SARK, RB7, AKAGI, BARK HMS ENDEAVOUR, HUMMER H1, MITSUBISHI ZERO.
|
|
|
Rank: Amateur Level 1 Groups: Registered
Joined: 01/12/2011 Posts: 34 Points: 102 Location: London
|
Thanks for your kind comments Mike. Interstingly, know-one has posted photos of their steering wheel  . I'm not getting my parts by subscription so I won't be getting the steering wheel or other promo gifts so it would be intersting to see - if anyones up to it. Dont worry about the magazine binder or cap - I think I can live without seeing those ! Anyways, my newsagent still hasn't obtained a copy of issue 40 but hopefully it will arrive soon. Otherwise I'll just organise a copy directly through de ag. Although ther isn't much to "put together" in issue 40, you still feel like you do a lot because the drivers cockpit base is just so big and it makes a huge difference. It was also good to put some of the rear damper unit in place. There's no real problems doing either of these. The rear damper requires a bit of manouvering, but the parts are fairly solid and simply slide and clip into place. You'll probably notice that the joints at the end of the suspension arms that screw in on each side of the damper piece don't really align with the angle of the damper as in this photo. [ 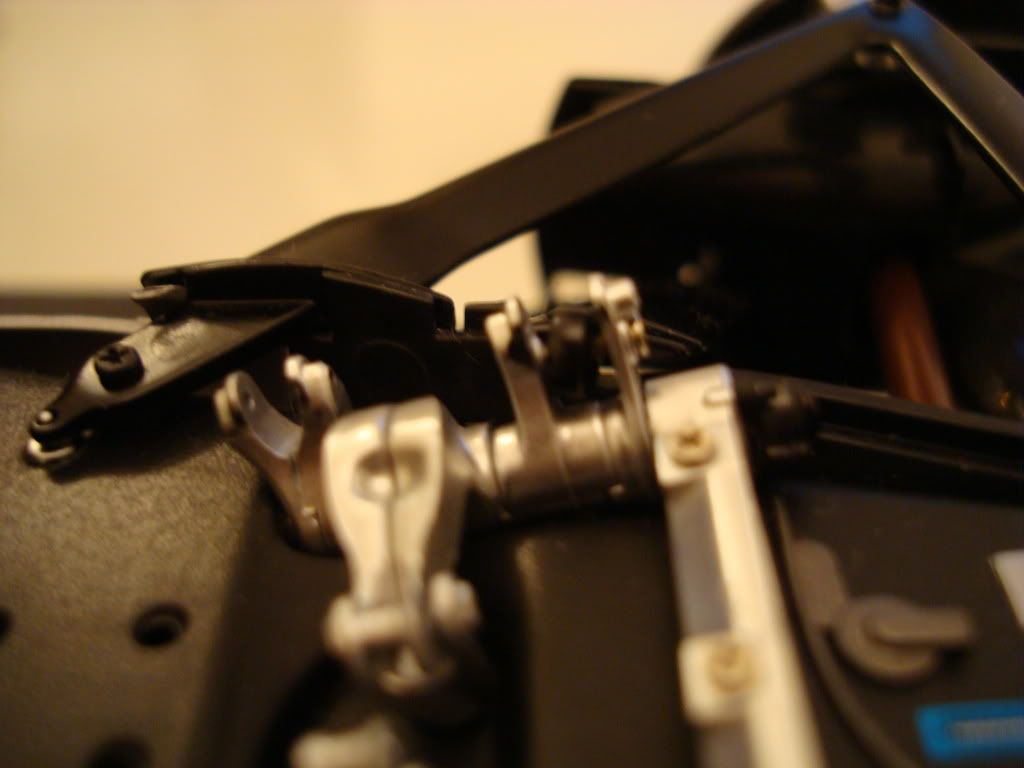 ] Because the parts are cast I didn't want to risk snapping off the rod end trying to twist it to properly align. I thought it might be a problem, but in the end the screws actually went through easily. The rest of issue 44 is quite simple and the cockpit tub went together easily. Take Kev's advice again and go easy with the glue on the locating pins. There quite big in relation to other pins done in other areas and you could quite easily fall into a trap of over applying glue. The finishes are shiny black again and any over runs will be visible. I'm happy to say I had no over spills. It's so good to have the advice from others go through your head at every step. The tub is just sitting in place without being fixed, but its really impressive and starts to fill the floor pan out nicely. There's not a lot to photograph, but I hope you like these. [  ] The cockpit tub in place on the floor pan. Those who have built his will know that it is quite impressive and bigger than expected. [ 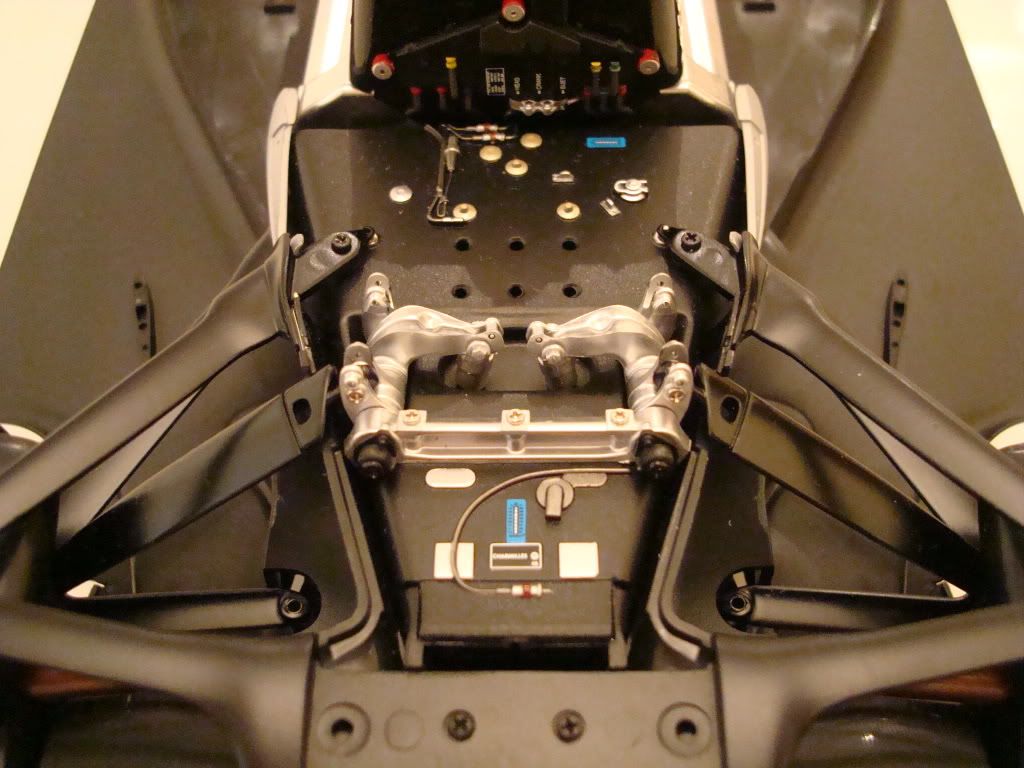 ] The first part of the rear damper is in place and connected to the suspension arms. The rear end is quite stiff now and the rear section of the car is looking really detailed. Can't wait to see what it will look like with the rest of the damper components in place. My last note for this week is that I finally got some lint free gloves. Again, another one of Kev's suggestions . I was getting pretty tired of polishing off the finger prints from the shiny black areas and with some silver finishes coming along soon I dont want to experience finger print stains like others have reported in earlier issues. Cheers.
|
|
|
Rank: Pro Groups: Joined: 24/08/2009 Posts: 48,051 Points: -13,308
|
Hello Jack, Excellent work there my friend, looking very good indeed, very tidy. Of all the McLaren builds on here, yours is the one that I look forward to reading about the most, as the updates are usually very informative and interesting. Your photography is coming on leaps and bounds too, looking quite professional - well done !! Although I was usually on top of the build each week as each issue arrived, I am now well behind most of you with my build as I have been very busy since my last update and haven't been able to do any of the build since just before the gold foil/airbox stage. I will still be very busy with work for the next month or two but I seriously look forward to getting back on the Mac as soon as I can. I have some changes and enhancements that I will be doing as well, so will need time to get them sorted as well, but I can't wait to get going on it. Thanks for posting the update, Jack, well done once again and keep 'em coming - I look forward to them !! Kev
|
|
|
Rank: Super-Elite Groups: Registered
Joined: 24/04/2010 Posts: 5,787 Points: 17,662 Location: Stafford, United Kingdom
|
Hi Jack Great build Great photos I will post a photo of the steering wheel tomorrow for you Regards Mike MWG BUILD DIARIES: HMS VICTORY, SOVEREIGN OF THE SEAS, SAN FRANCISCO II, HMS HOOD, HMS ENDEAVOUR LONGBOAT, HMS VICTORY X-SECTION, 007 DB5, NISSAN GTR, CUTTY SARK, RB7, AKAGI, BARK HMS ENDEAVOUR, HUMMER H1, MITSUBISHI ZERO.
|
|
|
Rank: Pro Groups: Registered
Joined: 01/07/2011 Posts: 383 Points: 1,194 Location: Birmingham
|
Hi Jack, Great build. There are already a couple of pictures on the forum showing the steering wheel under:- http://forum.model-space...aspx?g=posts&t=3438
http://forum.model-space...aspx?g=posts&t=3388
The steering wheel is ok, but nothing to shout about. Ta Ian
|
|
|
Rank: Super-Elite Groups: Registered
Joined: 24/04/2010 Posts: 5,787 Points: 17,662 Location: Stafford, United Kingdom
|
Jack, Here are the pictures of the steering wheel I promised you Regards Mike MWG attached the following image(s): MWG BUILD DIARIES: HMS VICTORY, SOVEREIGN OF THE SEAS, SAN FRANCISCO II, HMS HOOD, HMS ENDEAVOUR LONGBOAT, HMS VICTORY X-SECTION, 007 DB5, NISSAN GTR, CUTTY SARK, RB7, AKAGI, BARK HMS ENDEAVOUR, HUMMER H1, MITSUBISHI ZERO.
|
|
|
|
Guest
|
 US
US

