|
|
 Rank: Amateur Level 1 Groups: Registered
Joined: 01/12/2011 Posts: 34 Points: 102 Location: London
|
Thanks again for the photo's Mike. I can see why you were so looking forward to getting your wheel. Kev, I'm enjoying my ten minutes of fame while your distracted. We can't wait to see your posts again. The indication of some "changes and enhancements" sounds very interesting. So here is my efforts for issue 45 - even though you don't actually do anything with the parts in issue 45  . I have to admit though, getting the rear damper in is supurb. I think the rear end is absolutely beautiful in its simplicity, detail and fit. [ 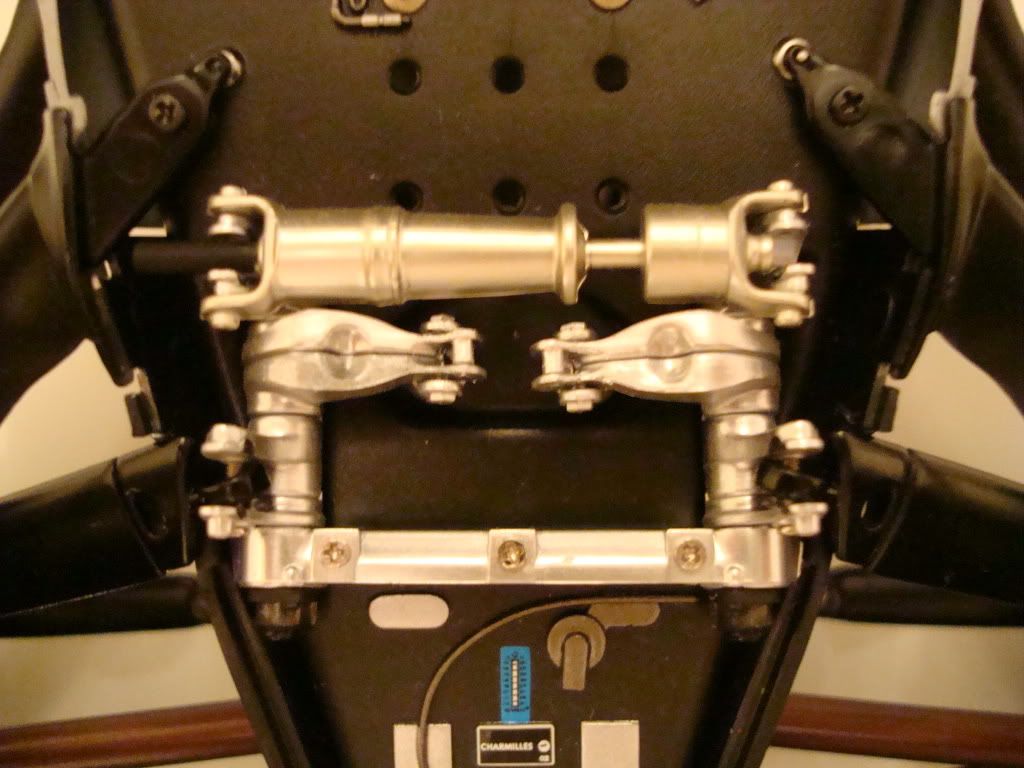 ] There's items 1 & 2 completed and the inertia damper is in place. I was a bit nervous applying pressure to the pins, but once you get one side in you have a feel for it and the other one is easy. [ 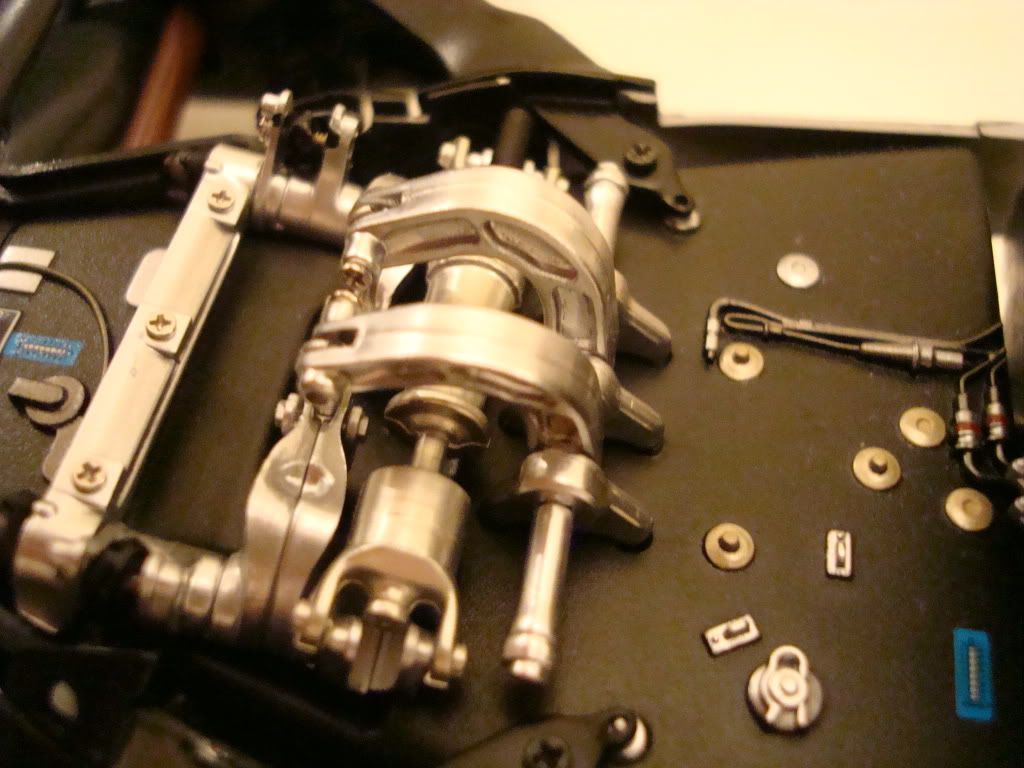 ] Steps 3 to 5 and these were a little harder. The fine hooks dangle everywhere while you try and get yourself sorted. I had parts in the wrong hand and facing the wrong direction, all while these tiny pins tempted fate. I found that once you got one side hooked on, you lost the room to angle the other side enough to hook it into place. To get it in, I slightly lifted the torsion bar crank upwards. This gave it just the right angle to slip easily into place. A tiny bit of glue on each of the mounting bracket pins and as you can see, no excess runs or marks. Beautiful  ! [ 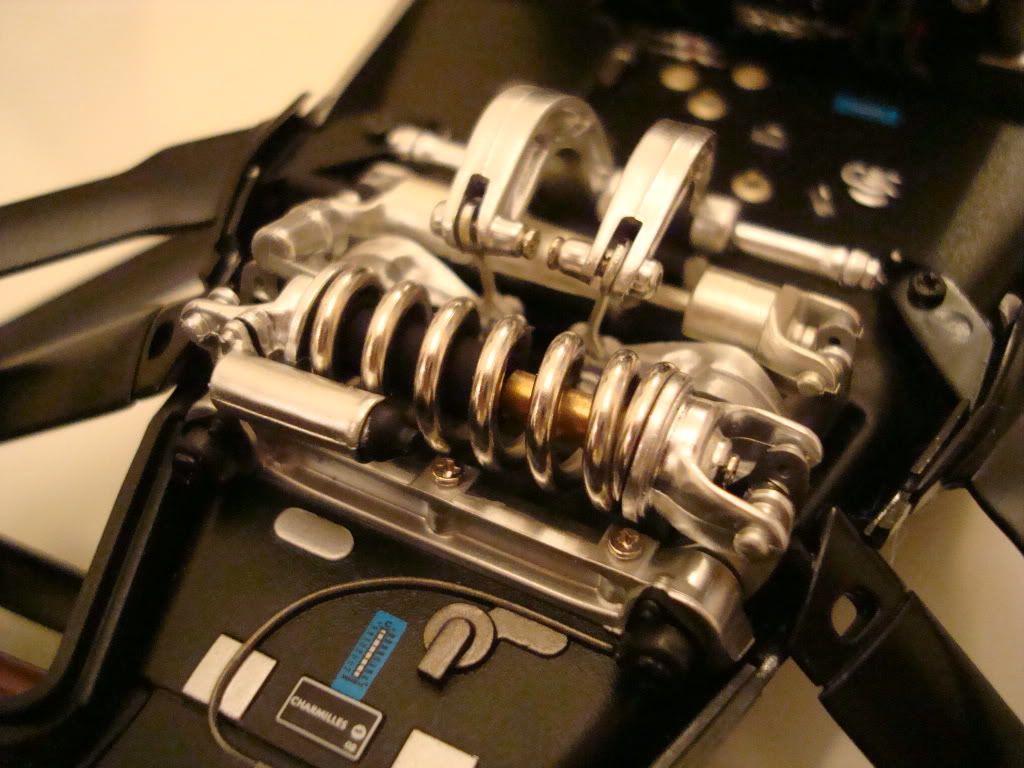 ] Fitting the element damper was just like the inertia damper. You have the feel for the clips by now, so its pretty simple. That's it, all in place. Looks great! [ 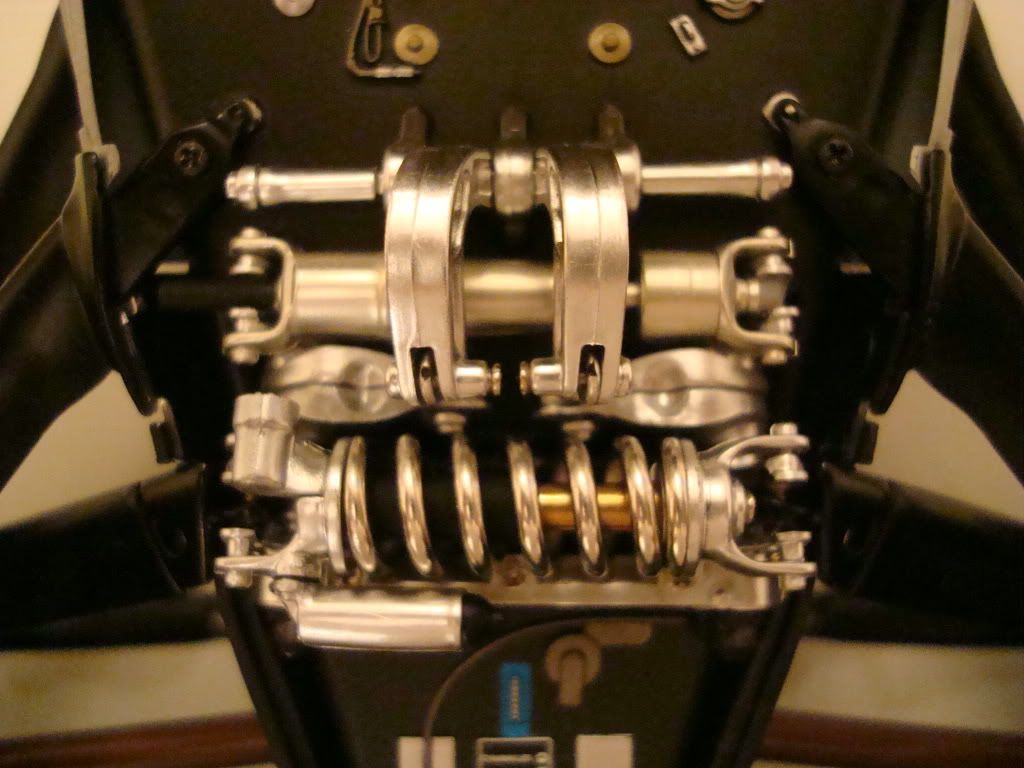 ] I think I just need some silver paint to touch up the ends of the crank relay rods. You can see the black marks where they came off the packaging. I haven't put the engine covers on this week. Don't know why not, they've been waiting forever to be fitted. Suppose it will give me something to do if we get snowed in this weekend . Cheers.
|
|
|
 Rank: Pro Groups: Joined: 24/08/2009 Posts: 48,051 Points: -13,308
|
Hello Jack, You are doing a superb job with your build and I still can't believe that this is your first real model build, which I think you mentioned when you first joined the forum ?? Though I may be wrong !! Looking very neat and tidy and a real credit to you, keep up the good work and thanks for holding the fort whilst I am busy. HaHa !!  A little tip for you here Jack that makes a small but noticeable difference to the appearance of your work. When tightening up a group of screws - such as the three in the top of the silver crossmember that bolts to the top of the gearbox - try to tighten them up so that each cross in the head of the screw is perpendicular or identically lined up to the next one. Same as with a cross cut screw where the flat head screwdriver slots all line up either verically or horizontally. It's an old craftsman thing that carpenters and the like used to do when fitting hinges and the like. Just makes everything look that tiny bit neater but you can see the difference once you have done it. Of course don't overtighten the screws just to achieve neatness, if you can't line them up by tightening then loosen slightly to achieve the same effect - as long as the parts are securely screwed together. Once you have done it, you will always be able to tell a craftsman's work by the way his screws are aligned !! Nice update and keep posting mate, I always look forward to them.  Kev
|
|
|
Rank: Amateur Level 1 Groups: Registered
Joined: 01/12/2011 Posts: 34 Points: 102 Location: London
|
Thank you so much Kev. I've just gone and reviewed all my screw head fixings and adjusted them....all  . I didn't notice them, but that's why I'm still a rookie. Once I posted the photos I noticed that the inertia damper was not clipped in correctly on the right hand side. Had you of not posted your reply I probably wouldn't have studied my photos and spotted not only the awful screw heads, but the misfit. And there was me saying it was all so simple. Your a champion Kev! Jack.
|
|
|
Rank: Pro Groups: Joined: 24/08/2009 Posts: 48,051 Points: -13,308
|
No worries Jack, always glad to help those who are willing to learn and help themselves improve. This is where the forum comes to life with members helping each other and it is a real pleasure for me to help where I can. Enjoy the build mate. Kev
|
|
|
Rank: Pro Groups: Joined: 24/08/2009 Posts: 48,051 Points: -13,308
|
Looks darn good Jack
|
|
|
Rank: Amateur Level 1 Groups: Registered
Joined: 01/12/2011 Posts: 34 Points: 102 Location: London
|
Hi everyone, Welcome to my photos for week 47. For those who have their issues, you'll probably know that its really just a box of bits, with very little to assemble and those parts you do, are very, very small. That said, I don't really mind how big or small the parts are or how many things you do, or do not, have to assemble each week. Big parts are good, but the small ones mostly represent the detail. To see the detail this week you almost have to have a magnifying glass. But if you have one, take a close look because it is brilliant. I dont' know how they print the text so small, yet so precisely. I'm really impressed and as always I take great care with assembling each and every peice, simply because it seems they have gone to a lot of trouble to carefully produce each and every piece for me to enjoy. [ 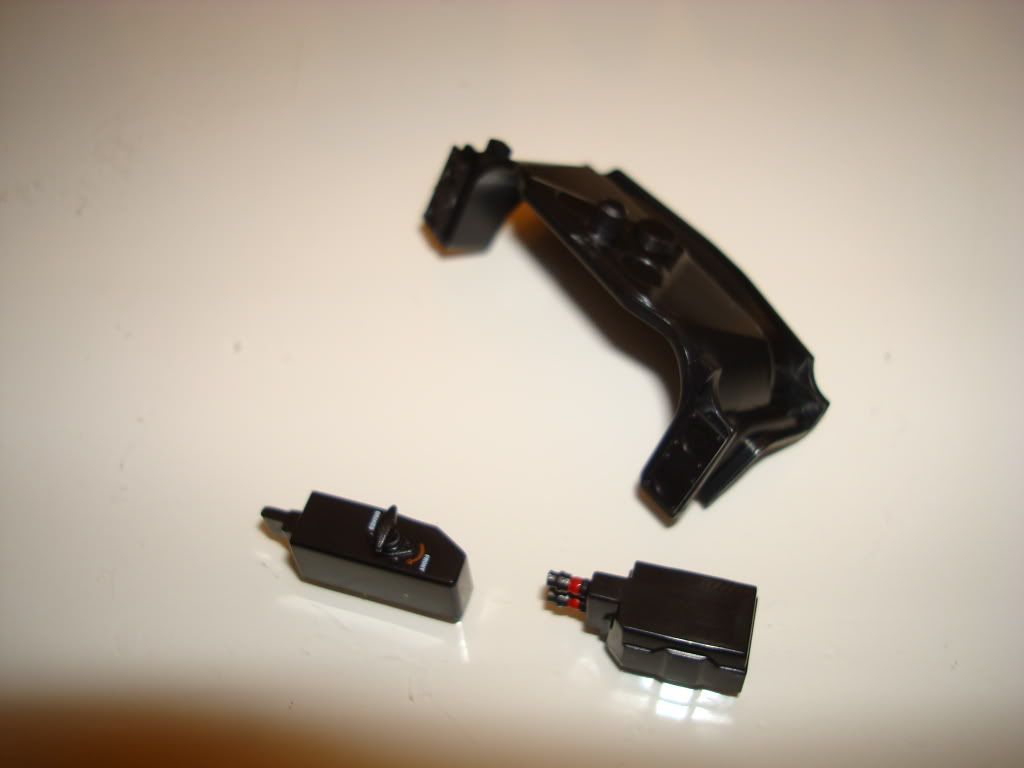 ] This is pretty much it for week 47. The photos aren't too clear because the parts are so small. The bottom left piece is the upper left switch panel. All you have to do is fix the lever that you can just manage to see. But, look at the text around the lever. Amazing!!. I was really careful not to put too much glue on the lever arm so as not to risk spilling onto the text. It would be heartbreaking to loose that detail. In the bottom right is the battery. You have to fix the connector on the LHS. Again, these are really small parts requiring small amounts of glue, and really steady hands. The larger piece at the top is the cockpit under panel. You can hardly see the switch panels you fix on the left and right hand sides because everythings black. They're not difficult to fix. I let the glue start to set for a few seconds before offering up the switch panels. That way, I only needed to slightly adjust the alignment at the sides before the glue started setting. [ 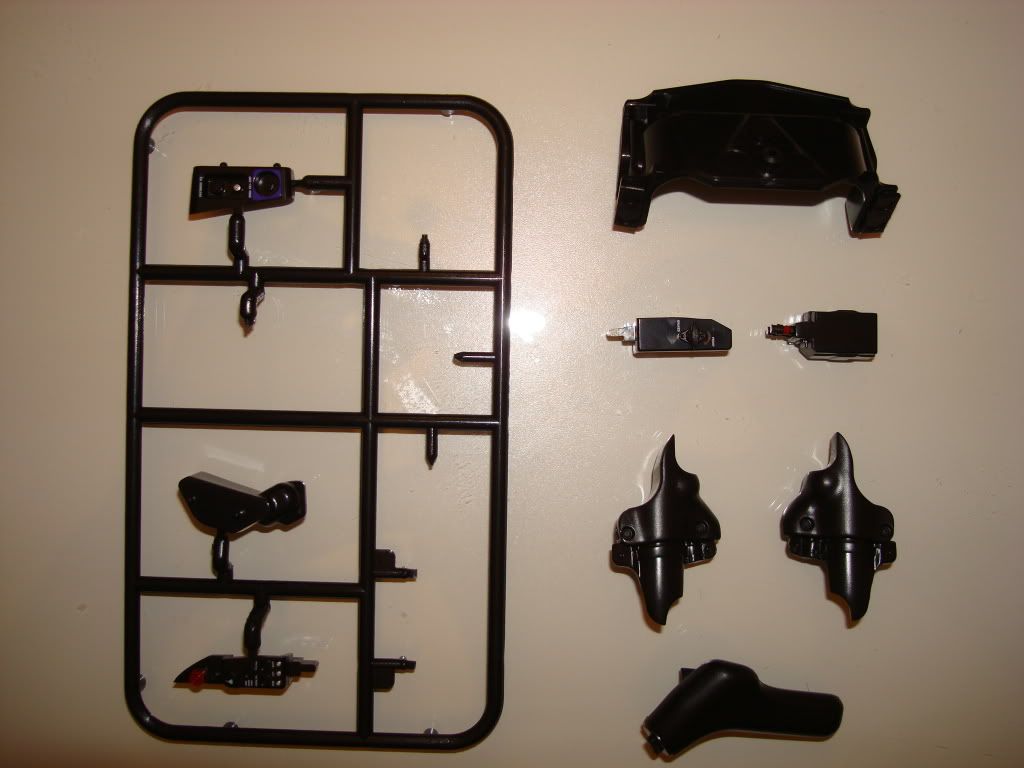 ] At the end of issue 47 your left with this handful of goodies. They tell you to cut everything off the sprue, but I left them just so I don't have to go hunting around my box next week for tiny little pieces. But, look at the detail on the upper right switch panel (bottom LH corner of the sprue) - that's what I'm talkin' about. It's tops! Apart from the small assembly this week, I have finally finished building my new accomodation for my car. Check it out below. [ 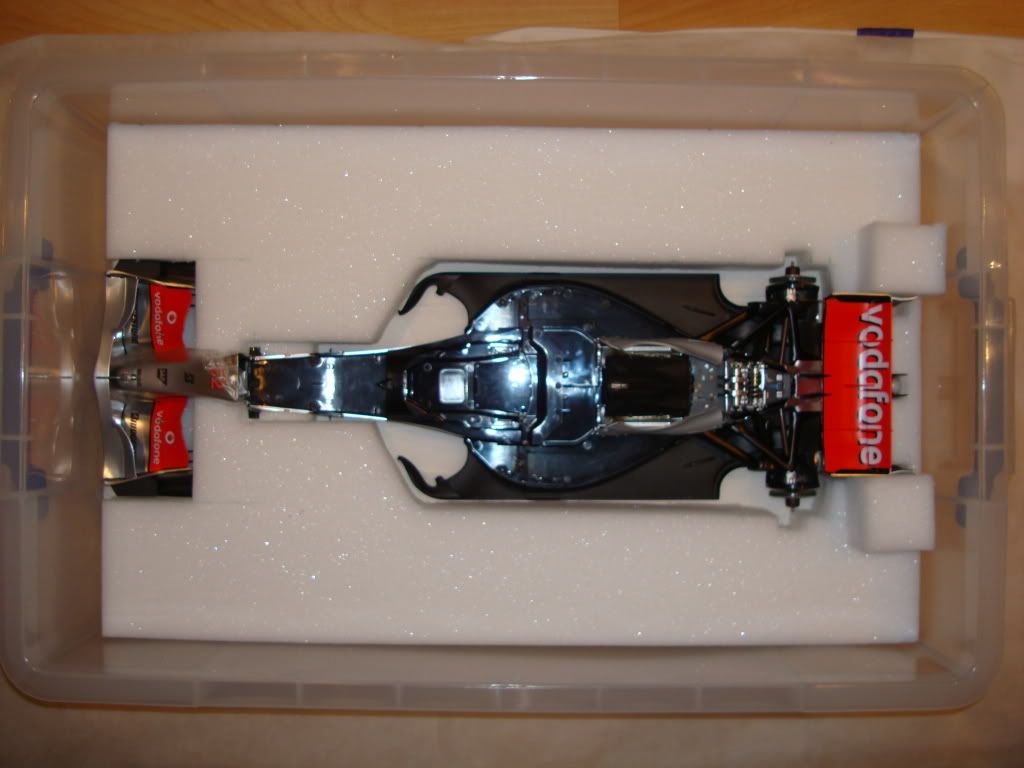 ] This is it. Becuase of the parts in 45 & 46, for the first time you can connect the front and rear together. This is the full length - 595mm. What I have done is bought a 50l storage bin from Rymans stationers. Then I went and bought a 1500l x 600w x 50mm thick junior foam mattress from IKEA. I have one full layer of foam on the bottom covered with soft cloth fabric for the model to sit on. Then, I set out and cut out the car base shape in the top layer, allowing different depths for things such as the front and rear wings to sit on so they are self supporting. You can still take out any part you want without having to do too much dismantling considering how much is now fixed together. Essentially, just remove the rear wing and you can pull out the complete engine and cockpit. Just two moves. [ 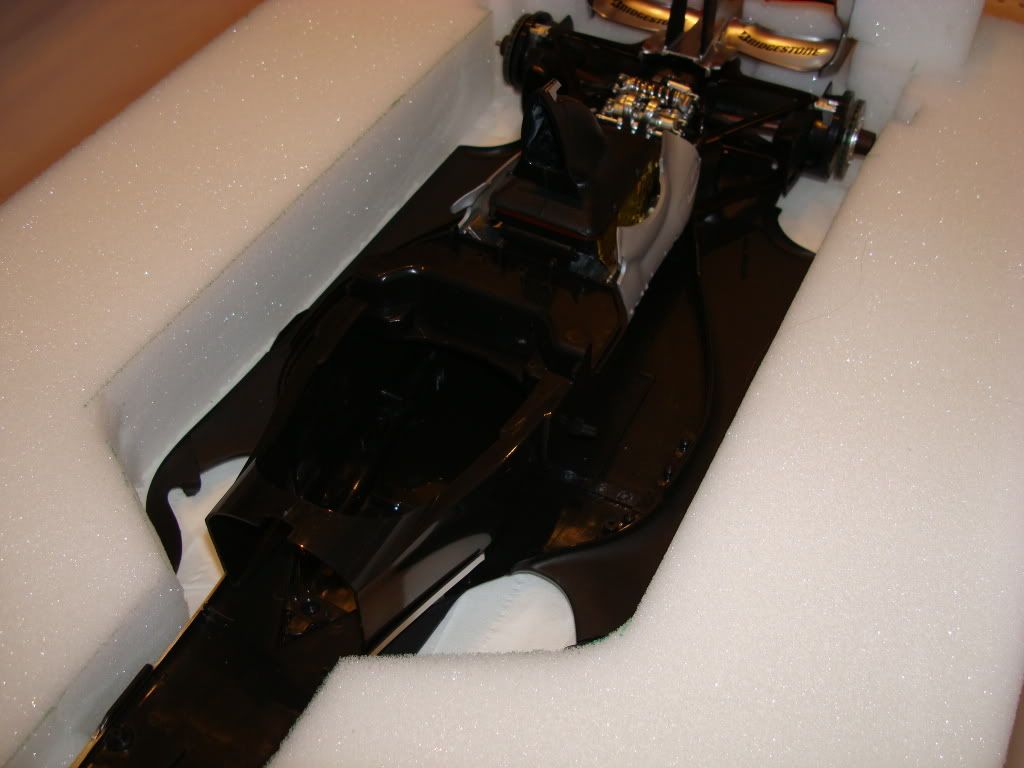 ] This is the main body sitting down into the top layer. The whole car is well supported, sitting flat and square. No more bits and pieces in boxes all over the place. The idea is that as the bodywork goes on I can shape the edges to follow the profiles. Any part that touches the foam is protected by a layer of white cloth. Oh yeah, good thing is that the box fits inside the removable cover that came with the mattress, so the whole thing goes inside a dust cover...nice [ 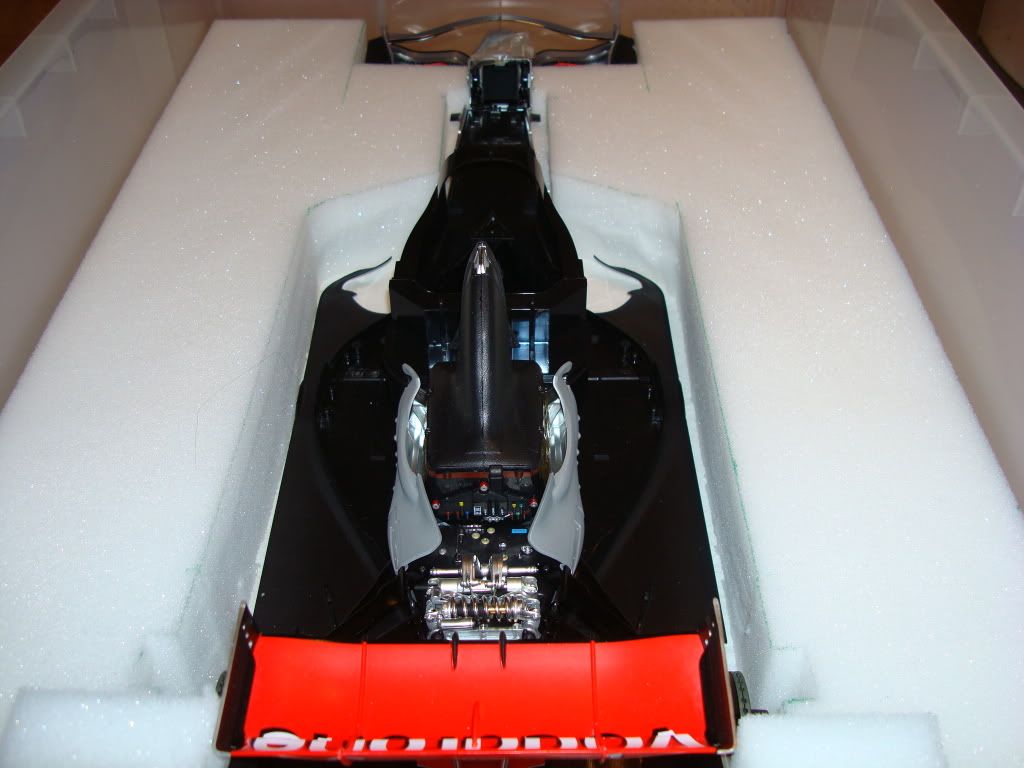 ] The full length looking rear to front. It really is big and something to see when finally assembled in a complete line. Well that's it for this week. I hope you like everything I've posted. More importantly I hope your all still enjoying your build as much as I am. Cheers until next week
|
|
|
 Rank: Super-Elite      Groups: Registered
Joined: 24/04/2010 Posts: 5,787 Points: 17,662 Location: Stafford, United Kingdom
|
Hi Jack, A really nice clean build I do like the use of the foam great idea, Regards Mike MWG BUILD DIARIES: HMS VICTORY, SOVEREIGN OF THE SEAS, SAN FRANCISCO II, HMS HOOD, HMS ENDEAVOUR LONGBOAT, HMS VICTORY X-SECTION, 007 DB5, NISSAN GTR, CUTTY SARK, RB7, AKAGI, BARK HMS ENDEAVOUR, HUMMER H1, MITSUBISHI ZERO.
|
|
|
 Rank: Vice-Master  Groups: Registered
Joined: 31/08/2011 Posts: 629 Points: 1,963 Location: Plymouth
|
Hi Jack, Awesome build there!!! Especially like the close up photos, almost as if you were phographing the full size car! Keep up the good work mate! Chris
|
|
|
Rank: Pro Groups: Joined: 24/08/2009 Posts: 48,051 Points: -13,308
|
Hello Jack, Some excellent work there as usual with some great photography - good stuff !! Love the storage system with the foam Jack, very well thought out and executed and the model looks as safe as a safe thing in a safehouse !!  Kev
|
|
|
Rank: Amateur Level 1 Groups: Registered
Joined: 01/12/2011 Posts: 34 Points: 102 Location: London
|
No progress photo's for this week....yet. I just wanted to post the following message: I GOT ISSUE 40!!!! Oh yeah! It's only a mere 9 weeks late. Happy days. That's all. Now down to catching up
|
|
|
Rank: Super-Elite    Groups: Official Builds, Administrators, Moderator, Global Forum Support, Registered Joined: 04/06/2011 Posts: 4,215 Points: 12,790 Location: ipswich
|
Nice build there....
I'm saving all my bits to build the completed car later on, but I'm learning a lot here.
I'm going to Carbon Fibre the various bits as well as extend the gold foil around and behind the driver. I'll use gold Bare Metal Foil and ditch the kit sheet as it isn't big enough.
One thing I WILL do though is fill the awful join line up the air box and re-spray it.
A lovely kit, but there are a few other joins I'll be trying to fix.
A tip about your Superglue haze - it comes off easily with nail polish remover, but make sure you get the 'gentle' stuff with NO acetone in it.
I've even used it to remove haze from clear parts etc numerous times.
I wouldn't try it on painted parts though.
Roy.
|
|
|
Rank: Pro Groups: Joined: 24/08/2009 Posts: 48,051 Points: -13,308
|
Hope you share your build with us once you get stuck in.
Superglue "fogging" is generally as a result of applying too much superglue in a confined space where there is little air circulation.
Certainly don't try nail varnish remover on painted surfaces, its a great stripper of paint!
|
|
|
Rank: Amateur Level 1 Groups: Registered
Joined: 01/12/2011 Posts: 34 Points: 102 Location: London
|
Hi guys, Hope your all well and still enthusiatically pushing on with your builds. Mine came to a bit of a grinding holt due to getting behind on a few issues. But, I've got them all now and happily pushing forward. There hasn't been any real problems with the latest issues, but I have noticed that my skills have become a little rusty due to the break. My cockpit shell is coming together nicely. I would have posted pictures but everything is black and so it's hard to get a good shot. But this week I have completed up to issue 52. Of course issue 52 is just the final rear rim so not too much to show there either. But issues 49 to 51 have been pretty good fun as well as a bit fiddly. The break callipers look fantastic in bright chrome and stand out nicely amongst the sea of black around the front end. [ 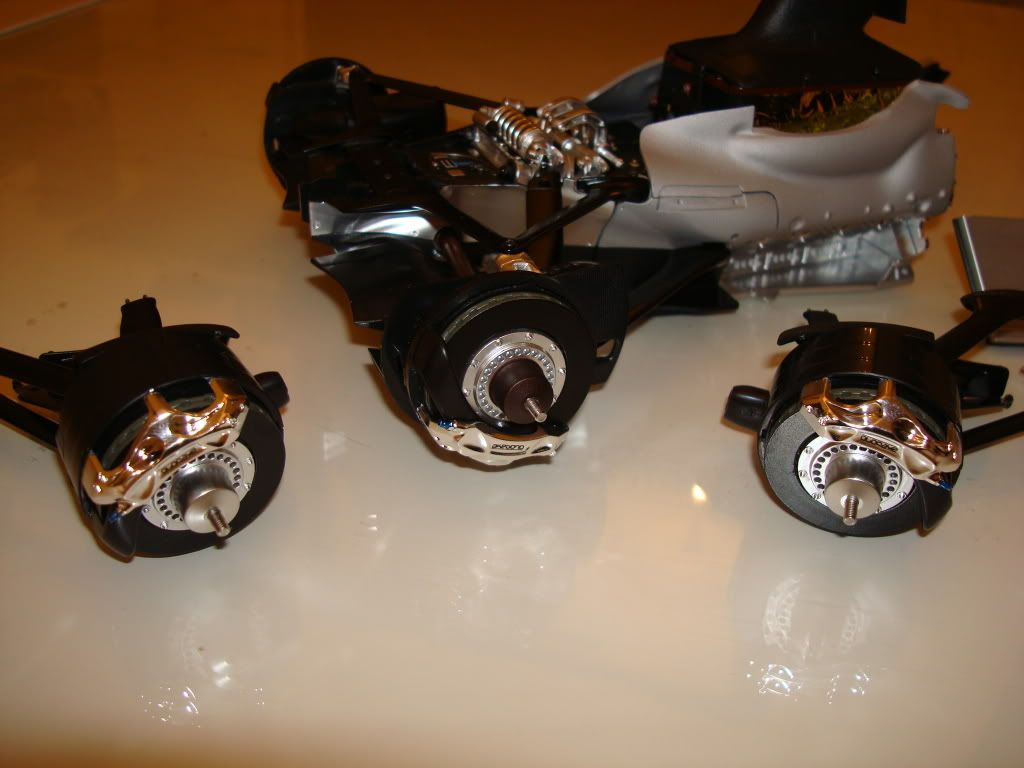 ] The rear break discs look finished and neat now. The parts fitted together really nicely and everything is sitting nice and neat. [ 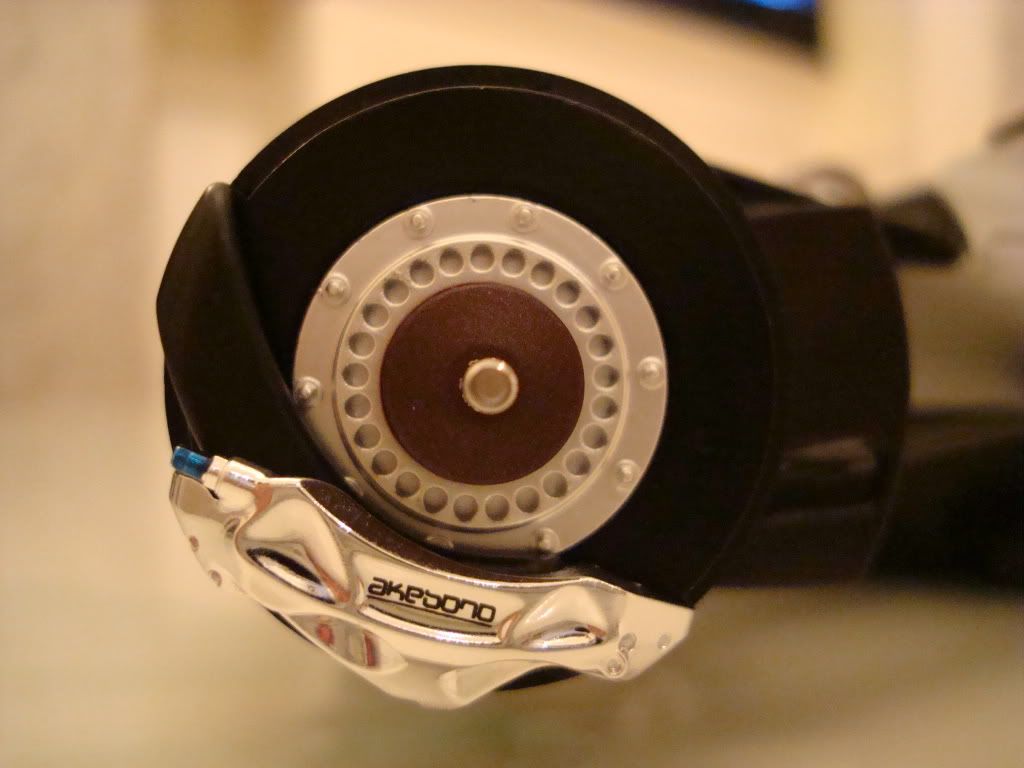 ] One last photo which is of the radiators. I can't wait to get these in place on the chassis, but I think there is a lot more to do around the cockpit before that happens. Nevertheless, they're pretty neat. [ 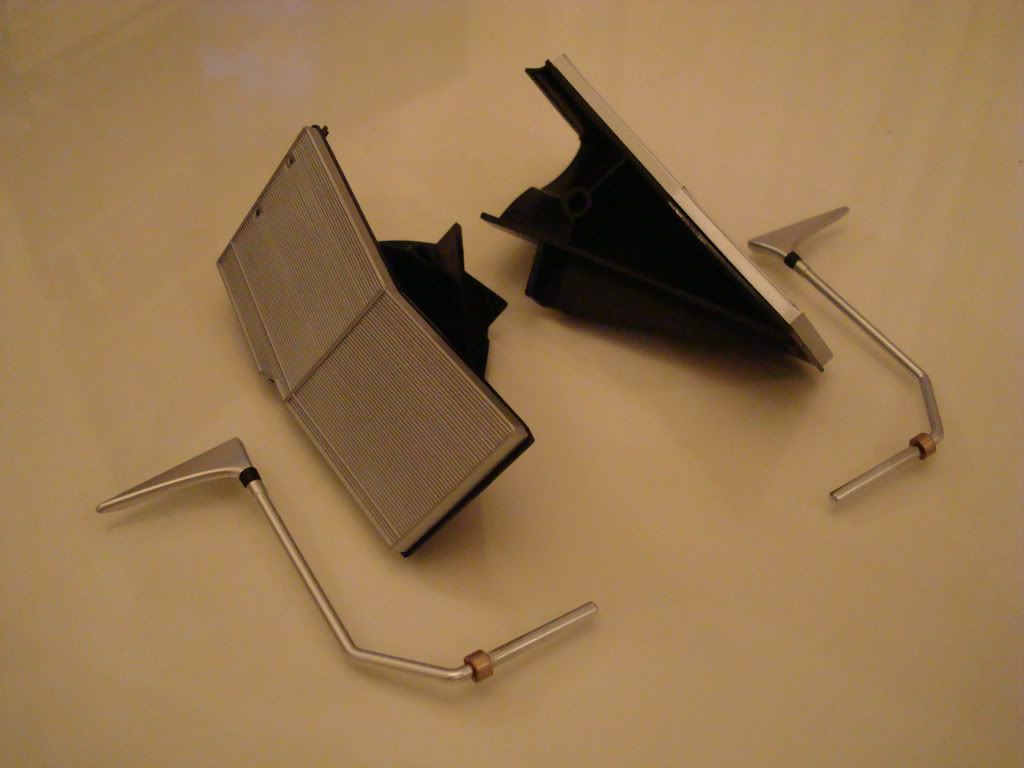 ] Hopefully my components will be recieved in order from now on, although that said I am taking some holidays soon which means I will again have some back issues to catch up on.....fun! Cheers until next week.
|
|
|
Rank: Super-Elite Groups: Registered
Joined: 24/04/2010 Posts: 5,787 Points: 17,662 Location: Stafford, United Kingdom
|
Good stuff Jack regards Mike MWG BUILD DIARIES: HMS VICTORY, SOVEREIGN OF THE SEAS, SAN FRANCISCO II, HMS HOOD, HMS ENDEAVOUR LONGBOAT, HMS VICTORY X-SECTION, 007 DB5, NISSAN GTR, CUTTY SARK, RB7, AKAGI, BARK HMS ENDEAVOUR, HUMMER H1, MITSUBISHI ZERO.
|
|
|
Rank: Pro Groups: Joined: 24/08/2009 Posts: 48,051 Points: -13,308
|
The 'meat' added to the 'bones' is looking
|
|
|
Rank: Pro  Groups: Registered
Joined: 07/04/2011 Posts: 251 Points: 741 Location: Leeds
|
Very sweet build mate, Really want to get stuck into mine reading this!!! But will wait a bit longer ;) Keep it up mate. Building the McLaren MP4-23
|
|
|
Rank: Amateur Level 1 Groups: Registered
Joined: 01/12/2011 Posts: 34 Points: 102 Location: London
|
Hi everyone. It's been a few weeks since I've been on the forum site which I am very pleased to say was due to some well earned holidays. Great to see so many new posts arriving with so many great photo's. I'm not at a level to go giving any advice, but they all look great! Being away for a few weeks meant that I had equally as many issues tyo come back to. It was great to head down to my local newsagent and pick up an absolute bundle of issues !! I was like a kid at Christmas. So, I've built up to issue 57. I have to say that the latest issues have been nothing short of amazing. The steering assembly has been tricky at times, but the big parts are easy to handle. [ 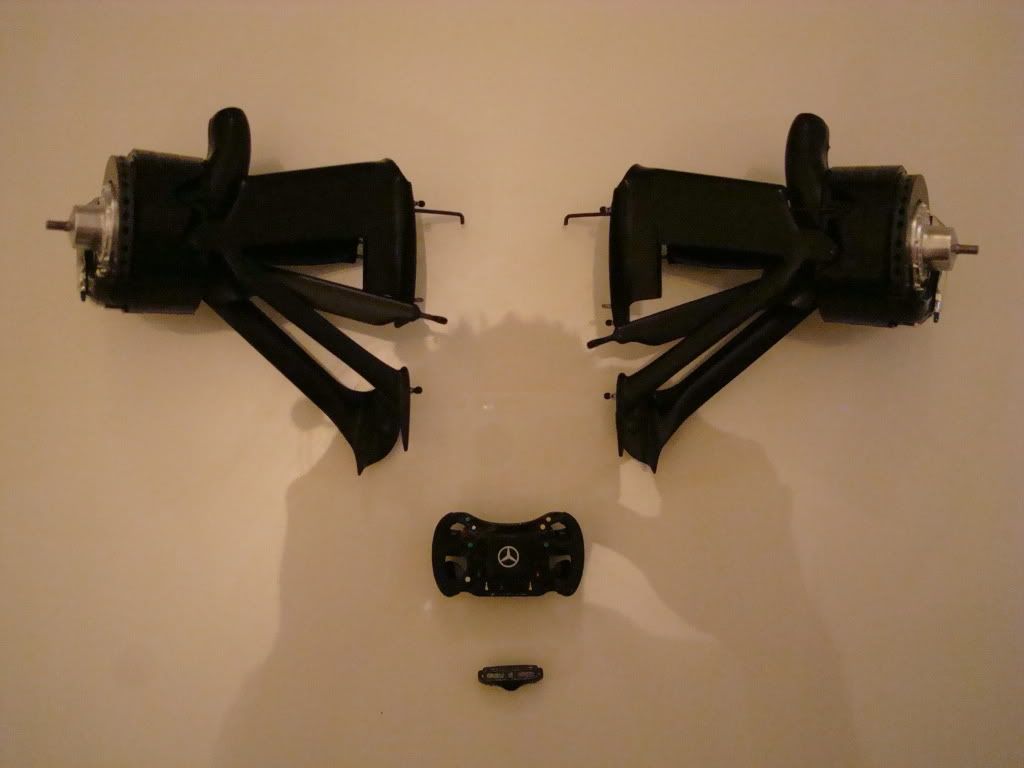 ] This is the completion of issue 54 and yes....I have a steering wheel !! As you can see, the front suspension assemblies now include steering rods. [ 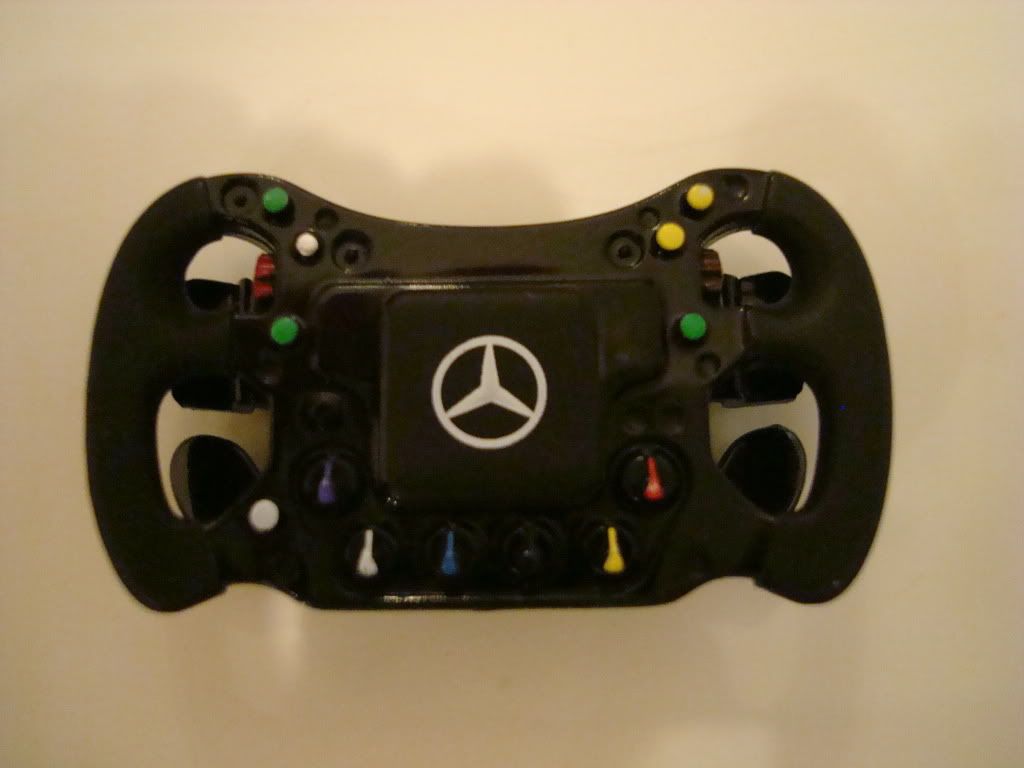 ] Ahhh..my steering wheel. Ain't it great! It's got some impressive detail and the combination of gloss and matt finishes brings it to life. [ 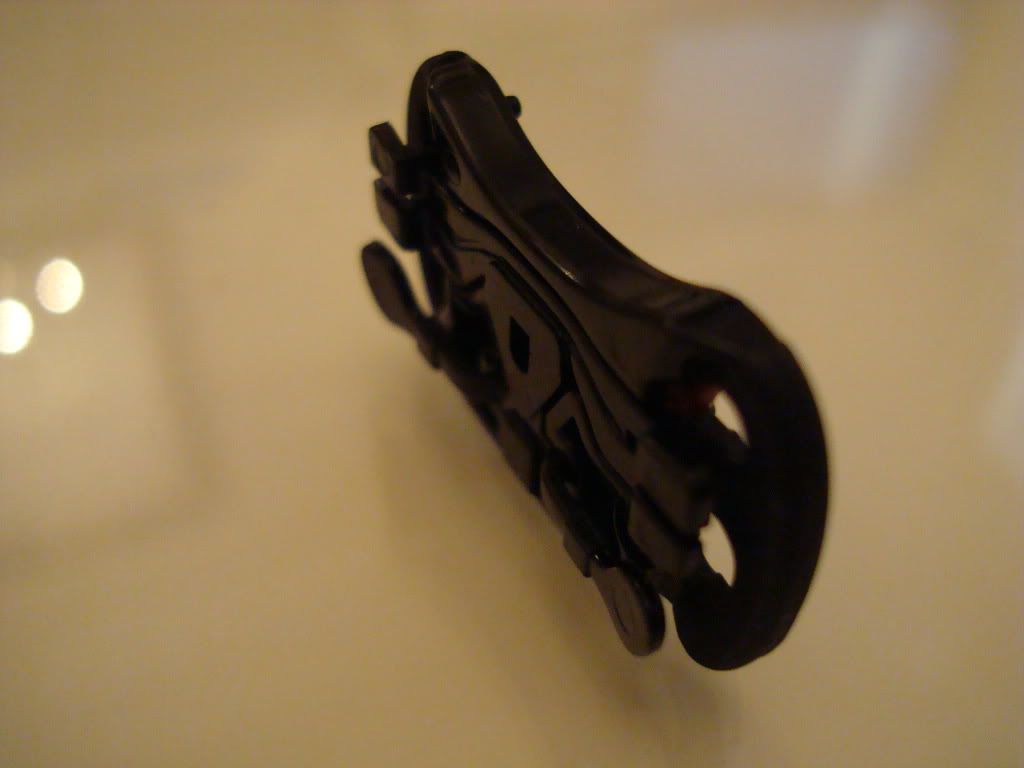 ] The back face if the steering wheel with the control paddles in place. In issue 55 you add the steering boss to the back. Issue 56 is where it all comes together. Four pages of construction is simply brilliant. You really have to control yourself because you can see the cockpit coming together and you can't wait to get it done. Keep it steady through this issue and enjoy the results. [ 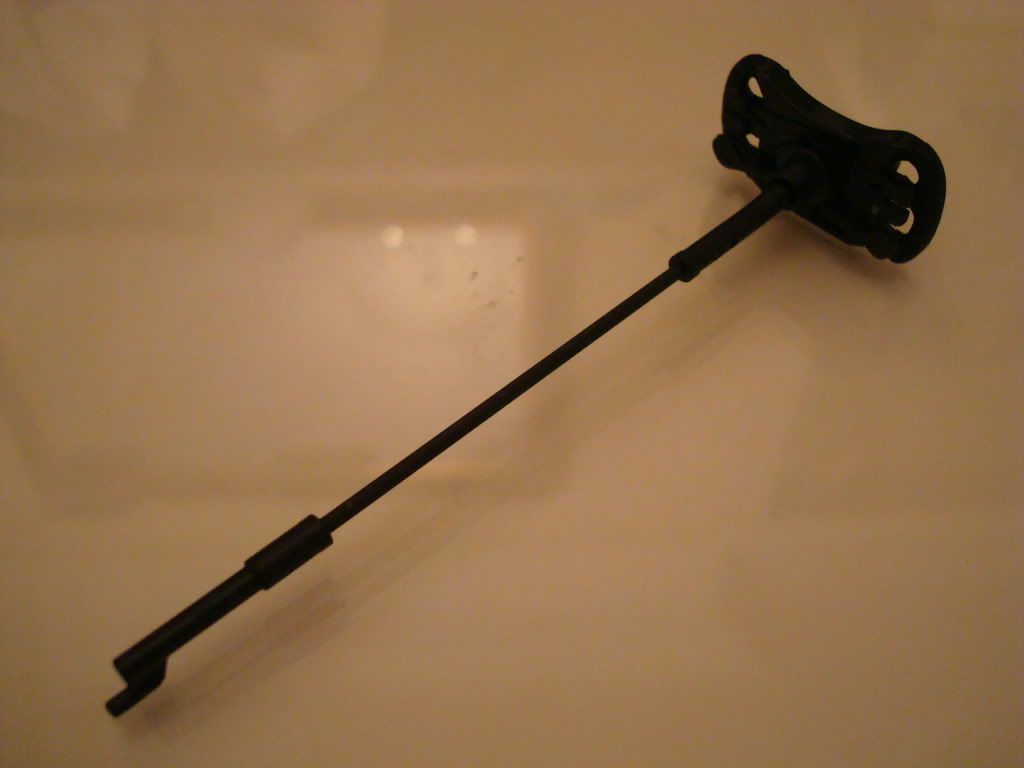 ] First, you add the steering column. Nothing tricky here. [ 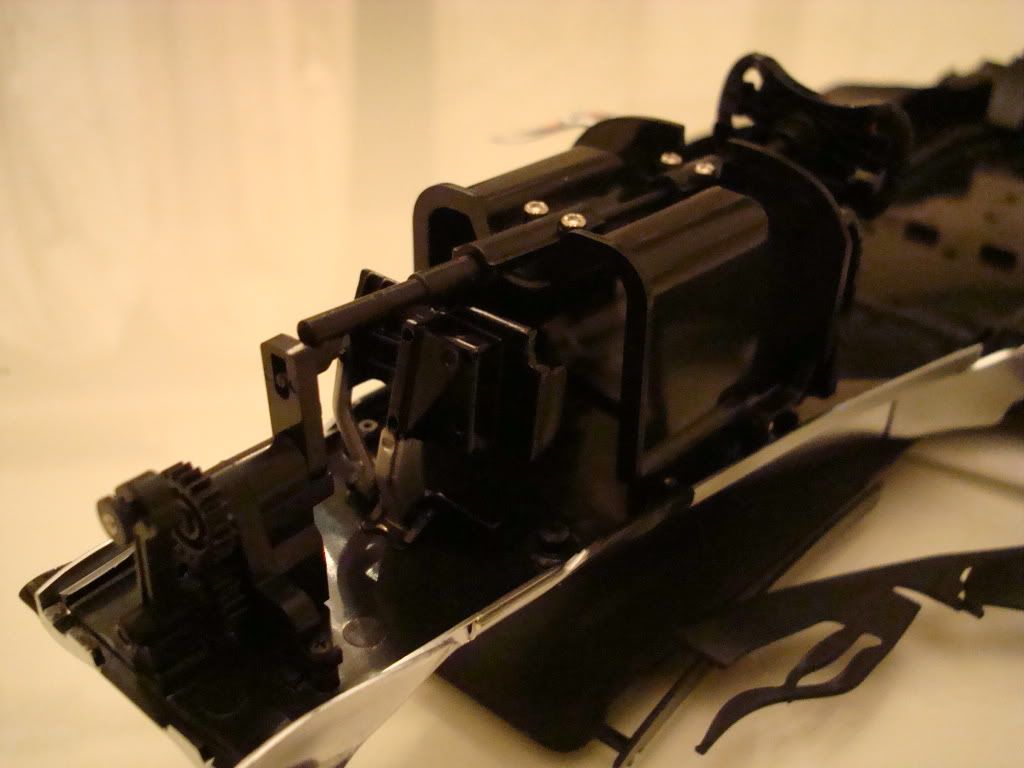 ] This was great fun to build. The brake peddles are a litle bit fiddly because they are more top heavy and they tend to want to fall over. I applied pressure by hand at the base until the glue took hold rather than use tape. I tried some test runs with tape and it kept sliiping sideways. [ 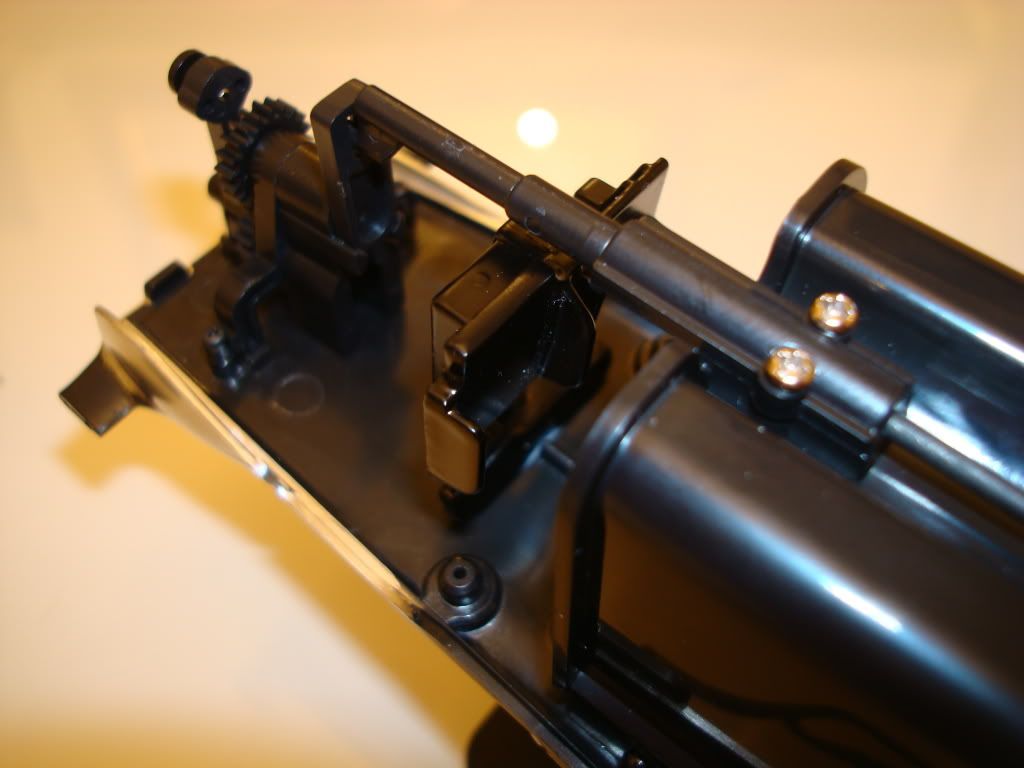 ] The steering gear unit in place and nicely aligned. All these parts fit together so neatly and operate smoothly. [ 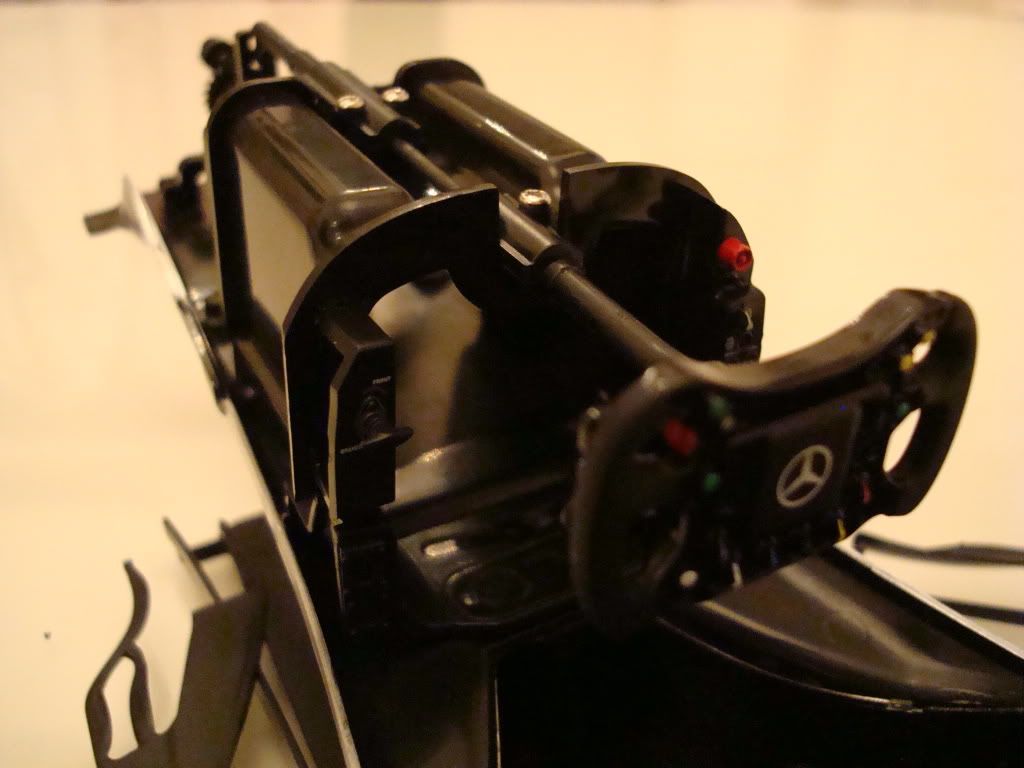 ] Here it is almost from the drivers seat. That was it for issue 56, but when its all in place it had added so much. [ 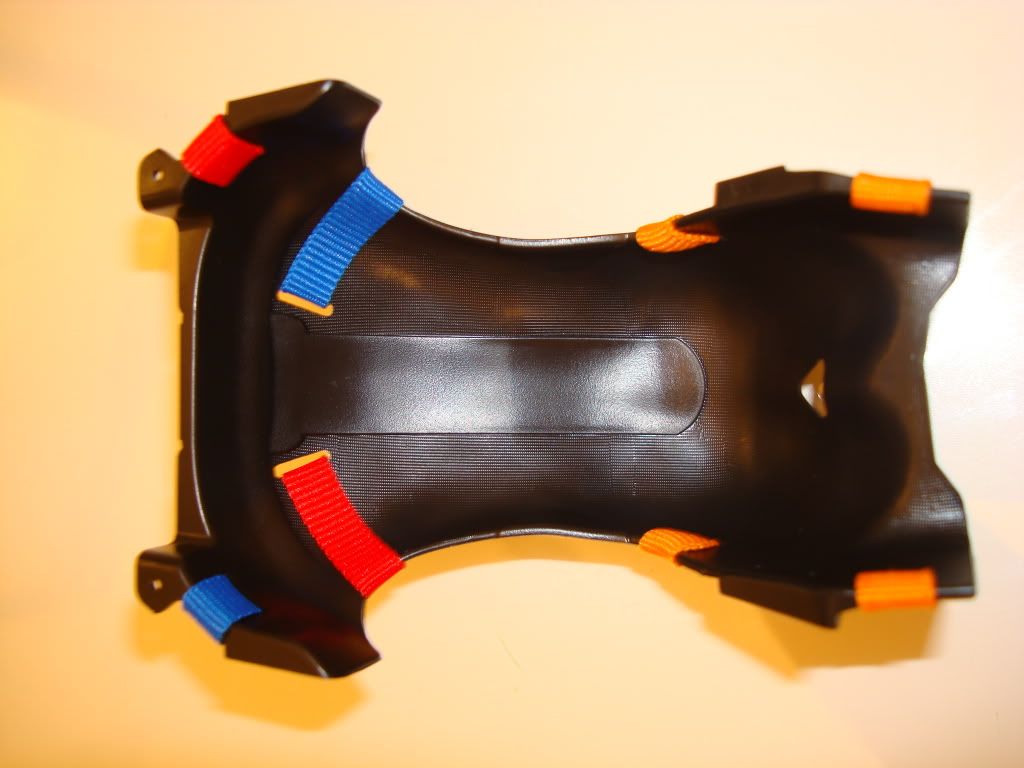 ] Issue 57 is another piece I was also really wanting to see. The belts apparently come next week, but for this week you get to put the lifting straps in place. I was really worried about getting all the straps looking neat and the same so I took my time and lined them up before pushing them in place. In the end I'm really happy with the result. The seat looks great and again the different surface finishes add some extra detail. I'm really pleased with the results of these issues and the amount of pieces is really impressive. There's hours of fun and even more enjoyment just looking at it when you get it all together. I have to stop playing with the steering wheel though ! Keep up the good work everyone and keep the photo's coming. Next week, seat belts. I can't wait!
|
|
|
Rank: Super-Elite Groups: Registered
Joined: 24/04/2010 Posts: 5,787 Points: 17,662 Location: Stafford, United Kingdom
|
Hi Jack, you have a great build Regards Mike MWG BUILD DIARIES: HMS VICTORY, SOVEREIGN OF THE SEAS, SAN FRANCISCO II, HMS HOOD, HMS ENDEAVOUR LONGBOAT, HMS VICTORY X-SECTION, 007 DB5, NISSAN GTR, CUTTY SARK, RB7, AKAGI, BARK HMS ENDEAVOUR, HUMMER H1, MITSUBISHI ZERO.
|
|
|
 Rank: Semi-Pro Level 1  Groups: Registered
Joined: 24/04/2012 Posts: 53 Points: 149 Location: Kent
|
Hi Jack.
You have a really nice build going on there my friend. It looks clean and tidy and is a credit to you.
I had a little chuckle to myself when i read about your mishap with the rear wing. I to have been guilty of muppetry as well as i remember cutting the crank relay rods off the sprue and snapping one in half. Wasn't expecting them to be as brittle as that... So i had to order replacement parts. But we live and learn i guess. Have to be more careful in the future..hehe
Keep up the good work, especially your photograghy which is stunning. The best i've seen by far. It's clear you put as much time and thought into your photo's as you do your build..
Looking forward to your next instalment.
Chris
|
|
|
Rank: Amateur Level 1 Groups: Registered
Joined: 01/12/2011 Posts: 34 Points: 102 Location: London
|
Thanks for your comments Chris and Mike. And go easy on the craft knife Chris!!! As a beginner I sometimes get a little shaky when cutting off some of the finer parts or cleaning off excess moulding. I just put the knife down, walk away and come back a little later. It doesn't always work, but its good practice. You should have been here when I dropped my rear wing. I was on the floor just picking up pieces thinking "I can fix this"...not! As for my photo's I have learnt a lot from Kev. His photos were superior and his diary was exceptional. Everything else is attributed to the fantastic help I get from other experienced people on this forum. It's so good of them to share their knowledge no matter how simple. Anyway, here is the combination of weeks 58 and 59. I love my seat. The belts are great and are much better than expected. Don't know why but I always expect things like buckles to be plastic. But these are metal and look and feel the real deal. [ 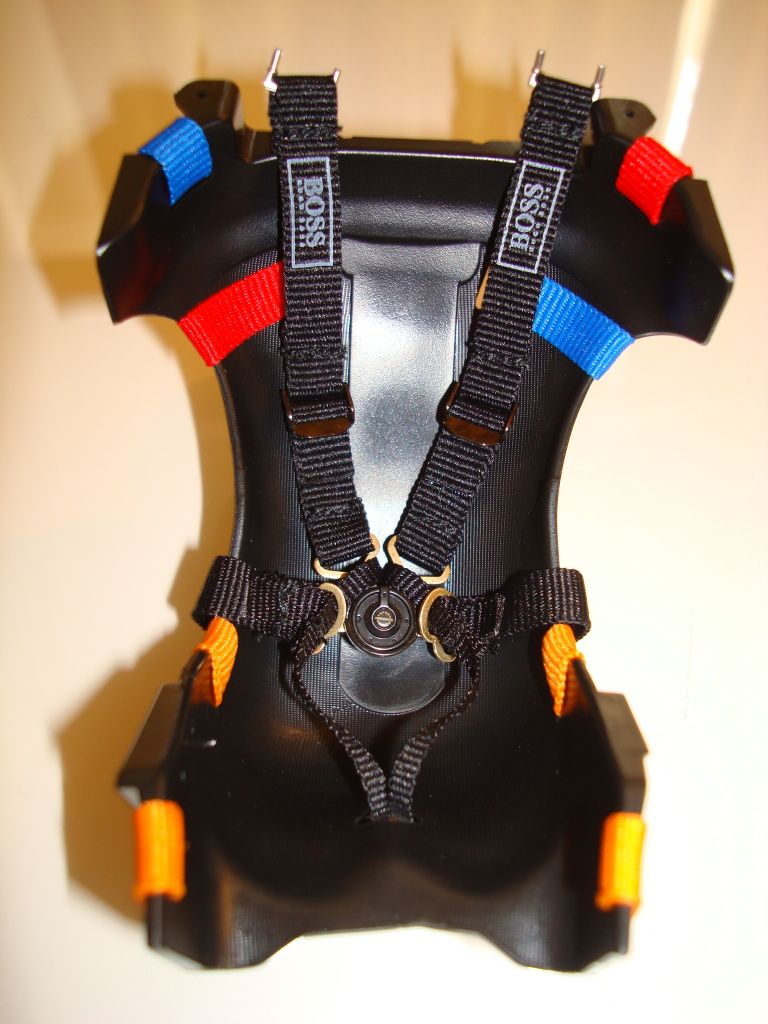 ] Assembling the belts requires real patience. The type of fabric is quite soft and they fall about quite a bit. The instruction photo's make it sound easy to just turn the assembly over and fix this and that. But in reality you need about 20 fingers, tweezers and glue. It's a real handful...for me anyway. But I think this has come together really well so I'm exceptionally happy . You get the first sections of exhaust pipes in issue 59 and again I was really surprised that they are metal. I know that Kev was going to customise this area so it will be interesting to see how those who are doing modifications turn out. Cheers guys.
|
|
|
|
Guest (2)
|
 US
US

