|
|
 Rank: Vice-Master      Groups: Registered
Joined: 05/04/2016 Posts: 706 Points: 2,121 Location: Ferrara
|
goddo wrote:Hi Francesco,
Your build is just amazing. Congratulations on your skills.
Chris Many Thanks Chris  The third attempt is the good one....is right one in teh first pics. After scaling it to 108% of the source file, I found the right size for my seat. Checking photos on the 911 network which, use the Recaro and Sparco ssport bucket seat, I verified that with the three sizes (X,Y,Z) I have now found the correct scale. Not being able to convert this STL into an editable body, I solved the problem working on the brackets of the seat the seat to the floor. Slightly inclined and directly fixed to the seat. Now I will print the other one too and finally I will be able to start with the roll vcage.... starting from the bases of the various tubes. 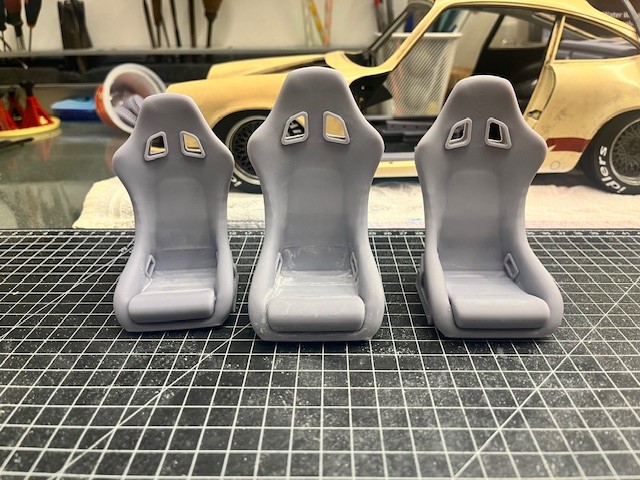 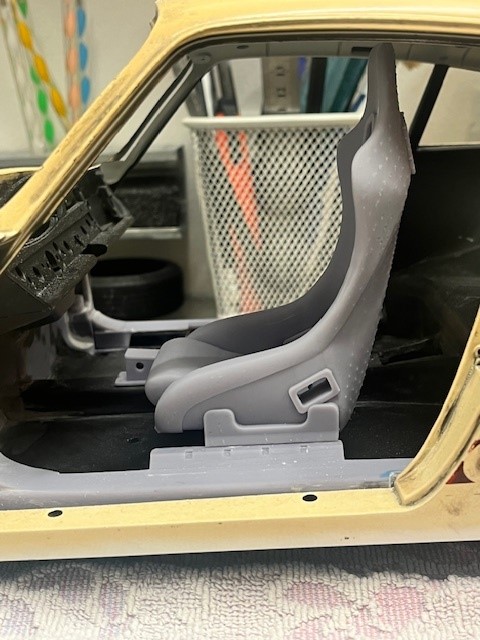 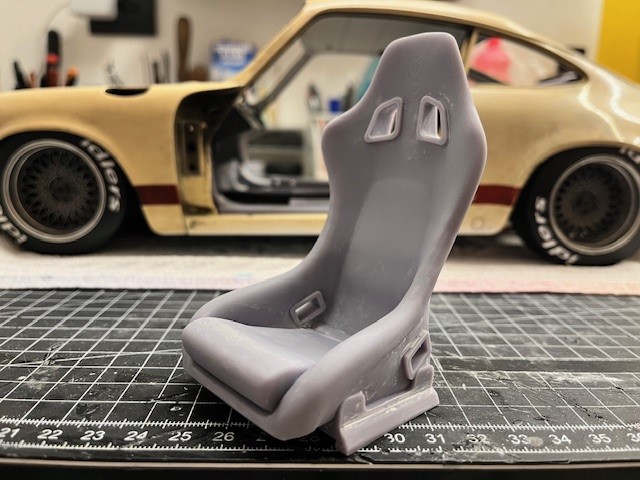    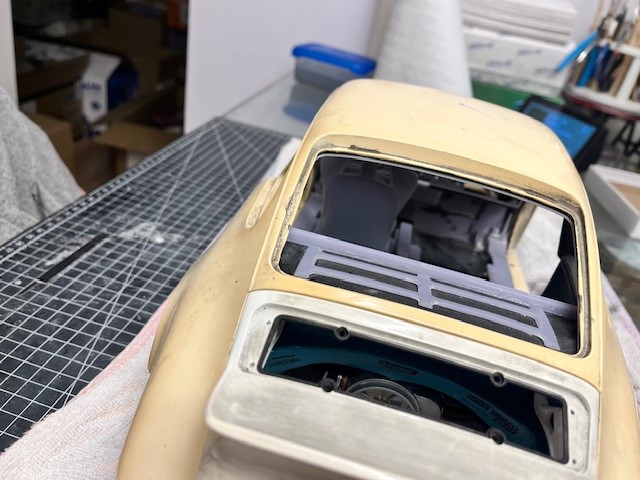 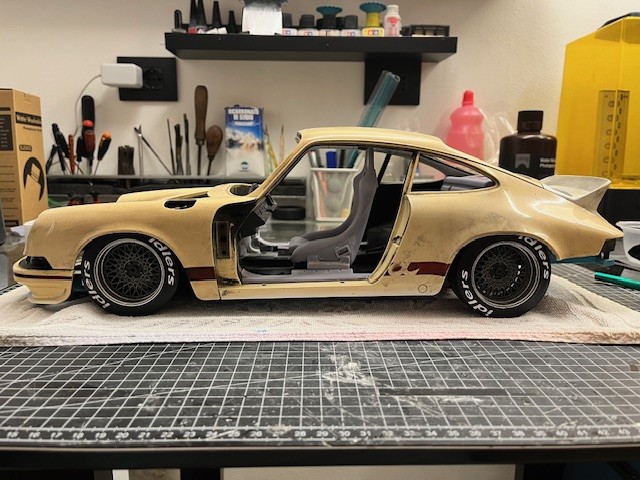 Collection active: Lotus 97T, Audi Quattro A2, Vw Maggiolino '60
Work in progress: Porsche 911 RS Turbo
Completed model: Delta WRC Martini, Mclaren MP4/4, Golf GTI 1/8 Tuned
|
|
|
|
|
The seat looks brilliant.  Mark
|
|
|
Rank: Vice-Master Groups: Registered
Joined: 05/04/2016 Posts: 706 Points: 2,121 Location: Ferrara
|
With the first part of the roll cage consolidated, I moved on to designing the more complicated piece. The upper junction must connect: roof side tube coming from the front pillar; central vertical upright, upper connection tube between the two central uprights, rear upright tubes that will connect in the lateral area of the firewall/internal fenders and finally lateral crosspiece that starts from the upper left central upright and which will anchor on the firewall/right rear mudguard ....in short, a "nice" headache to make come back. After 3 attempts and adjustments they succeeded. I assembled everything dry with the body fixed so as not to have any future surprises. With ciano glue and bicarbonate I gave some "solder points" so as not to lose the positioning. I disassembled the body and finally welded the upper "square" of roll cage. I then fixed the cross tube onto the roof square by bending it to follow the curvature of the roof pavilion Once everything has been fixed, the last part is missing: the rear. I designed the lower part of the firewall that I was missing and where the last pipes will be anchored with the relative plates which are almost ready.... meanwhile in the first part of the firewall I have arranged the holes for the future intercooler pipes . I reassembled the bodyshell and everything comes back as estimated and assembled. 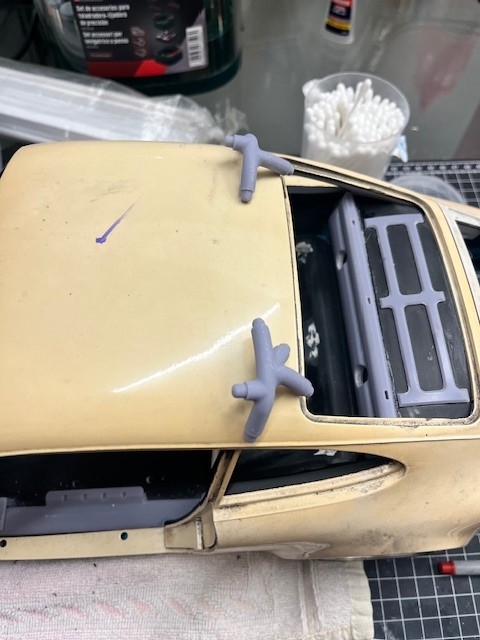 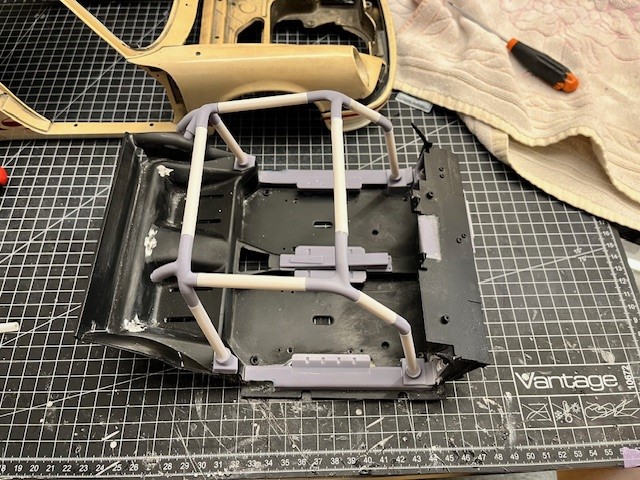 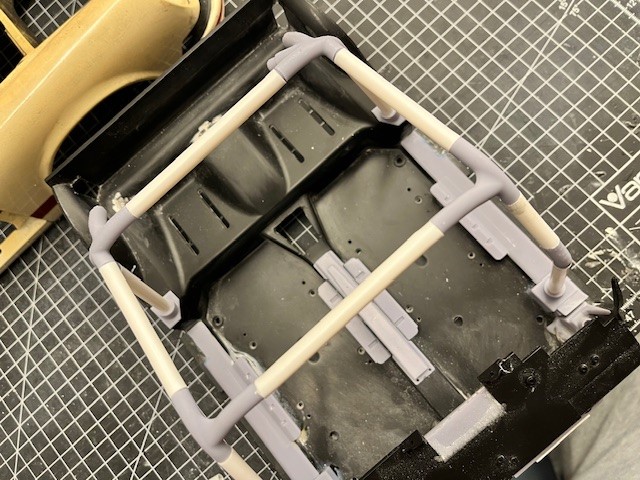 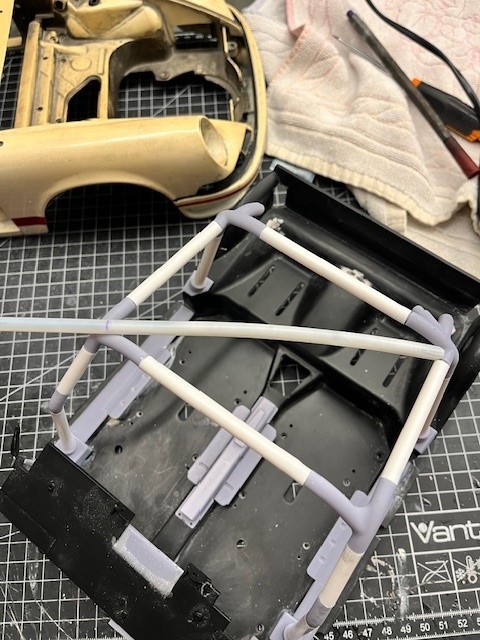 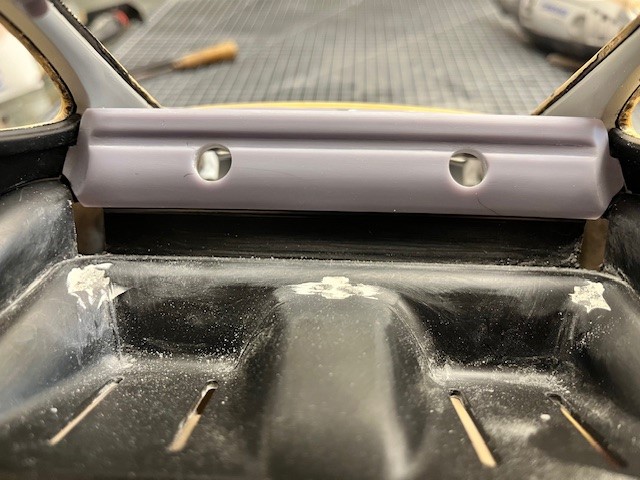 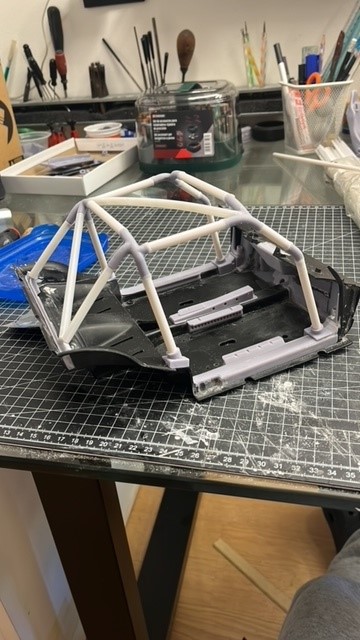 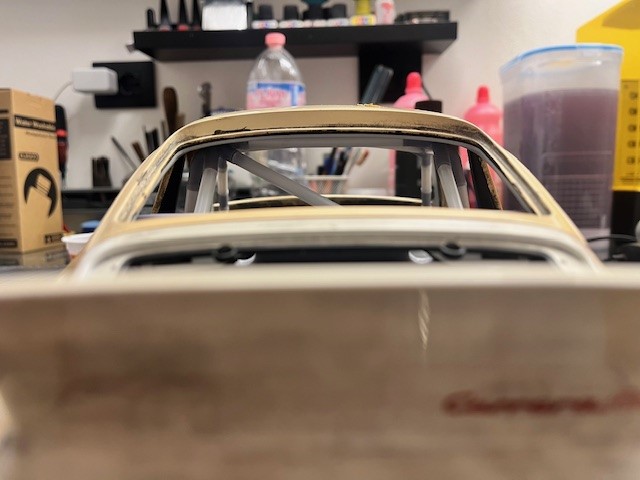 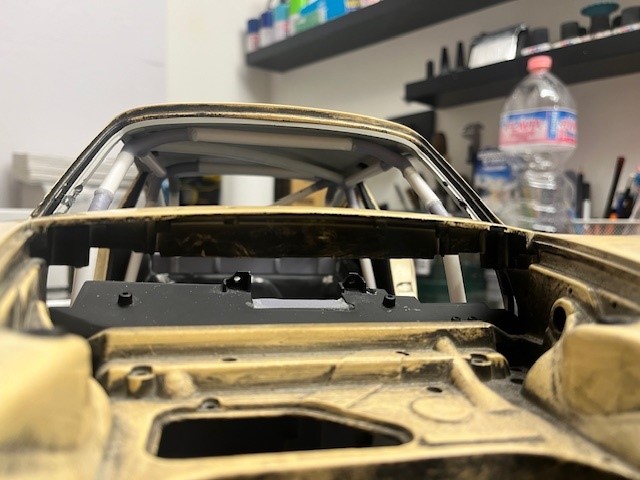 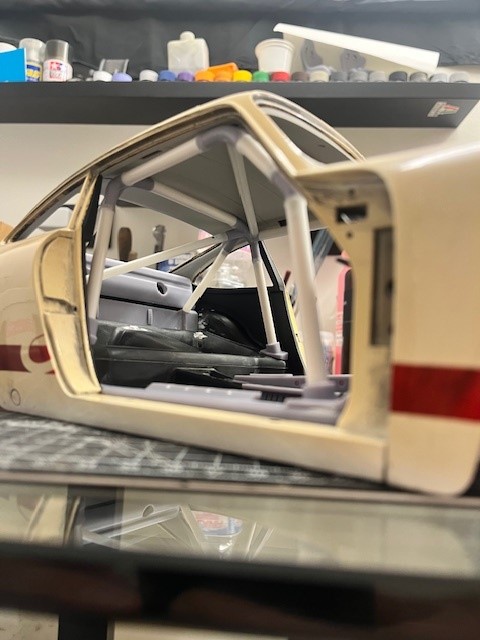 Collection active: Lotus 97T, Audi Quattro A2, Vw Maggiolino '60
Work in progress: Porsche 911 RS Turbo
Completed model: Delta WRC Martini, Mclaren MP4/4, Golf GTI 1/8 Tuned
|
|
|
Rank: Vice-Master Groups: Registered
Joined: 05/04/2016 Posts: 706 Points: 2,121 Location: Ferrara
|
I haven't posted in a while but I've moved on Finished the final work on the cage such as the anti-intrusion side bars, and then found a Wilwood pedal set that blends well into the project. I like the latest odds checks and the general context I then moved on to choosing a suitable steering wheel. In stock I had: - Porsche - Miura -Stratos - Impreza - Mp4/4 After various tests and scale correlations, the best in shape and size is the Sparco of the Impreza. 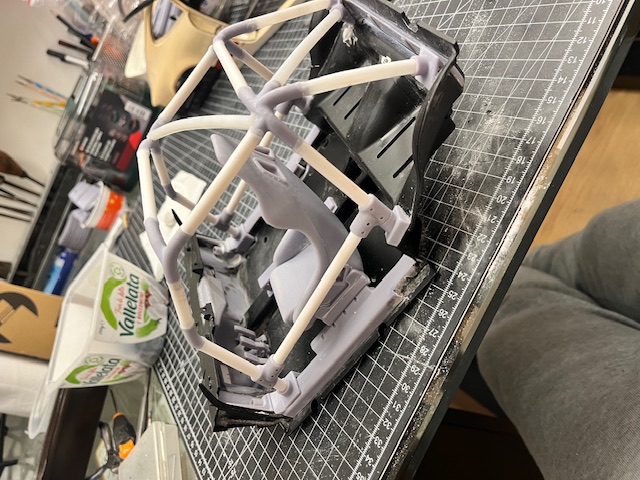  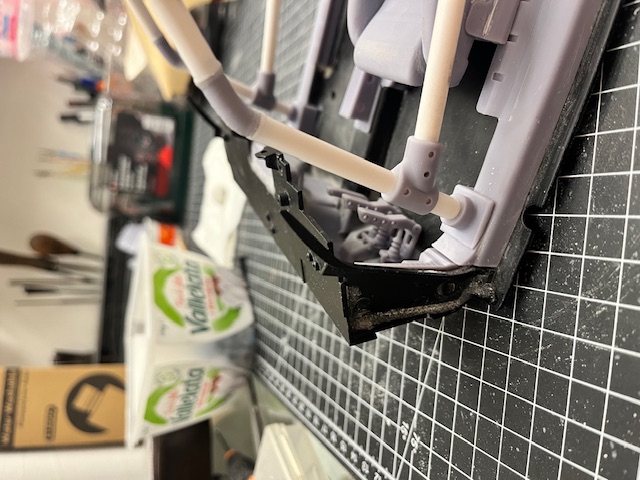 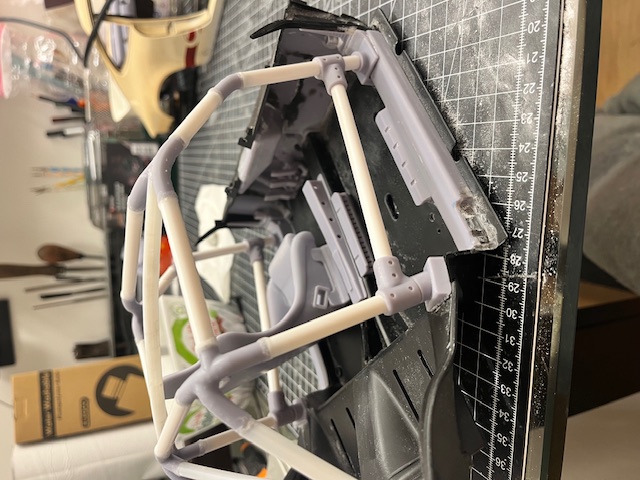 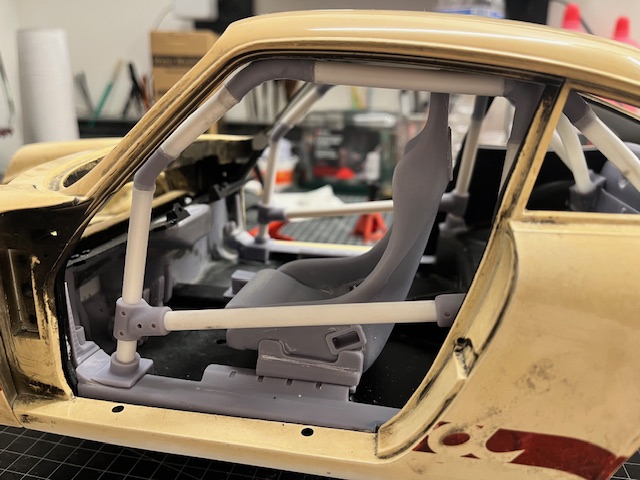 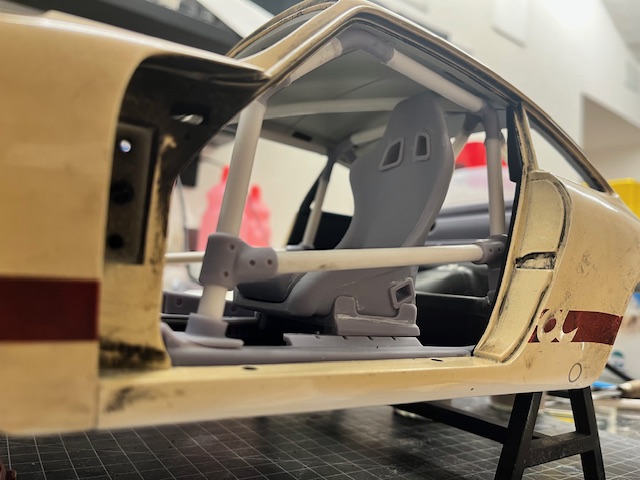 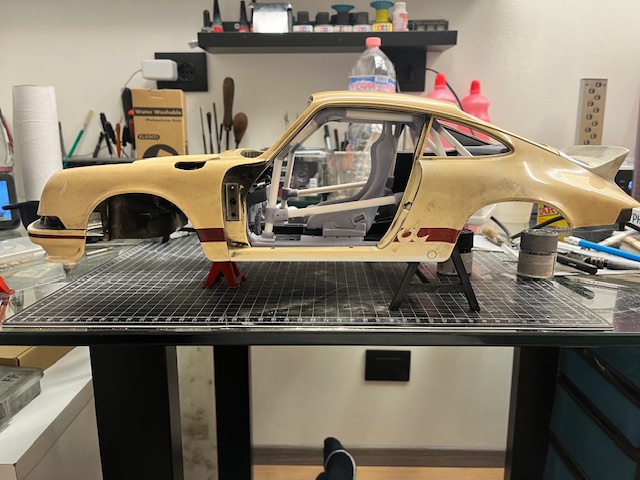 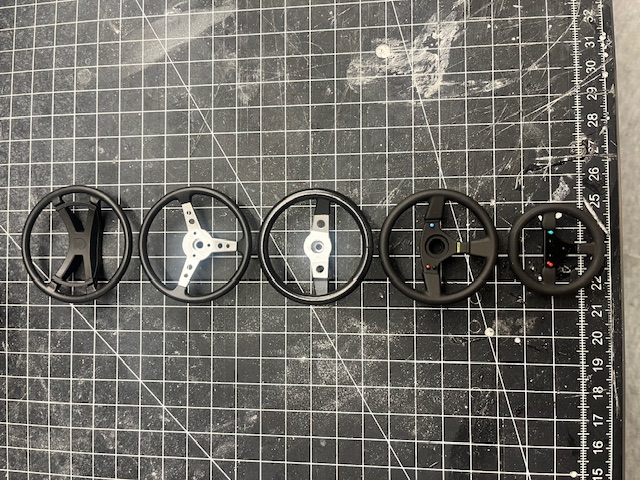 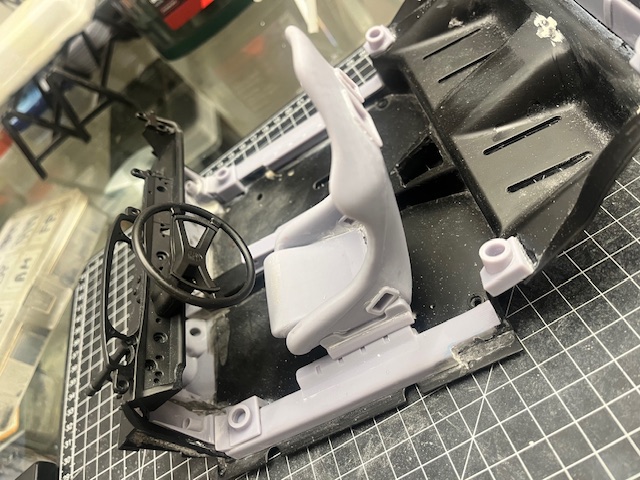 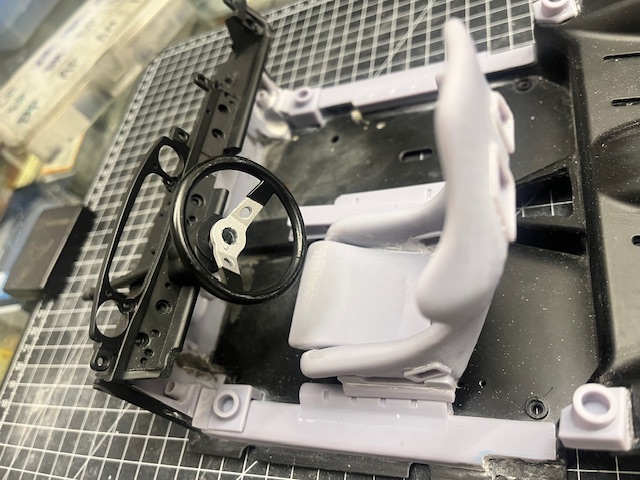 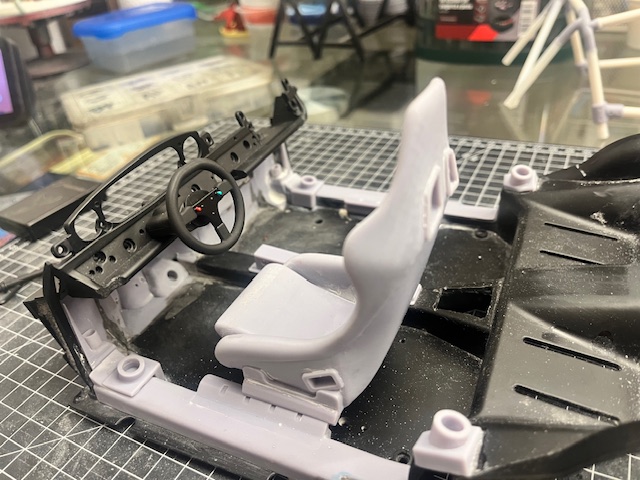 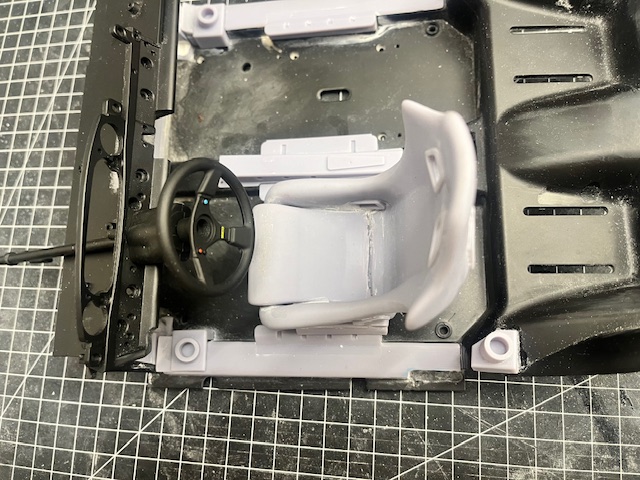 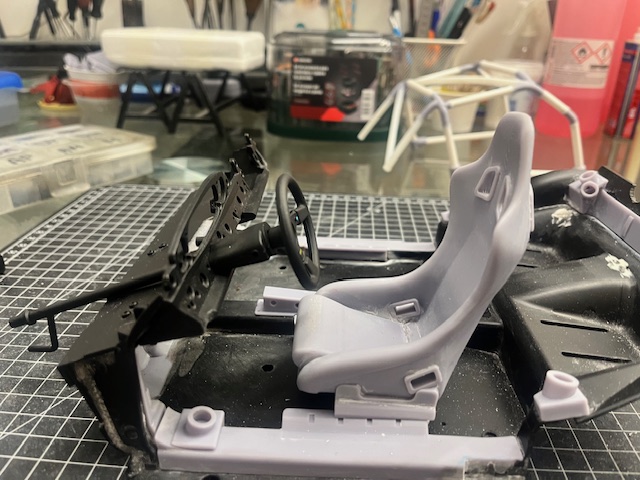 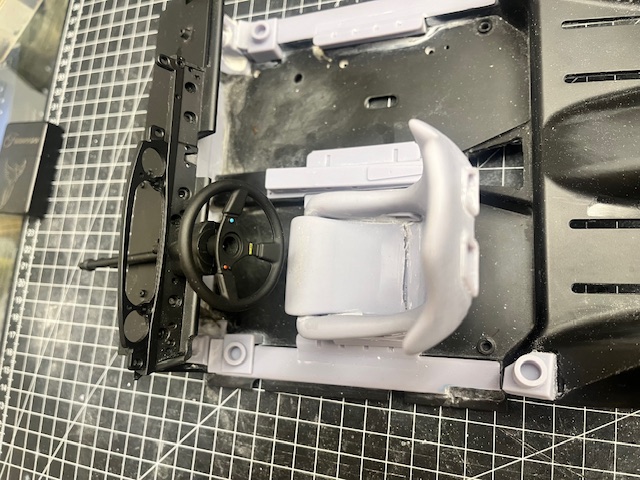 Collection active: Lotus 97T, Audi Quattro A2, Vw Maggiolino '60
Work in progress: Porsche 911 RS Turbo
Completed model: Delta WRC Martini, Mclaren MP4/4, Golf GTI 1/8 Tuned
|
|
|
Rank: Vice-Master Groups: Registered
Joined: 05/04/2016 Posts: 706 Points: 2,121 Location: Ferrara
|
|
|
|
Rank: Vice-Master Groups: Registered
Joined: 05/04/2016 Posts: 706 Points: 2,121 Location: Ferrara
|
|
|
|
Rank: Vice-Master Groups: Registered
Joined: 05/04/2016 Posts: 706 Points: 2,121 Location: Ferrara
|
|
|
|
Rank: Vice-Master Groups: Registered
Joined: 05/04/2016 Posts: 706 Points: 2,121 Location: Ferrara
|
|
|
|
Rank: Vice-Master Groups: Registered
Joined: 05/04/2016 Posts: 706 Points: 2,121 Location: Ferrara
|
|
|
|
|
|
|
|
|
Rank: Vice-Master Groups: Registered
Joined: 05/04/2016 Posts: 706 Points: 2,121 Location: Ferrara
|
Thanks Mark Collection active: Lotus 97T, Audi Quattro A2, Vw Maggiolino '60
Work in progress: Porsche 911 RS Turbo
Completed model: Delta WRC Martini, Mclaren MP4/4, Golf GTI 1/8 Tuned
|
|
|
Rank: Vice-Master Groups: Registered
Joined: 05/04/2016 Posts: 706 Points: 2,121 Location: Ferrara
|
|
|
|
Rank: Vice-Master Groups: Registered
Joined: 05/04/2016 Posts: 706 Points: 2,121 Location: Ferrara
|
|
|
|
Rank: Vice-Master Groups: Registered
Joined: 05/04/2016 Posts: 706 Points: 2,121 Location: Ferrara
|
|
|
|
Rank: Vice-Master Groups: Registered
Joined: 05/04/2016 Posts: 706 Points: 2,121 Location: Ferrara
|
|
|
|
|
|
The bolts look amazing, it looks. Like you're building a full size car. Excellent stuff. Mark
|
|
|
Rank: Administration    Groups: Registered, Forum Support Team, Administrators, Global Forum Support Team, Moderator, Official Builds Joined: 09/11/2012 Posts: 7,989 Points: 23,146 Location: East midlands
|
This level of detail is amazing.  Keep it coming. Regards delboy271155 (Derek) Admin COME BACK GUY FAWKES "YOUR COUNTRY NEEDS YOU"
|
|
|
 Rank: Super-Elite  Groups: Official Builds, Administrators, Moderator, Global Forum Support, Registered Joined: 04/06/2011 Posts: 4,239 Points: 12,865 Location: ipswich
|
Just superb.
It goes to show what can be done with these kits to take them to another level.
|
|
|
Rank: Vice-Master Groups: Registered
Joined: 05/04/2016 Posts: 706 Points: 2,121 Location: Ferrara
|
Many many many thanks mate for yours kind word and appreciation. Today I'll post some progress on my Turbo. Hope you'll enjoy Collection active: Lotus 97T, Audi Quattro A2, Vw Maggiolino '60
Work in progress: Porsche 911 RS Turbo
Completed model: Delta WRC Martini, Mclaren MP4/4, Golf GTI 1/8 Tuned
|
|
|
Rank: Vice-Master Groups: Registered
Joined: 05/04/2016 Posts: 706 Points: 2,121 Location: Ferrara
|
I was forgetting about the oil pressure light. I wanted to print it with transparent resin (to be bought at the moment just for this piece)... then the irrepressible instinct to go and put my hands in the Lego bin. The round mono brick fits into the seat of the former clock with very slight interference and the diameter is perfect to the tenth. It seems to be done on purpose so what to do? I sanded away the logo, passed the compound to leave a semi-matt effect and painted the external crown in semi-gloss black. For me, perfect effect with minimal expense and maximum yield 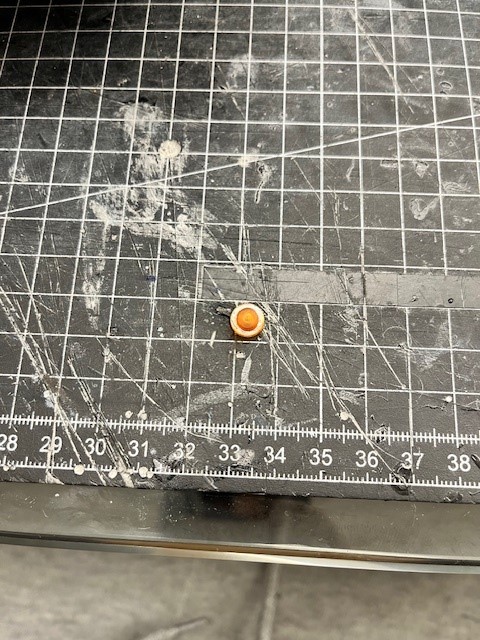 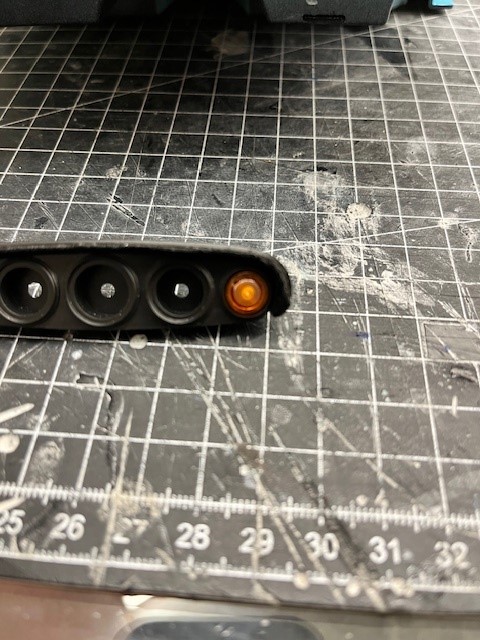 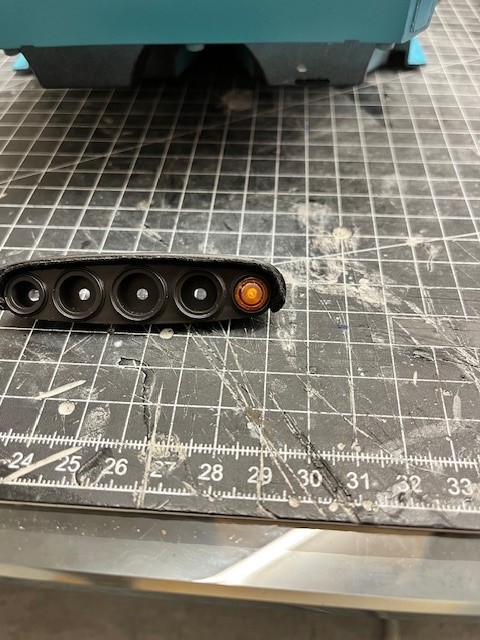 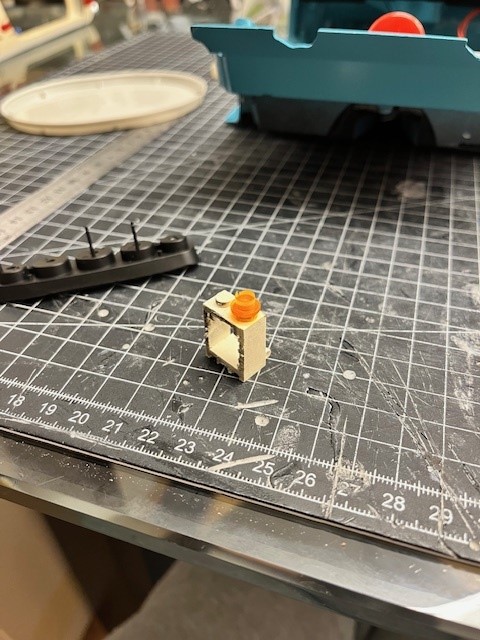 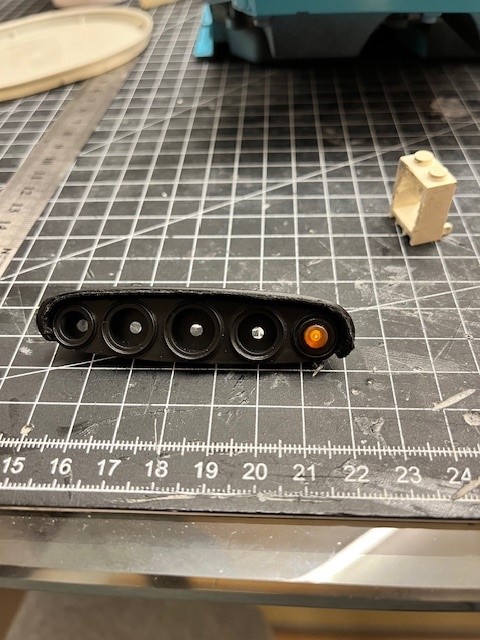 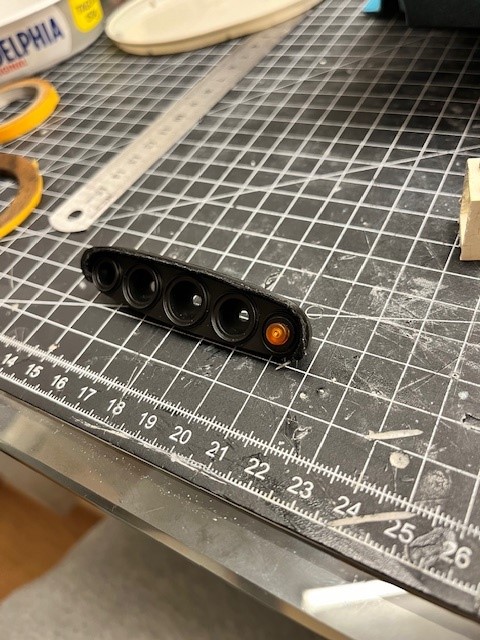 Collection active: Lotus 97T, Audi Quattro A2, Vw Maggiolino '60
Work in progress: Porsche 911 RS Turbo
Completed model: Delta WRC Martini, Mclaren MP4/4, Golf GTI 1/8 Tuned
|
|
|
|
Guest (2)
|
 US
US

