|
|
 Rank: Vice-Master      Groups: Registered
Joined: 05/04/2016 Posts: 706 Points: 2,121 Location: Ferrara
|
|
|
|
 Rank: Master  Groups: Registered
Joined: 21/04/2011 Posts: 1,040 Points: 3,149 Location: Buckinghamshire
|
This build is really starting to come together nicely......and seemingly quickly!
As I have said before, your attention to little details is amazing.
Chris
|
|
|
Rank: Vice-Master Groups: Registered
Joined: 05/04/2016 Posts: 706 Points: 2,121 Location: Ferrara
|
goddo wrote:This build is really starting to come together nicely......and seemingly quickly!
As I have said before, your attention to little details is amazing.
Chris Thanks Chris, really appecciate your words. I continue with some progress Having prepared the tank and battery with the usual 600 sanding process, then primer and two coats of matt black, I moved on to laying the carbon not before having created the templates. I allowed the decals to dry completely for 24 hours and sealed everything with glossy clear coat Finally, the tank compartment also received its "new skin" 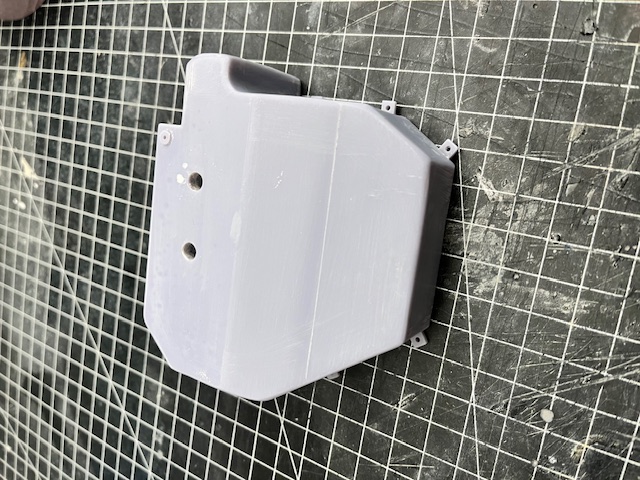 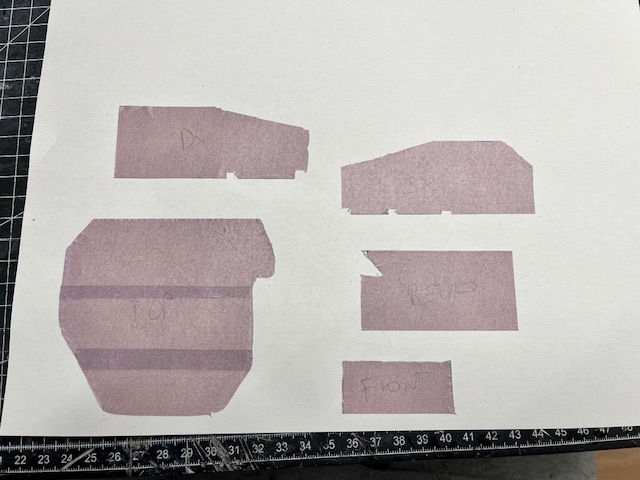 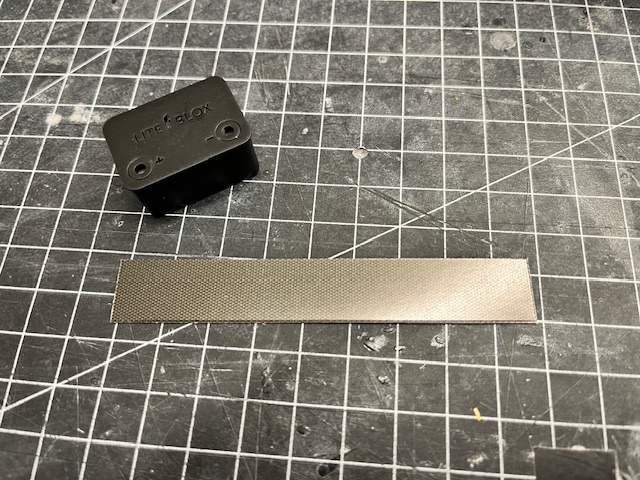 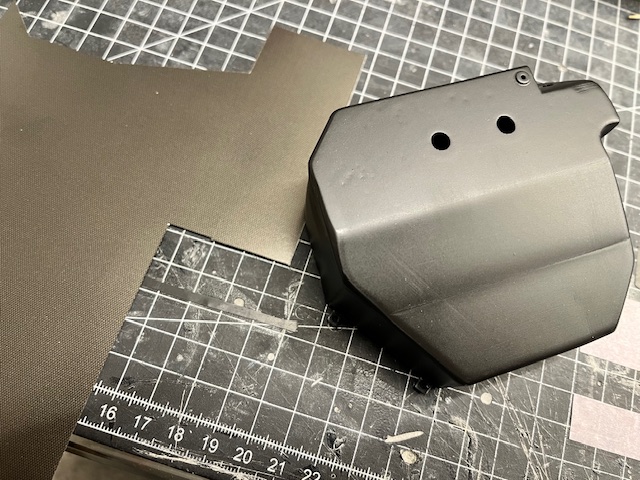 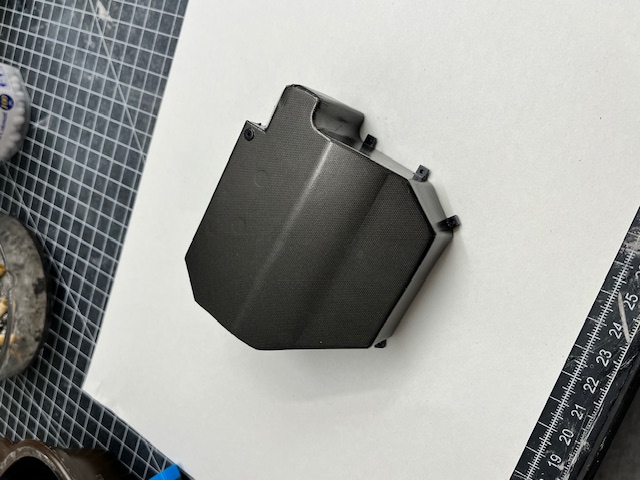 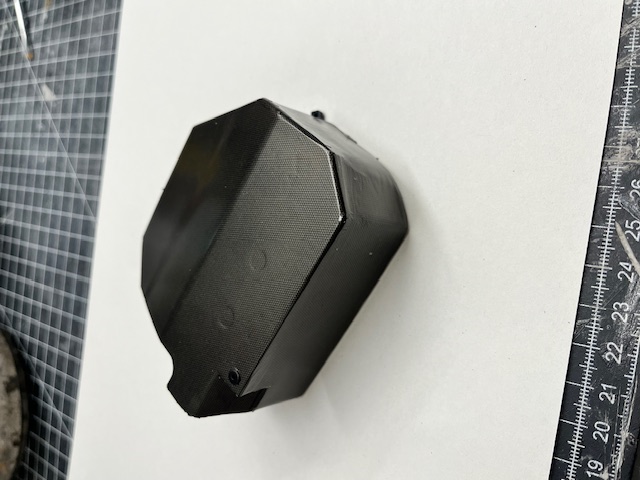 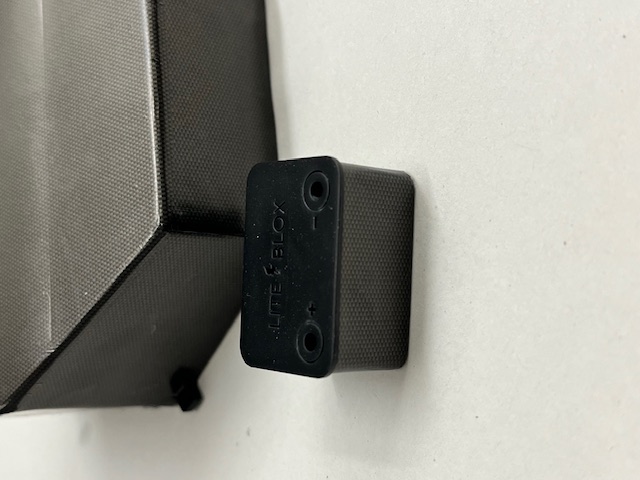 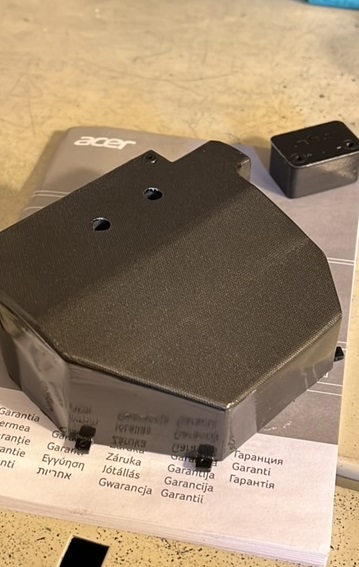 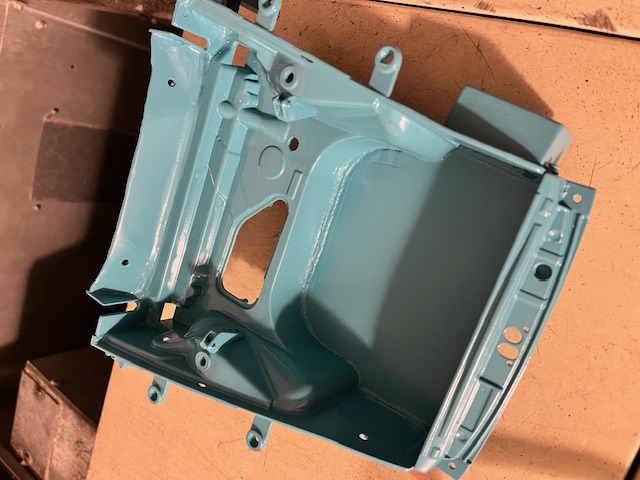 Collection active: Lotus 97T, Audi Quattro A2, Vw Maggiolino '60
Work in progress: Porsche 911 RS Turbo
Completed model: Delta WRC Martini, Mclaren MP4/4, Golf GTI 1/8 Tuned
|
|
|
Rank: Vice-Master Groups: Registered
Joined: 05/04/2016 Posts: 706 Points: 2,121 Location: Ferrara
|
I mimicked the glass water tank, I gave two coats of white, masked the upper part and painted the rest blue. I "dusted" the entire tank with the same blue to try to replicate the blue translucency of the upper part of the tank not reached by the liquid level. Finally, always spraying from afar, I applied various layers of opaque transparent both to opaque and to give a classic textured effect of liquid glass tanks. I then finished further mattifying with the Tamiya powders. The cap was then painted blue and applied to the tank. I then continued with the coloring of the upper flange of the tank and the smaller flange of the float for the fuel level sender; once finished I mounted everything on the tank. I created some cable glands and after painting them I fixed them to the sides of the front uprights Finally mounted and connected the Lite Blox battery 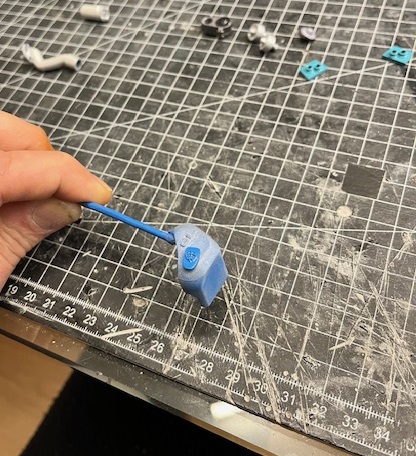 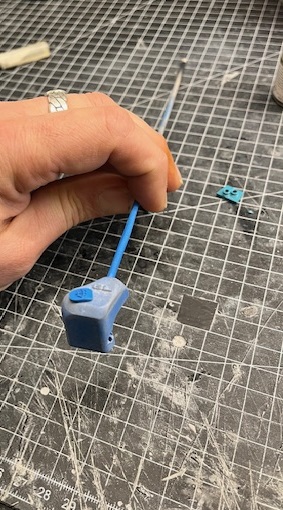  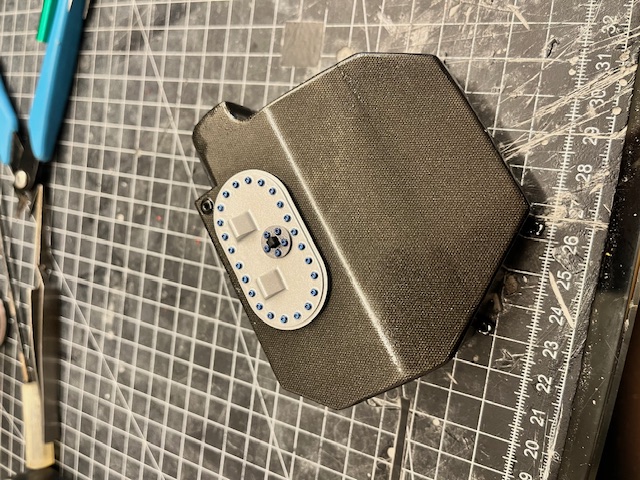 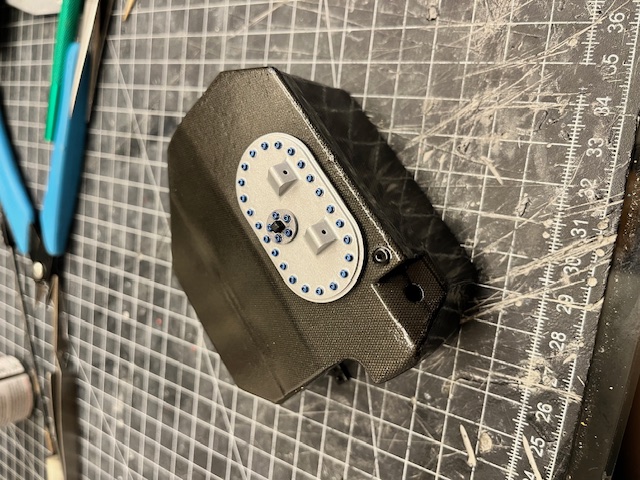   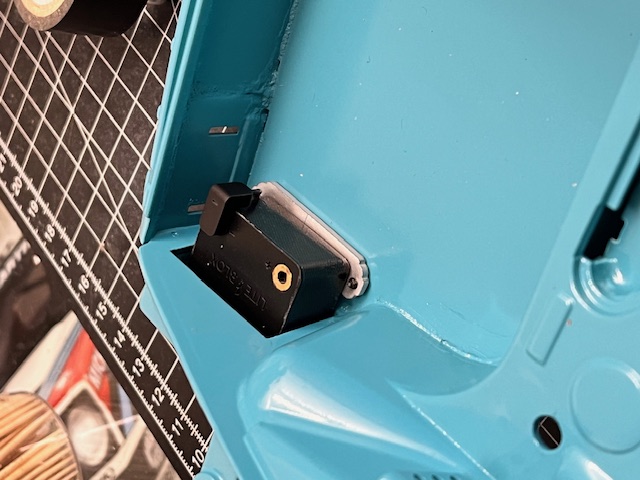 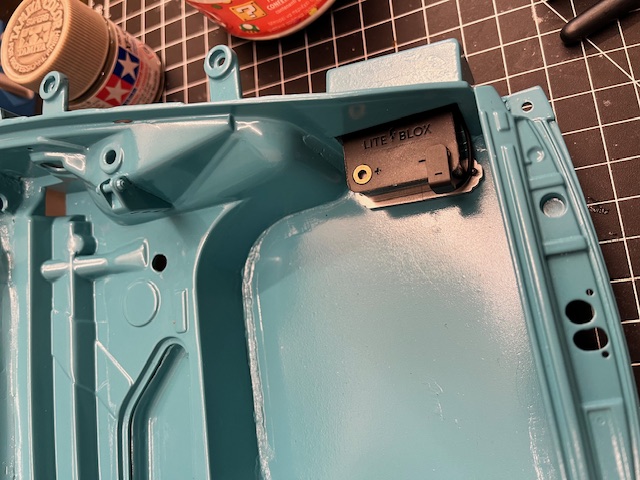 Collection active: Lotus 97T, Audi Quattro A2, Vw Maggiolino '60
Work in progress: Porsche 911 RS Turbo
Completed model: Delta WRC Martini, Mclaren MP4/4, Golf GTI 1/8 Tuned
|
|
|
Rank: Vice-Master Groups: Registered
Joined: 05/04/2016 Posts: 706 Points: 2,121 Location: Ferrara
|
I'll continue with the assembly of all the various details and connections: - Relay box positioned and front electrical wiring loom connected - Connected the passage of the front oil cooler pipe - Positioned the missing casing from the kit that covers the steering column - The upper front suspension plates are mounted - Mounted primary fuel pump on the struts bar and connected both the inlet and return supply pipes - The fuel fill hose and the petrol vapor vent hose are mounted and connected -Position the windshield washer tank with its bracket and connect the hoses to the pump. Hoses that in the future will connect to the nozzles located at the base of the windshield. Also connected is the electrical wiring that operates the windshield washer pump. 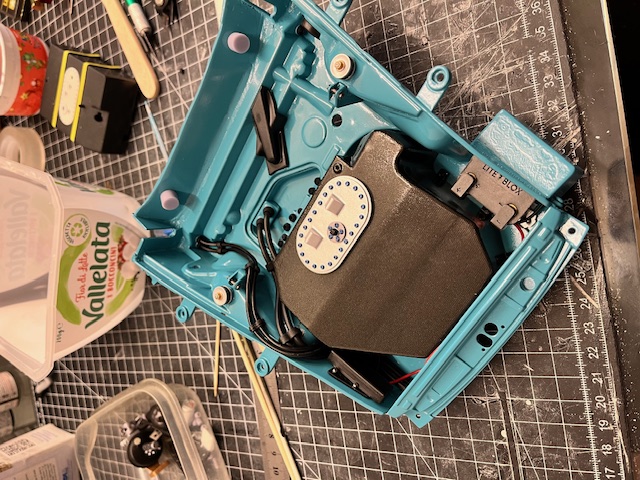 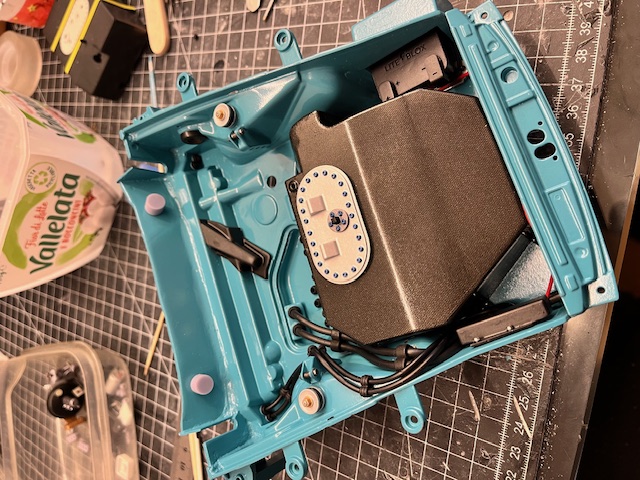 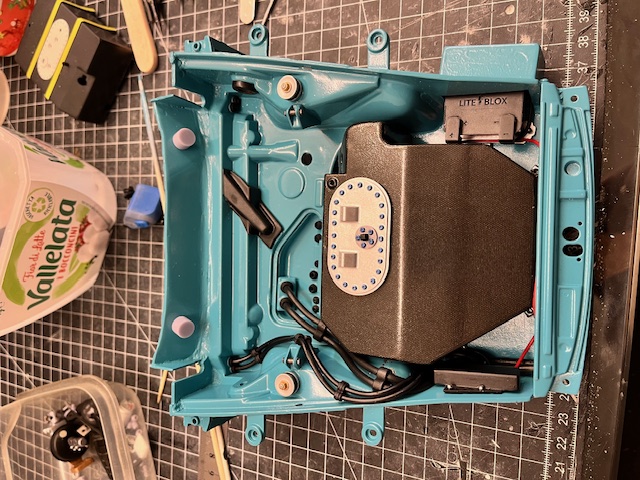  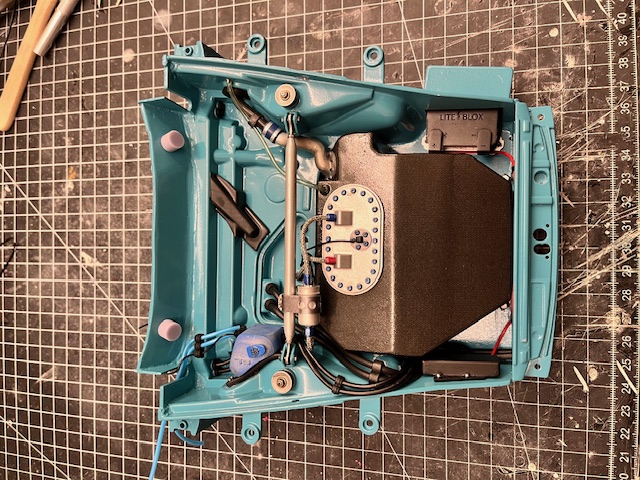 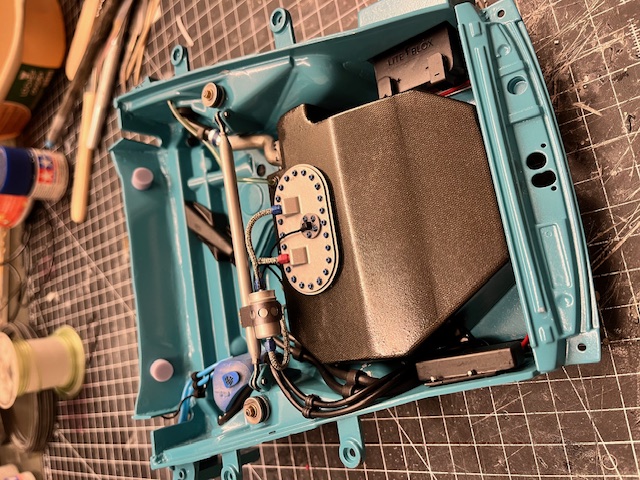  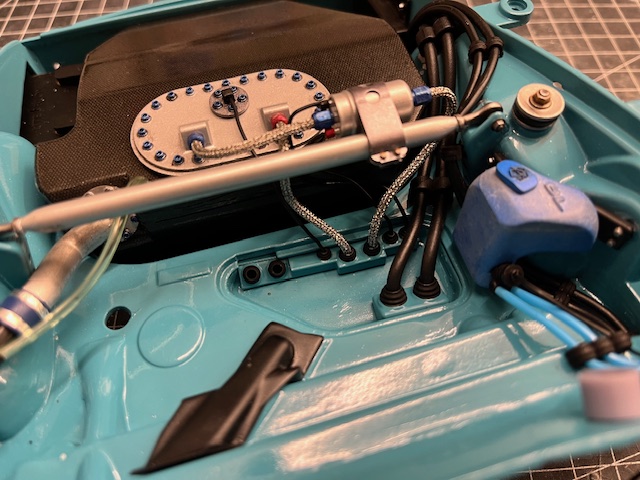  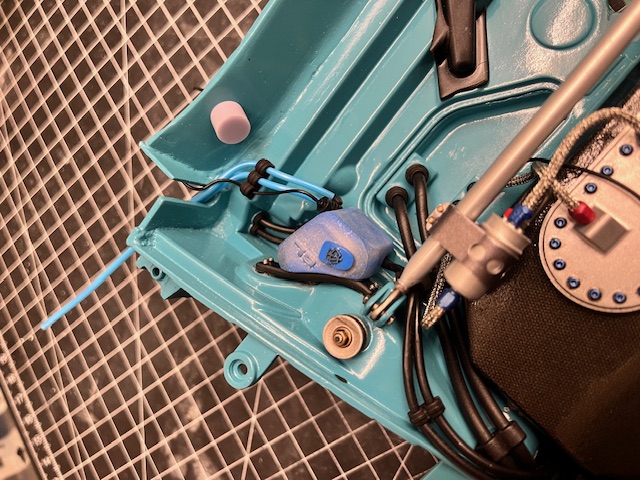 Collection active: Lotus 97T, Audi Quattro A2, Vw Maggiolino '60
Work in progress: Porsche 911 RS Turbo
Completed model: Delta WRC Martini, Mclaren MP4/4, Golf GTI 1/8 Tuned
|
|
|
Rank: Vice-Master Groups: Registered
Joined: 05/04/2016 Posts: 706 Points: 2,121 Location: Ferrara
|
Last job to finish the front compartment: the brake booster-master cylinder assembly and brake fluid reservoir. The tank was painted matt white and then I worked with Tamiya pigments to yellow it to mimic the color of the dot4 A light general wash is a bit of wheatereing and I placed the assembly in place. Last job, I connected the hydraulic pipes and the braking circuit pressure sensors I then mounted mudguards and bumpers to check that the bonnet closed without various impediments. 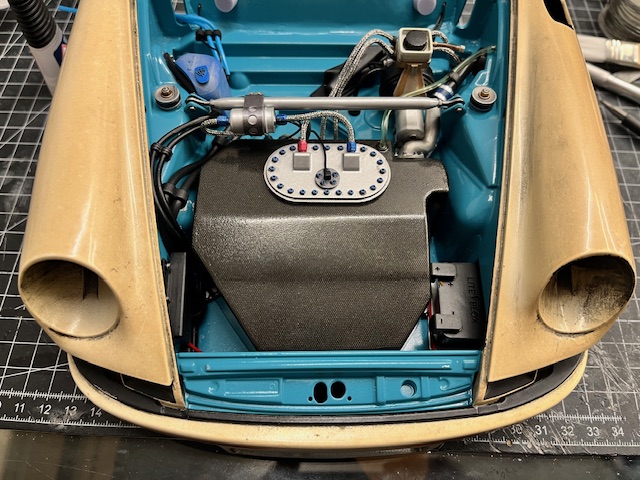 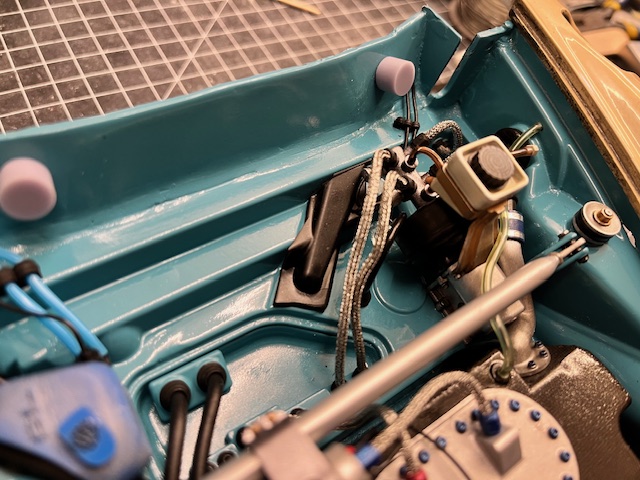 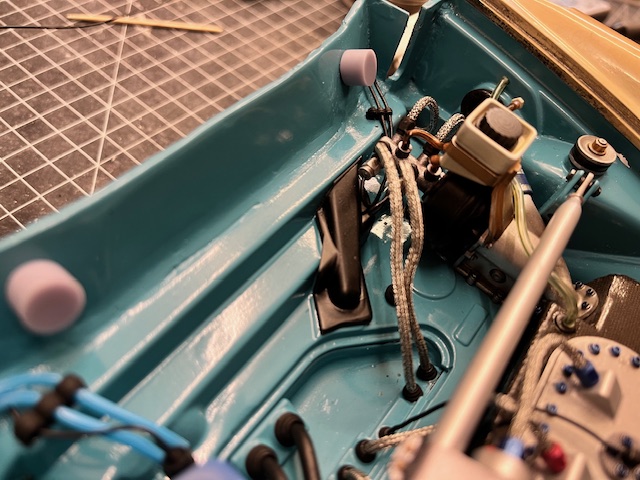 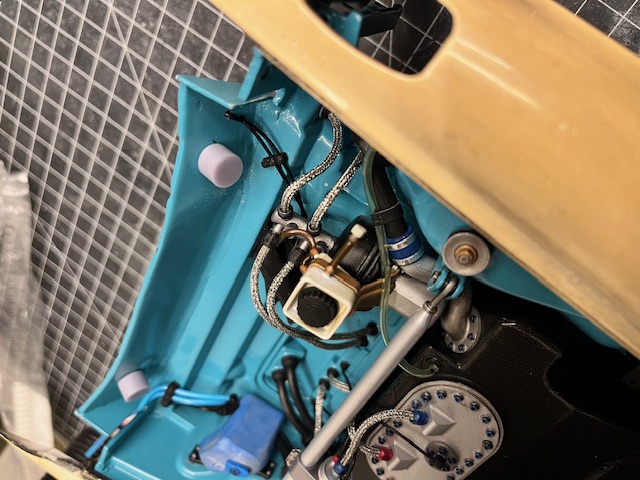 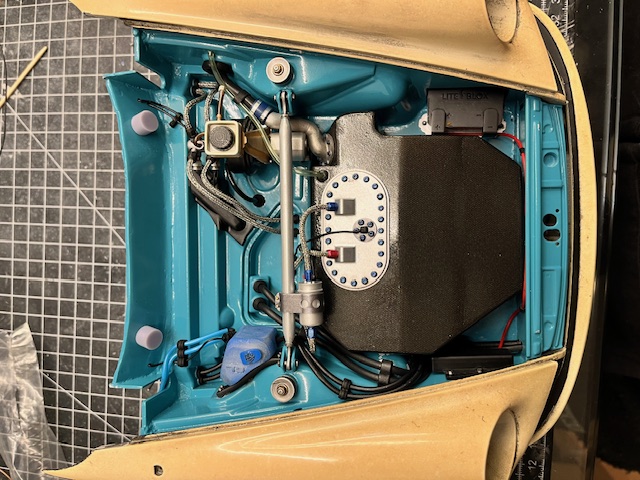 Collection active: Lotus 97T, Audi Quattro A2, Vw Maggiolino '60
Work in progress: Porsche 911 RS Turbo
Completed model: Delta WRC Martini, Mclaren MP4/4, Golf GTI 1/8 Tuned
|
|
|
Rank: Vice-Master Groups: Registered
Joined: 05/04/2016 Posts: 706 Points: 2,121 Location: Ferrara
|
|
|
|
Rank: Vice-Master Groups: Registered
Joined: 05/04/2016 Posts: 706 Points: 2,121 Location: Ferrara
|
|
|
|
Rank: Vice-Master Groups: Registered
Joined: 05/04/2016 Posts: 706 Points: 2,121 Location: Ferrara
|
|
|
|
Rank: Vice-Master Groups: Registered
Joined: 05/04/2016 Posts: 706 Points: 2,121 Location: Ferrara
|
|
|
|
Rank: Master Groups: Registered
Joined: 21/04/2011 Posts: 1,040 Points: 3,149 Location: Buckinghamshire
|
Hi Francesco,
This build continues to be of the highest skill and inventiveness.
Looking really good. Congratulations.
Chris
|
|
|
Rank: Vice-Master Groups: Registered
Joined: 05/04/2016 Posts: 706 Points: 2,121 Location: Ferrara
|
goddo wrote:Hi Francesco,
This build continues to be of the highest skill and inventiveness.
Looking really good. Congratulations.
Chris Many Thanks Chris! Once the splitter was finished I started thinking about fixed rear windows also known as quarter window With the adoption of the IC I already had a forced air flow in mind that would always remember the rsr system. I started the work by importing the graphic area on which to work and obtain the initial shape on which to then build the air intake: the fourth one was good. 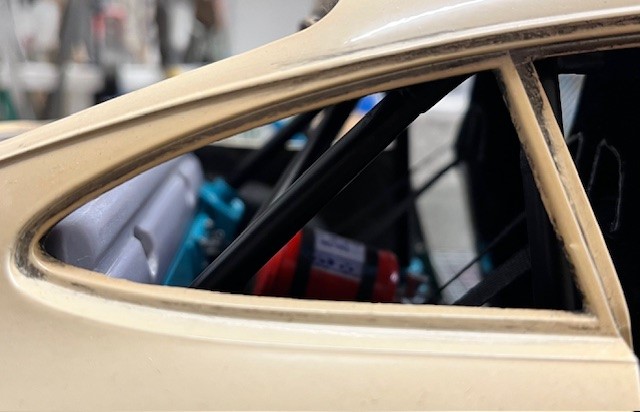 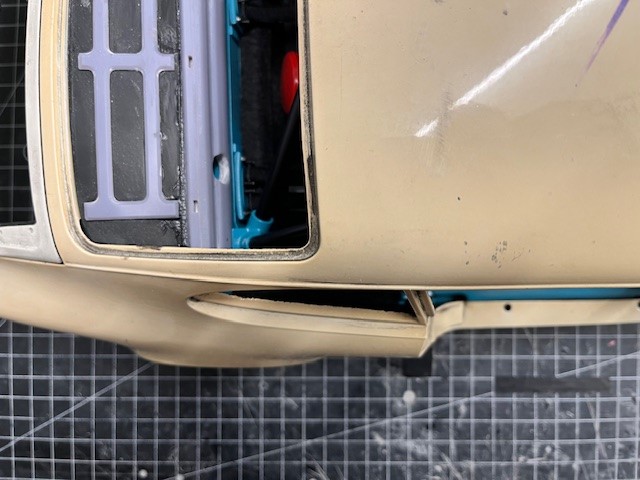 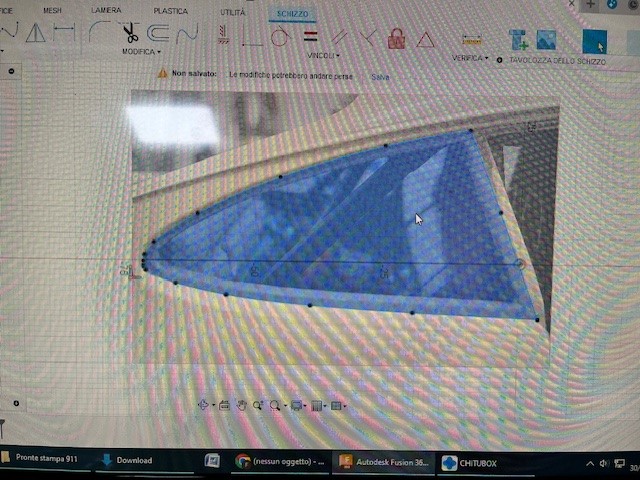 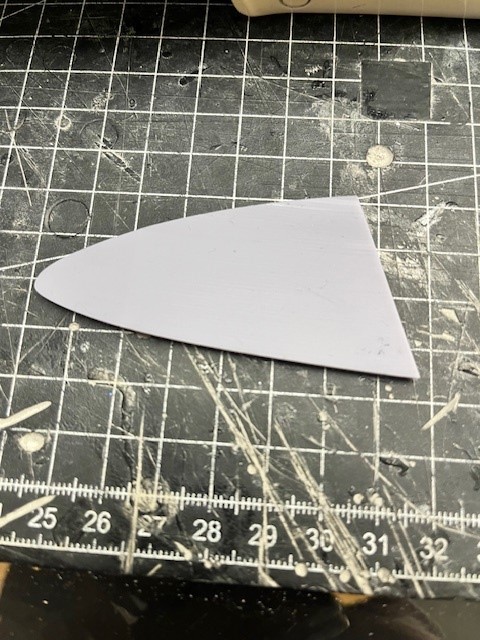  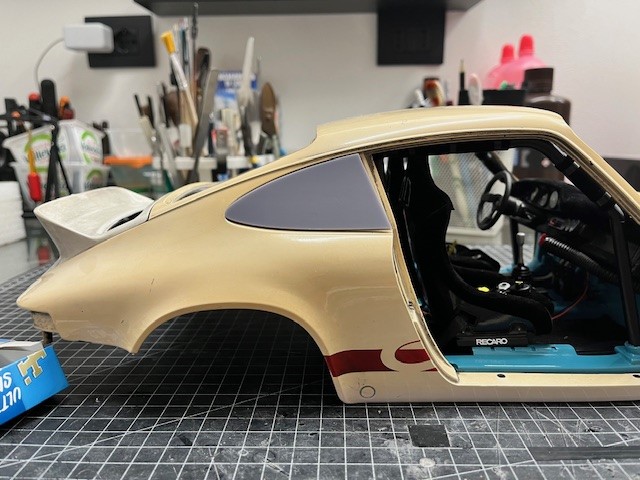 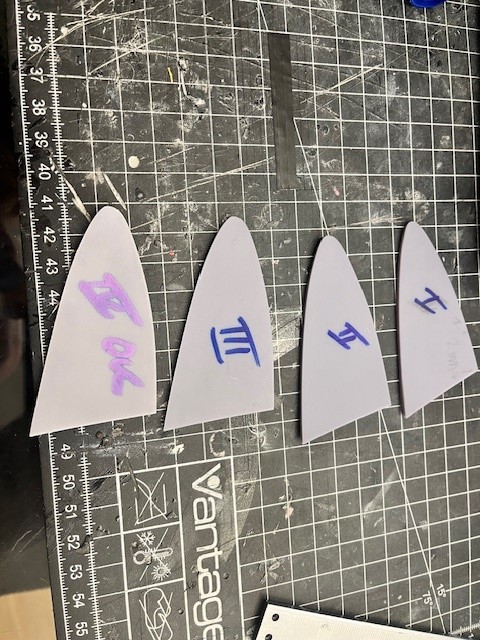 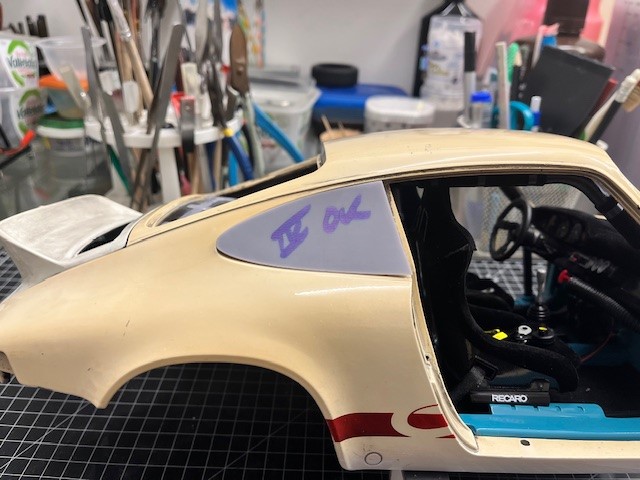 Collection active: Lotus 97T, Audi Quattro A2, Vw Maggiolino '60
Work in progress: Porsche 911 RS Turbo
Completed model: Delta WRC Martini, Mclaren MP4/4, Golf GTI 1/8 Tuned
|
|
|
Rank: Vice-Master Groups: Registered
Joined: 05/04/2016 Posts: 706 Points: 2,121 Location: Ferrara
|
|
|
|
Rank: Vice-Master Groups: Registered
Joined: 05/04/2016 Posts: 706 Points: 2,121 Location: Ferrara
|
|
|
|
Rank: Master Groups: Registered
Joined: 21/04/2011 Posts: 1,040 Points: 3,149 Location: Buckinghamshire
|
Hi Francesco,
Always look forward to seeing your build updates.
Superb workmanship.
Chris
|
|
|
Rank: Vice-Master Groups: Registered
Joined: 05/04/2016 Posts: 706 Points: 2,121 Location: Ferrara
|
|
|
|
Rank: Vice-Master Groups: Registered
Joined: 05/04/2016 Posts: 706 Points: 2,121 Location: Ferrara
|
I then started working on the doors and specifically on the inner cards. As in my previous 1/8 golf GTI, I will cover almost entirely in carbon decal. I look various panels as examples: I will mix carbon with elements of those covered in fabric/leather I applied a 0.5mm plasticard sheet over panel which I then drilled to apply in the future the internal handle, the internal door opening and the window lift handle.   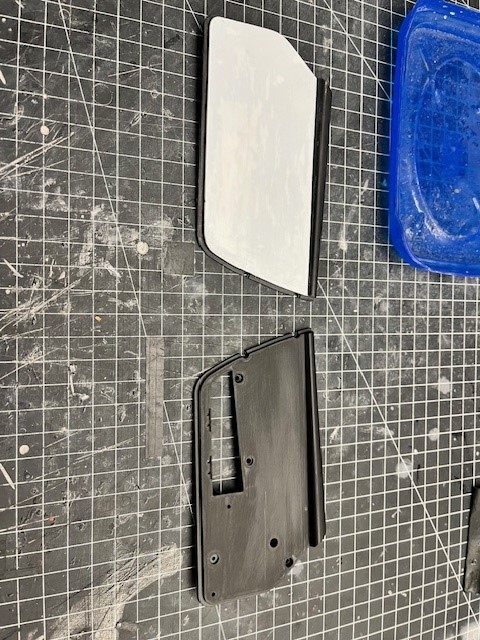 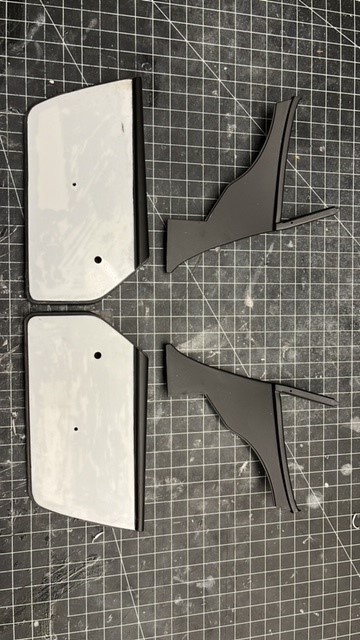 Collection active: Lotus 97T, Audi Quattro A2, Vw Maggiolino '60
Work in progress: Porsche 911 RS Turbo
Completed model: Delta WRC Martini, Mclaren MP4/4, Golf GTI 1/8 Tuned
|
|
|
Rank: Vice-Master Groups: Registered
Joined: 05/04/2016 Posts: 706 Points: 2,121 Location: Ferrara
|
I then turned my attention to other elements of the door. In addition to wanting to replace the mirrors, I also revised the handles. For the mirrors I opted for classic ogive ones where I also inclined the mirror depending on the side mounted. I replaced the handles with those of the 944 type which have a decidedly more beautiful shape for which I made the lock cylinder separate to facilitate future painting. I produced the door pin which was totally omitted. Finally I redid the knob that will be applied to the window lift handle (very basic). 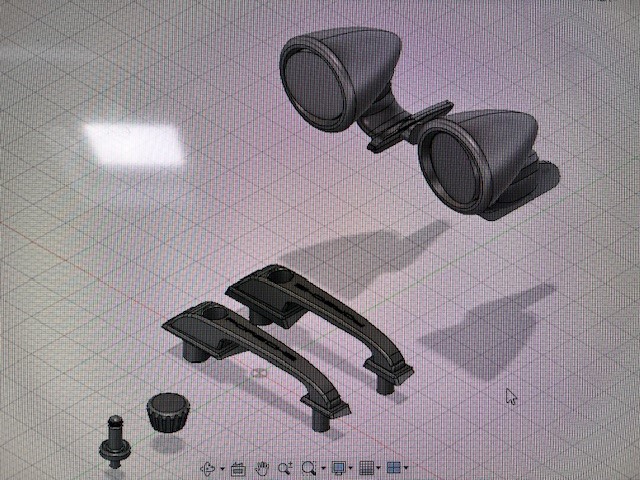 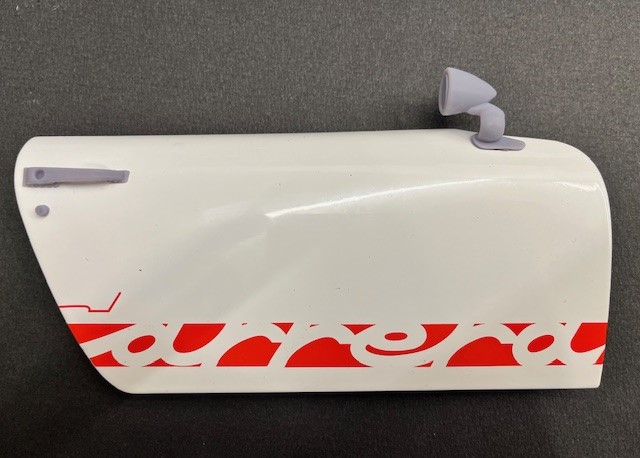 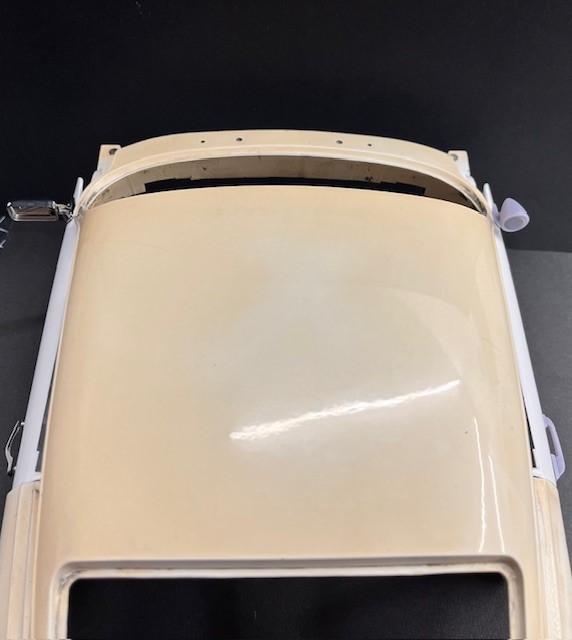 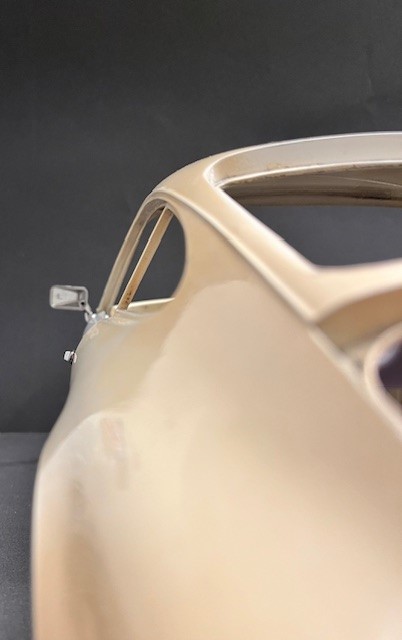 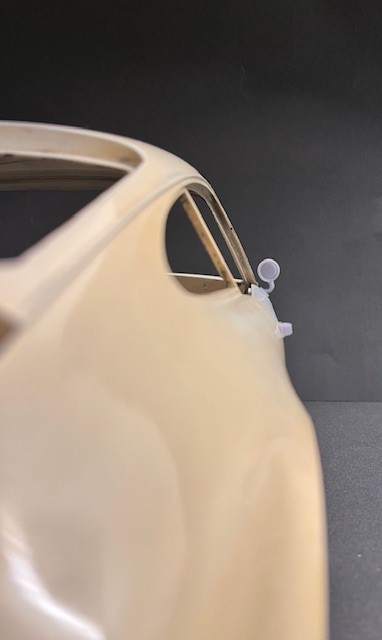 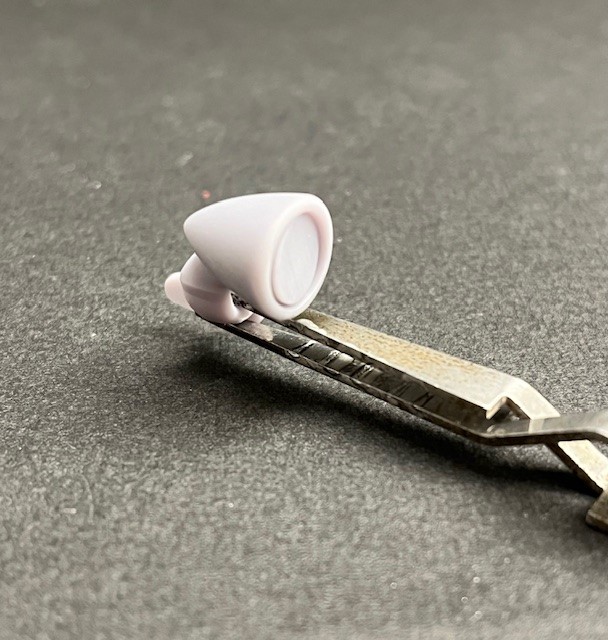 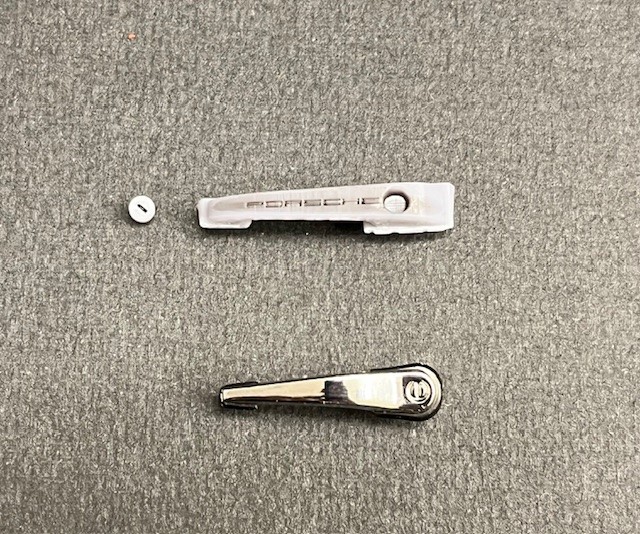 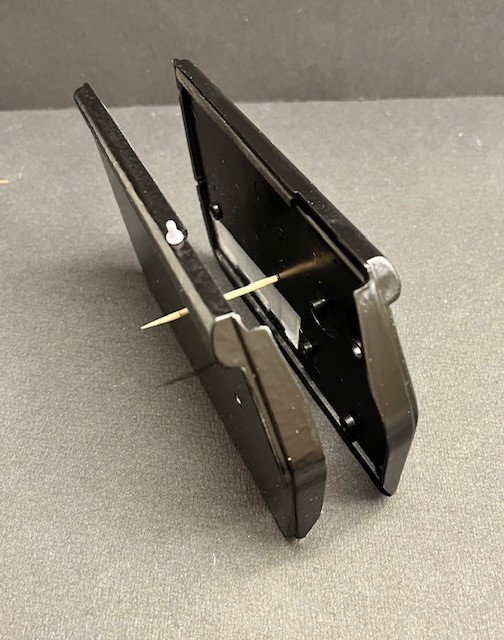 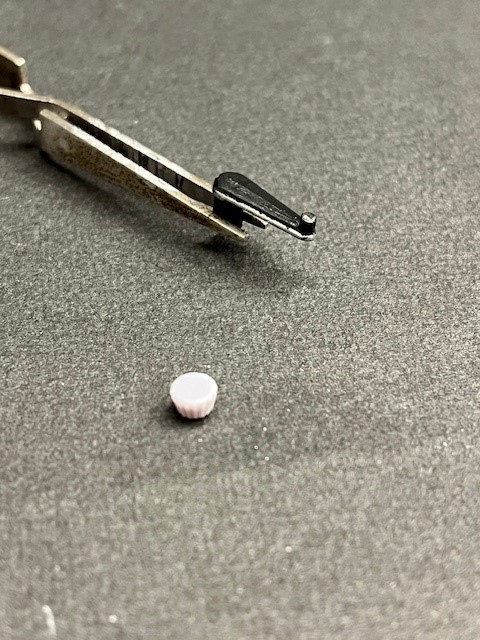 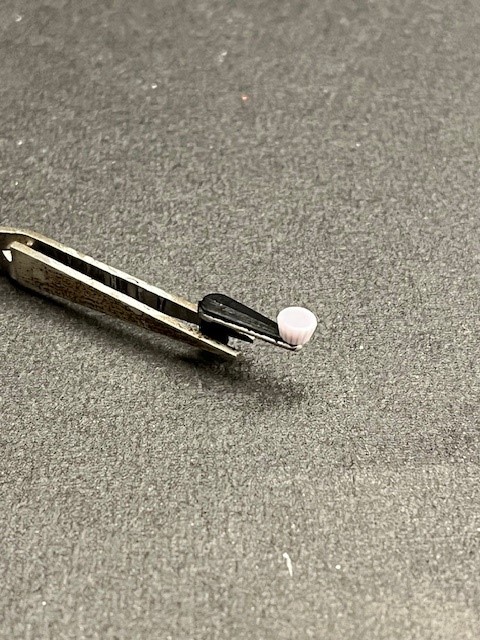 Collection active: Lotus 97T, Audi Quattro A2, Vw Maggiolino '60
Work in progress: Porsche 911 RS Turbo
Completed model: Delta WRC Martini, Mclaren MP4/4, Golf GTI 1/8 Tuned
|
|
|
Rank: Vice-Master Groups: Registered
Joined: 05/04/2016 Posts: 706 Points: 2,121 Location: Ferrara
|
In my first idea of air intake system I had in mind to put the cone filter directly on the cold side turbo but it seemed too extreme and not very functional. The RSR use an intake air flow system that I tried to replicate: periscope intake on the wing - duct - airbox and finally turbo. I started from the periscope air intake that I positioned in the right side area of the cooling grill. As usual I imported the various graphic areas in fusion to have a direction to follow for shapes and curves. I then continued to work on the duct with the airbox cover (which is the carbon air box of BMC-CDA) and finally the filter element. The system works when the bonnet is closed; when it raise it the airbox remains in position, but the duct with the airbox cover is raised. To work on the last components to connect to the turbo and get the measurements, i dry fixxed the CDA airbox with its duct to the air intake scope. 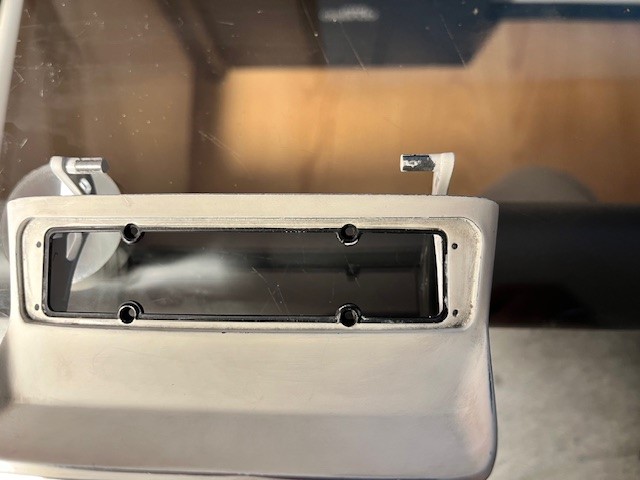 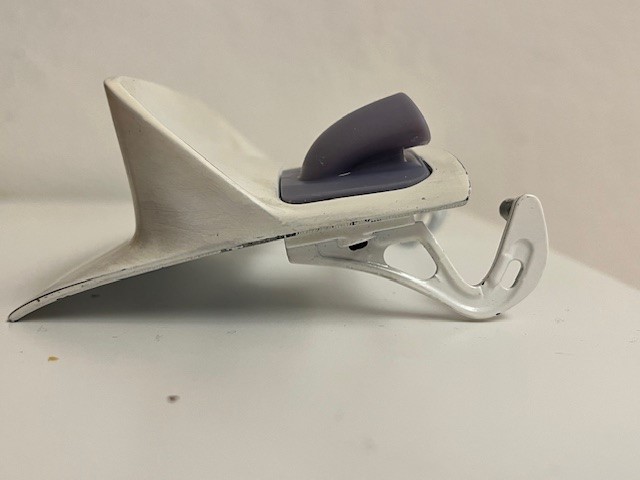 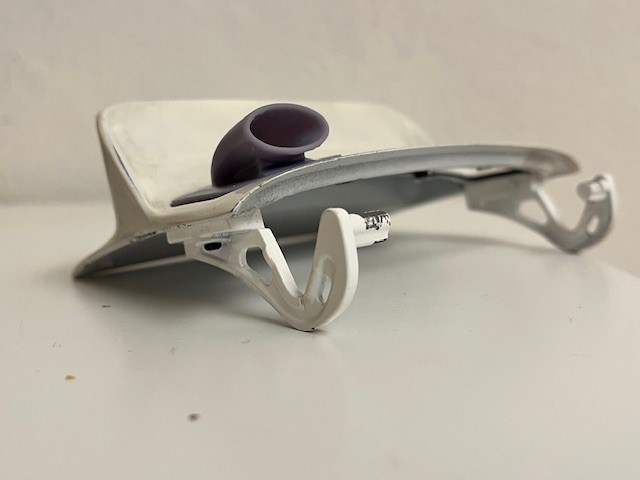 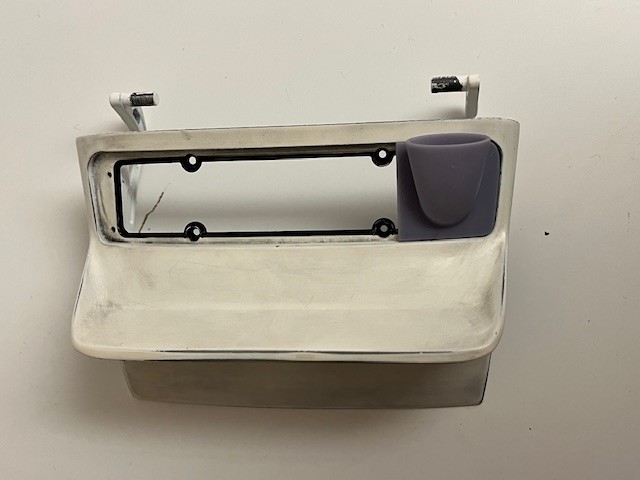 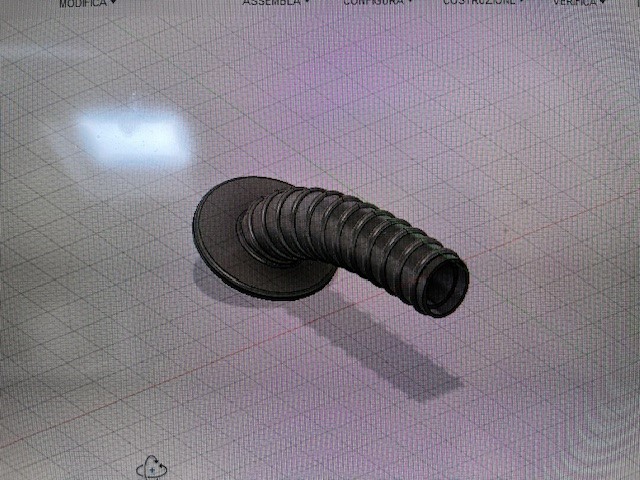 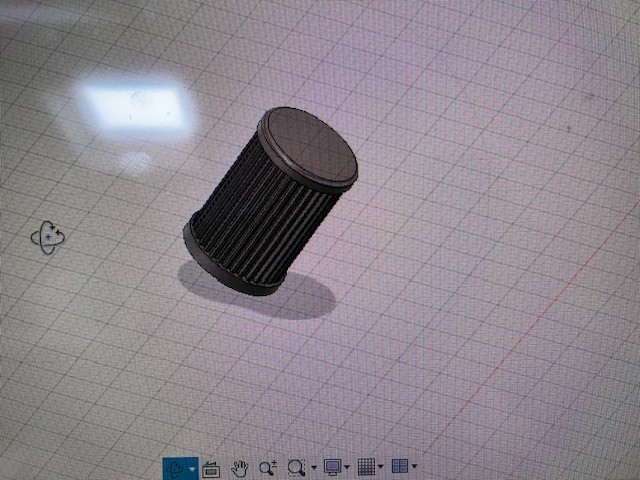 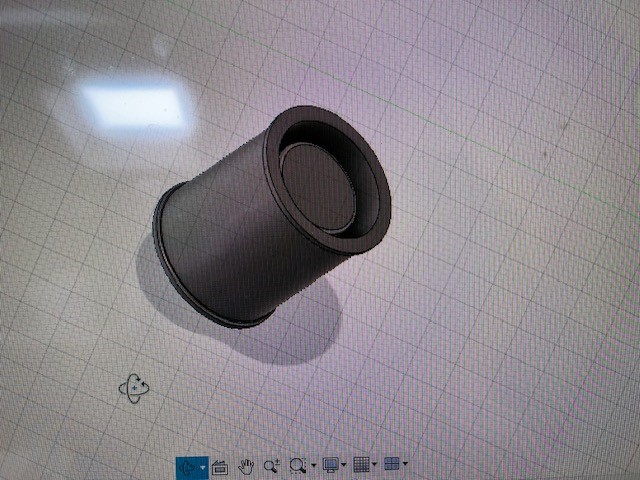 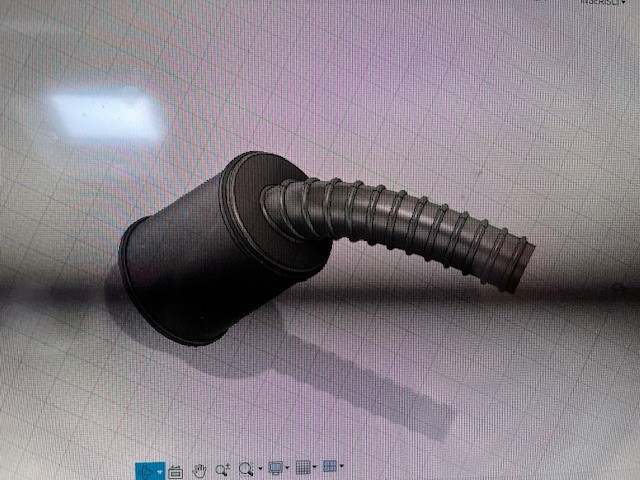  Collection active: Lotus 97T, Audi Quattro A2, Vw Maggiolino '60
Work in progress: Porsche 911 RS Turbo
Completed model: Delta WRC Martini, Mclaren MP4/4, Golf GTI 1/8 Tuned
|
|
|
Rank: Vice-Master Groups: Registered
Joined: 05/04/2016 Posts: 706 Points: 2,121 Location: Ferrara
|
As a first attempt I was getting closer to what I set out to do. I worked on the coupling between the pipe with cover and the CDA to align the CDA with the turbo flange so as to be able to work on a hose with a single 90° bend without having to create double curves with overly complicated trajectories in such a small space. Once I found the right inclination I went ahead designing the sleeve on the turbo, the connection flange between the turbo sleeve and the airbox pipe and finally the airbox pipe itself. I printed, dry mounted and everything came back as I had imagined. Airbox now is fixxed with the turbo.. With the hood down, everything is connected. When the bonnet is raised only the air intake duct separates.  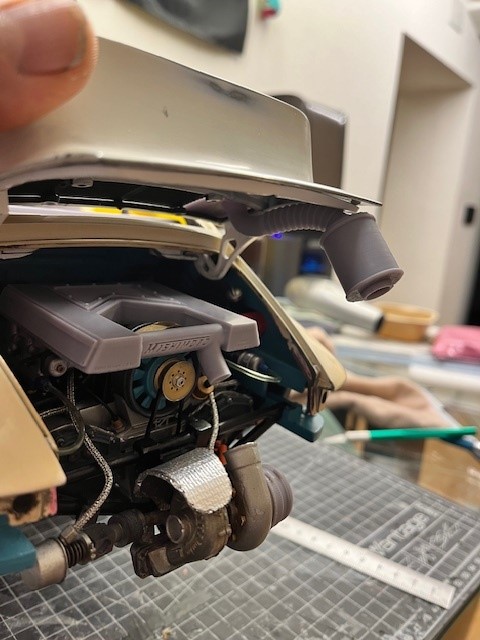  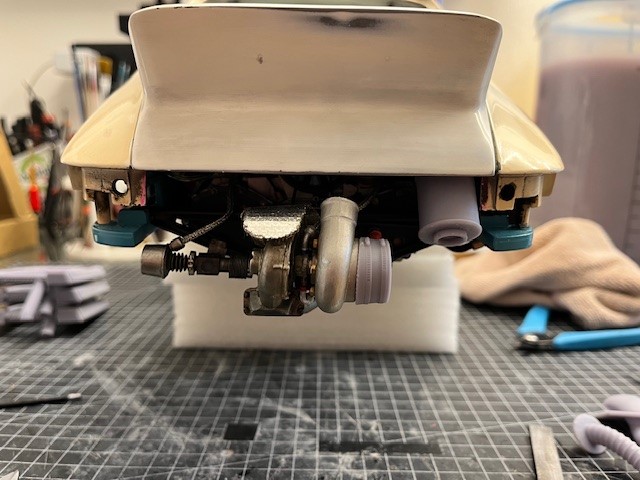 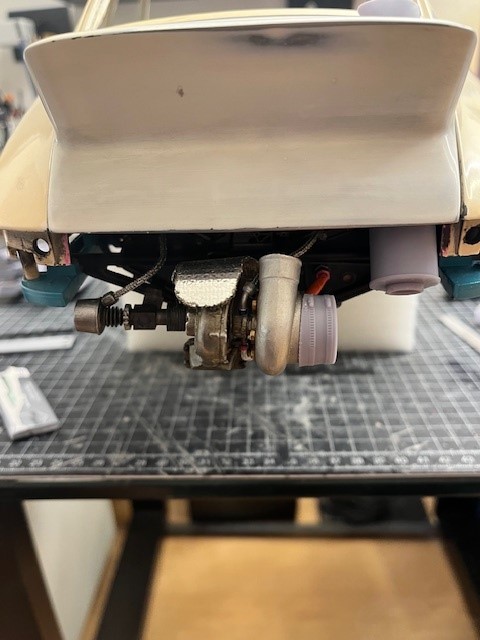 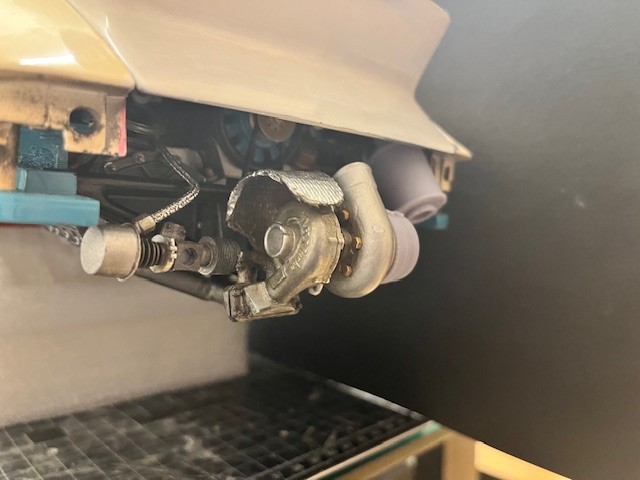 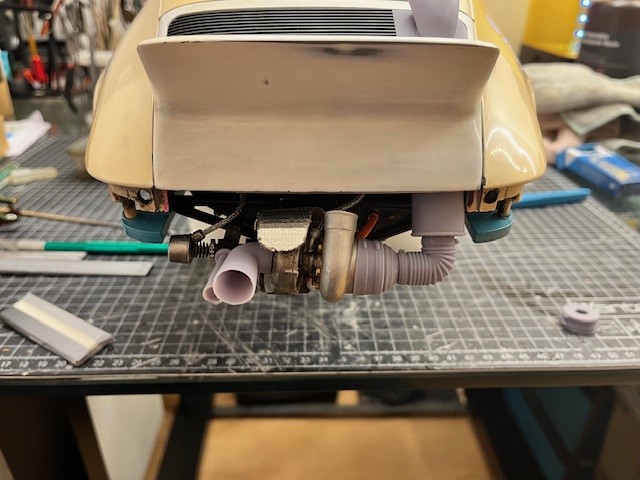 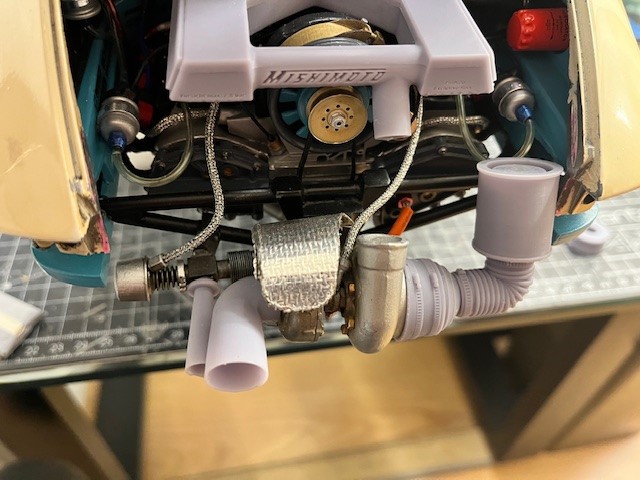 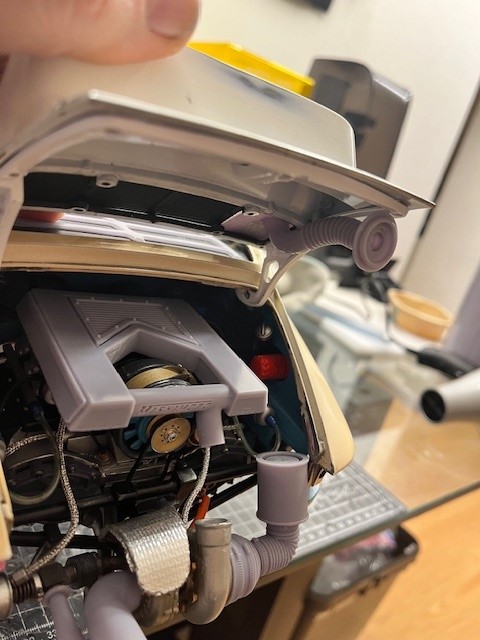 Collection active: Lotus 97T, Audi Quattro A2, Vw Maggiolino '60
Work in progress: Porsche 911 RS Turbo
Completed model: Delta WRC Martini, Mclaren MP4/4, Golf GTI 1/8 Tuned
|
|
|
|
Guest
|
 US
US

