|
|
 Rank: Semi-Pro Level 1  Groups: Registered, Forum Support Team, Forum Support Team Germany, Administrator, Official Builds, Tech Support, Moderator, registriert Joined: 27/09/2016 Posts: 73 Points: 209 Location: Berlin
|
|
|
|
Rank: Semi-Pro Level 1 Groups: Registered, Forum Support Team, Forum Support Team Germany, Administrator, Official Builds, Tech Support, Moderator, registriert Joined: 27/09/2016 Posts: 73 Points: 209 Location: Berlin
|
here the landing lights brushed in the basic color, 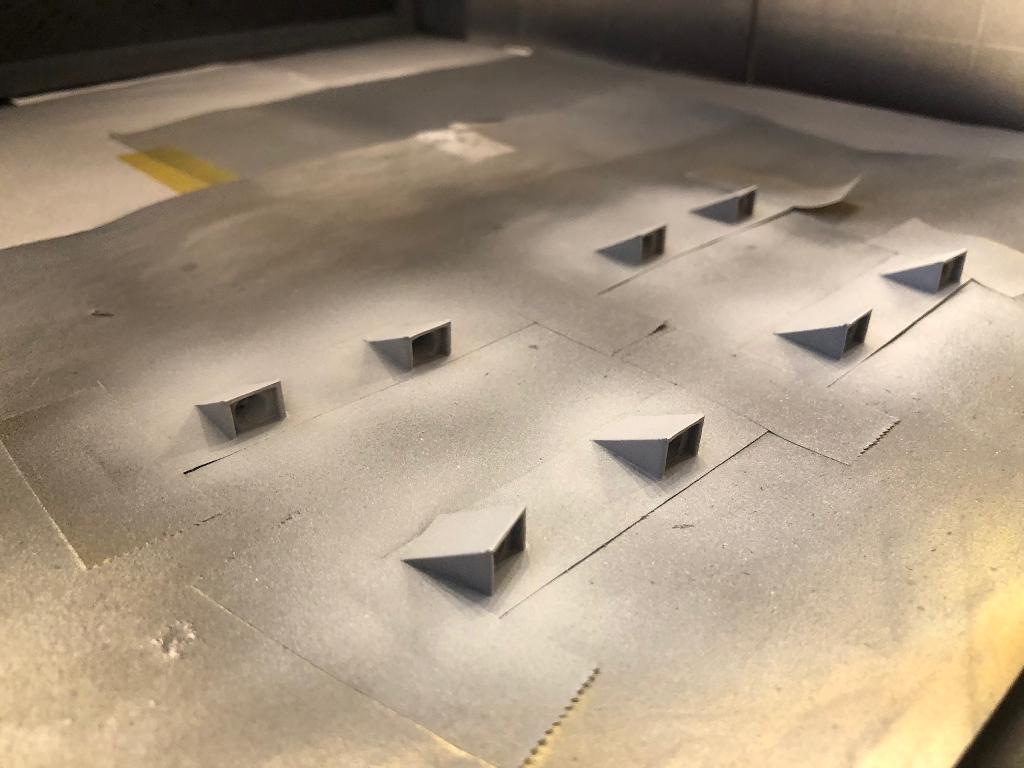 made the reflector chrome, 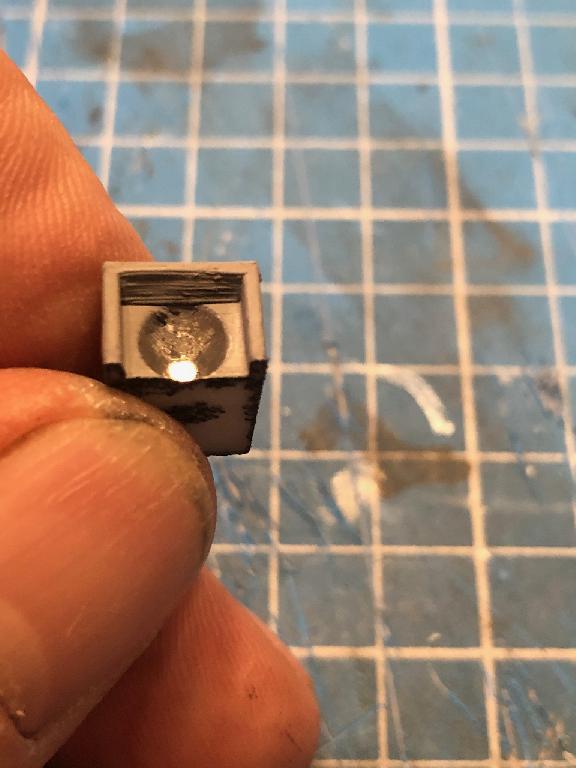 the position lights, 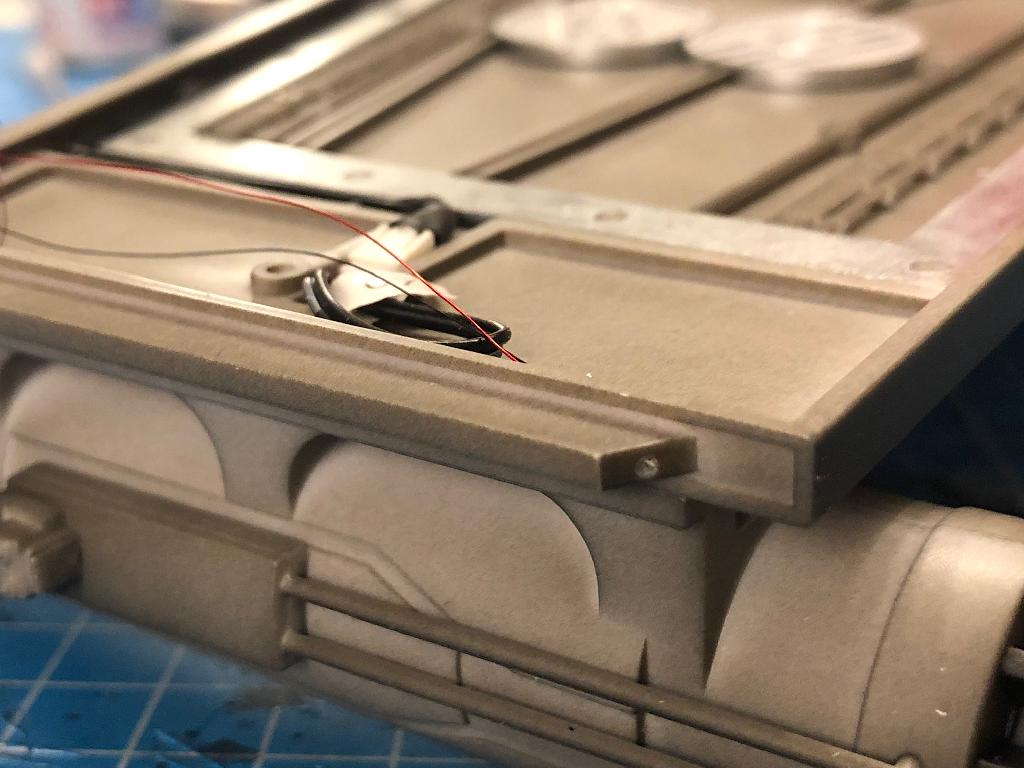 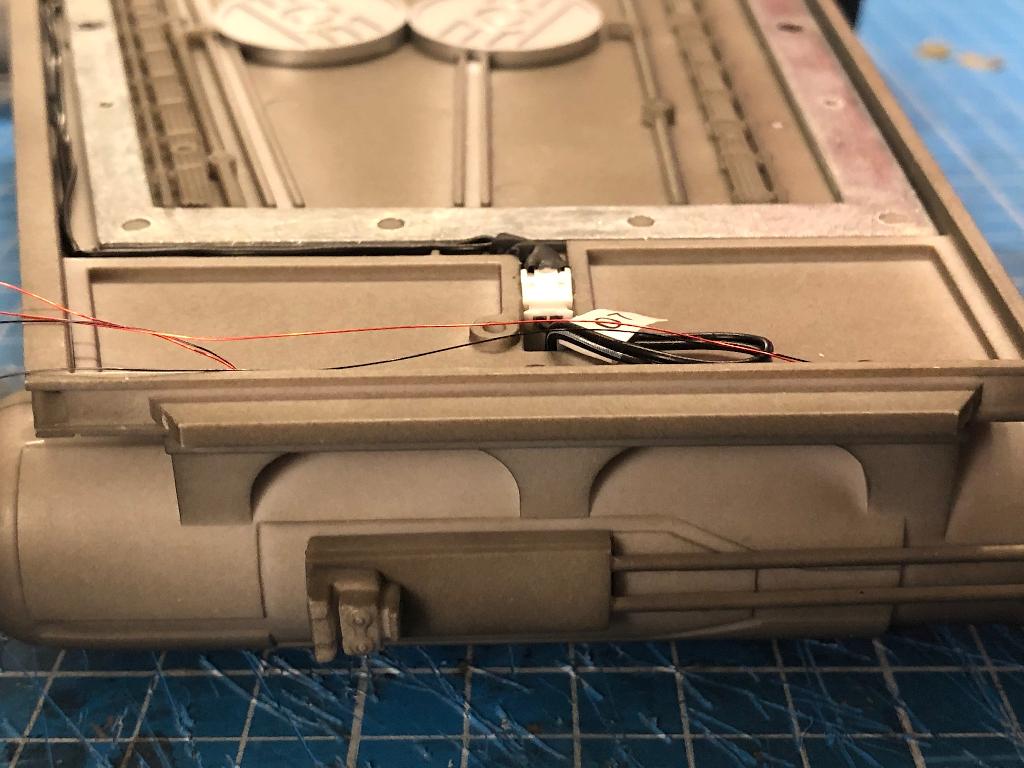 the landing light in function, 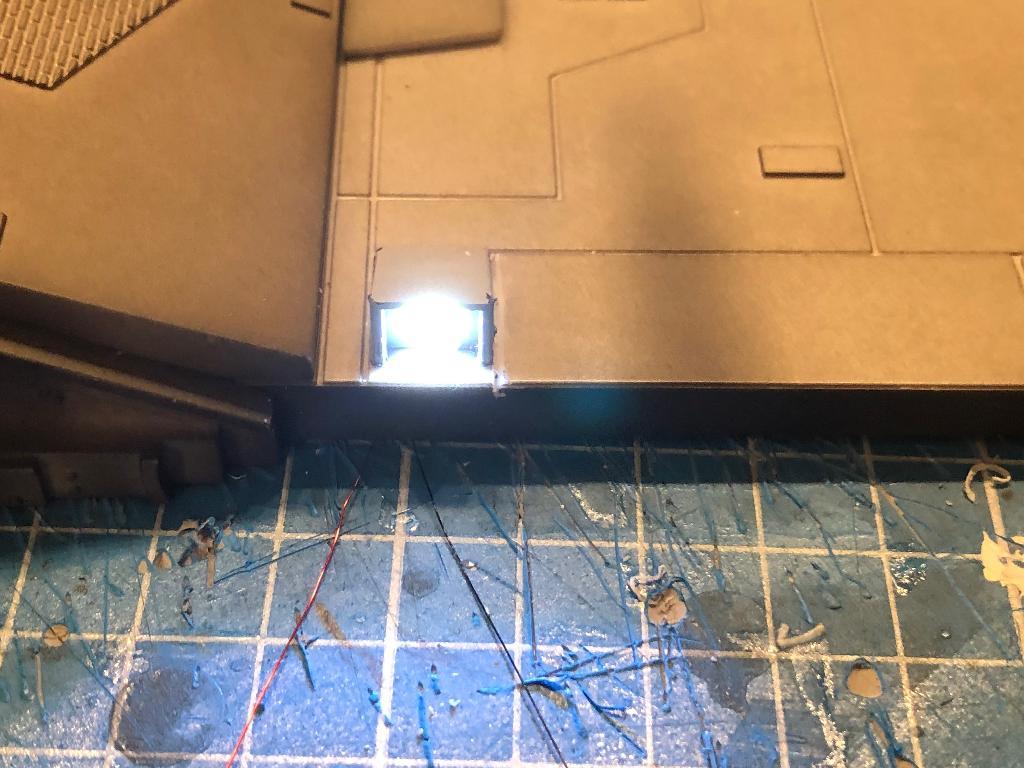 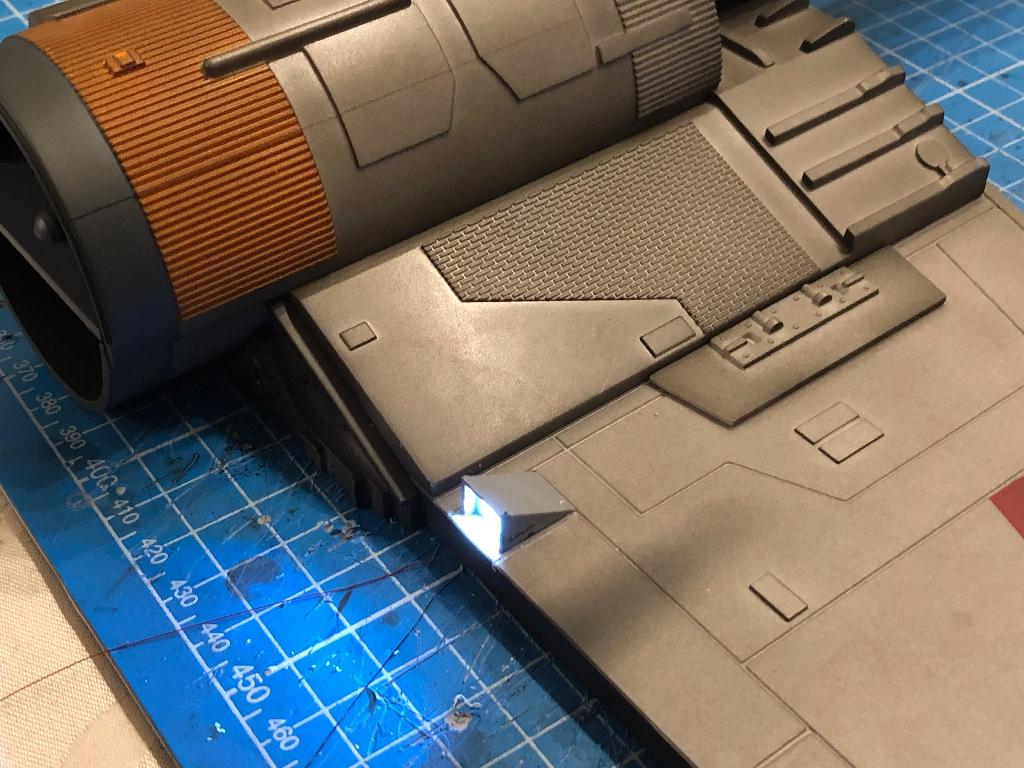 To be continued  Alle Berichte sowie alle Fotos unterliegen dem Urheberrecht. Verwendung außerhalb dieses Forums bedürfen schriftlicher Genehmigung/Zustimmung meinerseits. © StefanForum Support Teamhttp://www.model-space.com/de/
https://m.youtube.com/watch?v=qIC4f1LE86w
MfG Stefan 
|
|
|
Rank: Semi-Pro Level 1 Groups: Registered, Forum Support Team, Forum Support Team Germany, Administrator, Official Builds, Tech Support, Moderator, registriert Joined: 27/09/2016 Posts: 73 Points: 209 Location: Berlin
|
|
|
|
Rank: Semi-Pro Level 1 Groups: Registered, Forum Support Team, Forum Support Team Germany, Administrator, Official Builds, Tech Support, Moderator, registriert Joined: 27/09/2016 Posts: 73 Points: 209 Location: Berlin
|
|
|
|
 Rank: Amateur level 2  Groups: Registered
Joined: 10/09/2018 Posts: 42 Points: 129 Location: Texas
|
|
|
|
Rank: Semi-Pro Level 1 Groups: Registered, Forum Support Team, Forum Support Team Germany, Administrator, Official Builds, Tech Support, Moderator, registriert Joined: 27/09/2016 Posts: 73 Points: 209 Location: Berlin
|
I was thinking how to get the mass of fiber optics coming out of the cockpit tamed   here the idea,  since there is space in the front area of the X-Wing, I printed and adapted a partition 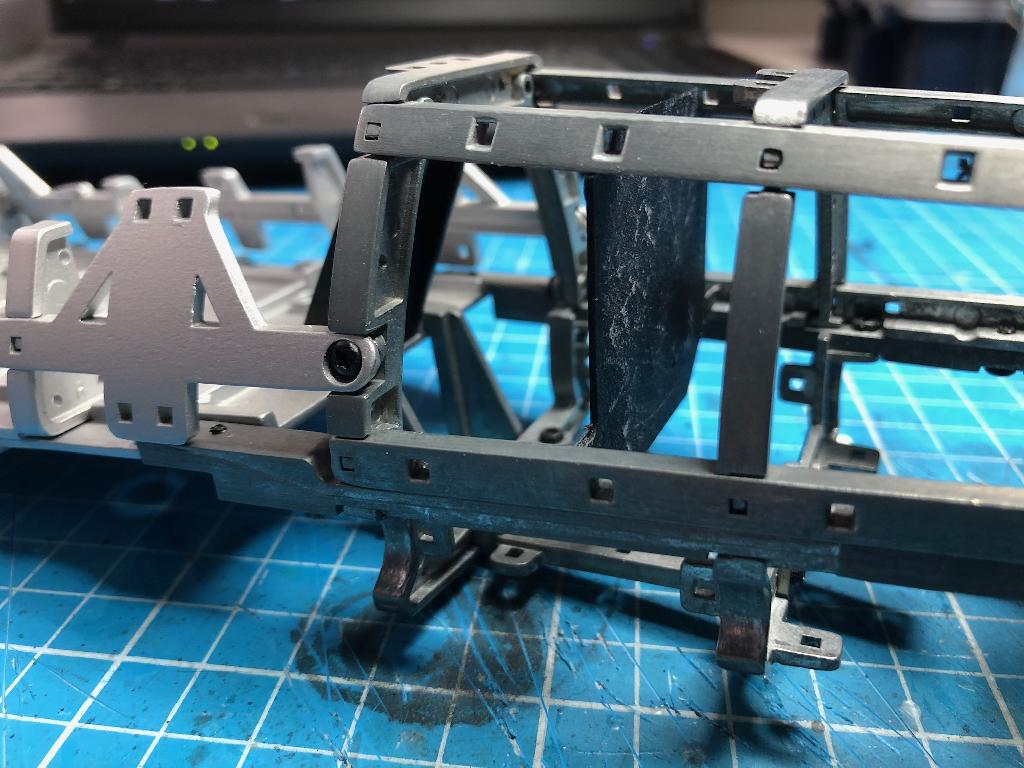 Since the tips of the fiber optic cables have to be illuminated, tubes with 5mm inner diameter come into this partition, here the design in the slicer, 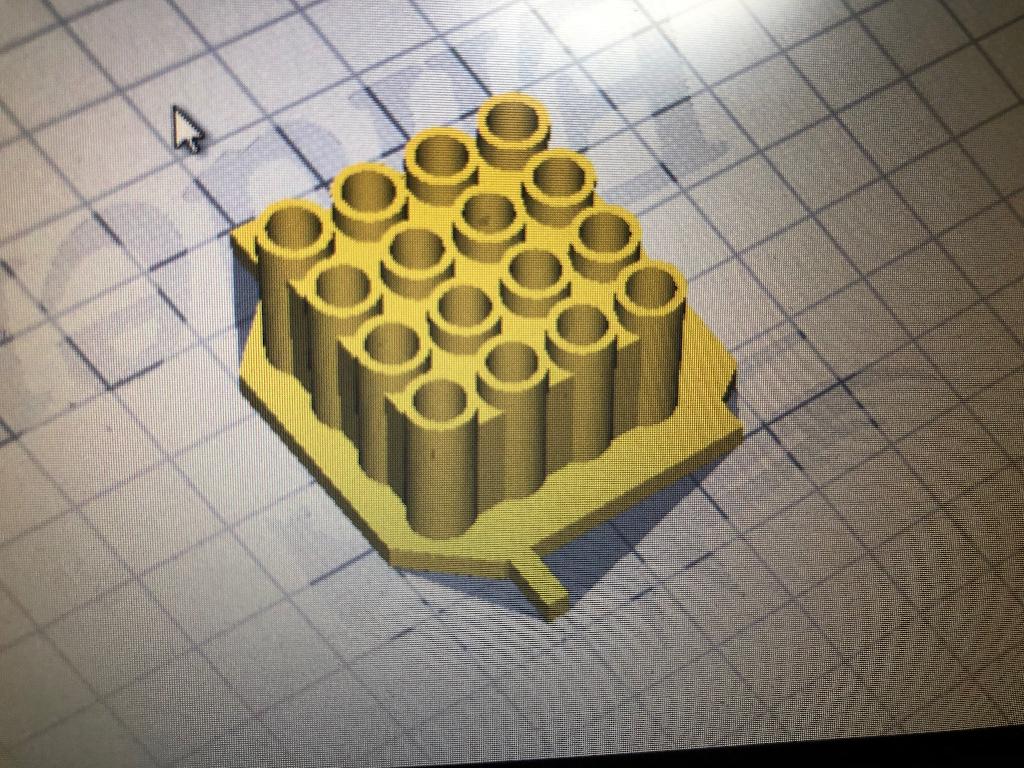 the finished print, 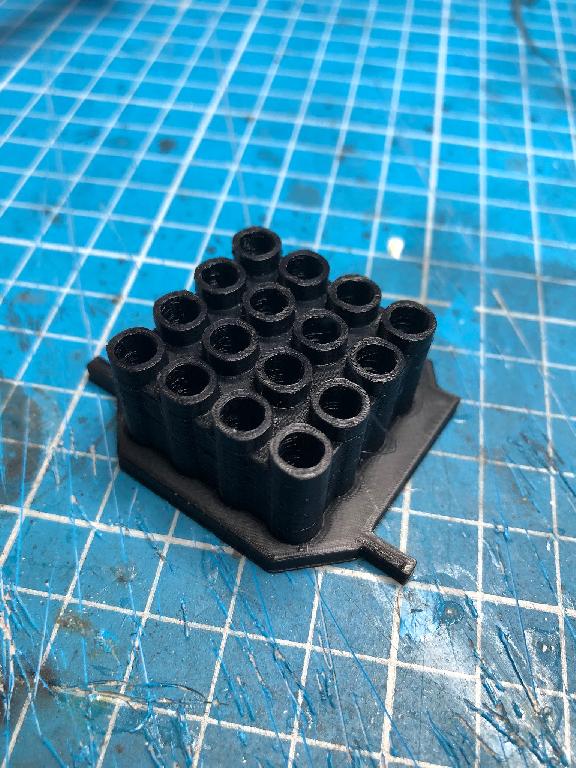 once an LED is inserted, up to 16 LEDs fit in, colored, flashing and continuously lit, as required;) 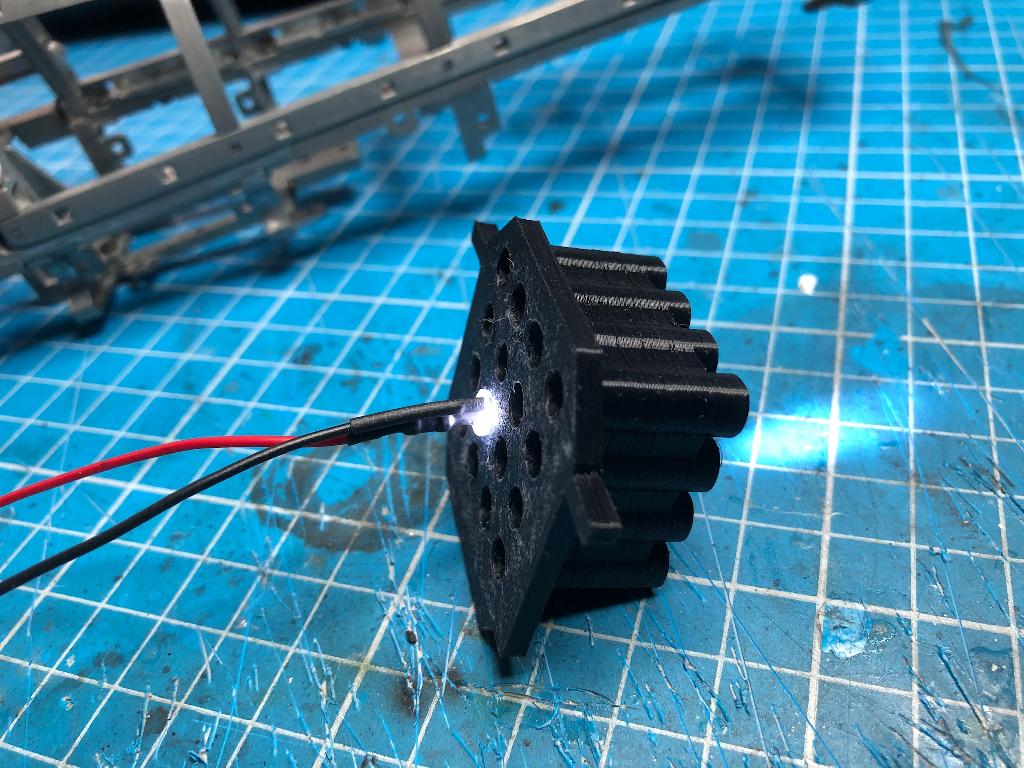 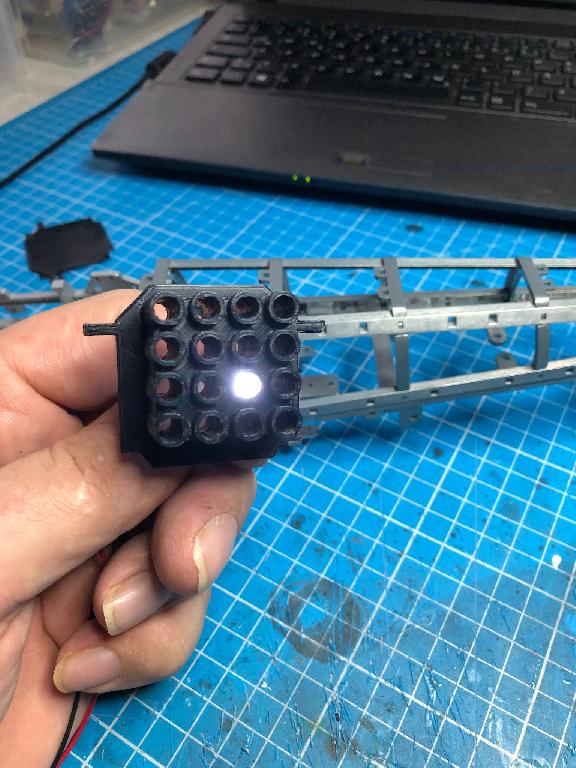 I had to remove a connecting strut at the top for assembly, 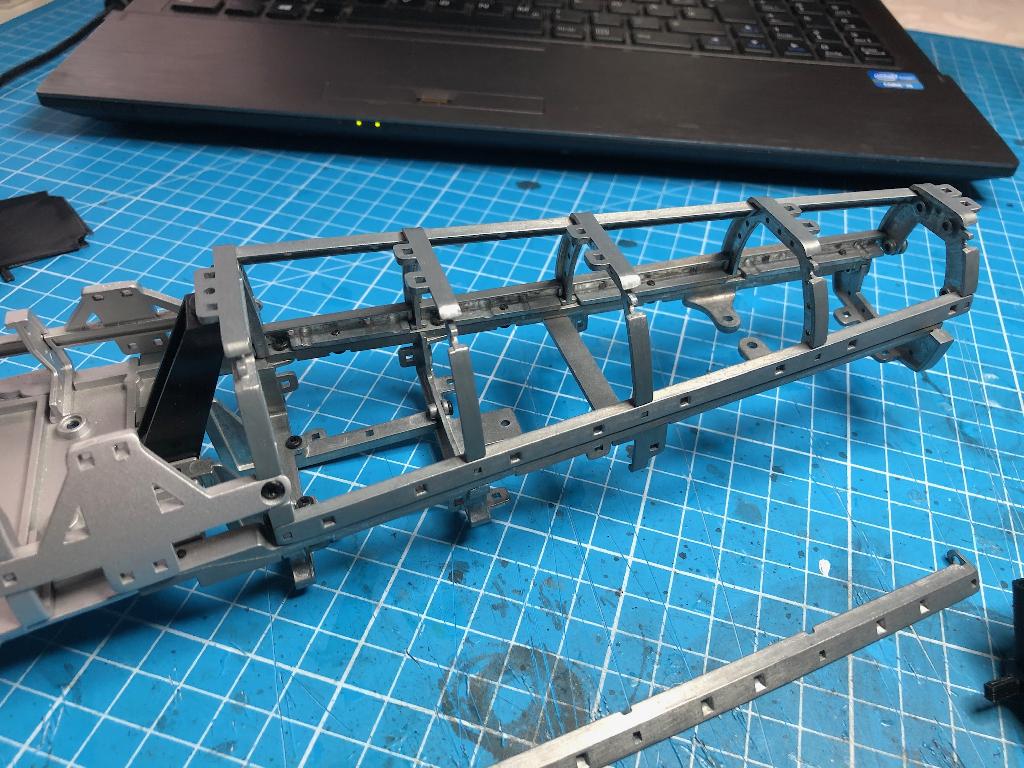 here it is used, 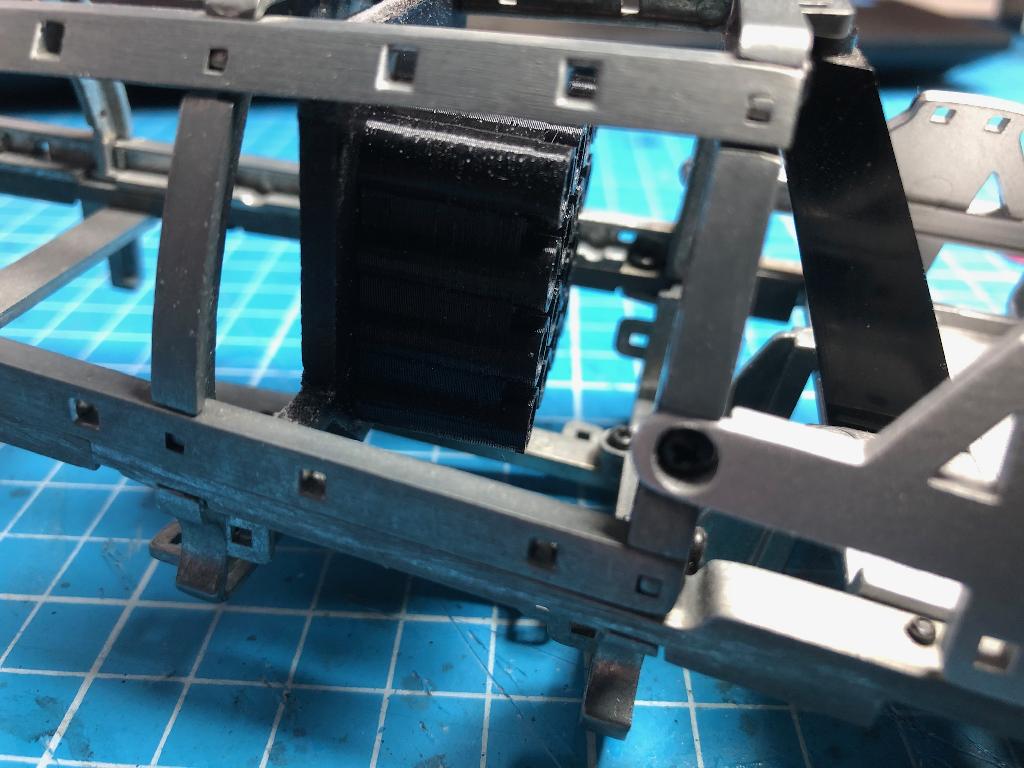 with provisionally inserted fiber optics, these are finally fixed with white glue, 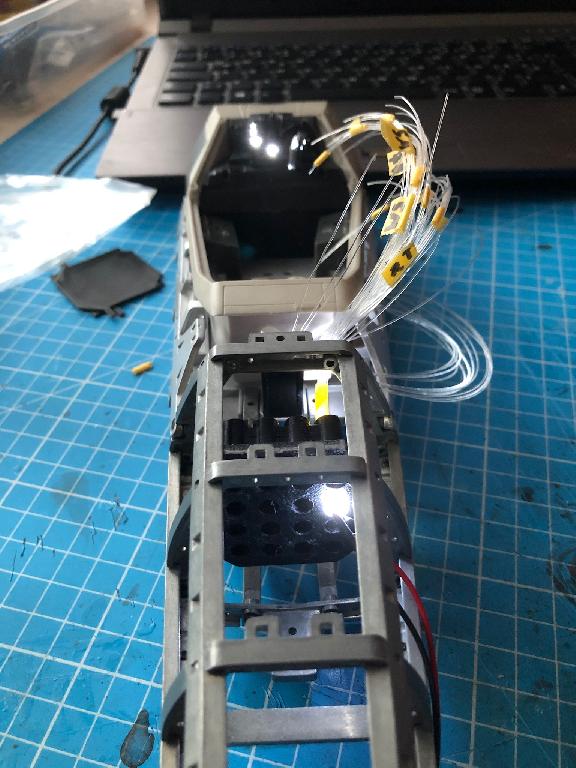 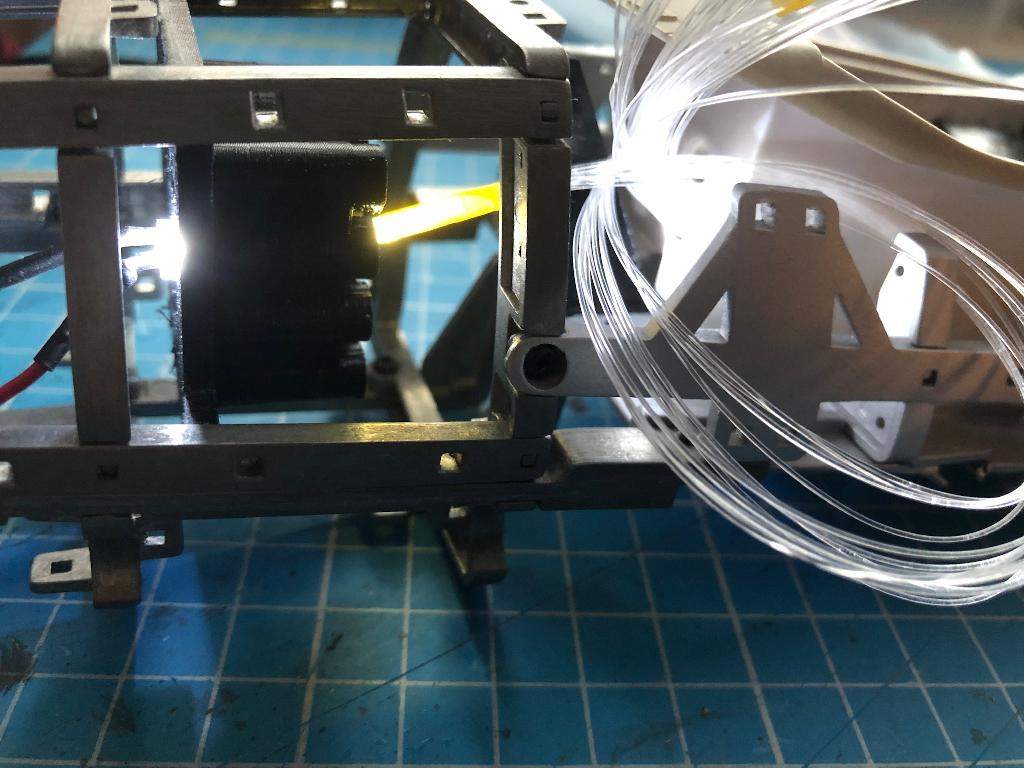 photographed again in the nose, 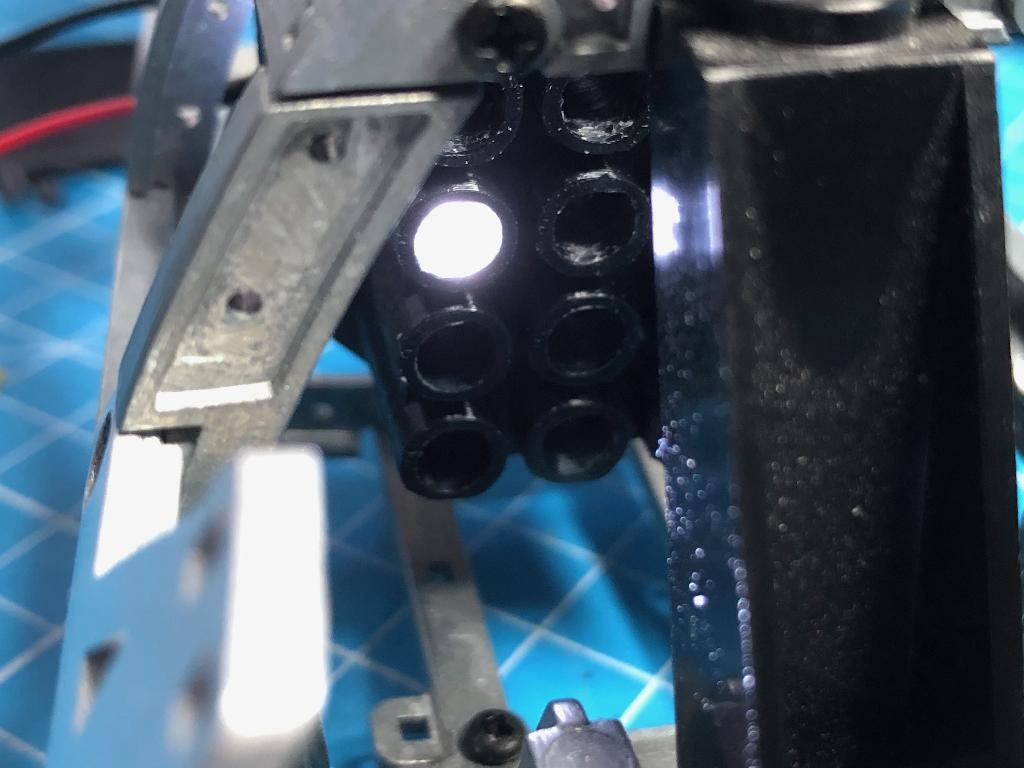 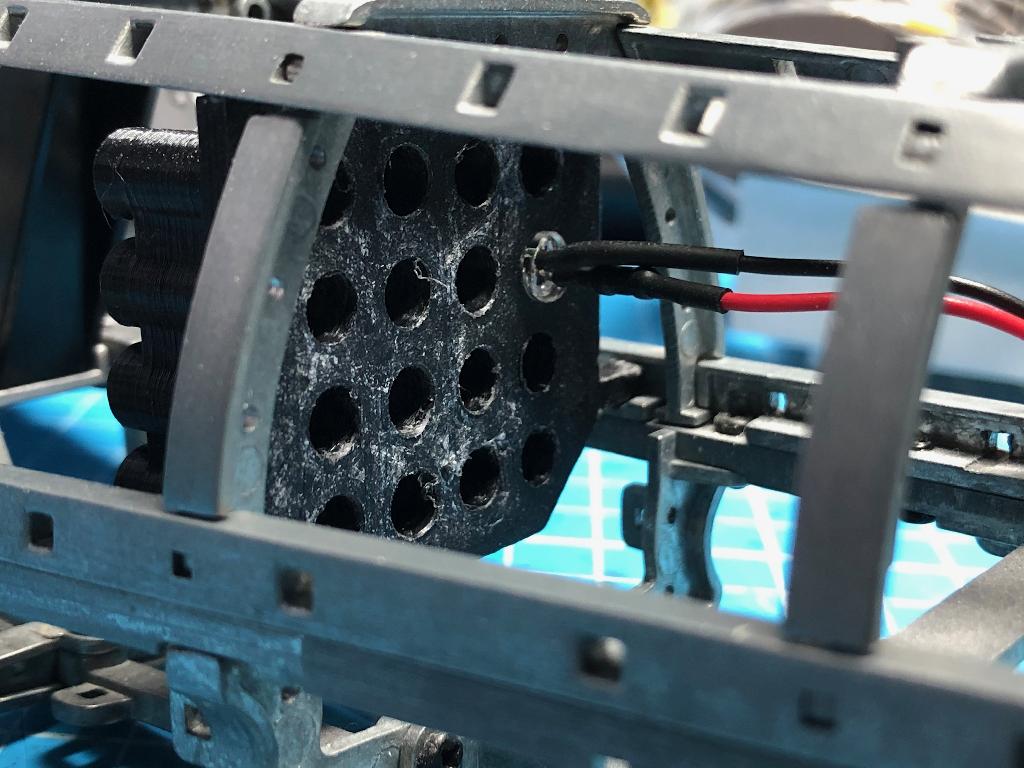 To be continued Alle Berichte sowie alle Fotos unterliegen dem Urheberrecht. Verwendung außerhalb dieses Forums bedürfen schriftlicher Genehmigung/Zustimmung meinerseits. © StefanForum Support Teamhttp://www.model-space.com/de/
https://m.youtube.com/watch?v=qIC4f1LE86w
MfG Stefan
|
|
|
Rank: Semi-Pro Level 1 Groups: Registered, Forum Support Team, Forum Support Team Germany, Administrator, Official Builds, Tech Support, Moderator, registriert Joined: 27/09/2016 Posts: 73 Points: 209 Location: Berlin
|
|
|
|
Rank: Semi-Pro Level 1 Groups: Registered, Forum Support Team, Forum Support Team Germany, Administrator, Official Builds, Tech Support, Moderator, registriert Joined: 27/09/2016 Posts: 73 Points: 209 Location: Berlin
|
|
|
|
Rank: Semi-Pro Level 1 Groups: Registered, Forum Support Team, Forum Support Team Germany, Administrator, Official Builds, Tech Support, Moderator, registriert Joined: 27/09/2016 Posts: 73 Points: 209 Location: Berlin
|
I uploaded a test video of the cockpit lighting to YouTube https://youtu.be/0seJQlbIErwAlle Berichte sowie alle Fotos unterliegen dem Urheberrecht. Verwendung außerhalb dieses Forums bedürfen schriftlicher Genehmigung/Zustimmung meinerseits. © StefanForum Support Teamhttp://www.model-space.com/de/
https://m.youtube.com/watch?v=qIC4f1LE86w
MfG Stefan
|
|
|
Rank: Semi-Pro Level 1 Groups: Registered, Forum Support Team, Forum Support Team Germany, Administrator, Official Builds, Tech Support, Moderator, registriert Joined: 27/09/2016 Posts: 73 Points: 209 Location: Berlin
|
|
|
|
Rank: Semi-Pro Level 1 Groups: Registered, Forum Support Team, Forum Support Team Germany, Administrator, Official Builds, Tech Support, Moderator, registriert Joined: 27/09/2016 Posts: 73 Points: 209 Location: Berlin
|
I did it myself and soldered a Y adapter. This can be used to tap the power supply at connector 20, e.g. if you Additional lighting installed and maybe want to make a cockpit modification, but the performance is too high for the original board and does not want to destroy it. But first of all, this is a permanent voltage that is not switched by the board and is always present when the power supply is switched on or the batteries are inserted !!!! You can e.g. switch with a separate remote control. https://www.ebay.de/itm/...7ffc:g:iSwAAOSwIeNdg3UB
Here with an external power supply of 6V, 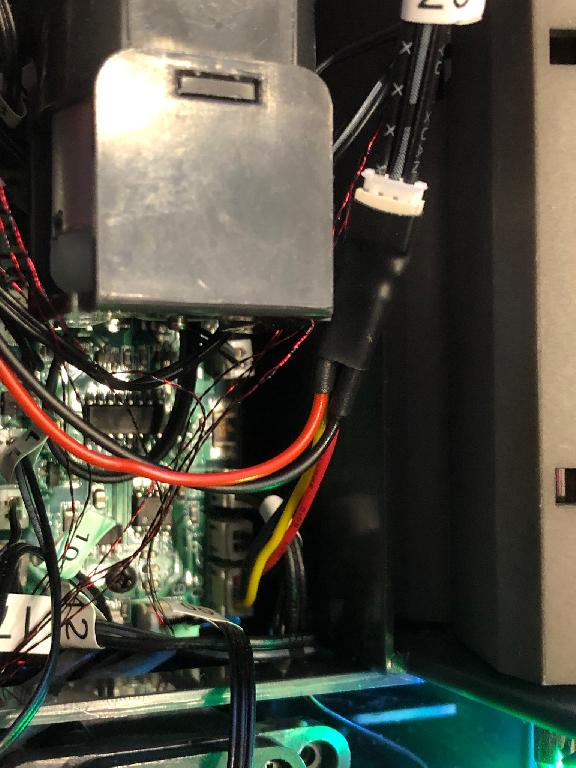 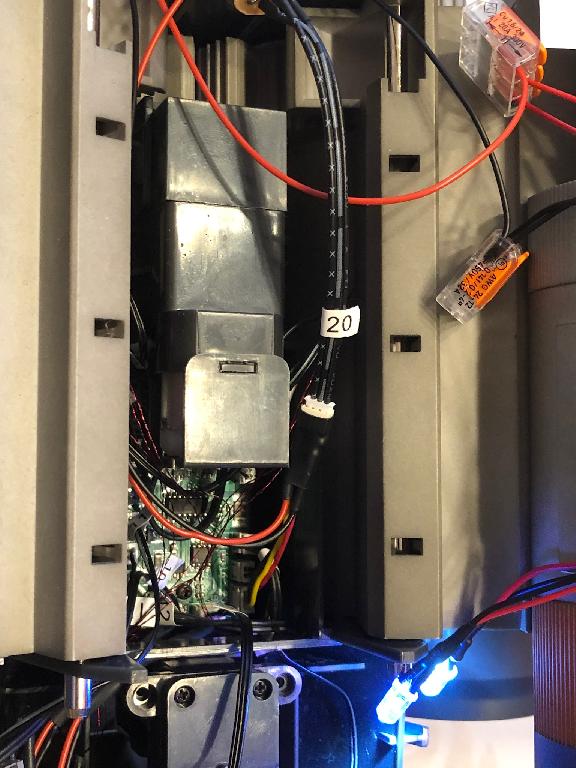 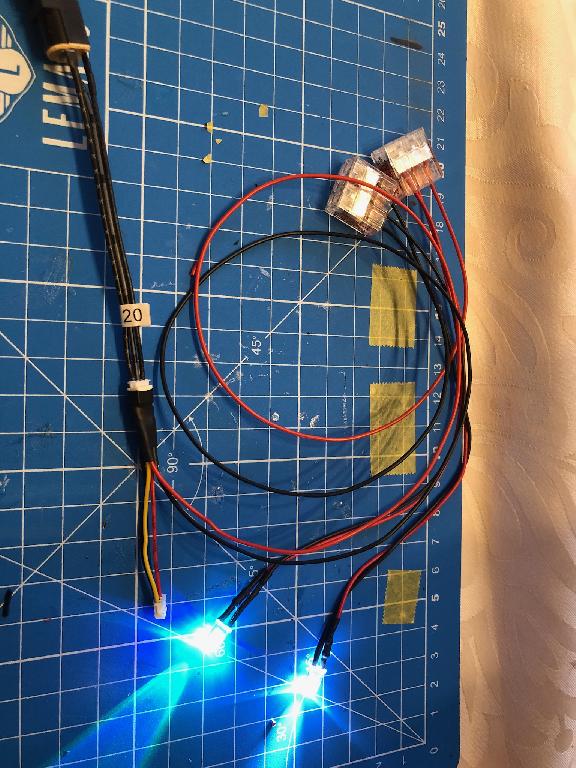 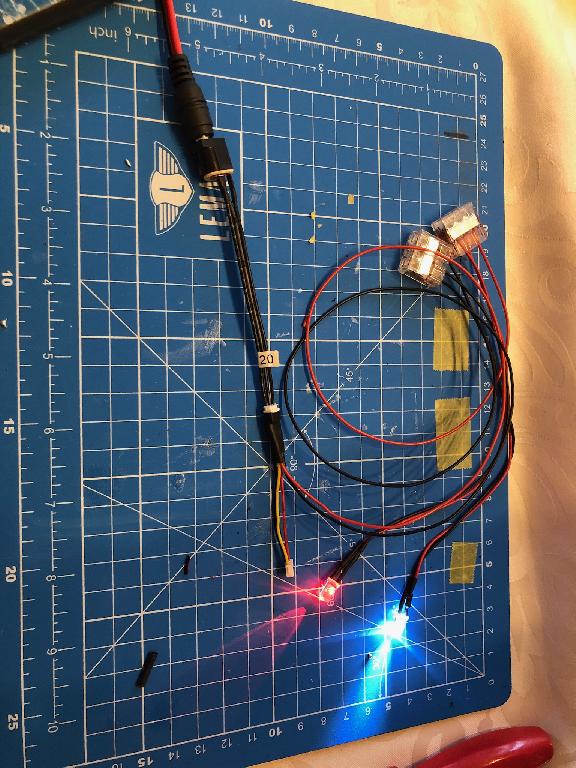 the Y adapter on connector 20, 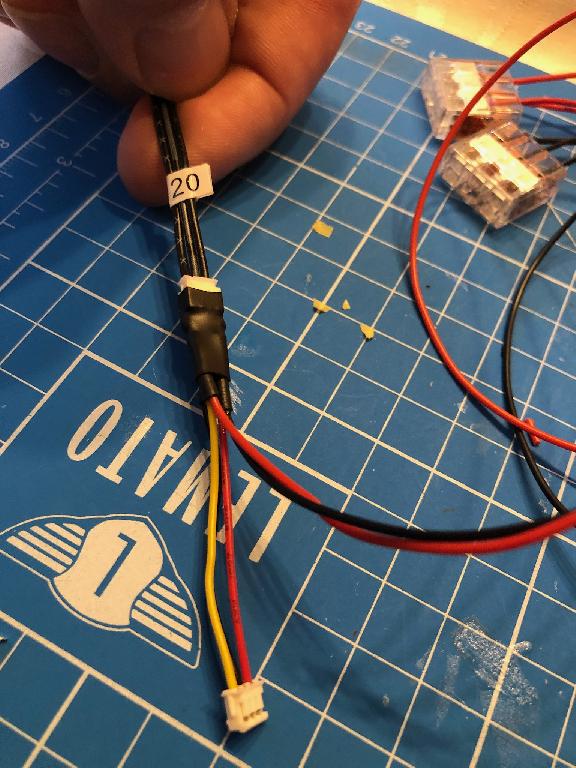 and the complete Y-adapter with the voltage tap and folding wagons. So you can save yourself soldering. 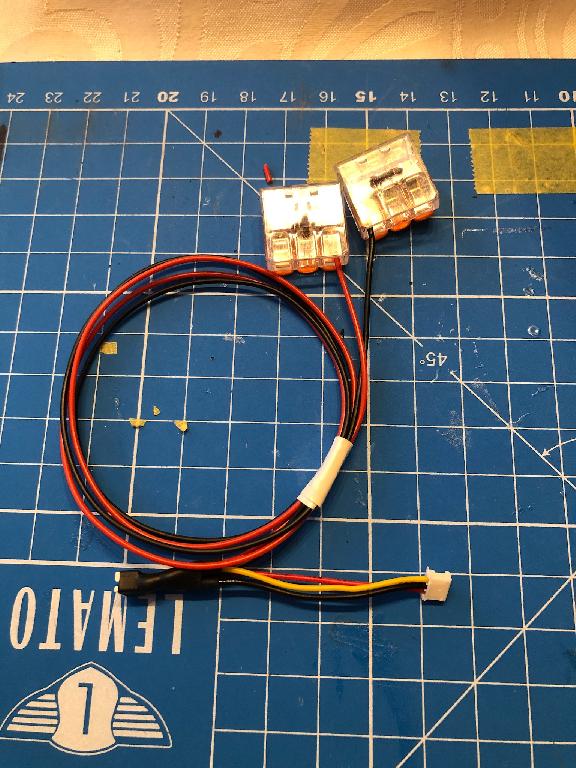 here in battery mode, 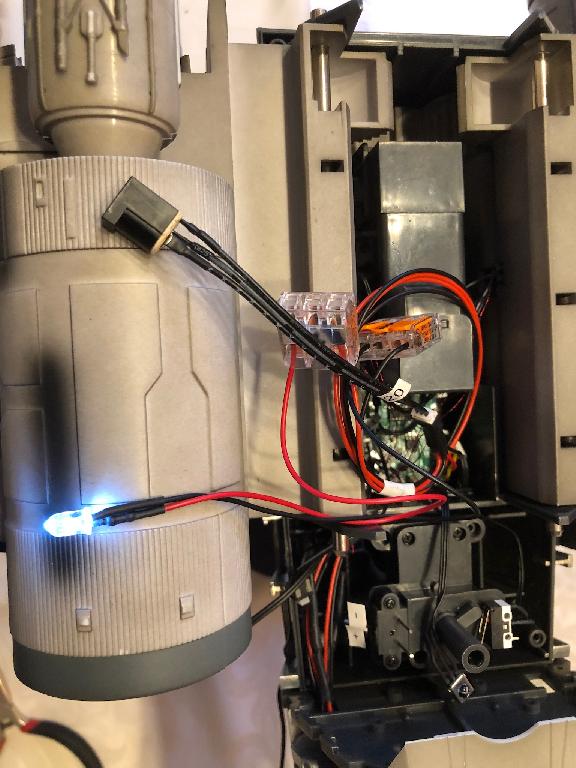 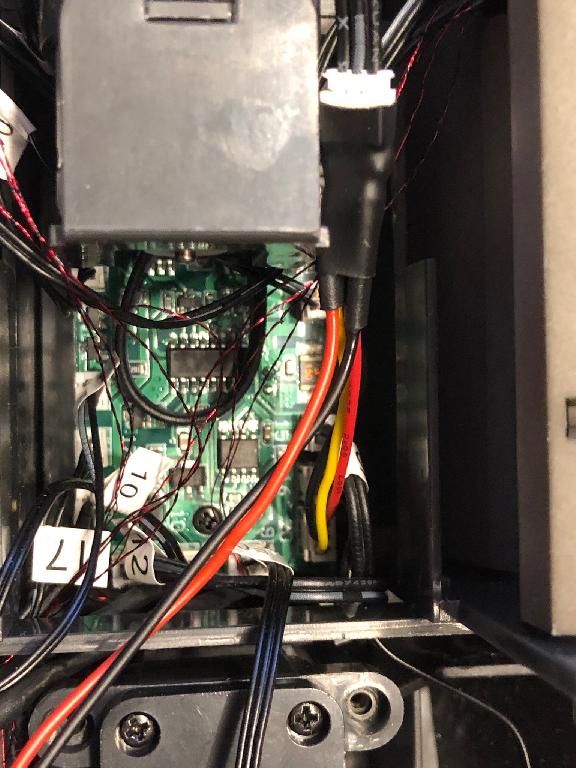 If you are interested, please PM me. Sequel follows. Alle Berichte sowie alle Fotos unterliegen dem Urheberrecht. Verwendung außerhalb dieses Forums bedürfen schriftlicher Genehmigung/Zustimmung meinerseits. © StefanForum Support Teamhttp://www.model-space.com/de/
https://m.youtube.com/watch?v=qIC4f1LE86w
MfG Stefan
|
|
|
Rank: Semi-Pro Level 1 Groups: Registered, Forum Support Team, Forum Support Team Germany, Administrator, Official Builds, Tech Support, Moderator, registriert Joined: 27/09/2016 Posts: 73 Points: 209 Location: Berlin
|
here my engine modification for the X-Wing My friend programmed the controller and opened a 12-inch neopixel ring. Made in Germany  Starting with the wiring for the rings, since this requires a voltage supply of max. 5V, 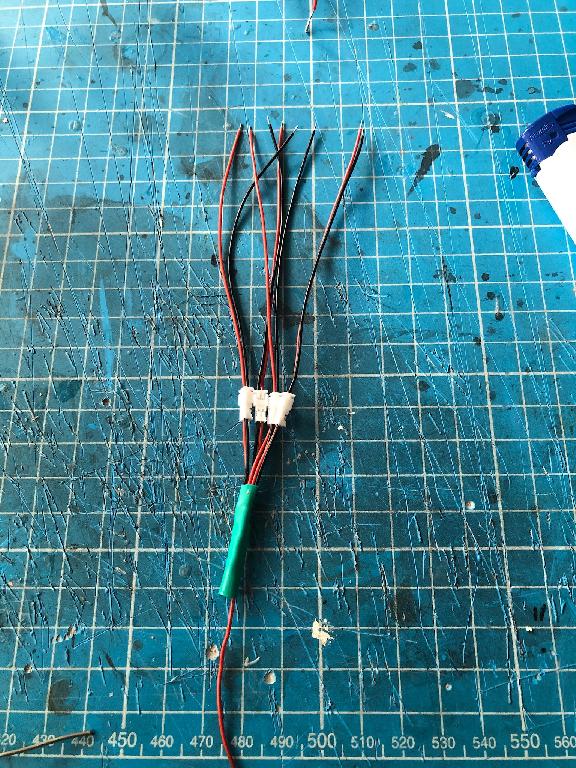 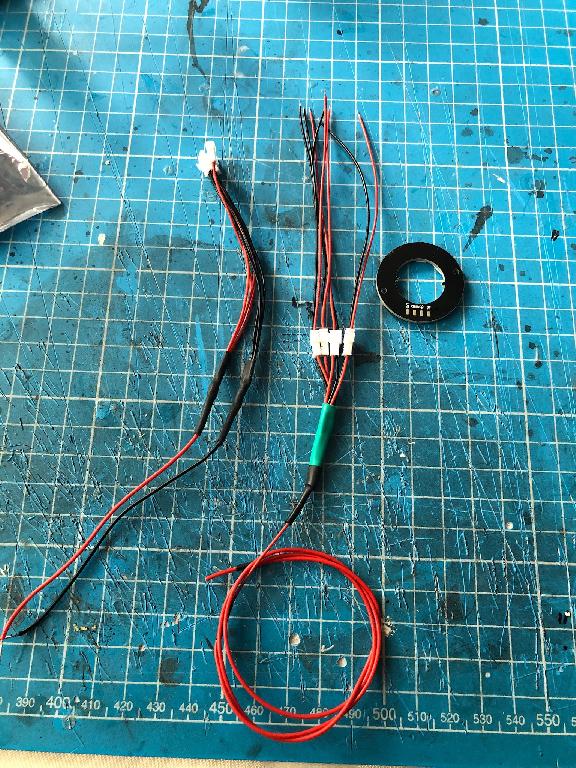 then the wings disassembled  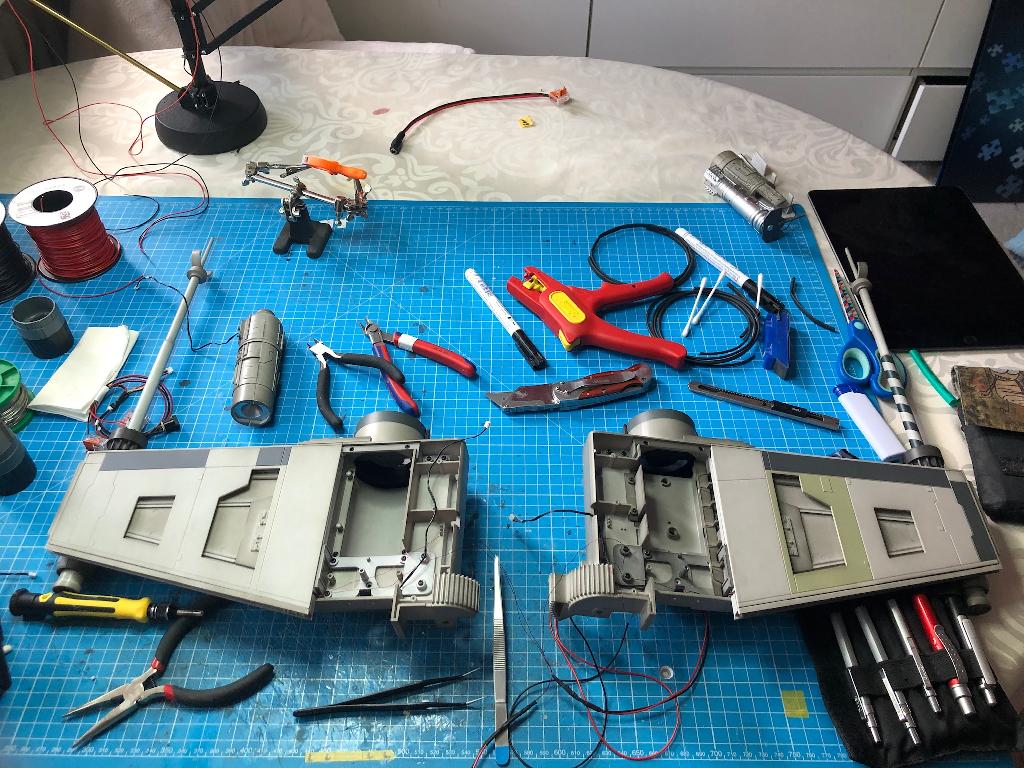 shortened the end of the engine, 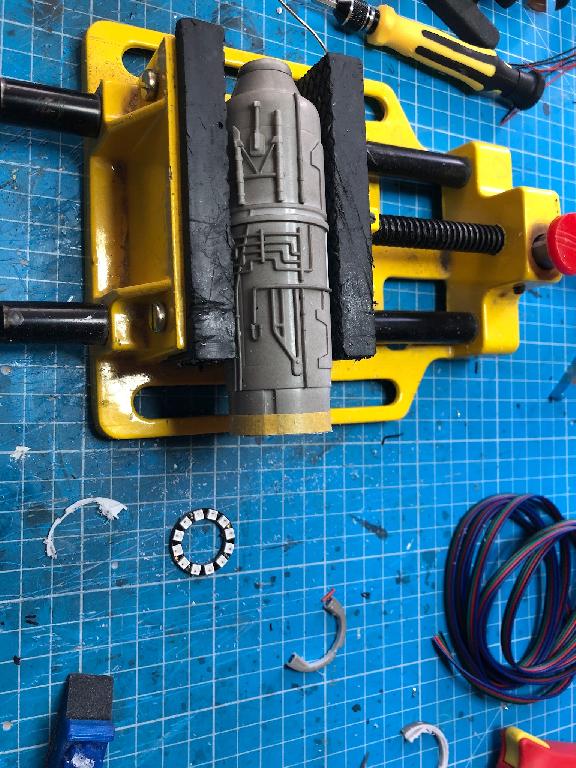 designed the holder for the neopixel rings, 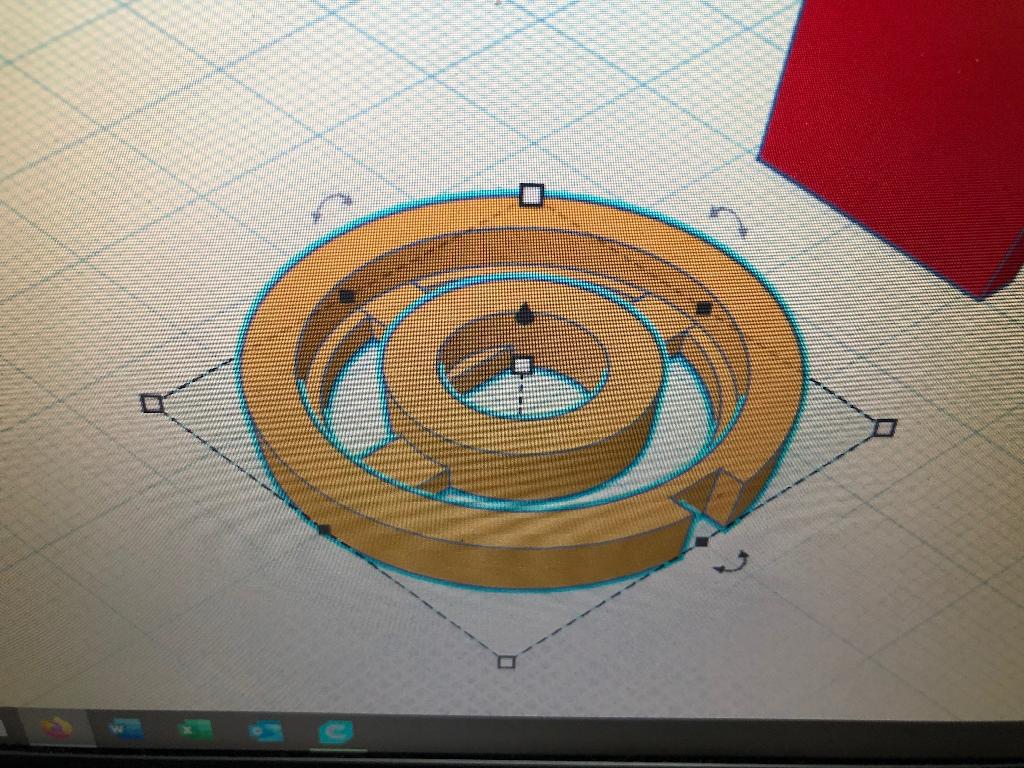 the controller and the IR receiver for the remote control, this is separate and you have to cut a hole 7x3mm in the fuselage, I'll do that when the front is firmly installed, 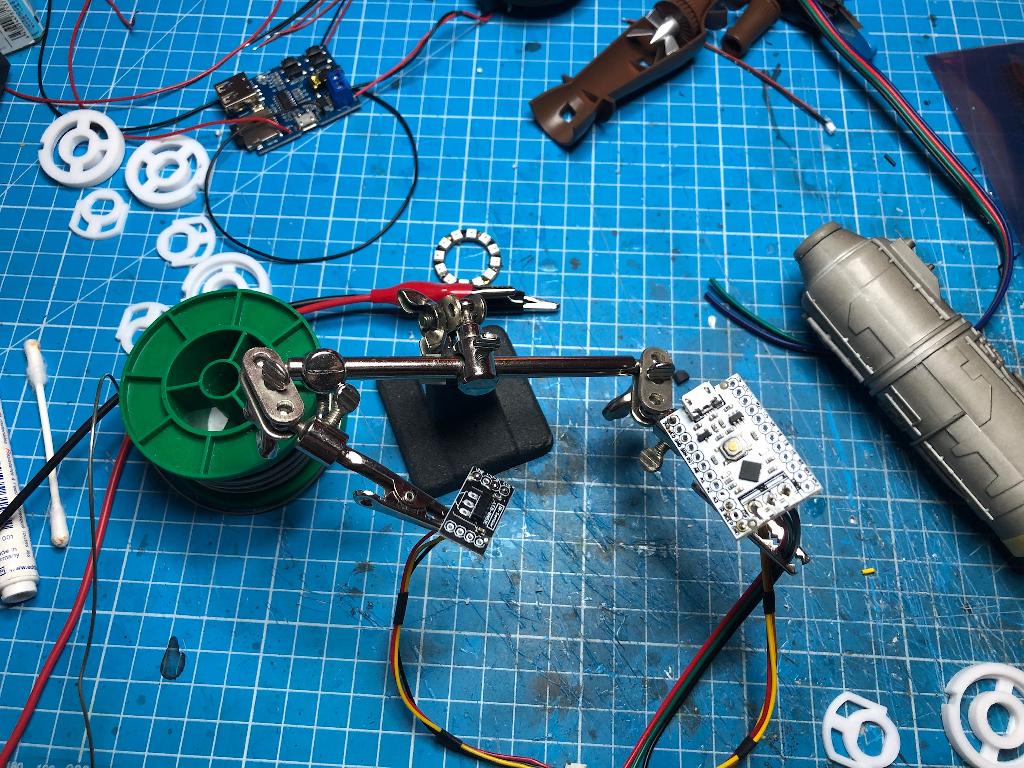 fitted the ring, fits 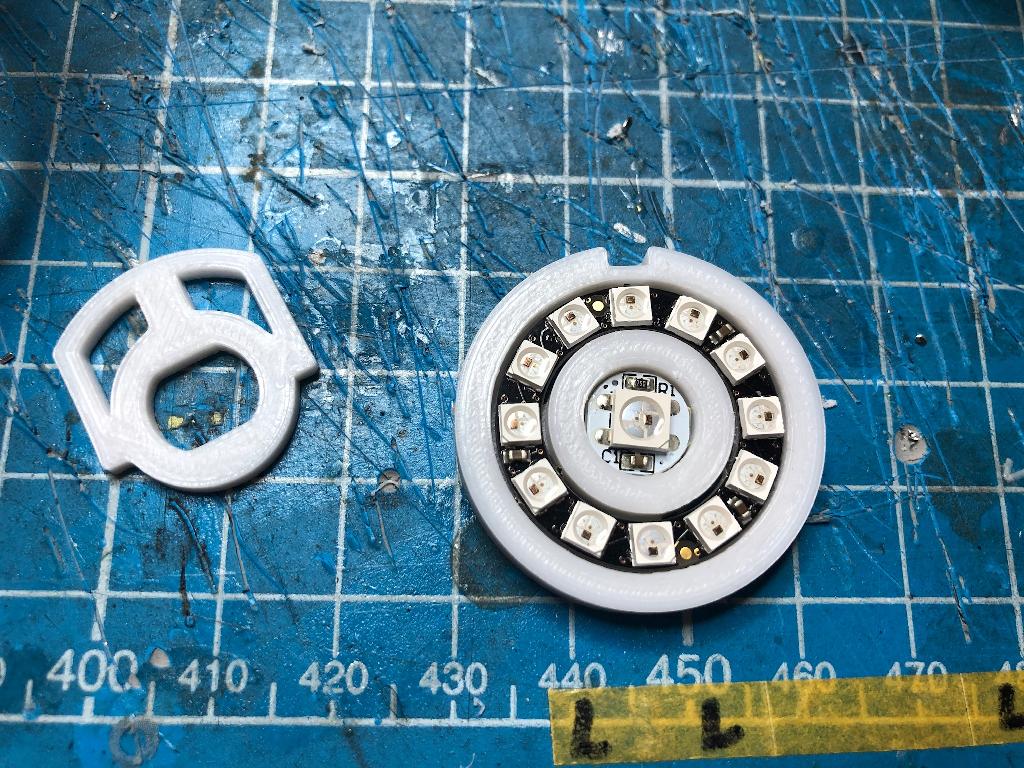 on the engine housing, 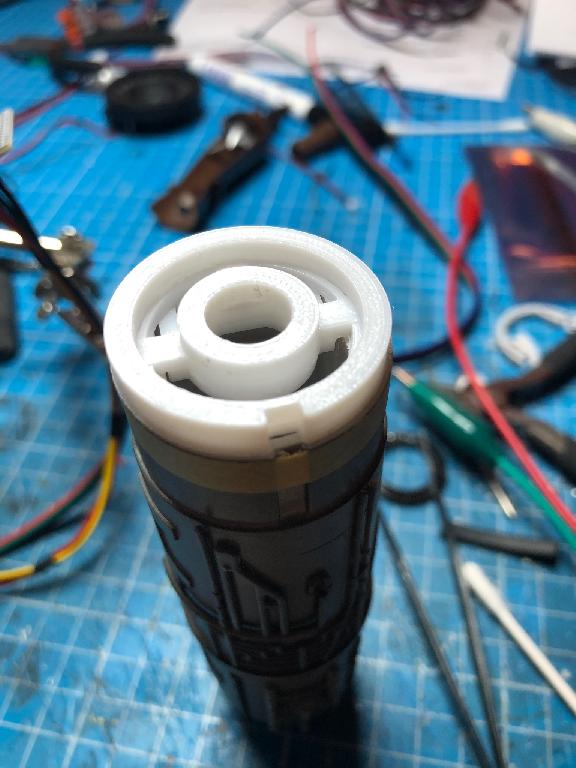  Here is the status of the building after the installation of the new engines,  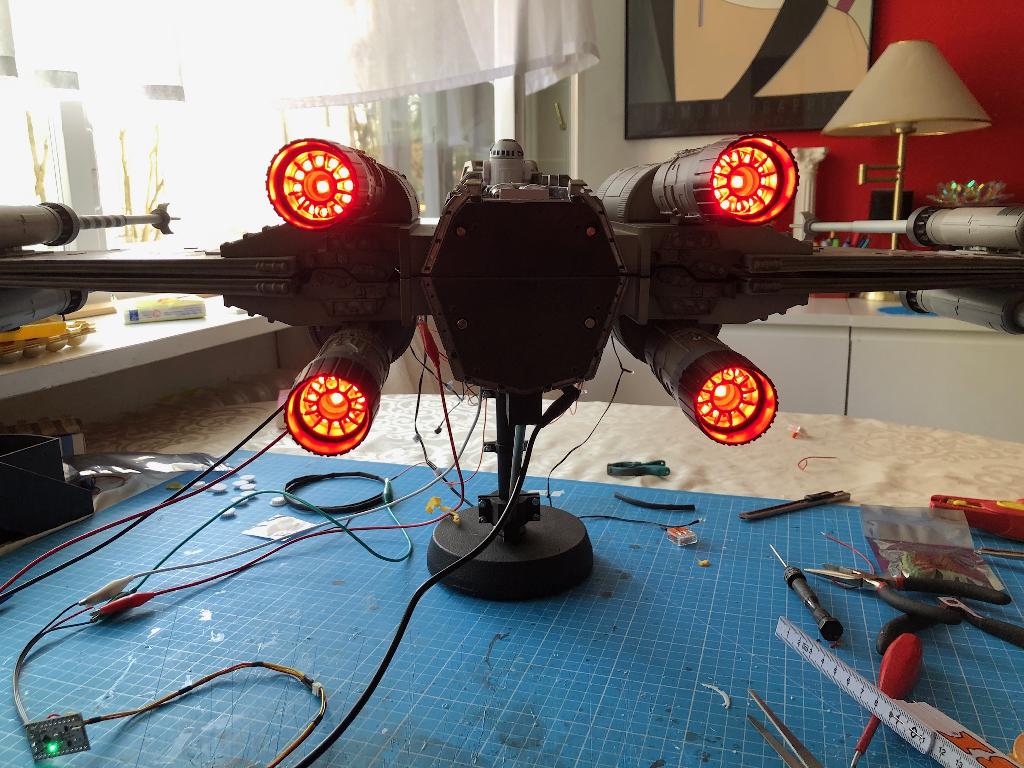 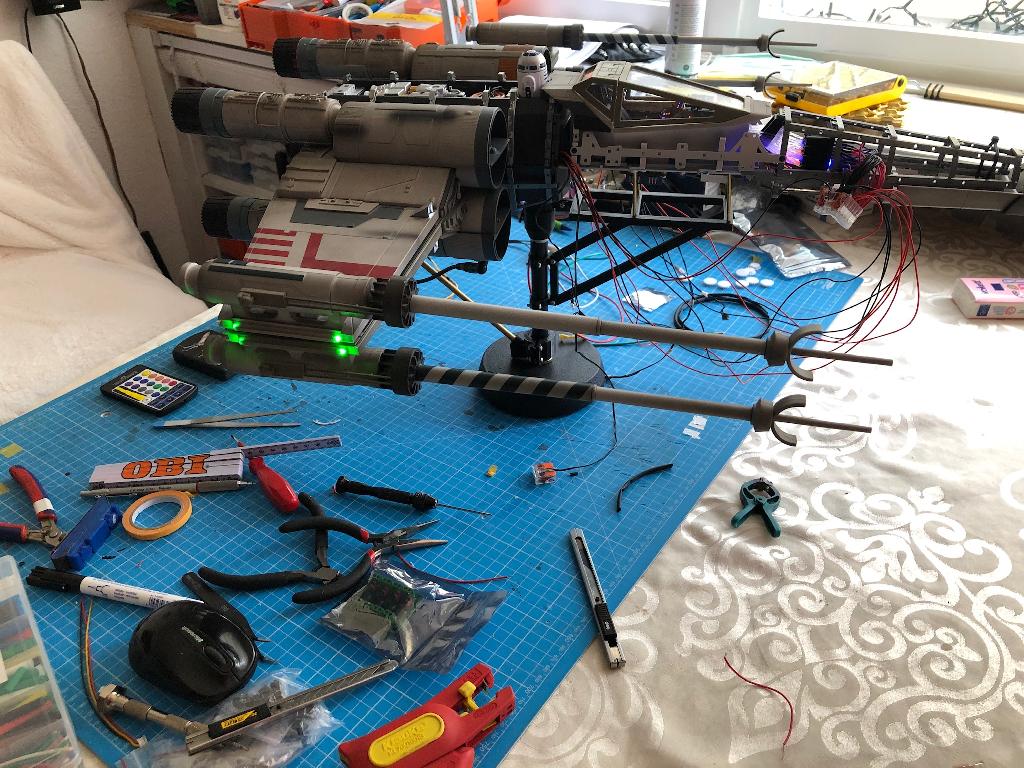 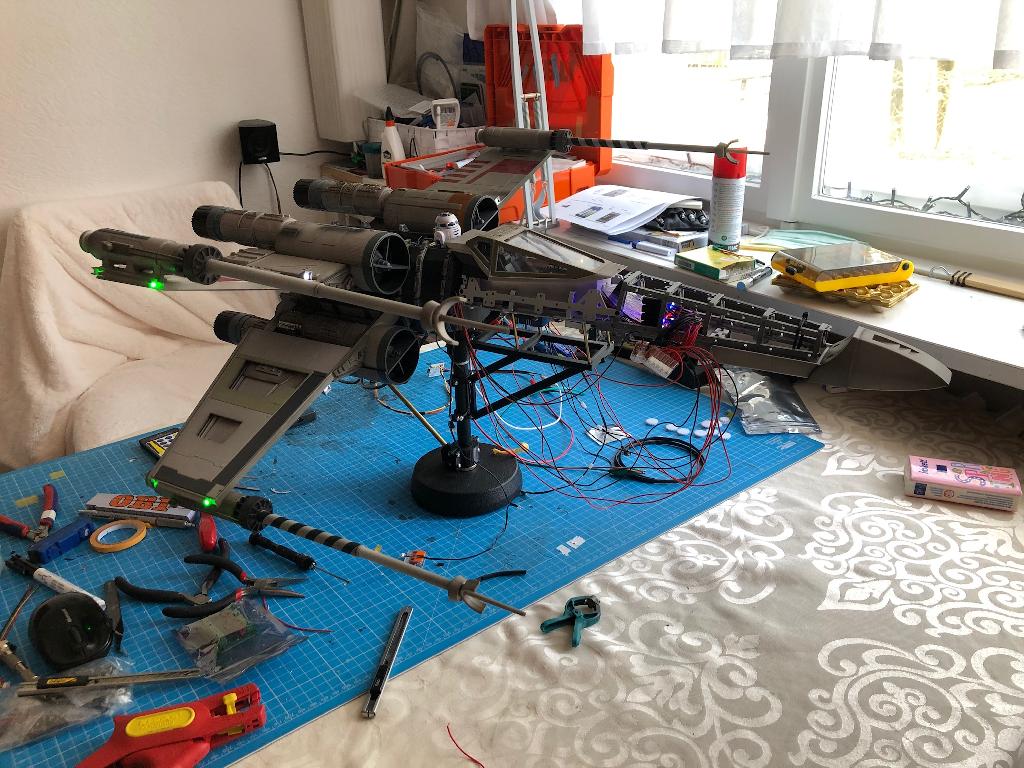 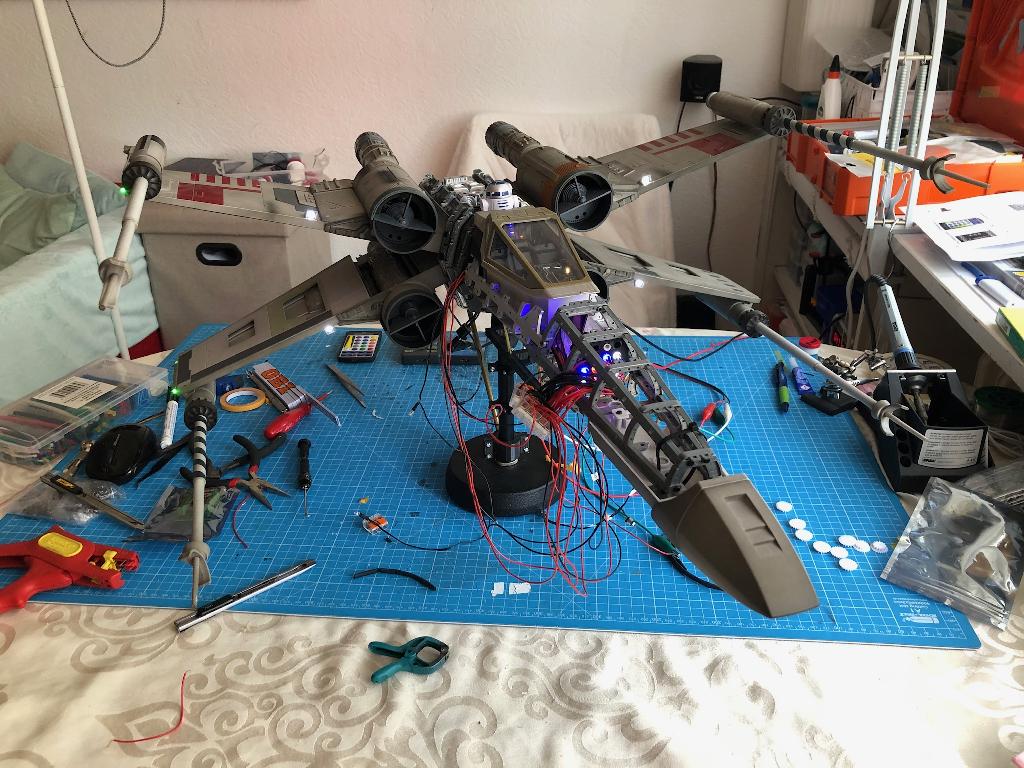 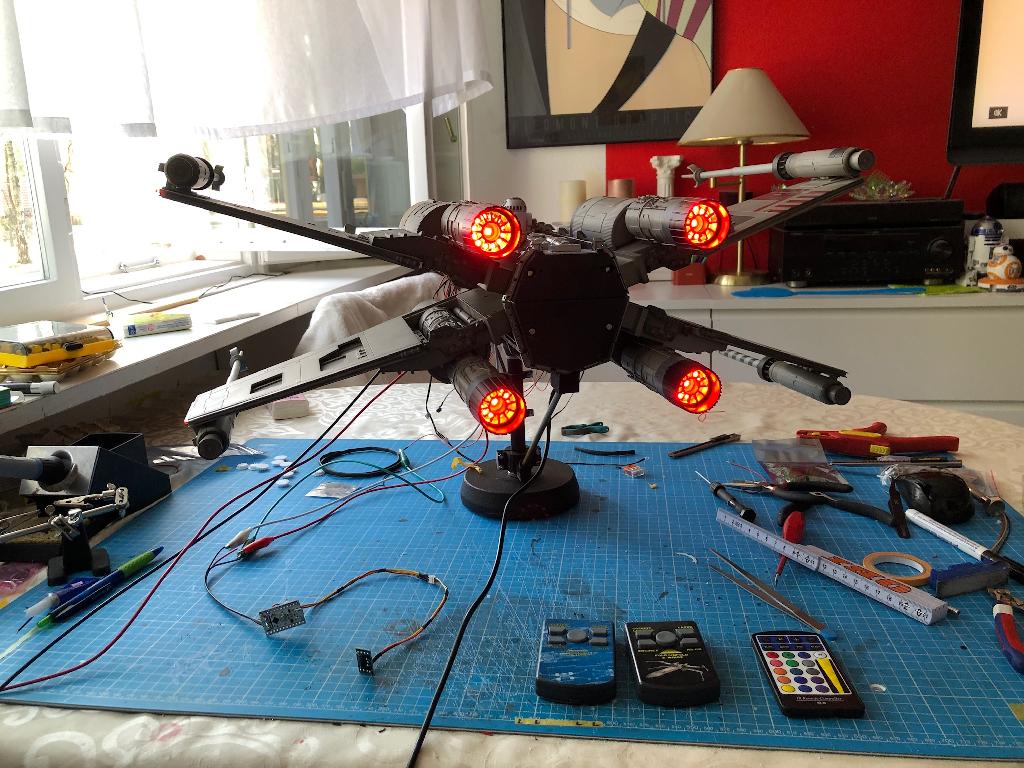 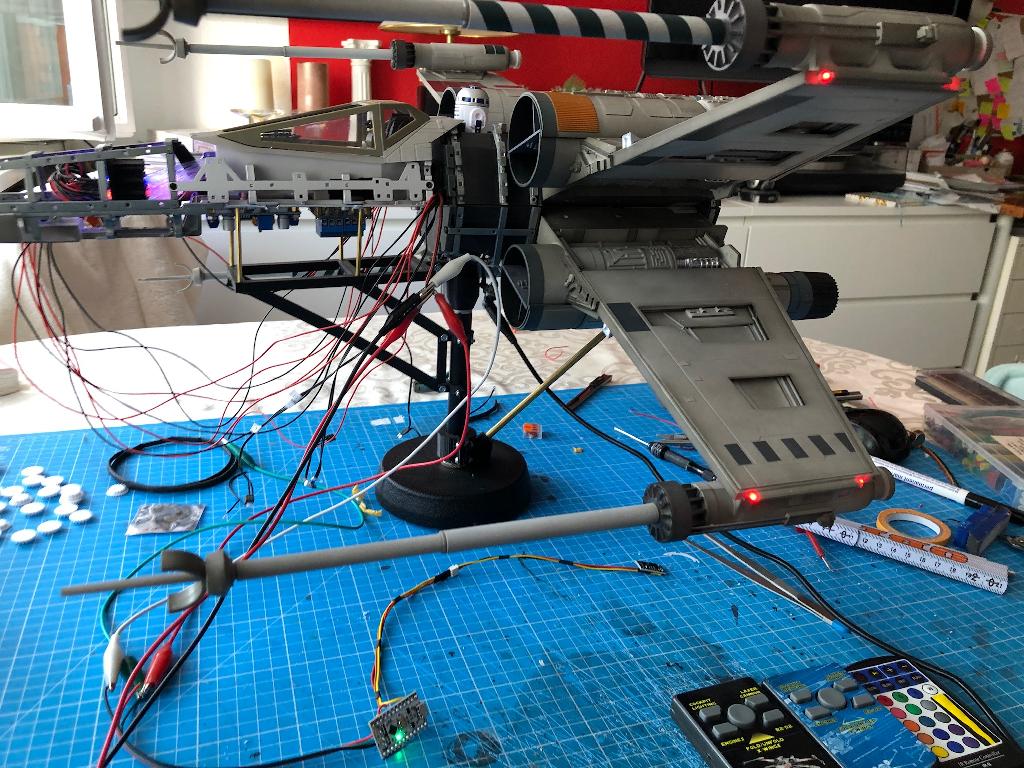 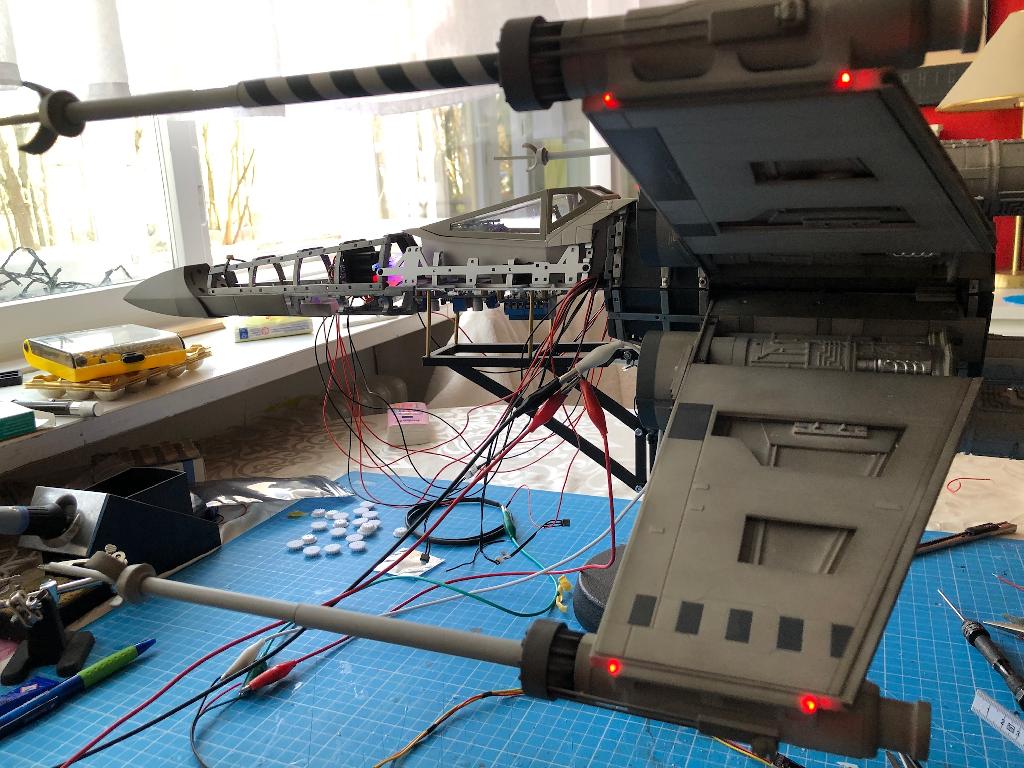 here is a small video With the engine’s https://youtu.be/yZuuKmMzj3s
So that's it from this construction site To be continued I wish you all a nice week and stay healthy  Alle Berichte sowie alle Fotos unterliegen dem Urheberrecht. Verwendung außerhalb dieses Forums bedürfen schriftlicher Genehmigung/Zustimmung meinerseits. © StefanForum Support Teamhttp://www.model-space.com/de/
https://m.youtube.com/watch?v=qIC4f1LE86w
MfG Stefan
|
|
|
|
|
Looking good Stefan.  Mark
|
|
|
 Rank: Super-Elite     Groups: Registered, Moderator, Tech Support, Technical Support, Forum Support Team, Forum Support USA, Global Forum Support, Global Forum Support Team Joined: 17/12/2013 Posts: 3,983 Points: 11,974 Location: NY, USA
|
Amazing work.There is a lot of room in this model to add your own electronics
Carl
|
|
|
Rank: Semi-Pro Level 1 Groups: Registered, Forum Support Team, Forum Support Team Germany, Administrator, Official Builds, Tech Support, Moderator, registriert Joined: 27/09/2016 Posts: 73 Points: 209 Location: Berlin
|
Hello everybody, For me it goes on again, I spent the days at and processed the next issues of the X-Wing and installed and modified the parts starting with issues 82 and 83, this is how the sprue should look like on the upper wing cover,   here you can see one of the struts, this has a small cast edge,  I removed these,  through these acquaintances the frame has risen a bit, as a result, the frame was not flush during assembly and this would result in larger gaps. Seen here  here the finished upper shell of the grand piano holder, 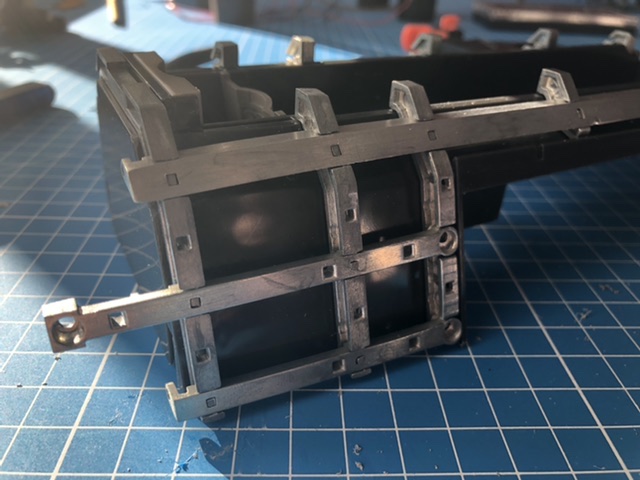 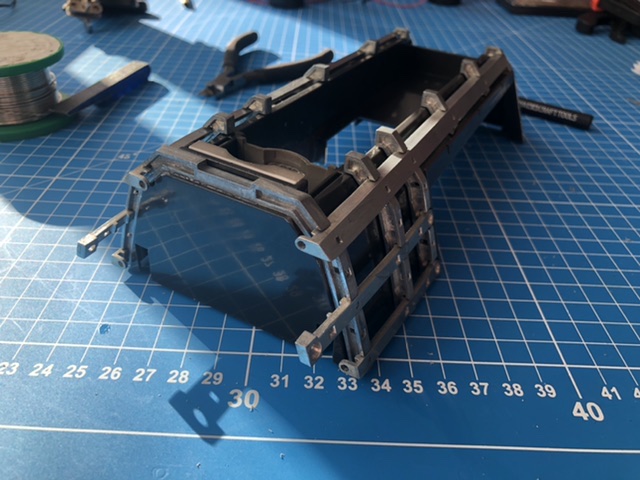 I made an opening in the top cover at the level of the circuit board, because I would like to make 2 modifications afterwards. I got this tip from a friend on Facebook # Thank you Axel, 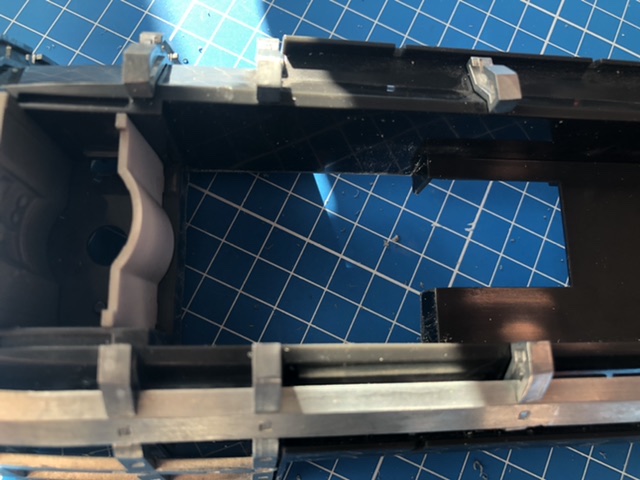 here with fixtures, somewhat confusing, due to all the additional lighting, 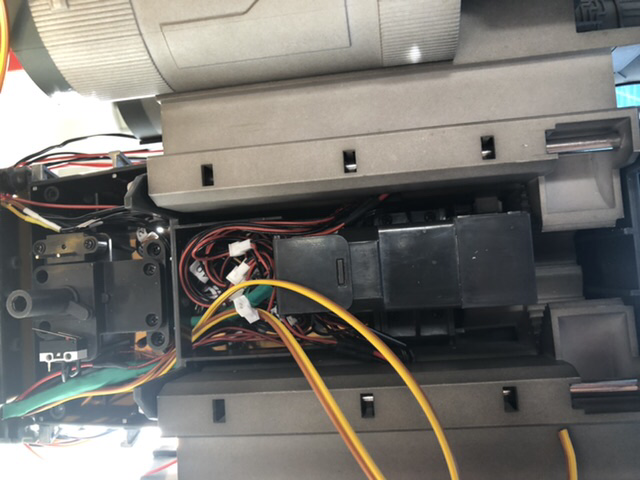 here the screwed parts, here you can see that they are very close to each other, thereby reducing the gap dimensions of the panels, to be seen later in the report, 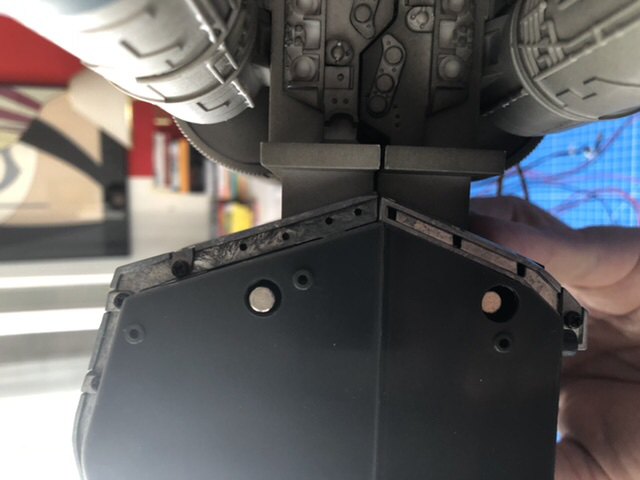 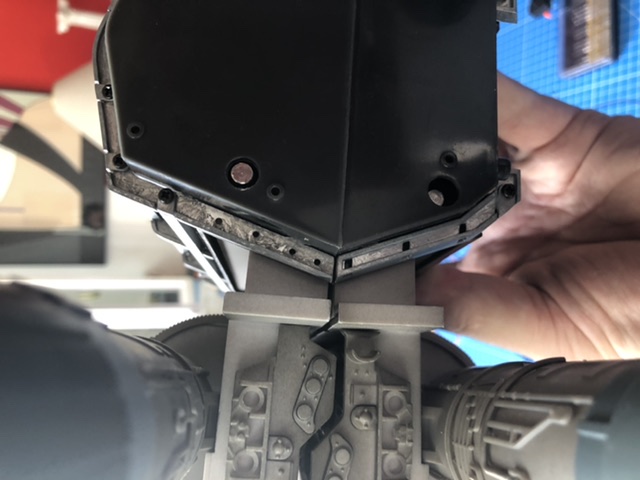 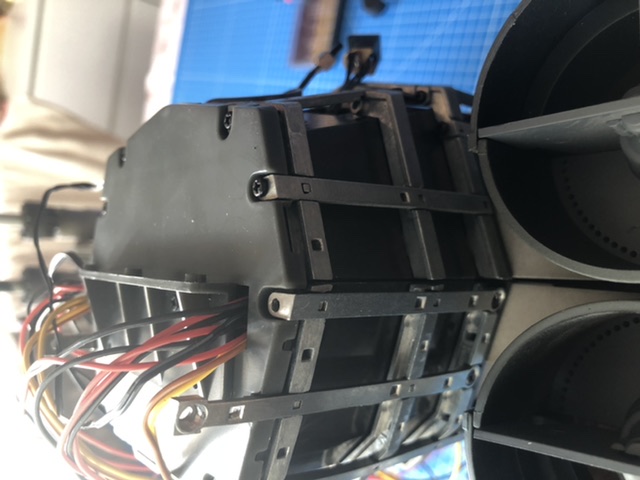 here the parts from issue 84, there Torsten Engel has already taken on the part in advance and found out that the cast edges apply something to the glued areas and thus also contribute to the inaccuracy, here the lower ground plane and the upper original, 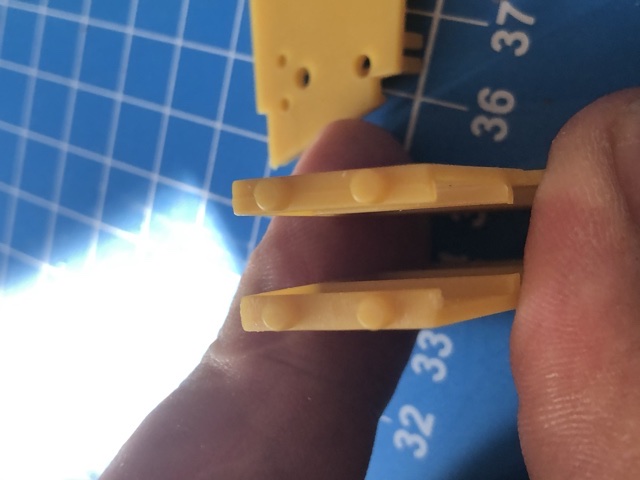 I glued and fixed the part, so it could glue it in peace, 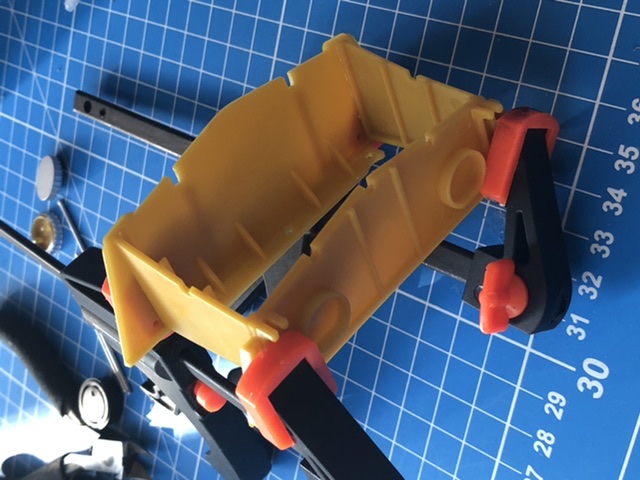 here are the lines that I have to move from back to front, the other side looks the same, 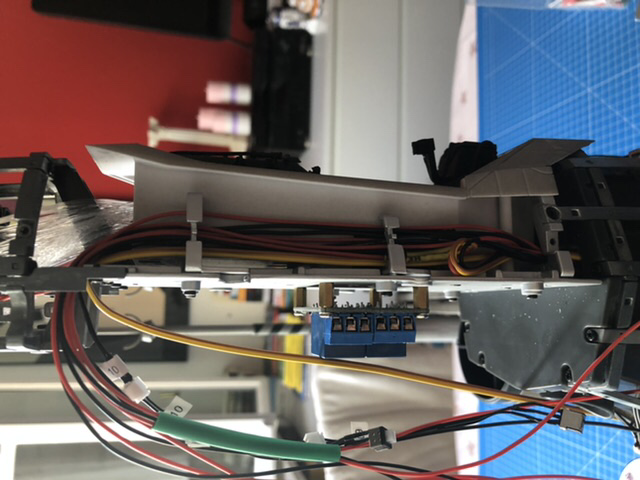 The construction status at the end of issue 84, 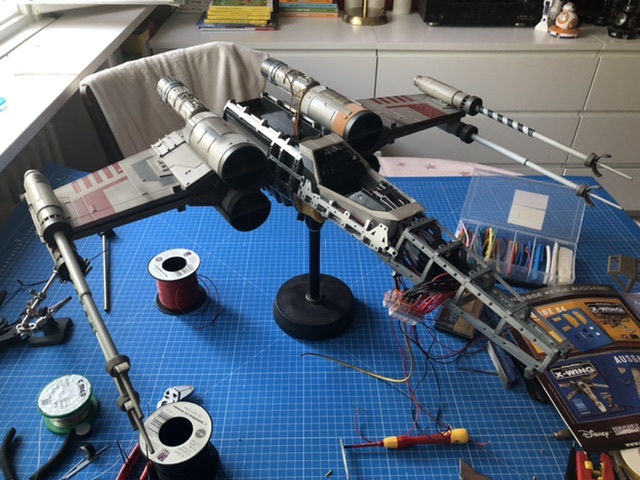 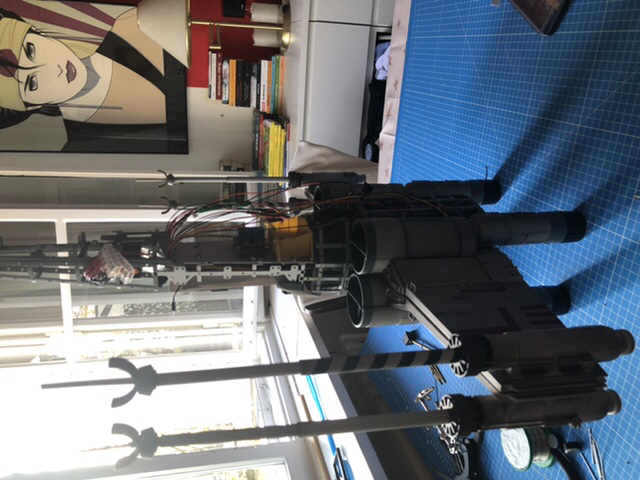 Here's my hyperdrive, I'll modify it a bit, a mold was made of the carrier plate and then poured with clear resin, # many thanks to Gregor, but that at a later date, 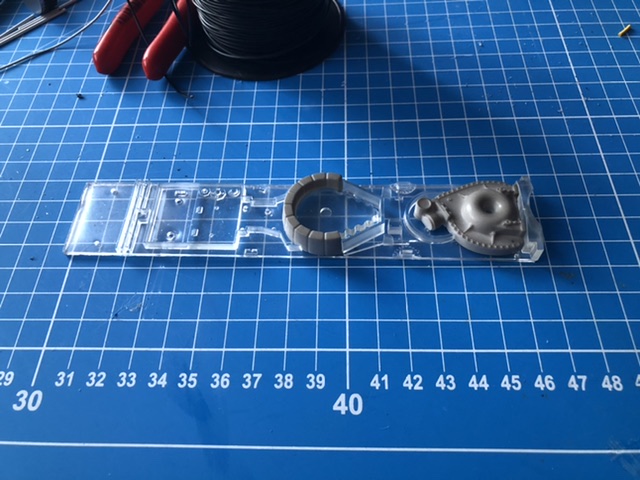 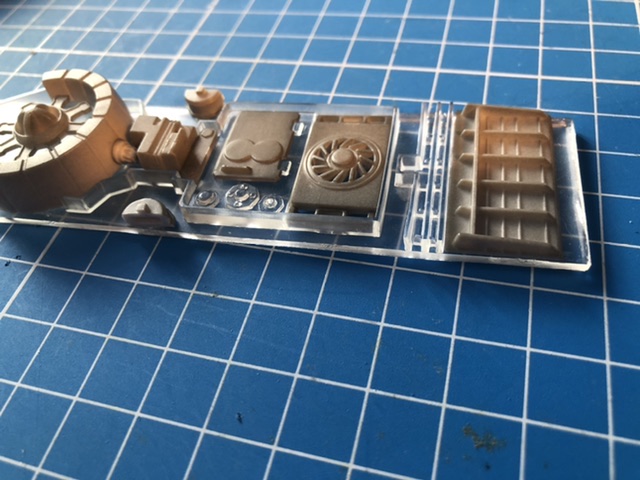 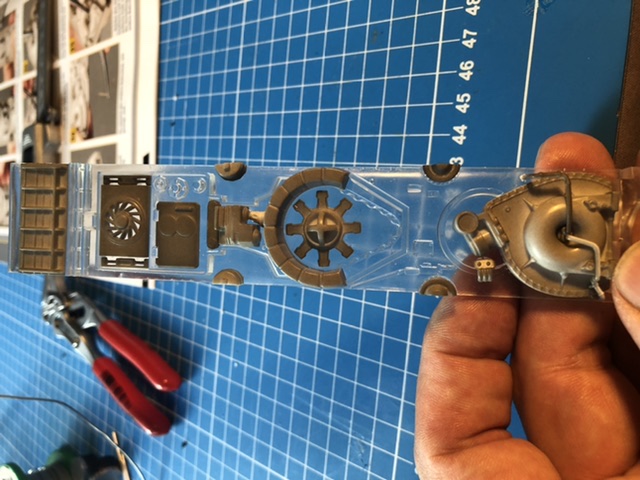 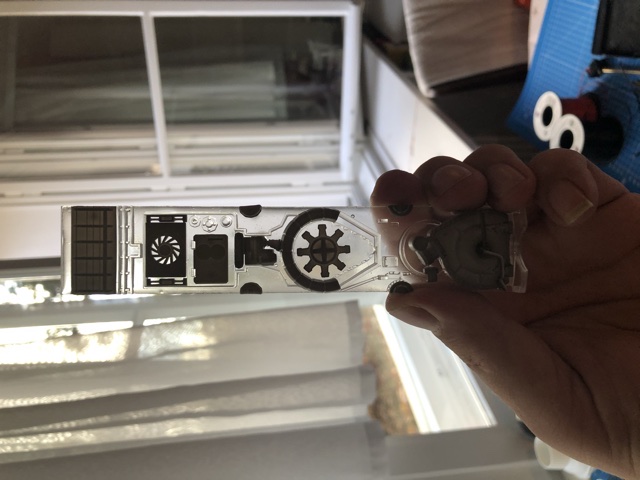 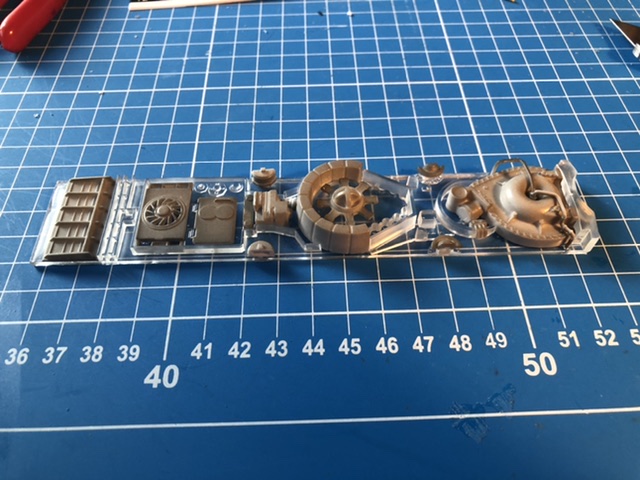  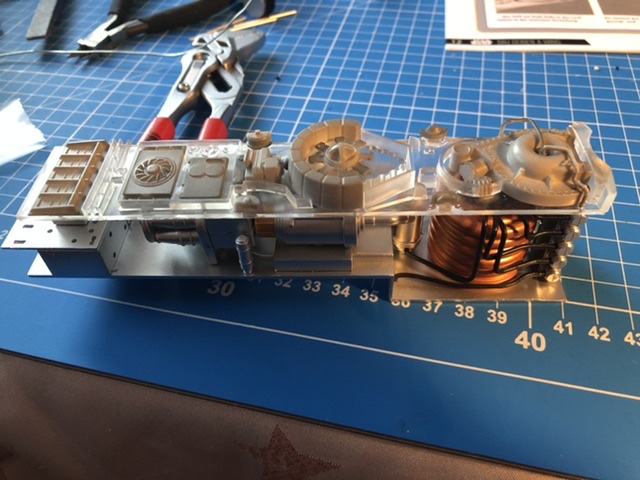 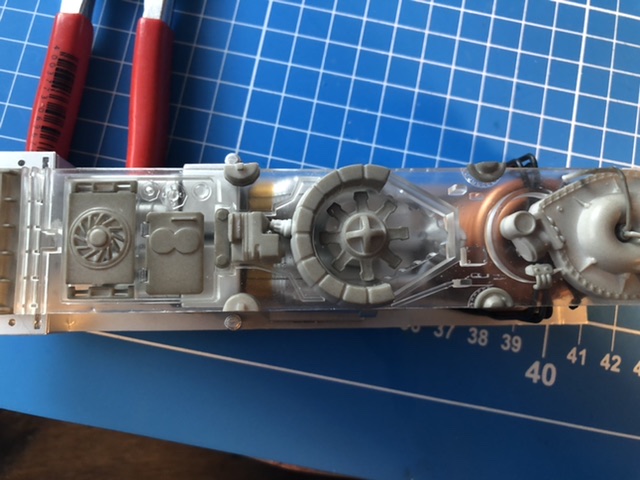 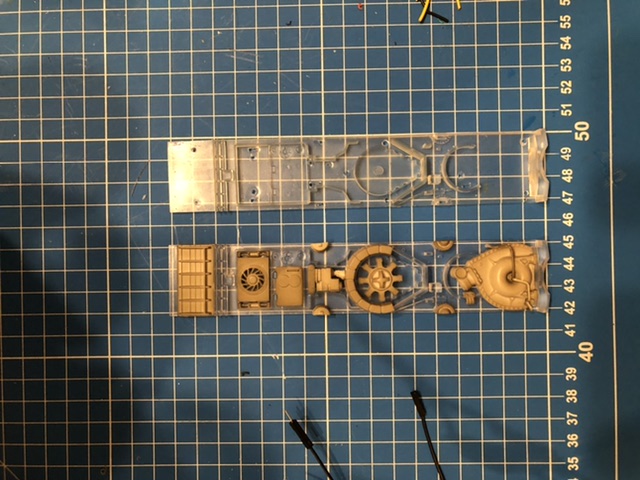 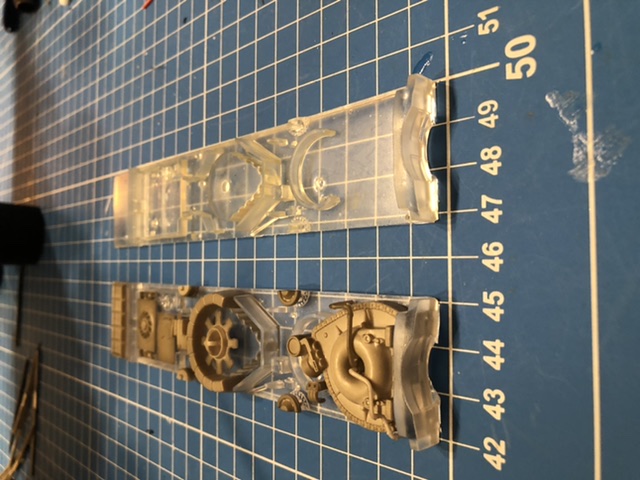 Here is another modification by me, since I pimped the engine a bit, I mounted the IR receiver in the front of the support shaft. The closed flap is in issue 99, 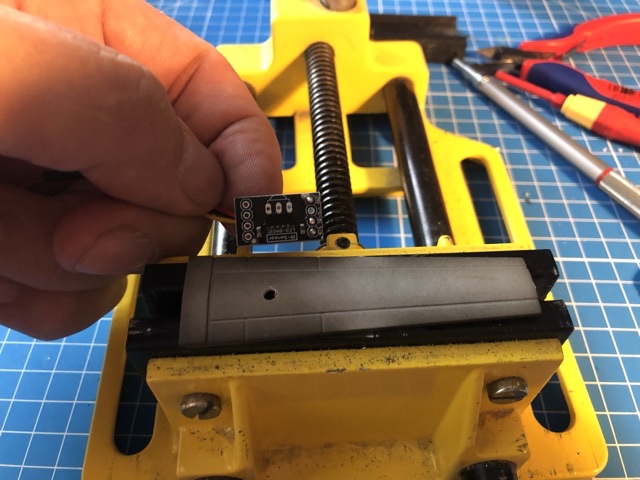 the opening filed square, 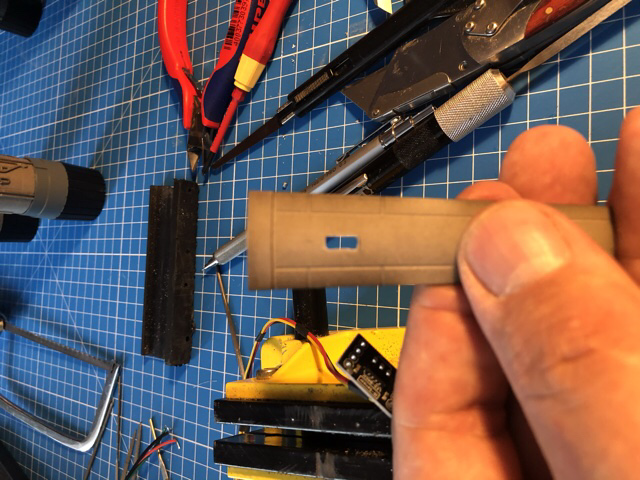 glued in the IR receiver, 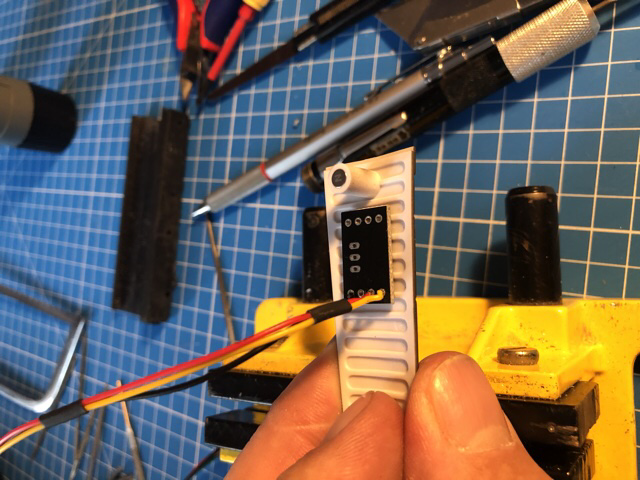 and done, 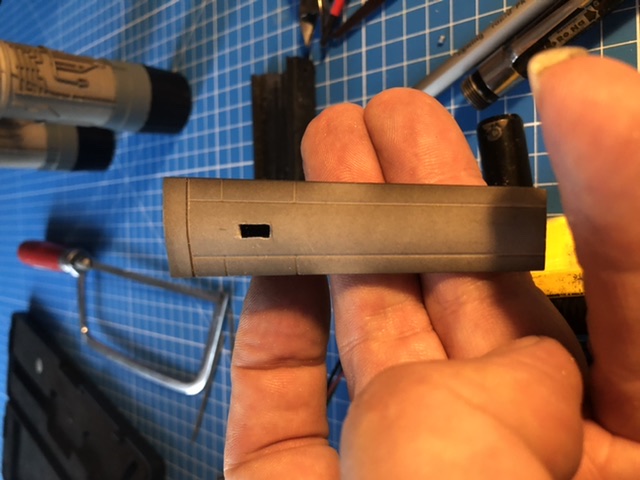 here mounted from below, 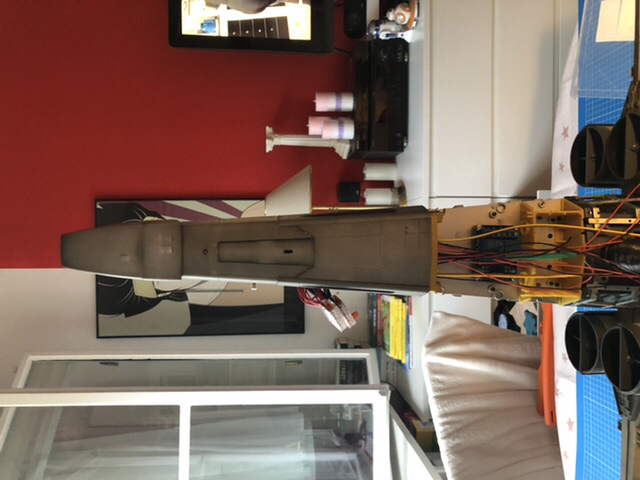 continue with issue 92, the front side panels sometimes photographed from several sides so that you can see that they fit in, 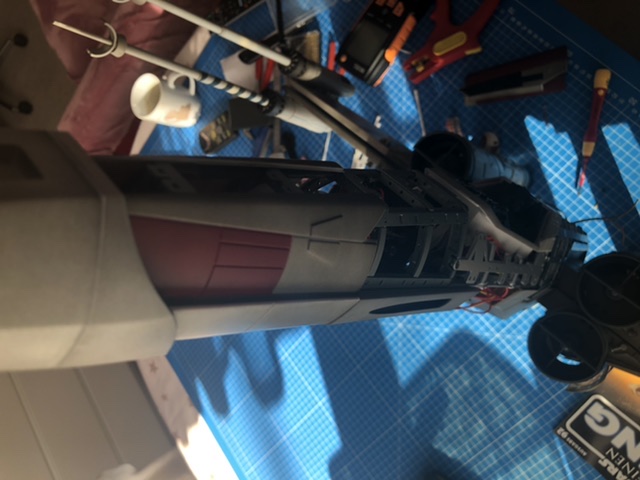 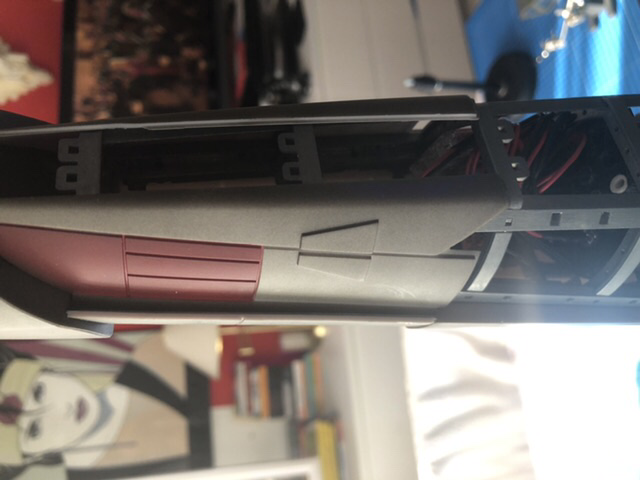 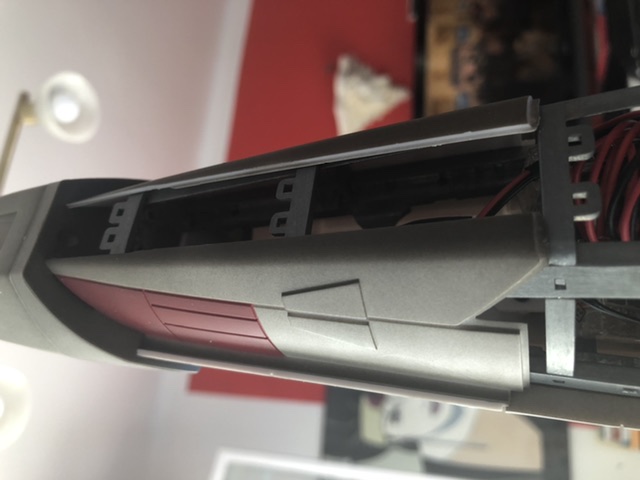 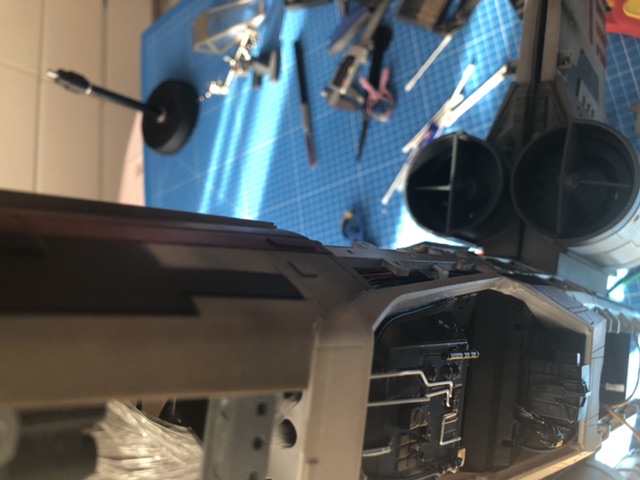   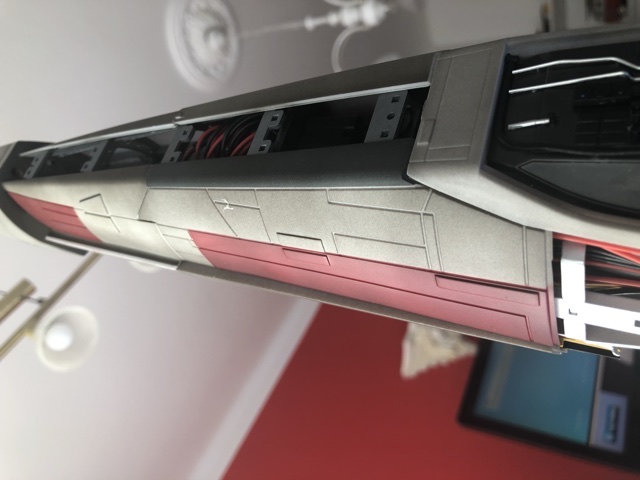 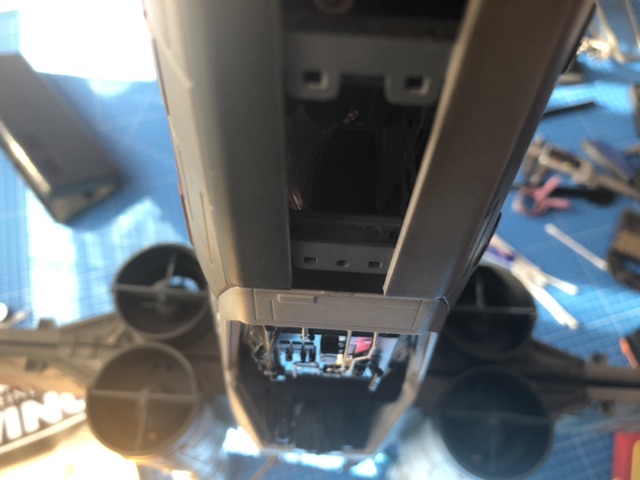 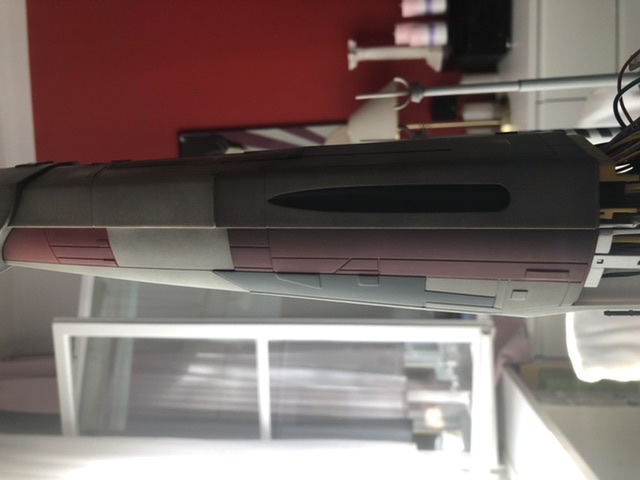 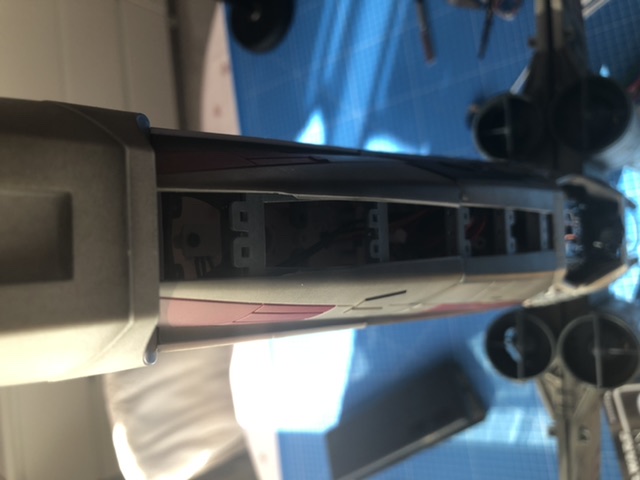 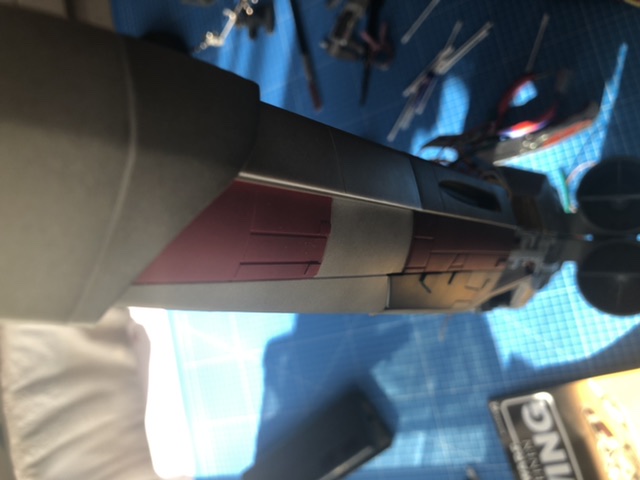 I have marked the screws here, you should screw them out if you unscrew the front side panels so you can get the front side panels in better, 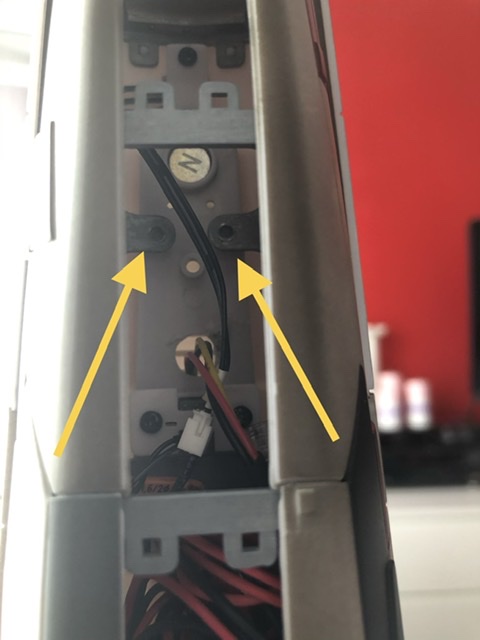 The rear panels of issue 93,  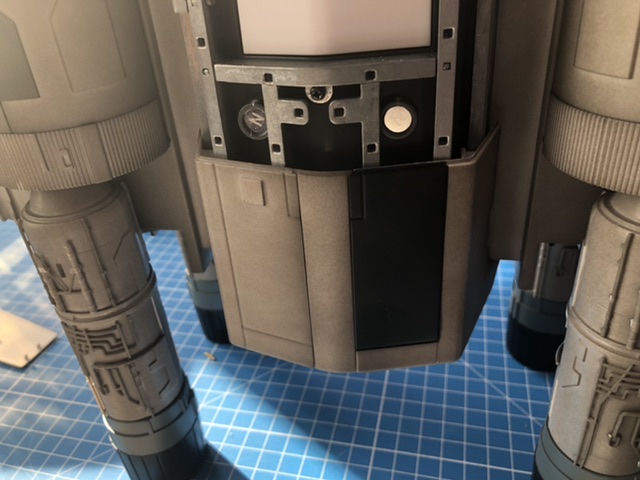 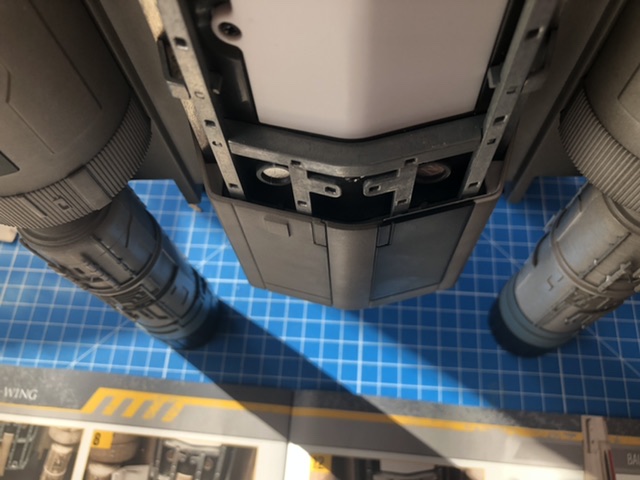 Here you can see the rear panel, that fits very well and goes exactly to the edge, that is exactly the place where, if you have not assembled it correctly, you will have problems with the assembly of the rear,  here the side panels on the cockpit, 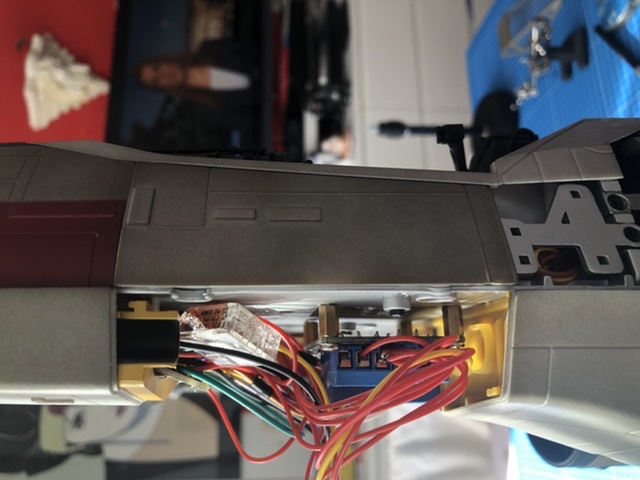 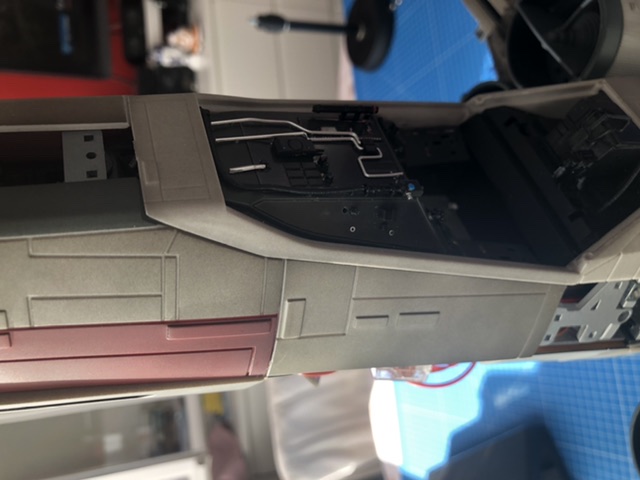  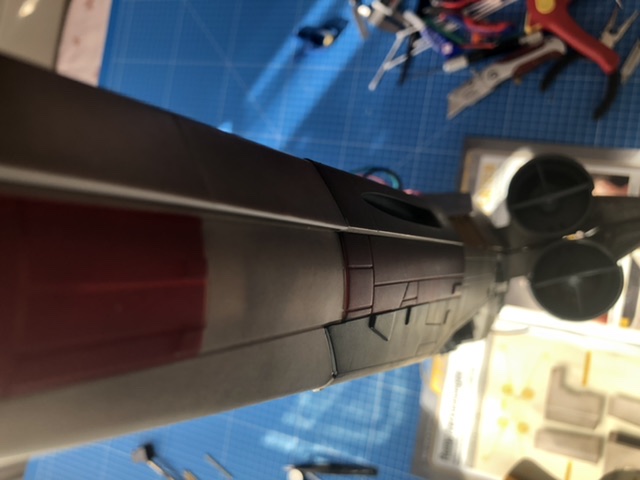 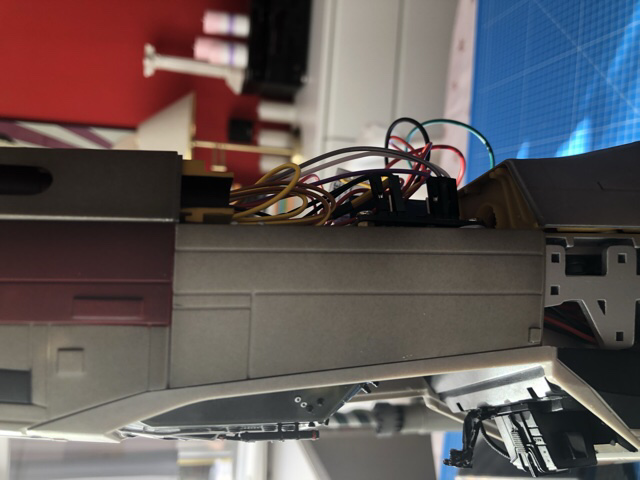 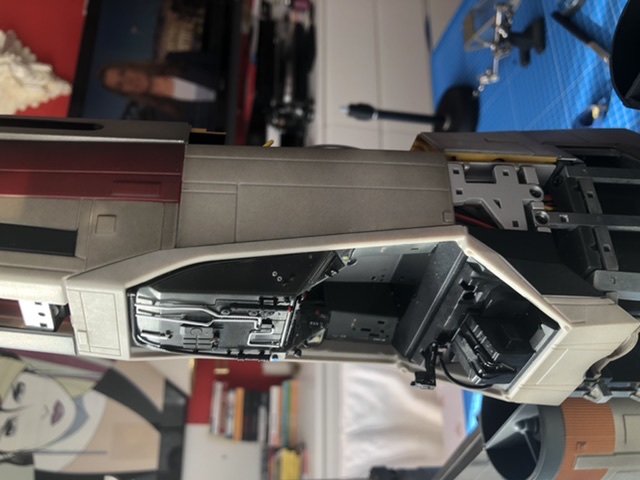 Issue 94, the rear upper side panels, 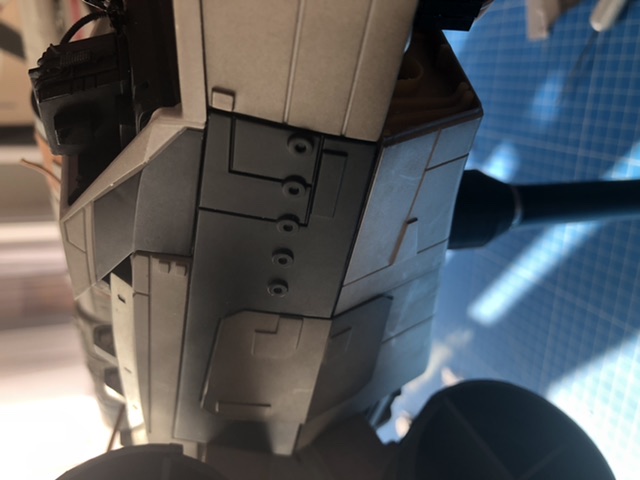 Unfortunately, there is an inaccuracy here and a large gap that can be removed either with a spatula or a small plastic sheet, I'll do that a little later in my construction report, 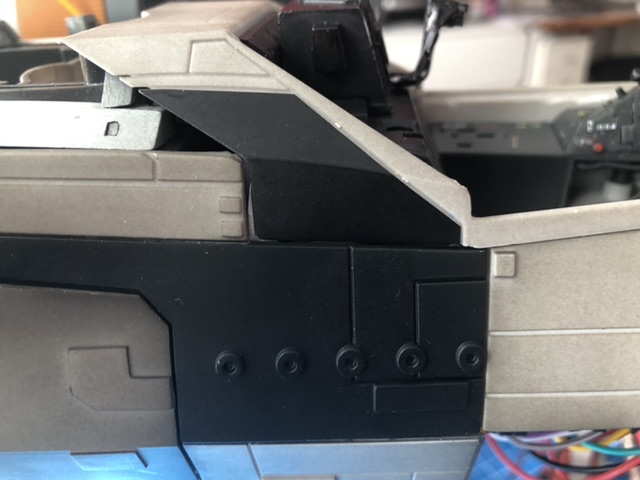 here you can see how the top and bottom panels come together, the gap is minimal, a good prerequisite for neatly assembling the rear and saving yourself trouble because everything is so tight, 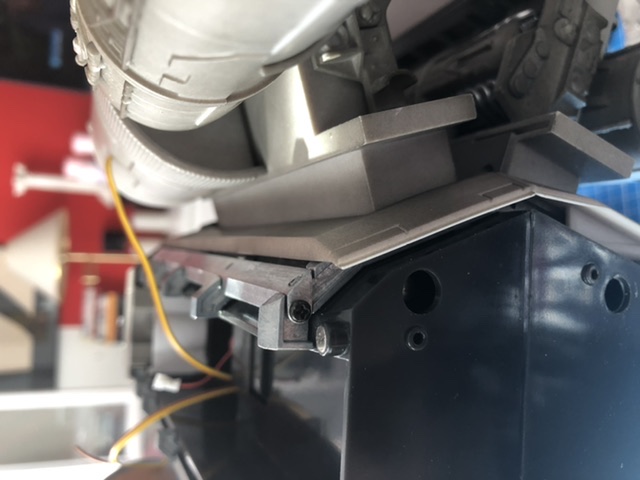 the right side, 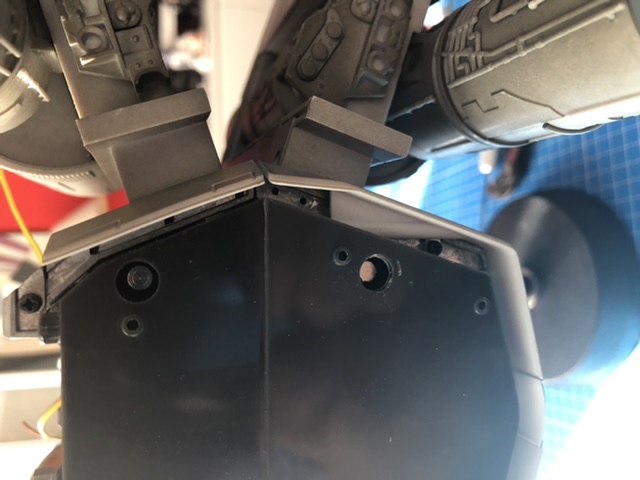 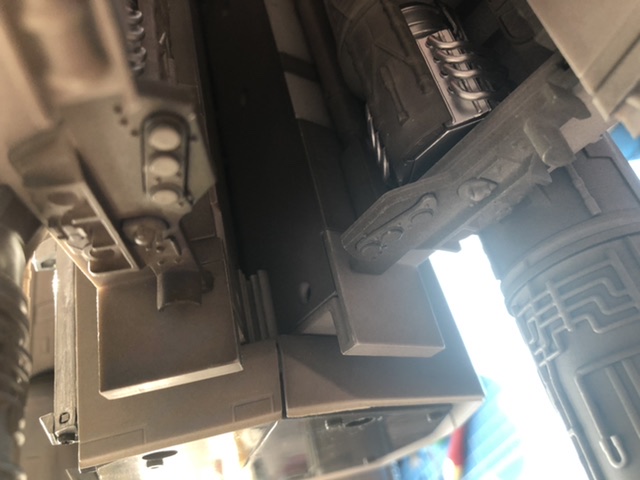 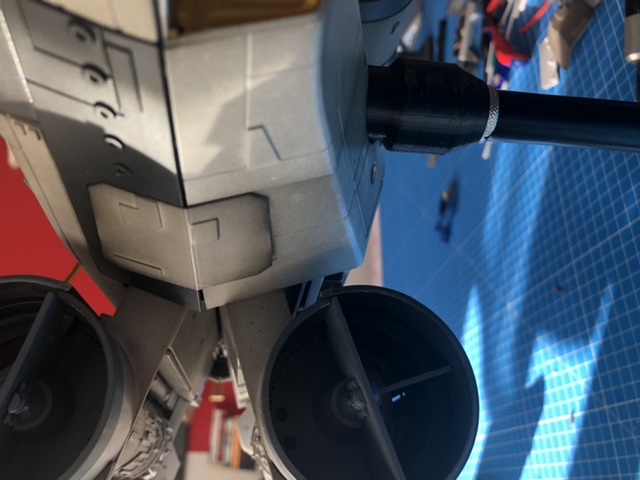 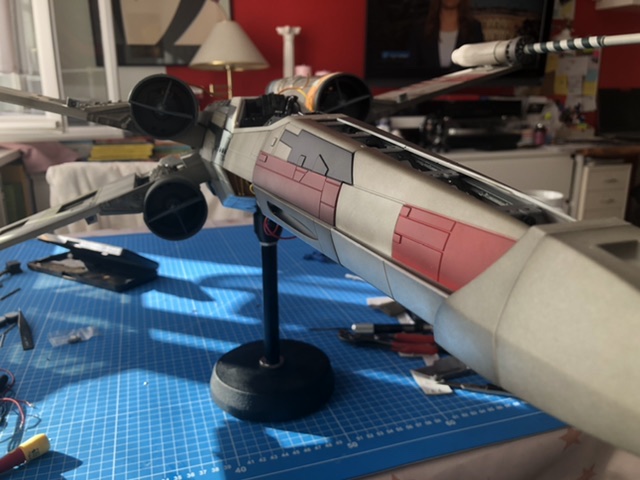  and the left side, 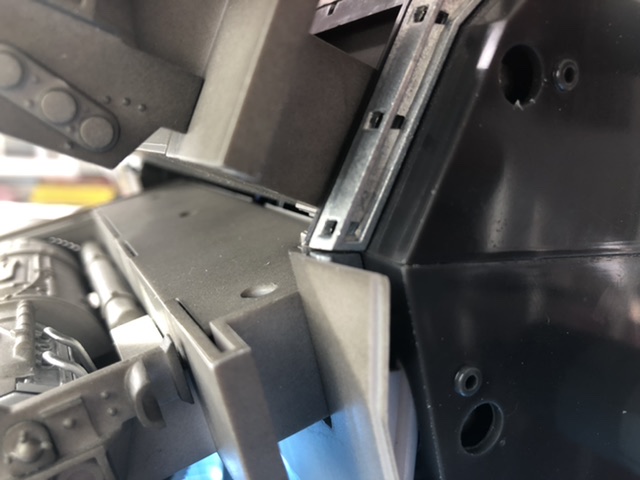 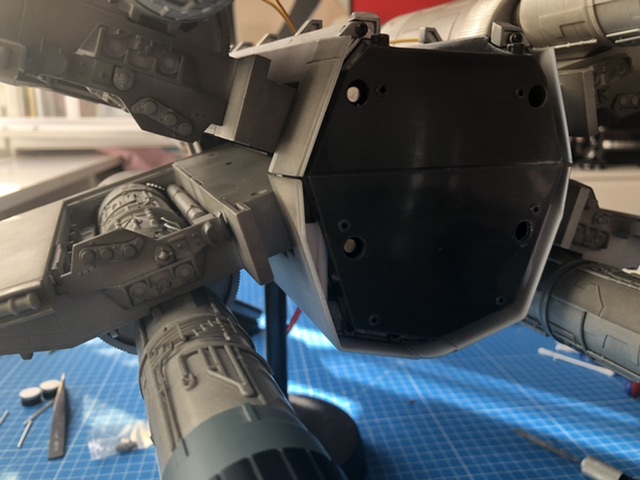 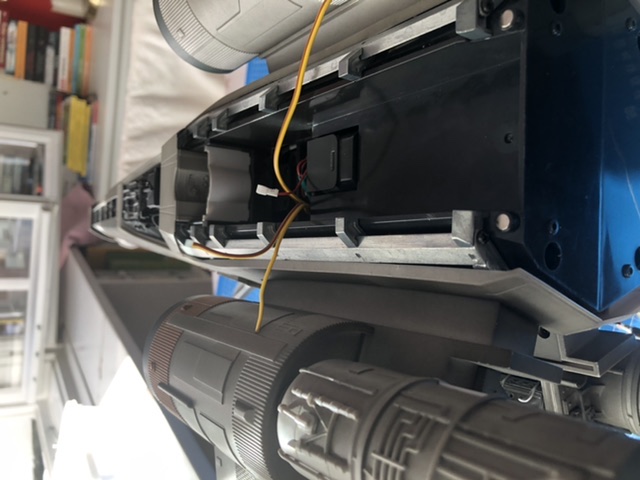 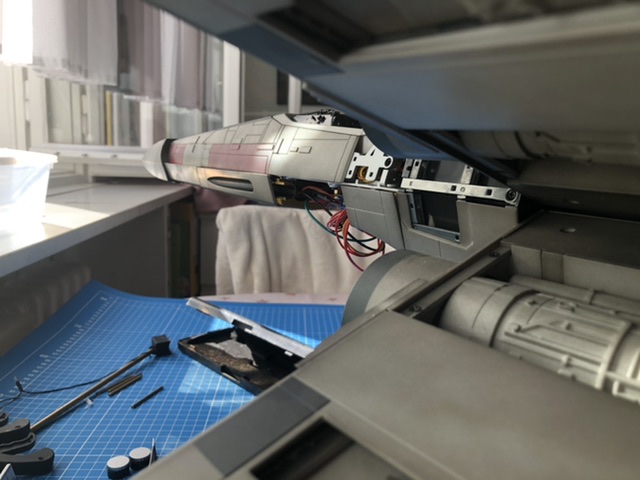 the view from the front, 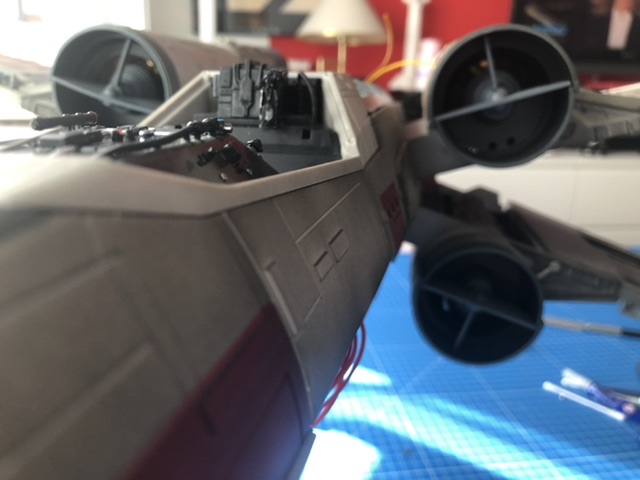 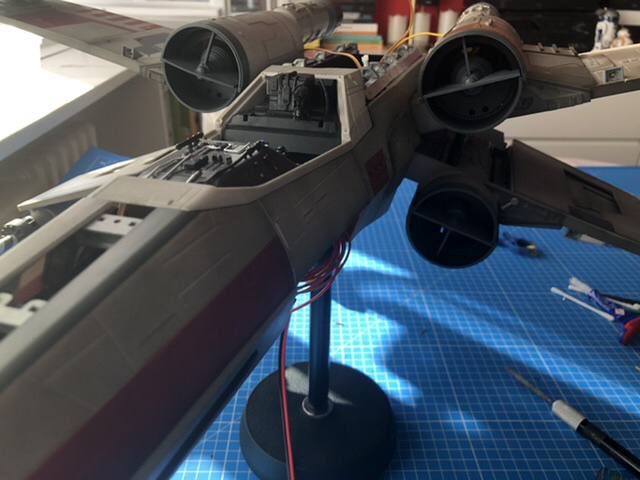 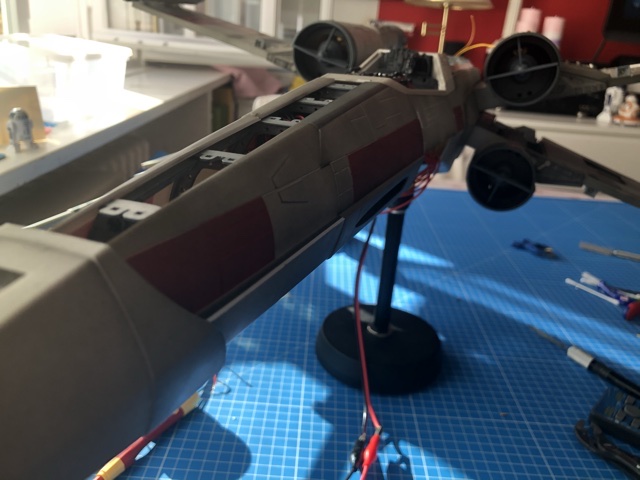 issue 95, that stern, which, thanks to the preparatory work, can be put on cleanly, 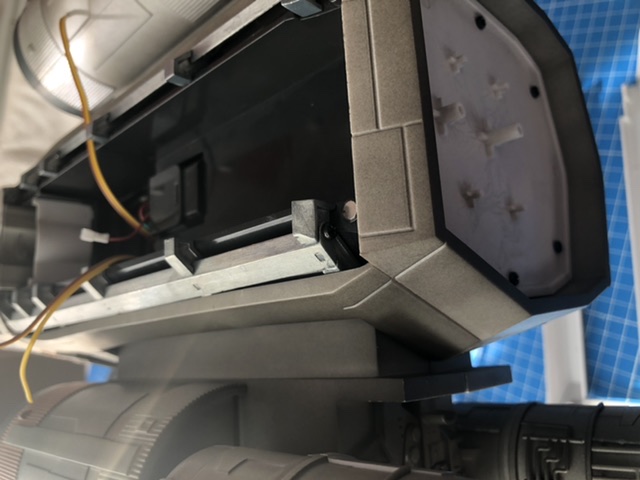  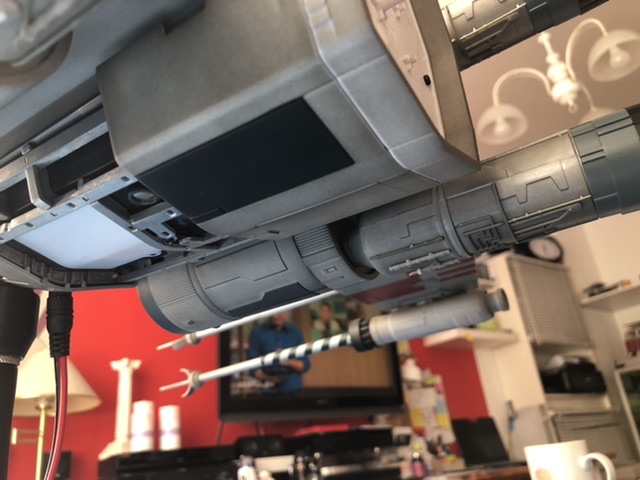  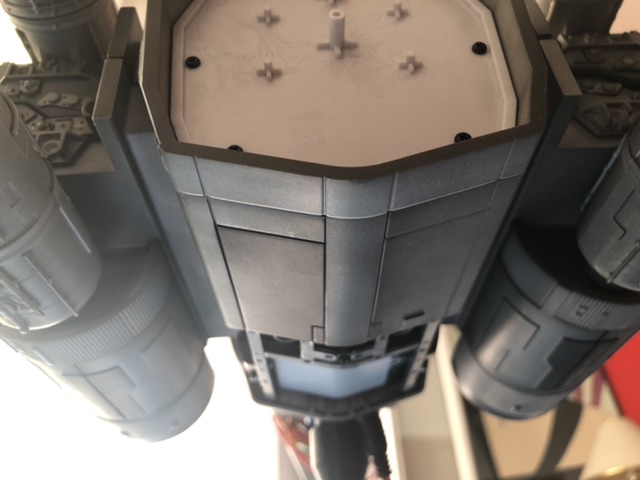 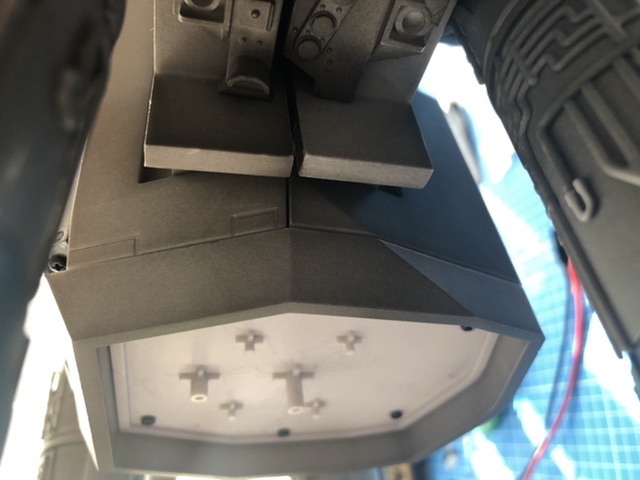 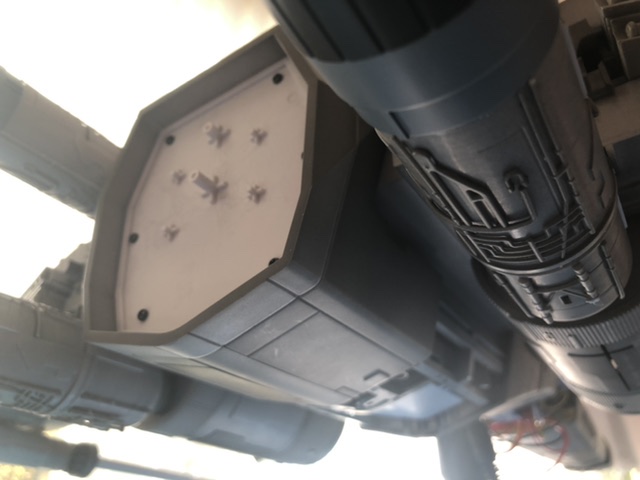 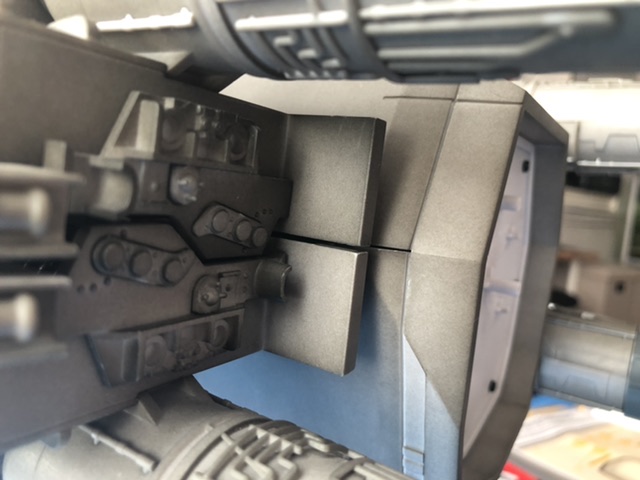 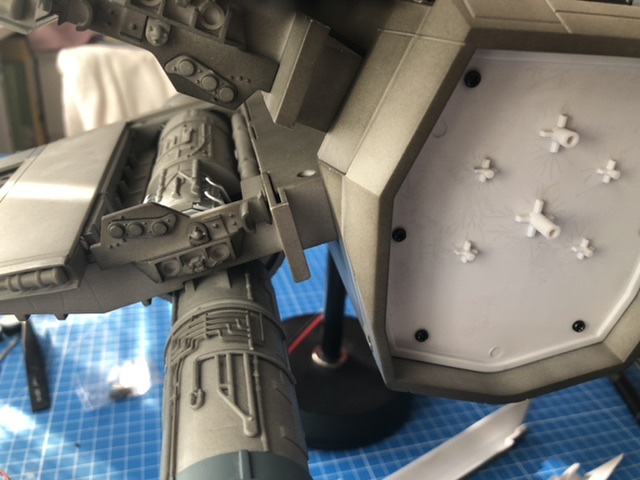 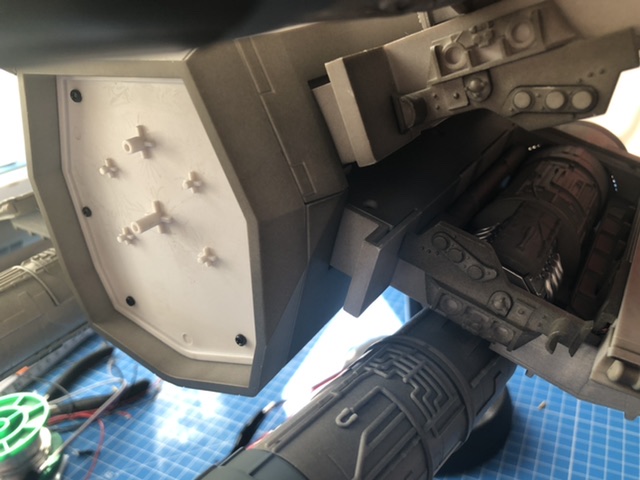 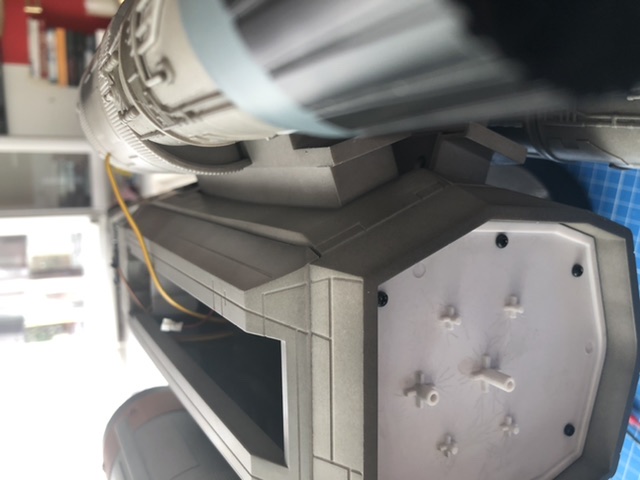  sometimes a photo of the building status between 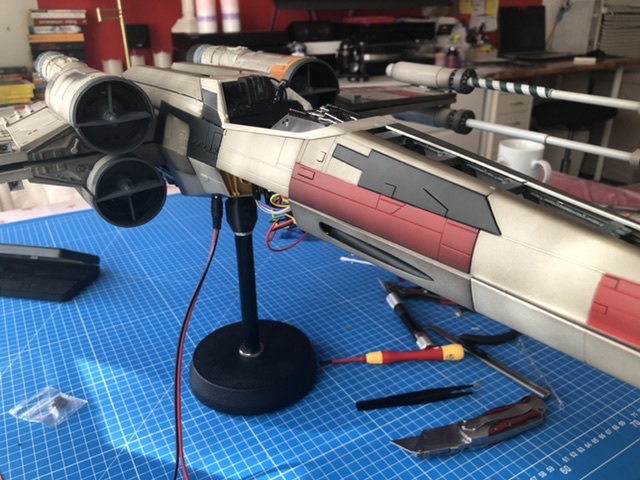 here the issue 96 and 97, the details for the rear, 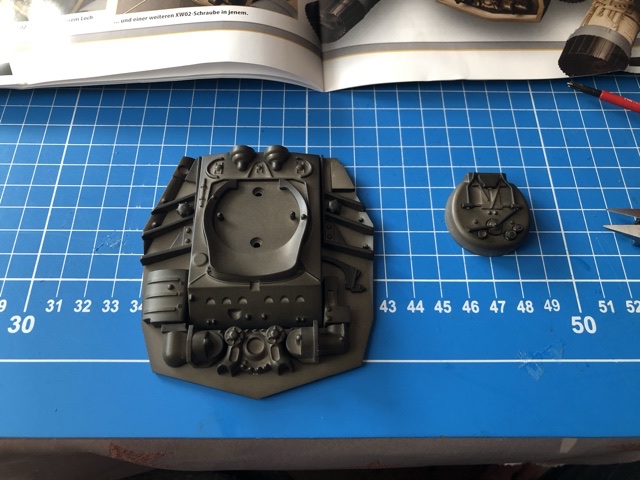 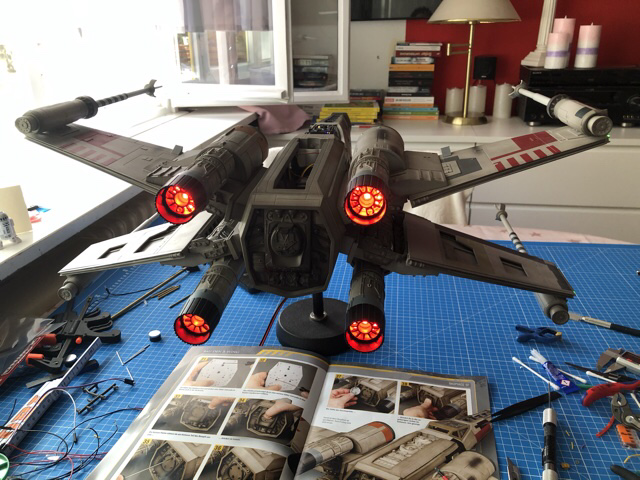 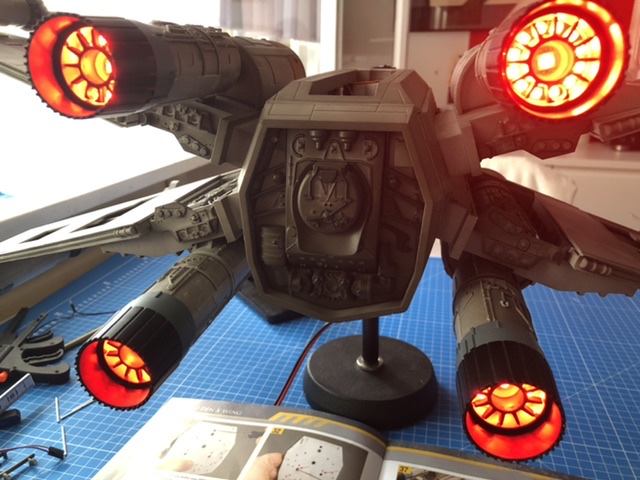 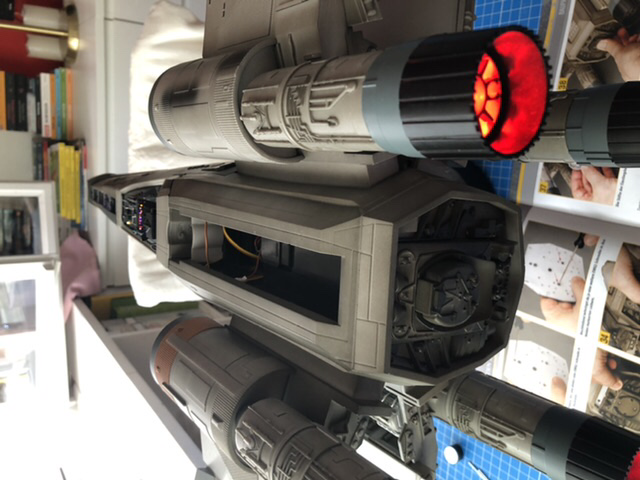 Issue 98, this is where the cover for the battery compartment goes, 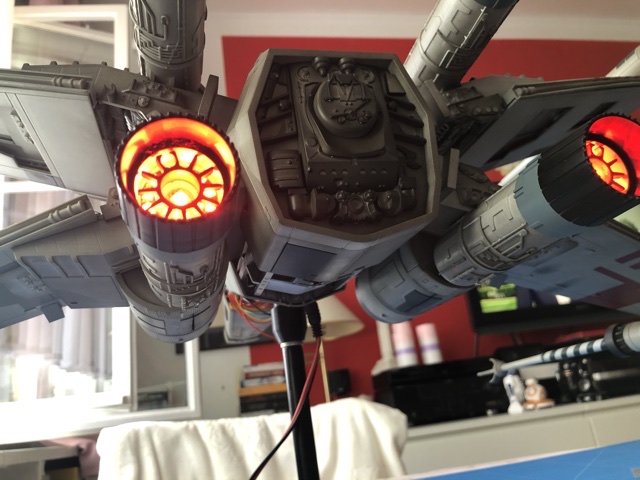 that battery compartment,  and the panels for the nose, 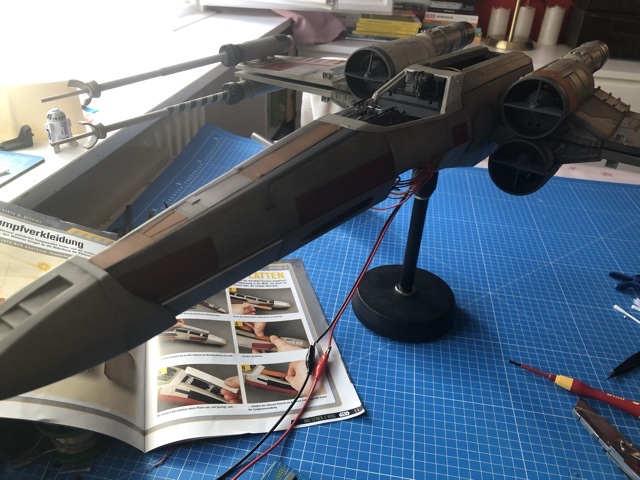 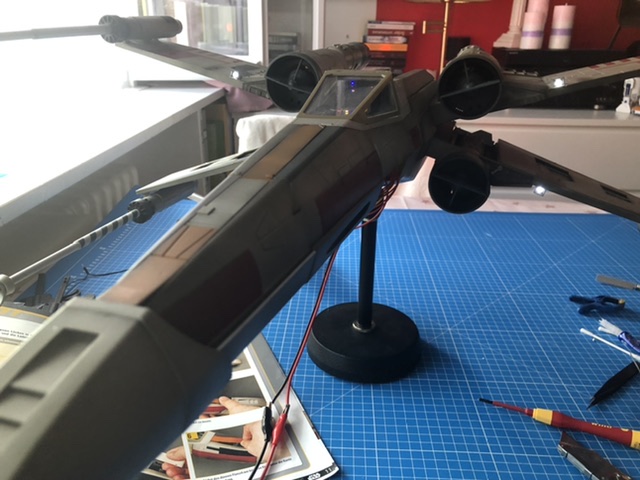 so that's it for today, here is the final construction, 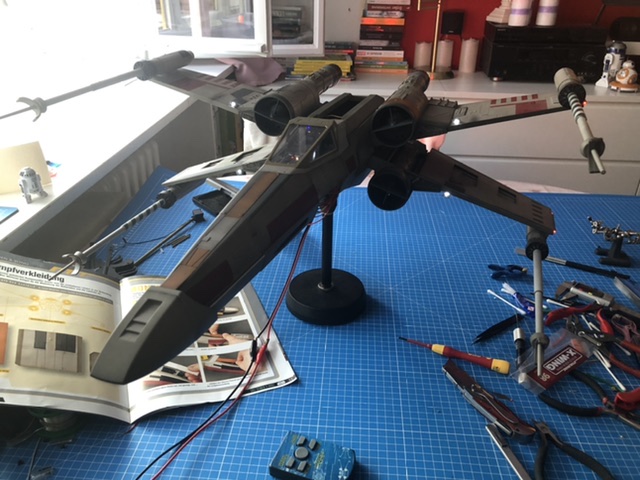 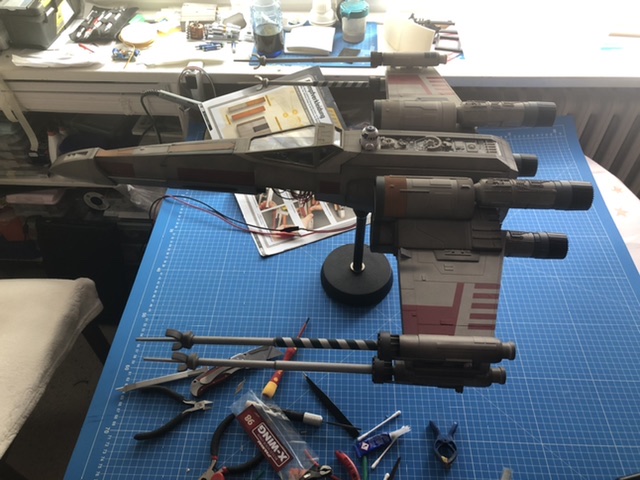 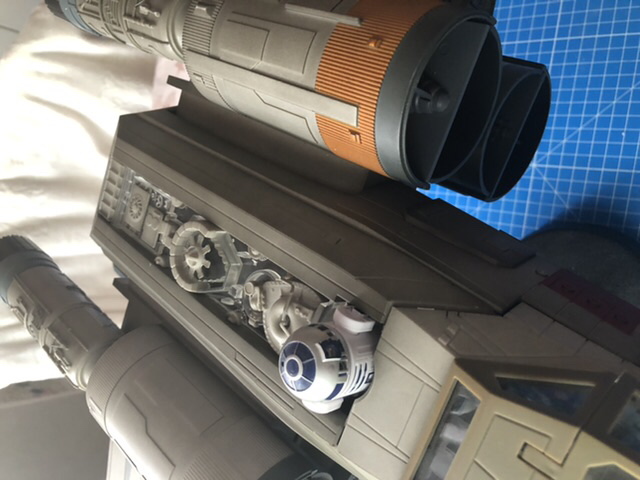 I hope I was able to shed some light on the dark and show you guys that the panels are not quite as bad as they are commonly claimed. If you have any questions, just ask. If I can help, I'll be happy to do it. To be continued I wish you a nice Day and stay healthy Alle Berichte sowie alle Fotos unterliegen dem Urheberrecht. Verwendung außerhalb dieses Forums bedürfen schriftlicher Genehmigung/Zustimmung meinerseits. © StefanForum Support Teamhttp://www.model-space.com/de/
https://m.youtube.com/watch?v=qIC4f1LE86w
MfG Stefan
|
|
|
Rank: Amateur level 2 Groups: Registered
Joined: 10/09/2018 Posts: 42 Points: 129 Location: Texas
|
Stephan,
No pictures made it to your post!!! By the way, the effect you made with the engines starting up is fantastic!!! Can't wait to see more of what you do and if you can get the pictures uploaded, I would like to see your fixes to the model!
Have a wonderful weekend!
Clay
|
|
|
Rank: Semi-Pro Level 1 Groups: Registered, Forum Support Team, Forum Support Team Germany, Administrator, Official Builds, Tech Support, Moderator, registriert Joined: 27/09/2016 Posts: 73 Points: 209 Location: Berlin
|
hello clay, please try a different browser, with me all the pictures are there. I use Mozilla Firefox. my picture host is phoximages. greetings stefan Alle Berichte sowie alle Fotos unterliegen dem Urheberrecht. Verwendung außerhalb dieses Forums bedürfen schriftlicher Genehmigung/Zustimmung meinerseits. © StefanForum Support Teamhttp://www.model-space.com/de/
https://m.youtube.com/watch?v=qIC4f1LE86w
MfG Stefan
|
|
|
|
|
Superb work Stephan. You are really bring this thing to life.  Mark
|
|
|
Rank: Semi-Pro Level 1 Groups: Registered, Forum Support Team, Forum Support Team Germany, Administrator, Official Builds, Tech Support, Moderator, registriert Joined: 27/09/2016 Posts: 73 Points: 209 Location: Berlin
|
thank you, Mark and Clay I am glad that you like the construction Greetings from Germany and stay healthy Alle Berichte sowie alle Fotos unterliegen dem Urheberrecht. Verwendung außerhalb dieses Forums bedürfen schriftlicher Genehmigung/Zustimmung meinerseits. © StefanForum Support Teamhttp://www.model-space.com/de/
https://m.youtube.com/watch?v=qIC4f1LE86w
MfG Stefan
|
|
|
Rank: Semi-Pro Level 1 Groups: Registered, Forum Support Team, Forum Support Team Germany, Administrator, Official Builds, Tech Support, Moderator, registriert Joined: 27/09/2016 Posts: 73 Points: 209 Location: Berlin
|
|
|
|
|
Guest
|
 US
US

