|
|
 Rank: Pro Groups: Registered
Joined: 31/12/2011 Posts: 123 Points: 369 Location: Graz, Austria
|
Today, there's still something to tell: It's about fitting the flags 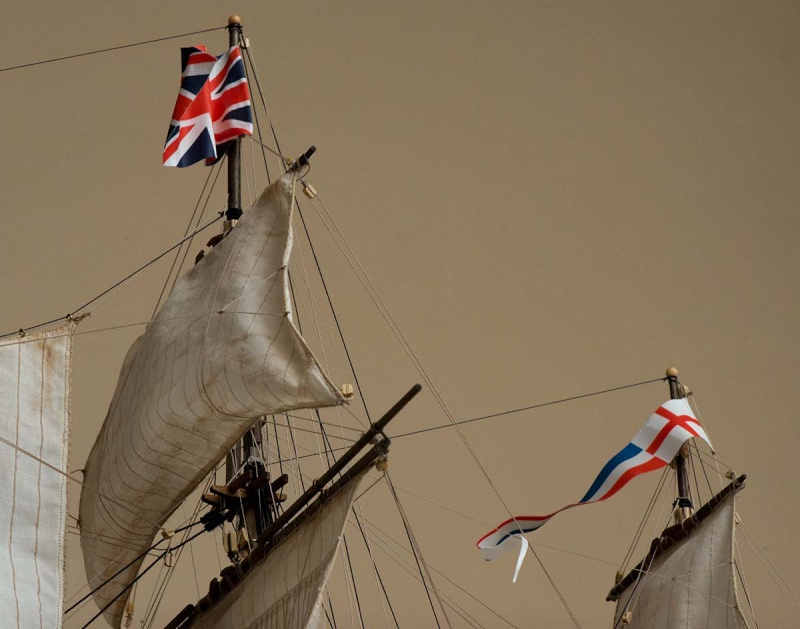 Here is the Union Jack on the main mast 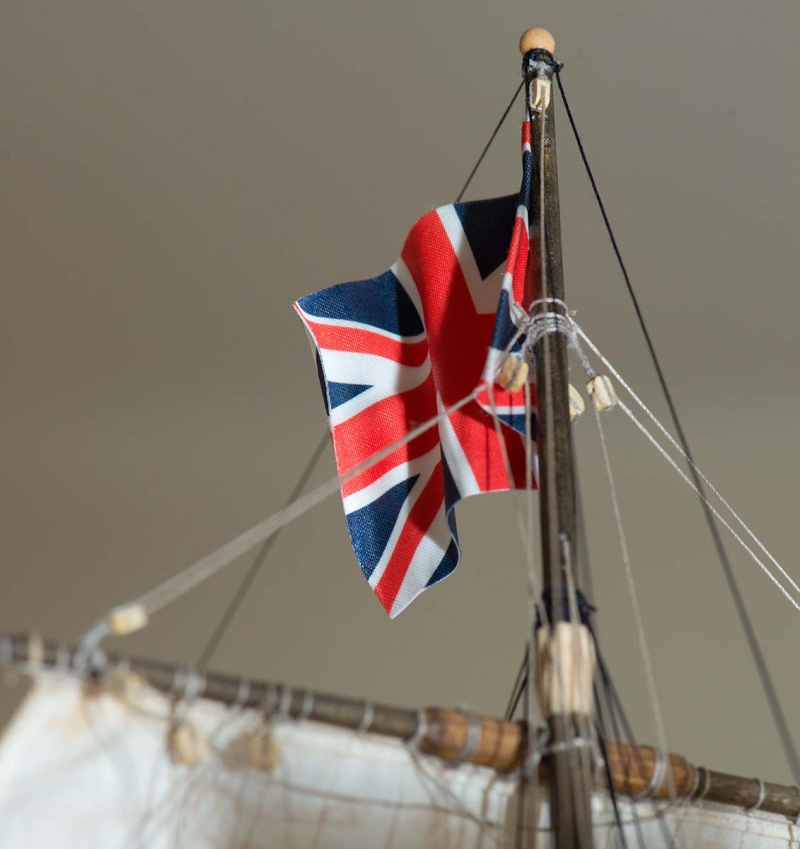 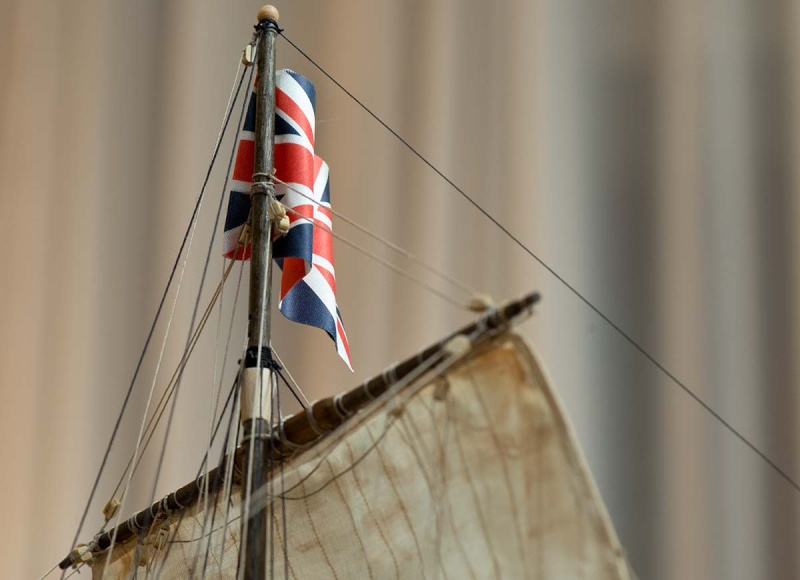 The White Ensign: 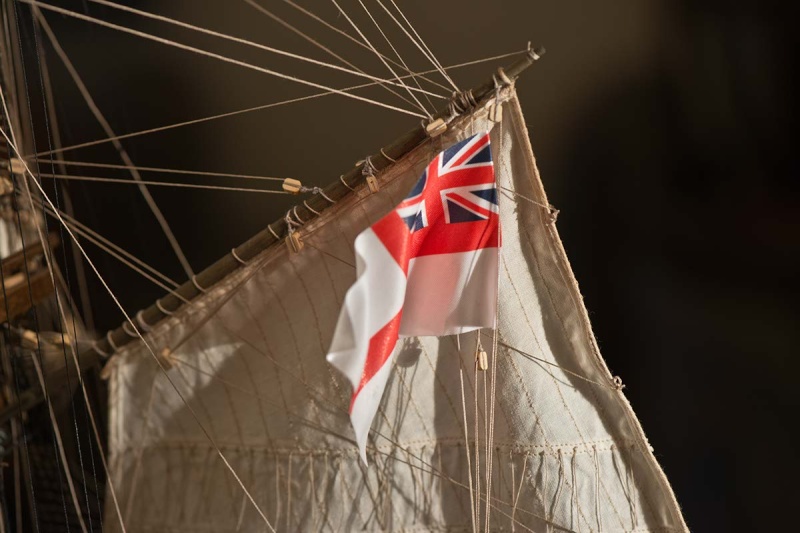  In order to create the impression of a flag in the wind, I fold and press it into form and apply some diluted PVA. Then I try to keep it in form with one hand, while drying it with a hair-dryer in the other hand. Here's St George’s Cross on the fore mast: 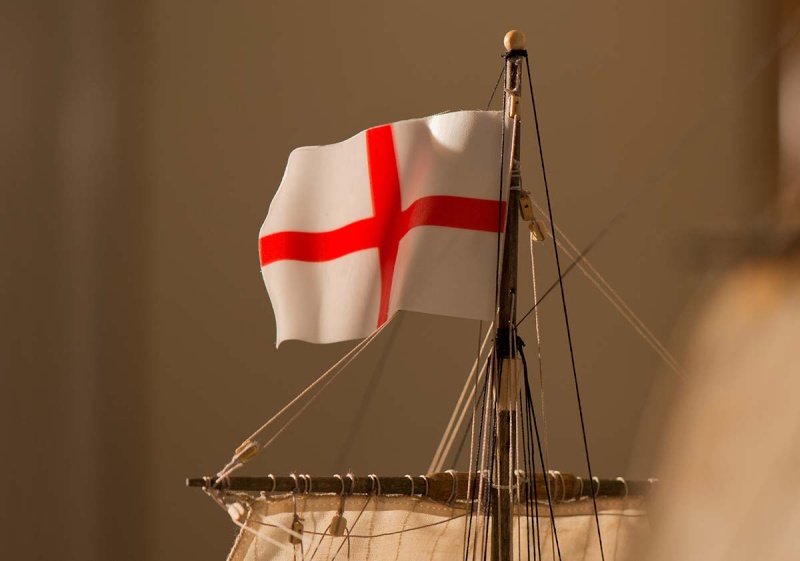 All these flags look quite new compared to my sails. Perhaps I should apply some color to simulate yellowing? BTW, does anybody know, how the material of the flags is called. Looks like some plastic-covered fabric to me. This is the pennant on the mizzen mast:  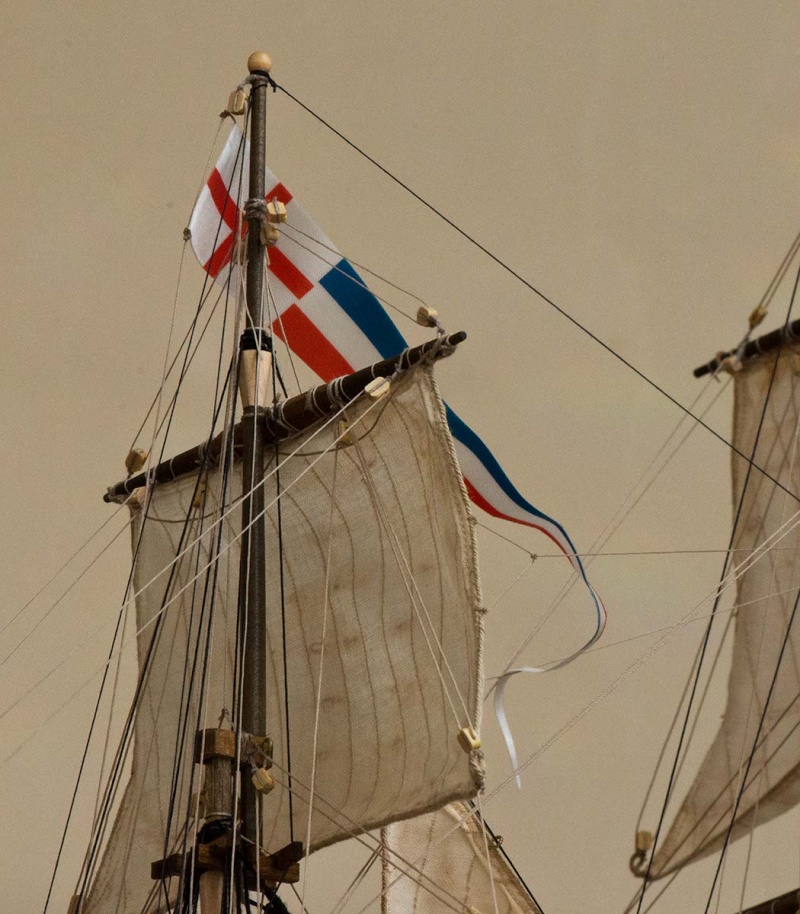 And there is a small Union Jack on the bowsprit  I haven't yet mounted the signal flags. And this is where I am now:  She is almost finished on this side, but with the cut-away section still empty on the other side. And the ship's boats still wait to be built.
|
|
|
|
|
 Top Work Bernd  Current builds:-C57,Zero, Lamborghini Countach, Caldercraft HMS Agamemnon,Robi,R2-D2, MFH Cobra .
|
|
|
|
|
Hi Bernd. I just checked back on ebay, that's where I got my Abbey Blu Gel from and loads of suppliers still have it on there. It's about £5.50 plus p&p on average, some will only post to the UK but many of them will post worldwide so you shouldn't have any problem. The flags look great! Incidentally, you're correct about the Union Jack on the bowsprit, that's the ONLY time it IS a Union Jack, when it's being flown from the Jack Staff on the bowsprit. When it's flown from anywhere else either on land or from the mast tops its just a Union Flag! (I might just put this one into the Nelson Speak thread!) Best Wishes Robin First wooden ship: The Grimsby 12 Gun 'Frigate' by Constructo Second: Bounty DelPrado Part Works Third: HMS Victory DelPrado Part Works 1/100 scale Diorama of the Battle of the Brandywine from the American Revolutionary War Diorama of the Battle of New Falkland (unfinished sci-fi), Great War Centenary Diorama of the Messines Ridge Assault Index for the Victory diary is on page 1
|
|
|
Rank: Pro   Groups: Registered
Joined: 01/04/2013 Posts: 342 Points: 1,029 Location: Essex
|
Fantastic work Bernd  Good tip re the diluted pva on the loose rigging and flags.  Regards Alan England expects that every man will do his duty.
|
|
|
|
|
Bernd, you have created such a stunning build of the Vic there just isn't words enough to express it's beauty.... You should be exceptionally proud of your creation.... .. Thanks for sharing this masterpiece and for all the wonderful tips you have given throughout your diary.....  Best regards and respect... Alan
|
|
|
 Rank: Master       Groups: Registered
Joined: 20/09/2011 Posts: 1,312 Points: 4,126 Location: Austria
|
Amazing build, Bernd! Would you recommend to stiffen all ropes with diluted PVA - as i read in some books, they tend to loose their tension after some time? I think Mondfeld recommends to do it with bee-wax. Or do you apply the glue only on the ropes without any tension? Thanks, Walter Greetings,
Walter
Present builds:
Revell B-24D Liberator 1:48
On the shelf:
Italeri "Fiat Mefistofele", Italeri "Moto Guzzi California", Fokker "Red Baron", Revell Bismarck, Revell Tirpitz, Arab Dow, Stage Coach, .....
Completed builds:
McLaren MP4/4, D-51 Steam Locomotive, HMS Victory, GWH F-15D Eagle, St. Stephen`s Cathedral (cardboard), Solar-powered paddle Steamer (little project with my son), HMS Victory X-section, "Geli" Phantom II (cardboard)
|
|
|
Rank: Master  Groups: Registered
Joined: 30/03/2011 Posts: 1,344 Points: 4,079 Location: Bryanston, Johannesburg. RSA
|
Awesome, awesome build there Bernd. An absolute masterpiece. Well done. Rgds, Hans
"It's okay to make mistakes. mistakes are our teachers - they help us to to learn, even if it is painfully"
Current Build:
Endeavour Cross section,D51
Completed: HMS Victory
Under the bench: Endeavour x 2,Sovereign of the Seas, Akagi and The Black Pearl!HMS Victory Cross Section
|
|
|
 Rank: Super-Elite   Groups: Registered
Joined: 16/08/2010 Posts: 2,771 Points: 8,344 Location: Brighton
|
Hi bernd Really fantastic Build .she looks stunning. Ian Current builds.Hachettes build the bismark,HMS Victory, HMS Hood.
Finished Builds Corel HMS Victory cross section.
|
|
|
Rank: Pro Groups: Registered
Joined: 31/12/2011 Posts: 123 Points: 369 Location: Graz, Austria
|
DaDokta wrote:Would you recommend to stiffen all ropes with diluted PVA - as i read in some books, they tend to loose their tension after some time?
I think Mondfeld recommends to do it with bee-wax.
Or do you apply the glue only on the ropes without any tension?
Hi Walter, waxing or applying diluted PVA could perhaps help to reduce the little hairs surrounding the ropes. Otherwise I see no reason to treat all ropes. I only used PVA to stiffen the loose ropes. However, for much of the rigging I used this thread which is probably waxed, because it has no hairs: http://www.cornwallmodelboats.co.uk/acatalog/mantua_rigging_thread.html#a34360Regards, Bernd
|
|
|
Rank: Pro Groups: Registered
Joined: 31/12/2011 Posts: 123 Points: 369 Location: Graz, Austria
|
Thanks, shipmates, your nice comments are very much appreciated! Last week I finally received the missing parts and figures for the cut-away section. I want to make some changes here, but while I'm thinking how to do it, I've started with painting the figures. I'll tell about my plans in a few days! Greetings from Austria, Bernd
|
|
|
Rank: Master Groups: Registered
Joined: 20/09/2011 Posts: 1,312 Points: 4,126 Location: Austria
|
Thanks for the information, Bernd! By the way - i also read somewhere, that the little hairs can be reduced by soaking the thread in beer! Don`t know about the smell of the model afterwards - but for us Austrians this would be an easy way to do it :)) Greetings, Walter Greetings,
Walter
Present builds:
Revell B-24D Liberator 1:48
On the shelf:
Italeri "Fiat Mefistofele", Italeri "Moto Guzzi California", Fokker "Red Baron", Revell Bismarck, Revell Tirpitz, Arab Dow, Stage Coach, .....
Completed builds:
McLaren MP4/4, D-51 Steam Locomotive, HMS Victory, GWH F-15D Eagle, St. Stephen`s Cathedral (cardboard), Solar-powered paddle Steamer (little project with my son), HMS Victory X-section, "Geli" Phantom II (cardboard)
|
|
|
Rank: Pro Groups: Registered
Joined: 31/12/2011 Posts: 123 Points: 369 Location: Graz, Austria
|
(This is just to keep my build diary complete. By mistake, I opened a new topic with this post and it has already been discussed:) I thought that I was done with the rigging ... But there are some unused blocks, double blocks, belaye pins, etc... Did I miss something? 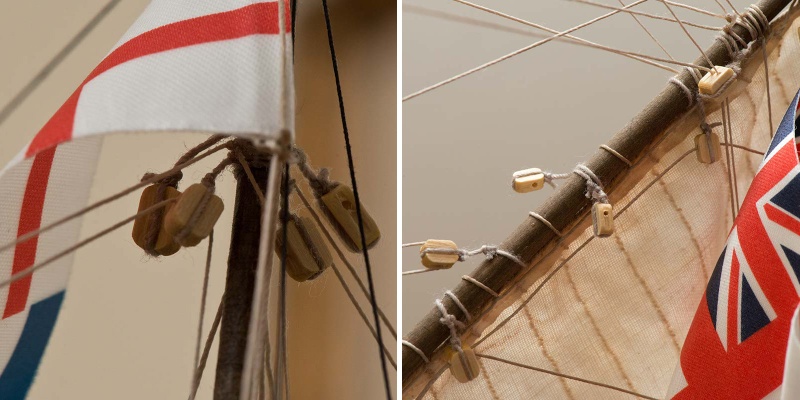 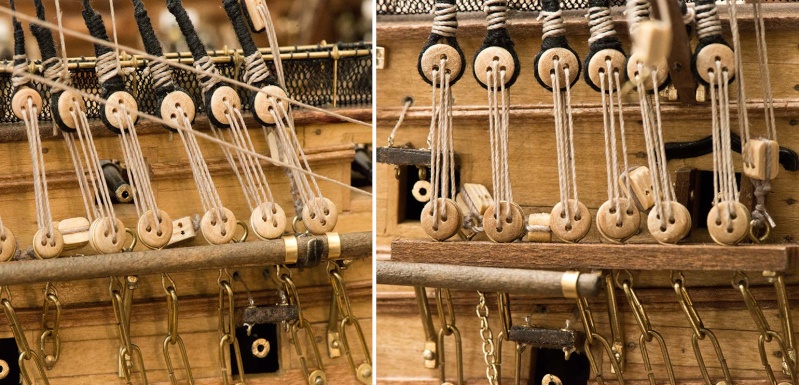 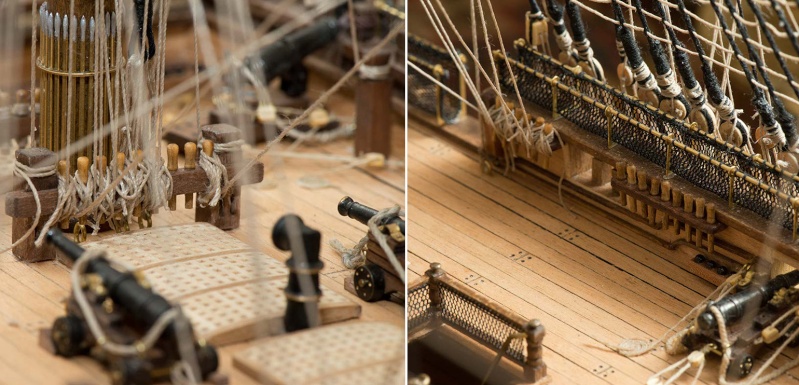 Regards, Bernd
|
|
|
Rank: Pro Groups: Registered
Joined: 31/12/2011 Posts: 123 Points: 369 Location: Graz, Austria
|
Hi, shipmates, my next big project is the cut-away section. Last week, it was still a gaping hole 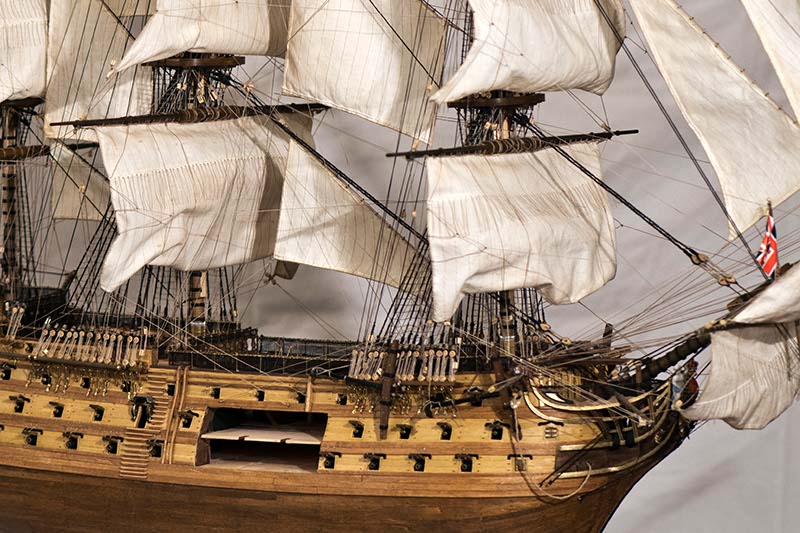 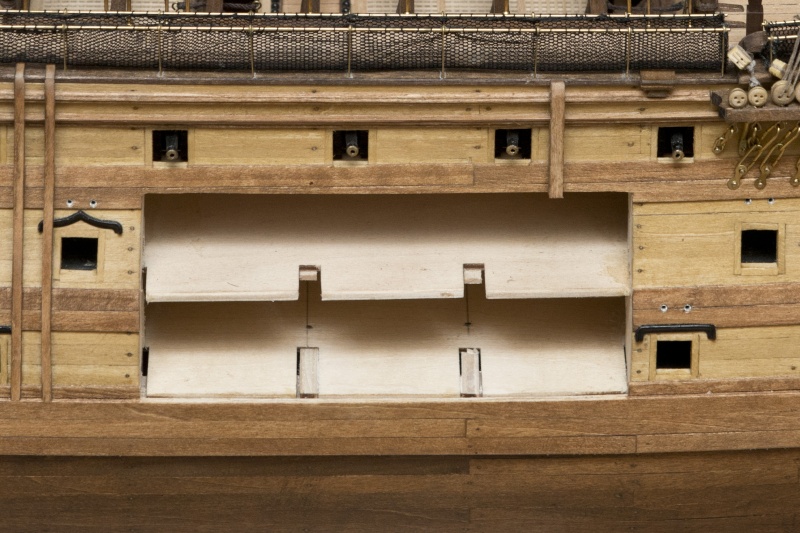 One had to make the decision for the cut-away section with issue 17 and not much has been done since then. At that time I thought it would be a good idea to have additional elements between the decks providing stability, like this... 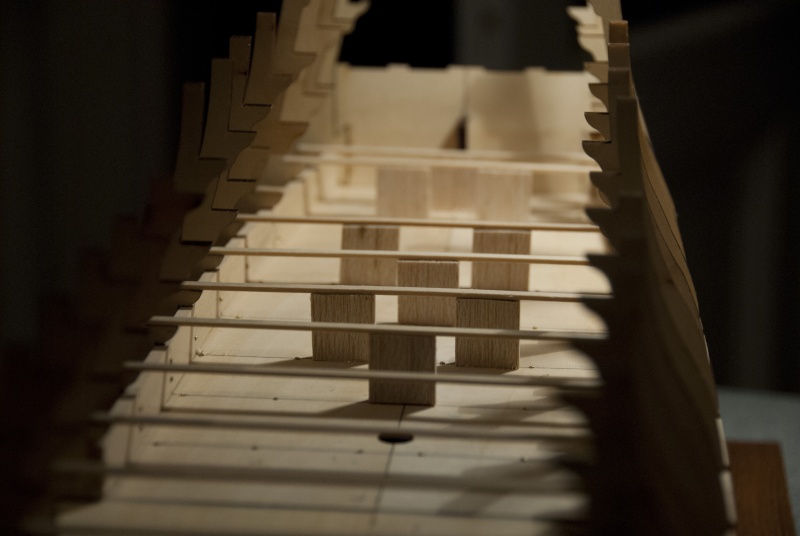 But now, some of them can still be seen through the opening in the hull. I could at least have painted them black!!  I remember that I thought it was strange to simulate planking of the whole deck behind the entrance (most of it cannot be seen from outside), but to leave the cut-away section completely untouched.  Unfortunately, I wasn't clever enough to do something about it. It would have been so much easier then. But at that time, I followed instructions very closely. So, anyway. Now there are some things visible through the opening that I 'd rather don't want to show, for example, the other side of the vessel (why didn't I paint it black, when it was still easy?), or the ugly side walls of the cut-away section, and my improvised pillars. I am afraid that the solution provided by deAgostini will not sufficiently hide these. Regards, Bernd
|
|
|
Rank: Pro Groups: Registered
Joined: 31/12/2011 Posts: 123 Points: 369 Location: Graz, Austria
|
Hi there! I have finally received the missing parts for the cut-away section. While thinking about what to do with this, I have started painting the guys. I am aware that others have painting figures as a hobby and are true masters, but I am just a raw beginner. Here is my attempt at Admiral Nelson 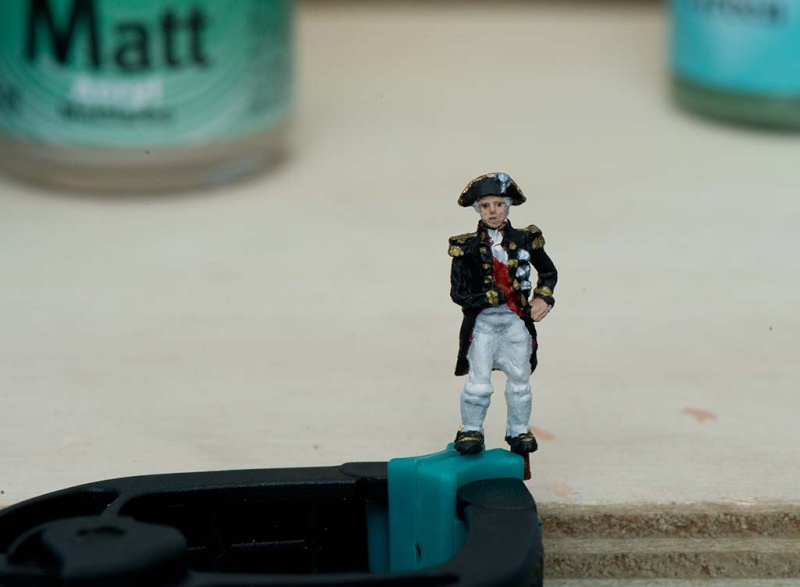 Here some of the guys are waiting while I still contemplate deAgo's instructions.. 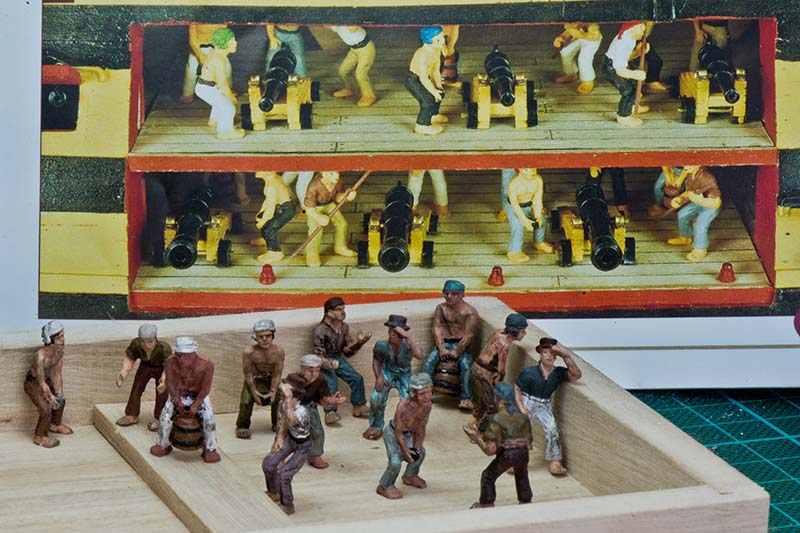 They are quite happy in their box 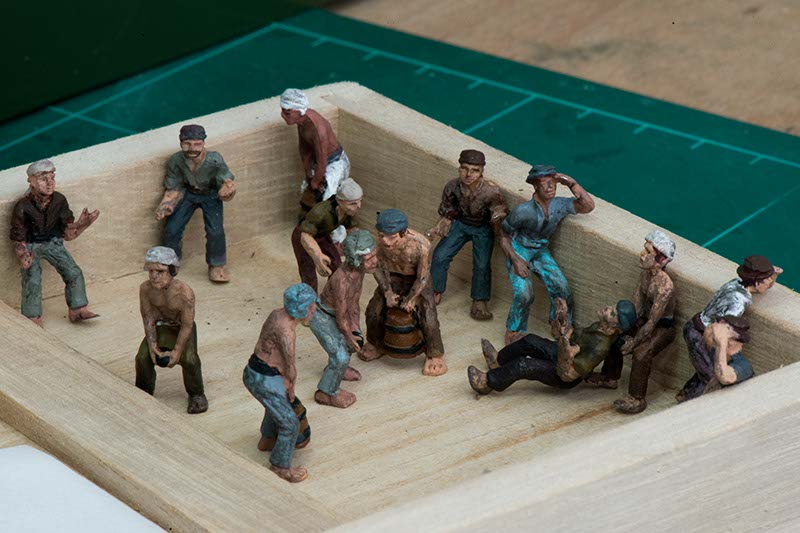 I tried to make them dirty (dry-brushing with black), as suggested by Tommick  One shouldn't take close-ups of these guys - they look like zombies. But I have no medical loupes and this is the only way to discover errors, otherwise one cannot see these details (the face is only about 2mm in diameter).  One problem with painting fine details (like lips or eyes): If I use a very small amount of color on a brush with only a few hairs, the color dries up before I can position the brush on the object. You probably know this: http://www.willard-wigan.com/gallery.aspxI simply can't imagine how he paints these tiny figures. Fortunately, I won't need that level of detail. Best regards, Bernd
|
|
|
Rank: Pro Groups: Registered
Joined: 01/04/2013 Posts: 342 Points: 1,029 Location: Essex
|
Hi Bernd, Good job on the figures. I have found that taking close up shots of my work shows up flaws, but you have to take into account that it will not be viewed that closely. Spare a thought for me and Robin painting our 15mm figures  Regards Alan England expects that every man will do his duty.
|
|
|
|
|
Hi Bernd 25mm figures? Oh you lucky man! Take it from me M8, there's nothing raw or beginner about your figure painting, Old Horatio looks perfect and it's not that long ago that that level of finish would have been expected for a 54mm figure! Incidentally, you were right about painting the cutaway walls white, the lower and middle gun decks were painted with white wash, only the upper gun deck had yellow ochre walls - so well done!! Magnificent model! Robin First wooden ship: The Grimsby 12 Gun 'Frigate' by Constructo Second: Bounty DelPrado Part Works Third: HMS Victory DelPrado Part Works 1/100 scale Diorama of the Battle of the Brandywine from the American Revolutionary War Diorama of the Battle of New Falkland (unfinished sci-fi), Great War Centenary Diorama of the Messines Ridge Assault Index for the Victory diary is on page 1
|
|
|
Rank: Pro Groups: Registered
Joined: 31/12/2011 Posts: 123 Points: 369 Location: Graz, Austria
|
Back to the cutaway section. I will not follow the official method. Instead of assembling the planking outside the ship, I put the planks direktly into the opening. I used Tanganjika planks, as for the visible decks. They are very thin, but probably too thick if assembled on an extra sheet of veneer. It will be rather crowded there, so I refrained from modelling the joints and nails. 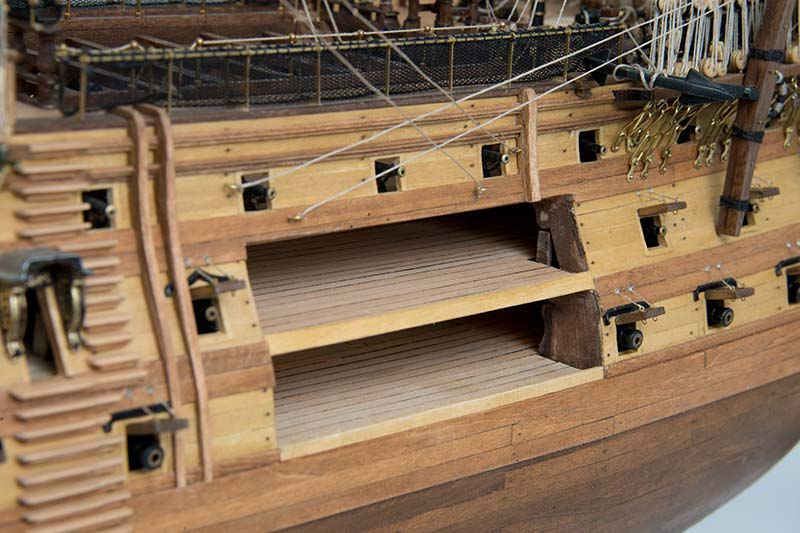 Unfortunately, not much can be done about the ugly side walls 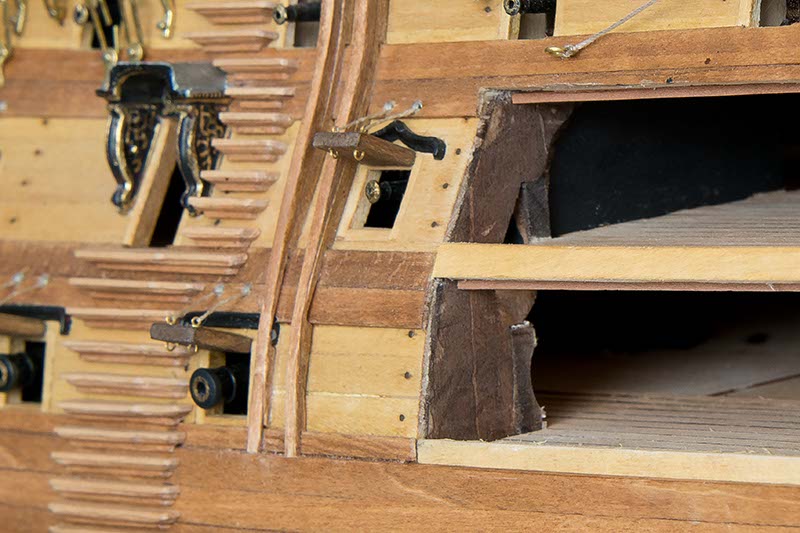 Through the opening one can see the stairs from the upper battery deck and some of the supporting elements (woodblocks). This following image is overexposed, so you can see it too: 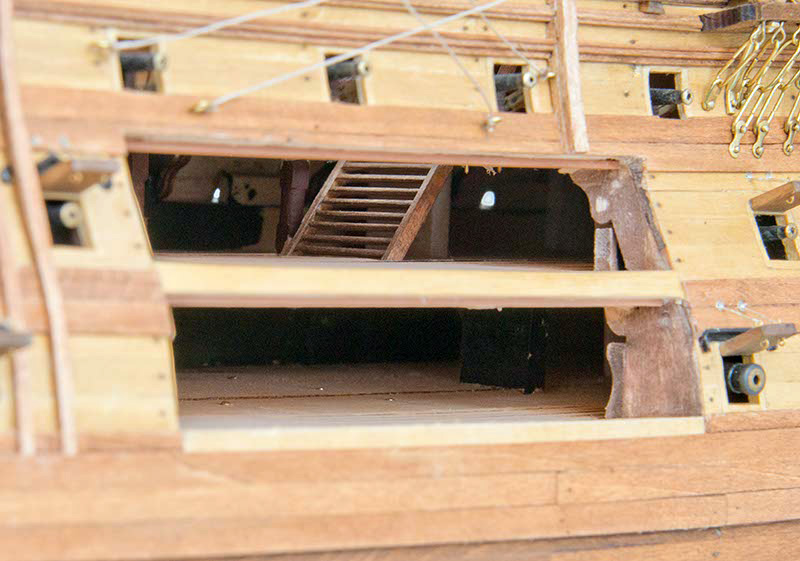 I have tried to paint the other side and the woodblocks black (as far as I can reach with a brush). So I hope they will be invisible later. Moreover, I am not happy with the ceilings, the small woodstrips alongside will not really hide this 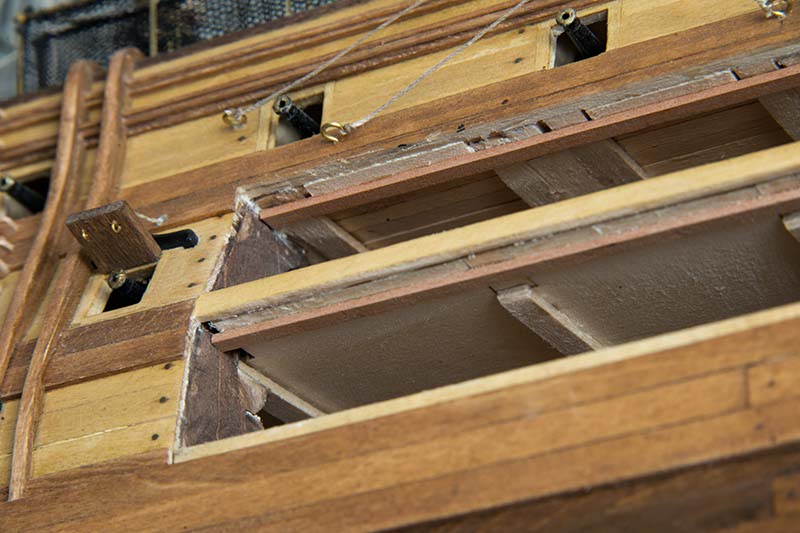 I just remembered, that all my stairs were scratch built with a smaller step-size. Fortunately, after some searching, I found the original stairs from the kit 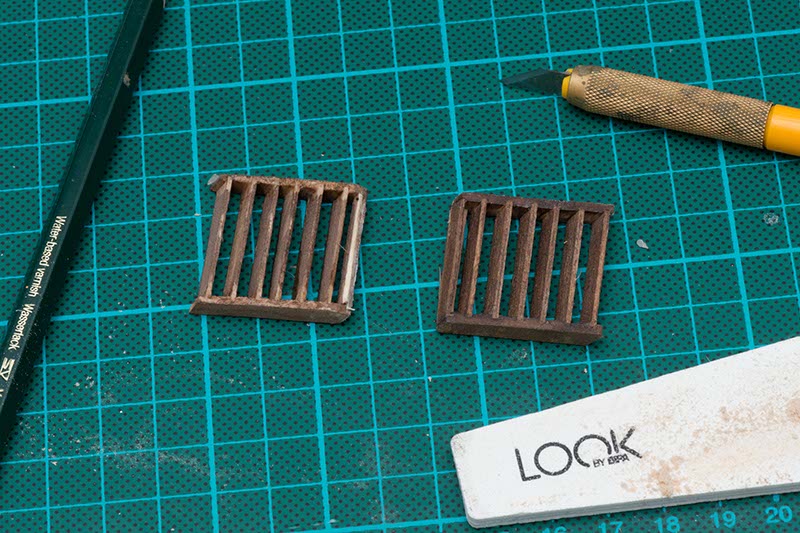 and I fitted them to the lower deck. 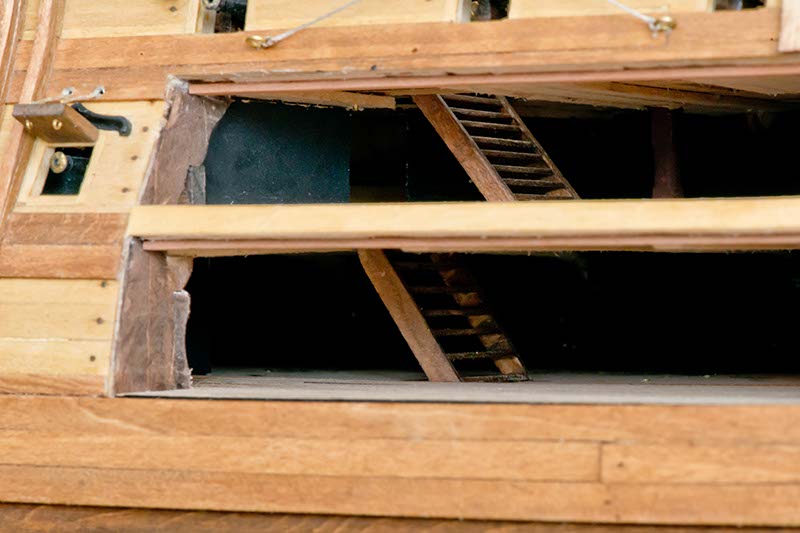 Finally, I can also use grating elements from the magazine 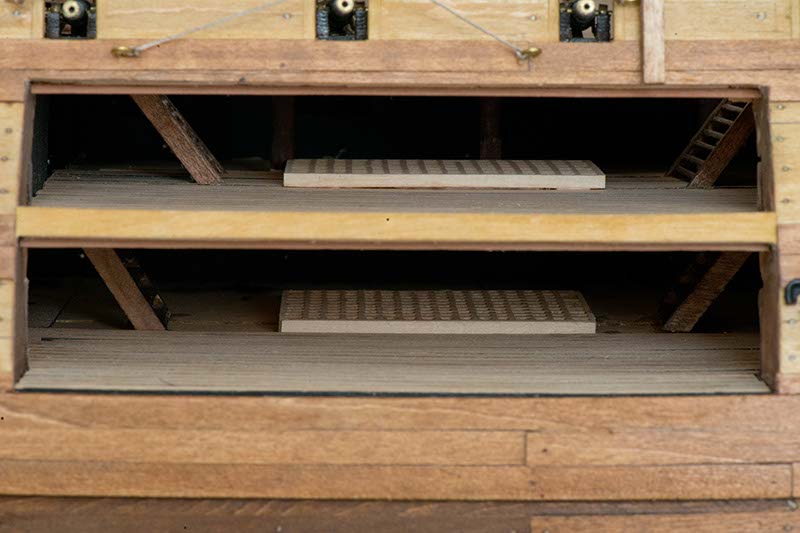 The barrels will help to hide that there are no holes in the deck for the stairs  I also adapted some pillars ...  ... for use in the background 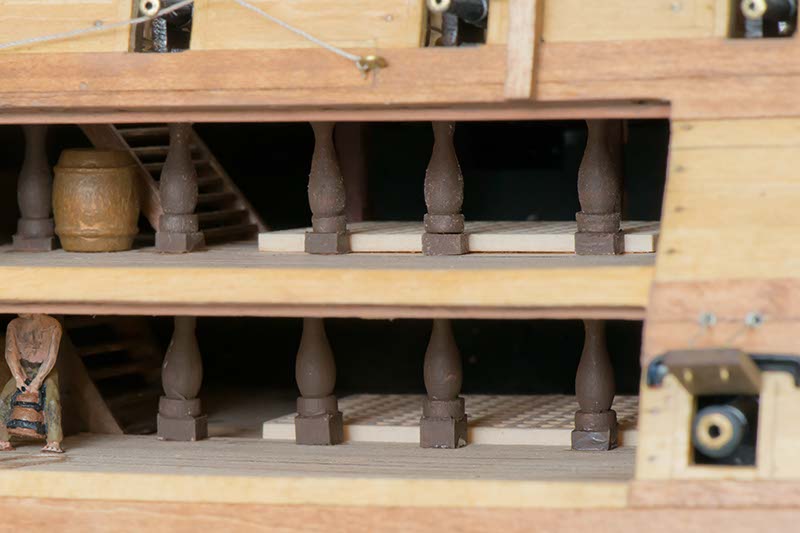 and I also plan to place a strip with cannonballs in front of the gratings. Regards, Bernd
|
|
|
Rank: Pro Groups: Registered
Joined: 31/12/2011 Posts: 123 Points: 369 Location: Graz, Austria
|
I almost followed the instructions when assembling the guns, with one exception: I used the larger carriage bases (which come together with smaller upper deck guns) for the larger lower deck guns.  The upper deck guns have exactly the right size and height 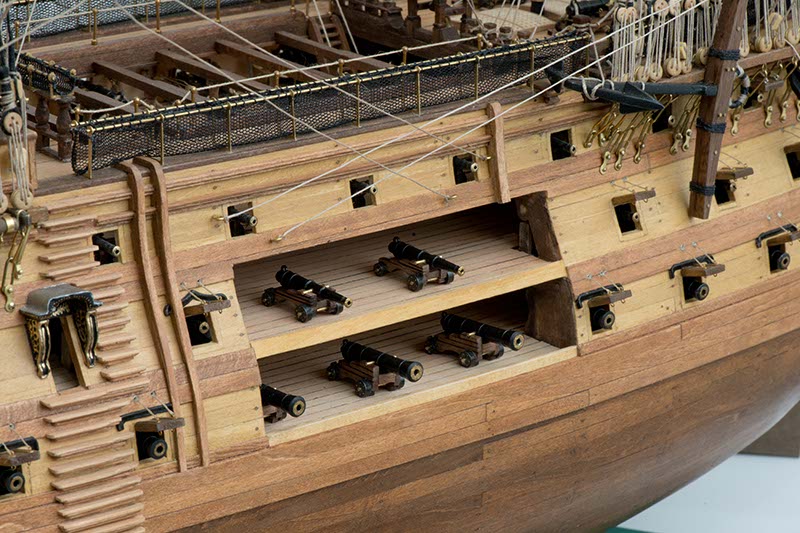 but the lower deck guns aimed too high and I had to adjust them 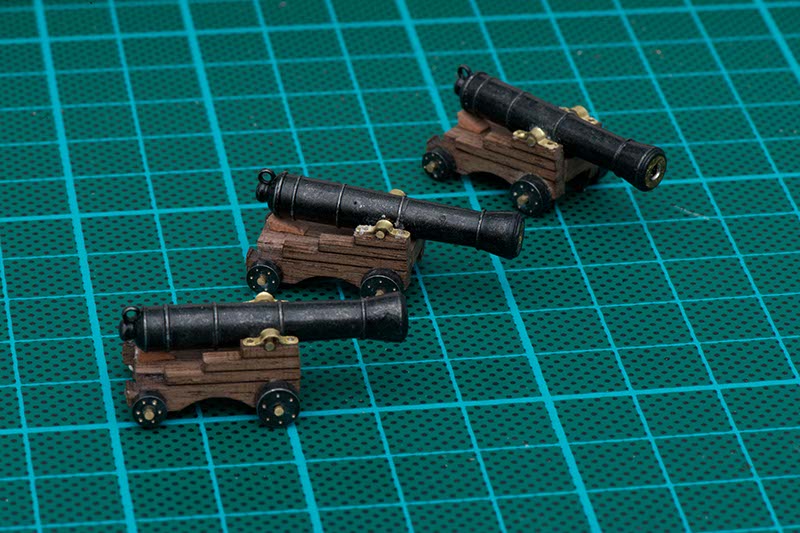
|
|
|
Rank: Pro Groups: Registered
Joined: 31/12/2011 Posts: 123 Points: 369 Location: Graz, Austria
|
Now I can see mainly two problems: One is the ugly side walls  which I tried to improve by painting (sorry, I won't paint them red):  And my other problem is with the guns. The instructions say that they just should be glued in place without any rigging. I must confess that I do not like that idea. Everywhere else, the guns are rigged, even if they almost can't be seen (on the upper battery deck) Now I had the following idea, which might bring a solution to both problems: I will show a part of the frame construction which will hide the side walls and provide support for the rigging of the guns. One of the frames could look like this:  and I could use it well to tie up the guns: 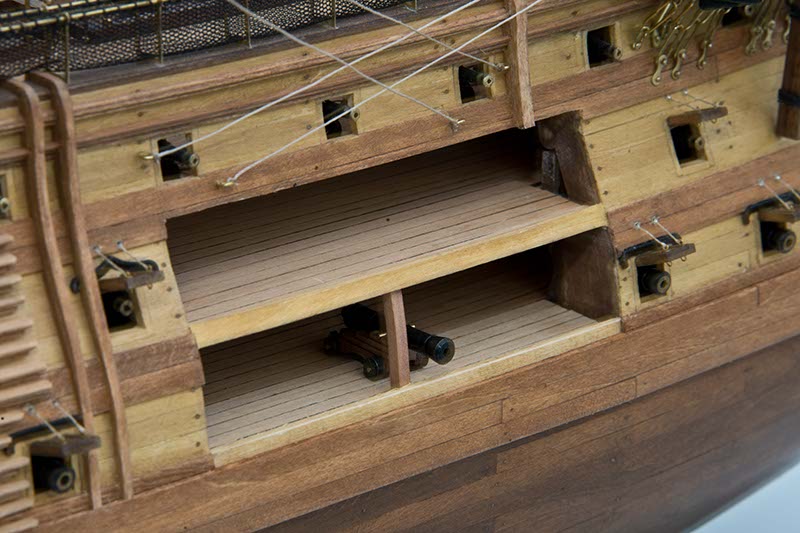 Moreover, the frames will help to obstruct the view of unwanted parts of the ship's interior. I will follow the plans of McKay in "Anatomy of the Ship", but I will show only a small part of the construction. Here is a first sketch of my idea  And here are my first attempts built from scratch  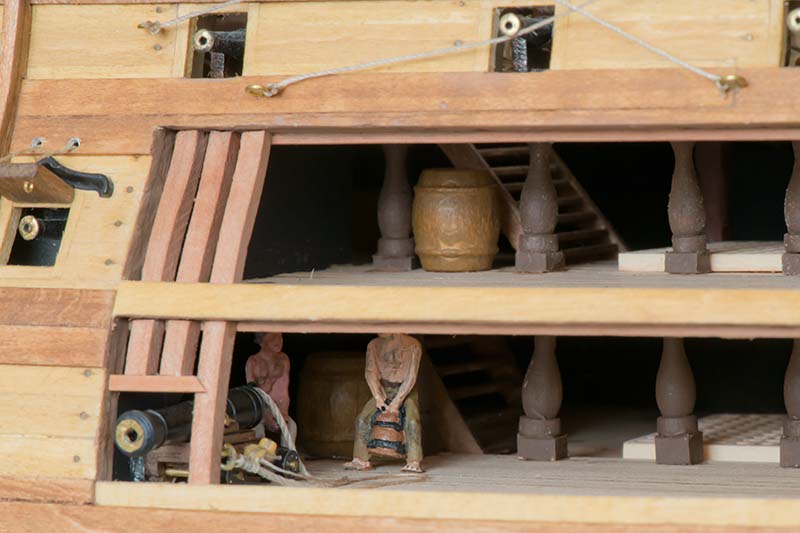 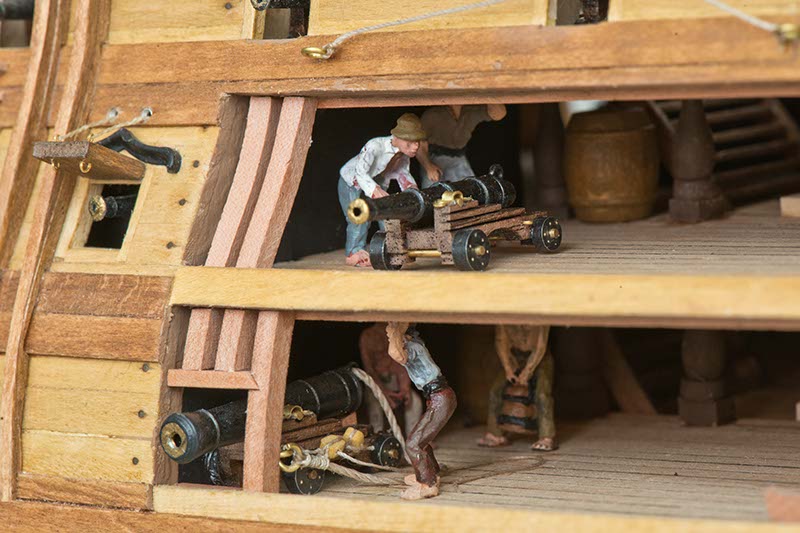 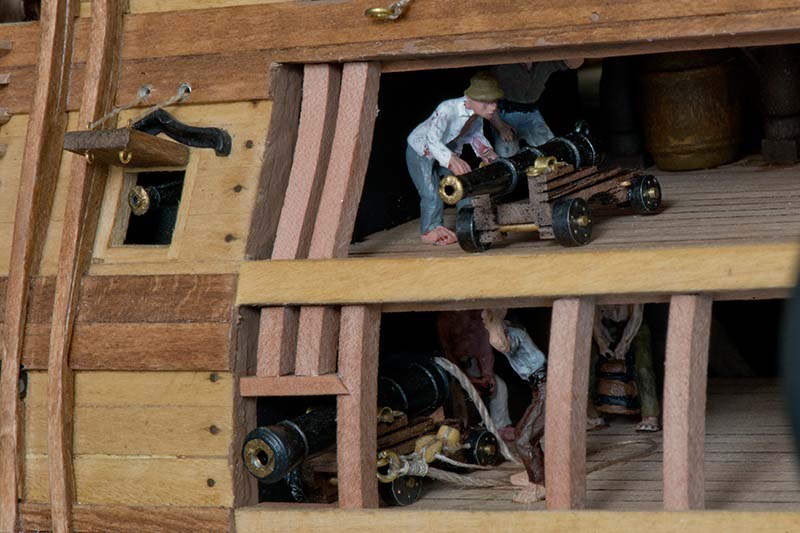
|
|
|
Rank: Pro Groups: Registered
Joined: 31/12/2011 Posts: 123 Points: 369 Location: Graz, Austria
|
It's sizzling hot in Austria. The only cool place in the house is the basement with my crafting room. So, this is today's working area. Most of the frames are not fixed yet.  This thing was pretty useless up to now, but today it really comes in handy. 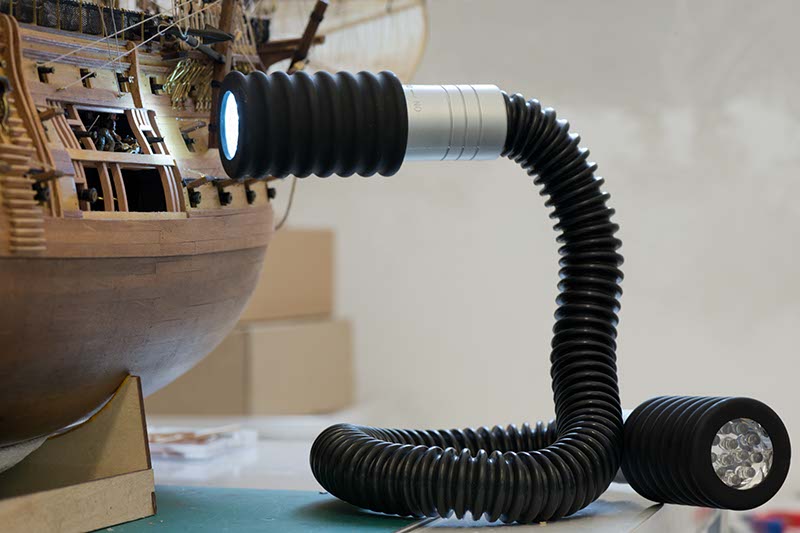 Let's go to work: 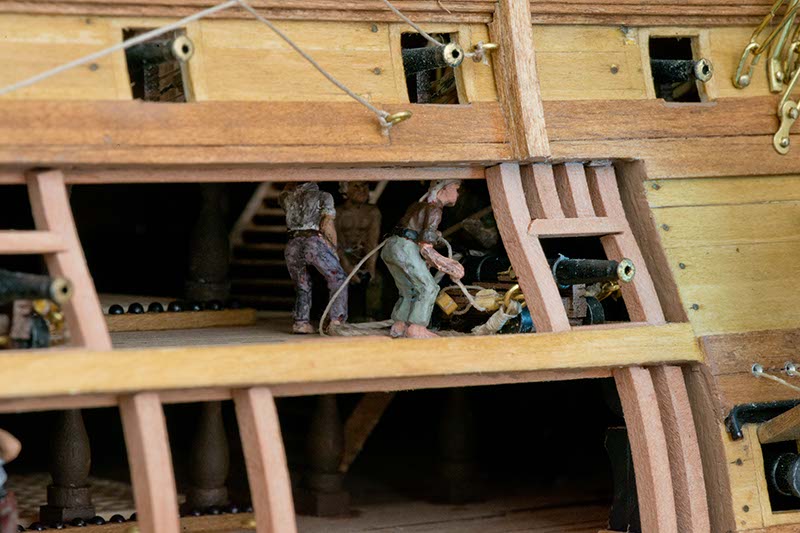 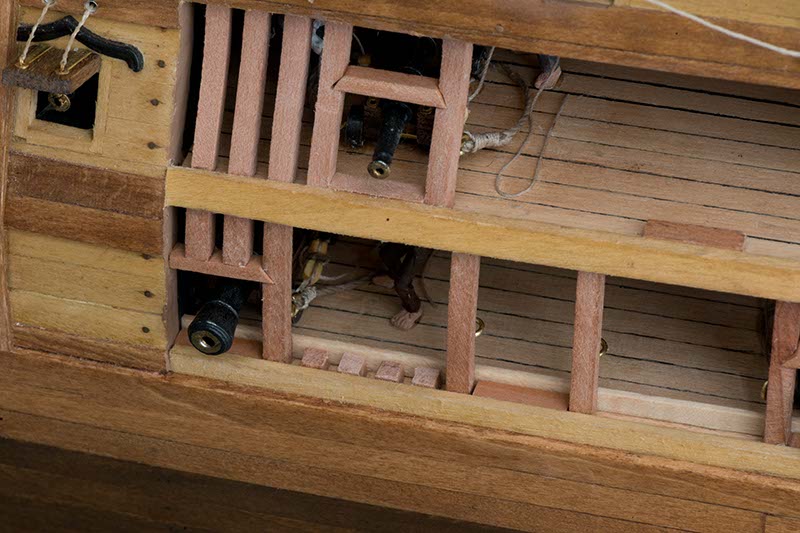 Every gun is prepared outside the ship: 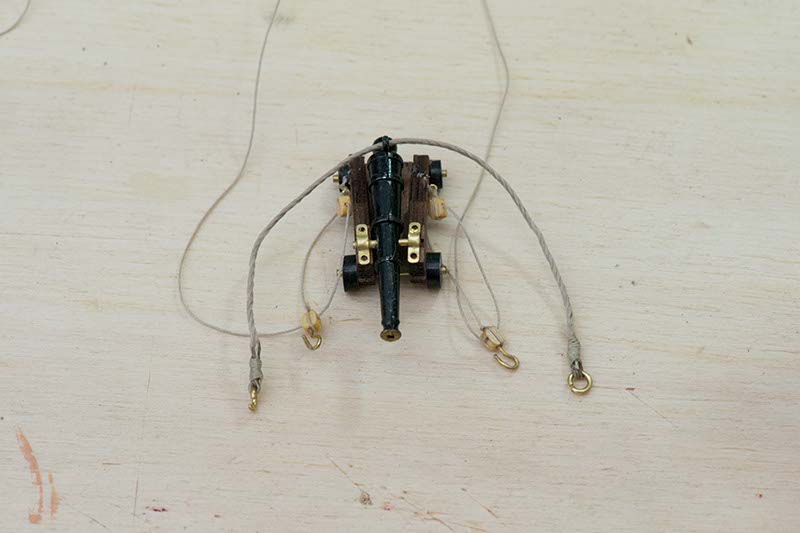 . 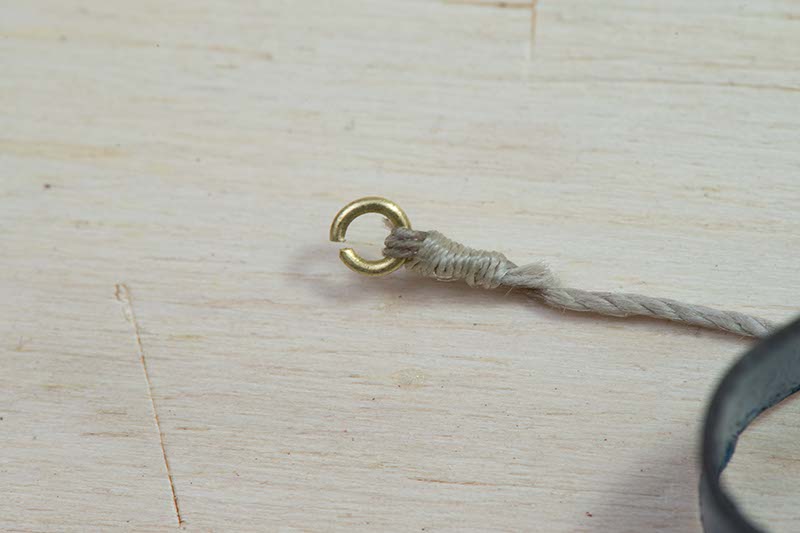 Then the sailors standing behind the gun are glued in place. 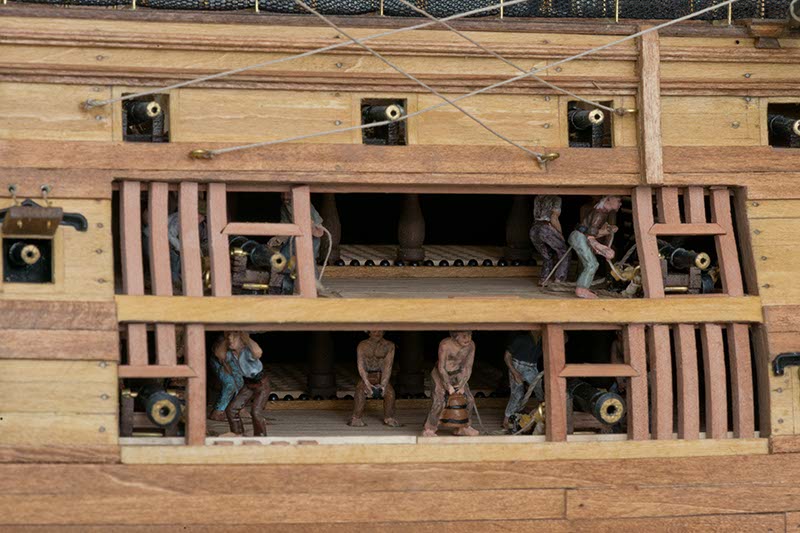 Then I put the guns in place (but not yet the remaining sailors, as I will need the space to adjust the rigging) 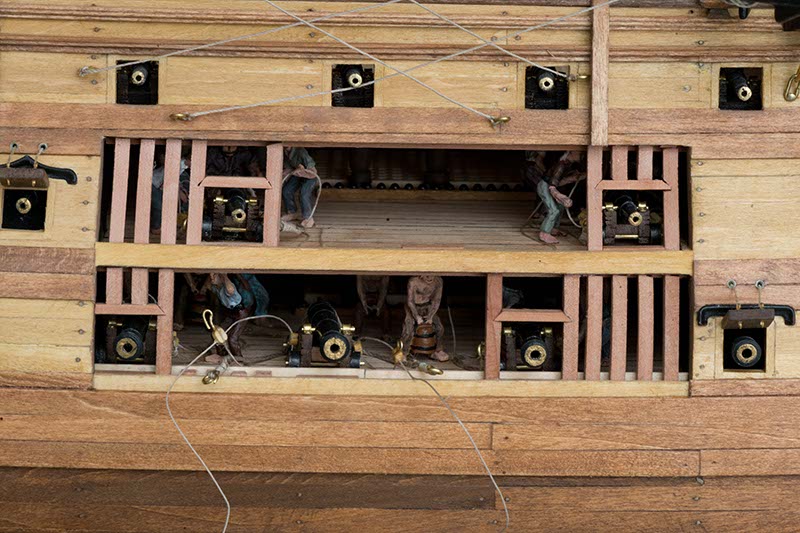 The frames were prepared with ringbolts. Now I attach the ropes to the ringbolts, while the frames are still outside (easier that way!) 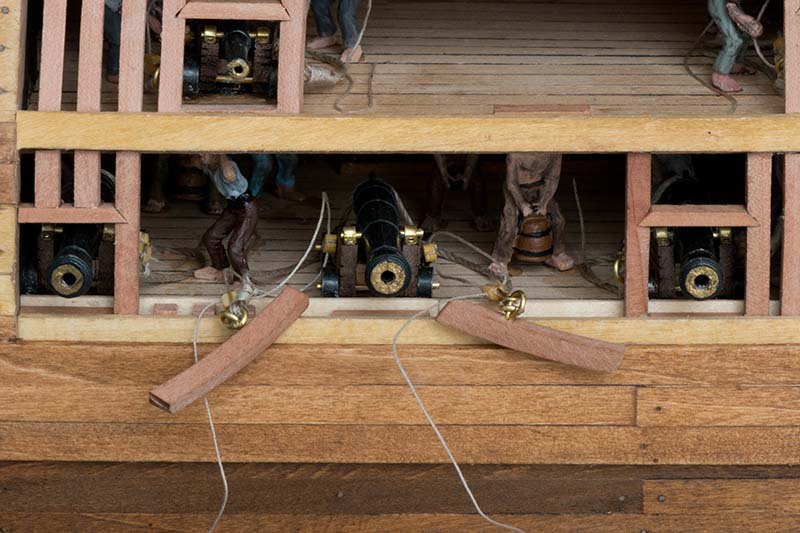 Next, frames are glued in position, without glueing or tangling up the ropes  Last step is to arrange the ropes in a decorative way. Quite difficult, but I had help by the tiny people ...  Kind regards, Bernd
|
|
|
|
Guest (2)
|
 US
US

